

Page 1
342
Before beginning, read the instructions below and follow all local plumbing and
Unpack and inspect your new water lines for any shipping damages and ensure
If any damages are discovered DO NOT INSTALL.
SHUT OFF ALL WATER AT THE TUB W HEN INSTALLING.
Please contact custumer service at 1(866)448-Tubs. You may also call our
cuscustomer service for any other assistance with our products.
building codes.
no pieces are missing.
TOOLS AND MATERIALS NEEDED :
Adjustable W rench
Plumberʼs Tape
Level
Because tubs can vary in size, measure your working space thoroughly
before installation. Trim pipes accordingly to ensure a correct fit.
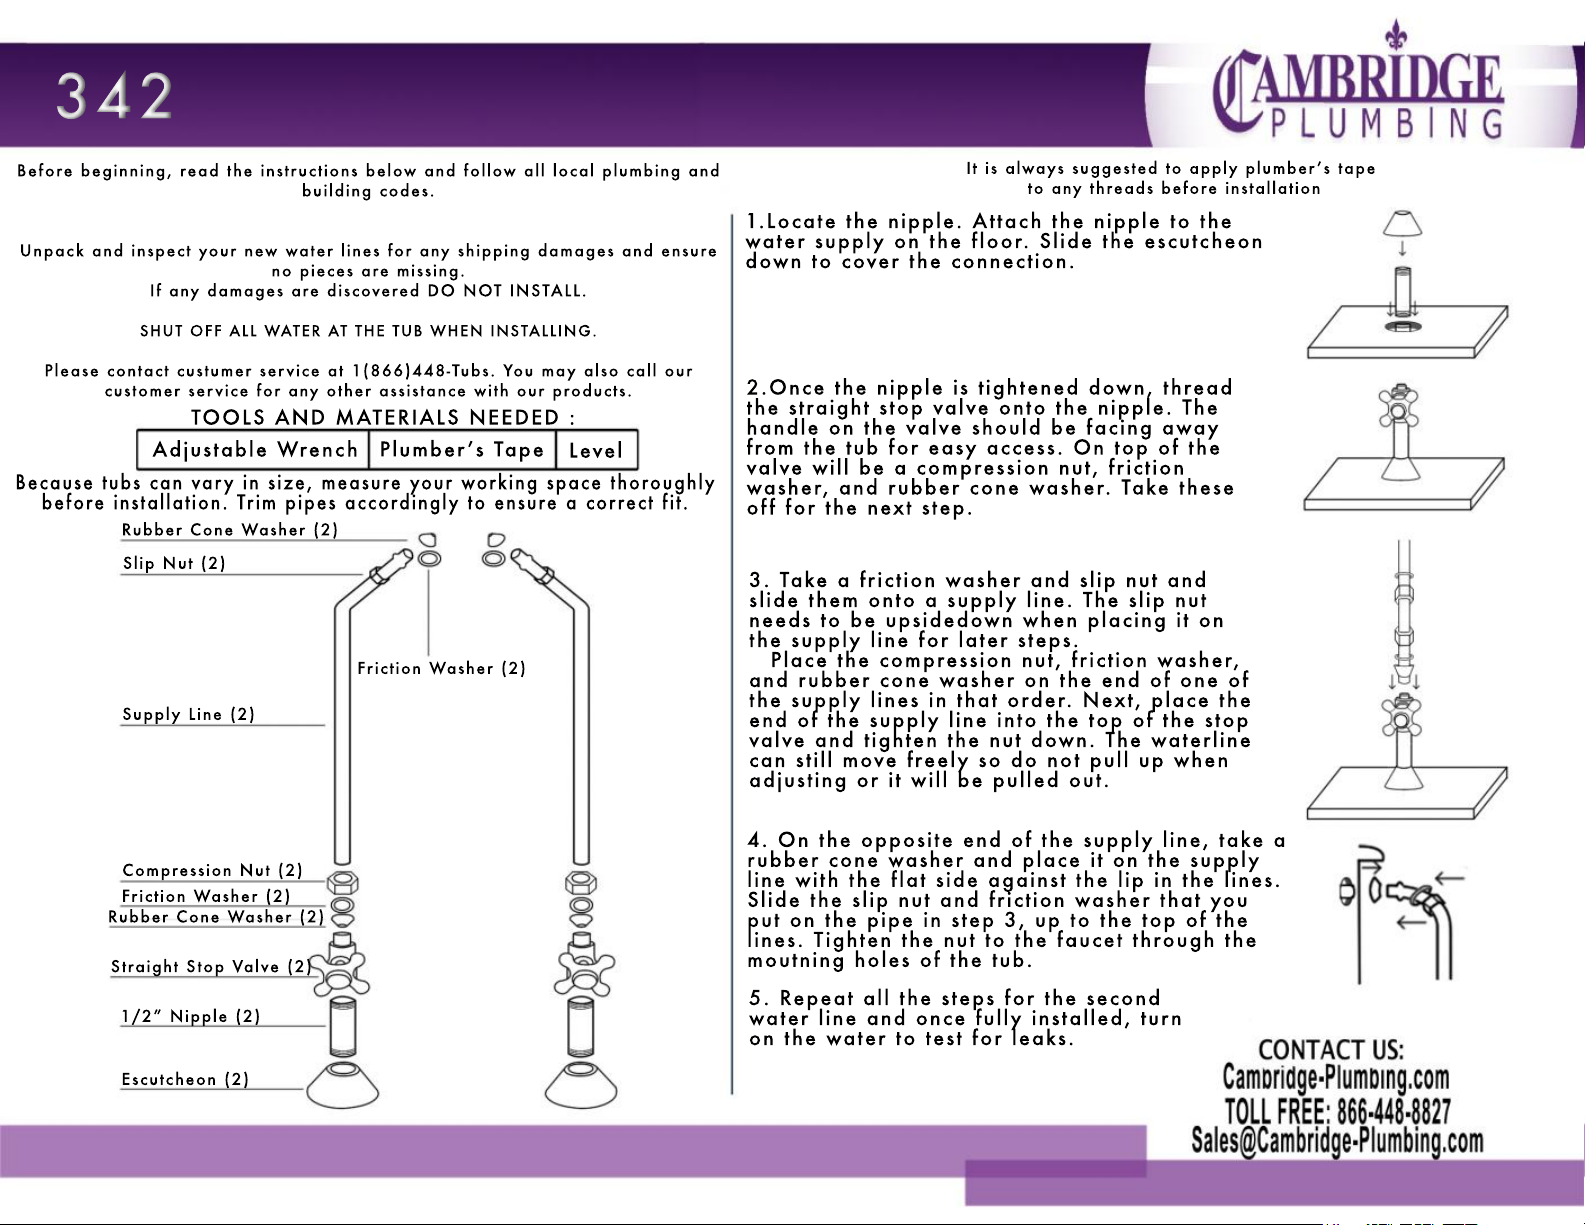
Rubber Cone Washer (2)
Slip Nut (2)
Friction W asher (2)
Supply Line (2)
It is always suggested to apply plumberʼs tape
to any threads before installation
1.Locate the nipple. Attach the nipple to the
water supply on the floor. Slide the escutcheon
down to cover the connection.
2.Once the nipple is tightened down, thread
the straight stop valve onto the nipple. The
handle on the valve should be facing away
from the tub for easy access. On top of the
valve will be a compression nut, friction
washer, and rubber cone washer. Take these
off for the next step.
3. Take a friction washer and slip nut and
slide them onto a supply line. The slip nut
needs to be upsidedown when placing it on
the supply line for later steps.
Place the compression nut, friction washer,
and rubber cone washer on the end of one of
the supply lines in that order. Next, place the
end of the supply line into the top of the stop
valve and tighten the nut down. The waterline
can still move freely so do not pull up when
adjusting or it will be pulled out.
Compression Nut (2)
Friction W asher (2)
Rubber Cone Washer (2)
Straight Stop Valve (2)
1/2” Nipple (2)
Escutcheon (2)
4. On the opposite end of the supply line, take a
rubber cone washer and place it on the supply
line with the flat side against the lip in the lines.
Slide the slip nut and friction washer that you
put on the pipe in step 3, up to the top of the
lines. Tighten the nut to the faucet through the
moutning holes of the tub.
5. Repeat all the steps for the second
water line and once fully installed, turn
on the water to test for leaks.
 Loading...