

Page 1
150 Freestanding Faucet
Before beginning, read the instructions below and follow all local plumbing and
For this installation of your new freestanding faucet it is presumed that the
water supply lines are underneath the floor and are in direct access for faucet
A rounded hole, 1-1/2” in diameter, will provide access to the water supply
A
lines when mounting the faucet. The distance between the mounting location to
Unpack and inspect your new faucet for any shipping damages and ensure no
SHUT OFF ALL W ATER SUPPLY LINES AT THE TUB W HEN INSTALLING NEW FAUCET
Please conPlease contact custumer service at 1(866)448-Tubs. You may also call our
the water supply lines should be approximately 2 - 2 1/2”
If any damages are discovered DO NOT INSTALL.
customer service for any other assistance with our products.
building codes.
installation.
pieces are missing.
TOOLS AND MATERIALS NEEDED :
Level Drill Adjustable W rench
It is always advised o place
plumberʼs tape on all threaded areas.
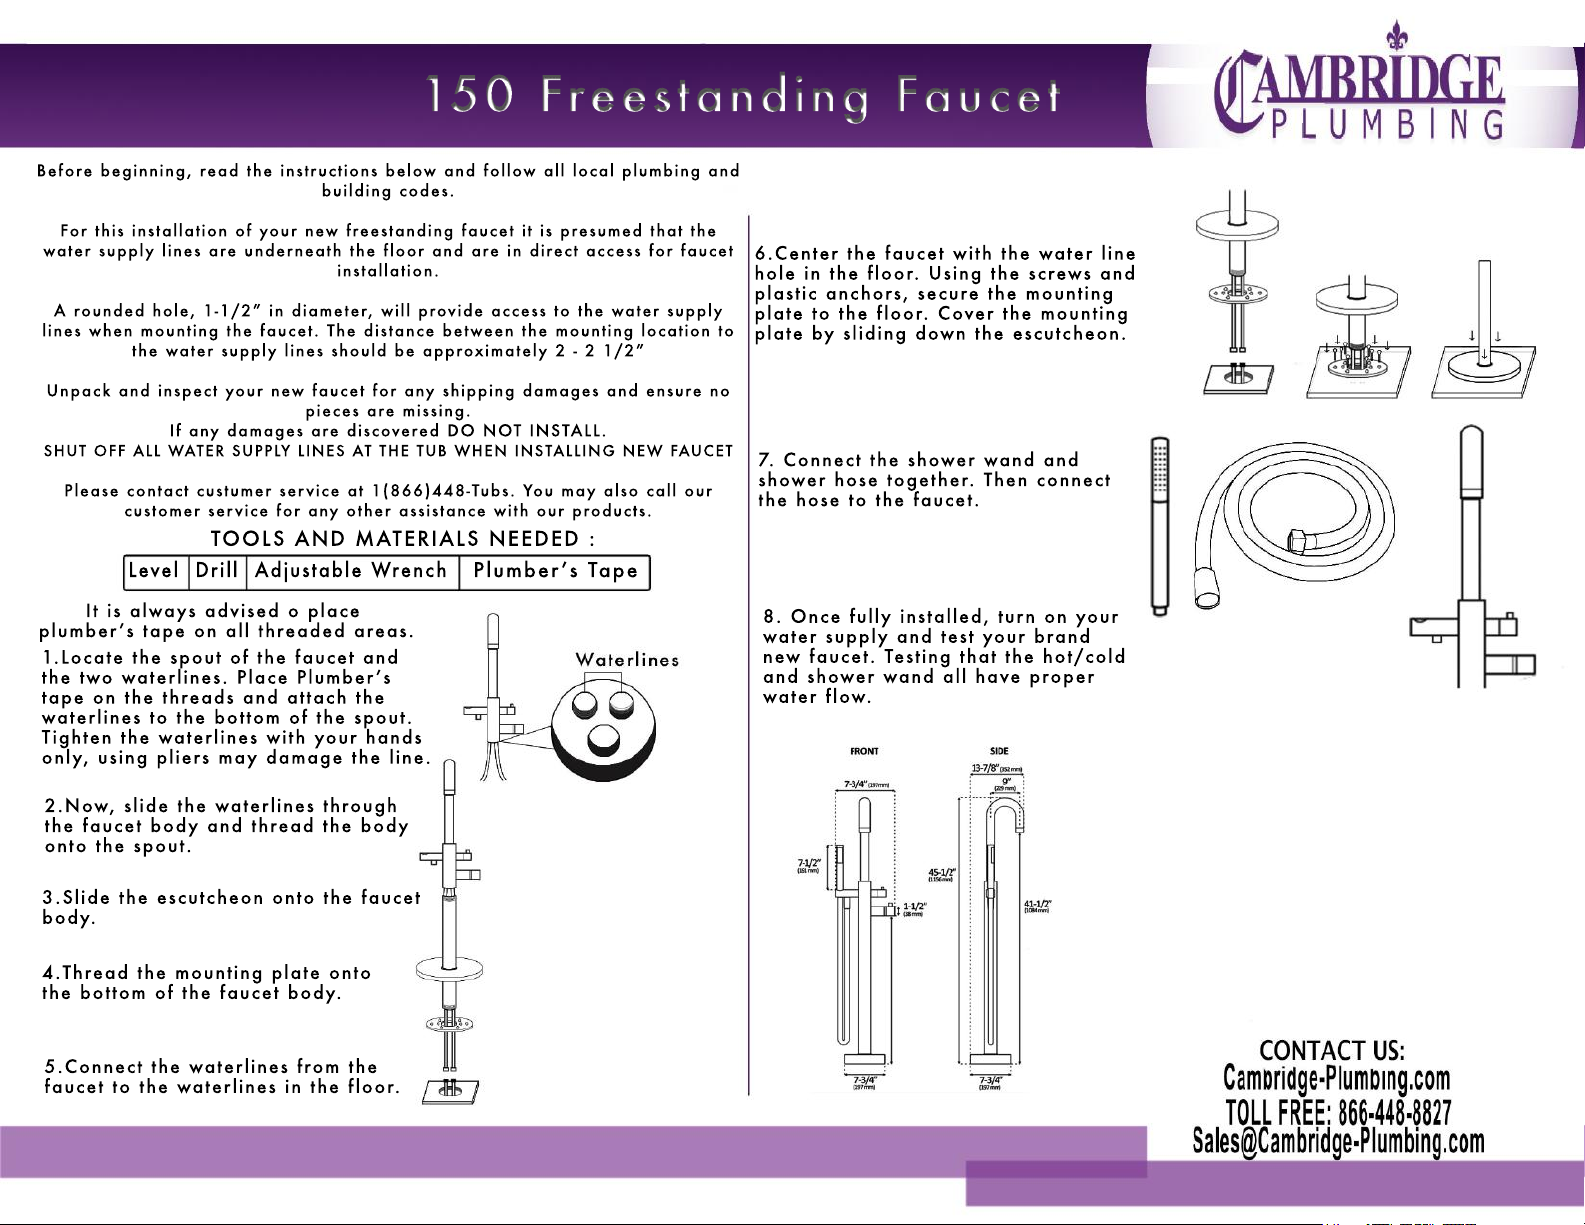
1.Locate the spout of the faucet and
the two waterlines. Place Plumberʼs
tape on the threads and attach the
waterlines to the bottom of the spout.
Tighten the waterlines with your hands
only, using pliers may damage the line.
Plumberʼs Tape
6.Center the faucet with the water line
hole in the floor. Using the screws and
plastic anchors, secure the mounting
plate to the floor. Cover the mounting
plate by sliding down the escutcheon.
7. Connect the shower wand and
shower hose together. Then connect
the hose to the faucet.
8. Once fully installed, turn on your
water supply and test your brand
new faucet. Testing that the hot/cold
and shower wand all have proper
water flow.
2.Now, slide the waterlines through
the faucet body and thread the body
onto the spout.
3.Slide the escutcheon onto the faucet
body.
4.Thread the mounting plate onto
the bottom of the faucet body.
5.Connect the waterlines from the
faucet to the waterlines in the floor.
 Loading...