

Page 1
NOTICE D’EMPLOI
A lire attentivement et à conserver.
GEBRUIKSAANWIJZING
Lees zorgvuldig. Bewaar de gebruiksaanwijzing
INSTRUCTIONS FOR USE
Read carefully and save for future reference.
BEDIENUNGSANLEITUNG
Bitte aufmerksam durchlesen und sorgfältig aufbewahren.
CONVECTEUR - KONVEKTOR - CONVECTOR HEATER
Mod. 6610 - 6616 - 6618 - 6620
CONVECTEUR/SOUFFLANT - VENTILATORKACHEL/KONVEKTOR
CONVECTOR/FAN HEATER - KONVEKTOR/HEIZLÜFTER
Mod. 6670 - 6672
Page 2
F
1 -
1 - SÉCURITÉ
Français Nederlands
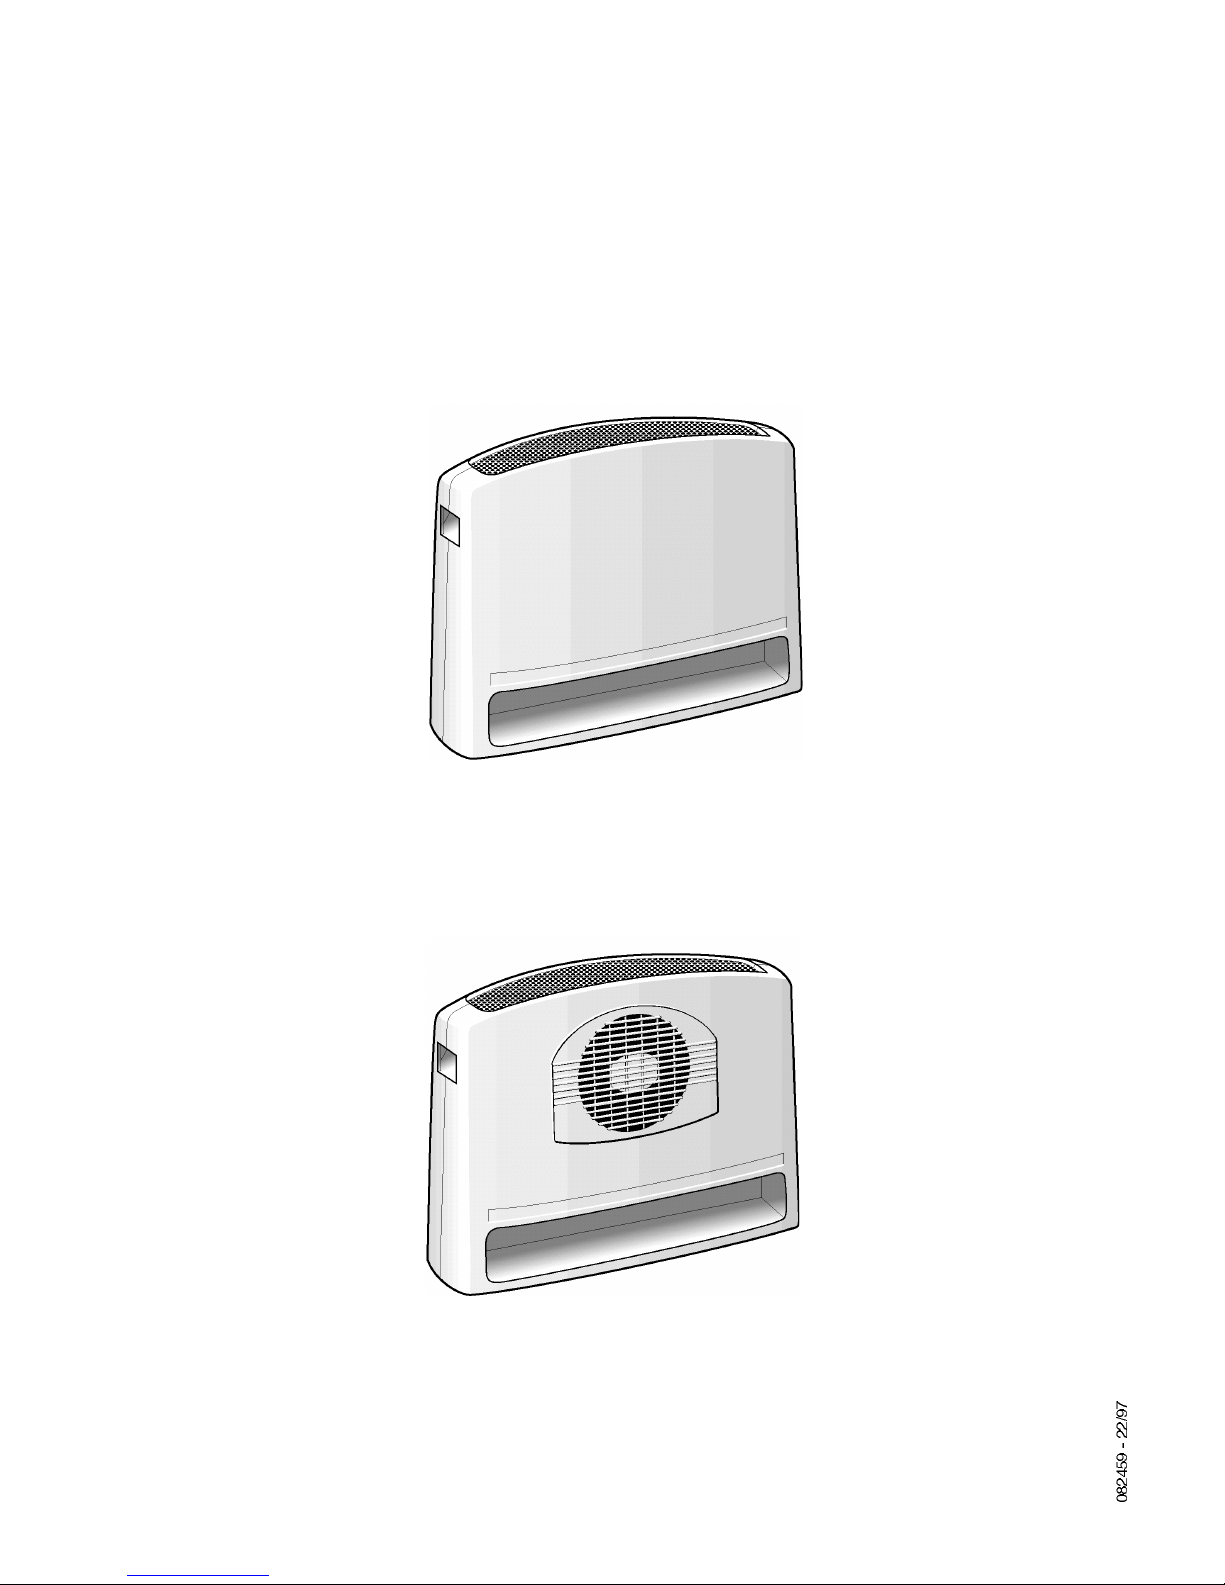
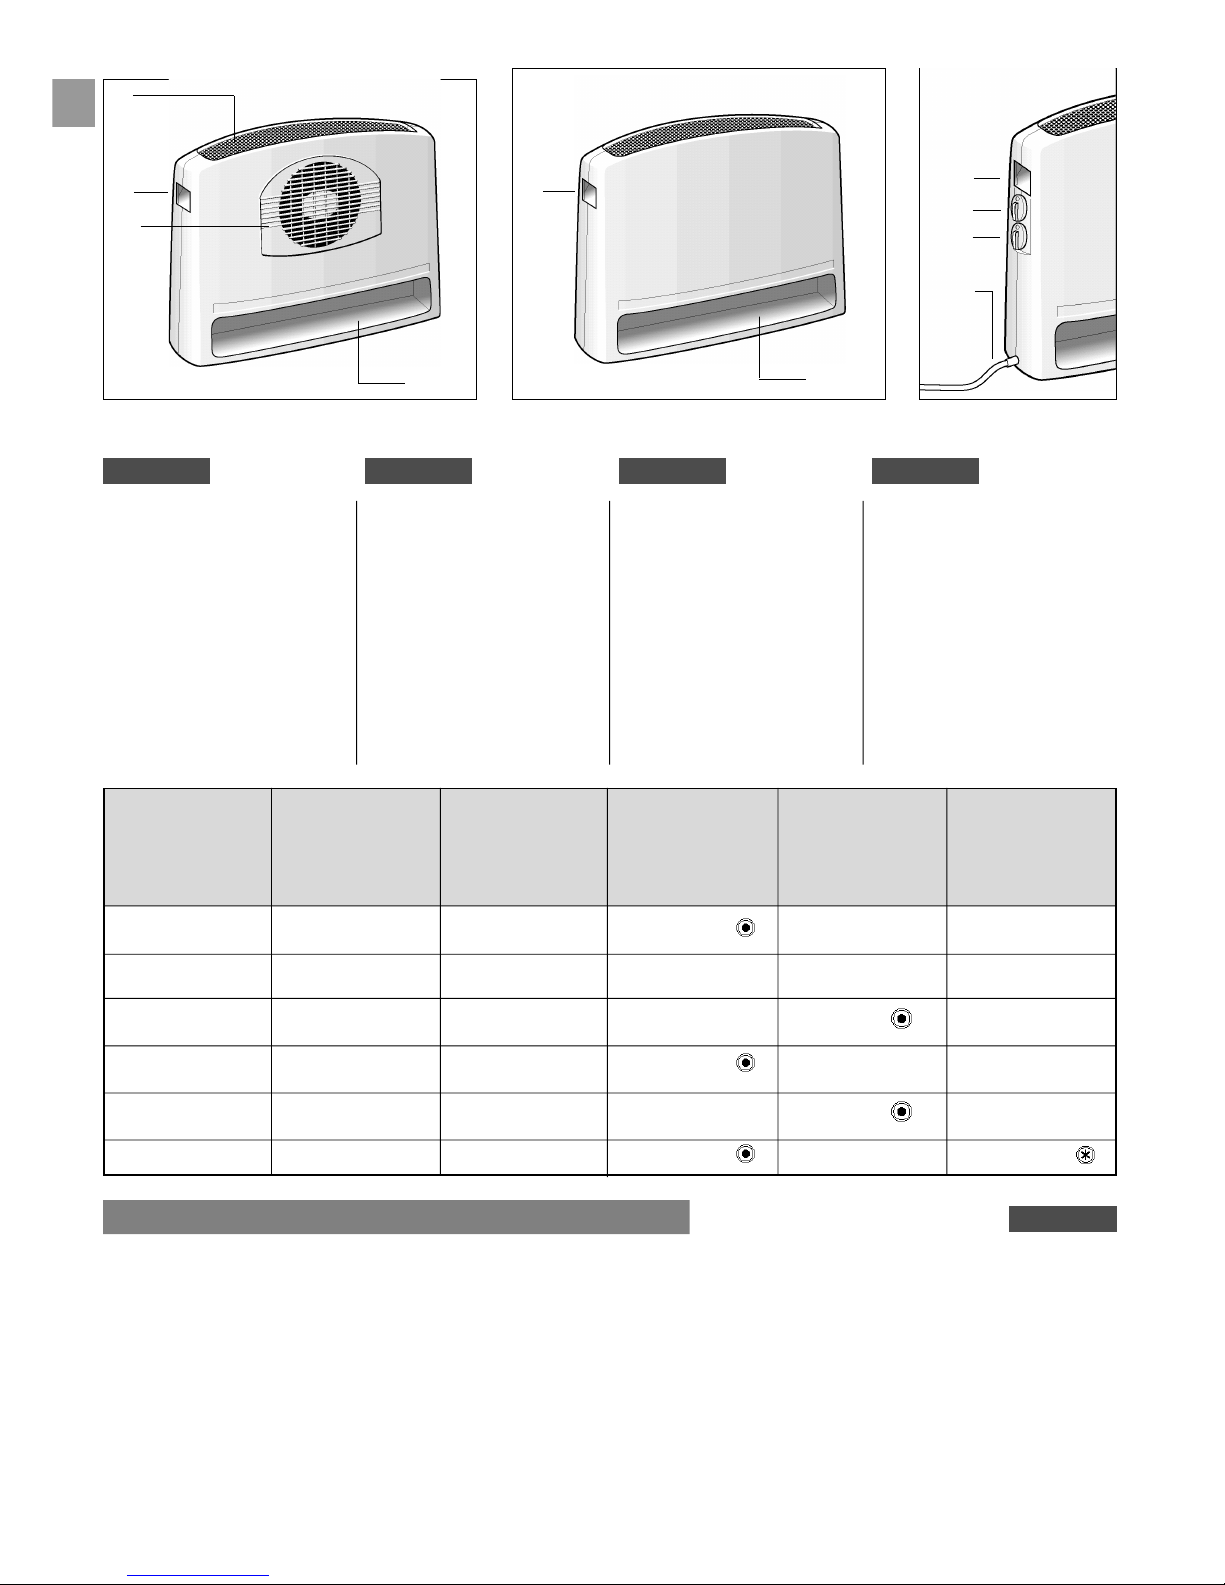
D E S C R I P T I O N
A. G rille de sortie d’air
c o nve c t e u r
B . Po i g n é e s
C . Bouton de thermostat
(positions de 1 à 9 plus
hors gel)
D. Bouton de commandes
E . Zone d’entrée d’air
F.G rille de sortie d’air “soufflant”
(modèles 6670/6672)
G . S o rtie de cordon
d ’ a l i m e n t a t i o n
BESCHRIJVING
A. Luchtuitlaatrooster
B . Handgrepen
C . Thermostaatknop (stand 1 -
9 en vo r s t v ri j s t a n d )
D. Keuzeschakelaar
E . Luchtinlaat
F.Uitlaatrooster voor blaaslucht
(modellen 6670/6672)
G . Bevestiging van het
voedingssnoer
English
DESCRIPTION
A. Convector air outlet grill
B . Handles
C . Thermostat dial (positions 1
to 9, plus frost-free position)
D. Control dial
E . Air intake area
F.Fan heater air grill outlet
(models 6670 / 6672)
G . Power lead outlet
Deutsch
BESCHREIBUNG
A. Konvektor-Luftaustrittsgitter
B . Haltegriffe
C . Thermostatknopf (Position 1
bis 9 plus Position Frostfrei)
D. Schalter
E . Lufteintrittsbereich
F.Heizlüfter-Luftaustrittsgitter
(Modell 6670 / 6672)
G . Netzkabelaustritt
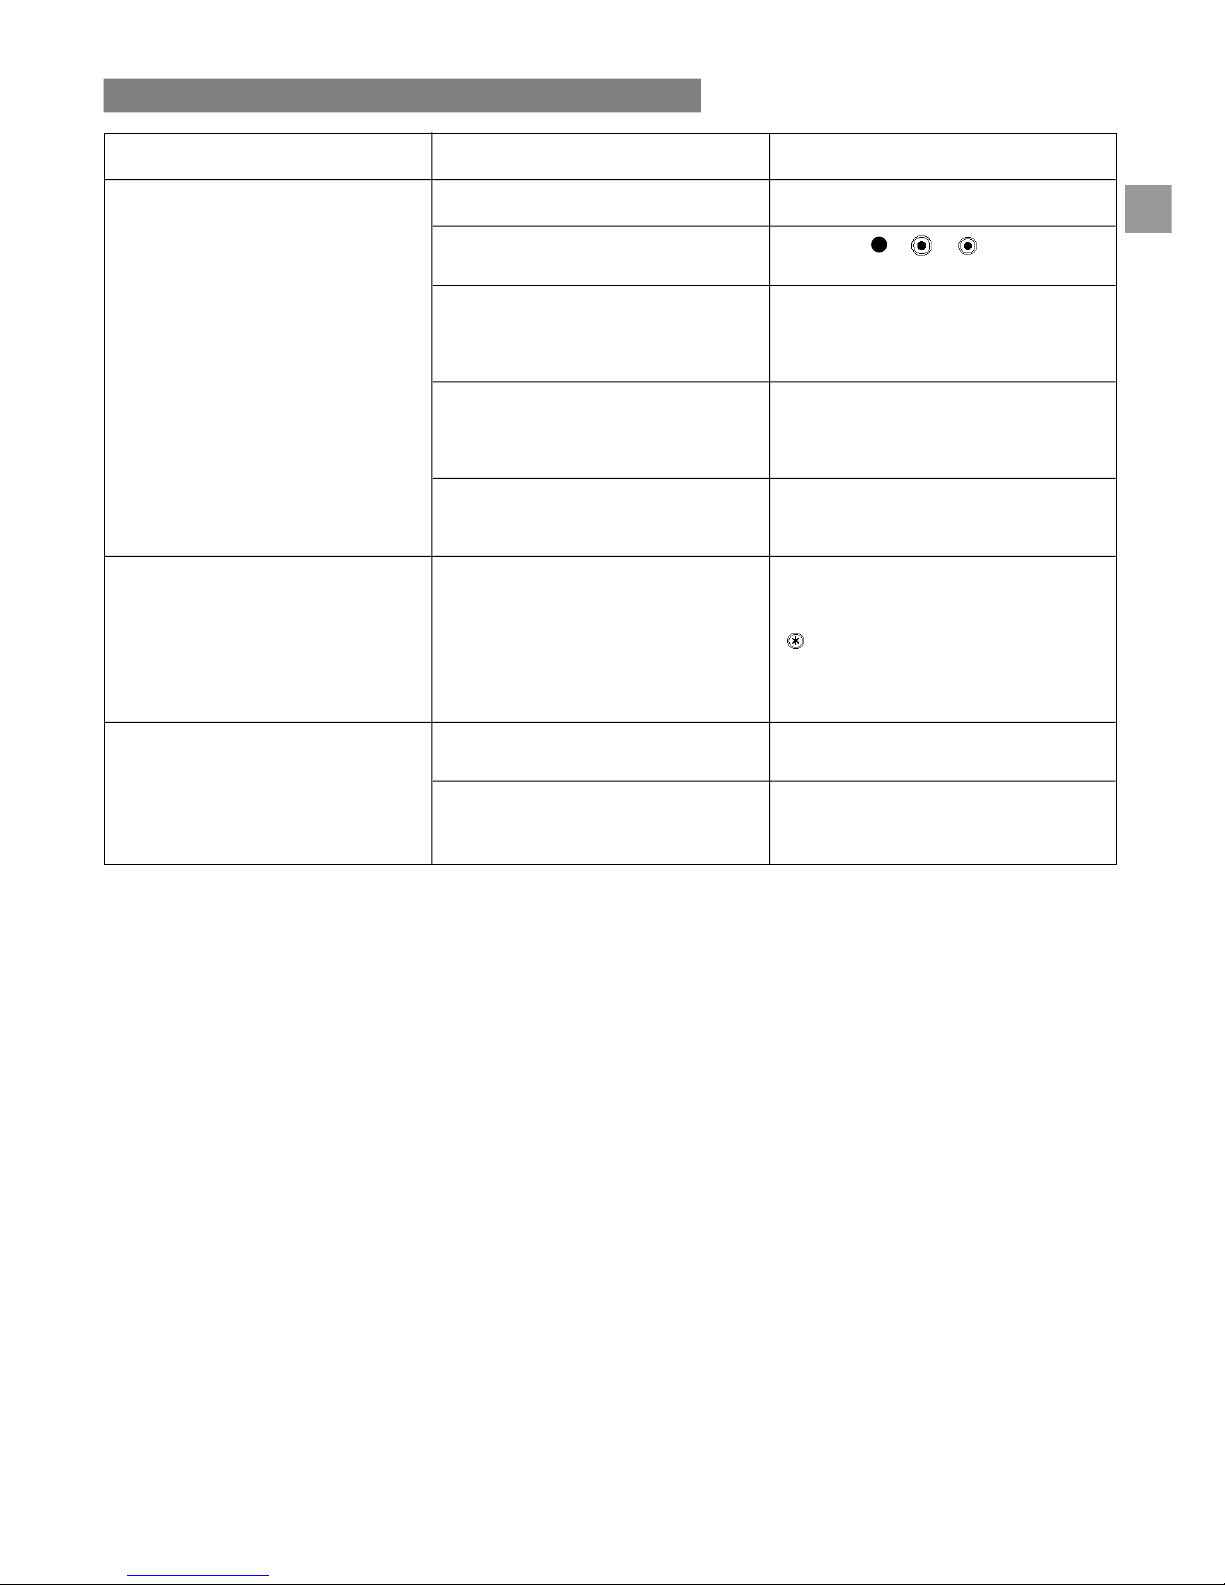
Modèle Thermostat Position arrêt Demi-puissance Pleine puissance Position soufflant
Tekeningen Thermostaat Uit-stand
Verbruik bij half vermogen Verbruik bij vol vermogen Verbruik in blaasstand
Mod. Thermostat Stop position Half-power Full-power Fan heater position
Mod. Thermostat Aus-Position Zwischenleistung volle Leistung Heizlüfter-Position
6610 x 0 750 W 1500 W ● 6616 x - - 2000 W ● -
6618 x 0 - 2000 W ❍ -
6620 x 0 1000 W 2000 W ● -
6670 x 0 - 2000 W ● 2000 W
● Vous ne devez pas le manipuler avec les mains mouillées.
● Ne le placez jamais à proximité d’objets inflammables.
● N’utilisez jamais l’appareil dans des pièces contenant des gaz
explosifs ou pendant l’emploi de colles ou solvants.
● Ne l’utilisez pas pour réchauffer des aliments ou tout autre
produit (colle, goudron…).
● Ne posez rien sur la (ou les) grille(s) de sortie d’air chaud
(située en haut -et en façade pour le soufflant-) lorsque l’appareil
fonctionne, ou juste après l’avoir arrêté.
● Ne le placez jamais derrière un rideau. Les grilles d’entrées et
de sortie d’air doivent toujours être dégagées. Rien ne doit
empêcher la circulation de l’air : il y aurait risque de surchauffe.
Il est essentiel de lire attentivement cette notice et d’observer les
recommandations suivantes.
● Cet appareil est conforme aux directives communautaires
73/23/CEE et 89/336/CEE.
● Avant chaque utilisation, vérifiez le bon état général de
l’appareil, de la prise et du cordon.
● Si vous devez utiliser une rallonge, celle-ci ne doit pas
dépasser 25 m de long et la section de chaque câble
conducteur ne doit pas être inférieure à 1,5 mm2. Le cordon
et la rallonge doivent être complètement déroulés.
● Ne le placez pas sous une prise électrique murale.
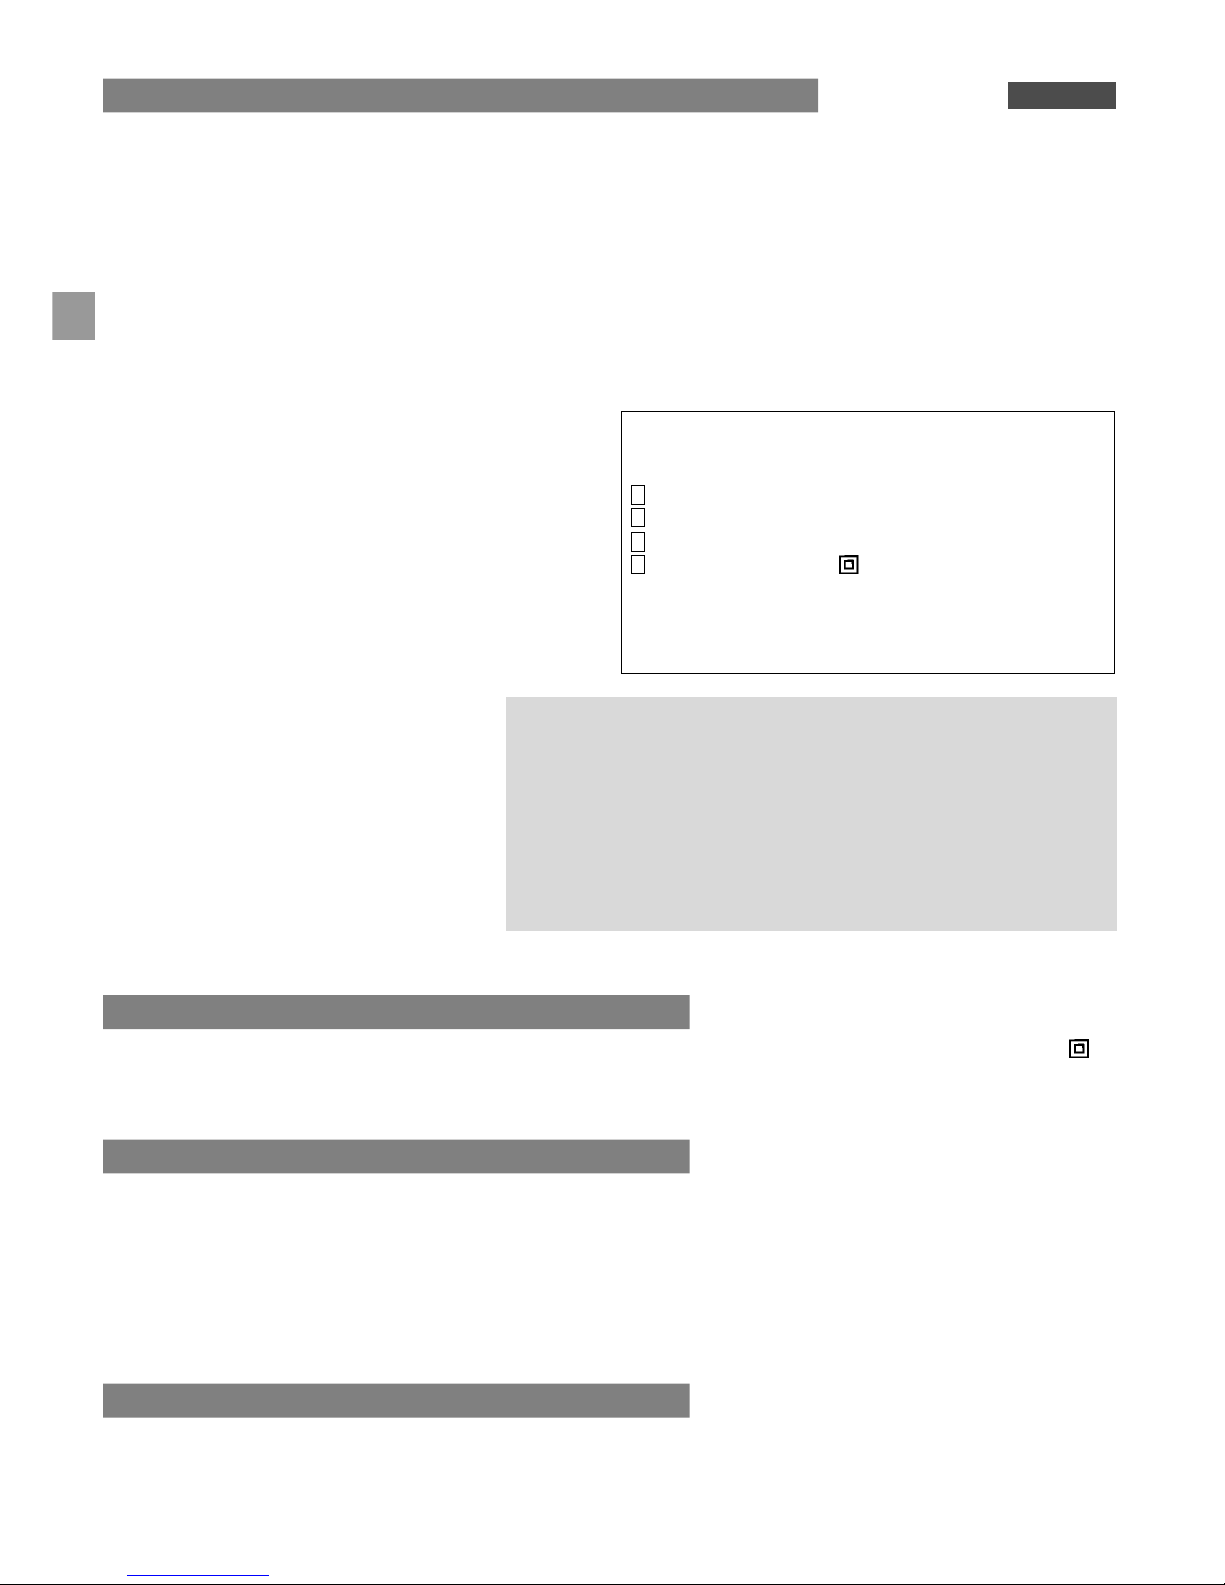
A
B
E
F
D
C
B
G
B
E
Mod. 6670 - 6672 Mod. 6610 - 6616 - 6618 - 6620
Français
Page 3

F
2 - TENSION
Votre appareil est prévu pour fonctionner en 230-240 V Q 50 Hz monophasé. C’est un appareil de classe II, double isolation
électrique . Il peut fonctionner avec une prise de courant sans terre. Cependant, cet appareil n’est pas conçu pour l’utilisation dans
une salle de bains ou dans une pièce avec des projections d’eau.
3 - CONSEILS D’UTILISATION
- Avant la première utilisation, retirez toute étiquette promotionnelle.
- Installez l’appareil à 1 m au moins des meubles ou des murs ; laissez une distance d’au moins 1 m devant
la (ou les) grille(s) de sortie d’air.
- Déplacez l’appareil en le tenant par les poignées situées sur les côtés.
- Ne tirez pas l’appareil par le cordon.
- Ne tirez pas sur le cordon pour le débrancher.
- Ne posez pas le cordon sur la grille de sortie d’air immédiatement après avoir arrêté l’appareil.
- Ne modifiez pas l’aspect extérieur de l’appareil en le peignant ou en le tapissant.
4 - FONCTIONNEMENT
IMPORTANT :
Lors de la première utilisation, il peut se dégager momentanément une légère odeur et de la fumée (phénomènes classiques sur tous
les appareils neufs ; ils disparaîtront après quelques minutes).
MODÈLES MONO-PUISSANCE CONVECTEUR :
Modèle 6616 : (1 bouton) Modèle 6618 : (2 boutons)
L’appareil est prêt à fonctionner dès qu’il est branché. Tournez le bouton de commande sur la position.
Réglez la température désirée en tournant Pour arrêter l’appareil, revenez sur la position initiale 0.
le thermostat.
Pour arrêter l’appareil, placez le thermostat
sur la position hors gel ( ) et débranchez-le.
● N’utilisez jamais l’appareil pour sécher du linge.
● Ne le placez pas sous un étendage.
● Ne touchez pas la (ou les) grille(s) de sortie d’air
qui diffuse(nt) la chaleur : vous pourriez vous brûler.
● Ne le placez pas près d’une autre source de chaleur
(cheminée…).
● N’utilisez pas votre appareil sur un sol qui vibre
(machine à laver ou compresseur à proximité).
● Evitez d’utiliser votre appareil dans un local
empoussiéré.
● N’introduisez jamais d’objet à l’intérieur de l’appareil
(ex : aiguilles…).
● Lors de son utilisation, cet appareil doit être tenu
hors de portée des jeunes enfants, des animaux
et de certaines personnes handicapées.
Idéal pour le chauffage longue durée d’une pièce, cet appareil
est protégé de 4 façons différentes :
1 parois latérales thermo-isolantes pour limiter les risques de
brûlures,
2 sécurité anti-basculement,
3 sécurité thermique contre les surchauffes accidentelles.
4 double isolation électrique (branchement sur prise
de terre inutile). Cependant, cet appareil n’est pas conçu
pour l’utilisation dans une salle de bains ou dans une pièce
avec projections d’eau.
Très important :
● NE JAMAIS COUVRIR L’APPAREIL, même temporairement,
car il y a risque de surchauffe (ex. Ne jamais faire sécher du linge
en le posant sur l’appareil).
● NE JAMAIS L’UTILISER INCLINÉ OU COUCHÉ sur un côté.
● N’utilisez pas votre appareil près d’un lavabo, d’une baignoire, d’une
douche ou d’une piscine, ni dans un environnement humide ou givré.
● NE JAMAIS LAISSER DE L’EAU S’INTRODUIRE DANS
L’APPAREIL.
1
Page 4

F
AUTRES MODÈLES :
Choisir la puissance adaptée.
La puissance nécessaire pour chauffer une pièce est principalement fonction :
- du volume du local
- de l’isolation du plancher, des murs, des fenêtres et du plafond.
Dans la pratique, on doit compter environ 90 W/m2(dans des conditions standard de hauteur sous plafond (2,5 m) et d’isolation).
Mais attention, chaque pièce est un cas particulier. Par exemple, une bonne isolation peut permettre de réduire jusqu’à 70% une
consommation de chauffage électrique. Avec une mauvaise isolation, 160 W/m2peuvent devenir nécessaires.
Grâce au bouton de commandes, choisissez la puissance la plus appropriée en fonction de la pièce à chauffer.
Pour atteindre rapidement la température souhaitée, sélectionnez la position soufflant ou la pleine puissance.
MODÈLES BI-PUISSANCE CONVECTEUR
Modèle 6610 (2 boutons) Modèle 6620 (2 boutons)
Tournez le bouton de commandes sur la position désirée : Tournez le bouton de commandes sur la position désirée :
- en demi-puissance (750 W) - en demi-puissance (1000 W)
- en pleine puissance (1500 W) - en pleine puissance (2000 W)
Pour arrêter l’appareil, revenez sur la position initiale 0. Pour arrêter l’appareil, revenez sur la position initiale 0.
MODÈLES SOUFFLANTS
La position soufflant offre une diffusion de chaleur plus rapide et plus homogène.
Modèle 6670 (mono-puissance convecteur ou soufflant) Modèle 6672 (bi-puissance convecteur ou soufflant)
(2 boutons) (2 boutons)
Tournez le bouton de commandes sur la position
Tournez le bouton de commandes sur la position désirée :
Pour obtenir la position soufflant, sélectionnez
- en demi-puissance convecteur (1000 W)
Pour arrêter l’appareil, revenez sur la position initiale 0.
- en pleine puissance convecteur (2000 W)
- en position soufflant (2000 W)
Pour arrêter l’appareil, revenez sur la position initiale
0.
THERMOSTAT
Placez d’abord le bouton de commandes sur une autre position que arrêt 0 (sauf modèle 6616).
Pour augmenter la température, tournez le bouton du thermostat progressivement vers le chiffre 9.
Pour diminuer la température, tournez le bouton du thermostat dans le sens inverse des aiguilles d’une montre (vers le chiffre 1).
L’appareil s’arrêtera automatiquement dès qu’il aura atteint le niveau de température choisi. Il se remettra en marche, si nécessaire,
pour maintenir cette température.
POSITION HORS GEL
SÉCURITÉ THERMIQUE
Cette position vous permet de maintenir automatiquement la température au dessus de 0°C dans une pièce normalement isolée
et dont le volume correspond à la puissance de votre appareil.
Pour cela, réglez le bouton du thermostat sur la position hors gel .
Modèles 6618/6670 : placez le bouton de commande sur la position Modèles 6610/6620/6672 : choisissez la demi-puissance
2
Pour le remettre en marche :
Tout d’abord :
■ Modèle 6616 : placez le bouton du thermostat en position hors gel .
■ Les autres modèles : placez le bouton de commande en position arrêt : 0
Puis pour tous les modèles procéder comme suit :
- débranchez la prise de courant,
- débouchez ou dépoussiérez les grilles sans jamais démonter l’appareil,
- laissez l’appareil refroidir pendant 15 mn,
- rebranchez l’appareil et remettez-le en marche.
3
4
5
En cas d’échauffement anormal, un dispositif
de sécurité coupe automatiquement
le fonctionnement de l’appareil.
Page 5
F
5 - ENTRETIEN
■ Débranchez l’appareil (bouton de commandes sur 0, ou thermostat sur pour le modèle 6616)
et attendez son refroidissement complet.
■ Dépoussiérez régulièrement les grilles d’entrée et de sortie d’air avec un chiffon sec ou un aspirateur sans démonter l’appareil.
■ Pour enlever une tache, humidifiez très légèrement un chiffon.
■ N’utilisez ni alcool, ni solvant.
Important :
Ne laissez jamais de l’eau s’introduire dans l’appareil.
Si le câble d’alimentation est endommagé, il doit être remplacé par un Centre Service Agréé, un outil spécial étant nécessaire pour le
démontage de l’appareil.
6 - RANGEMENT
En cas d’inutilisation prolongée, débranchez l’appareil, protégez-le de la poussière et de l’humidité.
Attendez que l’appareil refroidisse avant de le ranger.
7 - GARANTIE
Cet appareil est destiné à un usage domestique ou pour des bureaux uniquement.
Il n’est donc pas adapté à une utilisation industrielle ou dans un lieu public.
Toute utilisation non conforme à cette notice d’emploi entraîne une suppression de la garantie.
8 - RÉPONSES AUX PROBLÈMES ÉVENTUELS
Problèmes Causes possibles Solutions
L’appareil ne chauffe pas : Il est mal branché. Vérifiez le branchement.
Le bouton de commande est sur arrêt : 0 Placez-le sur ou ou
(tous modèles sauf 6616).
Le thermostat est réglé sur une Réglez le thermostat sur
position trop faible par rapport à une position plus élevée.
la température de la pièce.
L’appareil s’est arrêté Voir paragraphe “sécurité
automatiquement car l’entrée d’air thermique”.
(ou la sortie d’air) est bouchée.
L’appareil s’est renversé : la sécurité Redressez l’appareil et
anti-basculement a coupé placez-le sur un sol bien
l’alimentation. plat.
L’appareil ne souffle pas d’air chaud : La fonction “soufflant” n’est pas Placez le bouton de commande sur la
(concerne les modèles 6670/6672). sélectionnée. position “soufflant” :
pour le 6670,
pour le 6672
Si, malgré cela, l’appareil ne souffle
pas d’air chaud, contactez un Centre
Service Agréé.
L’appareil ne chauffe pas assez : Le réglage du thermostat n’est Augmentez le réglage
pas assez élevé. de la température
grâce au thermostat.
Le choix de la puissance n’est Placez le bouton de commande sur
pas assez élevé. la position supérieure
(modèles 6610 / 6620 / 6672).
Important :
Ne laissez jamais de l’eau s’introduire dans l’appareil.
Si le câble d’alimentation est endommagé, il doit être remplacé par un Centre Service Agréé, un outil spécial étant nécessaire pour
le démontage de l’appareil.
■ Si la sécurité thermique coupe à nouveau, amenez l’appareil pour vérification dans un Centre Service Agréé.
■ Si votre appareil se renverse, le système de sécurité coupe automatiquement l’alimentation électrique. Replacez l’appareil
en position stable et il se remettra en marche.
Page 6

NL
1 - VOOR UW VEILIGHEID
2 - NETSPANNING
Dit apparaat werkt op een netspanning van 230 - 240 V ~ 50 Hz eenfasig. Het is een apparaat uit de klasse II met een dubbele elektrische isolatie . Het hoeft niet per se op een geaard stopcontact te worden aangesloten. Het is echter niet geschikt voor gebruik in
een badkamer of een vertrek waar water kan opspatten.
3 - WAARSCHUWINGEN
● Verwijder alle verkoopetiketten voordat u het apparaat voor het eerst gebruikt.
● Plaats het apparaat minstens 1 meter van meubelen of muren vandaan. Laat minstens 1 meter ruimte voor luc h t u i t l a a t ro o s t e rs .
● Pak het apparaat bij de handgrepen aan de zijkant vast wanneer u het verplaatst.
● Verplaats het apparaat nooit door aan het voedingssnoer te trekken. Trek de stekker evenmin uit het stopcontact door aan het snoer
te trekken.
● Leg het snoer niet op het luchtuitlaatrooster vlak nadat u het apparaat hebt uitgeschakeld.
● Verander niet het uiterlijk van het apparaat door het te verven of bekleden.
4 - HET GEBRUIK
BELANGRIJK :
Wanneer u het apparaat voor het eerst gebruikt, kan er een beetje rook vrijkomen en een lichte geur ontstaan. Dit is normaal bij een
nieuw apparaat en zal na enkele minuten verdwijnen.
Dit apparaat voldoet aan de Europese veiligheidsrichtlijnen 73/23/CEE en 89/336/CEE.
Voor uw veiligheid is het zeer belangrijk om de volgende aanwijzingen op te volgen.
● Zet het nooit achter een gordijn. De luchtinlaat- en uitlaatroosters moeten altijd vrij zijn. De luchtcirculatie mag nergens door worden
belemmerd, anders kan er oververhitting ontstaan.
● Pak het niet met natte handen vast.
● Controleer voor elk gebruik de toestand van het apparaat, het voedingssnoer en de stopcontact.
● Als u een verlengsnoer gebruikt, mag de lengte niet langer dan 25 meter zijn en de doorsnede van elke geleidingskabel niet
kleiner dan 1,5 mm2zijn. Het snoer en het verlengsnoer moeten volledig uitgerold worden.
● Plaats het apparaat niet vlak onder een muurstopcontact.
● Gebruik het nooit in de buurt van brandbare voorwerpen, in een vertrek met explosieve gassen of tijdens het gebruik van lijm of
oplosmiddelen.
● Gebruik het nooit om levensmiddelen of andere produkten op te
warmen.
● Raak het/de luchtuitlaatrooster(s), waar warme lucht uitstroomt,
nooit aan, ook niet wanneer u het apparaat zojuist hebt uitgeschakeld. Anders kunt u brandwonden oplopen.
● Plaats het niet bij een andere warmtebron, bijvoorbeeld een
schoorsteen.
● Gebruik het apparaat niet op een ondergrond die trilt, bijvoor-
beeld door een draaiende wasmachine of een compressor.
● Gebruik het bij voorkeur niet in een stoffige ruimte.
● Steek nooit een voorwerp in het apparaat.
● Als het niet wordt gebruikt, dient het buiten het bereik van jonge
kinderen, dieren en mensen met bepaalde handicaps te worden
neergezet.
Zeer belangrijk:
● ZORG DAT ER NOOIT WATER IN HET APPARAAT KAN DRINGEN.(Plaats
het dus nooit onder wasdrooglijnen en gebruik het nooit in de buurt van een
wastafel, bad, douche of zwembad en evenmin in een vochtige of met ijs
bedekte omgeving).
● DEK HET APPARAAT NOOIT AF, ook niet tijdelijk. Anders kan er oververhit-
ting ontstaan. (Leg bijvoorbeeld nooit wasgoed op het apparaat te drogen).
● GEBRUIK HET APPARAAT NIET HELLEND OF LIGGEND op de zijkant.
Het apparaat is speciaal ontworpen om een vertrek langdurig
te verwarmen. Daarom is het voorzien van 4 verschillende
beveiligingen:
1 Warmte-isolerende (= handwarme) zijwanden die het risiko
van verbranding verminderen,
2 Omvalbeveiliging,
3 Oververhittingsbeveiliging,
4 Dubbele elektrische isolatie (zodat het apparaat ook op
een niet-geaard stopcontact kan worden aangesloten). Het
is echter niet geschikt voor gebruik in een badkamer of een
vertrek waar water kan opspatten.
Nederlands
Page 7

NL
CONVECTORMODELLEN MET VAST VERMOGEN
Mod. 6616 : (1 knop)
Zodra u de stekker in het stopcontact hebt gestoken,
is het apparaat klaar voor gebruik.
Stel de gewenste temperatuur in met behulp
van de thermostaatknop.
Om het apparaat uit te schakelen, zet u de thermostaat
in de vorstvrijstand en trekt u de stekker
uit het stopcontact.
OVERIGE MODELLEN :
Het juiste vermogen kiezen
Het vermogen dat nodig is om een vertrek goed te verwarmen, hangt vooral af van:
- de grootte van het vertrek,
- de isolatie van de vloer, muren, ramen en plafond.
In de praktijk is ongeveer 90 W/m2voldoende (bij een standaard plafondhoogte van 2,5 meter en normale isolatie).
Let op! Elk vertrek is anders. Een goede warmte-isolatie kan het energieverbruik van een elektrisch verwarmingstoestel met wel 70%
verminderen. Wanneer het vertrek slecht is geïsoleerd, kan 160 W/ m2 noodzakelijk zijn.
Met behulp van de keuzeschakelaar kunt u het vermogen dat voor het vertrek nodig is, instellen.
Als u het vertrek snel wilt verwarmen, kies dan de blaasstand of stel het apparaat in op vol vermogen.
CONVECTORMODELLEN MET INSTELBAAR VERMOGEN
MODELLEN MET BLAASWARMTE
In de blaasstand wordt de warmte sneller en gelijkmatiger door het vertrek verspreid.
Mod. 6618 : (2 knop)
Om het apparaat in te schakelen,
zet u de keuzeschakelaar in de stand .
Om het uit te schakelen,
zet u het terug in de beginstand 0.
1
2
Mod. 6610 (2 knop)
Schakel het apparaat in door de keuzeschakelaar op de
gewenste stand te zetten:
- half vermogen (750 W)
- vol vermogen (1500 W)
U schakelt het apparaat uit door het in de beginstand te
zetten 0.
Mod. 6620 (2 knop)
Schakel het apparaat in door de keuzeschakelaar op de
gewenste stand te zetten:
- half vermogen (1000 W)
- vol vermogen (2000 W)
U schakelt het apparaat uit door het in de beginstand te zet-
ten 0.
Mod. 6670 (convector met vast vermogen of
blaaswarmte). (2 knop)
Schakel het apparaat in door de keuzeschakelaar op de
gewenste stand te zetten:
- convector 2000 W
- blaasstand 2000 W
U schakelt het apparaat uit door het in de beginstand te zet-
ten 0.
Mod. 6672 (convector met instelbaar vermogen of blaaswarmte). (2 knop)
Schakel het apparaat in door de keuzeschakelaar op de
gewenste stand te zetten:
- convector half vermogen 1000 W
- convector vol vermogen 2000 W
- blaasstand 2000 W
U schakelt het apparaat uit door het in de beginstand te zet-
ten 0.
Page 8
NL
THERMOSTAAT
Zet eerst de keuzeschakelaar op een andere stand dan Uit 0 (niet bij Mod. 6616).
Om de temperatuur te verhogen, draait u de thermostaatknop naar het cijfer 9.
Om de temperatuur te verlagen, draait u de thermostaatknop tegen de wijzers van de klok in (naar het cijfer 1).
Het apparaat stopt automatisch zodra de gewenste temperatuur is bereikt. Zodra de temperatuur daalt, gaat hij vanzelf weer werken.
DE VORSTVRIJSTAND
Met deze stand zorgt u dat de temperatuur van het vertrek automatisch boven 0°C blijft. Voorwaarden zijn dat het vertrek normaal is
geïsoleerd en het vermogen van het apparaat voldoende is voor de grootte ervan.
Zo werkt de vorstvrijstand:
- Zet de thermostaatknop op de vorstvrijstand ,
- Zet de keuzeschakelaar op (mod. 6618/6670) of op half vermogen (mod. 6610/6620/6672).
THERMISCHE BEVEILIGING
5 - ONDERHOUD
■ Nadat u de keuzeschakelaar op 0 of (bij model 6616) de thermostaat op hebt gezet, trekt u de stekker uit het
stopcontact en wacht u tot het apparaat volledig is afgekoeld.
■ Maak regelmatig de luchtinlaat- en -uitlaatroosters met een droge doek of een stofzuiger stofvrij.
Demonteer het apparaat hierbij niet!
■ Vlekken kunt u met een zeer licht bevochtigd doekje verwijderen.
■ Gebruik nooit alcohol of een oplosmiddel.
Important :
Ne laissez jamais de l’eau s’introduire dans l’appareil.
Si le câble d’alimentation est endommagé, il doit être remplacé par un Centre Service Agréé, un outil spécial étant nécessaire pour le
démontage de l’appareil.
6 - OPBERGEN
Als het apparaat langere tijd niet wordt gebruikt, trekt u de stekker uit het stopcontact en beschermt u het tegen stof en vocht.
Wacht tot het apparaat volledig is afgekoeld voordat u het opbergt.
7 - GARANTIE
Dit apparaat is uitsluitend bedoeld voor gebruik in een woning of kantoor. Het is niet geschikt voor industriële doeleinden of voor openbare ruimten.
Wanneer het apparaat niet wordt gebruikt zoals in deze gebruiksaanwijzing staat, vervalt de garantie.
3
4
- Bij oververhitting.
■ Mod. 6616: Zet de thermostaatknop op de vorstvrijstand .
■ Overige modellen: zet de keuzeschakelaar op de Uit-stand 0.
V E RVO L G E N S :
- Trek de stekker uit het stopcontact,
- Verwijder stof of andere ongerechtigheden van de luchtroosters. Demonteer
het apparaat hiervoor niet!
- Laat het apparaat 15 min. afkoelen,
- Steek de stekker weer in het stopcontact en schakel het apparaat in.
■ Als de oververhittingsbeveiliging het apparaat opnieuw uitschakelt, laat het
dan door een erkend reparateur nakijken.
■ Als het apparaat valt.
Zodra het apparaat weer rechtop op een stabiele ondergrond staat, werkt het
weer.
In bepaalde gevallen sluit de beveiliging
automatisch de stroom van het apparaat af.
5
Belangrijk: Zorg dat er nooit water in het apparaat kan dringen.
Als het voedingssnoer is beschadigd of als het apparaat niet werkt, neem dan kontakt op met een erkend reparateur. Voor de
demontage van het apparaat is speciaal gereedschap nodig.
Page 9
NL
8 - PROBLEMEN EN MOGELIJKE OPLOSSINGEN
Ga met een ander probleem naar de winkel waar u het apparaat hebt gekocht of een erkend reparateur.
Probleem Mogelijke oorzaak Oplossing
Het apparaat verwarmt niet: Het is verkeerd aangesloten. Controleer de aansluiting.
De keuzeschakelaar staat op 0 Zet hem op of of .
(behalve bij 6616).
De thermostaatknop staat Zet hem op een hogere
op een te lage stand in stand.
vergelijking met de
temperatuur van het vertrek.
Het apparaat heeft zichzelf Zie het hoofdstuk
uitgeschakeld omdat het "Thermische Beveiliging".
luchtinlaat- of -uitlaatrooster
is verstopt.
Het apparaat is gevallen: Zet het apparaat rechtop en
de omvalbeveiliging heeft de plaats het op een volledig
stroomtoevoer afgesloten. vlakke ondergrond.
Het apparaat blaast geen warme lucht : Het apparaat staat niet op Zet de keuzeschakelaar op
(mod. 6670/6672) de stand "blaaswarmte". de stand "blaaswarmte":
voor model 6670,
voor model 6672
Als het apparaat nog steeds geen warme
lucht blaast, neem dan kontakt op met een
erkend reparateur.
Het apparaat verwarmt onvoldoende : De thermostaat staat op Zet de thermostaat op een
een te lage stand. hogere stand.
Het gekozen vermogen onvoldoende. Zet de keuzeschakelaar in
een hogere stand.
(mod. 6610/6620/6672).
Page 10
ENG
1 - SAFETY ADVICE AND RECOMMENDATIONS FOR USE
2 - VOLTAGE
Your appliance is designed to operate at 220-240 V ~50 Hz single phase. It is a class II appliance, with dual electrical insulation . It
can operate with a power socket without earth. However, this appliance is not designed for use in a bathroom or any other room in
which it may be splashed with water.
3 - WARNINGS
● Before using the appliance for the first time, remove any promotional labels.
● Install the appliance at least 1 m away from furniture or walls; leave a distance of at least 1 m in front of the air outlet
grill(s).
● Move the appliance using the handles fitted on the sides.
● Never pull the device using the power lead. Do not pull the power lead to unplug it.
● Never place the power lead on the air outlet grill immediately after turning of the appliance.
● Do not change the outer appearance of the appliance by painting it or covering it with adhesive paper.
4 - OPERATION
IMPORTANT:
When the appliance is used for the first time, it may give off a slight smell and small quantity of smoke (these phenomena, which are
typical on all new appliances, will disappear after a few minutes).
This appliance complies with European Union directives 73/23/EEC and 89/336/EEC.
To enable your appliance to function correctly, the following recommendations must be respected.
● Never place it behind a curtain. The air inlet and outlet grills must always remain clear. The air flow must never be hindered, as this
could cause overheating.
● Never handle it with wet hands.
● Before turning on the appliance, always check its general condition, together with that of the power lead and the socket.
● If you have to use an extension lead, it must not be longer than 25 m and the section of each conductor wire must not be less than
1.5 mm2. The power lead and extension lead must be completely unwound.
● Never place the appliance beneath a electrical wall socket.
● Never use the appliance near inflammable objects, in a room containing explosive gases or while using glue and solvents.
● Never use it to reheat foodstuffs or other products.
● Do not touch the hot air distribution outlet grill(s)
immediately after turning off the appliance: you could suffer
burns.
● Do not place it near another heat source (fireplace...)
● Do not use your appliance on a vibrating floor (washing machine
or compressor nearby).
● Avoid using your appliance in a dusty room.
● Never insert objects into your appliance.
● When in use, this appliance must be kept out
of the reach of young children, animals and certain handicapped
persons.
Very important:
● NEVER ALLOW WATER TO ENTER THE APPLIANCE (e.g. Do not place
the appliance under a washing line, do not use it near a washbasin, bathtub, shower or pool, nor in a damp or frozen environment).
● NEVER COVER THE APPLIANCE, even temporarily, as this could cause
overheating. (e.g. Never dry washing by placing it on the appliance).
● DO NOT USE THE APPLIANCE WHEN TILTED OR LAID ON ITS SIDE.
Ideal for long-term heating of rooms, this appliance has 4
different protective systems:
1 heat insulating side panels, to reduce the risk of burns,
2 anti tip-over device,
3 overheat safety device,
4 dual electrical insulation (enabling it to operate with an
unearthed power plug).
However, this appliance is not designed for use in a bathroom
or any other room in which it may be splashed with water.
English
Page 11

ENG
SINGLE-POWER CONVECTOR MODELS:
Mod. 6616: (1 control knob)
The appliance is ready to operate as soon as you plug it in.
Set the required temperature, by turning the thermostat dial.
To turn off the appliance, turn the thermostat
to the frost-free position and unplug the appliance.
OTHER MODELS:
Choose the appropriate power setting
The power needed to heat a room mainly depends on:
- the volume of the room
- the insulation of the floor, the walls, the windows and the ceiling.
In practice, you need 90 W per m2(with a ceiling height of 2.5 m and standard insulation conditions).
Caution! Every room is different. For example, good insulation can reduce electrical heating consumption by up to 70%. However, with
poor insulation, you may require 160 W per m2.
Using the control dial, choose the most appropriate power setting for the room you wish to heat.
To reach the required temperature quickly, select the fan (models 6670/6672) or full power position.
DUAL POWER CONVECTOR MODELS
FAN MODELS
The fan heater position provides faster and more uniform heat distribution.
Mod. 6618: (2 control knobs)
To turn on the appliance,
turn the control button to position .
To turn it off, turn the button back
to the initial position 0.
1
2
Mod. 6610
(2 control knobs)
To turn it on, turn the control dial to the required setting:
- half power (750 W)
- full power (1500 W)
To turn it off, turn the dial back to its initial position 0.
Mod. 6620
(2 control knobs)
To turn it on, turn the control dial to the required setting:
- half power (1000 W)
- full power (2000 W)
To turn it off, turn the dial back to its initial position 0.
Mod. 6670 (single-power convector or fan heater)
(2 control knobs)
To turn it on, turn the control dial to the required setting:
- half power (2000 W)
- fan (2000 W)
To turn it off, turn the dial back to its initial position 0.
Mod. 6672 (dual-power convector or fan heater)
(2 control knobs)
To turn it on, turn the control dial to the required setting:
- half power convector (1000 W)
- half power convector (2000 W)
- fan (2000 W)
To turn it off, turn the dial back to its initial position 0.
Page 12

THERMOSTAT
First turn the control dial to any position other than off 0 (except model 6616).
To increase the temperature, turn the thermostat dial to setting 9.
To reduce the temperature, turn the thermostat dial anti-clockwise (to setting 1)
The appliance will stop automatically as soon as it reaches the chosen temperature. It will restart, if necessary,
to maintain this temperature.
FROST-FREE POSITION
This position enables you to keep the temperature automatically above 0°C in a normally insulated room, whose volume corresponds
to the power of your appliance.
To do this:
- set the thermostat dial to frost-free position .
- turn the control dial to (mod. 6618 / 6670) or half-power (mod. 6610 / 6620 / 6672).
OVERHEAT SAFETY CUT-OUT
5 - MAINTENANCE
■ After turning the control dial to 0, or the thermostat dial
to for model 6616, unplug the appliance and let it cool
down completely.
■ Regularly dust the air inlet and outlet grills with a dry cloth or
vacuum cleaner, without dismantling the appliance.
■ To remove stains, use a slightly dampened cloth.
■ Never use alcohol or solvents.
6 - STORAGE
If the appliance is not to be used for some time, unplug it and
protect it from dust and damp.
Wait for the appliance to cool before storing it.
8 - SOLUTIONS TO POSSIBLE PROBLEMS
ENG
For any other problems, please contact your retailer or your Approved Service Centre.
Problems Possible causes Solutions
The appliance does not heat It is not plugged in correctly. Check connections.
The control dial is set to "off": Turn it to , or or .
0 (except 6616).
The thermostat dial setting Turn it to a higher setting.
is too low compared with
the temperature in the room.
The appliance turned itself See "overheat safety device"
off automatically, as the air paragraph.
inlet (or air outlet) is clogged.
The appliance has been Stand up the appliance
tipped over: the anti-tip-over and place it on a fully horizontal floor.
safety device has cut the power supply.
The appliance does not bl ow out The "fan" position has not Turn the control dial to the
hot air: (mod. 6670/6672) been selected. "fan" setting.
for the 6670, for the 6672
If the appliance still does not blow out hot
air, contact an Approved Service Centre.
The appliance does not heat enough: The thermostat setting is too low. Increase the thermostat setting.
The power choice is too low. Turn the control dial to the next highest
setting. (mod. 6610 / 6620 / 6672).
3
Important: Never let water enter the appliance.
If the power lead is damaged, or if the appliance becomes
defective, please consult an Approved Service Centre; a special
tool is needed to dismantle the appliance.
THERMOSTAT
First turn the control dial to any position other than off 0
(except model 6616).
To increase the tempera t u r e, turn the thermostat dial to setting 9.
To reduce the temperature, turn the thermostat dial anti-clock-
wise (to setting 1)
The appliance will stop automatically as soon as it reaches the
chosen temperature. It will restart, if necessary,
to maintain this temperature.
FROST-FREE POSITION
This position enables you to keep the temperature automatically above 0°C in a normally insulated room, whose volume corresponds to the power of your appliance.
To do this:
- set the thermostat dial to frost-free position .
- turn the control dial to (mod. 6618 / 6670) or half-power
(mod. 6610 / 6620 / 6672).
4
5
THEN FOR ALL MODELS PROCEED AS FOLLO W S :
- unplug the power plug
- remove dust and clean the grills without disassembling the appliance.
- let the appliance cool down for 15 mins.
- plug in the appliance and turn it back on.
■ If the overheat safety device cuts out again, have the appliance checked by
an approved service centre.
■ If the appliance tips over.
To restart the appliance, put it back into a stable upright position.
In some circumstances, the safety cut-out
device automatically cuts the electrical power
supply.
- In the event of overheating, first do the following:
■ Mod. 6616: turn the thermostat dial to frost-
free position .
■ Other models: turn the control dial to
stop: 0.
OVERHEAT SAFETY CUT-OUT
7 - GUARANTEE
This appliance is intended for domestic or office use only. It is
not suitable for industrial use or for use in public places.
Failure to comply with the terms of these instructions will render the guarantee null and void.
Page 13

D
1 - SICHERHEITS- UND BENUTZUNGSHINWEISE
2 - SPANNUNG
Ihr Gerät ist für einen Betrieb bei 230-240 V/50 Hz ausgelegt. Es ist nicht erforderlich, es an eine geerdete Steckdose anzuschließen,
da es sich um ein Gerät der Klasse II, mit doppelter elektrischer Isolierung handelt . Dieses Gerät darf weder in Badezimmern,
noch in anderen Räumen, in denen viel Wasser verwendet wird, benutzt werden.
3 - WARNUNG
● Vor der Benutzung des Geräts etwaige Werbeaufkleber entfernen.
● Stellen Sie das Gerät mindestens in 1 m Abstand vor Möbel oder Wände. Lassen Sie vor dem (oder den)
Luftaustrittsgitter(n) mindestens 1 m frei.
● Das Gerät zum Umstellen immer an den Griffen an der Seite anfassen.
● Ziehen Sie das Gerät nie am Netzkabel. Schalten Sie das Gerät nicht durch herausziehen des Netzkabels aus.
● Das Netzkabel nicht auf das Luftaustrittsgitter legen, wenn das Gerät gerade abgeschaltet wurde.
● Das Gerät weder bemalen oder bekleben.
4 - BETRIEB
WICHTIG:
Bei der ersten Benutzung kann es zu einer vorübergehenden Geruchs- bzw. Rauchbildung kommen (diese für neue Geräte typischen
Erscheinungen werden nach einigen Minuten verschwinden).
Dieses Gerät entspricht den Richtlinien 73/23/EWG und 89/336/EWG.
Damit das Gerät einwandfrei funktioniert, sind folgende Hinweise zu beachten.
● Nie hinter den Vorhang stellen. Die Lufteintritts- und -austrittsgitter müssen immer frei sein. Die Luftzirkulation darf in keinem Fall
behindert werden, da sonst Überhitzungsgefahr besteht.
● Das Gerät niemals mit feuchten Händen anfassen.
● Vor jeder Benutzung den Zustand des Geräts, des Netzkabels und des Steckers prüfen.
● Bei Verwendung einer Verlängerungsschnur: sie darf nicht länger als 25 m sein und der Querschnitt jedes Leiterkabels darf nicht
unter 1,5 mm2liegen. Netzkabel und Verlängerungsschnur müssen vollständig ausgerollt sein.
● Das Gerät nicht direkt unter eine Wandsteckdose stellen.
● Das Gerät niemals in der Nähe entflammbarer Gegenstände, in einem Raum mit explosivem Gas oder während des Gebrauchs von
Klebstoffen oder Lösungsmitteln benutzen.
● Das Gerät niemals zum Erwärmen von Lebensmitteln oder
anderen Produkten benutzen.
● Selbst bei ausgeschaltetem Gerät niemals das (oder die)
Luftaustrittsgitter berühren, durch welche(s) die Wärme verteilt
wird. Verbrennungsgefahr.
● Das Gerät nicht in die Nähe anderer Wärmequellen
stellen (Kamin...)
● Das Gerät nicht auf einem vibrierenden Boden benutzen (z.B. mit
einer laufenden Waschmaschine oder einem Kompressor in der
Nähe).
● Das Gerät möglichst nicht in einem staubigen Raum benutzen.
● Keine Gegenstände in das Gerät hineinstecken.
● Das Gerät außerhalb der Reichweite von Kleinkindern, Tieren
oder Behinderten benutzen.
Sehr wichtig:
● DAS GERÄT VOR WASSER SCHÜTZEN (Bsp.: Das Gerät nie unter
aufgehängte Wäsche stellen, nie in der Nähe eines Waschbeckens,
einer Badewanne, einer Dusche, eines Schwimmbads, in feuchten oder
vereisten Räumen verwenden).
● DAS GERÄT NIEMALS ZUDECKEN, auch nicht zeitweise, da sonst
Überhitzungsgefahr besteht (Bsp.: Das Gerät niemals zum
Wäschetrocknen benutzen).
● DAS GERÄT NIEMALS IN GEKIPPTER POSITION ODER AUF DER
SEITE LIEGEND BENUTZEN.
Dieses Gerät, das sich für eine längere Beheizung von
Räumen eignet, ist auf 4 verschiedene Arten geschützt:
1 wärmeisolierende Seitenwände, um Verbrennungsgefahr
vorzubeugen,
2 Sicherheit gegen Umkippen
3 Wärmeschutz gegen unbeabsichtigtes Überhitzen
4 doppelte elektrische Isolierung (d.h. das Gerät kann
auch an eine nicht geerdete Steckdose angeschlossen
werden). Das Gerät darf nichtsdestotrotz weder in
Badezimmern noch in anderen Räumen, in denen viel Wasser
verwendet wird, benutzt werden.
Deutsch
Page 14

D
KONVEKTOR-MODELLE OHNE LEISTUNGSWAHL
Mod. 6616 : (1 Knopf)
Das Gerät ist betriebsbereit, sobald der Stecker in
die Steckdose gesteckt wird. Stellen Sie
am Thermostatknopf die gewünschte Temperatur ein.
Ausschalten des Geräts: Thermostat auf Position
Frostfrei stellen und den Stecker herausziehen.
ANDERE MODELLE :
Leistungswahl
Die Leistungswahl hängt grundsätzlich von der
- Größe des Raums,
- der Boden-, Wand-, Fenster- und Deckenisolierung ab.
Normalerweise rechnet man mit 90 W/m2(bei normalen Deckenhöhe (2,5 m) und herkömmlicher Isolierung).
Achtung! Jeder Raum bietet andere Voraussetzungen. Durch eine gute Isolierung kann die Stromentnahme für das Heizen auf 70 %
reduziert werden. Bei schlechter Isolierung dagegen können bis zu 160 W/m2notwendig sein.
Stellen Sie die für das Heizen des Raums erforderliche Leistung ein.
Um so schnell wie möglich die gewünschte Temperatur zu erhalten, den Schalter auf “Heizlüfter” oder auf volle Leistung stellen.
KONVEKTOR-MODELL MIT LEISTUNGSWAHL
HEIZLÜFTER-MODELL
Mit der Heizlüfter-Position wird die Wärme sehr schnell und einheitlich verteilt.
Mod. 6618 : (2 Knöpfe)
Einschalten des Geräts: Schalter
auf Position drehen.
Ausschalten des Geräts: Schalter auf Ausgangsposition 0
zurückstellen.
1
2
Mod. 6610 (2 Knöpfe)
Einschalten des Konvektors: den Schalter auf die
gewünschte Position stellen:
- Zwischenleistung (750 W)
- volle Leistung (1500 W)
Ausschalten des Konvektors: den Schalter wieder auf die
Ausgangsposition 0 zurückstellen.
Mod. 6620 (2 Knöpfe)
Einschalten des Konvektors: den Schalter auf die
gewünschte Position stellen:
- Zwischenleistung (1000 W)
- volle Leistung (2000 W)
Ausschalten des Konvektors: den Schalter wieder auf die
Ausgangsposition 0 zurückstellen.
Mod. 6670 (Konvektor oder Heizlüfter ohne
Leistungswahl) (2 Knöpfe).
Einschalten: den Schalter auf die gewünschte Position
stellen:
- Konvektor 2000 W
- Heizlüfter 2000 W.
Ausschalten: den Schalter wieder auf die Ausgangsposition
0 zurückstellen.
Mod. 6672 (Konvektor oder Heizlüfter mit
Leistungswahl) (2 Knöpfe).
Einschalten: den Schalter auf die gewünschte Position
stellen:
- Konvektor Zwischenleistung 1000 W
- Konvektor volle Leistung 2000 W
- Heizlüfter 2000 W.
Ausschalten: den Schalter wieder auf die Ausgangsposition
0 zurückstellen.
Page 15

D
THERMOSTAT
Den Schalter auf eine beliebige Position stellen, außer auf 0 (außer Modell 6616).
Temperatur erhöhen: Den Knopf des Thermostats in Richtung der Zahl 9 drehen.
Temperatur senken: Den Knopf des Thermostats entgegen dem Uhrzeigersinn drehen (in Richtung der Zahl 1).
Das Gerät schaltet sich automatisch aus, sobald die gewählte Temperatur erreicht wurde. Es schaltet sich wieder ein, um diese
Temperatur zu halten.
FROSTWÄCHTERPOSITION
Mit der Position “Frostfrei” sorgt das Gerät automatisch dafür, daß die Temperatur in einem normal isolierten Raum, dessen Größe
der Leistung des Geräts entspricht, nicht unter 0 °C sinkt.
- Stellen Sie den Thermostatknopf auf die Position Frostfrei
- Stellen Sie den Schalter auf (Mod. 6618/6670) oder auf Zwischenleistung (Mod. 6610 /6620 / 6672)
WÄRMESCHUTZ
5 - WARTUNG
■ Stellen Sie den Schalter auf 0, bzw. bei Modell 6616 den Thermostatknopf auf , ziehen Sie den Stecker heraus und
warten Sie, bis das Gerät vollkommen abgekühlt ist.
■ Die Lufteintritts- und -austrittsgitter regelmäßig mit einem trockenen Tuch abstauben oder mit dem Staubsauger absaugen, ohne
das Gerät auseinanderzunehmen.
■ Flecken mit einem nur leicht befeuchteten Tuch entfernen.
■ Weder Alkohol noch Lösungsmittel benutzen.
Important :
Ne laissez jamais de l’eau s’introduire dans l’appareil.
Si le câble d’alimentation est endommagé, il doit être remplacé par un Centre Service Agréé, un outil spécial étant nécessaire pour le
démontage de l’appareil.
6 - AUFBEWAHRUNG
Sollte das Gerät längere Zeit nicht benutzt werden, den Stecker herausziehen und vor Staub und Feuchtigkeit schützen.
Das Gerät erst wegräumen, wenn es abgekühlt ist.
7 - GARANTIE
Dieses Gerät ist nur für den Gebrauch im Haushalt oder in Büroräumen bestimmt. Es darf nicht in der Industrie oder an öffentlichen
Orten benutzt werden. Der Garantieanspruch erlischt, wenn das Gerät nicht entsprechend den Benutzungshinweisen verwendet wird.
3
4
- bei anormaler Erwärmung.
■ Mod. 6616: Stellen Sie den Knopf des Thermostats auf die Position
Frostfrei
■ Andere Modelle: Stellen Sie den Schalter auf Aus: 0.
A N S C H L I E ß E N D :
- den Stecker herausziehen
- die Gitter entstauben oder festgesetzten Schmutz entfernen, ohne das Gerät
auseinanderzunehmen.
- Das Gerät 15 mn lang abkühlen lassen
- Stecker wieder in die Steckdose stecken und Gerät einschalten.
■ Sollte das Gerät erneut durch den Überhitzungsschutz ausgeschaltet werden,
bitte beim zugelassenen Kundendienst überprüfen lassen.
■ wenn das Gerät kippt.
Das Gerät vor dem erneuten Einschalten in eine stabile Position bringen.
In bestimmten Fällen schaltet eine
Sicherheitsvorrichtung den Konvektor
automatisch aus.
5
Wichtig: Achten Sie darauf, daß niemals Wasser in das Gerät eindringt.
Bei beschädigtem Netzkabel oder bei anormalem Betrieb an einen zugelassenen Kundendienst wenden. Das Gerät kann nur mit
Spezialwerkzeug repariert werden.
Page 16

D
8 - PROBLEME UND LÖSUNGEN
Sollten Probleme auftauchen, die hier nicht genannt wurden, bitte an den zugelassenen Kundendienst wenden.
Probleme Mögliche Ursachen Lösungen
Das Gerät heizt nicht Es ist falsch angeschlossen. Anschluß überprüfen.
Der Schalter steht auf Position 0 Den Schalter auf , oder oder
(außer bei 6616). stellen.
Der Thermostat ist in Bezug auf Den Thermostatknopf auf eine
die Zimmertemperatur zu höhere Temperatur stellen.
niedrig eingestellt.
Das Gerät hat sich automatisch siehe Abschnitt “Wärmeschutz”.
ausgeschaltet, da das
Lufteintrittsgitter (oder das
Luftaustrittsgitter) verstopft ist.
Das Gerät ist umgekippt: durch Das Gerät wieder aufstellen und
die Kippsicherung ist der in eine waagrechte Position
Strom abgeschaltet worden. bringen.
Es wird keine heiße Luft Der Schalter steht nicht auf Drehen Sie den Schalter
h e r a u s ge blasen (Mod. 6670/6672) “Heizlüfter”. auf die Position “Heizlüfter”:
für Modell 6670,
für Modell 6672
Sollte immer noch keine heiße Luft
herausgeblasen werden, an einen
zugelassenen Kundendienst wenden.
Das Gerät heizt nicht ausreichend: Der Thermostat steht nicht hoch genug. Stellen Sie den Thermostat höher.
Die eingestellte Leistung Stellen Sie den Schalter auf
ist zu niedrig. eine höhere Leistung.
(Mod. 6610 / 6620 / 6672).
 Loading...