

California Faucets Steampunk Bay CF-8502, Steampunk Bay CF-8602 Installation Instructions Manual
CALIFORNIA FAUCETS RECOMMENDS THAT ALL PLUMBING PRODUCTS BE INSTALLED
BY A LICENSED PROFESSIONAL
8
- ”
IMPORTANT: Read all instructions prior to installation and provide copy of instructions to consumer.
Operating Specifications:
Recommended Supply Pressure: 20 to 70 psi
Maximum Flow Rate: 1.2 gpm
Operating pressures between hot and cold supplies should vary no more than 30 psi.
*
If water pressure exceeds 70 psi, install a Pressure-Reducing Valve (PRV).
†
Widespread Lavatory Faucet
Steampunk Bay
™
CF-8502 & CF-8602
Installation Instructions
*†
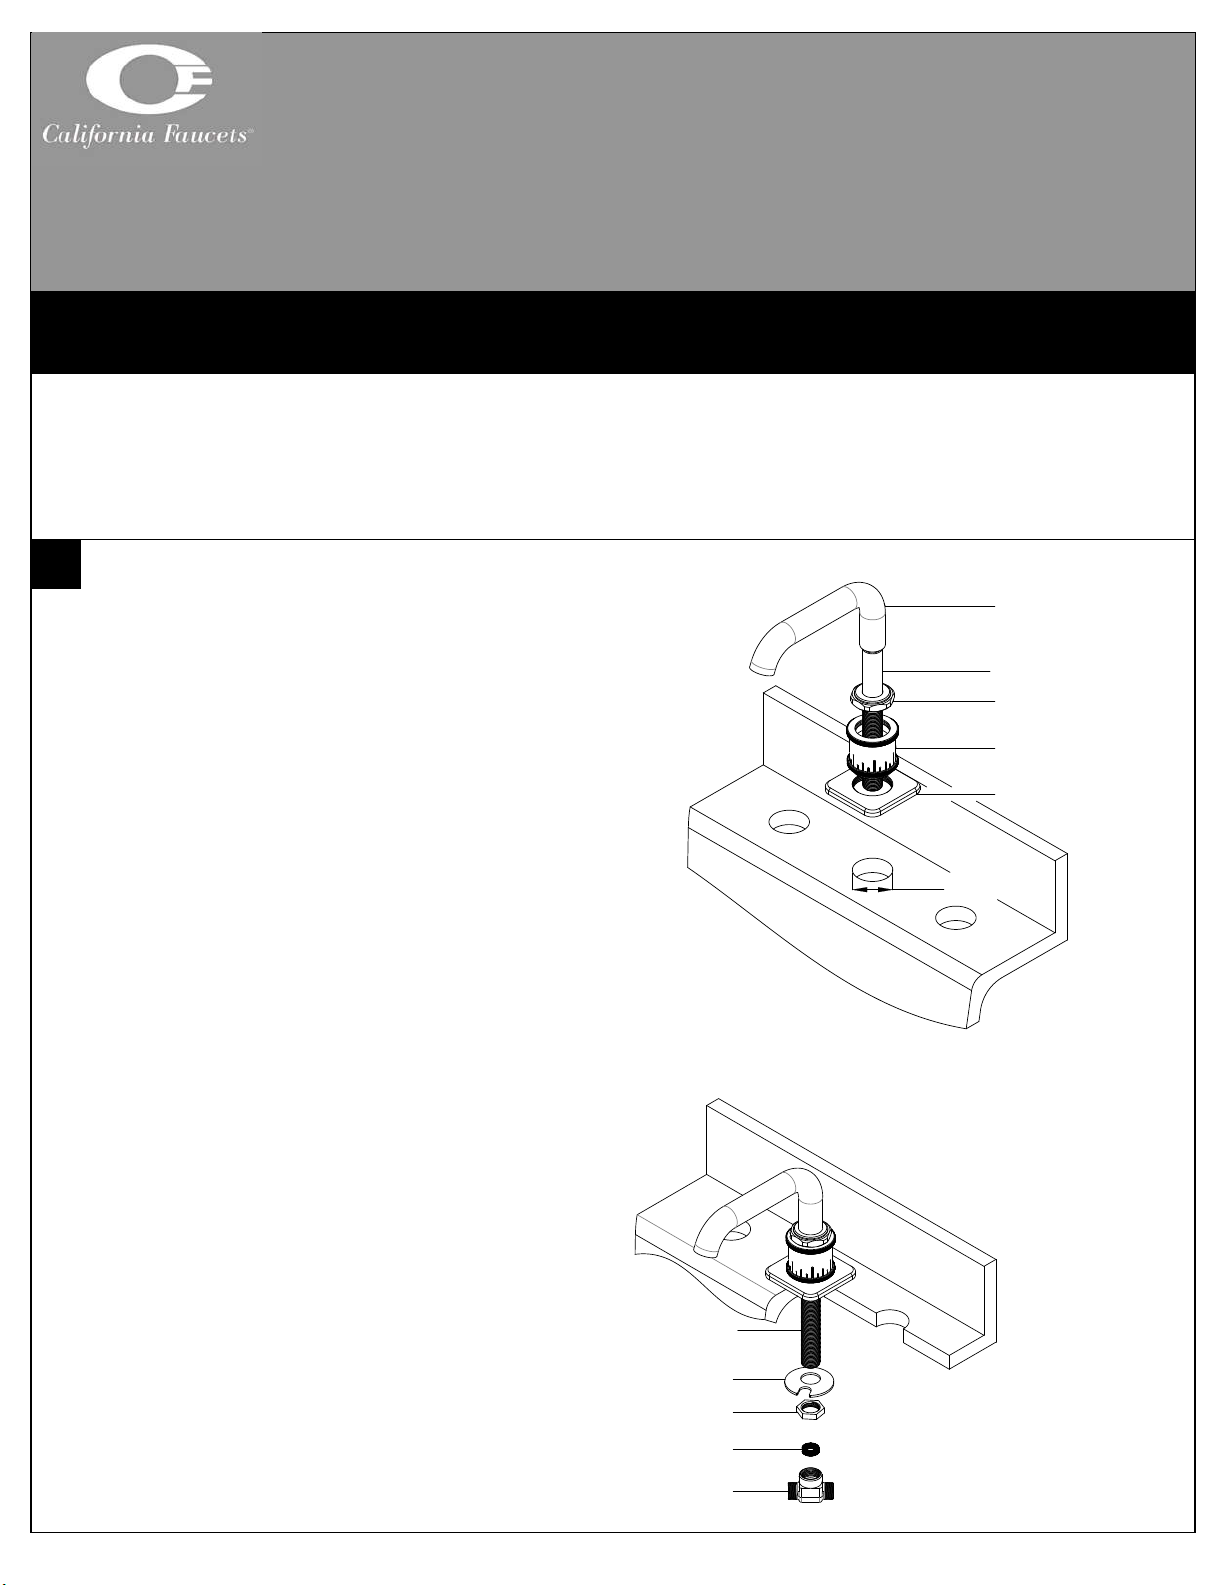
INSTALLING SPOUT TO SINK/DECK
Tighten spout BASE (4) and DECORATIVE NUT
(2) onto spout RISER (3), and slide onto spout
SHANK (1a)
Insert spout SHANK (1a) though sink/deck hole
NOTE: Sink/Deck recommended hole size shall be Ø1-3/8”
From underside, place SLOTTED WASHER (5)
onto spout SHANK (1a) and tighten SPOUT (1)
into place with NUT (6)
Insert RUBBER WASHER (7) into TEE (8) and
attach to spout SHANK (1a)
Ø1 3/8
1
1a
2
3
4
IMPORTANT: TEE (8) should be tightened to create watertight
seal and positioned to allow ease of attachment of valve hoses
CF-8502_ii_190102 Pg 1
1a
5
6
7
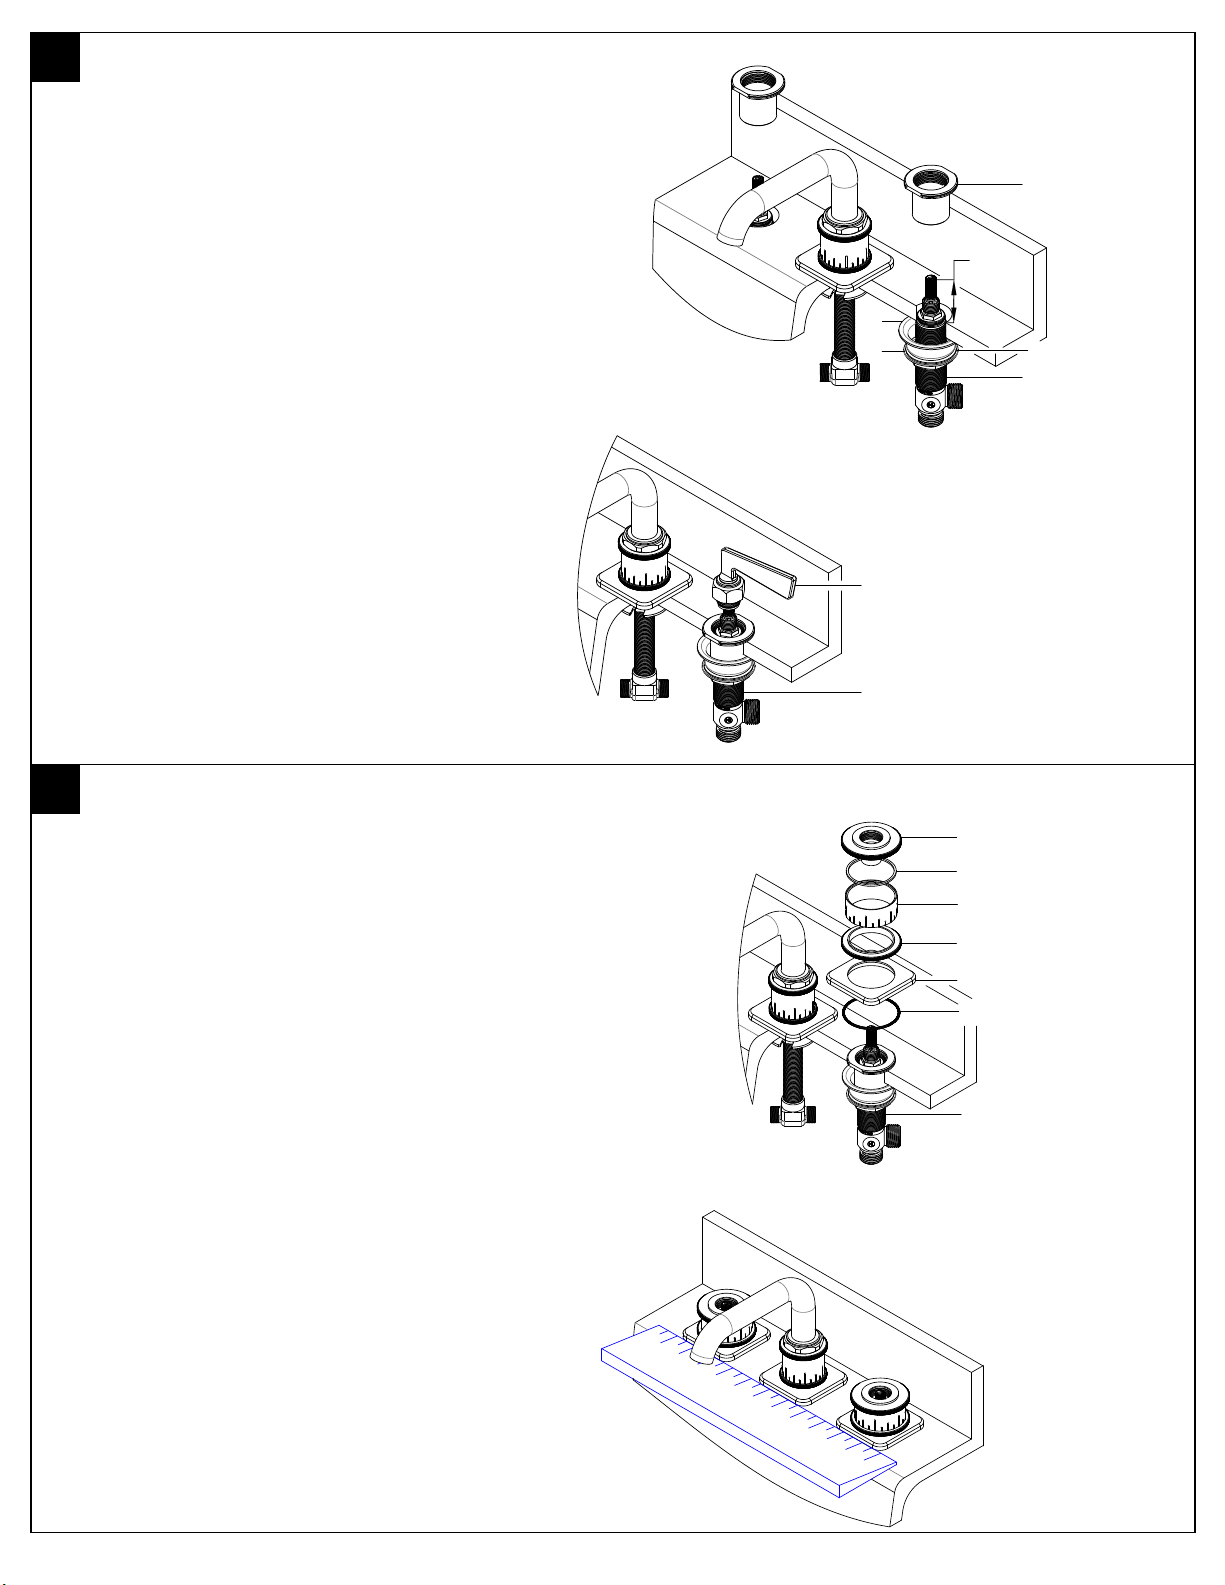
INSTALLING VALVE
From underneath insert VALVE (12) though
appropriate sink/deck hole
IMPORTANT: VALVES (12) are labeled as follows:
BLUE is COLD left turning (counter-clockwise) closed
RED is HOT right-turning (clockwise) closed
Position flange NUT (10), WASHER (9), and
SPACER (11) so that VALVE (12) extends 1-1/2”
above sink/deck surface
Attach INVERTED NUT (13) to VALVE (12)
Use HANDLE (15) to confirm proper VALVE (12)
alignment, rotate VALVE (12) if necessary
NOTE: See image in Section 4 to confirm proper alignment of other
handles
11
10
13
1-1/2"
9
12
INSTALLING ESCUTCHEON
NOTE: Confirm orientation of RISER (14c); hash marks at bottom as
shown
Insert O-RING (14f) into handle BASE (14e), place
COINED RING (14d) on handle BASE (14e),
position handle RISER (14c) on COINED RING
(14d), fit WASHER (14b) to ESCUTCHEON
(14a), place ESCUTCHEON (14a) onto RISER
(14c)
Place ESCUTCHEON ASSEMBLY (14) onto VALVE
(12) and secure to sink/deck surface by tightening
ESCUTCHEON (14a)
Use a ruler or straight edge to align the spout base,
and handle bases of the faucet as shown
15
12
14a
14b
14c
14d
14e
14f
12
After alignment retighten ESCUTCHEON (14a)
and spout NUT (6)
NOTE: Return to Section 2 if valve is not aligned properly
CF-8502_ii_190102 Pg 2
 Loading...