

California Faucets Single-Hole Bar/Kitchen Faucet User Manual
Single Hole Bar / Lavatory Faucet
Installation Instructions
CF-6209-1
CALIFORNIA FAUCETS RECOMMENDS THAT ALL PLUMBING PRODUCTS BE INSTALLED
BY A LICENSED PROFESSIONAL
IMPORTANT: Read all instructions prior to installation and provide copy of instructions to consumer.
Operating Specifications:
Recommended Supply Pressure: 20 to 70 psi
* If water pressure exceeds 70 psi, install a Pressure-Reducing Valve (RPV).
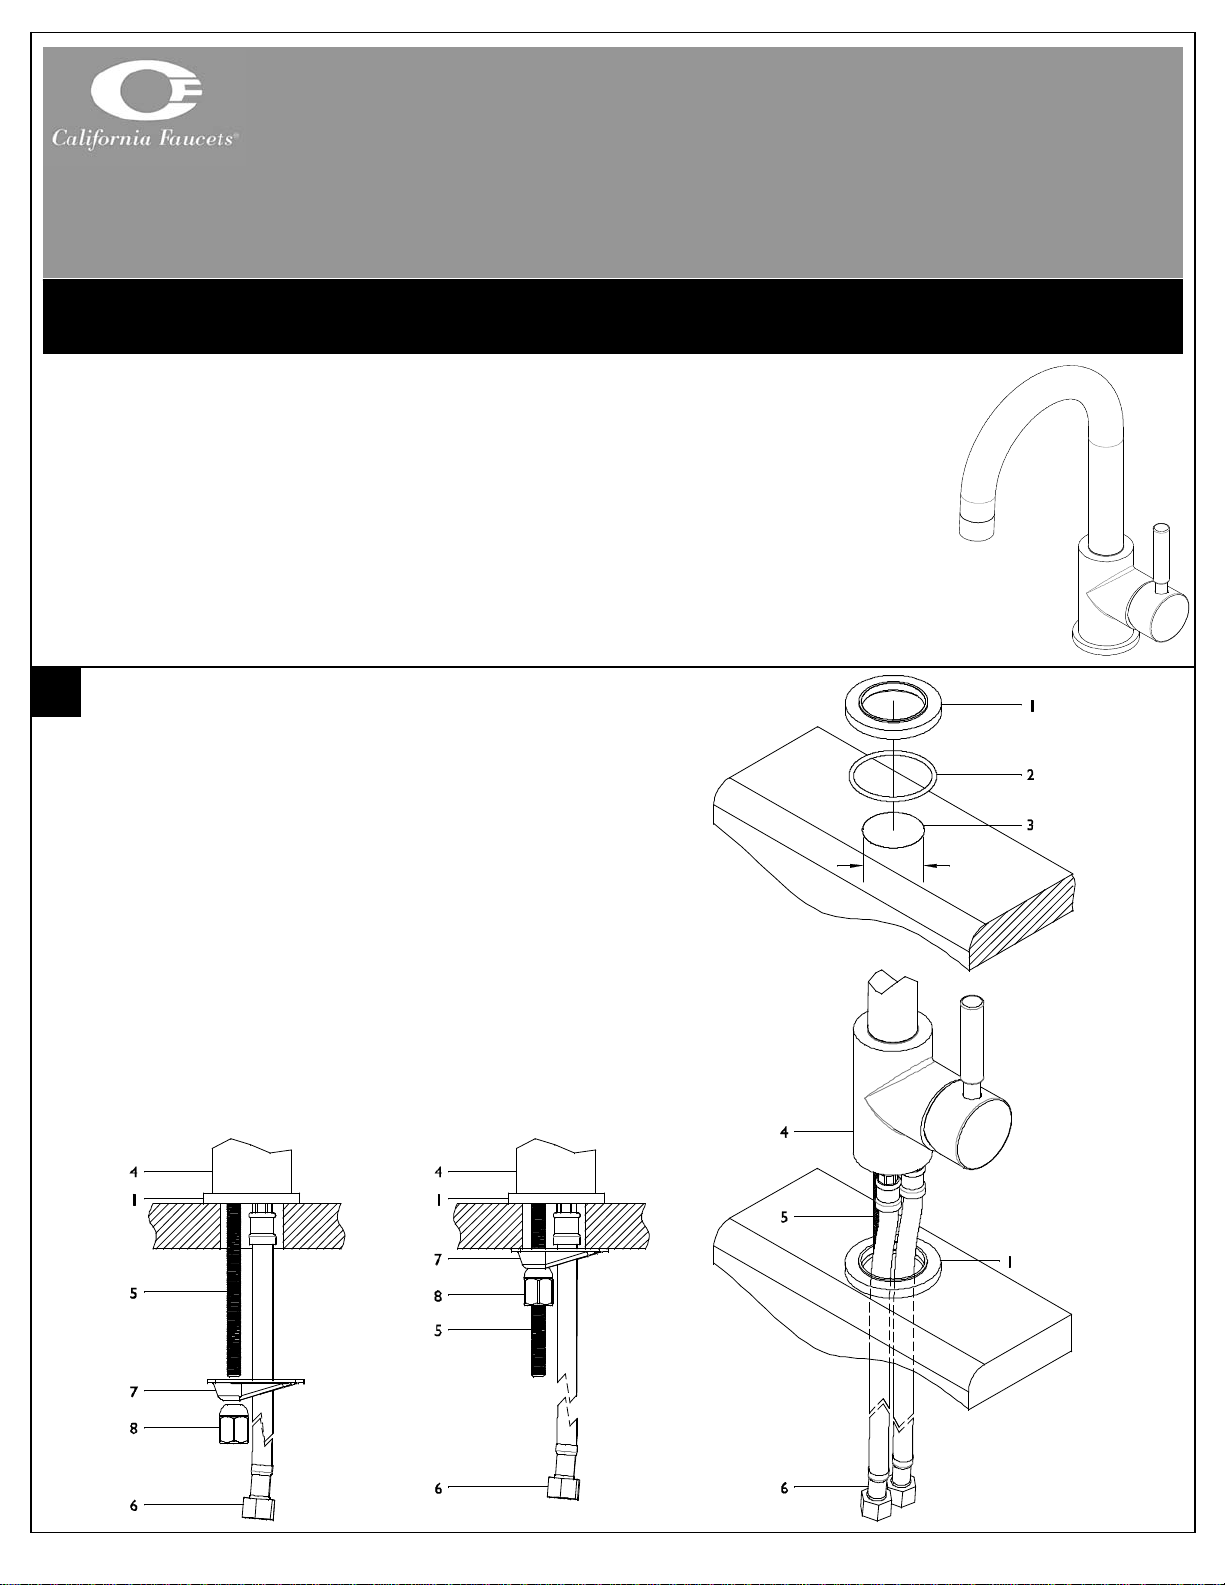
INSTALLING FAUCET TO SINK/DECK
*
• Insert O-RING (2) into bottom of BASE RING (1) and
center over sink/deck THROUGH-HOLE (3)
NOTE: Recommended sink/deck THROUGH-HOLE is Ø1-d”
• Insert FLEX HOSE (6) (one at a time) and THREADED
ROD (5) though BASE RING (1) and sink/deck
THROUGH-HOLE (3)
• Place BODY (4) on top of BASE RING (1)
• From underside of sink/deck THROUGH-HOLE (3),
place MOUNTING BRACKET (7) and NUT (8) onto
THREADED ROD (5)
• Tighten NUT (8) until BODY (4) and BASE RING (1) is
secure to sink/deck
Ø1-d”
CF-6209-1_ii_101217.doc Pg 1
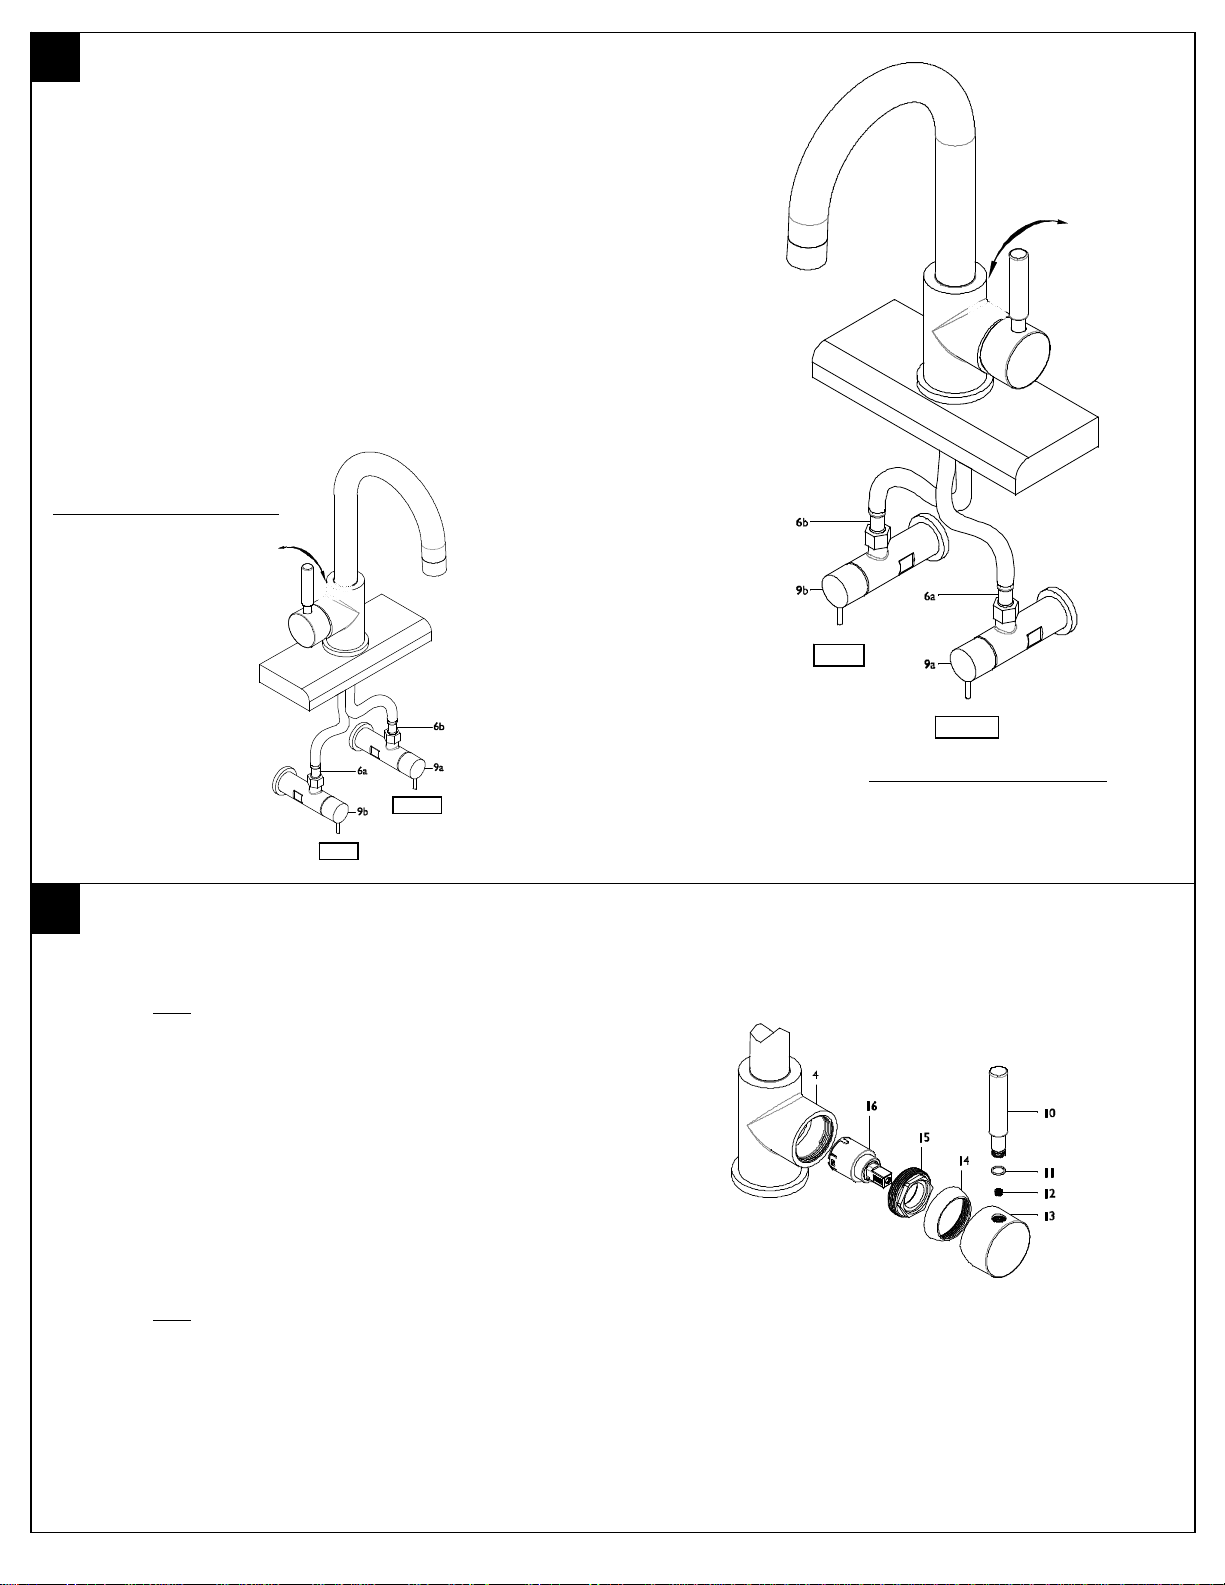
SUPPLY CONNECTIONS
tHot
For Right Handed Installations
• Connect blue colored FLEX HOSE (6a) to “COLD”
SUPPLY VALVE (9a)
• Connect red colored FLEX HOSE (6b) to “HOT”
SUPPLY VALVE (9b)
IMPORTANT: Flush supply lines and valves prior to installation to prevent
damage and malfunction of cartridge
Cold
Ho
For Left Handed Installations
• Connect the blue colored FLEX HOSE (6a) to “HOT”
SUPPLY VALVE (9b)
• Connect the red colored FLEX HOSE (6b) to “COLD”
SUPPLY VALVE (9a)
Left Handed Installation
Cold
HOT
HOT
COLD
Right Handed Installation
COLD
MAINTENANCE
Cartridge Service
• Turn off both
“HOT” and “COLD” SUPPLY VALVES (9a
& 9b)
• Unscrew HANDLE (10) and loosen SETSCREW (12).
• Slide CAP (13) off CARTRIDGE (16) stem.
• Unscrew BONNET (14), may require use of rubber jar lid
removal pad or protected jaw pliers.
• Unscrew NUT (15) from BODY (4).
• Slide CARTRIDGE (16) out of BODY (4).
• Reinstall items in reverse order. CARTRIDGE (16) has
two pins that must align into BODY (4). Ensure that ORING (11) is on HANDLE (10) during reassembly.
• Turn on both
“HOT” and “COLD” SUPPLY VALVES (9a
& 9b)
• Check all connections for leaks and repair as necessary
NOTE: Occasionally, due to water conditions it may be necessary to
remove aerator and clean debris off with soft bristle toothbrush
www.calfaucets.com
5231 Argosy Ave. Huntington Beach, CA 92649
CF-6209-1_ii_101217.doc Pg 2
800-822-8855
 Loading...