

California Faucets Builder Series Roman Tub Sets User Manual
INSTALLATION
Ref. RTBLD1-INSTL
(V 01) 09/06/06
INSTRUCTIONS
800-822-8855
R
www.calfaucets.com
ROMAN TUB SETS
(Builder's Series)
IMPORTANT
All California Faucets products are engineered to provide quality performance provided they
are installed and operated properly. To fully enjoy the comfort, safety, and reliability of your new
Roman Tub Set, please follow the instructions below.
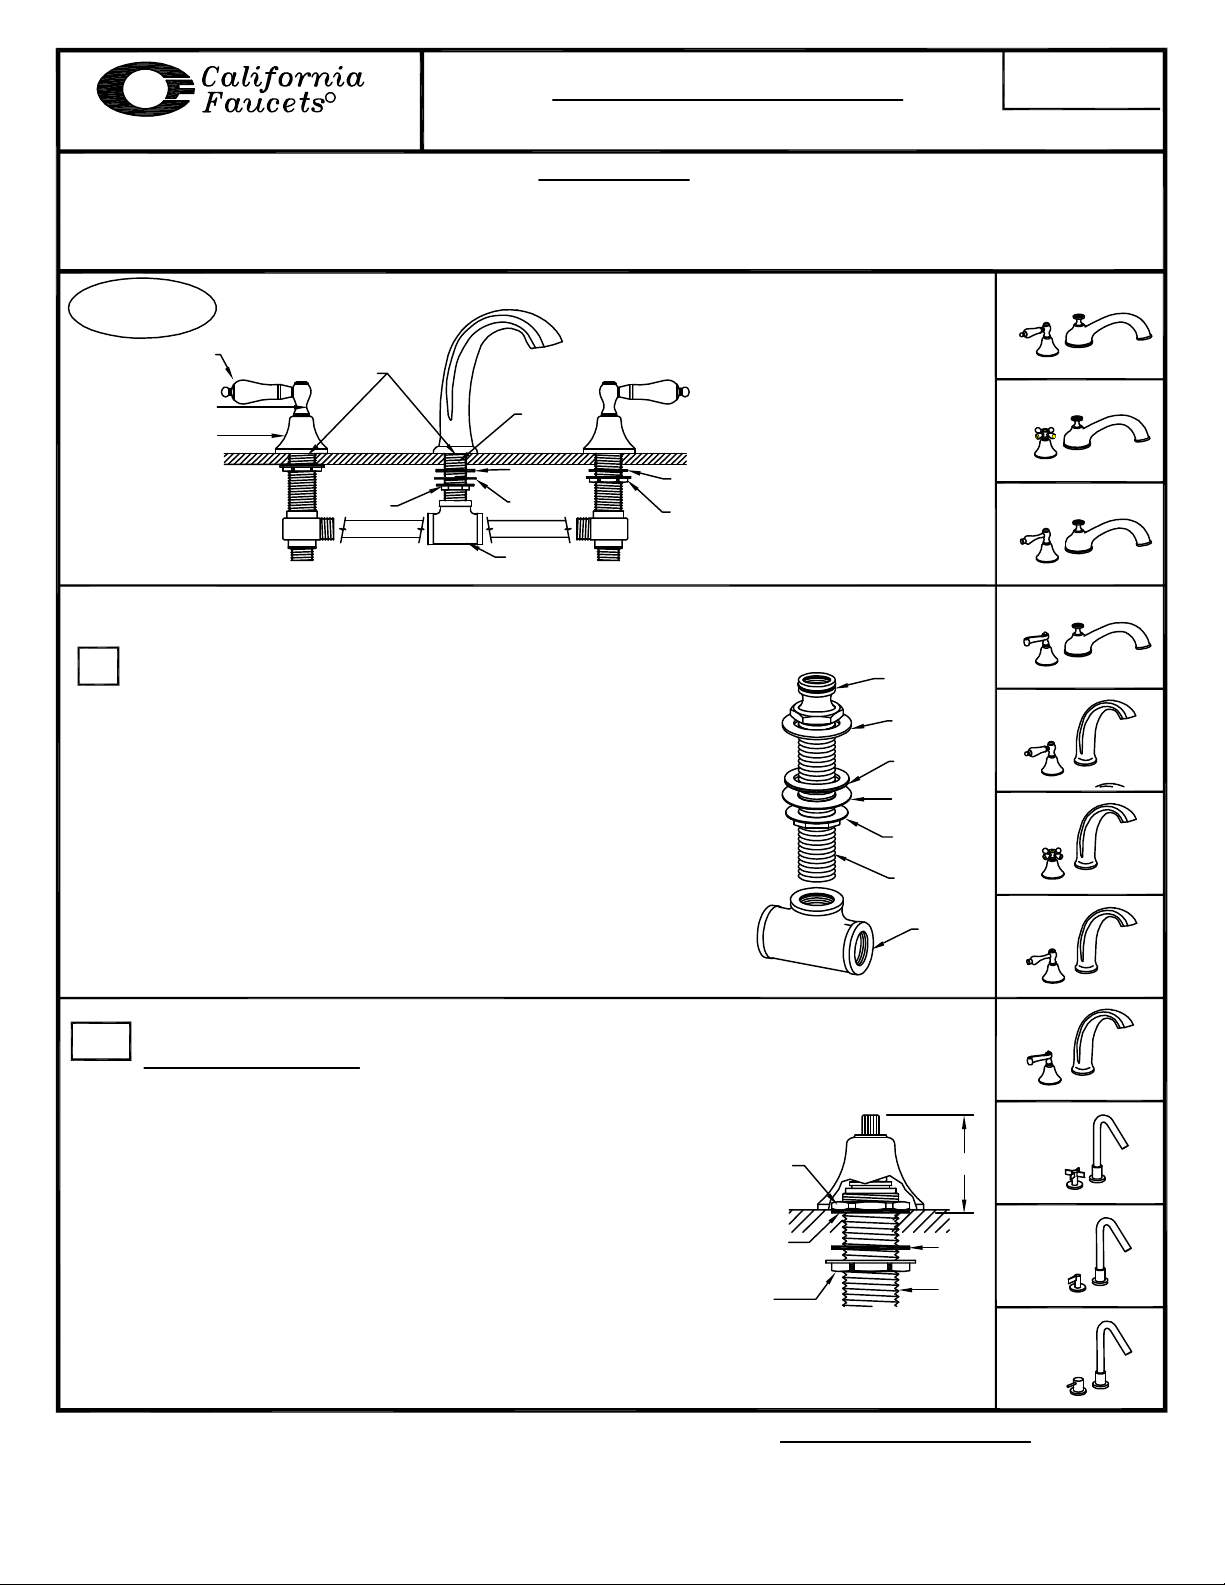
Series #2108
Shown
Handle
Set
Screw
Escutcheon
1 1/4" Hole Size
for Drilling
Quick
Connect
NOTE:
-The manufacturer recommends
the use of hard piping (not flex
connections) for all connections.
-It is also recommended that an
access panel be provided for
all Roman Tub installations.
#2008-PL
Porcelain Handle
#2008-CR
Rubber
Washer
Tefflon
Washer
Connector
Tee
Cold
Fig. 1
Hot
Brass
Nut
***NOTE: SHUT OFF WATER SUPPLY BEFORE BEGINNING INSTALLATION***
Install spout:
1
-Remove tee, bottom brass nut, teflon washer and rubber washer from
Quick Connect assembly.
-Ensure that O-ring is properly seated in the brass washer. ( See Fig. 3)
-Insert Quick Connect assembly through spout hole in deck.
-Quick connector spout shank may need to be shortened at time of
installation. This will vary by series type & installation conditions.
-Re-install rubber washer, teflon washer and brass nut from
underneath deck and tighten firmly.
-Seat spout onto Quick Connect
-Ensure spout is in the proper position, then tighten set screw at base
of spout.
-Apply approximately three to five wraps of teflon tape to spout shank.
Thread on tee and tighten firmly. Align as necessary.
Install valve bodies:
2A
For series 20 & 21
NOTE: Hot & cold valves are labeled: cold=blue & hot=red.
-Loosen handle set screws with Allen key provided. Remove handle,
escutcheon, top nut & fiber washer.Turn bottom nut with fiber washer
down the valve until stops, (repeat for other valve).
-Insert valve through hole from below and install fiber washer, top nut,
and adjust to proper height. (See Fig. 3), (repeat for other valve).
-Tighten the bottom nuts to secure the valves onto sink or countertop.
-Install trim parts escutcheons and handles and tighten handle set
screws with allen key provided.
Reminder: Please retain Allen key as handles may require
re-tightening with normal use.
Fiber
Washer
Bottom
Nut
Fig. 2
Top
Nut
Fiber
Washer
Bottom
Nut
O-ring
Brass Washer
w/ O-ring
Rubber
Washer
Teflon
Washer
Brass
Nut
3/4" NPT
Spout Shank
Connector
Tee
Fig. 3A
2 3/8"
Fiber
Washer
Valve
Cross Handle
#2008-LEV
Lever Handle
#2008-SC
Scroll Handle
#2108-PL
Porcelain Handle
#2108-CR
Cross Handle
#2108-LEV
Lever Handle
#2108-SC
Scroll Handle
#2208-CR
Cross Handle
#2208-ML
Metal Lever Handle
#2208-CY
NOTE: Due to sediment in the water it may
be necessary on occasion to remove the aerator
and clean the screen with a soft bristle toothbrush.
Metal Cylinder Handle
IMPORTANT CLEANING NOTICE
Please refer to Finish Care Instructions for complete
cleaning information. Wipe frequently with a soft, damp
cloth. Never use acids, harsh abrasives or detergents .
Ref. RTBLD2-INSTL
P2
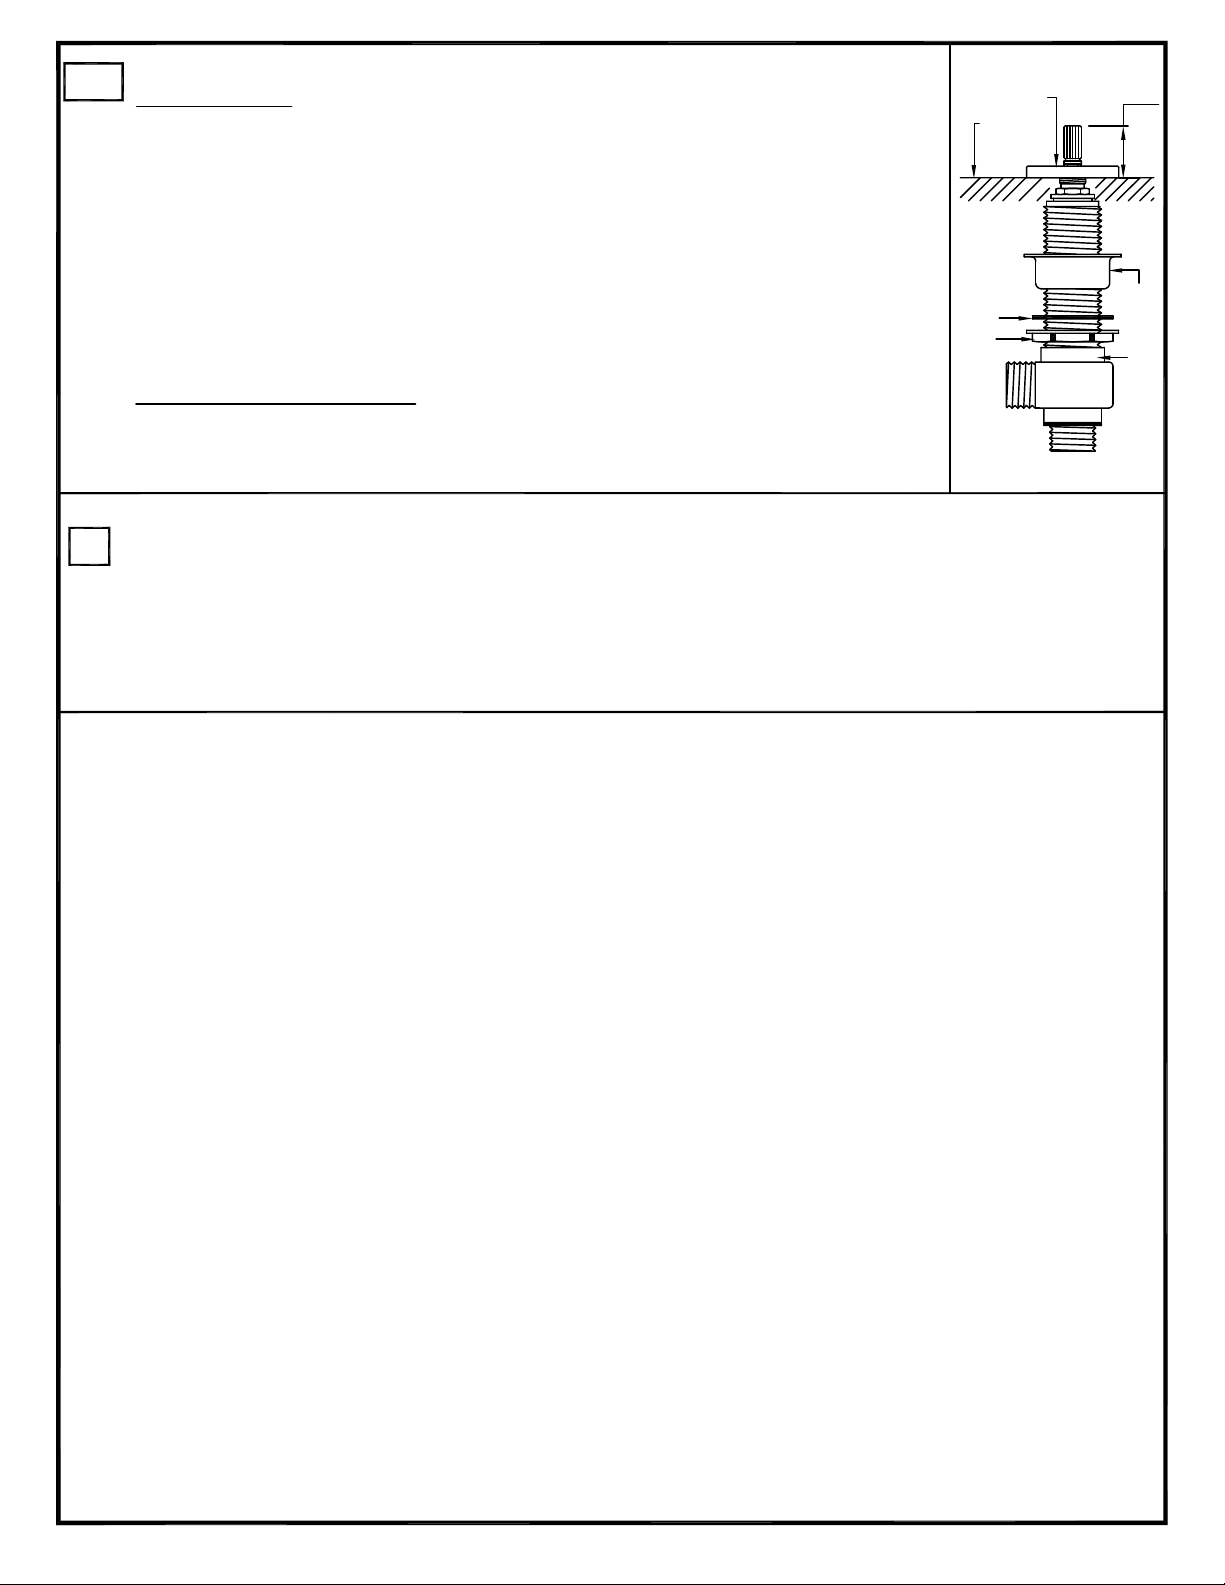
2B
For series 22
NOTE: Hot & cold valves are labeled: cold=blue & hot=red.
-Loosen handle set screws with Allen key provided. Remove handle, escutcheon, and spacer
cup. Turn bottom nut with fiber washer down the valve until stops and place spacer cup with
flange up back onto the valve body, (repeat for other valve).
-Insert valve through hole from below and install the escutcheon and adjust to proper height,
(See Fig. 3B). Then place handle onto valve broach to verify correct clearance between handle
and escutcheon, (repeat for other valve).
-Align handle in desired position and tighten the bottom nut to secure the valve,
(repeat for other valve).
-Install handles and tighen handle set screws with Allen key provided.
Reminder: Please retain Allen key as handles may require re-tightening with normal use.
Installation Note for series: #22
The trims to these products do not require a top nut & a fiber washer to be installed on the valve,
the escutcheon takes the place of the top nut, (See Fig. 3B)
Piping:
Install valve bodies:
3
-Install piping (not provided) to connect hot & cold valves to connector tee (See Fig. 1).
NOTE:
-The manufacturer recommends the use of hard piping (not flex connections) for all connections.
-It is also recommended that an access panel be provided for all Roman Tub installations.
Escutcheon
Sink/
Countertop
Fiber
Washer
Bottom
Nut
1 1/8"
Spacer
Cup
Valve
Fig. 3B
 Loading...