

Page 1
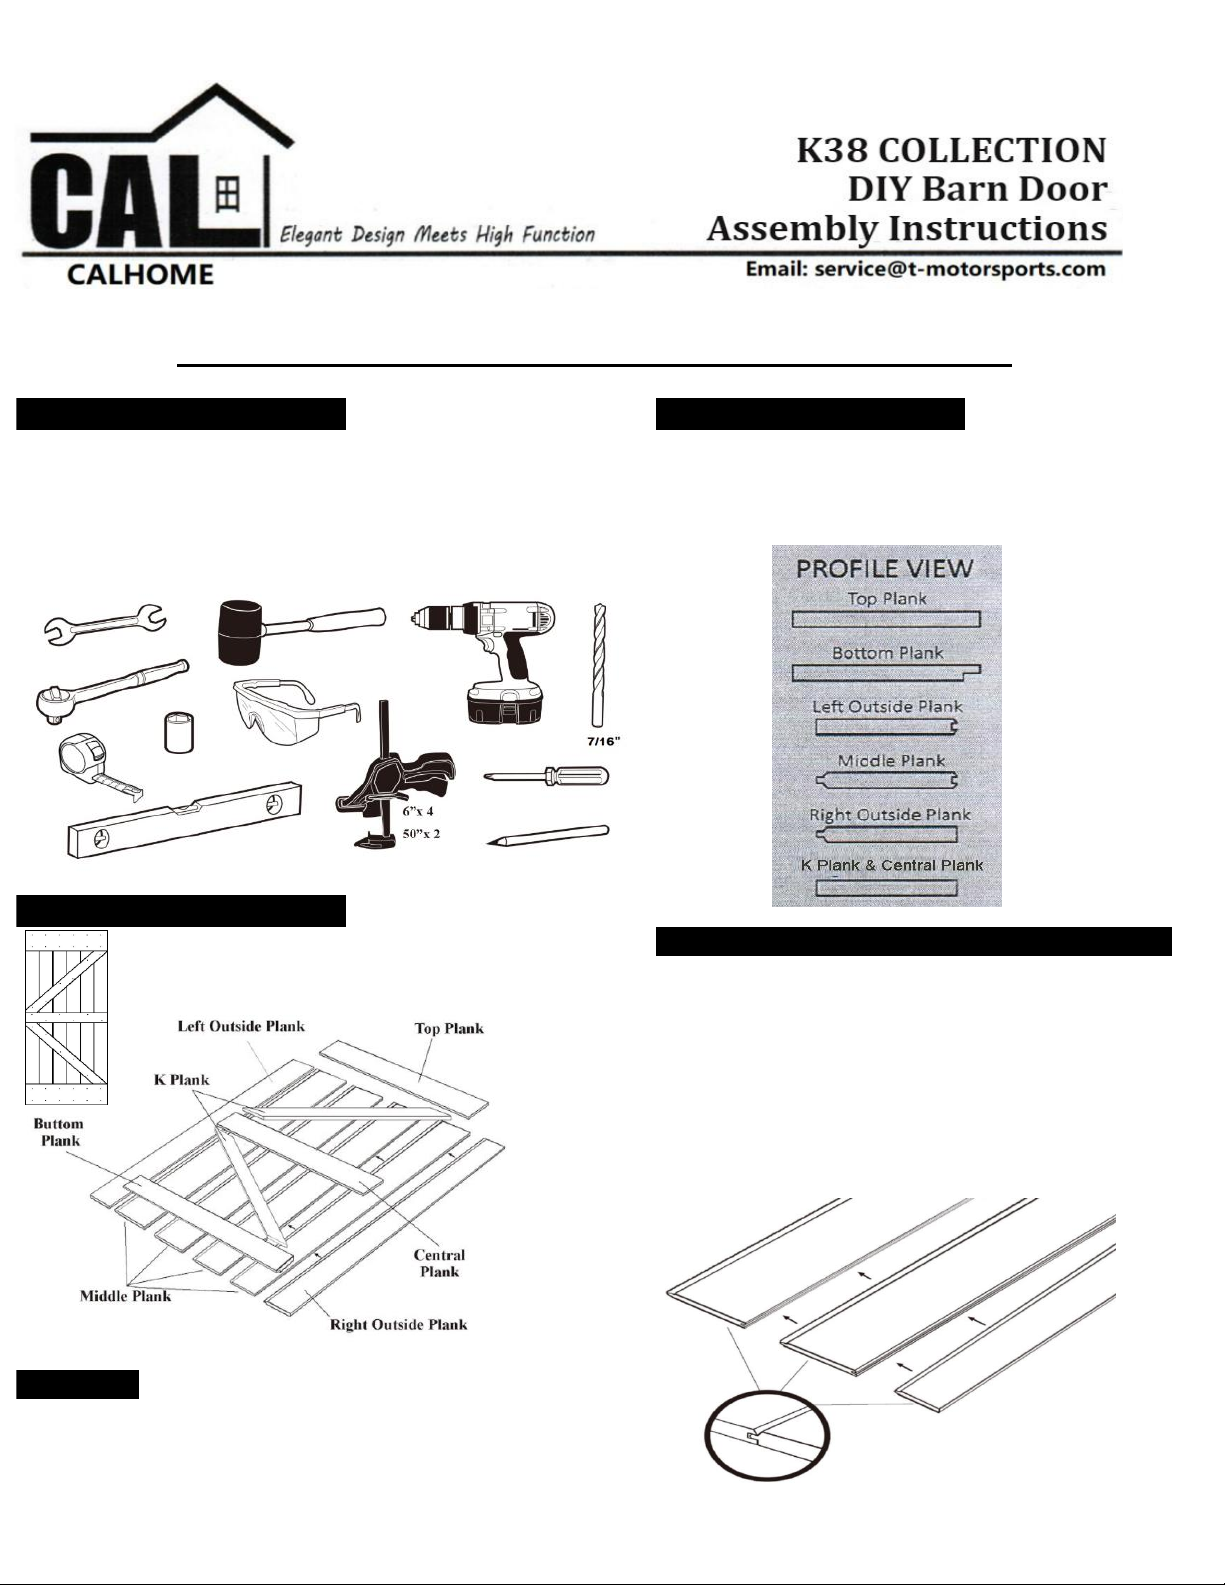
Step 1 Tools Needed Step 2 Parts Included
You will need a Pencil, Phillips head screwdriver,Tape Make sure ALL parts are included before installing.
measure, Drill, 7/16” Assorted Drill bits, 6” Phillips head 1 Top Plank, 1 Bottom Plank, 1 Left Outside Plank,
bit and 1/2” socket ratchet, 4ft Level,Rubber mallet, 4 Middle Planks.1 Right Outside Plank ,
Safety glasses, 4 Clamps(6") and 2 Clamps(50"). 2 K Planks, 1 Central Plank, and 56 Screws.
Step 3 Expanded View
Step 4 Assemble Door Middle and Outside Planks
CAUTION
CAREFULLY READ ALL INSTRUCTIONS BEFORE INSTALLING
Place one plank flat on your work surface, making sure
the groove side of the panel is to the inside. Take next
plank and place it evenly into the first plank’s groove.
Repeat steps with the remaining planks. Make sure all
planks are aligned top and bottom as you go. Planks
should be evenly spaced and snug. The smooth outer
edge of the left and right end planks should be placed to
the outside.
Assembled door is heavy and should be lifted by
2 people at all times.Mishandling of heave
objects (i.e. doors) may cause injury. Safety
shoes should be worn at all times to prevent
injury.
Page 2
Door Color
36A = 266260 GOLDEN PECAN 20066 22051
36B = 266167 DARK WALNUT 20066 22002
36C = 266256 EBONY 20066 22047
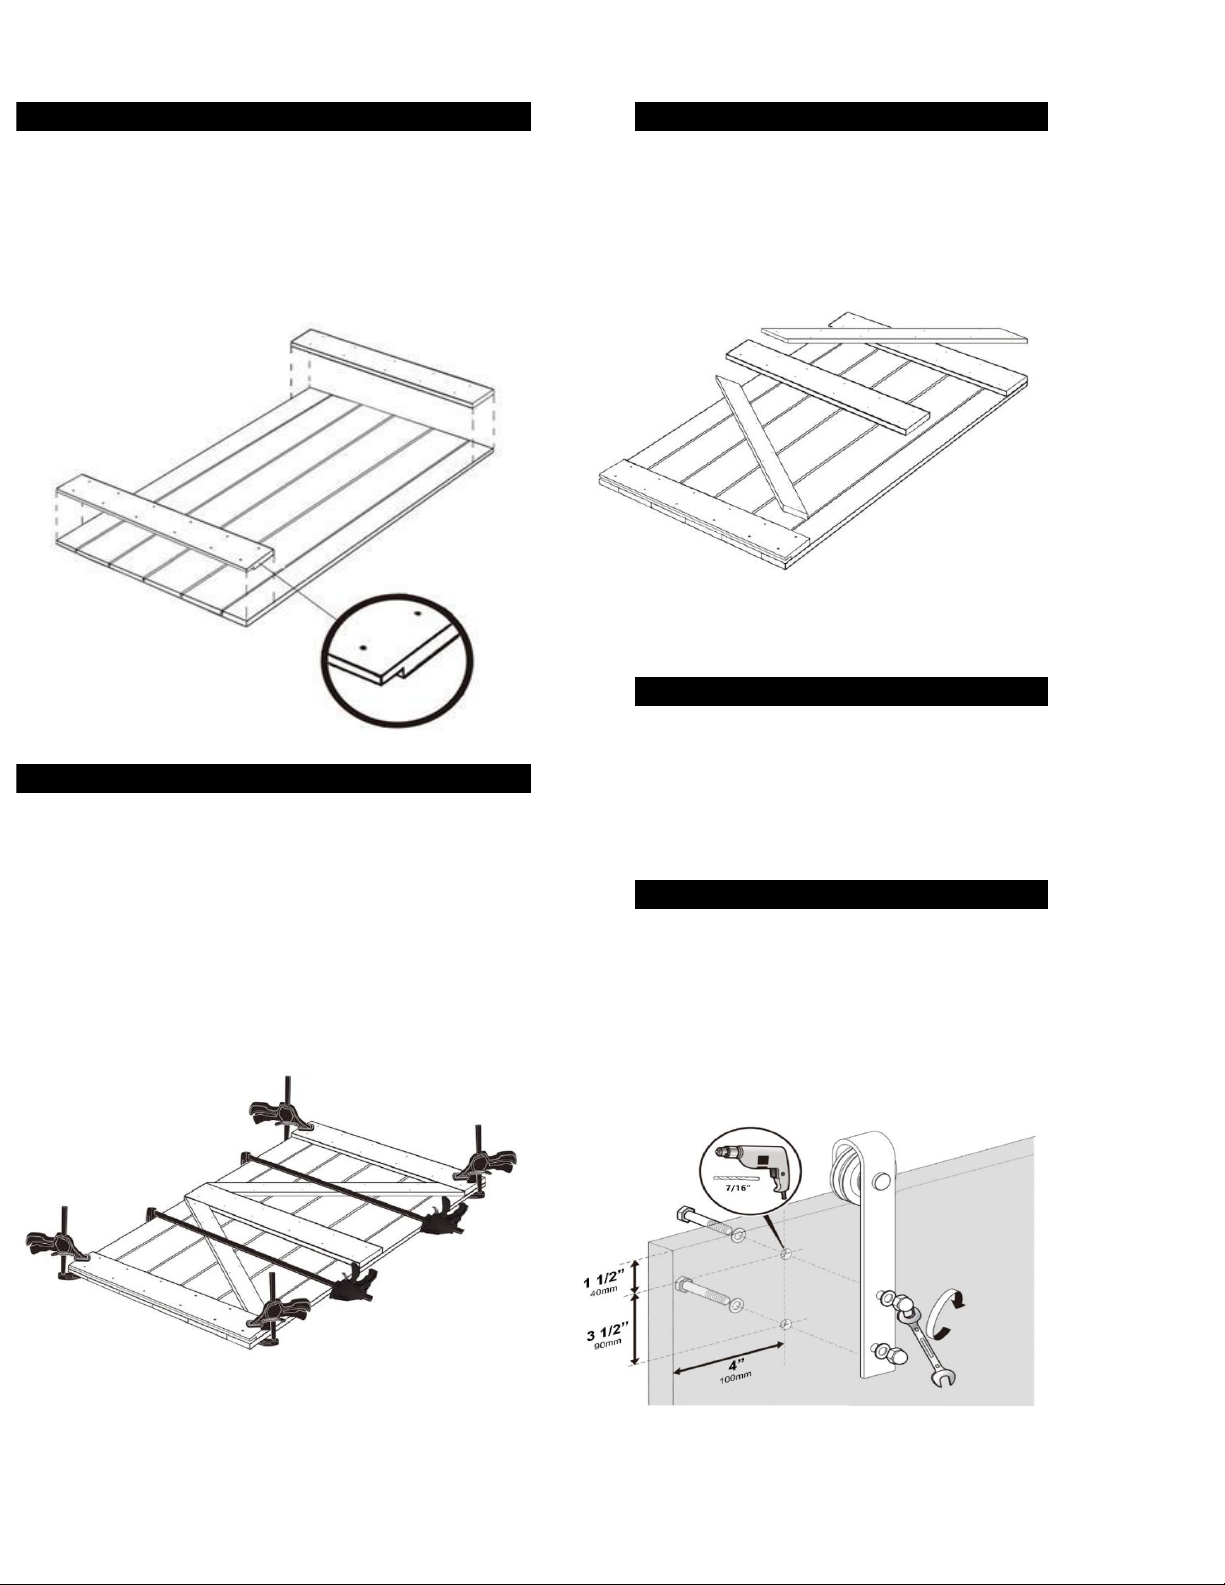
Once the top and bottom planks are installed,
drill shallow pilot holes in door planks through
K and central planks(using the pre-drilled
holes as a guide) and then with a screwdriver,
secure with the screws provided. Do not drill
completely through the door plank. It is
Step 7 Secure Top and Bottom Planks
Once all planks are flush and squre, secure the top and
bottom planks with the screws provided. Using the
clamps, secure all 4 corners. With the pre-drilled holes as
your guide, drill(1/8"bit) a shallow pilot hole into 4 corner
holes. Do not drill completely through the door
plank.Using a screw driver insert screws into the 4 corner
pre-drilled holes. Continue process with the remaining
screws. Make sure all screws are installed and secure. It
is important to check that all planks are still flush and
squre as you go.
Step 9 Install Sliding Door Hardware
The door is now ready to have the sliding
door hardware track brackets installed
Note: The below guide is for our SDHSWD11 hardware. If using the wood barn
door track included in the kit, please refer
to the provided hardware installation
instructions prior to installing.
Step 8 Secure K and Central Planks
Step 5 Assemble Top and Bottom Planks
Step 6 K and Central Planks
Place the top and bottom planks onto the assembled
door planks with the pre-drilled opening side up. Make
sure both panels are flush with the door edges on top
and sides. There should not be any overhang. Planks
should be evenly spaced and snug. Do not insert any of
the screws at this point.
Place the K and central planks onto the door
with the pre-drilled opening side up. Make
sure it lays flush against the top and bottom
planks.
 Loading...