

Page 1
Getting Started
Page 2

Apple, Apple Logo, Mac, the Mac logo, Macintosh, are trademarks of Apple
Computer Inc. Microsoft, Windows and Windows Logos are registered
trademarks or trademarks of Microsoft Corporation. All other trademarks are
the property of their respective owners.
*Specications and package contents are subject to change without
notice.
Page 3
Thank you for choosing the CalDigit VR mini,
please use the following quick installation guides
to setup your CalDigit VR mini.
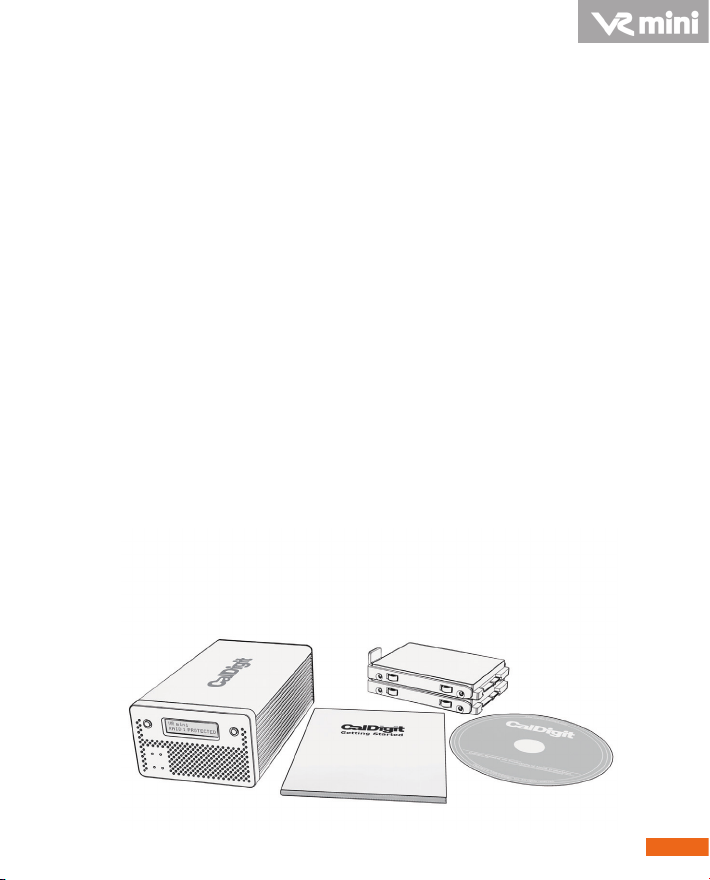
Package Contents:
1. (One) CalDigit VR mini
2. (Two) CalDigit drive modules.
Pre-installed in the CalDigit VR mini.
3. (One) FireWire 800 cable
4. (One) FireWire 400 cable
5. (One) eSATA cable
6. Quick Installation Guide
7. CalDigit VR RAID Tool CD
8. (One) Power supply kit
The following accessories should be in the box. Please contact
your CalDigit reseller for any faulty components or missing
parts.
3
Page 4

Index page
5 A. Installing the CalDigit VR mini
77 B. Feature Overview
LCD display information and instructions
77
RAID Tool feature overview
11
14 C. Conguring your RAID
Using LCD
14
Using RAID Tool
17
20 D. Order accessories and parts
4
Page 5
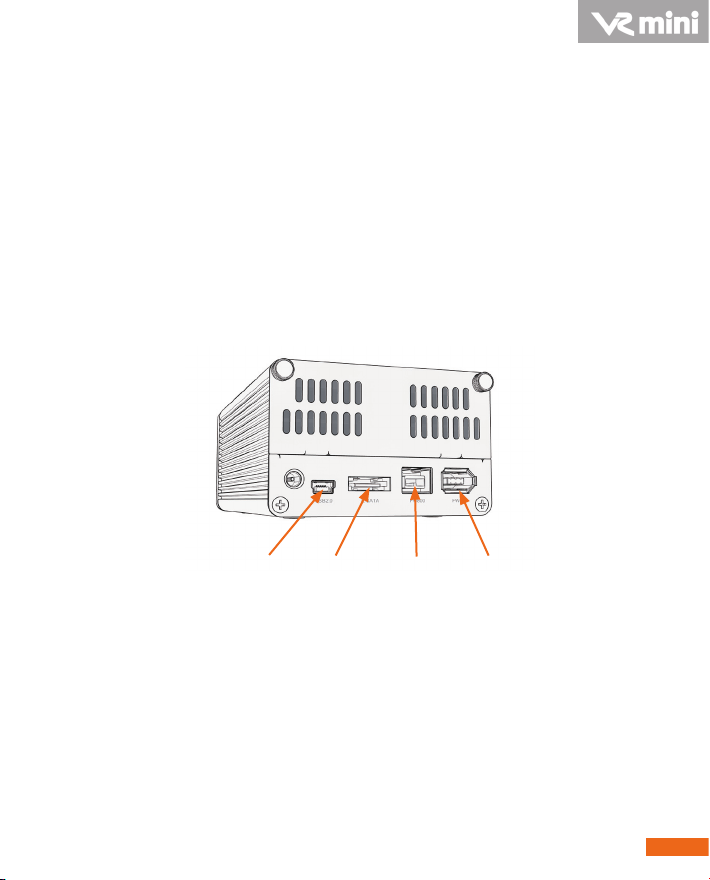
A. Installing the CalDigit VR mini
The CalDigit VR mini is ready to use, right out of the
box.
1. Select the desired interface, FireWire 400, FireWire 800, USB
2.0 or eSATA. (FireWire 800, FireWire 400, and eSATA, and
eSATA cables are included.)
USB 2.0 eSATA FireWire800 FireWire400
2. When using a FireWire connection no power supply is
needed, since the CalDigit VR mini is bus powered.
a. When using FireWire in conjunction with USB or eSATA,
the FireWire connection will only supply power.
b. The power supply is not needed when using the FireWire
connection.
5
Page 6
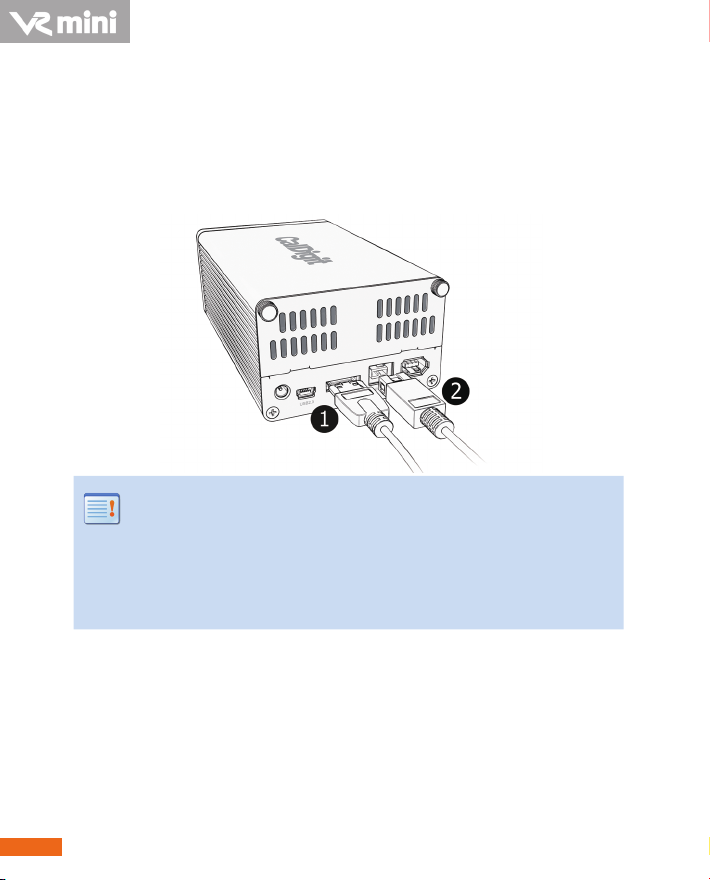
3. If you are using the eSATA port as your main interface and
FireWire 400 or Firewire 800 as your power source, please
connect the eSATA cable to the computer and CalDigit VR
mini before you connect the FireWire cable.
Note: If you would like to use the eSATA connection
with your CalDigit VR mini, you can purchase one of
CalDigit's eSATA controller cards (FASTA-1ex, FASTA2e or FASTA-4e).For more information visit
www.caldigit.com.
6
Page 7

B. Feature Overview
LCD Display Information
The CalDigit mini's LCD displays information in the following
order:
1. System Prole - will display the status of the following
features
1.1 RAID status
Displays the current RAID status.
1.2 Serial number
Displays CalDigit VR mini serial number.
1.3 Firmware version
Current rmware version.
1.4 System temp
Displays the current system temperature.
1.5 Fan speed
Displays the current fan speed.
1.6 Disk 1 temp
Displays temperature of the top hard drive.
1.7 Disk 2 temp
Displays temperature of the bottom hard drive.
1.8 Beeper enable
Provides audible alarm.
7
Page 8

1.9 Auto rebuild
Enable or disable auto rebuild under RAID 1.
2. Create RAID
2.1 Create RAID 0
Data is written onto two hard drives simultaneously,
for maximum speed.
2.2 Create RAID 1
Identical data is written onto two hard drives with
maximum protection.
2.3 Create SPAN
Combine two hard drives into one volume, data will be
accessed from the rst hard drive until full, then the
second hard drive will be used.
2.4 Create JBOD
Conguring two hard drives in the VR without RAID
features. Each drive shows up separately in the OS.
3. MISC cong - internal system set up
3.1 LCD power on / o
Turn the LCD display screen on or o.
3.2 Beeper on / o
Turn on the audible alarm.
3.3 Turbo mode on / o
Turn o the audible alarm.
8
Page 9

3.4 Japanese language
Display menu content in Japanese.
3.5 Access LED
Turn on/o drive status LEDs.
3.6 Read only mode
This turns the VR mini into a Read-only volume. This
function is not compatible with RAID 1.
3.7 Auto rebuild
Enable or disable auto rebuild under RAID 1.
3.8 Load default cfg
Reset default settings.
For more information about the CalDigit VR mini's LCD,
please go to
http://www.caldigit.com/support.asp
9
Page 10

10
Page 11

RAID Tool Feature Overview
RAID Tool provides the current status of the CalDigit VR mini
and also allows you to change it's settings.
1. RAID information
Provides related information for the current
RAID set.
2. RAID conguration
Create RAID 0, RAID 1, SPAN or JBOD.
11
Page 12

3. Email conguration
Error logging system set up. When an error
occurs, the CalDigit VR mini will automatically
send out the log to the system administrator via
email. Internet and proper email account services
are required.
4. Environmental monitor
Obtain the current environmental status for the
CalDigit VR mini.
5. Event Log
Displays log of all CalDigit VR mini events.
6. Firmware update
Manually update the CalDigit VR mini Firmware,
to add new features or patches for the CalDigit
VR mini.
7. MISC. Conguration
Set RAID Tool password protection, LCD cong
enable/disable, beeper enable/disable and VR mini
nickname to customize LCD with personalized
message, Turbo mode, and LED status.
12
Page 13

8. Re-Scan
Re-Scan for additional CalDigit VR mini(s) or
CalDigit VR(s) on the computer.
9. Online Update
Online search for current version of rmware or
RAID Tool software. Internet connection
required.
For more information about GUI, please go to
http://www.caldigit.com/support.asp
13
Page 14

C. Conguring your RAID
If you wish to create your RAID from the LCD, please
follow the steps below.
1. Turn on the CalDigit VR mini, once it has booted, press the
right button next to the LCD panel. Press the right button
one more time when the LCD displays “Create RAID”, then
confirm the selection by pressing the left button.
2. You will see the CalDigit VR mini cycle through the
following RAID levels; R0>R1>SPAN>JBOD. Select the
desired RAID level by pressing the right button. You will
receive a confirmation message with the RAID level you
selected. Select Yes to continue, Cancel to go back. When
you see"Are you sure?" press the left button to confirm, or
the right button to cancel and return to the previous menu.
14
Page 15

3. Press the left button when you see "Erase all data". Or press
the right button to cancel and return to the previous menu.
4. Press the left button when you see "Final Confirm". This
will erase all data on the RAID. Or press the right button to
cancel and return to the previous menu.
Note: This will erase all data on the RAID.
5. Please wait a moment while the CalDigit VR mini creates
the RAID.
6. The CalDigit VR mini will restart twice automatically.
7. Please restart your computer.
8. The CalDigit VR mini will display the new RAID setting. It
can be verified via RAID Tool or the LCD panel.
*Do Not remove power cable / rewire cable during RAID change.
15
Page 16

9. Once the computer has restarted, a message will appear
asking you to initialize your CalDigit VR mini.
• Disk Utility will launch and allow you to format the
CalDigit VR mini. If you do not see this message, simply
launch Disk Utility which can be found in the
Applications > Utilities folder.
• Select the erase tab.
• Select your desired volume format (Mac OS extended is
recommended) and name your volume.
• Select Erase and Disk Utility will format the CalDigit VR
mini.
• The CalDigit VR mini will mount and is now ready for use.
16
Page 17

If you wish to create your RAID using RAID Tool, please
follow the steps below.
1. Launch RAID Tool. RAID Tool can be found in the
Applications > CalDigit RAID Tool folder.
2. Select the desired CalDigit VR mini to enter the menu.
3. Select RAID configuration. Note: the current RAID type will
be displayed on the RAID Tool's information bar (left side).
17
Page 18

4. Choose the desired RAID level and click "Yes" to proceed.
Click "No" to cancel.
Warning: Changing RAID level will cause all data on the
array to be lost.
5. The CalDigit VR mini will now perform the RAID change,
and it will restart twice automatically.
6. Check LCD and GUI to make sure RAID levels match.
7. Please restart your computer.
*Do Not remove power cable / rewire cable during RAID change.
18
Page 19

8. Run Disk Utility (Mac) or Disk management tool (PC) to
format your CalDigit VR mini.
9. Once the computer has restarted, a message will appear
asking you to initialize your CalDigit VR mini.
• Disk Utility will launch and allow you to format the
CalDigit VR mini. If you do not see this message, simply
launch Disk Utility which can be found in the
Applications > Utilities folder.
• Select the erase tab.
• Select your desired volume format (Mac OS extended is
recommended) and name your volume.
• Select Erase and Disk Utility will format the CalDigit VR
mini.
• The CalDigit VR mini will mount and is now ready for use.
19
Page 20

D. Order accessories and parts
‧
Power supply kit:
Part # CDPS-VRmini SKU # 705101
‧
eSATA cable:
Part # CBeSATA-3-CD SKU # 703102
‧
FireWire 800 cable, 9-pin to 9-pin, 6ft:
Part # CBFWY9-6 SKU # 704102
‧
FireWire 800 cable, 9-pin to 4-pin, 6ft:
Part # CBFWY4-6 SKU # 704103
‧
FireWire 800 to FireWire 400 cable, 9-pin to 6-pin, 6ft:
Part # CBFWY6-6 SKU # 704104
‧
USB 2.0 cable,A to Mini, 3ft:
Part # CBUSBAM-3 SKU # 705102
‧
eSATA Extender:
Part # CBeSATA-Extender SKU # Should be 704113
‧
VR mini 320GB Drive Module:
Part # VRmini-DM-320 SKU # 771511
‧
VR mini 500GB Drive Module:
Part # VRmini-DM-500 SKU # 771502
20
Page 21

CalDigit VR mini Manual v1.0 RC1
www.caldigit.com
©Copyright 2009 CalDigit, Inc. All Rights Reserved
 Loading...