

Page 1
Getting Started
Page 2

Apple, Apple Logo, Mac, the Mac logo, Macintosh, are trademarks
of Apple Computer Inc. Microsoft, Windows and Windows Logos are
registered trademarks or trademarks of Microsoft Corporation. All
other trademarks are the property of their respective owners.
*Specications and package contents are subject to change without
notice.
Page 3

Installing your CalDigit HDElement
Installing the CalDigit RAID Card
Please install your CalDigit RAID Card rst. Make sure you also
install the latest driver and RAIDShield. If you are installing a
CalDigit RAID Card in your PCI-e G5 or MacPro, please install it
in slot 3 of your MacPro. If you are installing it in a PC, please
make sure you install it in a 4X (or faster) PCI-e slot.
If you are installing a CalDigit RAID Card in your 4-core
Mac Pro, please select option 2 in the Expansion Slot Utility
( / System / Library / CoreServices / Expansion slot utility ) and
restart.
3
Page 4
If you already installed your CalDigit RAID Card in your
workstation, please proceed with the following steps to set
up your CalDigit HDElement.
Before you start
Please check to make sure that all the accessories are in
the box including the CalDigit HDElement with four hard
drives installed, power cord, Mini-SAS cable, environmental
control cable, and hard drive key. Please also make sure your
computer is turned off before you begin the installation
process.
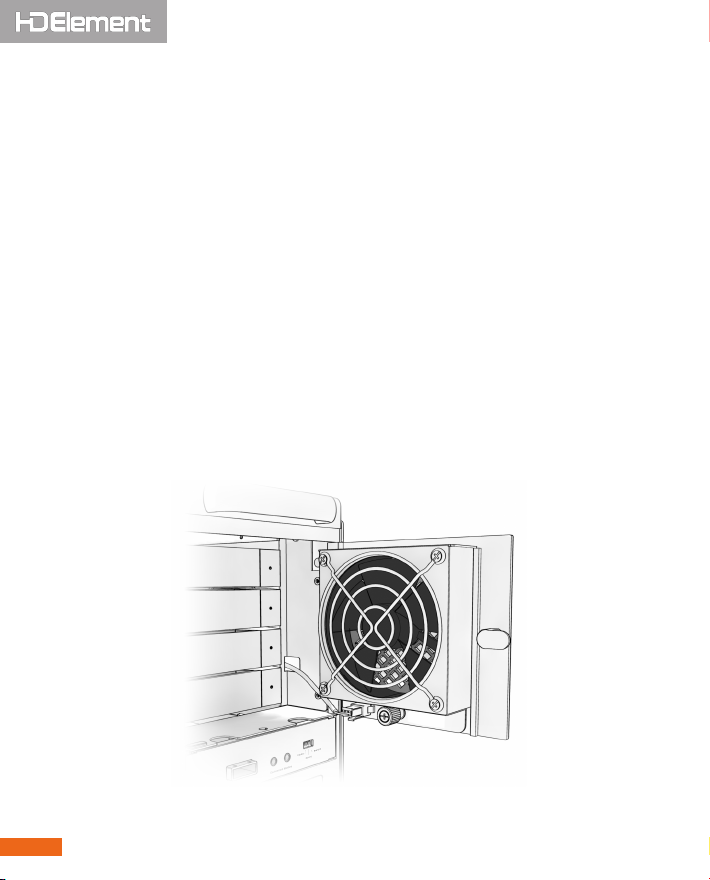
Getting to know your CalDigit HDElement
Fan - for air ow/ventilation1.
4
Page 5
Key Hole - for access to the drives2.
Mini SAS port - Connecting the CalDigit HDElement and 3.
the CalDigit RAID Card
Key Hole
5
Page 6

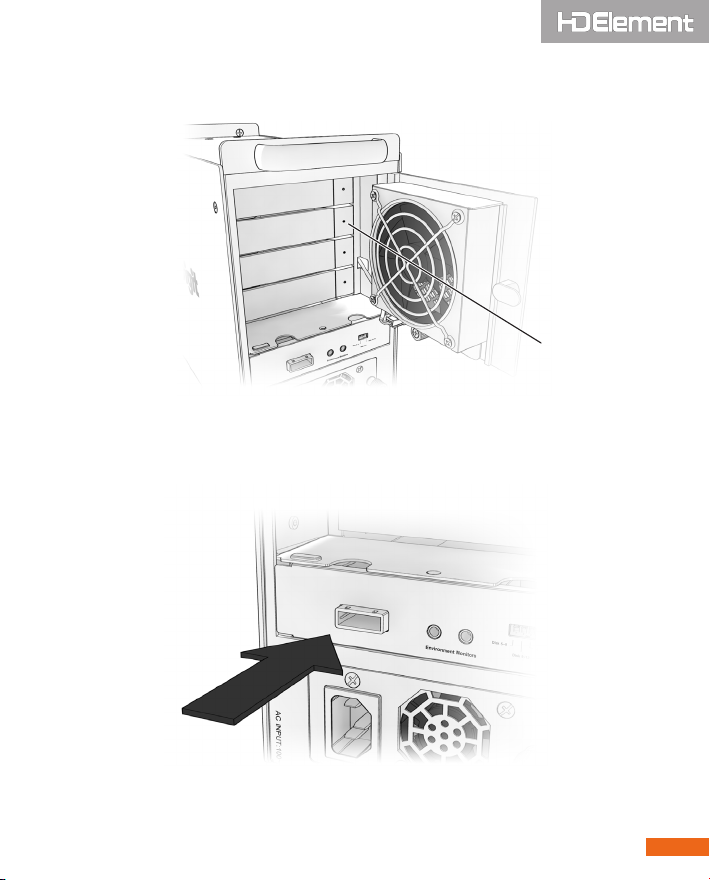
Mini-Phone jack - use for environmental control cable to 4.
monitor the environmental data
ID Switch - Assigning different ID's to multiple CalDigit 5.
HDElements
Mini-Phone jack
ID Switch
6
Page 7

Power Supply6.
Key7.
7
Page 8

Conguring your CalDigit HDElement
You will need to rst determine your ID switch position 1.
before you start the conguration. If this is the rst CalDigit
HDElement you are connecting, please set the switch as
shown on the right. Please also refer to the illustration if you
are connecting your second or third CalDigit HDElement.
First
HDElement
1 2 3
Second
HDElement
1 2 3
Third
HDElement
1 2 3
Note: Your CalDigit HDElement's LED display will
not display properly if your switch is set to a wrong
position.
8
Page 9

Connect the Mini-SAS cable to the RAID Card and the Mini-2.
SAS port on the CalDigit HDElement. Please connect you
rst CalDigit HDElement to port 5-8 on the RAID Card;
Second CalDigit HDElement to port 9-12; Third CalDigit
HDElement to port 13-16.
First HDElement
Second HDElement
Third HDElement
Note: HDElements must be connected in sequence
as shown & switches set to the appropriate settings
for correct operation.
9
Page 10

Connect the other end of the Mini-SAS cable to the Mini-3.
SAS port on the back of the HDElement.
Plug in the environmental control cable between the Mini-4.
Phone Jack port of the RAID Card and the back of the
CalDigit HDElement for monitoring fan speed and hard
drive temperature.
10
CalDigit RAIDCard CalDigit HDElement
Page 11

Note: If you have more than one CalDigit HDElement
and wish to connect the environmental control
cable, please daisy chain the CalDigit HDElement by
connecting the environmental control cable from
one CalDigit HDElement to another. You may not be
able to monitor fan speed, hard drive temperature,
and LED display if the cable is not installed correctly.
First HDElement Second HDElement Third HDElementCalDigit RAIDCard
Turn on your computer. Launch RAID Shield and congure 5.
your RAID.
11
Page 12

For more information on how to congure your RAID, Please
visit http://www.caldigit.com/RAIDShieldDemo.asp
Thank you for choosing the CalDigit RAID Card. Please
download the latest driver and manual from
http://www.CalDigit.com/support.asp
12
Page 13

*Optional accessories
●
MiniSAS Cable 1M
(Part # CBeMiniSAS-3 SKU# 702103)
●
MiniSAS Cable 1.5M
(Part # CBeMiniSAS-4 SKU# 702104)
●
MiniSAS Cable 2M
(Part # CBeMiniSAS-6 SKU# 702106)
13
Page 14

CalDigit HDElement Getting Started Manual v1.0
www.caldigit.com
©Copyright 2008 CalDigit, Inc. All Rights Reserved
 Loading...