

Page 1
Getting Started
For more information visit www.caldigit.com
Page 2

Fast, Reliable and Secure Storage Solutions
Apple, Apple Logo, Mac, the Mac logo and Macintosh are trademarks of Apple Inc.
Microsoft, Windows and Windows Logos are registered trademarks of the Microsoft Corporation.
All other trademarks are the property of their respective owners.
*Specications and package contents are subject to change without notice.
02
Page 3

Contents
Introduction
General Use Warnings
Safety Warnings
System Requirements
Package Contents
Installing the CalDigit AV Drive
Connecting the CalDigit AV Drive
Features Overview
CalDigit AV Drive Front Panel
CalDigit AV Drive Rear Panel
AV Drive Features
Formatting the CalDigit AV Drive
Mac OS X
Windows
Accessories and Parts
Technical Support & Warranty Information
Technical Support
CalDigit Warranty Information
Glossary
4
5
5
6
7
9
9
12
12
12
13
14
14
16
18
19
19
19
20
03
Page 4
Introduction
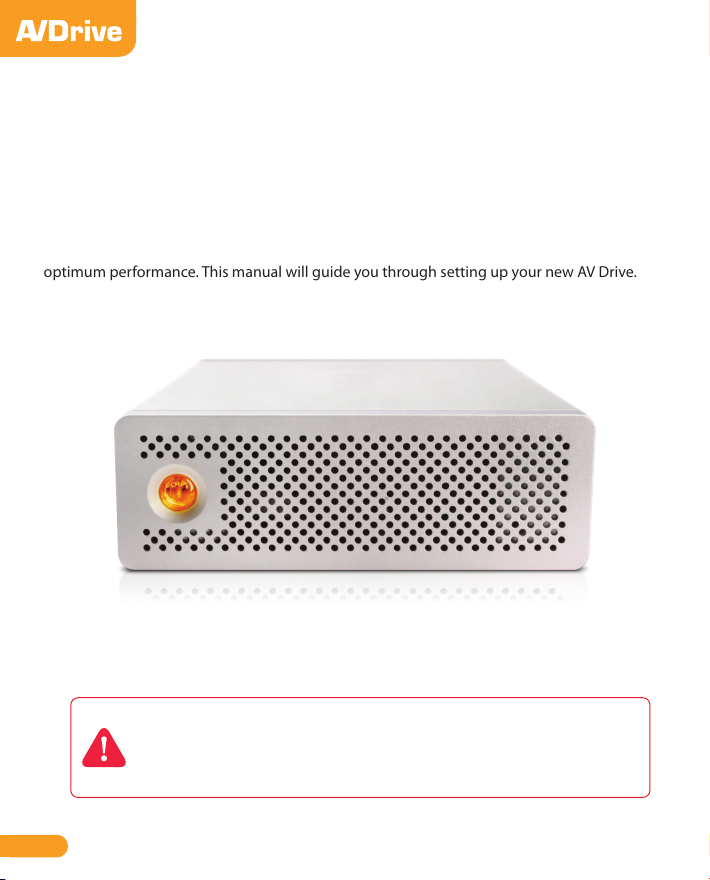
Thank you for purchasing the CalDigit AV Drive. Speed, reliability and security are what
dierentiates CalDigit storage products from our competitors. The CalDigit AV Drive was
designed for those in the eld of video and audio post-production, graphic design, 3D
animation, and anyone else that requires a single drive storage solution that delivers
optimum performance. This manual will guide you through setting up your new AV Drive.
04
Note: Please only use the CalDigit AV Drive in places with cool and natural
ventilation. Please do not use the CalDigit AV Drive under extremely hot or
cold environments to avoid possible data damage that can be caused by
extreme temperatures.
Page 5
General Use Warnings
Please read the AV Drive manual thoroughly and become familiar with the product before
use.
Only use the CalDigit AV Drive in an area with cool ventilation. Make sure that the fan is
not obstructed to ensure heat dissipation. Do not leave or use the AV Drive near a heat
source such as a heater or direct sunlight.
Avoid using the AV Drive in extremely hot and cold environments as it will increase the
likelihood of premature drive failure. A safe temperature range is between 40F – 95F.
Avoid using the AV Drive in humid environments. Moisture and condensation can
accumulate in the drive and damage the electrical components, resulting in unit failure
and catastrophic data loss.
Only use the power adapter that has been supplied with the CalDigit AV Drive. An
excessive or inadequate power supply can result in unstable performance or drive failure.
Make sure to transport your AV Drive with care. Hard drives are sensitive to shock and
rough handling can result in degrading performance or disk failure.
Safety Warnings
Keep the AV Drive away from liquids and moisture. Direct application of liquids on the
AV Drive can result in electric shock, re hazard and damage the unit. If your AV Drive
gets wet while it is still o, do not turn it on.
Do not tamper with or try to repair the AV Drive unless you are a certied CalDigit
technician. Doing so can result in personal injury and damage the AV Drive. This will also
void your warranty. If you have any issues, contact CalDigit Technical Support.
05
Page 6
System Requirements
Mac
• OS X 10.4 or Higher (OS X 10.5 or higher required for USB 3.0)
• G4, G5, and Intel Based Macs
• 256 MB RAM (512MB recommended)
• Requires available FireWire 400 or 800 port to use FireWire 800 interface
• Mac Pro requires an available x1 (lane) PCIe slot for CalDigit SuperSpeed USB 3.0 card in
orderto use USB 3.0 interface
• Macbook Pro requires an available Expresscard 34 slot for the CalDigit SuperSpeed USB 3.0
laptop card in order to use the USB 3.0 interface
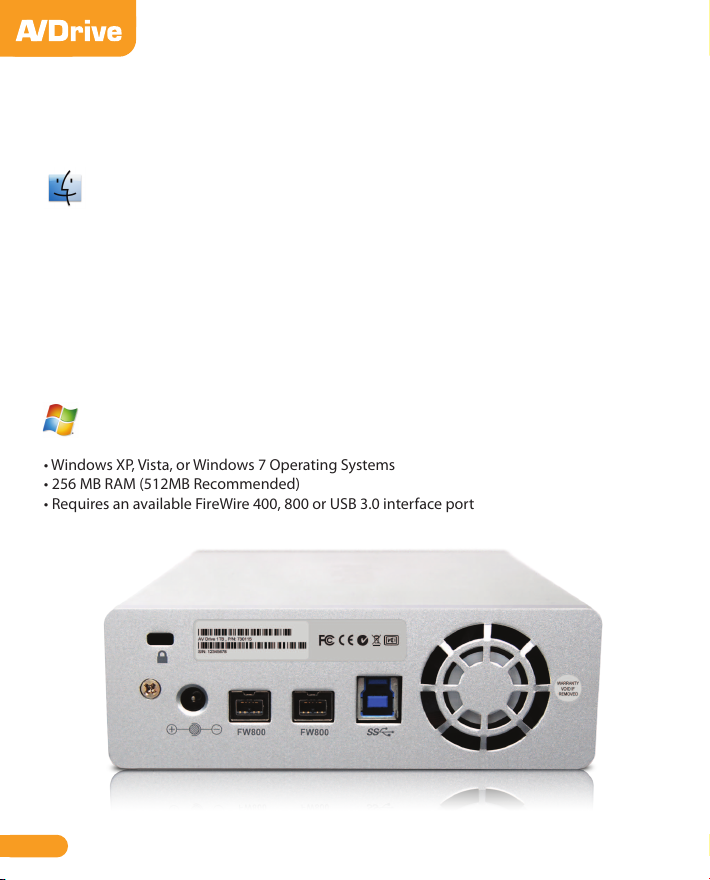
PC
• Windows XP, Vista, or Windows 7 Operating Systems
• 256 MB RAM (512MB Recommended)
• Requires an available FireWire 400, 800 or USB 3.0 interface port
06
Page 7
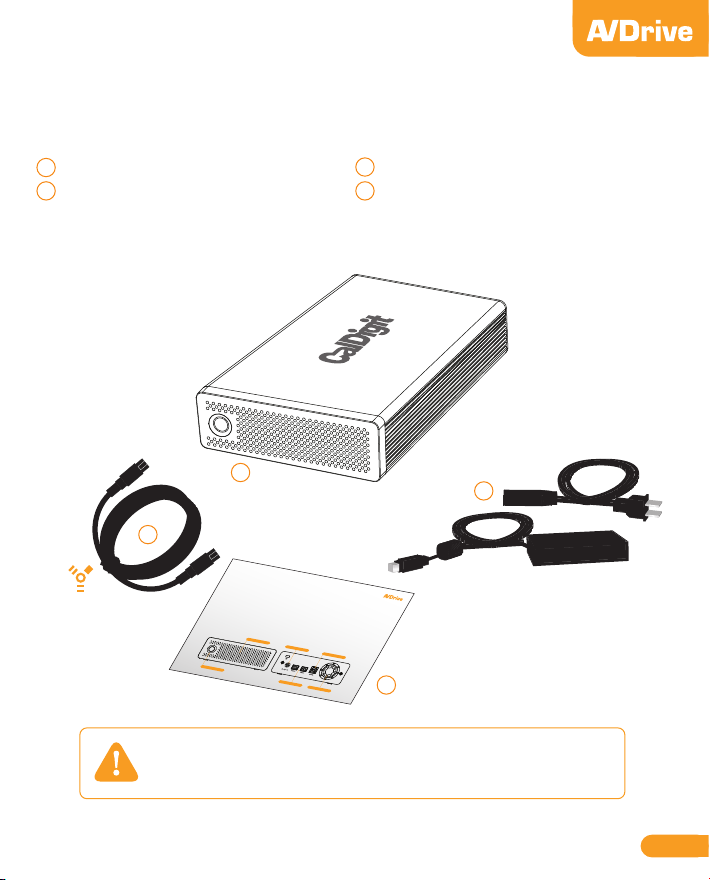
Package Contents:
1x CalDigit AV Drive
A
1x FireWire 800 Cable
B
(IEEE 1394 9 to 9 Pin Cable 1m)
C
1x AC Power Adapter & Cord
1x Quick Start Card
D
A
C
B
CalDigit AV Drive Quick Start Guide
The CalDigit AV Drive comes preloaded with CalDigit Drive Assistant which will format the CalDigit AV Drive. It also contains
the CalDigit USB 3.0 driver, RAID Tool, the CalDigit AV Drive manual and Carbon Copy Cloner backup software (Mac OS X only).
CalDigit Drive Assistant will automatically detect if your computer is a Mac or PC and will format your drive as well as transfer
the bundled software.
IMPORTANT: If you will be using USB 3.0 the rst time you connect the CalDigit AV Drive using the SuperSpeed PCI Express
Card or the SuperSpeed ExpressCard for Laptop, please download the latest driver from the CalDigit support site prior to
connecting the CalDigit AV Drive. www.caldigit.com/support.asp
Quick Start
1 Connect the power to the CalDigit AV Drive.
2 Connect the FireWire 800 or USB 3.0 cable (if using USB 3.0 make sure the USB 3.0 drivers are installed) to the CalDigit
AV Drive and then to the computer.
3 The CalDigit AV Drive will mount and CalDigit Drive Assistant will launch.
4 Follow the on screen instructions in CalDigit Drive Assistant to format and setup your CalDigit AV Drive.
Ventilation Holes
Power
Illuminated Power Button
USB 3.0
FireWire 800
Smart Fan
D
Please contact your CalDigit reseller for any faulty or missing parts.
07
Page 8

CalDigit SuperSpeed PCI Express
Card
If you purchased the CalDigit SuperSpeed
PCI Express Card, please make sure you have
an available PCIe slot for installation. Make
sure you have the following items:
1. CalDigit SuperSpeed PCI Express Card
2. CalDigit driver, the lastest driver can be
found at
www.caldigit.com/support.asp
3. CalDigit certied USB 3.0 cable
CalDigit SuperSpeed Expresscard
for Laptop
If you are using the CalDigit AV Drive on a
laptop, please make sure the laptop is
equipped with a USB 3.0 port, or you can
purchase the CalDigit SuperSpeed
Expresscard for Laptop.
Please make sure the laptop is equipped with
an Expresscard 34 slot in order to use the
CalDigit SuperSpeed Expresscard for Laptop.
Make sure you have the following items:
1. CalDigit SuperSpeed PCI Expresscard
for Laptop.
2. CalDigit driver, the lastest driver can be
found at
www.caldigit.com/support.asp
3. CalDigit certied USB 3.0 cable
08
Page 9

Installing the CalDigit AV Drive
Connecting the CalDigit AV Drive (FireWire Interface)
Turn on the computer, make sure you have logged into the OS.
1
Connect the AC Adaptor to the CalDigit AV Drive.
2
Connect the FireWire cable from the back of the AV Drive to the FireWire port on the
3
computer.
Turn on the CalDigit AV Drive. You can now use the CalDigit AV Drive.
4
®
FireWire 800
FireWire 800 Expresscard 34
Connecting the CalDigit AV Drive to a laptop (USB 3.0 Interface)
Please make sure the laptop is equipped with a USB 3.0 port.
1
If you need to install the CalDigit SuperSpeed Expresscard for Laptop, please make sure the
2
computer is turned o.
Insert the CalDigit SuperSpeed Expresscard for Laptop into the Expresscard 34 slot.
3
Turn on the computer and install the CalDigit USB 3.0 Driver after you have logged into the
4
OS. After the installation, restart the computer. To download the latest driver visit
www.caldigit.com/support.asp
Connect the CalDigit AV Drive to the USB 3.0 port of the CalDigit SuperSpeed Expresscard
5
for Laptop using the CalDigit certied USB 3.0 cable.
Turn on the CalDigit AV Drive. You can now use the CalDigit AV Drive.
6
09
Page 10

Connecting the CalDigit AV Drive (USB3.0 Interface)
Please make sure you have a USB 3.0 interface on the computer.
1
If you need to install the CalDigit SuperSpeed PCI Express Card, please make sure the
2
computer is turned off. Unplug the power cord and wait 5 to 10 minutes allowing the
computer’s internal components to cool.
Power Cord Socket
Power Cord Plug
Open up the computer. If you are using a MacPro, please hold the side access panel and lift
3
the latch on the back of the computer. Remove the access panel. If you are using a PC, please
make sure there is an available PCIe slot and remove any necessary screws.
10
Page 11

Install the CalDigit SuperSpeed PCI Express Card into an empty PCIe slot and make sure
4
it is securely installed.
Install Card
Close the computer and connect the power cord.
5
Turn on the computer and install the CalDigit USB 3.0 Driver after you have logged into
6
the OS. After the installation, restart the computer. To download the latest driver visit
www.caldigit.com/support.asp
Connect the CalDigit AV Drive to the host adaptor using the CalDigit certied USB 3.0
7
cable.
Turn on the CalDigit AV Drive. You can now use the CalDigit AV Drive.
8
11
Page 12

Power
Features Overview
CalDigit AV Drive Front Panel
Ventilation Holes
Illuminated Power Button
CalDigit AV Drive Rear Panel
Security Lock*
USB 3.0
FireWire 800
Smart Fan
*Security lock (lock is not included)
Use a standard computer lock to to secure the CalDigit AV Drive and prevent theft.
12
Page 13

AV Drive Features
USB 3.0
The CalDigit AV Drive has a USB 3.0 port that is backwards compatible with USB 2.0. When
using USB 3.0, a throughput of up to 145 MB/s can be reached. CalDigit has developed the
rst USB 3.0 driver for the Mac OS, allowing Macs with the SuperSpeed PCI Express card to
utilize the USB 3.0 interface.
Optimized FireWire 800
The two FireWire 800 ports on the CalDigit AV Drive have been optimized to provide transfer
speeds up to 85 MB/s. Compared to typical speeds of 58MB/s to 74 MB/s, the AV Drive is about
30% faster than competing storage products. The dual FireWire 800 ports also allows for daisy
chaining multiple storage devices using the FireWire interface.
Automatic Power Management
The AV Drive comes with an automatic power management system that enables it to turn o
and on automatically according to the state of the host computer.
Ambient Temperature Controlled Smart Fan
The AV Drive runs cool and quiet, thanks to its smart fan technology. The fan only runs when
extra cooling is needed, so it does not generate extra noise. The AV Drive is always monitoring
its temperature, and will keep it cool to prevent any damage from excessive heat. This feature
will also increase the longevity and the reliability of your hard drive.
Smart Design
The AV Drive comes in a sleek package, mixing aesthetics with functionality. It comes housed
in a high-grade aluminum chassis with a ventilated front plate. Combined with the smart fan,
these features provide the AV Drive with superior heat dissipation. The front side LED
illuminated power button provides quick access while the security lock slot in the rear
provides an optional method of securing your precious data.
13
Page 14

Formatting the CalDigit AV Drive
Mac OS X - Using CalDigit Drive Assistant
The CalDigit AV Drive comes preloaded with CalDigit Drive Assistant which will format the
CalDigit AV Drive. It also contains bundled software, drivers and the CalDigit AV Drive
manual. CalDigit Drive Assistant will automatically detect if your computer is a Mac or PC
and will format your drive as well as transfer the bundled software.
Connect the AC Adaptor to the CalDigit AV Drive.
1
Connect the power to the CalDigit AV Drive.
2
Connect the FireWire 800 or USB 3.0 cable (if using USB 3.0 make sure the USB 3.0 drivers
3
are installed) to the CalDigit AV Drive and then to the computer.
The CalDigit AV Drive will mount and CalDigit Drive Assistant window will Open.
4
Double-click on the icon to launch CalDigit Drive Assistant.
5
The CalDigit Drive Assistant will launch, read the introduction information and press
6
continue to proceed.
Read and Accept the Software License Agreement
7
14
Page 15

Register your CalDigit AV Drive online. If you choose this option your serial number will
8
automatically be entered.
To format your CalDigit AV Drive, select between Macintosh Computer (Recommended) or
9
Manual Format, then select start.
10
Make sure no other external drives are connected.
11
The CalDigit Drive Assistant will format your CalDigit AV Drive and transfer bundled
12
software, manuals and drivers.
Once the optimizations is complete you can read the manual and install the bundled
13
software.
15
Page 16

Windows - Using CalDigit Drive Assistant
The CalDigit AV Drive comes preloaded with CalDigit Drive Assistant which will format the
CalDigit AV Drive. It also contains bundled software, drivers and the CalDigit AV Drive
manual. CalDigit Drive Assistant will automatically detect if your computer is a Mac or PC
and will format your drive as well as transfer the bundled software.
1
Connect the AC Adaptor to the CalDigit AV Drive.
2
Connect the power to the CalDigit AV Drive.
3
Connect the FireWire 800 or USB 3.0 cable (if using USB 3.0 make sure the USB 3.0 drivers
are installed) to the CalDigit AV Drive and then to the computer.
4
The CalDigit AV Drive will mount and CalDigit Drive Assistant window will Open.
5
Double-click on the icon to launch CalDigit Drive Assistant.
6
The CalDigit Drive Assistant will launch, read the introduction information and press
continue to proceed.
7
Read and Accept the Software License Agreement
16
Page 17

Register your CalDigit AV Drive online. If you choose this option your serial number will
8
automatically be entered.
To format your CalDigit AV Drive, select between Windows Platform Computer
9
(Recommended) or Manual Format, then select start.
10
Make sure no other external drives are connected.
11
The CalDigit Drive Assistant will format your CalDigit AV Drive and transfer bundled
12
software, manuals and drivers.
Once the optimizations is complete you can read the manual and install the bundled
13
software.
17
Page 18

Accessories and Parts
SuperSpeed PCI Express Card for USB 3.0 for Mac
Part # U3-HostAdapter SKU # 791900
SuperSpeed ExpressCard for Laptop
Part # U3-ExpressCard SKU # 791901
CalDigit FireWire 800 cable, 9-pin to 9-pin, 6ft
Part # CBFWY9-6 SKU # 704102
CalDigit USB 3.0 A/B Cable, 3ft
Part # CBUSB3AB-3-CD SKU # 791980
CalDigit USB 3.0 A/B Cable, 6ft
Part # CBUSB3AB-6-CD SKU # 791981
CalDigit AV Drive Drive Stand
Part # AVDrive-Stand SKU # 791982
CalDigit AV Drive Carrying Case
Part # CDAVDrive-CarryingCase SKU # 791983
CalDigit AV Drive Rack Mount Kit
Part # AVDrive-RackKit SKU # 791984
CalDigit AV Drive AC Adapter
Part # AVDrive-ACAdapter SKU # 791985
18
Page 19

Technical Support & Warranty Information
Technical Support
If you run into any issues while installing your CalDigit AV Drive please contact CalDigit
Technical Support:
support@caldigit.com
www.caldigit.com/support.asp
1-714-572-6668
When contacting CalDigit Technical Support, make sure to be at your computer and have the
following information available:
• Your CalDigit AV Drive serial number
• Operating system and version
• Computer brand and model
• Other devices attached to your computer
You can also can post on CalDigit forum at the Creative Cow:
www.creativecow.net.
CalDigit Warranty Information
For detailed CalDigit warranty information please see the CalDigit website:
www.caldigit.com/rma/Limited-Warranty.pdf
19
Page 20

Glossary
Backup
The creation of an additional copy of data onto a dierent location than
the existing data and can be retrieved at a later time.
Bit
Also know as a binary digit. The smallest measure of data. A bit can be a
1 or a 0. One character is equal to one byte or 8 bits.
Byte
A sequence or series of binary digits (also known as bits). A byte is 8 bits.
Cross-Platform
Any device that can operate on both Macintosh and Windows operating
systems.
Driver
A software component that allows a computer to communicate with a
peripheral. Dierent drivers are appropriate for dierent peripherals.
File System
System that links the physical map of a disk to its logical structure.
Firmware
Semi-permanent of permanent instructions programmed directly into a
read only memory or memory chip. Firmware is used in controlling the
operation of a computer or drive. Firmware is dierent from software.
Folder
An area on a disk to store les. Folders help in organizing and storing
data in a logical manner.
Format
The process where a device can record data. The hard disk writes
information onto its own surface areas (called blocks). Formatting causes
all current data on the disk to be loss.
GB (Gigabyte)
One billion bytes. Usually associated with storage.
Hardware
The physical components of a computer system. This includes the
peripherals.
Host Bus Adapter (HBA)
A printed circuit board also called a controller.
Host Computer
Any computer system to which disks are directly attached and accessible
for I/O. Mainframes, and servers, as well as workstations andpersonal
computers, can all be considered host computers in the context of this
manual, as long as they have disks attached to them.
Initialize
Process of writing the data that helps Mac and Windows create and save
data. This process is usually done after a format or partition and this
process, like formatting, causes all data to be lost.
Interface
The data transmitters, data receivers, logic and wiring that links one
piece of the computer to another.
Kb(Kilobit)
1,000 bits.
Kb/s
Kilobits per second.
KB (Kilobyte)
1,000 bytes.
Mb (Megabit)
One million bits.
Mb/s
Megabits per second.
MB (Megabyte)
One million bytes.
MB/s
Megabytes per second.
Media
The device or material used to store data in a storage device.
Operating System
Software that controls use and assignment of resources. It is the basis of
which software runs on.
Partitioning
The process of dividing a formatted hard drive into useable storage areas.
For instance, a single partition arranges the hard drive so it has one
volume of storage area, while two partitions divides it into two areas.
Software
A set of commands that direct the computer on how to accomplish
specic tasks.
Storage
A place where data can be saved. Storage is usually separated into two
categories, internal and external storage. Internal storage usually
consists of internal hard drives while external storage is comprised of
media such as DVDs, pen drives, and external hard drives.
Transfer Rate
The rate in which data can be sent away and received from the controller.
This speed is restricted by the CPU, meaning that it is limited by either
your drive or your computer.
Volume
The digital manifestation of a storage device that mounts and dismounts
as it is recognized by a computer.
20
Page 21

CalDigit AV Drive Manual v1.1
www.caldigit.com
© 2010 CalDigit, Inc. All Rights Reserved
 Loading...