

C A L D E R A
Please Read and Save for Future Reference
Caldera Corporation, Waterbury Center, VT, 05677, USA
800-725-7711 www.calderacorp.com Fax 800-962-3072

CONGRATULATIONS
The Caldera® Dial 2000™ Series of touch control cooktops has been engineered to
be simple to use while providing many extra features that benefit your cooking and
your cooking experience.
We encourage you to register your cooktop so you may take advantage of our full
two year warranty and limited five year warranty should the need ever arise.
Registration may be done on our website at www.calderacorp.com
the enclosed postcard or by faxing us toll free at 800-962-3072. For your
convenience, the model #, serial #, and manufacturers # are below.
We hope you enjoy your purchase.
REGISTRATION
; by returning
2

Table of Contents
Page 4-5: Safety Precautions
Page 6: Operating Instructions... The Basics
Page 7: Safety Features
Page 8: Burner and Downdraft Features; Cookware and Energy Tips
Page 9: Cleaning and Caring for Your Cooktop
Page 10-11: Control Layout and Sample Operating Sequence
Page 12-18: Operating Instructions… Detailed
1. Initial Power Up
2. Unlock Mode
3. To Lock (Instant Off and Lock)
4. Lock Mode
5. To Unlock
6. Automatic Lock Feature
7. Deactivation of Automatic Lock Feature
8. Programming Mode
9. Individual Burner Functions
10. Selecting an Element
11. Selecting a Power Level
12. Selecting Detailed Power
13. Turning Elements Off (4 methods)
14. Dual Element Operation
15. Warmer/Simmer Burner
16. Recall Feature for Elements
17. Exhaust Options
18. Downdraft Controls (Fan speed & Up/Down control)
19. Hood Control (Fan speed & Light control)
20. Timer Description and Functions
a. General
b. Timer Display
c. Timed Cooking
d. Adjusting or Canceling a Programmed Time
e. Remembering a Programmed Time
f. Timed Fan
g. Stand-Alone Timer
h. Instant Off in Timer Mode
21. Cooling Fan
22. Water Spill
23. Safe Mode
24. Error Handling
a. Keyboard Error (E1)
b. Temperature Error (E2)
c. Thermistor Failure Error (E3)
d. Key Failure Error (E4)
e. 60Hz Failure Error (E5)
Page 19: Warranty and Service Information
3

Before Using Your Cooktop:
1. Read all instructions before using your cooktop unit. If you have questions please call us
at 800-725-7711 between 9am and 5pm EST.
2. Insure proper installation and servicing. Have the cooktop installed by a qualified
electrician. All cooktops must be grounded for the controls to function. Improper
installation could destroy your electronic controls and void the warranty.
3. Know where your circuit breaker or fuse box is located and mark the cooktop location.
4. Do not repair or replace any part of the unit unless specifically recommended in the
Installation or Use and Care manual. All other servicing should be performed by a
qualified technician.
Safety Precautions:
1. Use the unit only for it’s intended purpose.
2. Never use the unit to heat or warm the room.
3. Before servicing, disconnect the power supply by removing the fuse or switching off the
circuit breaker.
4. When using an electrical appliance near the cooktop, be sure that the cord of the
appliance does not come into contact with the burner area.
5. Do not leave children unattended in an area where appliances are in use. They should
never be allowed to sit or stand on any part of the cooktop or the area around the cooktop.
6. Do not store items of interest to children above or at the back of the cooktop. They could
be seriously injured in attempting to reach these items.
7. Do not store items on the unit.
8. Never let clothing, pot holders or other flammable materials come into contact with, or
close proximity to the burners while in operation. Fabric may ignite and cause personal
injury. For personal safety, wear proper apparel - loose fitting or hanging garments
should never be worn while cooking.
9. Allow sufficient time for the unit to cool before touching or exposing surface areas to
flammable materials.
10. Always use dry pot holders when removing utensils from the burners. Wet or damp pot
holders can cause steam burns. Do not let pot holders touch the heating elements. Do
not use a towel or bulky cloth in place of a pot holder.
4

11. WARNING : Clean the cooktop with caution. A wet sponge or cloth used to wipe
spills on a hot cooking surface can result in steam burns and may damage the surface of
the cooktop. Some cleansers can produce noxious fumes if applied to a hot surface.
12. Be sure all controls are turned off and the cooktop is cool before using aerosol cleaners.
The chemicals used in aerosol sprays may be flammable.
13. Do not let cooking grease or other flammable materials accumulate on the unit.
14. Never leave the unit unattended while cooking. Very hot oils can cause fire.
15. Do not use water to extinguish grease fires. Never pick up a flaming pan. Smother the
flames or use a dry chemical or foam type fire extinguisher.
16. Always heat fat slowly, watching as it heats.
17. If high settings are used, remain near the unit to monitor for flammable splattering grease
and boil over.
18. WARNING : Glazed Cooking Utensils- Only certain types of glass, glass/ceramic,
earthenware, or other glazed utensils are suitable for range-top service without breaking
due to the sudden change in temperature.
19. WARNING : Utensil Handles Should Be Turned Inward and Not Extended Over
Adjacent Surface Units- To reduce the risk of burns, ignition of flammable materials, and
spillage due to unintentional contact with the utensil, the handle of a utensil should be
positioned so that it is turned inward and does not extend over adjacent surface units.
20. Use the proper pan size. Select utensils having flat bottoms large enough to cover the
heating element. The use of undersized cookware will expose a portion of the element to
direct contact and may result in ignition of clothing. Proper relationship of utensil to
burner will also improve efficiency.
21. Before removing pots and pans, be sure to turn the element off.
22. WARNING : Do Not Cook on A Broken Cooktop. If the cook-top should break,
cleaning solutions and spillovers may penetrate the broken cook-top and create a risk of
electric shock. Contact a qualified technician immediately.
23. Keep any venting filters clean to avoid grease fires and maintain good venting.
24. Do not store or use gasoline, kerosene or other flammable vapors and liquids in the
vicinity of this appliance.
25. IMPORTANT : Verify that meat and poultry has been cooked to an internal
temperature of 160 degrees Fahrenheit for meat and 180 degrees Fahrenheit for poultry to
protect against food borne illnesses.
26. Avoid scratching your ceramic glass. Rings, other jewelry and sharp metal objects may
scratch your cooktop.
5

Operating Instructions
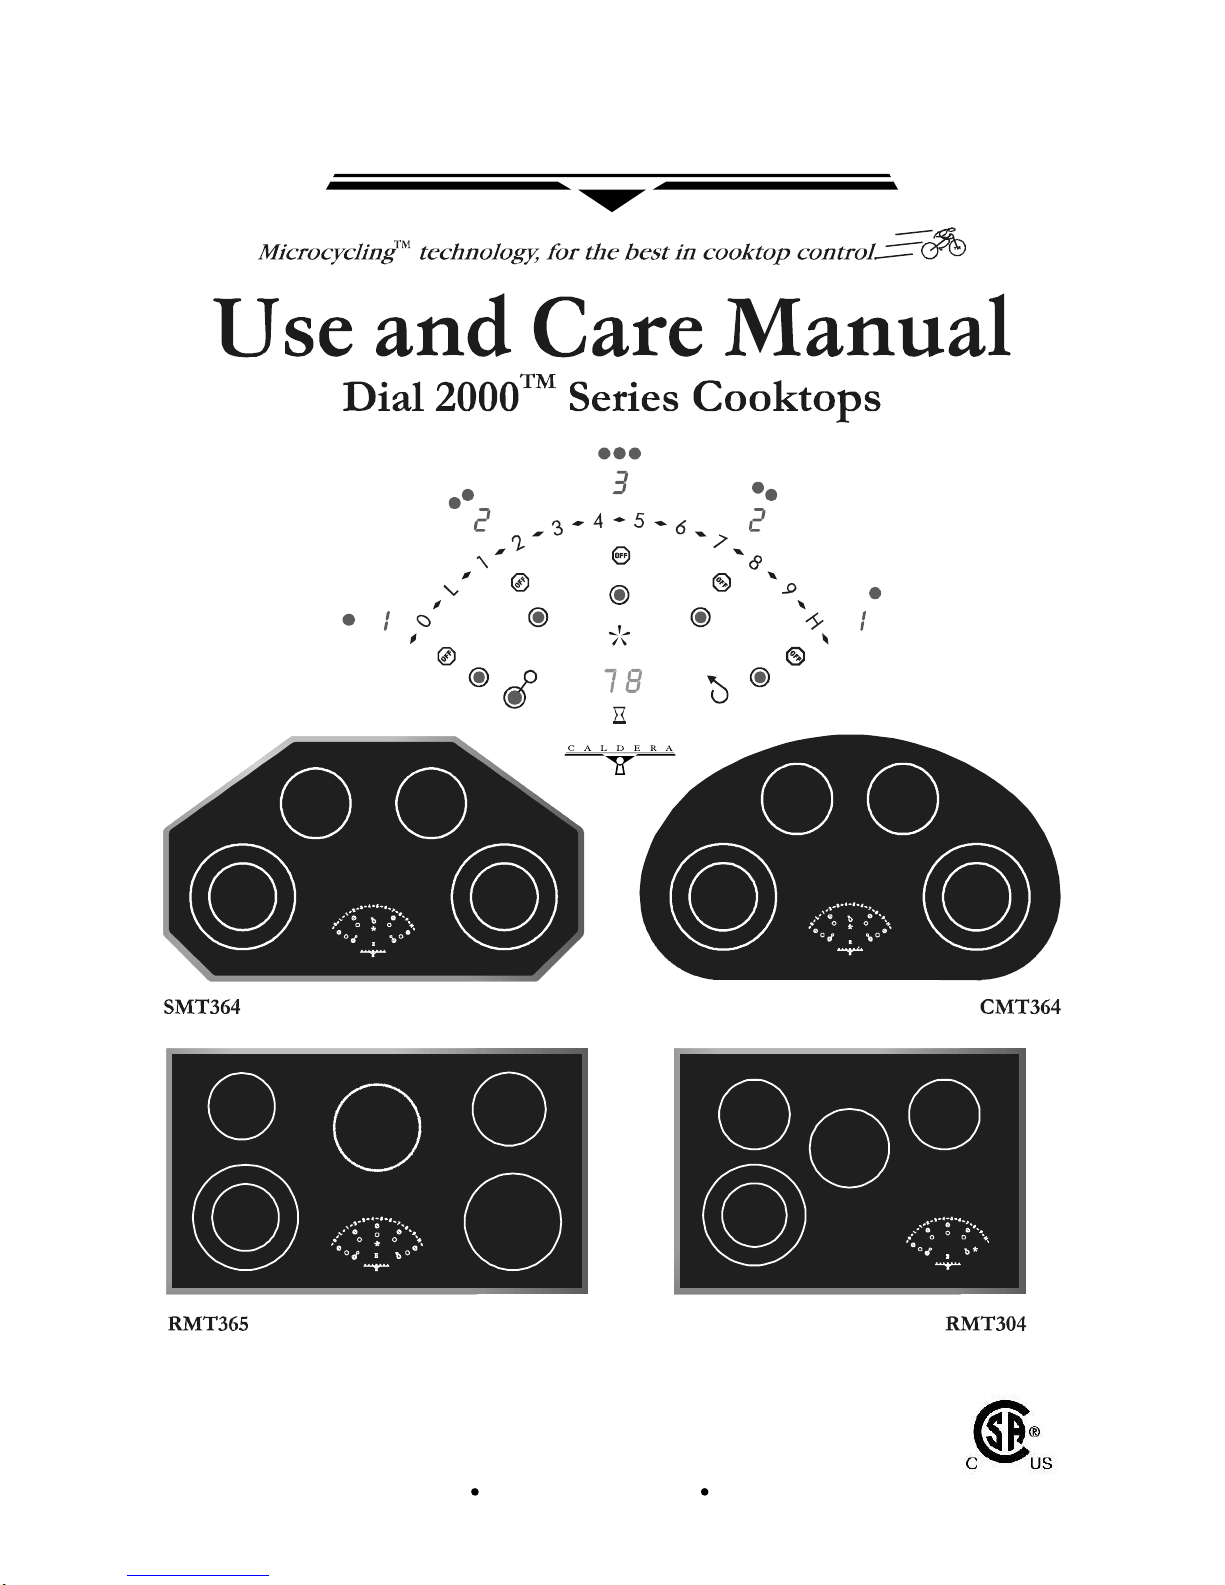
Dial 2000™ Cooktop Series
THE BASICS
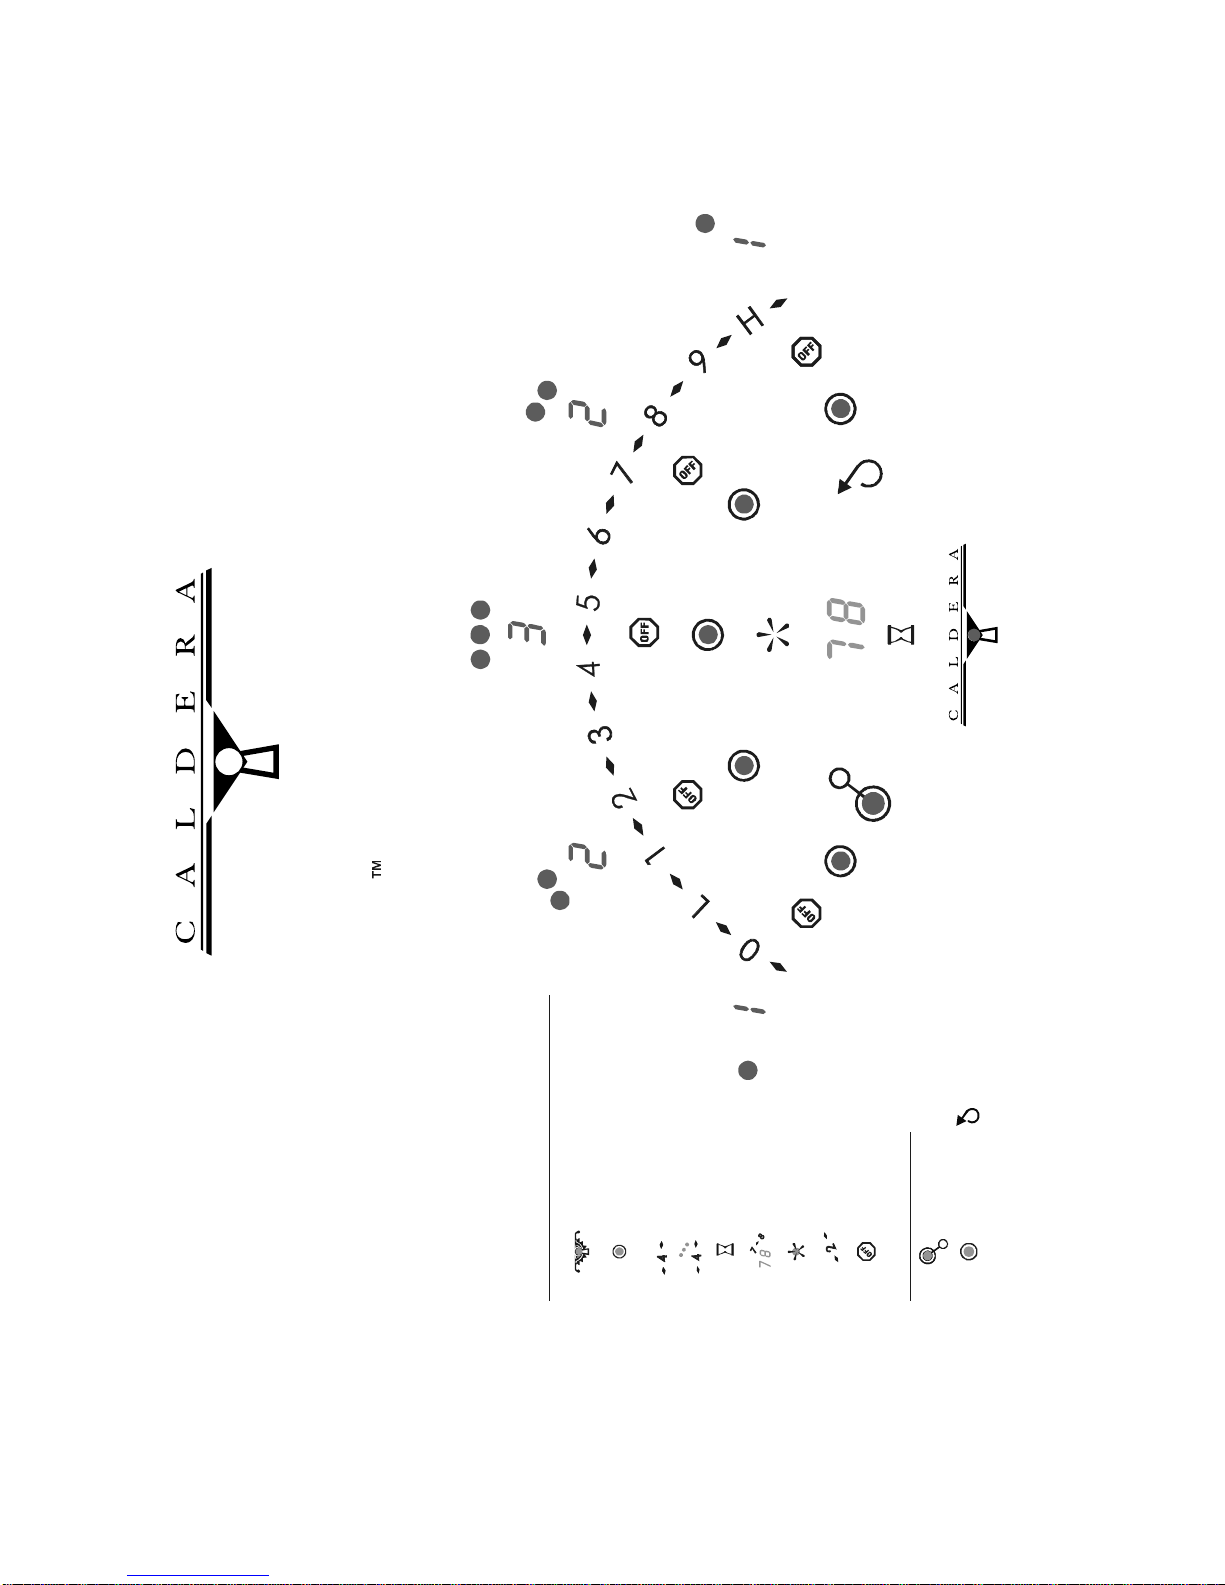
‘On’ for each burner
‘Off’ for each burner
‘Timer’ ‘Fan’ control
‘Recall’ key ‘Dual Burner toggle’
‘Lock’
Digits are used for level of power on burners and fan; and for timer settings
Unlocking the unit: touch the for two (2) seconds
Using a burner: touch the corresponding to enter programming mode, then any digit
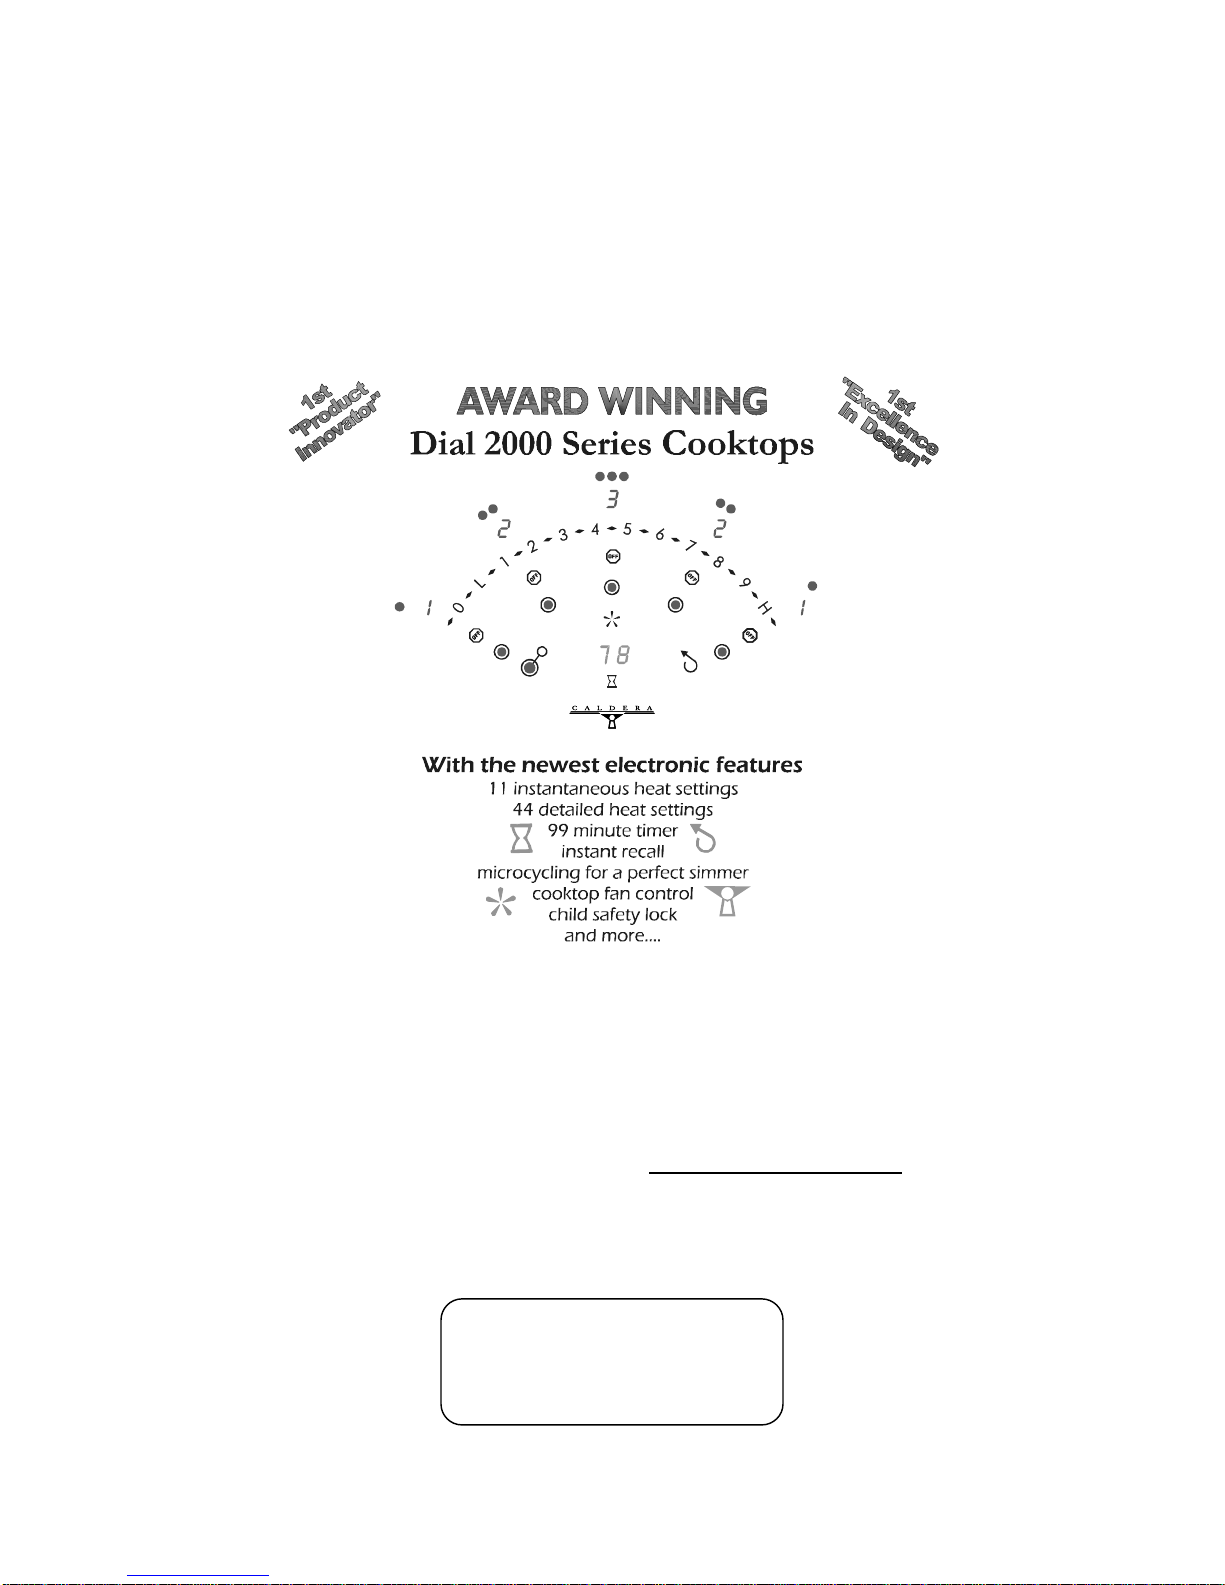
Detailed power: when 7 is too high but 6 isn’t high enough for that perfect simmer, you’ll
love the detailed power settings of your Caldera cooktop. Enter programming mode , touch
the same digit multiple times to add ¼ increments
Turn a burner off : a) touch the corresponding, or
b) touch the corresponding to enter programming & then the ‘0’
Using the timer by itself: touch the hourglass, then the digits that represent the minutes
you want to set
Using the timer to control a burner: touch the corresponding to enter programming
mode; select the timer; select the digits that represent the time
Controlling your Downdraft: select the ; select a digit that represents the power
desired
Using recall: select the burner ; select ; this recalls the previous setting at that burner
Dual burner: touch the to toggle between use of the inner burner and use of both
burners
6

Safety Features
Intentional Touch™: When no burners are activated, touching multiple keys at the same
time will not initiate any functions. This prevents un-intentional or accidental use by children or
pets. When burners are activated, a multiple key touch that includes the off key for the activated
burner will deactivate that burner. Should this happen, simply use the recall function to
regain your previous setting.
Automatic Lock Feature: To operate the cooktop it must first be unlocked by touching the
lock key for two seconds. This is an added feature to protect against misuse. If the cooktop
has not been used for a period of 10 minutes after all burners have been shut off, the cooktop will
automatically re-enter lock mode. If you find the Automatic Lock unnecessary, you may disable
it by touching the lock key and the recall key at the same time for three seconds.
One Touch Off : Touching the lock key for one second will deactivate all burners. This is
useful if you have an emergency or if you need to leave the cooktop for an unknown period of
time to either answer the door, the phone, or deal with a child for example. The recall key is
useful in regaining your settings after the situation has been handled.
Hot-lights: 3/8” hot-lights are located at the bottom of each burner to indicate that the burner
is too hot to touch. The lights will remain on until the glass is safe to touch, even after the burner
has been turned off.
Limit Switches: Limit switches are located in each of the radiant ribbon burners. In the event
that the glass above the burner reaches an unacceptable temperature the limit switch will cycle
the burner off briefly.
Water Control: Nearly all of the current touch control systems are unable to operate through
even a film of water. This is not the case with the Dial Series touch controls. In the event that
you spill water over the controls, the keys will still be usable. In the event that you spill a
substance that is conductive in nature (salted water, for example) the off key of each burner and
the lock key will still function. This eliminates the panic of not being able to operate your unit in
the event of a spill.
Safe Mode: This feature is intended for demonstration purposes in a showroom or model
home. Entering safe mode by touching the ‘0’ and the ‘H’ simultaneously for 5 seconds allows
the controls to be used but deactivates all of the burners. (fan functions remain active) This same
combination reactivates the controls.
Caldera
cooktop, while maintaining a high degree of usability. Please operate your unit sensibly and
safely, while you enjoy the advantages of a technologically advanced control to enhance your
cooking experience.
®
has strived to bring you the ultimate in safety features for your premiere electric
7

Burner & Downdraft Features
Your Caldera Dial 2000 Series Cooktop features Radiant Ribbon Burners. The 44 settings provided by
the detailed control allow the user to find the perfect temperature setting. WARNING: Your CALDERA
cooktop will have more power than you are accustomed to. In the beginning please be watchful of your
control settings. The burners will heat to full power within 4 seconds. They will glow red only on the
highest settings. Remember to use a burner that complements your cooking utensil. The Caldera units
include a wide range of burners to accommodate your needs.
Radiant Ribbon Burners:
RMT365
Front Left: 2500W Dual Burner; Inner Only is 1000W
Front Right: 2200W
Rear Right: 1500W
Rear Left: 1200W
Center: 375W Warmer Burner
RMT304
Front Left: 2500W Dual Burner; Inner Only is 1000W
Center: 1800W
Rear Right: 1500W
Rear Left: 1500W
SMT364, CMT364
Front Right: 2500W Dual Burner; Inner Only is 1000W
Front Left: 2500W Dual Burner; Inner Only is 1000W
Rear Right: 1500W
Rear Left: 1500W
Downdraft Features:
550 cfm with a built in blower and matching glass top, controlled from your cooktop.
Energy Saving Tips
餀 Place a utensil on the cooktop before turning on the burner.
餀 Use a lid to retain heat.
餀 Choose cookware of the proper size, material, and construction.
餀 Minimize the amount of liquid of frying oil to reduce cooking times.
餀 Use residual heat in the burner to keep foods warm or to finish up the cooking process.
餀 Select the proper temperature setting for the cooking task.
Because your Caldera cooktop distributes heat so evenly, you do not need to invest in special utensils.
However, it is desirable that the utensils you use maintain as much contact with the element as possible.
This serves to maximize performance and safety. We recommend the use of flat-bottomed utensils, the
same size as, or not more than 1 in diameter larger than, the element. Avoid using utensils with warped,
rounded, ridged or indented bottoms. Use flat-bottomed woks rather than round-bottomed woks. Metal
cookware is more suitable than glass because of its superior conductivity.
Energy Tips
Cookware Tips
8

Cleaning and Caring For your Cooktop
Ceramic glass is tough, much tougher than ordinary glass. Nonetheless, don’t stand on it or drop heavy
objects on it from high above. The glass is resistant to extreme temperature changes. You can pour cold water
onto a hot surface without causing any damage. Please adhere to the following tips to keep your ceramic glass
cooktop looking new.
餀 Prevent damage by ensuring your cooktop is clean and dust free before heating. Also make sure that
the bottom of your cooking utensils are clean and dry.
餀 Lifting utensils rather than dragging them will prevent minor scratching to the glass.
餀 Avoid overflows by using a sufficiently large utensil. This is particularly important when cooking
with sugar. Sugars, including starch, can cause discoloration and pitting of your cooktop if not
cleaned up quickly.
餀 Keep the cooktop surface clear of plastic or aluminum wrap. It can melt and damage the cooktop.
餀 Be extremely careful not to drop plastic utensils such as spatulas on the hot surface of the glass as
these will react immediately with the glass surface causing pitting when the plastic is removed from
the glass. Any pitting caused by sugar or plastic does not weaken the structural integrity of the glass.
Daily care
First, be sure that all heat indicator lights are off and the cooktop surface is cool. Apply a small dab, about the
size of a dime, of cooktop cleaning cream in the center of each area to be cleaned. Dampen a clean paper towel
and work the cleaning cream on the cooktop surface as if you were cleaning a window. As a final step, wipe
the cooktop surface with a clean, dry paper towel. Regular use of cooktop creams leaves a protective coating
on the smooth surface which helps prevent scratches and abrasions in which food particles can collect.
Clean-up for spillovers
For spills and boil-overs that occur while cooking, turn the unit off and wipe the area surrounding the hot zone
with a clean paper towel. If a spillover (other than a sugary substance) is on the hot zone, do not clean until the
unit is completely cooled down and follow the instructions below ("Clean-up for burned-on spillovers"). If you
accidentally melt anything on the cooktop or if you spill foods with a high sugar content (preserves, ketchup,
tomato sauce, etc.), REMOVE THE SPILL IMMEDIATELY with a razor scraper while the unit is still hot.
Use a mitt to protect your hand from potential steam burns. Scrape the major spill or melted material from the
cooking zone and push into a cold area. Then, turn the unit "OFF" and allow to cool before cleaning further.
After the cooktop cools down and the heat indicator lights go off, use the daily care procedure as outlined
above.
Clean-up for burned-on spillovers
First, be sure that the heat indicator lights are off and the cooktop is cool. Remove excess burned-on substance
with a single-edged razor scraper. Hold the scraper at approximately a 30º angle to the cooktop and scrape the
burned-on matter off the cooktop as you would scrape paint off of a window. Next follow the daily care
procedure as outlined above.
To remove metal rub-off
It may happen, particularly if you use thin gauge metal cookware, that there will be marks on your cooktop,
resulting from metal-rub off. These marks often appear like scratches, but can be easily removed using the
procedure described above for cleaning spillovers. If the rub-off marks are especially stubborn, use the
cleaning cream together with the razor scraper, using the technique described above.
Recommended cleaning products
Following is a list of recommended cleaning products. Some window cleaning materials may contain an
ingredient that can damage the cooktop over time. We have included a way to contact these companies to find
out where you can purchase their product/s.
Hopes Cooktop Cleaning
Cream
Golden Ventures Cerama
Bryte
Weiman Cleaning Crème
for Smooth Top Ranges
1-800-325-4026
1-800-578-4663
1-800-837-8140 www.weiman.com
www.hopecompany.com
(lists retailers by state)
www.ceramabryte.com
(lists retailers by city/state)
Linens & Things and Bed
Bath & Beyond
Home Depot, Lowes,
Home Base, ACE
Walmart, Sears, many
grocery chains
9
Dial 2000 Series Cooktops
10
Unlock 1.Select Burn er
Dial 365 Sample Touch Sequence
Instant Power
Detailed Po wer
Timer
Timer minutes
Fan
Fan level
Burner Off
4
2.
3.
4.
5.
7.
6.
8.
9.
Switch To Inner Burner
Select Burner, Recall
Other Burner Functions
11.
10.

Detailed Operating Instructions
1. INITIAL POWER UP
When power is first applied to the unit, or restored after a power outage, all LED’s will flash,
numbers at 8, dots in full, in a fan pattern. The total flashing time will last for a period of 30
seconds. During the flashing sequence if any key is touched the key will be recognized and the
flashing will stop. If, at the end of thirty seconds, no key has been touched, the unit will adopt
“Unlock” mode.
2. UNLOCK MODE
When the cooktop is in Unlock mode all keys are active. During Unlock mode the LED beneath
the keyhole and Caldera logo is on. This indicates that the heating elements can now
be programmed.
3. TO LOCK (INSTANT OFF AND LOCK)
To touch the Lock key for a period of 1 second is to enter Lock Mode. After a 1
second touch, the control will beep once and the LED beneath the Lock key will turn off
indicating that the burners cannot be programmed. You may use the Lock function as an
“Instant Off”: locking the unit will de-energize all active burners immediately.
4. LOCK MODE
When the cooktop is in Lock Mode (Lock LED is off) the burners may not be operated. The
downdraft fan and the timer may be operated.
5. TO UNLOCK
To activate the cooktop while in Lock mode, the Lock key must be touched and held
for 1.5 seconds. After a 1.5 second touch, the control will beep once and the LED beneath the
Lock key will turn on indicating that the elements can now be programmed.
6. AUTOMATIC LOCK FEATURE
If all burners are turned off and haven’t been used for 10 minutes, the unit will automatically
adopt “Lock mode”, unless the Automatic Lock Feature has been deactivated.
7. DEACTIVATION/REACTIVATION OF AUTOLOCK FEATURE
The Automatic Lock Feature may be deactivated and/or reactivated by touching and holding the
Lock key and the Recall key at the same time for three seconds. There will be
two beeps to acknowledge deactivation and one beep to acknowledge reactivation of the
Automatic Lock Feature. When the Automatic Lock feature is deactivated, the unit does not
automatically adopt "Lock mode” after 10 minutes of cooking inactivity.
11

8. INITIAL PROGRAMMING MODE AND PROGRAMMING MODE
A touch to any element "ON" key or to the “FAN” key will activate “Initial
Programming Mode”. Initial Programming Mode is active for a period of 10 seconds from that
first touch. Once a level has been selected, the Programming Mode is active for an additional 5
seconds period from the last key touched. When in Programming and Initial Programming
Modes, the LED under the “ON/ADJUST” key will flash.
9. INDIVIDUAL BURNER FUNCTION CONTROL
Each burner has an “ON/ADJUST” key with an LED in the center, an ‘OFF’ key , a
seven segment digit display representing the power setting and 3 round LED's to represent ¼; ½;
¾ heat settings beside each digit. The dual burner has a dual toggle key , beneath which two
LED’s indicate the dual or single state of the burner. Hot light indicators are located beside the
burners and are independently driven from the control. There is one centralized power
adjustment with the keys 0, L, 1, 2, 3, 4, 5, 6, 7, 8, 9, and H.
10. SELECTING AN ELEMENT
To select an element, the corresponding on/adjust symbol must be touched. A touch to that
symbol will cause the selected element to enter “Initial programming mode”, the corresponding
LED digit to display a “0” and flash the "ON" key LED. If a power level or timer key is
not touched for an uninterrupted period of 10 seconds, the programming attempt will be
canceled. A touch of any other element symbol will cause that element to be selected while
the previous selection is cancelled.
11. SELECTING A POWER LEVEL
After Selecting an Element and entering Programming Mode, you have 10 seconds to select a
digit that represents the desired power setting. A touch to ‘0’ will display ‘0’ for the 5
seconds of Programming Mode, following the 5 seconds, if no other power setting has been
selected, the burner will turn off. After selecting L, 1, 2, 3, 4, 5, 6, 7, 8, 9, or H the burner will
remain in Programming Mode for an additional 5 seconds in case you would like to select a
different setting or a Detailed Power Level.
12. SELECTING DETAILED POWER
While in Programming Mode of an element and after having selected a power level, if the same
power level key is touched again the selected element will enter detail mode. Multiple touches
will turn the “detail” setting up and down with the following pattern: ¼, ½, ¾, back to ½, ¼,
none, back to ¼…etc. This provides a total of 44 settings per burner so you can find that perfect
simmer or melted chocolate setting.
13. TURNING ELEMENTS OFF (4 methods)
a) Touching the OFF key for the corresponding element will turn off the selected element.
b) Selecting the ‘0’ and no subsequent power setting for five seconds, while in programming
mode of an element, will turn off the selected element.
12

c) Locking the cooktop by holding the Lock key for a period of 1 second will turn all
active elements off.
d) While in Timed Cooking (see paragraph 20), at the end of the programmed cook time, the
appropriate element will turn off.
14. DUAL ELEMENT OPERATION
The Dual element starts by default in dual mode. If the dual element is selected it will begin in
dual mode and the LED will come on under the double ring of the toggle / indicator. The
element will maintain its power setting while toggling between the inner and both burners.
15. WARMER/SIMMER BURNER
The warmer / simmer element is meant to offer a wide selection (44 levels) of low power levels
ranging from a mere 8.6 Watts and up to a maximum of 375.0 Watts.
16. LONG TERM INDIVIDUAL ELEMENT RECALL
At all times when the cooktop is in normal operation, if any burner "On" key is selected,
followed by the “Recall” key , the selected burner will activate whatever its last setting was
regardless of the time elapsed. Loss of power from a power outage will return all units to zero.
17. EXHAUST OPTIONS
The cooktop will determine if there is or is not a connection to an exhaust device. If there is not a
connection the fan key and fan functions will not work (no beeps, no LED’s). It will also
determine if it is hooked to a downdraft or to a hood. (Hoods may not yet be available.)
18. DOWNDRAFT CONTROLS (Fan speed & Up/Down control)
The Downdraft is activated from the cooktop. There is one Fan touch key and an LED is
located beneath the Fan touch key. Touching for 1.5 second will raise the Downdraft. From
the “up” position, the Fan LED then flashes for a period of 10 seconds, indicating that the Fan is
in Initial Programming Mode. Touching one of the L, 1, 2, 3,…H level keys within the 10second period will start the fan speed at the corresponding level. The last selected Fan level is
then stored in memory for further recall. Touching zero while in Programming Mode shuts the
fan off but leaves it raised. This is useful for cleaning. Touching the Fan key for 1.5 seconds
shuts the Fan "off" and lowers the Downdraft or, if the Fan is already 'off', the 1.5 second touch
simply lowers the downdraft. Subsequent 1.5-second touch to the Fan touch pad will raise the
Downdraft. If the RECALL key is touched during programming mode, the Fan will adopt the
last selected speed level as stored in memory. A single quick touch to the fan key while the fan
is operating will re-enter Programming mode and enable the fan speed to be changed. The
Timer can then be invoked during "programming mode” to program a timed shut off (see
paragraph 20).
13

19. HOOD CONTROL (Fan speed & Light control)
FAN CONTROL: The Hood is activated from the cooktop. There is one Fan touch key and
an LED is located under the Fan touch key. Touching the Fan key (short touch) flashes the Fan
LED for a period of 10 seconds, indicating that the Fan is in Initial Programming Mode.
Touching one of the L, 1, 2, 3,…H level keys within the 10-second period starts the fan speed at
the corresponding power. The last selected Fan level will be stored in memory for further recall.
Touching “0” after selecting the fan will turn the Fan ‘off’ and maintain Programming Mode for
5 seconds. Any subsequent touch within the 5-second Programming Mode will turn the Fan “on”
again at the newly selected speed. Touching the Fan key while the fan is operating will re-enter
Programming mode and enable the fan speed to be changed. The Timer can then be invoked
during Programming Mode to program a timed shut off (see paragraph 20).
LIGHT CONTROL
If there is a light bulb installed in the hood, it can also be controlled from the Fan touch key. To
activate the light, touch and hold the Fan touch key for 1 second, if the light was ‘off’ it will be
turned ‘on’, and if the light was ‘on’ it will be turned ‘off’.
NOTE 1: Turning the light ‘on’ or ‘off’ also places the fan in Programming Mode. Meaning that,
during the following 10 seconds after activating the light functions, touching a level key (L, 1, 2,
3…H or Recall) will turn the fan ‘on’ to the selected level.
NOTE 2: The fan and the light can be independently controlled at any time regardless of the
status of either of them.
20. TIMER DESCRIPTION & FUNCTIONS
a. General: The timer key features two seven-segment displays. The Timer
can be set from 0 to 99 minutes by one-minute increments. When the Timer
key is touched, the timer digits start with two - zeros. The last number key that
is touched is the furthest right digit. For example, start with '00', touch '5' with
no more touches the timer would be on for 5 minutes. Touch '5', then '1'; timer
is on for 51 minutes. Touch '5', then '1', then '0'; timer is on for 10 minutes
(scrolling the “5” out to the left). The timer can be used for each and every
element to set cook time, to set a fan time and as a stand-alone timer. Each can
be set separately and run simultaneously.
b. Timer display: The time relative to the "cook time" of any particular
element is displayed exclusively during Programming Mode of that element.
The time relative to the Fan time is displayed exclusively during Programming
Mode of the Fan. The time relative to the Stand-alone Timer is displayed at all
times except during Programming Mode of any element or of the Fan.
c. Timed Cooking: Once a cooking level has been set and the burner is in
Programming Mode, the timer can be set to establish the automatic "off" time
of the selected element. To set a cook time, after programming the level of an
element, touch the Timer key ("00" will appear on the Timer display) and
then select the desired cook time using the number keys. The programmed time
14

is displayed for the duration of Programming Mode. At the end of the
programmed cook time, the appropriate element will turn "off" and three long
beeps lasting ½ second "on" ½ second "off" will be heard; the “ON” LED will
flash for five seconds and the appropriate display will show “0” to indicate
which burner turned off and to return the unit to programming mode.
Each and every element can be individually programmed with the timer, each
one having its own time settings and all can run simultaneously.
NOTE: The small dot on the bottom right of the digit displaying the cooking
level of the selected element will illuminate to indicate that the burner is being
timed.
d. Adjusting or canceling a programmed Cook time: At anytime
during programming of an element (while the “ON” LED flashes), the timer
can be adjusted to a new time. To adjust or cancel the Cook time of an active
element, select the element to be adjusted , the timer display will show the
remaining cooking time, then select Timer by touching the Timer key , then
adjust time using the number keys. To turn the timer off, select “0” twice.
Bringing the cook time to zero cancels the timer for the selected element (this
does not turn the burner off, just the timer for the burner).
e. Remembering a programmed Cook time: To view the remaining
cook time of a particular element, just touch the "on" key of the element.
The remaining cook time is displayed for the 10-second duration of the Initial
Programming mode (while the 'ON" key LED is flashing). If no time is set for
a particular element, the display will go blank during the 10-second period.
f. Timed Fan: At any time during programming of the fan (while the fan LED
flashes and the Fan level is set), the timer can be set to establish the automatic
fan "off" time. The fan time can be programmed, adjusted, viewed and
cancelled using the same set of rules as the burner cook time. At the end of the
programmed fan time, the fan will turn "off", three long beeps lasting ½ second
"on" ½ second "off" will be heard. NOTE: If a Downdraft is connected to the
cooktop the Downdraft will not automatically lower when the Fan
programmed time elapses.
g. Stand-alone Timer: The Timer can be used alone as a reminder. The
stand-alone Timer has no effect on the elements or on the fan. For the standalone timer to be set, neither elements nor the fan should be in Programming
Mode. To set the Timer, touch the Timer key
using the number keys. The Stand-alone Timer is displayed on a continuous
basis, except during programming of an element or of the fan. At the end of the
programmed time, three long beeps lasting ½ second "on" ½ second "off" will
be heard. The Stand-alone Timer can be adjusted or cancelled. To adjust or
cancel the Timer, touch the Timer key, then change the Timer settings by using
the number keys. Bringing the time to '00' cancels the timer.
, then set the desired time,
h. Instant-off/Lock and the Timer: The timer is affected by Instant-
off/Lock. When the Lock key is touched while elements are ‘on’,
15

all active elements are immediately turned ‘off’. If any of the active elements
were in Timer mode, the remaining time is cancelled. When the unit is turned
back on, if the burner key, then the recall key is touched, only the
element cooking level is recalled. The timer will revert to zero.
NOTE: Neither the Timed Fan nor the Stand-alone Timer is affected by
the Instant-off/Lock.
21. COOLING FAN
A cooling fan, installed in the cooktop, helps regulate the ambient temperature of the unit. It is
turned on at the beginning of operation and runs regardless. There is a temperature control that
shuts down the cooktop should the fan fail.
22. SPILL OVER
a. NON-CONDUCTIVE LIQUIDS:
will respond to a touch even in the presence of a film of water.
Each key of the Control keyboard interface
b. CONDUCTIVE LIQUIDS: In the presence of conductive liquids, such as
salted water, partially or totally covering the keyboard, multiple keys can be seen as
touched at once, due to cross conductance. In this particular case, when the user
touches the keyboard, if more than one key is activated and if one or more of the keys
seen as touched is the off key to an element, then the control will turn off the
appropriate active element(s). Simply clean and dry to restore complete function.
23. SAFE MODE
“SAFE” mode is particularly meant for Distributors use. In “SAFE” mode, the burners are never
activated, although all keys are functioning and the display shows the selections “as if” the
burners were active. “SAFE” mode is a handy tool for demonstration purposes, it allows
demonstration of the control features without actually heating the elements. The Fan functions do
remain active in “SAFE” mode. To enter “SAFE” mode, the user must simultaneously touch and
hold the “0” and the “H” keys for a period of 5 seconds. When “SAFE” mode is active, the word
“SAFE” appears in the digit displays. Releasing the “0” and/or “H” keys, makes the word
“SAFE” disappear from the display, allowing the display to re-enter normal displaying functions,
while maintaining “SAFE” mode. To insure that the unit is in “SAFE” mode, briefly touch both
the “0” and “H” keys at once. If it is in “SAFE” mode, the word “SAFE” will reappear in the
display.
WARNING: If the word “SAFE” does not appear while ‘0’ and ‘H’ keys are touched, then
the control unit is not in “SAFE” mode and consequently, activated elements will heat up.
To exit “SAFE” mode, the user must simultaneously touch and hold the “0” and “H” keys for a
period of 5 seconds. During the 5 seconds period, the display will show the word “SAFE”
indicating that it is still in “SAFE” mode. At the end of the 5 seconds period, the control will reinitialize and all the LED’s on the display will flash until you release the ‘0’ and/or ‘H’. All
elements that were activated during “SAFE” mode will be cancelled.
IMPORTANT NOTE: For demonstration purposes, during “SAFE” mode, the Fan
functions remain active and consequently the Downdraft up/down actions will be activated
and the Fan will turn ‘on’.
16

24. ERROR HANDLING
a. KEYBOARD ERROR (E1): A keyboard error mode will be generated
under the following conditions: The communication between the Keyboard
microprocessor and the Control microprocessor has failed. A keyboard error will
cause all active elements to shut off and the Downdraft fan to stop. A keyboard
error will sound the beeper for 27 seconds. The “E1” error will remain displayed
until repair is done
b. TEMPERATURE ERROR (E2): A temperature error mode is generated
if the controls reach an unacceptable temperature. The temperature error will
cause all active elements to shut off. The cooling Fan will continue to run, up
until the temperature reaches 40C on the way down. A Temperature error will
sound the beeper for 27 seconds. The “E2” error code will be visible until the
temperature lowers to 82 degrees C and the user has touched any key. Then the
unit restarts in Unlock mode.
c. THERMISTOR FAILURE ERROR (E3): A thermistor error code will
be generated if the on board thermistor is “short” or “open”. The thermistor error
will cause all active elements to shut off. The cooling fan will run for an
additional ½ hour. A thermistor error will sound the beeper for 27 seconds. The
“E3” error code will remain displayed until the repair is done.
d. KEY FAILURE ERROR (E4): A key error mode will be generated if the
keyboard is shorted or opened as reported by the Touch Keyboard
microcontroller. A key error will cause all active elements to shut off and the
Downdraft fan to stop.A keyboard error will sound the beeper for 27 seconds.
The "E4" error code will be visible up until recognition of the failing key is reestablished and the user has touched any key. Then the unit restarts in Unlock
mode.
e. 60Hz FAILURE ERROR (E5): A 60Hz error mode will be generated if
the pulse generated by the 60Hz circuitry is no longer read by the microcontroller.
A 60Hz error will cause all active elements and the Fan to shut off. A 60Hz
failure will sound the beeper for 27 seconds. The “E5” error code will remain
displayed up until repair is done.
17

Warranty
Two Year Parts and Labor
Five Year Parts
Full Two Year Warranty: For two years from the date of original purchase, we
will pay for parts and labor to repair or replace any part of your cooktop that has
failed due to a manufacturing defect.
Five Year Parts Warranty: For an additional three years after the Full Two Year
Warranty, Caldera agrees to provide any parts necessary for the repair of your unit
due to a manufacturing defect. You will be responsible for the labor charges.
This warranty does not cover damage due to acts of God, accident, misuse, abuse, negligence,
commercial use, or modification to any part of the product. This warranty does not cover
damage due to improper operation or maintenance, connection to improper voltage supply, or
attempted repair by anyone other than an authorized Caldera repair service. This warranty is
valid only in the United States. This warranty is invalid if the factory applied serial number has
been altered or removed from the product.
REPAIR OR REPLACEMENT AS PROVIDED UNDER THIS WARRANTY IS THE
EXCLUSIVE REMEDY OF THE CONSUMER. CALDERA CORPORATION SHALL NOT
BE LIABLE FOR ANY INCIDENTAL OR CONSEQUENTIAL DAMAGES FOR BREACH
OF ANY EXPRESS OR IMPLIED WARRANTY ON THIS PRODUCT. EXCEPT TO THE
EXTENT PROHIBITED BY APPLICABLE LAW, ANY IMPLIED WARRANTY OF
MERCHANTABILITY OR FITNESS FOR A PARTICULAR PURPOSE ON THIS PRODUCT
IS LIMITED IN DURATION TO THE DURATION OF THIS WARRANTY.
Proof of purchase in the form of a receipt or bill of sale which is evidence the specific unit is
within the Warranty period, or, return of the enclosed registration card is required to obtain
warranty service.
Should you need to have your Caldera cooktop serviced, please call us directly at 800-725-7711
between 9AM and 5PM EST. A Caldera service representative will diagnose your problem and
set up a service technician to handle your repair as quickly as possible. It is important that you
return your warranty card or register your Caldera cooktop on line at www.calderacorp.com so
that we may serve you more efficiently.
18
Service Information

Part #: C-14-03-0-1
Revised 10/28/05
19
 Loading...