

Page 1
AKENG41_CTSNav Page 1 Monday, June 2, 2008 5:48 AM
The Navigation System Supplement
Table of Contents
Important Notes About this Manual...............................2
Section 1
Overview..........................................................................5
Section 2
05AKENG41
Navigation Features and Controls ................................27
Section 3
Navigation Audio System..............................................99
Section 4
Navigation Voice Recognition.....................................179
Index ............................................................................185
Page 2
■
AKENG41_CTSNav Page 2 Monday, June 2, 2008 5:48 AM
Important Notes About this Manual
PREFACE
GENERAL MOTORS, GM and the
GM Emblem, CADILLAC and the
CADILLAC Crest & Wreath are
registered trademarks of General
Motors Corporation.
The name CTS is a trademark of
General Motors Corporation.
. . . 2
DTS and DTS Digital Surround are
registered trademarks of Digital
Theater Systems, Inc.
®
Gracenote
mark of Gracenote, Inc.
The Gracenote logo and logotype,
and the "Powered by Gracenote"
logo are trademarks of Gracenote.
is a registered trade-
Page 3

AKENG41_CTSNav Page 3 Monday, June 2, 2008 5:48 AM
Section
®
Dolby
license from Dolby
Dolby
double-D symbol are trademarks
of Dolby
is manufactured under
®
, MLP Lossless, and the
®
Laboratories.
®
Laboratories.
This product incorporates copyright protection technology that is
protected by U.S. patents and
other intellectual property rights.
Use of this copyright protection
technology must be authorized by
Macrovision, and is intended for
home and other limited viewing
uses only unless otherwise authorized by Macrovision. Reverse
engineering or disassembly is
prohibited.
This supplement includes the
latest information available at the
time it was printed. We reserve the
right to make changes in the product after that time without notice.
Please keep this supplement with
the owner's manual in your vehicle, so it will be there if you ever
need it while you're on the road. If
you sell your vehicle, leave the
owner's manual supplement and
the owner's manual with the
vehicle.
Changes or modifications not
expressly approved by the party
responsible for compliance could
void the user's authority to operate
the equipment.
3 . . .
Page 4

AKENG41_CTSNav Page 4 Monday, June 2, 2008 5:48 AM
Page 5

AKENG41_CTSNav Page 5 Monday, June 2, 2008 5:48 AM
–
1
Ov
er-
vie
w
Section 1 - Overview
Navigation System Overview ............................6
Getting Started .................................................7
Deleting Personal Information......................... 10
Cleaning the System ....................................... 10
Basic System Information ................................10
Hard Keys .......................................................11
Touch-Sensitive Buttons..................................16
Alpha-Numeric Keypad ................................... 17
Setup Menu .....................................................18
Screen Adjustment.......................................... 20
Clock Menu ....................................................22
5 . . .
Page 6
■
1.
|
AKENG41_CTSNav Page 6 Monday, June 2, 2008 5:48 AM
Overview
NAVIGATION SYSTEM
OVERVIEW
VOL (volume/power) Knob
2.
TUNE/TONE Knob
NAV
3. Navigation Screen Up/
Down Button
FAV Button
4.
5.
SEEK Button
6. |
SEEK Button
CD/DVD Eject Button
7.
8.
AUDIO Button
9.
NAV Button
10.
MENU/SELECT Knob
11.
REC (record) Button
12.
CONFIG Button
13.
/ (play/pause) Button
14.
FWD Button
1 2
3
4
5
6
7
15. REV (reverse) Button
16.
RPT Button
17.
DEST (destination) Button
18. CD/DVD Loading Slot
19.
DEL (delete) Button
21
20.
INFO Button
12111098
201916 17 18
13
14
15
21. (navigation display dimmer control) Button
See "Hard Keys" under "Basic
System Information" later in this
section for more information.
. . . 6
Page 7

AKENG41_CTSNav Page 7 Monday, June 2, 2008 5:48 AM
■
Section 1
GETTING STARTED
Your vehicle is equipped with a
Navigation System which has the
following integrated features:
• Radio
•Television Tuner
• CD/DVD Player
• Hard Drive
• Audio Input Jack
• USB Port
•Voice Recognition
The navigation system allows you
to plan a route and provides turnby-turn route and map guidance
with voice prompts.
The navigation system also allows
you to select a destination using
various methods and choices.
The navigation system may also
interact with the radio to receive
broadcast announcements on traffic and emergency alert
communications.
If navigation mapping is operated
in a region that is not covered by
the stored map data, or if the vehicle is ever more then 1/10 of a kilometer from a mapped road, the
system may display a compass in
place of the map.
If an inoperable function is selected, the system may display a
message indicating that the function is not available.
Before you begin to operate this
system, please read this manual
thoroughly to become familiar
with it and to understand how the
system works.
While your vehicle is parked, take
the time to familiarize yourself
with the system controls and operation, and to set up various
features.
That way, you will be able to use
the system with less effort and less
distraction from the road.
–
7 . . .
Page 8
AKENG41_CTSNav Page 8 Monday, June 2, 2008 5:48 AM
Overview
Make sure not to divert too much
attention from your driving.
CAUTION
Giving extended attention to
entertainment or navigation
tasks while driving will greatly
increase the risk of a collision
that may cause personal injury
or death.
Road safety has absolute priority. Only operate this system if
the road and traffic conditions
allow you to do so. The driver's
full attention is always required
while driving.
The navigation maps are stored on
the hard drive.
See the following, in Section 2, for
more information:
• Maps
• Updating Map Data
The navigation system is designed
to assist you while driving, but it is
possible that the information in
the system may not always be
complete.
Road conditions, such as no turns,
detours and construction, change
frequently.
It is important to consider whether
or not you can safely and legally
follow the directions given by the
system.
CAUTION
Looking at the moving map on
the navigation screen frequently or for too long while driving
can cause a crash.
You or others could be injured
or killed.
The driver's full attention is
always required while driving.
Use voice guidance directions
whenever possible.
. . . 8
Page 9

AKENG41_CTSNav Page 9 Monday, June 2, 2008 5:48 AM
Section 1
When getting started, you may set
the navigation system to your preferences using various options. To
do so, see the following:
• Setup Menu
If you wish to change the display
language from what the system is
currently set for, see "Driver Information Center" in your vehicle's
owner's manual.
You can also use the Driver Information Center to change your
display's readings between English
and metric units.
See "Driver Information Center" in
your vehicle owner's manual for
more information.
For more information on navigation mapping features, see the
following:
• Navigation Features and
Controls
To plan a route, see "Enter Destination" under "Navigation Features
and Controls".
Note that the navigation system
may not support all of the
language options supported by
the Driver Information Center.
If you select a Driver Information
Center language that is not
supported by the navigation
system, the navigation system will
default to its last used language.
If the language is changed from
English to a different language, the
majority of the voice guidance
prompts and the screen text will
change to the selected language.
Remember that the menu screens
will not match word-for-word as
they appear in this supplement.
–
9 . . .
Page 10
AKENG41_CTSNav Page 10 Monday, June 2, 2008 5:48 AM
Overview
■
Deleting Personal
Information
The navigation system can record
and store destinations and personal information such as names and
addresses.
At times, such as when you are
selling or disposing of your vehicle, you may want to delete this
information.
See the following, in Section 2, for
more information:
• Previous Destinations
• Adding, Editing or Deleting
Address Book Entries
Cleaning the System
If the panel or the display is
stained, wipe it with a dry, soft
cloth, such as a silicon cloth.
NOTICE
Do not use an abrasive cloth, or
paint thinner, alcohol, or other
volatile solvents to clean the
system. These may damage the
external surfaces of the system.
Also, do not spray cleaner
directly onto the system.
Spraying cleaner directly onto
the system could affect
mechanical parts.
BASIC SYSTEM
INFORMATION
This section describes the basic
information you will need to know
to operate the Navigation System.
You should read this section thoroughly to become familiar with it.
The basic controls consist of
buttons (or "hard keys"), knobs
and a touch-sensitive screen.
. . . 10
Page 11

AKENG41_CTSNav Page 11 Monday, June 2, 2008 5:48 AM
•
Section 1
Note:
If navigation mapping is operated in a region that is not
covered by the stored map
data, or if the vehicle is ever
more then 1/10 of a kilometer
from a mapped road, the
system may display a compass
in place of the map.
If an inoperable function is
selected, the system may
display a message indicating
that the function is not
available.
Hard Keys
The following hard keys are located on the navigation/audio system
control panel:
VOL (volume/power) Knob
•
Press the knob to turn the system on or off.
Rotate the knob to the right to
increase the volume and to the
left to decrease the volume.
Volume adjustment will occur
for the current audio source or
for active navigation voice
guidance or voice prompts.
TUNE/TONE Knob
Rotate the knob to tune to the
next or previous radio station
or television channel.
If you are listening to a CD or
DVD, the system will advance
to the next track/chapter.
Press the knob to access the
Sound Menu.
Use the Sound Menu to adjust
the following features to suit
your preference:
-Tone Control
- Fade/Balance Control
- Digital Signal Processing
See "Sound Menu" under "Navigation Audio System" for more
information.
–
11 . . .
Page 12

AKENG41_CTSNav Page 12 Monday, June 2, 2008 5:48 AM
Overview
•
|
NAV
• Navigation Screen Up/
Down Button
Press this button to make the
screen move up and down.
While the screen is in the "up"
position, you will be able to
view and use all touch-sensitive
buttons on the screen.
While the screen is in the
"down" position, a portion of
the screen will be shown and
will display the current audio
source and temperature.
FAV Button
Press the
repeatedly to cycle through the
mixed-band preset station/
channel lists.
See the following under "Navigation Audio System" for more
information:
- Playing the Radio
Mixed-Band Presets
•
With an audio source active,
press this button to seek to the
next selection (station, channel, track or chapter).
See "Navigation Audio System"
for more information.
FAV (favorites) button
SEEK Button
SEEK Button
•|
With an audio source active,
press this button to seek to the
previous selection (station,
channel, track or chapter).
See "Navigation Audio System"
for more information.
CD/DVD Eject Button
•
Press the eject button next to
the slot to eject a disc from the
CD/DVD player.
See the following under "Navigation Audio System" for more
information:
- CD/DVD Player
. . . 12
Page 13

AKENG41_CTSNav Page 13 Monday, June 2, 2008 5:48 AM
•
Section 1
AUDIO Button
Press the
to display the current audio
source screen.
Press the
repeatedly to cycle through all
of the available audio source
screens.
If you press this button while
the display shows a split screen
(with an audio source screen
on the left side and a map or
guidance screen on the right
side), the display will change to
the full audio source screen.
See the following under "Navigation Audio System" for more
information:
- Audio Source Menu
AUDIO hard key once
AUDIO hard key
NAV Button
•
Press this button to go to the
navigation map screen.
The map will appear and your
current vehicle position will be
displayed.
Press the
edly to toggle between a split
view or a full map view.
The current audio source will
appear on the source indicator
tab at the top of the screen.
Touch the source indicator tab
to display the guidance screen
and the current audio source
on a split view screen.
NAV hard key repeat-
Touch the
exit the split view screen.
See the following for more
information:
- Navigation Features and
Controls
- Navigation Audio System
FULL MAP tab to
–
13 . . .
Page 14

AKENG41_CTSNav Page 14 Monday, June 2, 2008 5:48 AM
Overview
• MENU/SELECT Knob
Rotate this knob to scroll
through menu items.
Once your choice is highlighted, press the knob once to
select it.
REC (record) Button
•
Press this button to record content from a CD, MP3 or USB
device to the hard drive.
See the following under "Navigation Audio System" for more
information:
- Playing a Compact Disc
- Hard Drive
CONFIG Button
•
Press this hard key to display
the Setup menu.
Pressing this button repeatedly
will allow you to scroll through
the available setup screens and
adjust sound, radio, television,
navigation, display and clock
features.
See "Setup Menu" later in this
section for more information.
/ (play/pause) Button
•
With one of the following
audio sources active, press this
button to play or to pause the
source:
-Time Shift Buffer
-CD
- MP3
- DVD
- HDD
- USB
®
- iPod
See "Navigation Audio System"
for more information.
. . . 14
Page 15

AKENG41_CTSNav Page 15 Monday, June 2, 2008 5:48 AM
•
Section 1
FWD Button
With one of the following
audio sources playing, press
this button to advance quickly
through playback:
-Time Shift Buffer
-CD
- MP3
- DVD
- HDD
- USB
®
- iPod
See "Navigation Audio System"
for more information.
•
•
REV (reverse) Button
With one of the following
audio sources playing, press
this button to reverse quickly
through playback:
-Time Shift Buffer
-CD
- MP3
- DVD
- HDD
- USB
®
- iPod
See "Navigation Audio System"
for more information.
RPT Button
Press this hard key to have the
system repeat the last voice
prompt heard while on a
planned route.
DEST (destination) Button
•
If a destination has not yet
been entered, press this hard
key to access the Destination
Entry screen.
With a destination already
entered, press the
nation) hard key to access the
ROUTE screen.
See the following under "Navigation Features and Controls"
for more information:
- Enter Destination
- Route Options
DEST (desti-
–
15 . . .
Page 16

AKENG41_CTSNav Page 16 Monday, June 2, 2008 5:48 AM
Overview
• DEL (delete) Button
Press this key to delete information from the hard drive.
Pressing this button may also
delete a selected Radio Data
System category from the
display.
See the following under "Navigation Audio System" for more
information:
- Playing the Radio
- Hard Drive
INFO Button
•
Press this button for help with
Voice Recognition.
See Section 4 for information
on the Voice Recognition
feature.
• (navigation display dimmer
control) Button
Press this button to toggle
between the available navigation display dimming modes.
See the following, later in this
section, for more information:
- Setup Menu
Screen Adjustment
Touch-Sensitive Buttons
Touch-sensitive buttons are located on the screen.
These buttons will be highlighted
when a feature is available (active)
and dim when they are unavailable (not active).
The following touch-sensitive
buttons appear on many screens:
(zoom in)
•
See "Map Scales" for more
information.
(zoom out)
•
See "Map Scales" for more
information.
BACK
•
Touch this button to exit a
menu or to go back to the previous screen.
. . . 16
Page 17

AKENG41_CTSNav Page 17 Monday, June 2, 2008 5:48 AM
Section 1
Alpha-Numeric Keypad
An alpha-numeric keypad will
automatically be available to you
whenever the system needs information from you.
Touch a character to select it.
There are several screens of available characters.
•Touch the
play characters with accent
marks.
•Touch the
ton to access the numeric
keypad.
The numeric keypad may also
provide access to punctuation
marks or other characters.
A-Y button to dis-
0-9 (numbers) but-
• If available, touch the
(symbol) button to access a
symbols keypad.
•Touch the
to the alpha keypad.
To enter a space between characters or words, touch the space
symbol .
If you select an incorrect character,
touch
space arrow .
To make your name selections
easier, the system will only allow
you to select a character that can
follow the last one you selected.
A-Z button to return
BACKSPACE or the back-
SYM.
The system will search the map
database and highlight the available characters and darken the
unavailable characters.
If you are unsuccessful when
inputting a name or word, it may
need to be selected differently.
It is also possible that the map
database does not contain that
information.
–
17 . . .
Page 18
AKENG41_CTSNav Page 18 Monday, June 2, 2008 5:48 AM
Overview
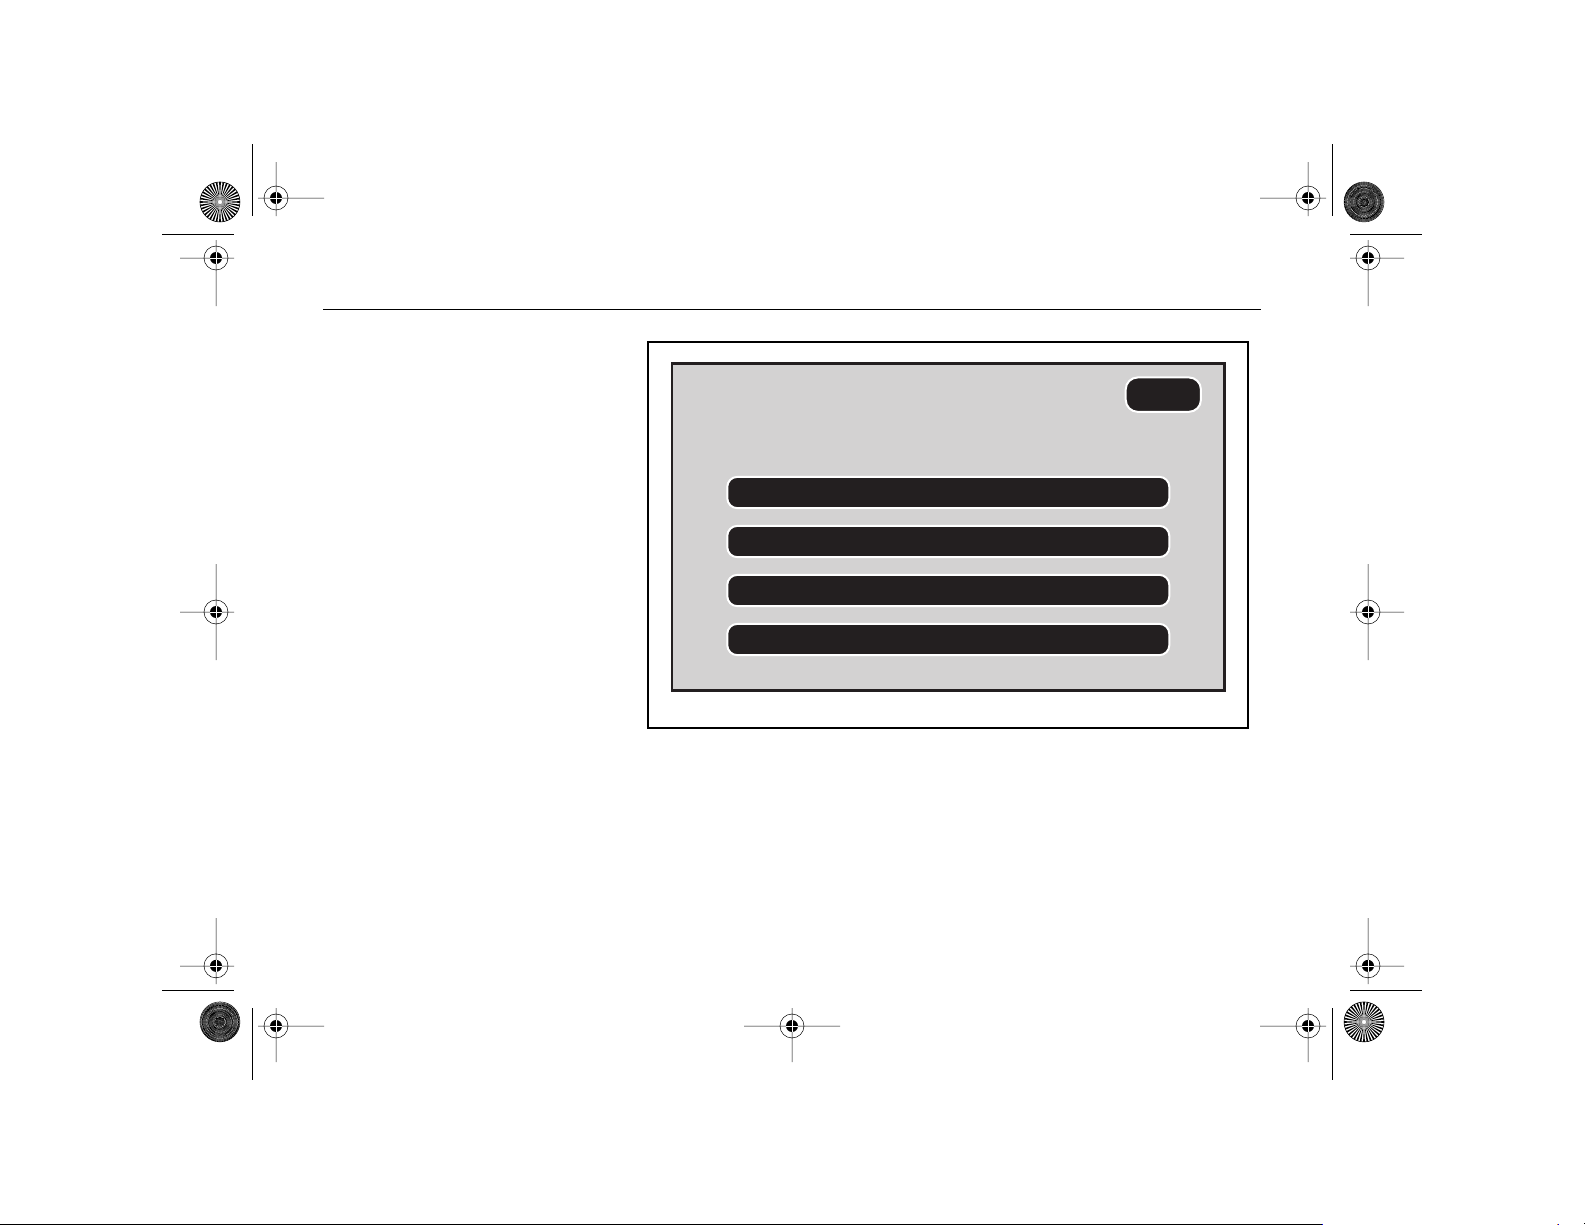
■ SETUP MENU
Press the CONFIG hard key to
display the Setup menu.
The Setup menu allows you to
access screens where you can
configure various audio and navigation features.
To scroll through the available
setup screens, either press the
CONFIG button repeatedly, or
touch the desired tab at the top of
the screen:
• SOUND
Touch this button to access the
sound menu.
See "Sound Menu" under "Navigation Audio System" for more
information.
Sound 30°CRadio DisplayTV NAV
Voice
Volume
Map
Database
Information
• RADIO
Touch this button to access the
Radio Menu.
Preference
Route
Back
Tr ac k
Tr affic
Information
See "Radio Menu" under "Navigation Audio System" for more
information.
. . . 18
Page 19

AKENG41_CTSNav Page 19 Monday, June 2, 2008 5:48 AM
Section 1
• TV
Touch this button to access the
Television Setup Menu.
See the following under "Navigation Audio System" for more
information:
-Television Tuner
Television Setup Menu
• NAV
Select this item to modify various navigation setup options.
See the following for more
information:
- Navigation Features and
Controls
Navigation Menu
• DISPLAY
Touch this button to access the
screen adjustment menu.
See "Screen Adjustment" later
in this section for more
information.
•Time/Temperature Display
Touch this button to access the
Clock setup screen.
See "Clock Menu" later in this
section for more information.
–
19 . . .
Page 20
AKENG41_CTSNav Page 20 Monday, June 2, 2008 5:48 AM
Overview
Screen Adjustment
To access this screen, do the
following:
1. Press the CONFIG hard key to
display the Setup menu.
2. Touch the DISPLAY tab at the
top of the screen or press
CONFIG repeatedly to access
the DISPLAY screen.
On this screen, the following
touch-sensitive buttons are
available:
• DISPLAY OFF
Touch this button to turn the
display off.
Sound 30°CRadio TV NAV
Display OFF
Brightness/Contrast/Mode
Display
. . . 20
To turn the display back on,
press a system hard key that
recalls a screen or menu. For
example, press one of the
following:
- NAV Button
- AUDIO Button
- FAV Button
- CONFIG Button
- DEST (destination) Button
Page 21

AKENG41_CTSNav Page 21 Monday, June 2, 2008 5:48 AM
Section 1
• BRIGHTNESS/CONTRAST/
MODE
Touch this button to access the
screen adjustment menu.
This screen allows you to adjust
the following screen appearance settings:
- (brightness): Touch the
plus (+) or minus (-) to adjust
the brightness of the screen.
Note:
If you select the AUTO setting, this control is
deactivated.
- (contrast): Touch the plus
(+) or minus (-) to adjust the
contrast of the screen.
- AUTO: This setting automatically adjusts the screen based
on exterior lighting
conditions.
- DAY: This setting leaves the
screen in day mode. The displays on the screen are usually brighter with a lighter
background so that they can
be seen better during the
brighter daylight hours.
- NIGHT: This setting leaves
the screen in night mode.
The displays on the screen are
usually dimmer with a darker
background so that they can
be seen better during the
darker nighttime hours.
(navigation display dimmer
control) Button
Press this button to toggle
between the available navigation
display dimming modes.
–
21 . . .
Page 22
AKENG41_CTSNav Page 22 Monday, June 2, 2008 5:48 AM
Overview
Clock Menu
Your vehicle is equipped with an
analog clock located on the instrument panel.
The navigation system time and
the analog clock are separate
features.
Changing the time through the
navigation system will not change
the time on the analog clock and
vice versa.
To change the analog clock time,
see "Analog Clock" in your vehicle
owner's manual.
Sound Radio DisplayNAVTV 10:05
10:05 PM
12Hr 24Hr
Hours Minutes
01 / 23 / 2007
DD/MM MM/DD
Auto GPS Update
Time Zone
MM YYYYDD
OffOn
OffOnDaylight Savings
ChangeGMT
. . . 22
To access the clock menu so you
can set the time on the navigation
system, do the following:
1. Press the CONFIG hard key to
display the Setup menu.
Page 23

AKENG41_CTSNav Page 23 Monday, June 2, 2008 5:48 AM
Section 1
2. Touch the time/temperature
display tab at the top of the
screen or press CONFIG
repeatedly to access the clock
menu.
Touch the plus (+) or minus (-)
buttons next to the HOURS and
MINUTES options to adjust the
time.
Touch the plus (+) or minus (-)
buttons next to the MM (month),
DD (day) and YYYY options to set
the date.
The following touch-sensitive
buttons are also available on this
screen:
• 12HR (12 hour): Touch 12HR
to set the clock in a.m. and
p.m. time.
• 24HR (24 hour): Touch 24HR
to set the clock in military time.
• DD/MM (day/month): Touch
this button to display the date
in the day/month/year format.
• MM/DD (month/day): Touch
this button to display the date
in the month/day/year format.
• AUTO GPS UPDATE (automatic global positioning system update): Touch ON to
automatically update the navigation system's time to match
the current Global Positioning
System time. Touch OFF to
maintain a manually set time.
–
23 . . .
Page 24
AKENG41_CTSNav Page 24 Monday, June 2, 2008 5:48 AM
Overview
• DAYLIGHT SAVINGS: Touch
ON to observe daylight savings
time.
When the daylight savings time
feature is turned on, the hour
on the clock will advance by
one.
Touch OFF to turn this feature
off.
The hour on the clock will
decrease by one.
Time Zone
Back
10:05 PM
Western Europe Time (GMT)
Central Europe Time (GMT+1)
Eastern Europe Time (GMT+2)
Moscow Time Zone (GMT+3)
. . . 24
• TIME ZONE: The currently
selected time zone will appear
next to this item.
Note:
The AUTO GPS UPDATE
(automatic global positioning system update) feature
must be off in order to
change the time zone.
To select a different time zone,
touch CHANGE.
Page 25

AKENG41_CTSNav Page 25 Monday, June 2, 2008 5:48 AM
Section 1
The following TIME ZONE submenu appears when this menu
item is selected:
- WESTERN EUROPE TIME
(GMT): Touch this button to
select the Western Europe
time zone (Greenwich Mean
Time).
- CENTRAL EUROPE TIME
(GMT+1): Touch this button
to select the Central Europe
time zone (Greenwich Mean
Time + 1).
- EASTERN EUROPE TIME
(GMT+2): Touch this button
to select the Eastern Europe
time zone (Greenwich Mean
Time + 2).
- MOSCOW TIME ZONE
(GMT+3): Touch this button
to select the Moscow time
zone (Greenwich Mean Time
+ 3).
Touch BACK to return to the
previous screen.
–
25 . . .
Page 26

AKENG41_CTSNav Page 26 Monday, June 2, 2008 5:48 AM
Page 27

AKENG41_CTSNav Page 27 Monday, June 2, 2008 5:48 AM
––
2
Na
vi-
ga-
tio
Section 2 - Navigation Features and Controls
Navigation Features and Controls ..................28
Navigation Menu.............................................30
Voice Guidance Volume Settings..................... 31
Route Preferences............................................32
Tracking Your Vehicle’s Path ...........................33
Traffic Information ..........................................35
Maps ................................................................44
Map Coverage ................................................44
Updating Map Data ........................................45
Map Adjustments............................................ 47
Symbols ..........................................................49
Enter Destination ............................................53
Destination Entry Methods ..............................54
Destination Entry Method: Address Entry ........54
Destination Entry Method: Point of Interest.....60
Destination Entry Method: Address Book ........64
Destination Entry Method:
Previous Destination ......................................66
Destination Entry Method: Map Scroll.............68
Destination Entry Method: Coordinates ..........70
Destination Entry Method:
Preset Destination ..........................................72
Route Options..................................................74
Turn List..........................................................76
Detour ............................................................76
Route Preview .................................................77
Waypoints.......................................................79
Driving on a Route .......................................... 81
Auto Reroute...................................................82
Canceling Guidance ........................................82
Preset Destinations .........................................82
Storing Preset Destinations: Current
Destination .................................................... 83
Storing Preset Destinations:
Address Book Entry ........................................ 84
Changing Preset Destinations .........................84
Adding, Editing or
Deleting Address Book Entries.......................85
Entering an Address ........................................85
Editing the Address Book ................................86
Deleting an Address........................................ 88
Previous Destinations......................................88
Points of Interest.............................................89
Searching for Local Points of Interest............... 91
Global Positioning System (GPS).................... 93
Vehicle Positioning.......................................... 94
Problems with Route Guidance ......................96
If the System Needs Service............................ 97
Ordering Map DVDs........................................ 97
Database Coverage Explanations ...................98
27 . . .
Page 28
AKENG41_CTSNav Page 28 Monday, June 2, 2008 5:48 AM
Navigation Features and Controls
■ NAVIGATION
FEATURES AND
CONTROLS
This section describes navigation
features.
The navigation system allows you
to plan a route and provides turnby-turn route and map guidance
with voice prompts.
The navigation system also allows
you to select a destination using
various methods and choices.
The navigation system is designed
to assist you while driving, but it is
possible that the information in
the system may not always be
complete.
Road conditions, such as no turns,
detours and construction, change
frequently.
It is important to consider whether
or not you can safely and legally
follow the directions given by the
system.
CAUTION
Looking at the moving map on
the navigation screen frequently or for too long while driving
can cause a crash.
You or others could be injured
or killed.
The driver's full attention is
always required while driving.
Use voice guidance directions
whenever possible.
. . . 28
Page 29
AKENG41_CTSNav Page 29 Monday, June 2, 2008 5:48 AM
Section 2
The navigation maps are stored on
the hard drive.
See the following, later in this
section, for more information:
• Maps
Updating Map Data
If navigation mapping is operated
in a region that is not covered by
the stored map data, or if the vehicle is ever more then 1/10 of a kilometer from a mapped road, the
system may display a compass in
place of the map.
If an inoperable function is selected, the system may display a
message indicating that the function is not available.
Following are the main hard keys
used to access navigation features:
NAV
• Navigation Screen Up/
Down Button
• NAV Button
• CONFIG Button
• RPT Button
• DEST (destination) Button
• INFO Button
An overview of button functions is
offered in Section 1 under "Basic
System Information". This section
offers more detailed information.
The Navigation System's voice
recognition feature allows for
hands-free operation of navigation
and audio system features.
See Section 4 for information on
the Voice Recognition feature.
–
–
29 . . .
Page 30
AKENG41_CTSNav Page 30 Monday, June 2, 2008 5:48 AM
Navigation Features and Controls
■ NAVIGATION MENU
The Navigation menu screen
allows you to access many of the
navigation system's route guidance features.
To access this menu, do the
following:
1. Press the CONFIG hard key to
display the Setup menu.
2. Touch the NAV tab at the top
of the screen or press CONFIG
repeatedly to access the navigation menu.
Sound 30°CRadio DisplayTV NAV
Voice
Volume
Map
Database
Information
Route
Preference
Back
Tr ac k
Tr affic
Information
. . . 30
On this screen, the following
touch-sensitive buttons are
available:
• VOICE VOLUME
This feature allows you to set
the voice prompt volume level
or to turn the voice prompts on
or off.
See "Voice Guidance Volume
Settings" later in this section for
more information.
Page 31

AKENG41_CTSNav Page 31 Monday, June 2, 2008 5:48 AM
Section 2
• ROUTE PREFERENCE
This feature allows you to select
which travel methods the navigation system can use when
calculating a route.
See "Route Preferences" later in
this section for more
information.
• BACK TRACK
This feature allows you to
record and display your vehicle's path when not on a
marked road.
See "Tracking Your Vehicle's
Path" later in this section for
more information.
• MAP DATABASE
INFORMATION
Select this item to view system
information.
• TRAFFIC INFORMATION
Select this item to use the
Radio Data System's Traffic
Message Channel feature.
See "Traffic Information" later
in this section for more
information.
Voice Guidance Volume
Settings
This feature allows you to set the
voice prompt volume level or to
turn the voice prompts on or off.
To access this menu, do the
following:
1. Press the CONFIG hard key to
display the Setup menu.
2. Touch the NAV tab at the top
of the screen or press CONFIG
repeatedly to access the navigation menu.
3. Touch the VOICE VOLUME
button.
Once on this screen, touch the
minus (-) button to decrease the
volume. Touch the plus (+) button
to increase the volume.
–
–
31 . . .
Page 32

AKENG41_CTSNav Page 32 Monday, June 2, 2008 5:48 AM
Navigation Features and Controls
The following touch-sensitive
buttons are also available on this
screen:
• VOICE GUIDANCE
Touch this button to enable or
disable voice guidance while
traveling on a planned route.
Voice guidance is enabled
when the button is
highlighted.
• TRAFFIC EVENT VOICE
PROMPT
Touch this button to enable or
disable traffic voice guidance.
Traffic voice guidance is
enabled when the button is
highlighted.
• SPEECH RECOGNITION
PROMPT
Touch this button to enable or
disable voice recognition
prompts.
Voice recognition prompts are
enabled when the button is
highlighted.
• SPEECH CONFIRMATION
FEEDBACK
Touch this button to enable or
disable voice confirmation
feedback.
Voice confirmation feedback is
enabled when the button is
highlighted.
NOTE:
A VOICE VOLUME button may
also be available on the ROUTE
screen.
Route Preferences
This feature allows you to select
which travel methods the navigation system can use when calculating a route.
To access this menu, do the
following:
1. Press the CONFIG hard key to
display the Setup menu.
2. Touch the NAV tab at the top
of the screen or press CONFIG
repeatedly to access the navigation menu.
3. Touch the ROUTE PREFER-
ENCE button.
. . . 32
Page 33

AKENG41_CTSNav Page 33 Monday, June 2, 2008 5:48 AM
Section 2
On this screen, the following
touch-sensitive buttons are
available:
• AVOID FREEWAY
Selecting this option instructs
the system to avoid major
roads when calculating a
planned route.
• AVOID TOLL ROAD
Selecting this option instructs
the system to avoid toll roads
when calculating a planned
route.
• AVOID FERRY
Selecting this option instructs
the system to avoid ferries
when calculating a planned
route.
• AVOID TIME AND SEASONAL
RESTRICTED ROAD
Selecting this option instructs
the system to avoid timerestricted and seasonal roads
when calculating a planned
route.
Tracking Your Vehicle's
Path
This feature allows you to record
and display your vehicle's path
when not on a marked road.
To access this menu, do the
following:
1. Press the CONFIG hard key to
display the Setup menu.
2. Touch the NAV tab at the top
of the screen or press CONFIG
repeatedly to access the navigation menu.
3. Touch the BACK TRACK
button.
–
–
33 . . .
Page 34

AKENG41_CTSNav Page 34 Monday, June 2, 2008 5:48 AM
Navigation Features and Controls
On this screen, the following
touch-sensitive buttons are
available:
• RECORD BACK TRACK
Touch this button to turn this
feature on and off.
If you turn this feature on, the
system will begin recording
your vehicle's path when not
on a marked road.
When the button is highlighted, this feature is on.
• DISPLAY BACK TRACK
Touch this button to turn this
feature on and off.
If you turn this feature on, the
system will display your vehicle's path on the map screen.
Since the map database will
not have these roads stored in
the system, this path will be a
simulation.
When the button is highlighted, this feature is on.
• DELETE RECORDED BACK
TRACK
Touch this button to delete the
recorded path.
. . . 34
Page 35

AKENG41_CTSNav Page 35 Monday, June 2, 2008 5:48 AM
Section 2
Traffic Information
Note:
Depending on the region you
are in, this feature may not be
available.
The Traffic Message Channel
(TMC), available only through the
FM Radio Data System (RDS), is a
digital channel used for broadcasting real-time traffic information.
TMC information is received via
the normal FM radio antenna.
There is no need to wait for scheduled traffic announcements, or to
listen to a specific program.
In order to receive traffic information, your vehicle must be within
the reception range of an RDS-
TMC station and the Traffic Information feature must be enabled.
The RDS-TMC traffic information
feature and its related menu
options are available in the TRAF-
FIC INFORMATION menu screen.
To access this menu, do the
following:
1. Press the CONFIG hard key to
display the Setup menu.
2. Touch the NAV tab at the top
of the screen or press CONFIG
repeatedly to access the navigation menu.
3. Touch the TRAFFIC INFOR-
MATION button.
The system will display the
Traffic Information menu.
–
–
35 . . .
Page 36

AKENG41_CTSNav Page 36 Monday, June 2, 2008 5:48 AM
Navigation Features and Controls
Traffic Information Menu
In the Traffic Information menu,
touch the ON or OFF button next
to DISPLAY TRAFFIC INFORMA-
TION to enable or disable the Traffic Information feature.
Traffic Information
Display Traffic Information
Back
ON OFF
. . . 36
Route guidance
TMC Station
Preferred Station
Current Station
The indicator in the selected
button will illuminate.
Auto
Auto Manual
SWR (DE) Change
Deutche Welle (DE)
ON
OFF
The other RDS-TMC options that
appear on this screen are only
available for selection if the Traffic
Information feature has been
enabled.
Page 37

AKENG41_CTSNav Page 37 Monday, June 2, 2008 5:48 AM
Section 2
• ROUTE GUIDANCE
In addition to providing RDS-
TMC traffic event information,
the navigation system is also
able to offer traffic-related
route guidance, while you are
on a planned route, if it determines that a quicker route may
be available.
To enable traffic-related route
guidance, touch AUTO or ON.
If you select AUTO, the system
will automatically calculate a
new route to avoid a traffic
event.
If you select ON, the system
will notify you if an alternate
route (avoiding a traffic event)
is available, and will prompt
you to confirm whether it
should calculate the alternate
route.
To disable traffic-related route
guidance, touch OFF.
• TMC STATION (Traffic Mes-
sage Channel station)
If you select AUTO, the system
will automatically receive traffic
information from the strongest
available station.
If you select MANUAL, the system will enable the PRE-
FERRED STATION feature.
–
–
37 . . .
Page 38

AKENG41_CTSNav Page 38 Monday, June 2, 2008 5:48 AM
Navigation Features and Controls
• PREFERRED STATION
This feature is only available if
TMC STATION selection is set
to MANUAL.
To change the preferred station, first touch the CHANGE
button.
The system will display the
TMC STATIONS (Traffic Message Channel stations) selection screen.
Use the up and down arrows to
scroll through the list.
Select the preferred station
from the list.
TMC Stations
TMC
Refresh
Alpen Radio (HE)
Deutsche Welle (DE)
Swiss Radio (FR)
SWR (DE
Back
. . . 38
Touch REFRESH to refresh the
list.
Touch BACK to return to the
previous screen.
Page 39

AKENG41_CTSNav Page 39 Monday, June 2, 2008 5:48 AM
Section 2
• CURRENT STATION
The display line next to this
item shows the current station.
Traffic Event Locations and
Information
If the Traffic Information feature is
enabled, the system will recieve
traffic event data and will display
event icons in their true locations
on the map screen.
Traffic flow conditions will also
appear on the map screen.
Traffic flow conditions will be indicated by a colored line on the side
of the mapped road that is affected by the condition.
•A green line indicates free traffic flow.
•A yellow line indicates traffic
congestion.
•A red line indicates heavy or
stopped traffic.
Note:
Some systems may only display
red traffic flow conditions.
A TMC menu tab will also be available at the top of map screen, next
to the audio source menu tab (if
available) and the FULL MAP tab.
If, while you are driving on a
planned route, the navigation
system receives traffic event data
that may impact your route, a
vehicle icon will appear on the
TMC menu tab.
–
–
39 . . .
Page 40

AKENG41_CTSNav Page 40 Monday, June 2, 2008 5:48 AM
Navigation Features and Controls
The vehicle icon will be color
coded as follows:
• Green indicates that the traffic
event is far away.
•Yellow indicates that a minor
traffic event is in the general
area.
• Red indicates that, while under
route guidance, a quicker route
is available.
CD 30°CFull Map
A8, CONSTRUCTION
B27, CLOSED
A81, DEL
TMC
1.2km
2.0km
2.5km
Avoid
Avoid
Avoid
. . . 40
A81, ACCIDENT
Press the NAV hard key repeatedly
or touch the TMC menu tab to
access the TMC event data
display.
The system will display a list of all
received traffic events within a set
distance.
9.9km
The list will indicate the direction
and distance of each traffic event
from your vehicle's current
position.
Note:
Not all traffic events may be
reported in the list.
Avoid
Avoided ListOn Route
Page 41

AKENG41_CTSNav Page 41 Monday, June 2, 2008 5:48 AM
The events are listed in order of
distance from your current vehicle
position.
If an up or down arrow button is
highlighted on the screen, you
may touch it to scroll up or down
through the displayed list.
If you are currently traveling on a
planned route, you can filter the
list to display only the traffic events
along your route.
To filter the list, select ON ROUTE.
200 M
Previous
Section 2
Back
–
–
AvoidNext
Select a traffic event from the list
to view it on the map. The map
screen will display with the area of
the traffic event shown.
Touch NEXT or PREVIOUS, or the
up or down arrows displayed in
the same location, to move
through the map displays of the
listed traffic events.
41 . . .
Page 42

AKENG41_CTSNav Page 42 Monday, June 2, 2008 5:48 AM
Navigation Features and Controls
Avoiding Traffic Events
Route guidance must be active
and the traffic event must be on
your route in order for the AVOID
feature to work.
Touch the AVOID button next to
the traffic event that you would
like to avoid.
Your current route will be updated
to avoid the area with the traffic
event.
You may avoid multiple traffic
events, however you must select
them one at a time.
If at least one traffic event has been
avoided, you may touch the
AVOIDED LIST button to view a
list of the avoided traffic events.
The AVOIDED LIST button is available on the TMC menu tab's event
data display.
CD 30°CFull Map
A8, CONSTRUCTION
B27, CLOSED
A81, DEL
A81, ACCIDENT
TMC
1.2km
2.0km
2.5km
9.9km
Touch the USE button next to an
avoided traffic event in the Avoided List display to place the event
back on your route.
Avoid
Avoid
Avoid
Avoid
Avoided ListOn Route
. . . 42
Page 43

AKENG41_CTSNav Page 43 Monday, June 2, 2008 5:48 AM
Section 2
Scrolling the Map
While scrolling the map, traffic
event icons may appear.
To receive information about a
traffic event, place the scroll crosshairs over the traffic event icon.
The (information) symbol will
appear.
Touch this button to display the
traffic event information, including
the type of traffic event, the street
name and a description of the traffic event.
See "Scrolling the Map" under
"Maps" later in this section for
more information.
Alternate Route
One of the following pop-up
displays may appear on the screen:
• DETOUR AVAILABLE
• A QUICKER ROUTE IS AVAIL-
ABLE. REROUTE?
These displays indicate that a
possibly quicker route, detouring
around a traffic event, is available:
Touch YES or REROUTE to calculate the new route.
Note:
• This option may only be available when the vehicle icon on
the TMC menu tab is red.
• RDS-TMC information may
not be provided for the alternate route, depending on
what type of road the system
will have you traveling on.
–
–
43 . . .
Page 44

AKENG41_CTSNav Page 44 Monday, June 2, 2008 5:48 AM
Navigation Features and Controls
Traffic Event Icons
Following is a list of event icons
and their descriptions.
Icon Description
Stationary Traffic
Queuing Traffic
Accidents
Closed Road
Lane Narrows
Road Works
Alert or Danger
Icon Description
Road Conditions
Road Visibility
Other
■ MAPS
This section includes basic information that you need to know
about the map database.
Map Coverage
The navigation maps are stored on
the hard drive.
Map data includes the following
countries:
• Andorra
• Austria
• Belgium
• Denmark
• Finland
• France
• Germany
• Ireland
. . . 44
Page 45

AKENG41_CTSNav Page 45 Monday, June 2, 2008 5:48 AM
Section 2
• Italy
• Liechtenstein
• Luxembourg
• Monaco
• Netherlands
• Norway
• Portugal
• San Marino
• Spain
• Sweden
• Switzerland
• United Kingdom
•Vatican
If navigation mapping is operated
in a region that is not covered by
the stored map data, or if the vehicle is ever more then 1/10 of a kilometer from a mapped road, the
system may display a compass in
place of the map.
If an inoperable function is selected, the system may display a
message indicating that the function is not available.
Updating Map Data
Your dealer installed the original
map database information on the
hard drive.
For information on ordering map
data updates, see "Ordering Map
DVDs" later in this section.
If you receive an updated map
disc, you will need to copy the
information to the hard drive.
Read through all of the following
procedure before operating this
feature.
1. Turn the ignition on.
2. Press the VOL (volume/
power) knob to turn the system on.
3. Insert the update disc partway into the slot with the
label side up. The player will
pull it in the rest of the way.
–
–
45 . . .
Page 46

AKENG41_CTSNav Page 46 Monday, June 2, 2008 5:48 AM
Navigation Features and Controls
4. The version information will
appear on the UPDATE CON-
FIRMATION screen.
Touch the UPDATE button.
5. Input the authentication code.
6. Touch the ENTER button.
7. If the correct code was
entered, the system will
reboot and begin the update.
A status bar will appear on the
display.
8. If necessary, the system will
prompt you to insert the next
update disc and will repeat
the previous steps.
9. When the database update is
complete, the disc will automatically eject and the system
will reboot.
The update process may take
between half an hour to two hours
to complete.
If the update disc also contains the
application update file, the application update is also done.
If the disc does not automatically
eject upon completion of the
update, press the (eject) button
to eject the disc.
Handling the DVD Map Disc
When handling the DVD map disc,
be careful of the following:
• Handle the disc very carefully
to avoid contamination or
flaws. Signals may not read out
properly if the disc gets contaminated or flawed.
• If the disc gets soiled, use a soft
cloth to clean it, wiping gently
from the center of the disc to
the outer edge.
Do not use photographic
record cleaner, solvents or
other cleaners.
• Do not write or draw with any
type of writing utensil if a disc
is under the writing surface.
. . . 46
Page 47

AKENG41_CTSNav Page 47 Monday, June 2, 2008 5:48 AM
Section 2
• Do not apply labels to discs.
The labels may get caught in
the player.
• Do not keep the disc in direct
sunlight, high temperatures or
humidity.
• After using the disc, place it
back into the original case.
Map Adjustments
The system allows you to adjust
the scale of view on the map. Also,
the map will scroll automatically
based on the direction you are
traveling.
Map Scales
You can change the level of map
detail by either zooming in or
zooming out using the (zoom
in) or (zoom out) buttons or by
touching the scale on the bar. The
system will adjust the map
accordingly.
The scale will appear on the screen
once the zoom in or zoom out
button is selected.
The scale of a map can range from
50 m (1/32 of a mile) to 550 km
(350 miles).
You can use the Driver Information
Center to change your display's
readings between US-English and
metric units.
See "Driver Information Center" in
your vehicle owner's manual for
more information.
–
–
47 . . .
Page 48

AKENG41_CTSNav Page 48 Monday, June 2, 2008 5:48 AM
Navigation Features and Controls
Scrolling the Map
Touch anywhere on the map
screen and the scroll symbol will
appear. Use this feature to scroll
through the map.
If you tap the map at a particular
location, the system will center
that location on the screen.
You can hold your finger in any
direction outside of the scroll
symbol and the map will continue
to scroll in that direction until you
remove your finger from the map
screen.
The scroll speed depends on
where the screen is being touched.
The scroll speed will increase when
touching closer to the edge of the
screen.
If you have used the scroll feature
to scroll the map and your vehicle
icon becomes lost, press the NAV
hard key to return to the current
vehicle location on the map.
When scrolling on the map, the
system may display the address of
the scroll symbol location.
You can use the scroll feature on
the map to set a destination.
See the following, later in this
section, for more information:
• Destination Entry Method:
Map Scroll
When scrolling the map without a
planned route, touch the GO
button to calculate the route from
your current position to the destination mark.
. . . 48
Page 49

AKENG41_CTSNav Page 49 Monday, June 2, 2008 5:48 AM
Symbols
The following symbols are the
most common that will appear on
a map screen.
Section 2
–
Vehicle Symbol
Your vehicle is shown as this
symbol. It indicates the current
position and heading direction of
your vehicle on the map screen.
Destination Symbol
After a route has been planned,
this symbol will appear on the map
to show your destination.
49 . . .
–
Page 50

AKENG41_CTSNav Page 50 Monday, June 2, 2008 5:48 AM
Navigation Features and Controls
36
km
36
km
0 19
hr min
Waypoint Symbol
When a waypoint has been selected, you will see this symbol on the
map.
The waypoint symbol will be
numbered from one through three
depending on how many
waypoints have been set.
. . . 50
Distance to Scroll Symbol
While scrolling the map, this
symbol may appear to display the
distance to the crosshair area on
the map screen.
Distance to Destination and
Estimated Travel Time Symbol
This symbol will display the
distance to your final destination
and either the estimated remaining travel time or the estimated
arrival time, depending on the
setting selected.
Touch this button to change
between viewing the time of day
and the arrival time. If waypoints
have been added to the current
route, each waypoint destination
will appear giving the same
information.
Page 51

AKENG41_CTSNav Page 51 Monday, June 2, 2008 5:48 AM
Section 2
–
North Up, Vehicle Up and 3D
Symbols
This symbol indicates that the map
view is North up.
While in North up mode, North
will always be at the top of the
map screen regardless of which
direction the vehicle is traveling.
Touch this screen symbol to switch
between the North Up, Vehicle
Up, and Three-Dimensional
modes.
This symbol indicates that the map
view is vehicle up.
The vehicle icon will always travel
up on the map screen regardless of
compass direction.
The shaded triangle indicates
North.
Touch this screen symbol to switch
between the North Up, Vehicle
Up, and Three-Dimensional
modes.
The symbol for the Three-Dimensional mode is the same as the
Vehicle Up symbol, but shows the
map in a three-dimensional view.
Touch this screen symbol to switch
between the North Up, Vehicle
Up, and Three-Dimensional
modes.
51 . . .
–
Page 52

AKENG41_CTSNav Page 52 Monday, June 2, 2008 5:48 AM
Navigation Features and Controls
POI
"Satellite Signal Unavailable"
Symbol
This symbol is displayed whenever
the Navigation System is unable to
receive the Global Positioning
System signal.
See "Global Positioning System
(GPS)" for more information.
. . . 52
ADD Symbol
Touch the ADD screen button to
store the location on the screen in
the Address Book.
See the following, later in this
section, for more information:
• Adding, Editing or Deleting
Address Book Entries
POI (point of interest) Symbol
Touch the POI button to display or
remove Point of Interest icons
from the map.
For information on Points of Interest features, see "Points of Interest"
later in this section.
Page 53

AKENG41_CTSNav Page 53 Monday, June 2, 2008 5:48 AM
■ ENTER DESTINATION
The Destination Entry screen
allows you to plan a route using
any of several destination entry
methods.
To access this screen, do the
following:
• Press the DEST (destination)
hard key.
The SELECT DESTINATION
screen will be displayed.
See "Destination Entry Methods"
later in this section.
Select Destination
Street
Previous
Destination
ANTON’S
ANTON’S
Point of
Interest
From Map
Section 2
Address Book
–
–
If a destination has been selected,
pressing the DEST (destination)
hard key displays the ROUTE
screen.
See the following, later in this
section, for more information:
• Route Options
53 . . .
Page 54

AKENG41_CTSNav Page 54 Monday, June 2, 2008 5:48 AM
Navigation Features and Controls
DESTINATION ENTRY
METHODS
Destination Entry Method:
Address Entry
This destination entry method
allows you to enter a destination
using the name of a city or a street.
You must provide the navigation
system with the destination's
street number, street name and
city.
City in DE
Street
House #
Cross Street
AB FGH
KL MNO PQ
DE
C J
R
Back
Back
Country
30953
I
S
List
. . . 54
TU W YZ
If you are having trouble finding a
city or a street name, do the
following:
• Input the street name first
instead of the city name, or
vice versa.
V
X
A-YA-Z
0-9
&
GoBACKSPACE
• Input more characters or
reduce the amount of characters to reduce or expand the
available options.
Page 55

AKENG41_CTSNav Page 55 Monday, June 2, 2008 5:48 AM
Section 2
Address Entry by Street Name
To use this destination entry method, do the following:
1. Press the DEST (destination)
hard key.
2. Touch the STREET button.
The street name input field will
automatically be selected for
data entry.
If the street name you need to
enter is one of the last five
street names used by the system, you do not have to input
the name manually. Instead,
you may use the LAST 5
feature.
See "LAST 5 Feature" later in
this section.
If you are able to select the
street name from the "Last 5"
list, you may select the name
and then jump ahead in this
procedure to the step for entering the address number.
However, if the street name
you need is not one of the last
five names used by the system,
proceed with the following
step.
3. Enter a name of a street by
touching the alphabet
keypad.
It is recommended that you do
not enter directional information or street type.
If, for example, you are looking
for the street called Route de
l'Abadie, you should enter the
name as Abadie. If you are
looking for Rue Bachelet, enter
Bachelet.
Touch the space button to
enter a space between street
or city names.
If you select an incorrect character, touch BACKSPACE or
the backspace arrow .
As information is entered, the
system will automatically
search for available names.
While inputting a name, the
LIST button will become available once there are names to
choose from.
The number of items available
in the list is displayed to the
right of the input fields.
–
–
55 . . .
Page 56

AKENG41_CTSNav Page 56 Monday, June 2, 2008 5:48 AM
Navigation Features and Controls
4. Touch the LIST button to view
the list or continue to input
information to further reduce
the list of available items.
The system will automatically
display a list when the number
of available items in the list is
four or less.
5. Select the street name from
the list.
6. Enter the address number
using the numeric keypad.
The system will list the address
number range that is available
for the street.
7. If the street address you
entered exists in more than
one city, a list of cities will
appear.
Select the correct city.
8. A confirmation screen will
appear.
If the address is correct, touch
the GO button.
The system will calculate the
route.
9. Select your route preference.
You may choose between the
following options:
- FASTEST
- SHORTEST
- EASY
The system will highlight the
route.
10. Touch START GUIDANCE to
set the calculated route and
begin route guidance.
See the following, later in this
section, for more information:
- Route Options
- Driving on a Route
. . . 56
Page 57

AKENG41_CTSNav Page 57 Monday, June 2, 2008 5:48 AM
Section 2
Address Entry by City Name
To use this destination entry method, do the following:
1. Press the DEST (destination)
hard key.
2. Touch the STREET button.
3. Touch the CITY button.
4. Enter the city name using the
alphabet keypad.
As information is entered, the
system will automatically
search for available names.
While inputting a name, the
LIST button will become available once there are names to
choose from.
The number of items available
in the list is displayed to the
right of the input fields.
5. Touch the LIST button to view
the list or continue to input
information to further reduce
the list of available items.
The system will automatically
display a list when the number
of available items in the list is
four or less.
6. Select the desired city name
from the list the system
provides.
7. If the system does not automatically select the street
name input field, touch
STREET.
If the street name you need to
enter is one of the last five
street names used by the system, you do not have to input
the name manually. Instead,
you may use the LAST 5
feature.
See "LAST 5 Feature" later in
this section.
If you are able to select the
street name from the "Last 5"
list, you may select the name
and then jump ahead in this
procedure to the step for entering the address number.
However, if the street name
you need is not one of the last
five names used by the system,
proceed with the following
step.
–
–
57 . . .
Page 58

AKENG41_CTSNav Page 58 Monday, June 2, 2008 5:48 AM
Navigation Features and Controls
8. Enter a name of a street by
touching the alphabet
keypad.
It is recommended that you do
not enter directional information or street type.
If, for example, you are looking
for the street called Route de
l'Abadie, you should enter the
name as Abadie. If you are
looking for Rue Bachelet, enter
Bachelet.
Touch the space button to
enter a space between street
or city names.
If you select an incorrect character, touch BACKSPACE or
the backspace arrow .
As information is entered, the
system will automatically
search for available names.
While inputting a name, the
LIST button will become available once there are names to
choose from.
The number of items available
in the list is displayed to the
right of the input fields.
9. Touch the LIST button to view
the list or continue to input
information to further reduce
the list of available items.
The system will automatically
display a list when the number
of available items in the list is
four or less.
10. Select the street name from
the list.
11. Enter the address number
using the numeric keypad.
The system will list the address
number range that is available
for the street.
12. A confirmation screen will
appear.
If the address is correct, touch
the GO button.
The system will calculate the
route.
. . . 58
Page 59

AKENG41_CTSNav Page 59 Monday, June 2, 2008 5:48 AM
Section 2
13. Select your route preference.
You may choose between the
following options:
- FASTEST
- SHORTEST
- EASY
The system will highlight the
route.
14. Touch START GUIDANCE to
set the calculated route and
begin route guidance.
See the following, later in this
section, for more information:
- Route Options
- Driving on a Route
LAST 5 FEATURE
If the street name you need to
enter is one of the last five street
names used by the system, you do
not have to input the name manually. Instead, you may use the
LAST 5 feature.
While the street name input field is
still empty, the LAST 5 STREETS
button will appear on the screen.
This option allows you to choose a
street name from a list of the five
street names last used by the
system.
Touch this button to display the
list.
Select the desired street name
from the list the system provides.
–
–
59 . . .
Page 60

AKENG41_CTSNav Page 60 Monday, June 2, 2008 5:48 AM
Navigation Features and Controls
Destination Entry Method:
Point of Interest
This option allows you to choose a
destination from the Point of Interest list.
For information on Points of Interest features, see "Points of Interest"
later in this section.
Name/Phone
City
Back
Back
Country
Any City
3
. . . 60
AB FGH
KL MNO PQ
TU W YZ
There are three ways to select a
point of interest destination from
this screen.
• Selecting a Point of Interest by
Name or Phone Number
DE
C J
V
X
A-YA-Z
0-9
I
S
R
&
List
Browse POI
Categories
BACKSPACE
• Selecting a Point of Interest by
City
• Selecting a Point of Interest by
Category
Page 61

AKENG41_CTSNav Page 61 Monday, June 2, 2008 5:48 AM
Section 2
Selecting a Point of Interest by
Name or Phone Number
To use this destination entry method, do the following:
1. Press the DEST (destination)
hard key.
2. Touch the POINT OF INTER-
EST button.
3. The name/phone number
input field will automatically
be selected for data entry.
Enter the name of the point of
interest or touch the 0-9 button on the keypad and enter
the phone number.
As information is entered, the
system will automatically
search for available names.
While inputting a name, the
LIST button will become available once there are names to
choose from.
The number of items available
in the list is displayed to the
right of the input fields.
4. Touch the LIST button to view
the list or continue to input
information to further reduce
the list of available items.
The system will automatically
display a list when the number
of available items in the list is
four or less.
5. Select the desired point of
interest name from the list.
6. A confirmation screen will
appear.
If the point of interest information is correct, touch the GO
button.
The system will calculate the
route.
7. Select your route preference.
You may choose between the
following options:
- FASTEST
- SHORTEST
- EASY
The system will highlight the
route.
8. Touch START GUIDANCE to
set the calculated route and
begin route guidance.
See the following, later in this
section, for more information:
- Route Options
- Driving on a Route
–
–
61 . . .
Page 62

AKENG41_CTSNav Page 62 Monday, June 2, 2008 5:48 AM
Navigation Features and Controls
Selecting a Point of Interest by
City
To use this destination entry method, do the following:
1. Press the DEST (destination)
hard key.
2. Touch the POINT OF INTER-
EST button.
3. Touch the CITY button.
4. Enter the city name using the
alphabet keypad.
As information is entered, the
system will automatically
search for available names.
While inputting a name, the
LIST button will become available once there are names to
choose from.
The number of items available
in the list is displayed to the
right of the input fields.
5. Touch the LIST button to view
the list or continue to input
information to further reduce
the list of available items.
The system will automatically
display a list when the number
of available items in the list is
four or less.
6. Select the desired city name
from the list the system
provides.
7. Touch the NAME/PHONE
button.
8. Enter the name of the point of
interest or touch the 0-9 button on the keypad and enter
the phone number.
As information is entered, the
system will automatically
search for available names.
While inputting a name, the
LIST button will become available once there are names to
choose from.
The number of items available
in the list is displayed to the
right of the input fields.
9. Touch the LIST button to view
the list or continue to input
information to further reduce
the list of available items.
The system will automatically
display a list when the number
of available items in the list is
four or less.
10. Select the desired point of
interest name from the list.
11. A confirmation screen will
appear.
If the point of interest information is correct, touch the GO
button.
The system will calculate the
route.
. . . 62
Page 63

AKENG41_CTSNav Page 63 Monday, June 2, 2008 5:48 AM
Section 2
12. Select your route preference.
You may choose between the
following options:
- FASTEST
- SHORTEST
- EASY
The system will highlight the
route.
13. Touch START GUIDANCE to
set the calculated route and
begin route guidance.
See the following, later in this
section, for more information:
- Route Options
- Driving on a Route
Selecting a Point of Interest by
Category
1. Press the DEST (destination)
hard key.
2. Touch the POINT OF INTER-
EST button.
3. Touch the BROWSE POI CAT-
EGORIES button.
4. Select a category and then
any appropriate subcategory.
The system will display a list of
available point of interest
names.
5. Select the desired point of
interest name from the list.
6. A confirmation screen will
appear.
If the point of interest information is correct, touch the GO
button.
The system will calculate the
route.
7. Select your route preference.
You may choose between the
following options:
- FASTEST
- SHORTEST
- EASY
The system will highlight the
route.
8. Touch START GUIDANCE to
set the calculated route and
begin route guidance.
See the following, later in this
section, for more information:
- Route Options
- Driving on a Route
–
–
63 . . .
Page 64

AKENG41_CTSNav Page 64 Monday, June 2, 2008 5:48 AM
Navigation Features and Controls
Destination Entry Method:
Address Book
This feature allows you to select a
destination from the address book.
To use this destination entry method, do the following:
1. Press the DEST (destination)
hard key.
2. Touch the ADDRESS BOOK
button.
The system will display the list
of locations stored in the address book.
Use the up and down arrows
to view the list.
Address Book
STAR
STAR
ENTRY 00 - 1/2/00, MITTE, HANNOVER
ENTRY 01 - 1/2/00, MITTE, HANNOVER
Back
Go
Go
Go
Go
Go
. . . 64
3. Select the desired destination
from the list.
Touch the GO button to select
the destination.
The system will calculate the
route.
Page 65

AKENG41_CTSNav Page 65 Monday, June 2, 2008 5:48 AM
Section 2
4. Select your route preference.
You may choose between the
following options:
- FASTEST
- SHORTEST
- EASY
The system will highlight the
route.
5. Touch START GUIDANCE to
set the calculated route and
begin route guidance.
See the following, later in this
section, for more information:
- Route Options
- Driving on a Route
You can store names, phone
numbers and addresses in the
system using the Address Book.
See the following, later in this
section, for more information:
- Adding, Editing or Deleting
Address Book Entries
–
–
65 . . .
Page 66

AKENG41_CTSNav Page 66 Monday, June 2, 2008 5:48 AM
Navigation Features and Controls
Destination Entry Method:
Previous Destination
This feature allows you to select a
destination from a list of the last 15
destinations entered into the
system.
Note:
As new destinations are
entered, the system will automatically delete the oldest
destinations and add the new
destinations to the list.
Previous Destinations
Delete All
LUDWIG-BRUNS-STR. 15, ZOO,
MARIENSTRASSE 108, SÜDSTADE
Back
Go
Go
Go
Go
Go
. . . 66
To use this destination entry method, do the following:
1. Press the DEST (destination)
hard key.
2. Touch the PREVIOUS DESTI-
NATION button.
The system will display the Previous Destination screen.
Page 67

AKENG41_CTSNav Page 67 Monday, June 2, 2008 5:48 AM
Section 2
3. Select the desired destination
from the list.
Use the up and down arrows
to view the list.
Touch the GO button to select
the destination.
The system will calculate the
route.
4. Select your route preference.
You may choose between the
following options:
- FASTEST
- SHORTEST
- EASY
The system will highlight the
route.
5. Touch START GUIDANCE to
set the calculated route and
begin route guidance.
See the following, later in this
section, for more information:
- Route Options
- Driving on a Route
See "Previous Destinations" later in
this section for more information.
–
–
67 . . .
Page 68

OS
R
AKENG41_CTSNav Page 68 Monday, June 2, 2008 5:48 AM
Navigation Features and Controls
Destination Entry Method:
Map Scroll
This allows you to select a destination by scrolling on the map.
To use this destination entry method, do the following:
1. Press the DEST (destination)
hard key.
2. Touch the FROM MAP
button.
The map will appear with the
scroll symbol.
UHSTRASSE
ASSE
50km
0.0
km
MM
MITTE, HANNOVER
GROSSE
HANNOVER
ASSE
RSTRASSE
GSTRASSE
Back
RATHENAUSTRASSE
POIAdd GoCoordinates
3. Use the scroll symbol and the
zoom in/zoom out feature to
locate your desired destination
on the map.
See the following, earlier in
this section, for more
information:
-Map Adjustments
. . . 68
Page 69

AKENG41_CTSNav Page 69 Monday, June 2, 2008 5:48 AM
Section 2
4. Touch the (information) button to display the address
information of the scrolled
location.
5. A confirmation screen will
appear.
If the address is correct, touch
the GO button.
The system will calculate the
route.
6. Select your route preference.
You may choose between the
following options:
- FASTEST
- SHORTEST
- EASY
The system will highlight the
route.
7. Touch START GUIDANCE to
set the calculated route and
begin route guidance.
See the following, later in this
section, for more information:
- Route Options
- Driving on a Route
–
–
69 . . .
Page 70

AKENG41_CTSNav Page 70 Monday, June 2, 2008 5:48 AM
Navigation Features and Controls
Destination Entry Method:
Coordinates
This option allows you to select a
destination by inputting the latitude and longitude coordinates.
To use this destination entry method, do the following:
1. Press the DEST (destination)
hard key.
LATITUDE
LONGITUDE
1
2
4
5
N_
W
3
6
NS
WE
Degrees
Minutes
Back
. . . 70
7
8
0
9
2. Touch the FROM MAP
button.
.
Seconds
OK
The map will appear with the
scroll symbol.
Page 71

AKENG41_CTSNav Page 71 Monday, June 2, 2008 5:48 AM
Section 2
3. Touch the COORDINATES
button.
The system will display the Coordinates screen.
4. Touch N (North) or S (South)
on the keypad to enter the latitude direction in the LATI-
TUDE input field.
5. Enter the latitude coordinate
using the numeric keypad.
6. Touch E (East) or W (West) on
the keypad to enter the longitude direction in the LONGI-
TUDE input field.
7. Enter the longitude coordinate
using the numeric keypad.
8. Touch the OK button.
A map will appear with the
destination shown.
9. Touch the GO button to select
the destination.
If the coordinates are near a
street or point of interest, the
system will calculate a route to
that street or point of interest.
If the coordinates are not near
a street or point of interest, the
system will provide straightline direction to the
coordinates.
See the following, later in this
section, for more information:
- Route Options
- Driving on a Route
–
–
71 . . .
Page 72

AKENG41_CTSNav Page 72 Monday, June 2, 2008 5:48 AM
Navigation Features and Controls
Destination Entry Method:
Preset Destination
This option allows you to select a
destination from one of six previously stored destinations.
To use this destination entry method, do the following:
1. Press the DEST (destination)
hard key.
Each preset destination is
stored to one of the touch-sensitive buttons at the bottom of
the Destination Entry screen.
The name or location will appear on the button.
Select Destination
Street
ANTON’S
ANTON’S
Previous
Destination
Point of
Interest
Address Book
From Map
. . . 72
2. To select a preset destination,
touch the corresponding preset button.
The system will calculate the
route.
Page 73

AKENG41_CTSNav Page 73 Monday, June 2, 2008 5:48 AM
Section 2
3. Select your route preference.
You may choose between the
following options:
- FASTEST
- SHORTEST
- EASY
The system will highlight the
route.
4. Touch START GUIDANCE to
set the calculated route and
begin route guidance.
See the following, later in this
section, for more information:
- Route Options
- Driving on a Route
If a destination is not stored for
one of the preset buttons, the
button will be dimmed and not
available for use.
See the following, later in this
section, for more information:
• Preset Destinations
–
–
73 . . .
Page 74

AKENG41_CTSNav Page 74 Monday, June 2, 2008 5:48 AM
Navigation Features and Controls
■ ROUTE OPTIONS
Once a destination has been set,
you may use this menu to perform
several functions.
With a destination already
entered, press the DEST (destination) hard key to access the
ROUTE screen.
On this screen, the following
touch-sensitive buttons are
available:
• TURN LIST
Touching the TURN LIST button allows you to view a list of
the upcoming maneuvers for
the entire route.
See the following, later in this
section, for more information:
-Turn List
Route
• DETOUR
This feature allows you to
detour around a problem area
while you are traveling on a
planned route.
Tu rn List
Detour
Preview
Voice
Volume
WALDSTR. 26, MI...
Current Position
See "Detour" later in this section for more information.
Cancel GuidanceSuspend Guidance
Add
Delete
Add
. . . 74
Page 75

AKENG41_CTSNav Page 75 Monday, June 2, 2008 5:48 AM
Section 2
• PREVIEW
This feature allows you to preview and scroll through the
entire planned route.
See "Route Preview" later in this
section for more information.
• VOICE VOLUME
This feature allows you to set
the voice prompt volume level
or to turn the voice prompts on
or off.
See the following, earlier in this
section, for more information:
- Navigation Menu
Voice Guidance Volume
Settings
• ADD
This feature allows you to add
waypoints along the way to
your final destination.
See the following, later in this
section, for more information:
-Waypoints
• DELETE
This feature allows you to
delete waypoints along the
way to your final destination.
See the following, later in this
section, for more information:
-Waypoints
• SUSPEND GUIDANCE/
RESUME GUIDANCE
- SUSPEND GUIDANCE
Touch this button if you
would like to turn off or
pause the guidance for the
current route.
- RESUME GUIDANCE
Touch this button if you
would like to restart guidance
on the current route.
• CANCEL GUIDANCE
Touch this button if you would
like to cancel the current route.
A confirmation window will
appear.
To select this option, touch
YES. To cancel this option,
touch NO.
–
–
75 . . .
Page 76

AKENG41_CTSNav Page 76 Monday, June 2, 2008 5:48 AM
Navigation Features and Controls
Turn List
PLATHNERSTR.
1.3 km
MARIENSTR.
10. km
AEGIDIENTORPLATZ
0.2 km
Current Position
Turn List
Touching the TURN LIST button
allows you to view a list of the
upcoming maneuvers for the
entire route.
This list provides street names, the
distance that you will travel on
each road and the turns you will
need to make during your planned
route.
Use the up and down arrows to
view the list.
Back
Detour
This feature allows you to detour
around a problem area while you
are traveling on a planned route.
To access this feature, touch the
following button on the ROUTE
screen:
• DETOUR
Select the desired detour distance
by touching the corresponding
button on the screen.
To detour around the entire
planned route, touch ENTIRE
ROUTE.
Once a detour distance has been
selected, the system will calculate
an alternate route.
The alternate route will be
displayed on the map screen.
. . . 76
Page 77

OS
R
AKENG41_CTSNav Page 77 Monday, June 2, 2008 5:48 AM
Route Preview
This feature allows you to preview
and scroll through the entire
planned route.
D73
UHSTRASSE
0.0
0.0
km
km
ASSE
50 km
50 km
MM
GROSSE
6 ST
DUBAI WORLD TRADE CENTRE
ASSE
HANNOVER
RSTRASSE
E11
Section 2
GSTRASSE
Back
Back
21 ST
–
–
RATHENAUSTRASSE
To preview the route, do the
following:
2. Touch the PREVIEW button.
A map screen will appear.
1. With a destination already
entered, press the DEST (destination) hard key to access
the ROUTE screen.
77 . . .
Page 78

OS
R
AKENG41_CTSNav Page 78 Monday, June 2, 2008 5:48 AM
Navigation Features and Controls
On this screen, the following
touch-sensitive buttons are
available:
•|
Touch this button to skip to the
previous marked location.
The previous marked location
may be the starting point, a
waypoint or a point of interest.
• or
Touch this button briefly to
scroll smoothly backwards
along the route to the previous
marked location.
The previous marked location
may be the starting point, a
waypoint or a point of interest.
Touch the button repeatedly to
increase or decrease the scroll
speed.
UHSTRASSE
ASSE
50 km
• (pause)
Touch this button to pause a
smooth scroll function.
0.0
km
MM
GROSSE
ASSE
GSTRASSE
Back
HANNOVER
RATHENAUSTRASSE
RSTRASSE
Touch , , or to
restart the smooth scroll
function.
. . . 78
Page 79

AKENG41_CTSNav Page 79 Monday, June 2, 2008 5:48 AM
Section 2
• or
Touch this button briefly to
scroll smoothly forward along
the route to the next marked
location.
The next marked location may
be the final destination, a waypoint or a point of interest.
Touch the button repeatedly to
increase or decrease the scroll
speed.
• |
Touch this button to skip to the
next marked location.
The next marked location may
be the final destination, a waypoint or a point of interest.
Waypoints
Trip waypoints are destinations
you want to arrive at before reaching your final destination.
The system will allow you to set up
to three waypoints, excluding
your final destination.
Adding a Waypoint
If a final destination has already
been entered, you can add a
waypoint.
To add a waypoint, do the
following:
1. With a destination already
entered, press the DEST (destination) hard key to access
the ROUTE screen.
NOTE:
- In order for a route to be cal-
culated, a final destination
must be entered.
- The navigation system will
not generate a route based
only on waypoints.
This screen displays an ordered
list of the stored waypoints
and the destination for your
current route.
–
–
79 . . .
Page 80

AKENG41_CTSNav Page 80 Monday, June 2, 2008 5:48 AM
Navigation Features and Controls
2. Touch the ADD button.
3. Enter a destination.
See the following, earlier in
this section, for more
information:
- Enter Destination
Destination Entry Methods
When you finish entering a location using one of the destination
entry methods, the system will
return you to the map and will
plan the route to your waypoints
and destination.
Route
Tu rn List
Detour
Preview
Voice
Volume
WALDSTR. 26, MI...
Current Position
Cancel GuidanceSuspend Guidance
Add
Delete
Add
. . . 80
To add additional waypoints,
repeat the procedure, touching
the ADD button that corresponds
with the location where you would
like the new waypoint added.
Once a waypoint has been added,
the points can be edited or
deleted.
Page 81

AKENG41_CTSNav Page 81 Monday, June 2, 2008 5:48 AM
Section 2
Deleting a Waypoint
The DELETE button on the ROUTE
screen allows you to delete a
waypoint.
To delete a waypoint, do the
following:
1. Press the DEST (destination)
hard key to view the ROUTE
screen.
This screen displays an ordered
list of the stored waypoints
and the destination for your
current route.
2. Touch the DELETE button that
corresponds with the location
you wish to delete.
A confirmation window will
appear.
3. Touch YES to delete the
location.
Touch NO to cancel the
operation.
The system will return you to the
map and will plan the route to
your waypoints and destination.
To delete additional waypoints,
repeat the procedure, touching
the DELETE button that corresponds with the next location you
would like to delete.
■ DRIVING ON A ROUTE
When a destination has been set
and you are traveling on a planned
route, the map screen will automatically display the next
maneuver.
The next maneuver pop-up will
display the direction of and
distance to the next maneuver.
When you are approximately 1/4
mile (0.4 km) from the next
maneuver, the screen will display
the name and a detailed view of
the next maneuver.
–
–
81 . . .
Page 82

AKENG41_CTSNav Page 82 Monday, June 2, 2008 5:48 AM
Navigation Features and Controls
Auto Reroute
When your destination is set and
you are off the planned route, the
system will automatically begin to
reroute. You will be able to see the
new route highlighted on the
screen.
■ CANCELING
GUIDANCE
Once you arrive at the final destination, guidance is canceled
automatically.
If you would like to cancel the
current route before arriving at the
final destination, do the following:
1. Press the DEST (destination)
hard key to view the ROUTE
screen.
2. Touch the CANCEL GUID-
ANCE button.
A confirmation window will
appear.
3. To select this option, touch
YES. To cancel this option,
touch NO.
■ PRESET DESTINATIONS
This feature allows you to store up
to six preset destinations.
Each preset destination is stored to
one of the touch-sensitive buttons
at the bottom of the Destination
Entry screen.
You can store the current final
destination as a Preset Destination.
See the following, later in this
section, for more information:
• Storing Preset Destinations:
Current Destination
Preset Destinations can also be
selected from the Address Book.
See the following, later in this
section, for more information:
• Storing Preset Destinations:
Address Book Entry
. . . 82
Page 83

AKENG41_CTSNav Page 83 Monday, June 2, 2008 5:48 AM
Section 2
The name or location will appear
on the corresponding preset destination button on the Destination
Entry screen.
See the following, earlier in this
section, for more information:
• Destination Entry Method: Preset Destination
Storing Preset Destinations:
Current Destination
To plan a route and store the final
destination as a preset destination,
do the following:
1. Enter a destination.
See the following, earlier in
this section, for more
information:
- Enter Destination
Once the route has been calculated, a map screen will
appear.
2. Touch the ADD button to
store the destination in the
Address Book.
The system will go to the Address Book screen.
3. Touch the NAME button. The
alphabet key pad will appear.
Enter the name using the
keypad.
4. Touch and hold the desired
preset button at the bottom of
the Address Book screen.
The name you entered will appear on the preset button.
The corresponding preset destination button on the Destination Entry screen is now
available for selection.
See the following, earlier in
this section, for more
information:
- Destination Entry Method:
Preset Destination
–
–
83 . . .
Page 84

AKENG41_CTSNav Page 84 Monday, June 2, 2008 5:48 AM
Navigation Features and Controls
Storing Preset Destinations:
Address Book Entry
To store an Address Book entry as
a preset destination, do the
following:
1. Press the DEST (destination)
hard key.
2. Touch the ADDRESS BOOK
button.
The system will display a list of
addresses.
Use the up and down arrows
to view the list.
3. Select the desired destination
from the list.
4. Touch and hold the desired
preset button at the bottom of
the Address Book screen.
The name you entered will appear on the preset button.
The corresponding preset destination button on the Destination Entry screen is now
available for selection.
See the following, earlier in
this section, for more
information:
- Destination Entry Method:
Preset Destination
Changing Preset
Destinations
Storing a different address book
entry to the preset destination
button will change the preset
destination.
See the following, earlier in this
section, for more information:
• Storing Preset Destinations:
Current Destination
• Storing Preset Destinations:
Address Book Entry
. . . 84
Page 85

AKENG41_CTSNav Page 85 Monday, June 2, 2008 5:48 AM
■ ADDING, EDITING OR
DELETING ADDRESS
BOOK ENTRIES
You can store names, phone
numbers and addresses in the
system using the Address Book.
You can also delete the address
book entries.
Address Book
Icon
Name
Location
Delete
Section 2
Back
More
Locations
–
Phone #
Add Voice Tag
Press and hold to make this location a favorite destination.
HOME
Entering an Address
While viewing a current final destination on the map screen, touch
the ADD button.
Go
Map
The system will automatically store
the final destination information in
the address book.
If you would like to change any of
your stored information, see "Editing the Address Book", following.
85 . . .
–
Page 86

AKENG41_CTSNav Page 86 Monday, June 2, 2008 5:48 AM
Navigation Features and Controls
Editing the Address Book
Name Editing
1. Press the DEST (destination)
hard key.
2. Touch the ADDRESS BOOK
button.
The system will display the list
of locations stored in the address book.
3. Use the up and down arrows
to view the list.
Select the desired location
from the list.
4. Touch the NAME button. The
alphabet key pad will appear.
5. Use the keypad to edit the
name.
6. Touch the OK button to save
your changes.
Editing a Phone Number
1. Press the DEST (destination)
hard key.
2. Touch the ADDRESS BOOK
button.
The system will display the list
of locations stored in the address book.
3. Use the up and down arrows
to view the list.
Select the desired location
from the list.
4. Touch the PHONE # button.
5. Use the keypad to add or edit
the phone number.
6. Touch the OK button to save
your changes.
Icon Editing
This feature allows you to change
the icon associated with an
address.
To change an icon:
1. Press the DEST (destination)
hard key.
2. Touch the ADDRESS BOOK
button.
The system will display the list
of locations stored in the address book.
3. Use the up and down arrows
to view the list.
Select the desired location
from the list.
. . . 86
Page 87

AKENG41_CTSNav Page 87 Monday, June 2, 2008 5:48 AM
Section 2
4. Touch the ICON button.
A list of icons will appear on
the display.
5. Touch the icon you would like
to use.
Storing a Voice Tag
If desired, you may add a voice tag
to an address book entry.
This feature allows you to select a
destination by stating the Voice
Tag command and the desired
destination.
See Section 4 for information on
the Voice Recognition feature.
To store a voice tag for a destination, do the following:
1. Press the DEST (destination)
hard key.
2. Touch the ADDRESS BOOK
button.
The system will display the list
of locations stored in the address book.
3. Use the up and down arrows
to view the list.
Select the desired location
from the list.
4. Touch the ADD VOICE TAG
button.
5. The system will prompt you to
state the name.
Within 2 seconds, state the
name you would like to associate with this entry.
The system will play back what
was recorded.
–
–
87 . . .
Page 88

AKENG41_CTSNav Page 88 Monday, June 2, 2008 5:48 AM
Navigation Features and Controls
Deleting an Address
1. Press the DEST (destination)
hard key.
2. Touch the ADDRESS BOOK
button.
The system will display the list
of locations stored in the address book.
3. Use the up and down arrows
to view the list.
Select the desired location
from the list.
4. Touch the DELETE button.
A confirmation window will
appear.
5. Confirm or cancel the operation as needed.
■ PREVIOUS
DESTINATIONS
This feature allows you to select a
destination from a list of the last 15
destinations entered into the
system.
As new destinations are entered,
the system will automatically
delete the oldest destinations and
add the new destinations to the
list.
See the following under "Enter
Destination" earlier in this section
for more information:
• Destination Entry Method: Previous Destination
To delete all destinations from the
list, do the following:
1. Press the DEST (destination)
hard key.
2. Touch the PREVIOUS DESTI-
NATION button.
3. Touch the DELETE ALL
button.
4. A confirmation window will
appear.
Confirm or cancel the operation as needed.
. . . 88
Page 89

AKENG41_CTSNav Page 89 Monday, June 2, 2008 5:48 AM
Section 2
POI
■ POINTS OF INTEREST
This feature allows you to view
icons for point of interest categories (such as gas stations, restaurants, hotels, etc.) on the map
screen.
These icons appear on the map at
the location of the point of
interest.
To display or remove icon categories from the map screen, do the
following:
1. Touch the POI button.
The SHOW POI ICONS (show
point of interest icons) menu
page will be displayed.
2. Touch the button for the category you want to select or
deselect.
When the indicator light in a
button is illuminated, the category is selected.
Icons for the selected categories will be displayed on the
map screen at the point of interest locations.
When the indicator light in a
button is off, the category is
not selected and the category's
icon will not appear on the
map.
–
–
89 . . .
Page 90

AKENG41_CTSNav Page 90 Monday, June 2, 2008 5:48 AM
Navigation Features and Controls
Show POI Icons
PETROL/GAS
STATIONS
HOTELS
The following touch-sensitive
buttons are also available on this
screen:
• EDIT
ALL SHOPPING
Edit
AIRPORTS
Nearby POIs
Use this button to change a
current point of interest category displayed on the SHOW
POI ICONS (show point of
interest icons) screen.
Back
AT MS
$
ALL
RESTAURANTS
Touch the EDIT (button) button, select the category you
would like to change and then
select the new category.
• NEARBY POIs (nearby points
of interest)
Touch this button to display a
list of available points of interest near the vehicle's current
position.
See the following, later in this
section, for more information:
- Searching for Local Points of
Interest
• BACK
Touch this button to go back to
the previous screen.
. . . 90
Page 91

AKENG41_CTSNav Page 91 Monday, June 2, 2008 5:48 AM
Searching for Local Points
of Interest
On the SHOW POI ICONS (show
point of interest icons) screen,
touch NEARBY POIs (nearby
points of interest) to display a list
of available points of interest near
the vehicle's current position.
The system will display a list of
available points of interest for the
selected point of interest
categories.
The list provides the point of interest icon, the name, the direction,
and the distance to the points of
interest from your vehicle's current
position.
Use the up and down arrows to
view the list.
Nearby POIs
Sort by
ARAL
CALENBERGR ES...
STAR
ARAL
STAR
To sort the list, you may be able to
select from the following options:
•To sort the list by distance,
touch DIST.
•To sort the list by icon, touch
ICON.
Section 2
Back
NameIconDist
On Route
0.0km
0.0km
0.0km
0.0km
0.0km
•To sort the list by name, touch
NAME.
•To find the points of interest on
the planned route, touch ON
ROUTE.
Go
Go
Go
Go
Go
–
–
91 . . .
Page 92

AKENG41_CTSNav Page 92 Monday, June 2, 2008 5:48 AM
Navigation Features and Controls
Touch the GO button next to the
desired point of interest.
The system will set the point of
interest as a waypoint or final
destination.
Select a point of interest name to
receive information about the
point of interest. From this screen,
you can choose from the following
options:
• ADD
Touch this button to add the
selected point of interest to the
address book.
See the following, earlier in this
section, for more information:
- Adding, Editing or Deleting
Address Book Entries
- Destination Entry Method:
Address Book
• GO
Touch this button to make the
selected point of interest a destination or waypoint.
• MAP
Touch this button to display
the map showing the location
of the point of interest.
. . . 92
Page 93

AKENG41_CTSNav Page 93 Monday, June 2, 2008 5:48 AM
Section 2
■ GLOBAL POSITIONING
SYSTEM (GPS)
The Navigation System determines the position of your vehicle
by using satellite signals, various
vehicle signals and map data.
The Global Positioning System
shows the current position of your
vehicle using signals sent by
Global Positioning System satellites. When your vehicle is not
receiving signals from the satellites, a symbol will appear on the
map screen.
See the following, earlier in this
section, for more information:
• Maps
- Symbols
"Satellite Signal Unavailable"
Symbol
At times, interferences such as the
satellite condition, road configuration, the condition of the vehicle
and/or other circumstances can
interfere with the Navigation
System's ability to determine the
accurate position of the vehicle.
This system may not be available
or interference may occur as a
result of any of the following
conditions:
• the satellite signal is obstructed
by tall buildings, trees, a large
truck or a tunnel
• objects are located on the rear
shelf
•a satellite is unable to send signals because it is being
repaired or improved
• after-market glass tinting has
been applied to the vehicle's
rear windshield
–
–
93 . . .
Page 94

AKENG41_CTSNav Page 94 Monday, June 2, 2008 5:48 AM
Navigation Features and Controls
NOTICE
Do not apply after-market glass
tinting to the vehicle's
windows. Glass tinting will
interfere with the system's ability to receive Global Positioning
System signals and may cause
the system to malfunction.
You might have to replace the
window to correct the problem.
The repairs would not be
covered by your warranty.
If you are experiencing a problem,
see the following later in this
section for more information:
•Vehicle Positioning
• Problems with Route Guidance
• If the System Needs Service
■ VEHICLE POSITIONING
At times, the position of the vehicle on the map may be inaccurate
due to one or more of the following reasons:
• The road system has changed.
• The vehicle is traveling on slippery road surfaces such as
sand, gravel and/or snow.
• The vehicle is being driven on
winding roads.
• The vehicle is being driven on a
long straight road.
• The vehicle is approaching a
tall building or a large vehicle.
• The surface streets run parallel
to a freeway.
. . . 94
Page 95

AKENG41_CTSNav Page 95 Monday, June 2, 2008 5:48 AM
Section 2
• The vehicle has just been transferred by a vehicle carrier or a
ferry.
• The current position calibration
is set incorrectly.
• The vehicle is being driven at
high speeds.
• The vehicle is repeating a
change of directions by going
forward and backward, or the
vehicle is turning on a turn
table in a parking lot.
• The vehicle is entering and/or
exiting a parking lot, garage or
a lot with a roof.
• If the Global Positioning System signal is not received.
• The vehicle has a roof carrier
installed on it.
• The vehicle has tire chains on
it.
• The tires have been replaced.
• The tire pressure is incorrect.
• The tires are worn.
• The first time navigation mapping is used after the map data
is updated.
• The battery is disconnected for
several days.
• The vehicle is driven in heavy
traffic where driving is at low
speeds and the vehicle is
stopped and started
repeatedly.
If you experience problems with
your navigation system, you may
need to calibrate the system.
To calibrate the system, see the
following in your vehicle owner's
manual:
• Driver Information Center
- Compass
–
–
95 . . .
Page 96

AKENG41_CTSNav Page 96 Monday, June 2, 2008 5:48 AM
Navigation Features and Controls
■ PROBLEMS WITH
ROUTE GUIDANCE
Inappropriate route guidance may
occur under one or more of the
following conditions:
• The vehicle did not turn onto
the road indicated by the
system.
•With automatic rerouting,
route guidance may not be
available for the next right or
left turn.
• The route may not be changed
during automatic rerouting.
• When turning at an intersection, there is no route
guidance.
• In some cases, plural names of
places may be announced.
• It may take a long time to operate automatic rerouting during
high-speed driving.
• If you are heading for a destination without passing
through a set waypoint, automatic rerouting may display a
route returning to the set
waypoint.
• The route prohibits the entry of
a vehicle due to a regulation by
time or season or any other
regulation which may be given.
• Some routes may not be
searched.
• If there are new roads, if roads
have recently changed or if certain roads are not listed in the
map data, the route to the destination may not be shown.
See "Ordering Map DVDs" in
this section.
If you experience problems with
your navigation system, you may
need to calibrate the system.
To calibrate the system, see the
following in your vehicle owner's
manual:
• Driver Information Center
- Compass
. . . 96
Page 97

AKENG41_CTSNav Page 97 Monday, June 2, 2008 5:48 AM
Section 2
■ IF THE SYSTEM NEEDS
SERVICE
If you are still experiencing difficulty with your navigation system
and have read the information in
this guide, see your dealer for
assistance.
■ ORDERING MAP DVDS
The map data in your vehicle
contains the most up-to-date
information available when your
vehicle was produced.
The map data is updated periodically, provided that the map information has changed.
To order a new map DVD, contact
your dealer.
When ordering a new map disc,
have your Vehicle Identification
Number available.
This helps make sure you receive
the correct and most up-to-date
DVD map disc for your vehicle.
See "Vehicle Identification
Number" in your vehicle owner's
manual for more information.
If you receive an updated map
disc, you will need to copy the
information to the hard drive.
See the following, earlier in this
section, for more information:
• Maps
- Updating Map Data
–
–
97 . . .
Page 98

AKENG41_CTSNav Page 98 Monday, June 2, 2008 5:48 AM
Navigation Features and Controls
■ DATABASE COVERAGE
EXPLANATIONS
The navigation maps are stored on
the hard drive.
Coverage areas within your region
vary with respect to the level of
map detail available for any given
area.
Some areas will feature greater
levels of detail than others. If this
happens, it does not mean there is
a problem with the system.
As the map data is updated, more
detail may become available for
areas which previously had limited
detail.
See "Ordering Map DVDs" earlier
in this section.
If navigation mapping is operated
in a region that is not covered by
the stored map data, or if the vehicle is ever more then 1/10 of a kilometer from a mapped road, the
system may display a compass in
place of the map.
If an inoperable function is selected, the system may display a
message indicating that the function is not available.
. . . 98
Page 99

AKENG41_CTSNav Page 99 Monday, June 2, 2008 5:48 AM
–––
3
Na
vi-
ga-
tio
Audio System.................................................100
Audio Source Menu.......................................102
Sound Menu ..................................................105
Setting the Tone ...........................................106
Adjusting the Speakers..................................106
Digital Signal Processing (DSP)......................107
Radio Menu ...................................................108
Playing the Radio ..........................................112
Source Selection ..........................................113
Finding a Station............................................114
Station Seeking ............................................114
Local Station List .......................................... 114
Mixed-Band Presets........................................ 116
Timeshift........................................................117
Radio Data System (RDS) ...............................118
Television Tuner ............................................120
Source Selection ...........................................121
Television Audio............................................122
Selecting a Television Channel ......................122
Television Source Screen Display...................123
Television Setup Menu..................................124
Driver Warning Screen ..................................125
Region of Operation......................................126
Section 3 - Navigation Audio System
CD/DVD Player..............................................128
Loading and Removing Discs ......................... 131
Playing a Compact Disc .................................132
Playing an MP3 Audio File.............................. 135
Playing a DVD................................................142
DVD Source Menu ....................................... 144
Cursor Menu ................................................148
DVD Setup Menu ......................................... 149
Error Messages...............................................153
Hard Drive ..................................................... 154
Playing Hard Drive Content ..........................158
Audiobook .................................................... 164
Auxiliary Devices ...........................................165
Using the Radio Controls to Connect and
Control Your iPod .......................................167
Gracenote
Updating the Gracenote Database ................170
Gracenote
Microsoft
®
Database.................................... 169
®
Database License Agreement ..... 170
®
License Agreement ..................... 173
99 . . .
Page 100

AKENG41_CTSNav Page 100 Monday, June 2, 2008 5:48 AM
Navigation Audio System
■ AUDIO SYSTEM
NOTICE
Added sound equipment - such
as an audio system, a CD play-
er, a CB radio, mobile tele-
phone or two-way radio - may
interfere with the operation of
your vehicle's engine, radio or
other systems, and even
damage them. Check with your
dealer.
Also check applicable rules
covering mobile radio and tele-
phone units.
NOTICE (Continued)
If your vehicle's navigation
system is removed or additional
equipment is added, your vehicle's chimes may be disabled.
Certain accessories may not be
compatible with your vehicle.
Likewise, your vehicle's systems
can interfere with the operation
of the added sound equipment.
See your dealer before adding
any equipment.
Also, see "Accessories and
Modifications" in your vehicle
owner's manual.
In order for this feature to work,
the ignition must be in ON or ACC
or Retained Accessory Power must
be active.
See "Retained Accessory Power" in
your vehicle owner's manual for
more information.
Your audio system is equipped
with the following audio sources:
• Radio
•Television Tuner
• CD/DVD Player
• Hard Drive
• Audio Input Jack
• USB Port
. . . 100
 Loading...