

Page 1
Infotainment460M09.book Page 1 Monday, March 31, 2008 11:15 AM
1
User Manual
Cadillac BLS Infotainment
Cadillac BLS Audio System 5
Cadillac BLS Navigation System 27
Mobile phone 3 79
© Copyright General Motors Corporation 2008
All rights reserved
Printed in Sweden
Bluetooth Universal Handsfree
Phone (UHP) 3
Index 97
83
Page 2
Infotainment460M09.book Page 2 Monday, March 31, 2008 11:15 AM
2
Introduction
This User Manual describes how to use the
Cadillac BLS Infotainment System. The
system is especially designed for the cabin
space in the Cadillac BLS.
This manual covers all the standard and
optional Infotainment equipment that can be
fitted in your car. There may be some differences between markets and to meet
national legal requirements.
This manual contains important warning
texts that must always be observed:
WARNING
WARNING texts warn against the danger
of injury if the specified instructions are
not followed.
NOTICE
NOTICE texts warn of potential damage
to your car if the recommendations are
not followed.
USER TIP
USER TIP texts provide you, the reader,
with useful information about the use and
function of the system.
We recommend that you read the appropriate sections of this manual before using the
system for the first time and that you keep
this manual in the car for future reference.
For information regarding warranty conditions, refer to the Warranty and Service
Book supplied with your car.
Since the policy at Cadillac is one of continual improvement, we retain the right to
incorporate modifications and to alter specifications during production without prior
notice.
3 Asterisk means: equipment not fitted in all
cars (can depend on model variant, engine
variant, market specification, options or
accessories).
If you have any queries concerning your car,
its equipment, the warranty conditions or
the like, an authorised Cadillac dealer will
be pleased to help.
Best wishes,
Cadillac
All work on the Infotainment system must be carried out by a workshop. We recommend that you
contact an authorised Cadillac workshop.
Cadillac does not accept liability for any damage
caused by the fitting of spare parts, exchange
parts or accessories that are not approved by
Cadillac.
The specifications, design particulars and illustrations included in the manual are not binding.
Page 3
Infotainment460M09.book Page 3 Monday, March 31, 2008 11:15 AM
3
Installation/
replacement
If you wish to install any of the units at a later
date or wish to transfer a unit to another car,
contact a Cadillac dealer to prevent missing
or defective functionality.
Cleaning the units
Wipe the DIC-display (Driver Information
Center) and the Audio System display clean
with a soft, dry cleaning cloth.
NOTICE
• Spraying cleaner or other fluid directly
onto the units can damage the
mechanical parts.
• Do not touch or point at the displays
with sharp or pointed objects as this
can cause scratches.
• Do not knock or jolt the units as this
can damage them.
Changing language
Change the menu text and voice recognition
language by:
1 Turn on the ignition.
2 Press the steering wheel controls or
until
display.
3 Hold the SET button depressed until a
chime is heard.
4 Press or until
on the DIC display and then press the
SET button.
5 Press or until the required lan-
guage is shown on the DIC display and
press the SET button to select.
Settings is shown on the DIC
Language is shown
Page 4
Infotainment460M09.book Page 4 Monday, March 31, 2008 11:15 AM
4
Antennas 3
The audio system has two antennas incorporated in the rear window, one for FM and
one for AM.
NOTICE
Refrain from placing hard or sharp
objects on the parcel shelf, to avoid
damaging the antenna wires (the top five
wires in the rear window).
USER TIP
• Roof loads can negatively affect telecommunication and GPS reception.
• If sun film is fitted to the rear window,
it must be the pure plastic variety, free
of metals, to maintain good radio
reception.
• Multipath propagation - Multipath prop-
agation occurs when radio waves from an
FM transmitter are reflected by a large
building, or similar, causing them to arrive
slightly later than the direct waves. This
can create interference to radio reception.
See also "Diversity antenna".
• Diversity antenna 3 - To improve radio
reception when the topography is problematic, a second FM antenna (diversity
antenna) can be fitted in the rear window.
We recommend that you contact a Cadillac dealer.
• Shadow effect - Because FM radio
waves travel in straight lines from the
transmitter, a shadow effect can occur
when tall buildings or hills obstruct the
propagation path from the transmitter to
the car.
• Cross modulation - If the radio is tuned
to a weak transmitter in the vicinity of a
stronger one, the car’s antenna will
receive a signal from both. Such interference may cause the unwanted broadcast
to be heard faintly in the background.
• Radio waves, FM/AM - FM radio waves
radiate in straight lines from the transmitter. Because such waves do not follow the
curvature of the Earth, their strength
becomes weaker the further they travel.
That is why a large number of transmitters
is needed to provide good reception.
AM waves, on the other hand, are
reflected off the ionosphere, thus greatly
extending their range.
• Sources of FM interference - Interfer-
ence to FM reception can be caused by
the electrical systems in other vehicles,
particularly if the signal from the transmitter is weak.
• Sources of AM interference - AM recep-
tion is prone to interference, e.g. from
electrical systems in other vehicles, hightension power lines and lightning.
Page 5

Infotainment460M09.book Page 5 Monday, March 31, 2008 11:15 AM
5Cadillac BLS Audio System
Cadillac BLS Audio System
Switching the audio
system On/Off _______ 8
Radio _______________ 10
CD player ____________ 17
CD changer 3 ________ 18
MP3/WMA player______ 20
Portable player _______ 23
General functions _____ 24
Audio system ________ 26
Security lock _________ 26
Error codes __________ 26
3 Asterisk means: equipment not fitted in all cars
(can depend on model variant, engine variant,
market specification, options or accessories).
Page 6
Infotainment460M09.book Page 6 Monday, March 31, 2008 11:15 AM
6 Cadillac BLS Audio System
Cadillac BLS Audio
System 3
To get the best out of your Cadillac BLS
Audio System, we recommend that you
read through this entire section.
Cadillac BLS Audio System consists of a
main unit with radio, CD player/CD
changer 3 for CD and MP3/WMA discs.
The audio system is available with different
amplifier and speaker options, see page 26.
The audio system is operated using the
steering wheel controls or the control panel
buttons.
WARNING
Safety first!
Cut off power immediately and contact
your Cadillac dealer if the system begins
to emit smoke or smells strange.
All work on the Audio system must be carried out
by a workshop. We recommend that you contact
an authorised Cadillac workshop.
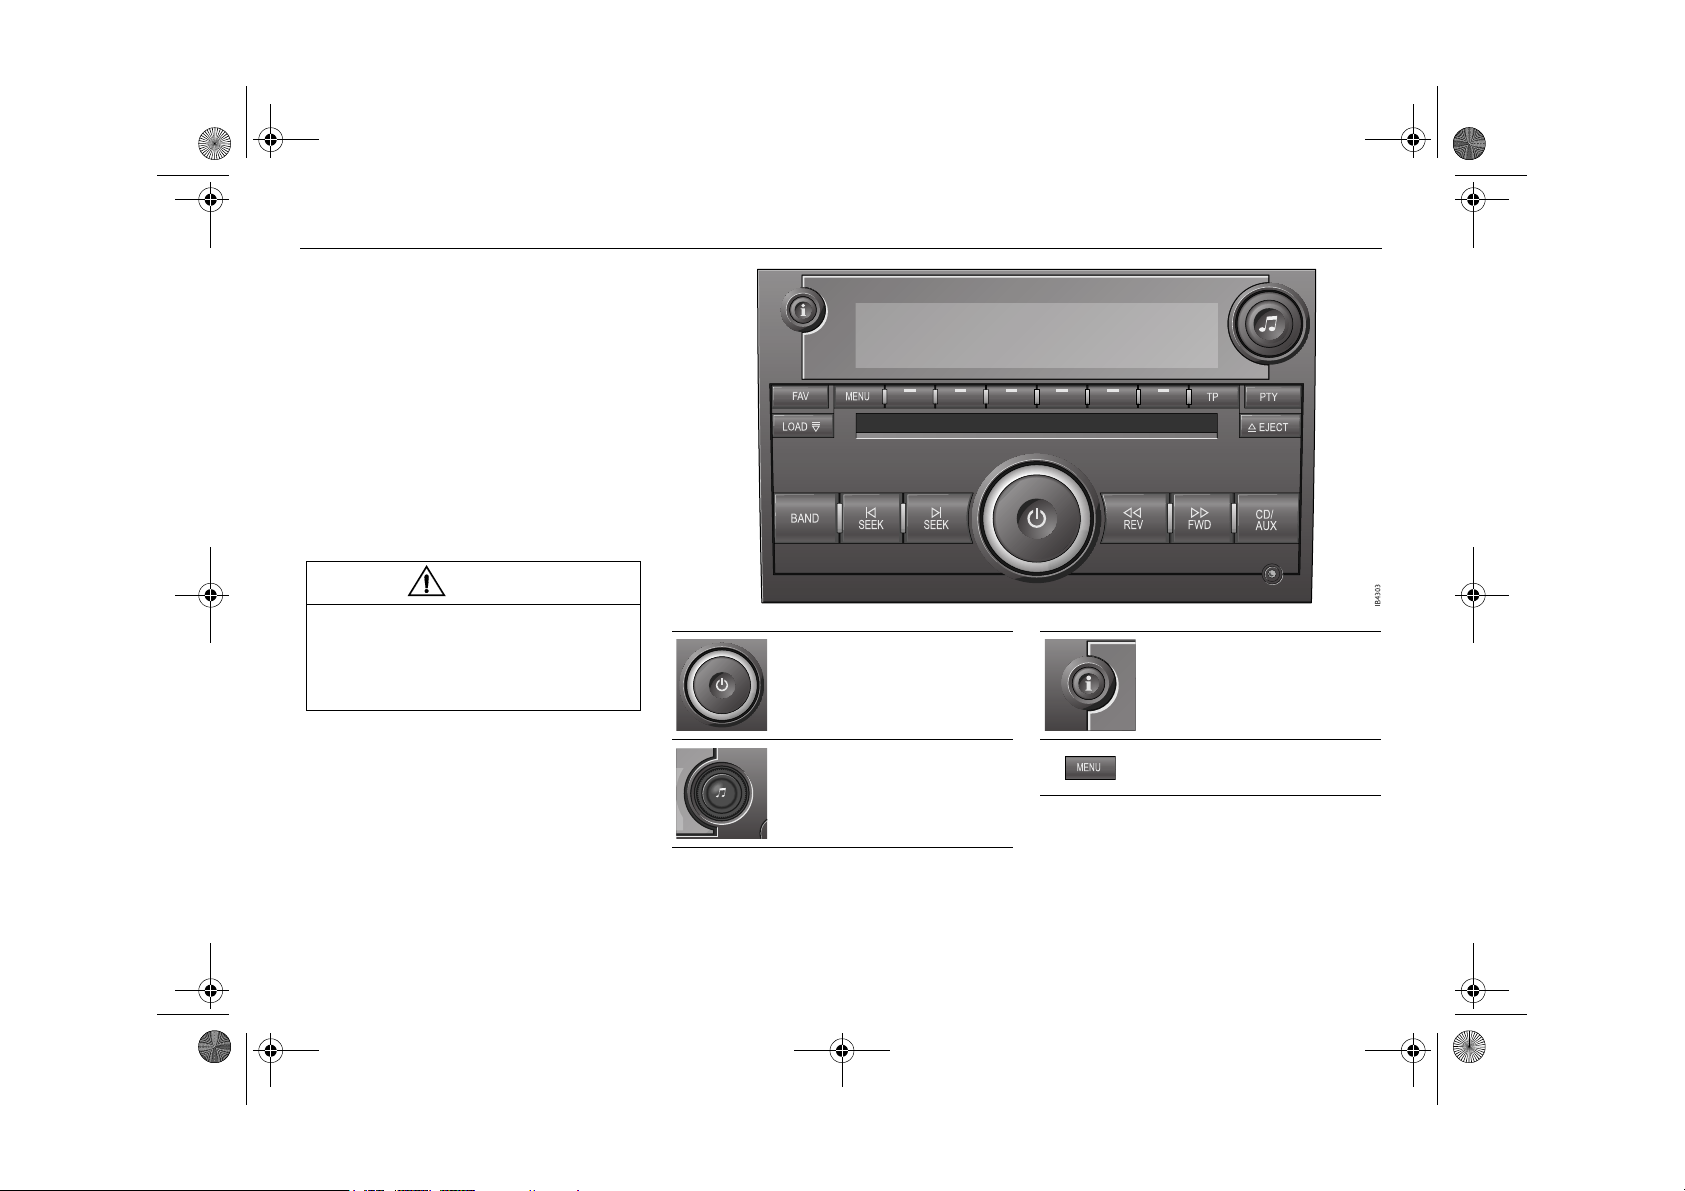
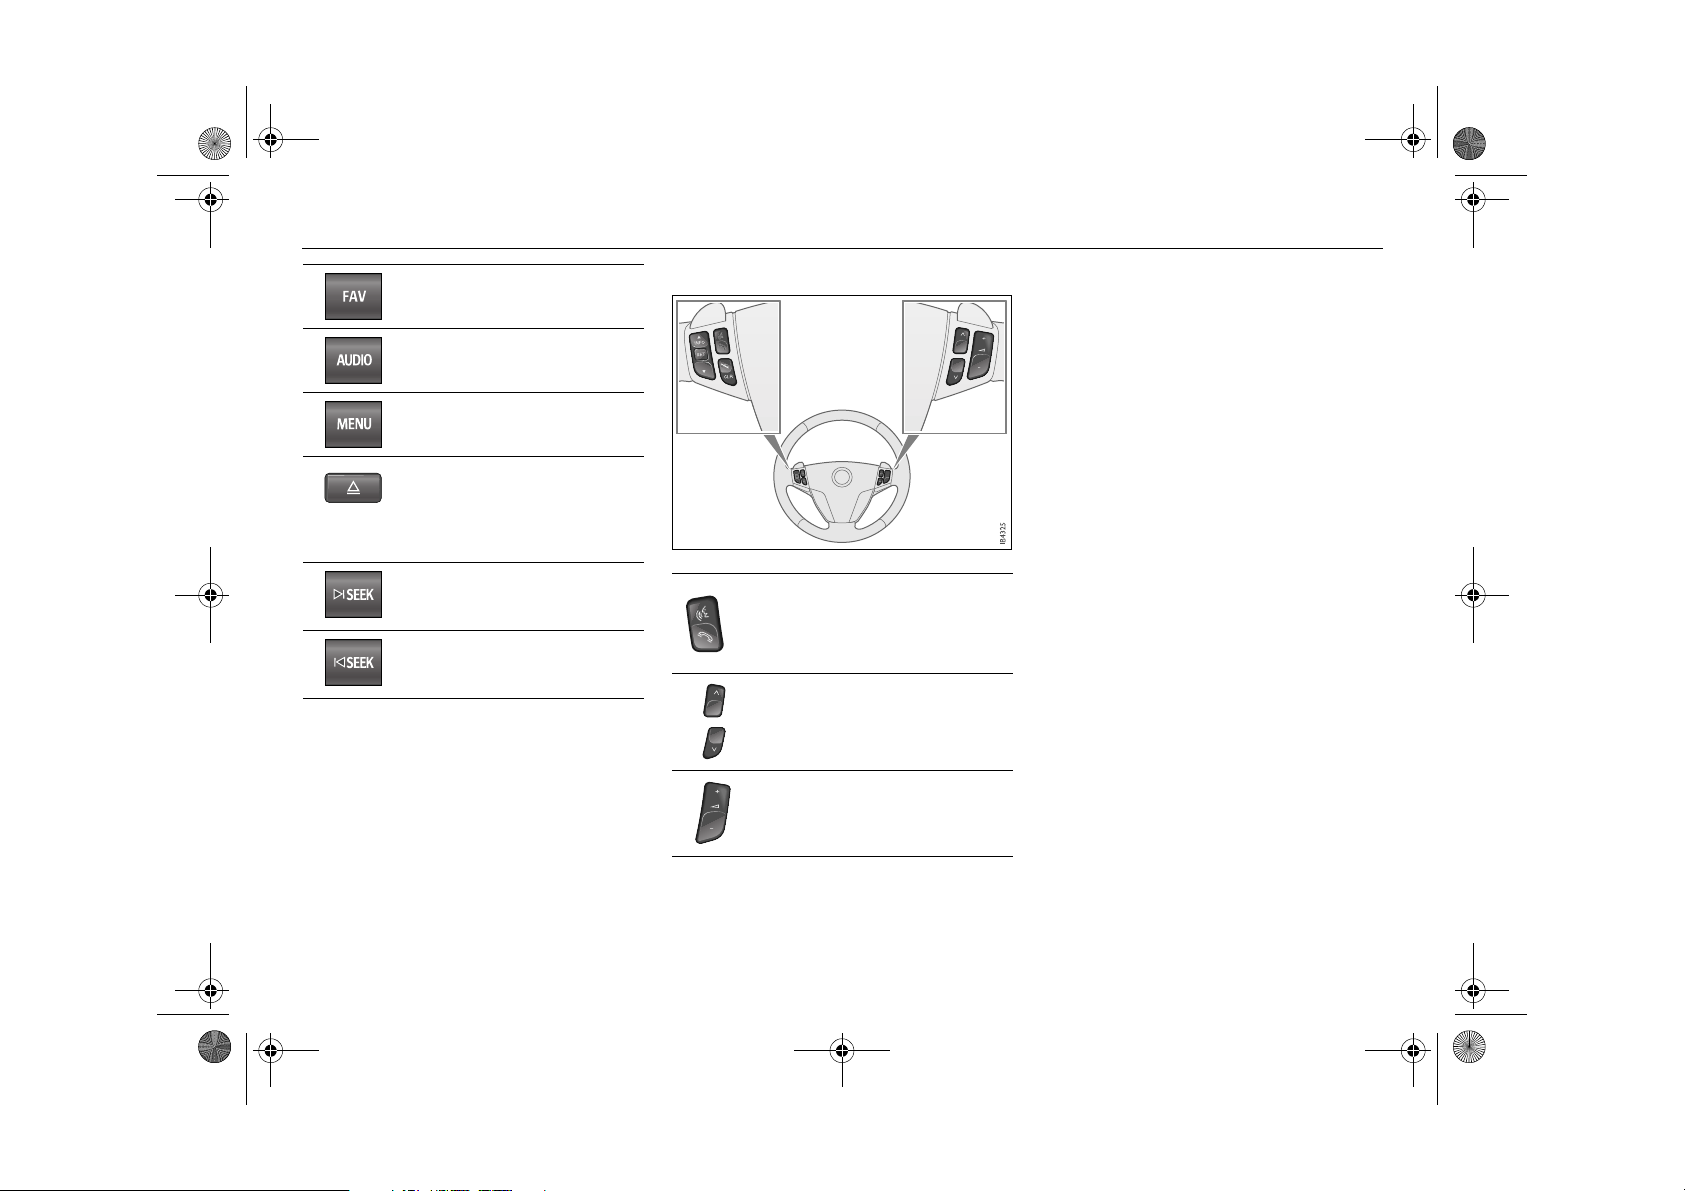
Audio system
activation/deactivation.
Volume adjust.
Tone control used to adjust the
tone and speaker setting,
change track/file on CDs or
MP3 discs and manual frequency setting.
Information about the artist,
album and song title.
Display radiotext.
Setup menu.
Page 7
Infotainment460M09.book Page 7 Monday, March 31, 2008 11:15 AM
7Cadillac BLS Audio System
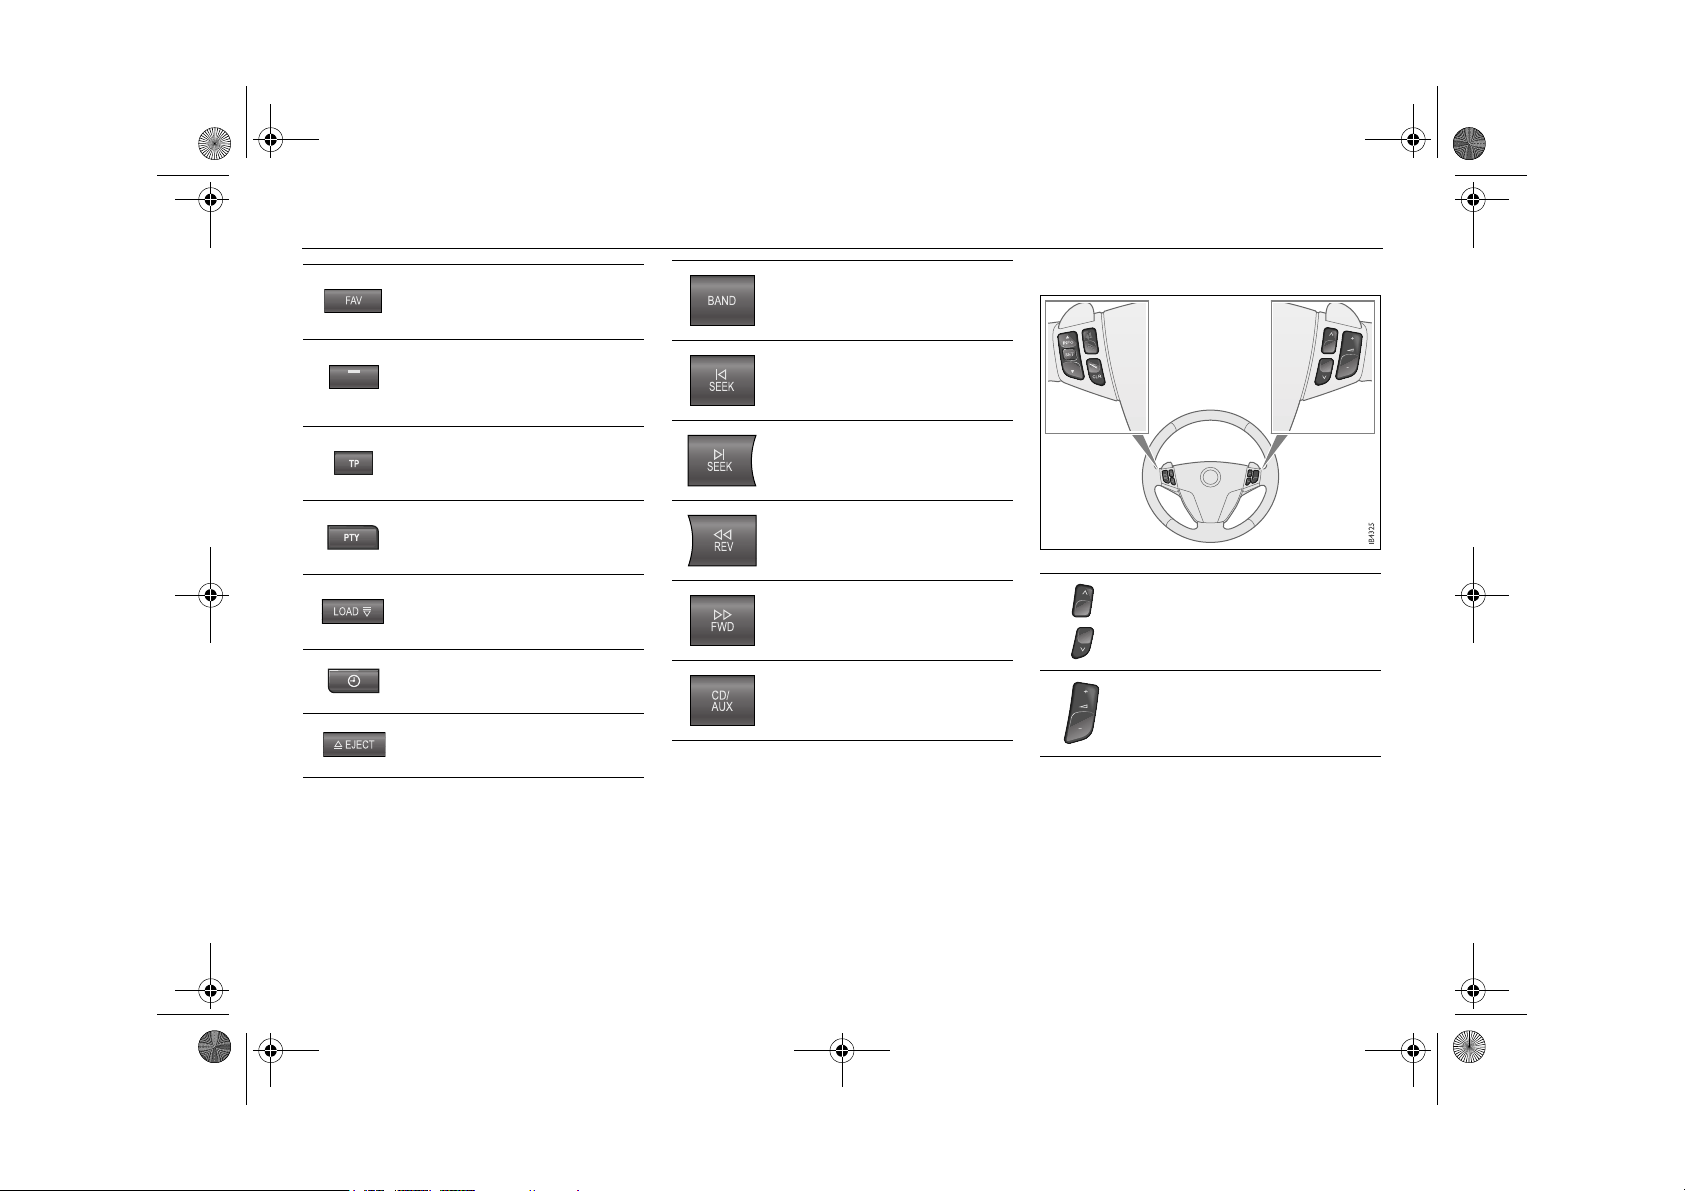
Scroll among preset pages.
Select the menu option in the
display, using the corresponding menu button directly
underneath.
Traffic announcements
On/Off.
Activate and select programme type.
Cars with CD changer 3:
Insert CD or MP3 disc or discs.
Cars without CD-changer 3:
set time and date.
Eject CD or MP3 disc.
Activate radio and change
frequency band.
Auto tuning down and change
track/file going back in order of
play on CD or MP3 disc.
Auto tuning up and change
track/file forward in order of
play on CD or MP3 disc.
Manual tuning and rapid play
back for a track/file on a CD or
MP3 disc.
Manual tuning and rapid play
forward for a track/file on a CD
or MP3 disc.
Activate CD media or portable
player.
Steering wheel controls
l
Change radio station preset,
change track on CD or MP3 disc.
Volume adjust.
Page 8
Infotainment460M09.book Page 8 Monday, March 31, 2008 11:15 AM
8 Cadillac BLS Audio System
Switching the audio
system On/Off
Switching the audio
system on
Switch on the audio system by turning the
key in the ignition switch to position 3
and/or press the ON/OFF control once.
ON/OFF control
Switching the audio
system off
The audio system is switched off:
• When the ON/OFF control is pressed.
• When the ignition key is removed.
• One hour after the ignition was switched
OFF, if the ignition key has not been
removed.
• 1 hour after the audio system has been
switched on if the key is not in the ignition
switch.
Audio settings 3
Volume
Turn the ON/OFF control until the desired
volume is obtained.
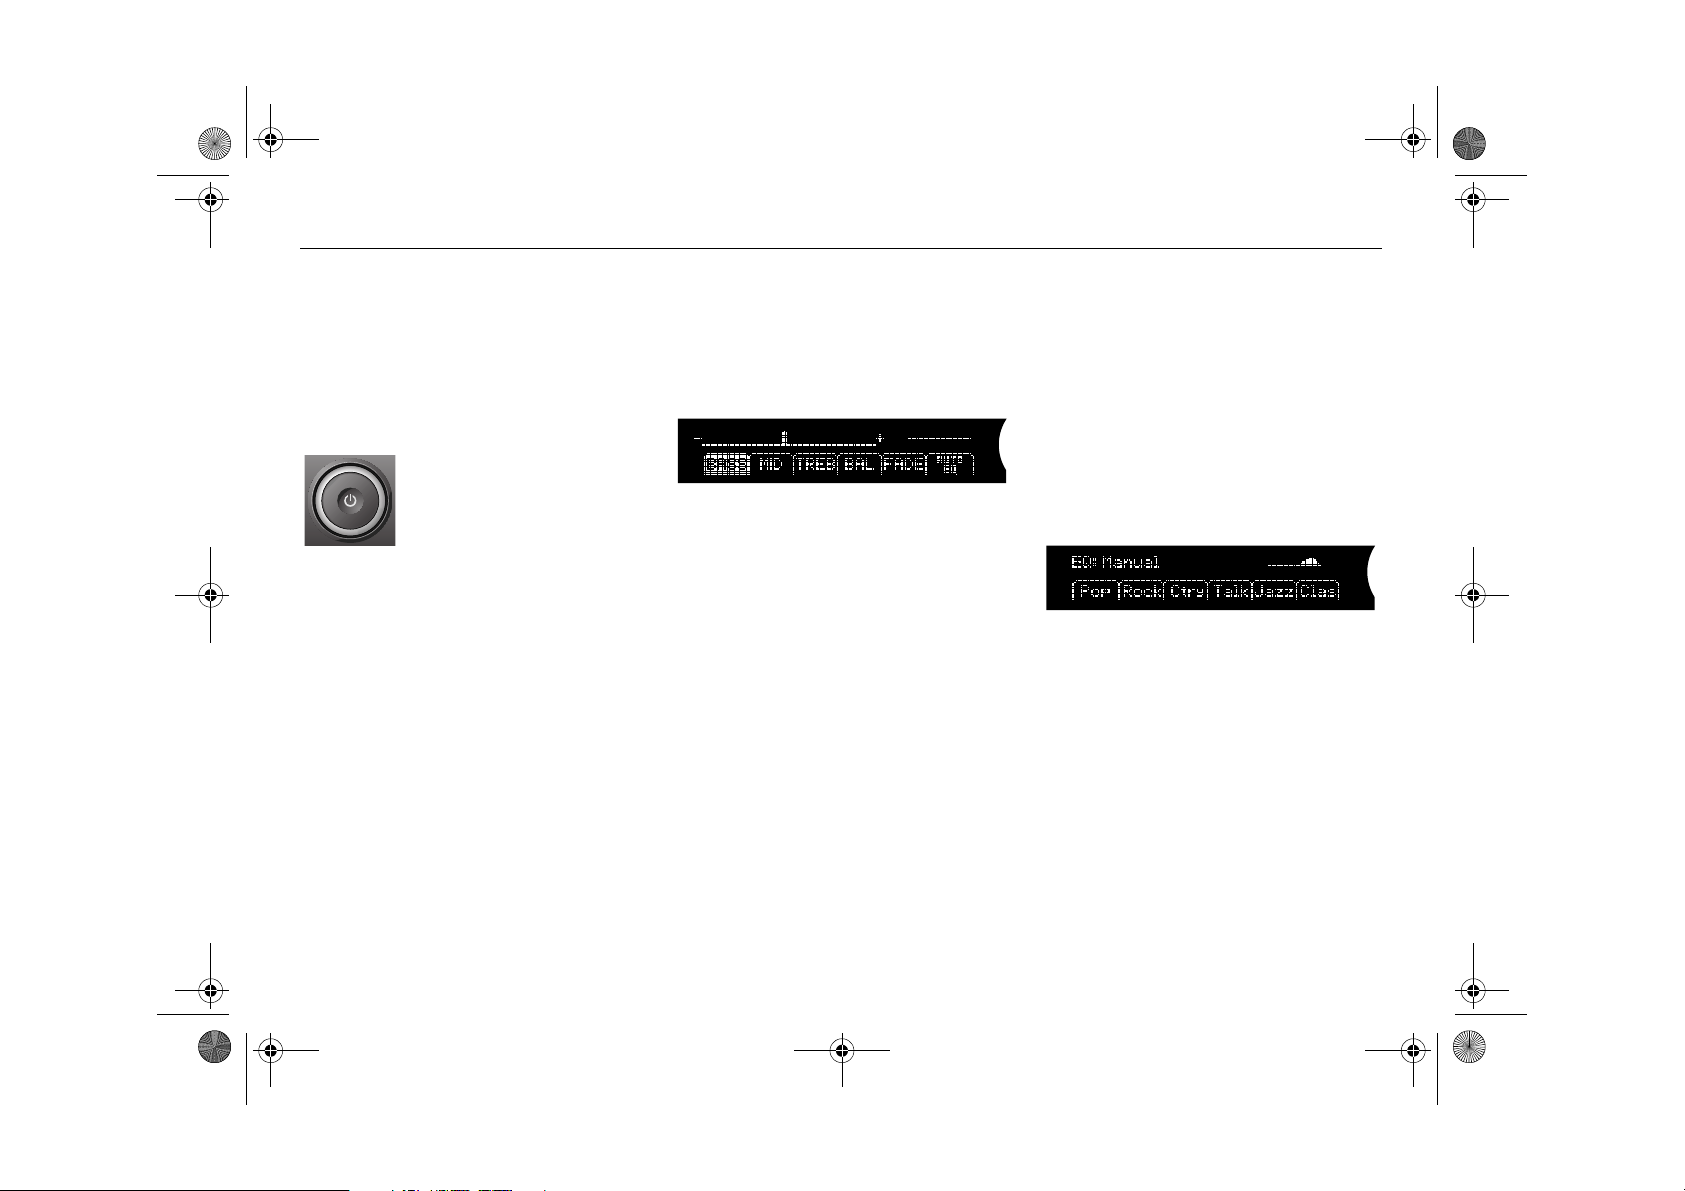
Tone controls
Tone and speaker settings
Manual tone and speaker settings
1 Press the tone control to open the menu
for tone and speaker settings.
2 Press the menu button directly under-
neath the desired tone/speaker setting.
3 Adjust the selected setting by turning the
tone control. The selected settings can
also be adjusted by pressing the SEEK,
FWD or REV buttons.
Centring tone and speaker settings
Hold the tone control depressed until a
chime sounds to centre all tone and speaker
settings.
Automatic tone setting
You can choose to automatically adapt tone
setting,
station or disc being played.
Auto EQ (Equalizer), to the tuned
1 Press the tone control to open the menu
for tone settings.
2 Press the menu button directly under-
neath the menu option
3 Press the menu button directly under-
neath the desired tone setting.
4 The tone settings menu automatically
returns to the previous menu within
5 seconds.
Auto EQ menu
Auto EQ.
Page 9
Infotainment460M09.book Page 9 Monday, March 31, 2008 11:15 AM
9Cadillac BLS Audio System
Audio settings
Bose® Centerpoint®
Surround Sound System 3
Volume
Turn the ON/OFF control until the desired
volume is obtained.
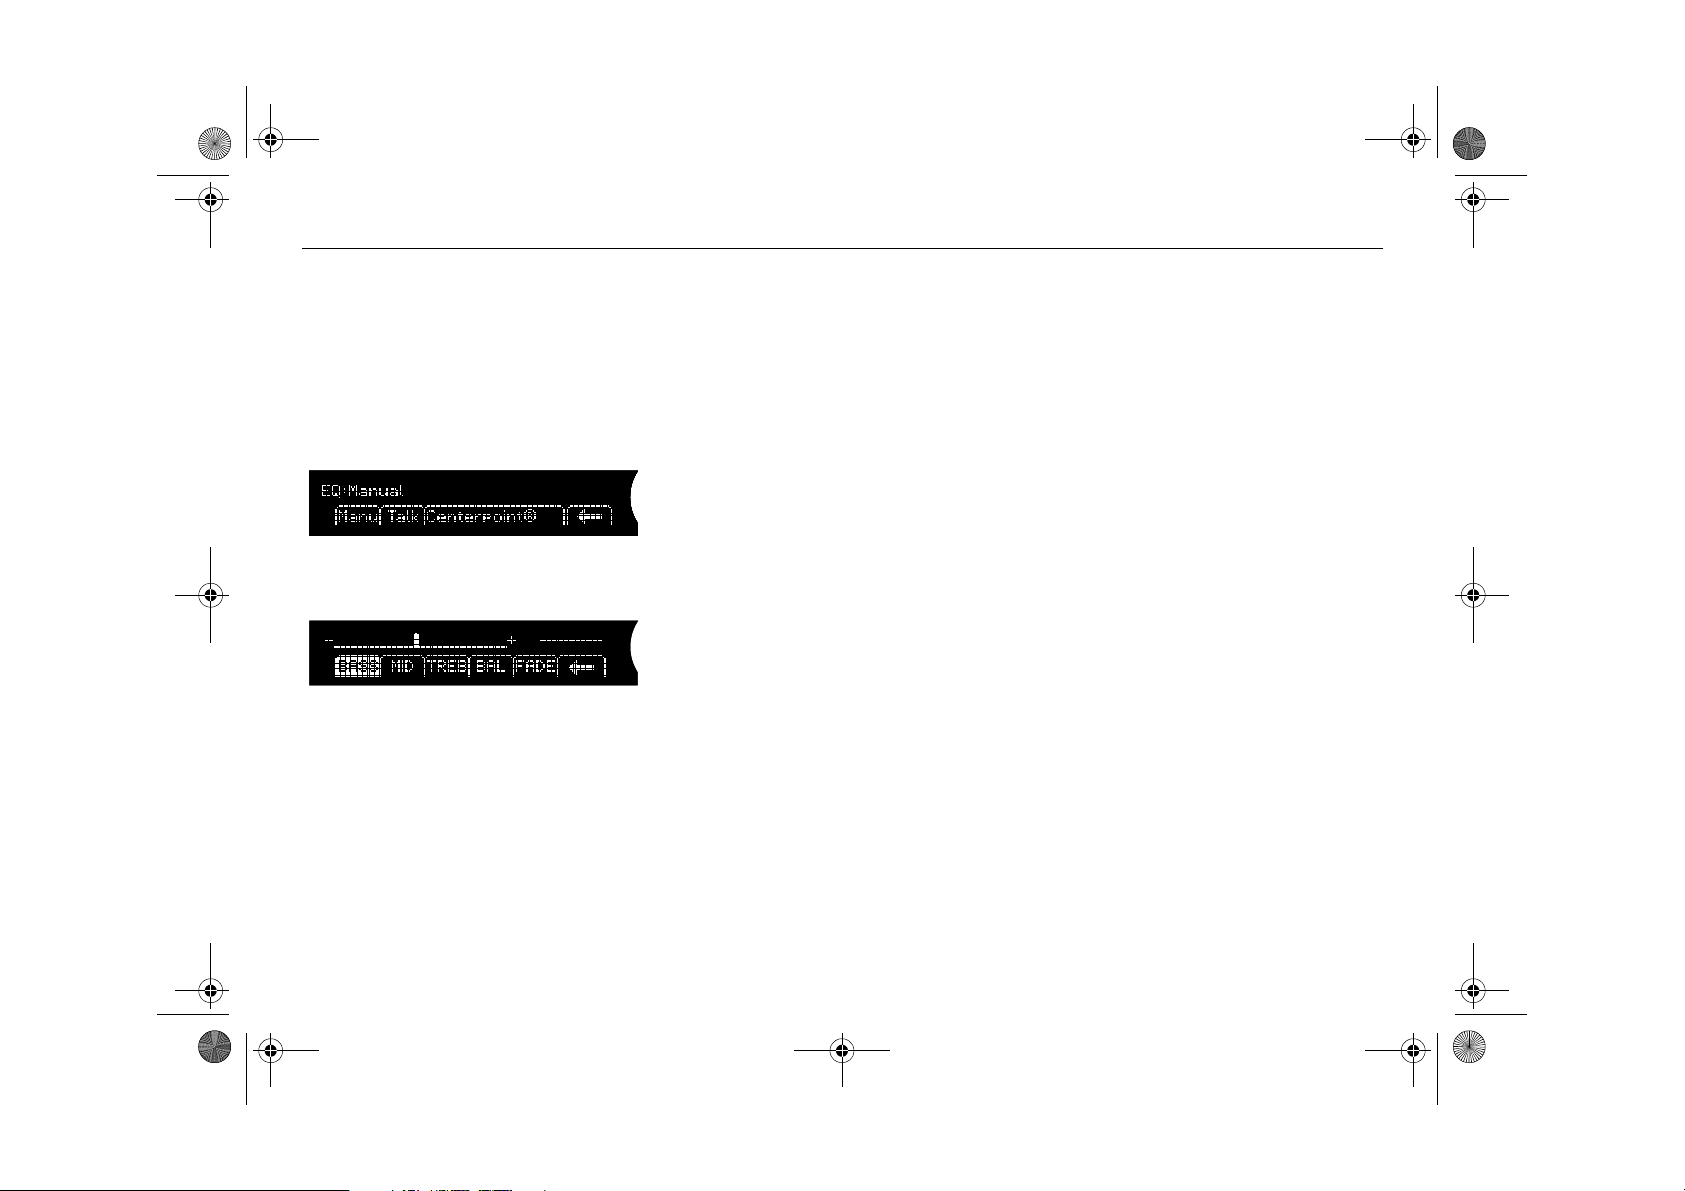
Tone controls
Tone and speaker settings
Manual tone and speaker settings
Tone and speaker settings
1 Press the tone control and then
to open the menu for tone and speaker
settings.
2 Press the menu button directly under-
neath the desired tone/speaker setting.
3 Adjust the selected setting by turning the
tone control. The selected settings can
also be adjusted by pressing the SEEK,
FWD or REV buttons.
Manual
Centring tone and speaker settings
Hold the tone control depressed until a
chime sounds to centre all tone and speaker
settings.
Automatic tone setting
You can select to automatically adapt your
tone settings for the programme you are listening to or the disc you are playing.
1 Press the tone control to open the menu
for tone settings.
2 Press the menu button directly under-
neath the menu option
3 The tone settings menu automatically
returns to the previous menu within
5 seconds.
Talk.
Centerpoint® signal processing circuitry
With the Bose® Centerpoint® Surround
Sound System, Centerpoint® signal
processing circuitry creates a surround
sound listening experience from stereo
CDs, MP3 CDs, satellite radio and auxiliary
audio sources. AM/FM is not supported by
the surround function.
Other tone and speaker settings can be
adjusted even when the surround function is
active, although not the Fader setting. The
surround function settings are saved for
each individual audio source (CD, MP3 and
AUX).
1 Press the tone control to open the menu
for tone settings.
2 Press the menu button directly under-
neath the menu option
activate the surround function for the
selected audio source.
Centerpoint
®
to
Page 10
Infotainment460M09.book Page 10 Monday, March 31, 2008 11:15 AM
10 Cadillac BLS Audio System
Radio
Press the BAND button to return to radio
mode if another audio source is in use.
Selecting a radio station
Selecting a frequency band
Press the BAND button to change frequency band. The selected frequency band
appears on the display.
Selecting a preset station
Scroll to the desired preset page by pressing the FAV button and then pressing the
menu button (1-6) directly underneath the
previously preset station.
You can also press the steering wheel controls, or , to select another preset station.
Tuning
Fine tuning
Turn the tone control one increment or
press the REV or FWD button to fine-tune
the frequency in increments of 0.05 MHz.
Automatic tuning
Press one of the SEEK buttons to perform
automatic tuning. The radio searches for the
closest, strong station upwards or downwards in the frequency band and stops at
this frequency.
Manual tuning
Turn the tone control or hold the REV or
FWD button depressed to seek a frequency
manually. Release the control or button to
stop at the desired frequency.
Scanning radio stations
Hold one of the SEEK buttons depressed
until a chime is heard to sample 5 seconds
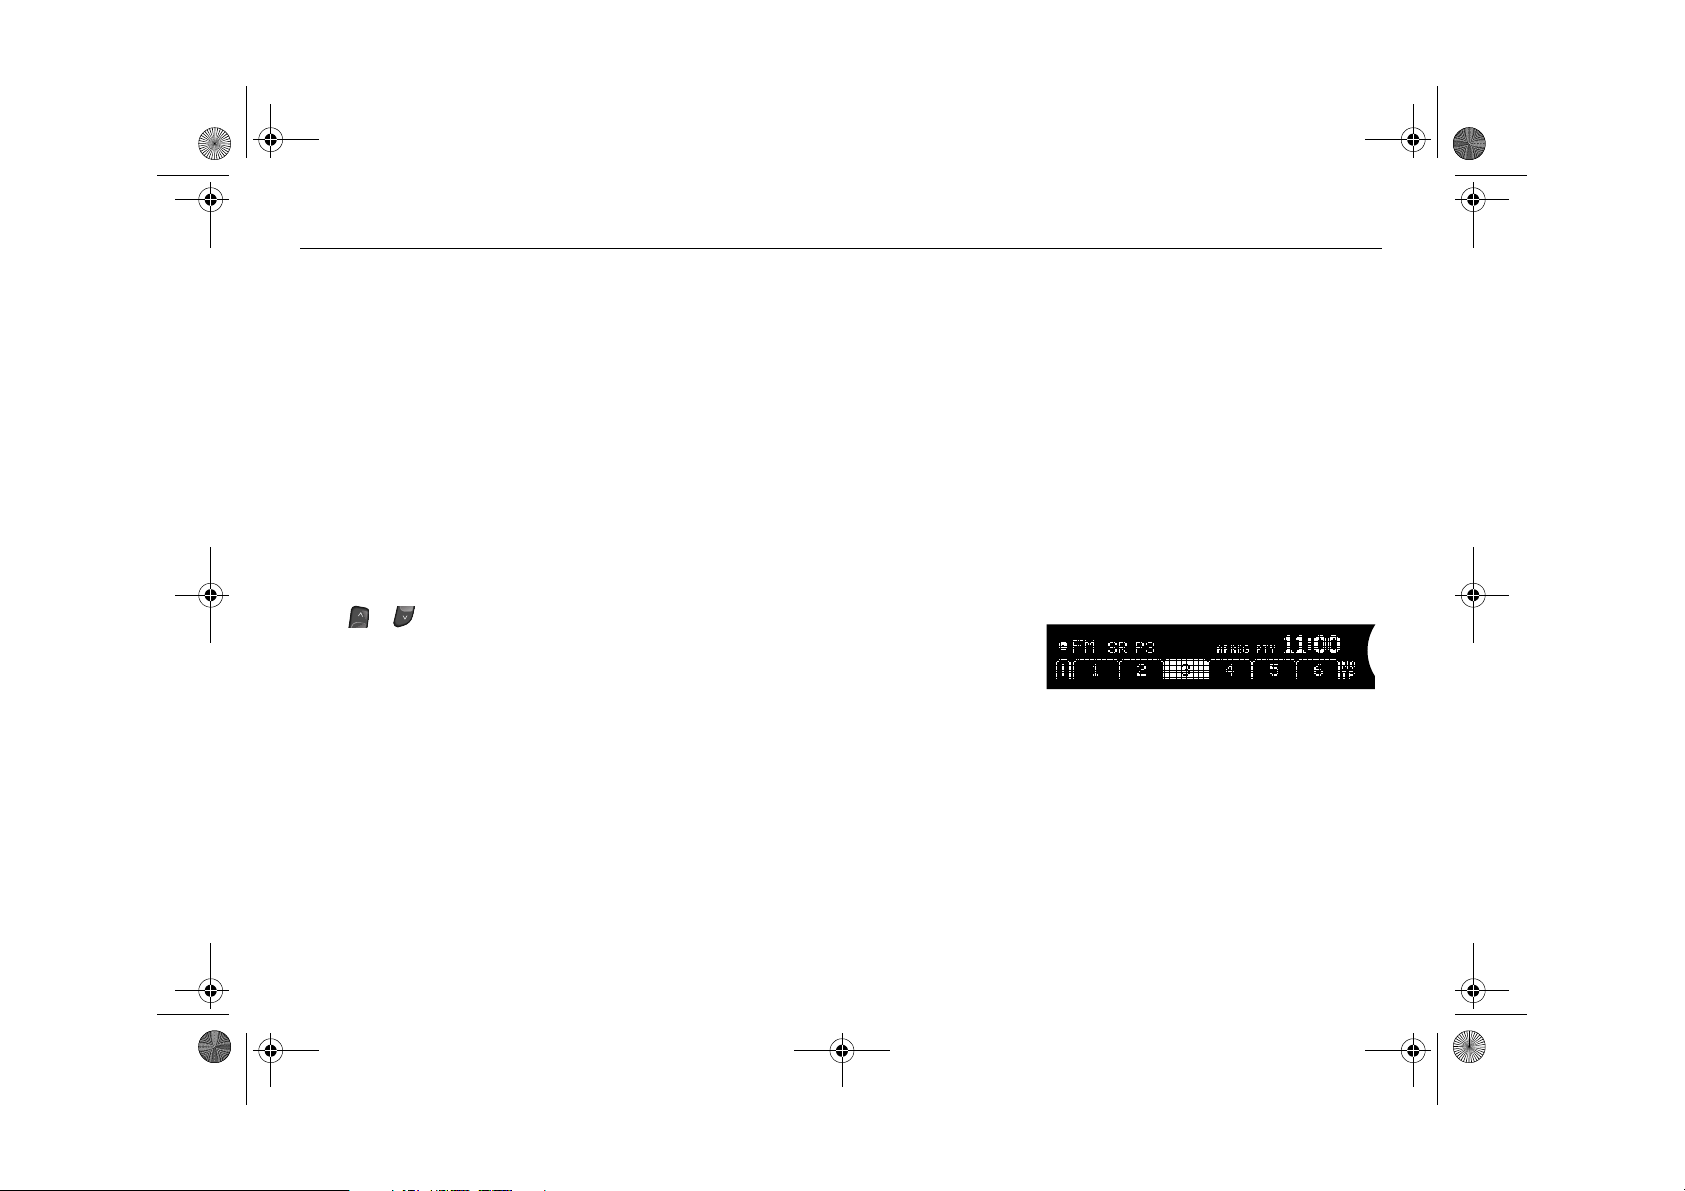
of each station available on the current frequency band. The display shows
Scanning...
Press one of the SEEK buttons again to stop
scanning and select the radio station currently playing.
Storing presets
You can store up to 36 radio stations as presets by using the 6 menu buttons below the
display and the FAV button. Press the FAV
button to scroll through up to 6 pages with 6
presets per page. Each page can contain a
combination of FM and AM stations.
Storing the current station as a preset
To store the current station as a preset:
1 Press the FAV button until you come to
the preset page (1-6) at which the station is to be stored.
2 Hold the menu button underneath the
spot (1-36) at which the station is to be
stored. A chime will sound once the station is stored.
Preset stations
Page 11
Infotainment460M09.book Page 11 Monday, March 31, 2008 11:15 AM
11Cadillac BLS Audio System
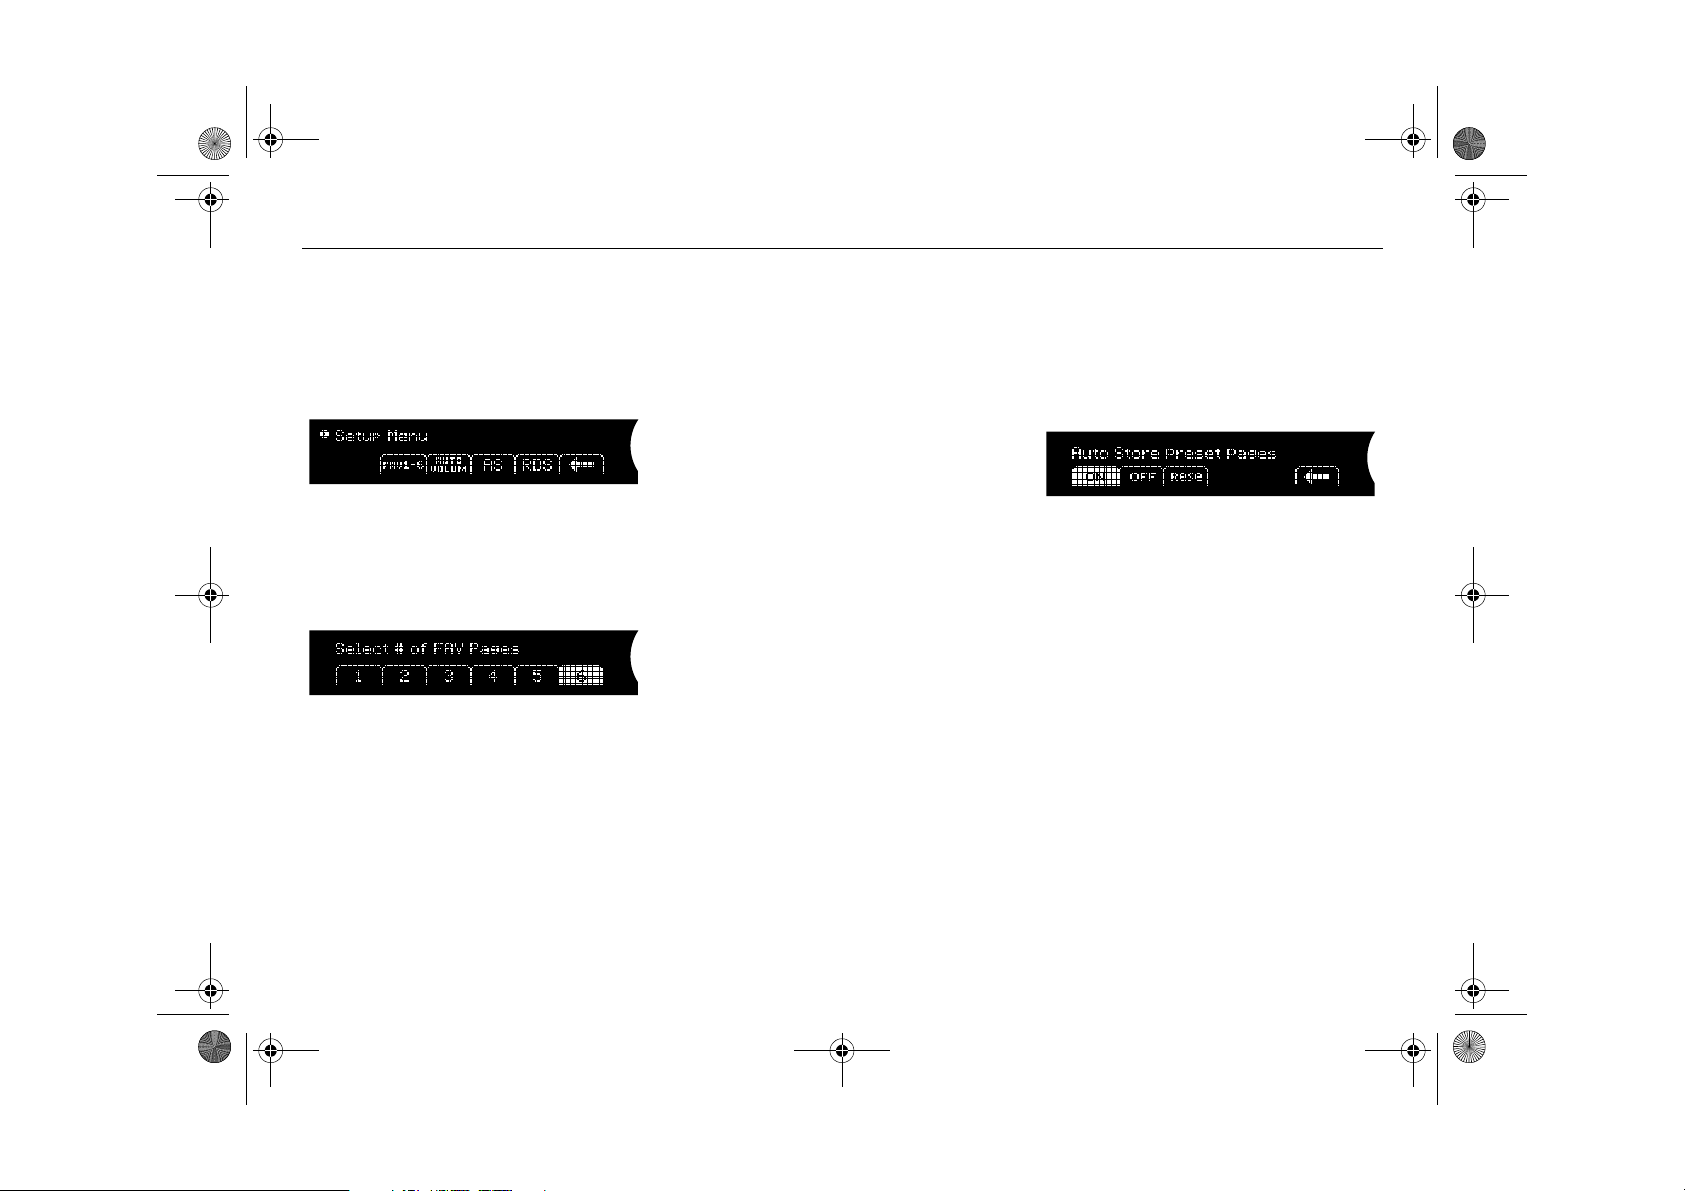
Number of pages with preset stations
To display the number of pages (1-6) with
preset stations:
1 Hold the FAV button depressed or press
the MENU button and then press the
menu button directly underneath menu
option
FAV 1-6.
Setup menu
2 Select the number of preset pages to be
displayed by pressing the menu button
directly underneath the menu option
with the desired number of preset pages
(1-6).
Number of preset pages
Storing stations automatically
AS (AutoStore) is a frequency band that can
be used to automatically store stations
when you are in an area where you are unfamiliar with the stations and their frequencies.
The function is used for the FM and AM
bands based on which frequency band is
selected. To initiate automatic storing of the
strongest stations:
1 Press the MENU button.
2 Press the menu button directly under-
neath the menu option
AUTO STORE.
3 Press the menu button directly under-
neath menu option
Rese to initiate auto-
matic storing of the 12 strongest stations
on the
AUTO STORE pages. The display
shows
Seeking...
4 Once storing is complete, the two FM or
AM pages are added after the pages of
previously stored station presets.
Hide/display AS pages
Press the menu button directly underneath
menu option On or Off in the AUTO STORE
menu if you wish to show/hide the
pages. When you exit this mode, the
STORE
AUTO
radio resumes playing the same station and
frequency band that was in use before
AUTO STORE was activated.
AutoStore
Page 12
Infotainment460M09.book Page 12 Monday, March 31, 2008 11:15 AM
12 Cadillac BLS Audio System
RDS (Radio Data System)
The Radio Data System (RDS) transmits
information in parallel with radio programmes broadcast over the FM network in
Europe. The signal from such FM stations
enables the automatic selection of the
transmitter providing the strongest signal,
thereby achieving the best possible reception.
Automatic traffic information and programme type monitoring are examples of
functions enabled by RDS.
Good reception is necessary for the RDS to
work well.
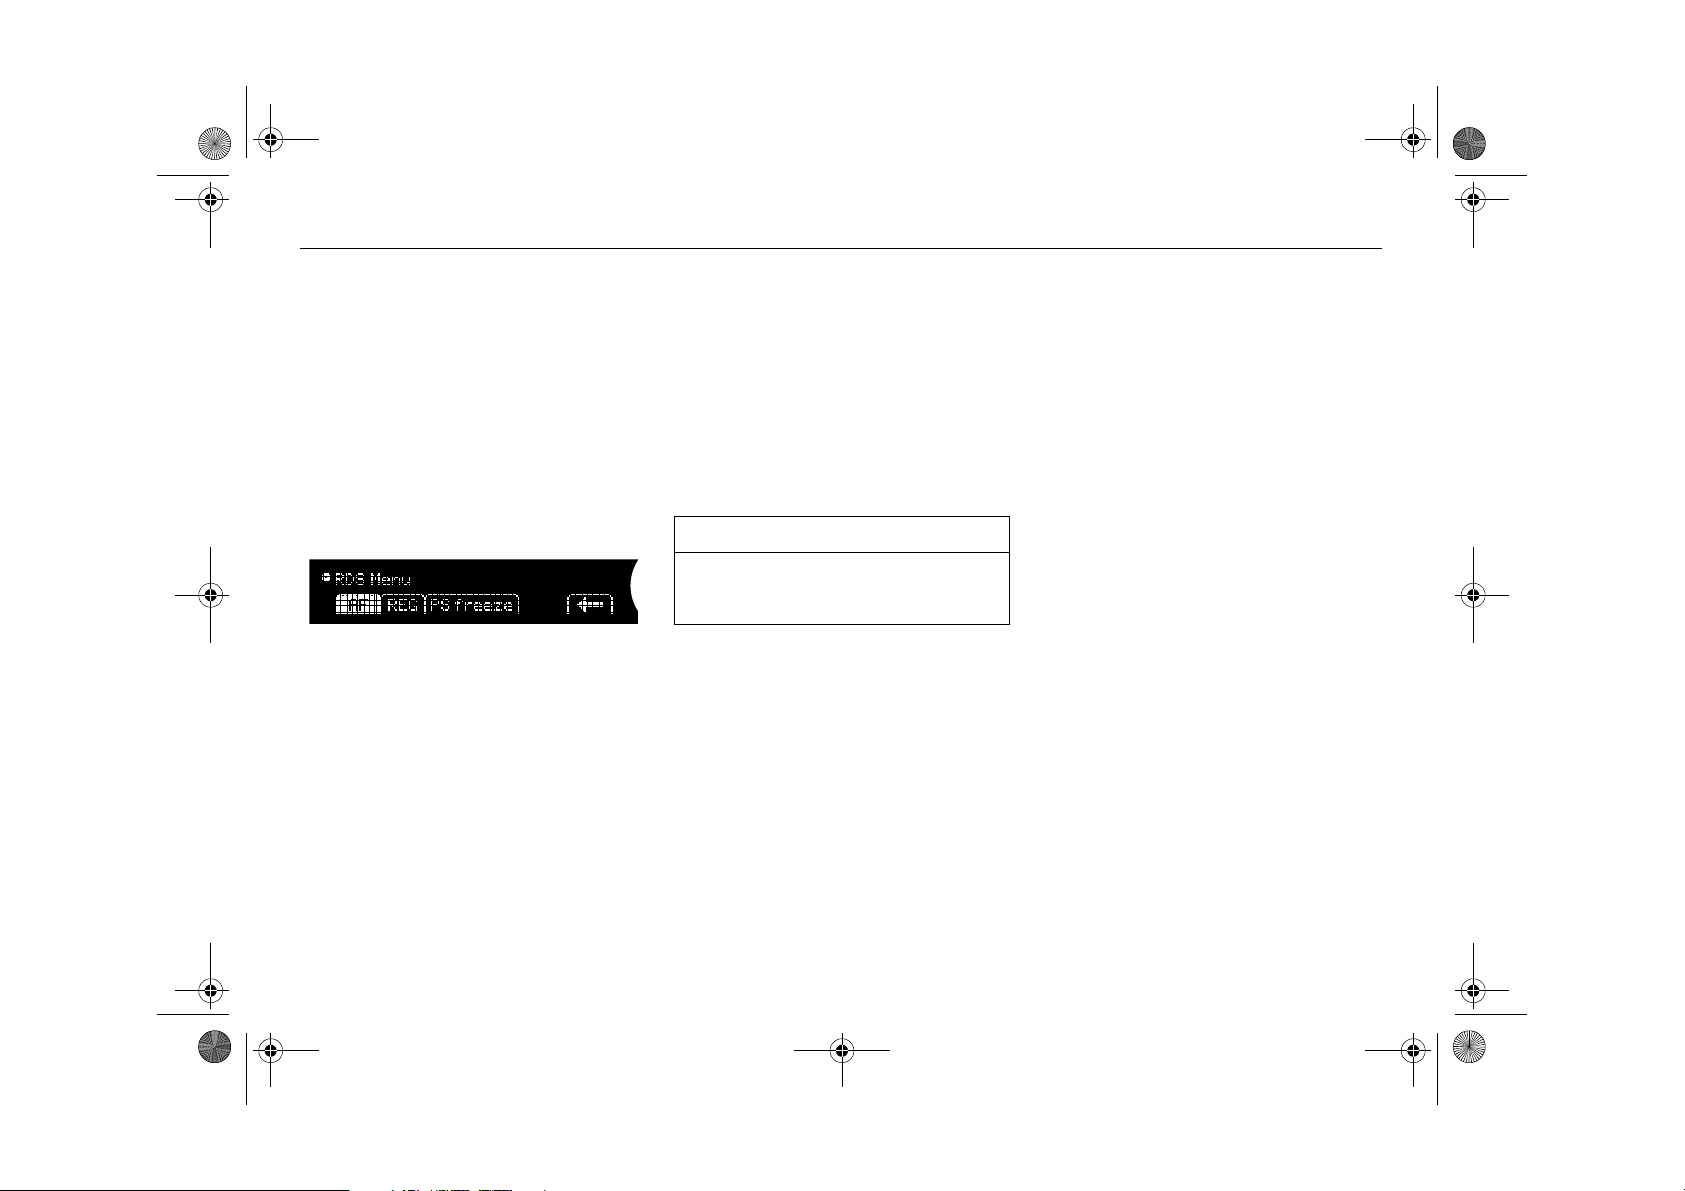
RDS menu
Alternative Frequency (AF)
The Alternative Frequency (AF) function
means that the radio will automatically seek
the strongest station to maintain good
reception.
• To activate AF, mark
menu button directly underneath.
• To deactivate AF, deselect
ing the menu button directly underneath.
When the function is active,
the display.
USER TIP
We recommend that AF is always activated in order to maintain as good reception as possible.
AF by pressing the
AF by press-
AF appears in
Regional frequencies (REG)
To prevent the radio switching between various regional radio stations REG, which is
normally inactive, can be turned on. This
limits the available frequencies to those
within the same regional broadcast as the
current station.
• To activate REG, mark
the menu button directly underneath.
• To deactivate REG, deselect
pressing the menu button directly underneath.
When the function is active,
the display.
REG by pressing
REG by
REG appears in
Weak signal
If signal strength is weak (when the radio
does not have access to alternative frequencies), the display might show:
(Seeking PI)
This message indicates that the radio is
searching for the best possible transmitter
of the current station. (PI = Programme
Identification)
.
PI Seek
Page 13
Infotainment460M09.book Page 13 Monday, March 31, 2008 11:15 AM
13Cadillac BLS Audio System
Rolling advertisements
Some radio stations present rolling advertisements in the display.
• To block rolling advertisements, mark
PS-Freeze by pressing the menu button
directly underneath.
• To allow rolling advertisements, deselect
PS-Freeze by pressing the menu button
directly underneath.
Press the menu button directly underneath
the arrow symbol in the menu or wait until
the system automatically returns to the previous menu.
Radio text
Press the i button to show text messages
sent by certain radio stations in the display.
If there are no text messages,
appears in the display.
No Info
Seeking and monitoring
programme type (PTY)
The PTY function (Programme Type)
requires that the programmes on the FM
wavelength are coded with programme type
(e.g. news). When the function is active, the
radio will monitor the airwaves in the background to search for the selected programme type, even if you are listening to
another audio source (e.g. CD).
Activating/changing programme type
1 Press the PTY button to open the PTY
menu.
2 Repeatedly press the PTY button to
scroll the list of programme types.
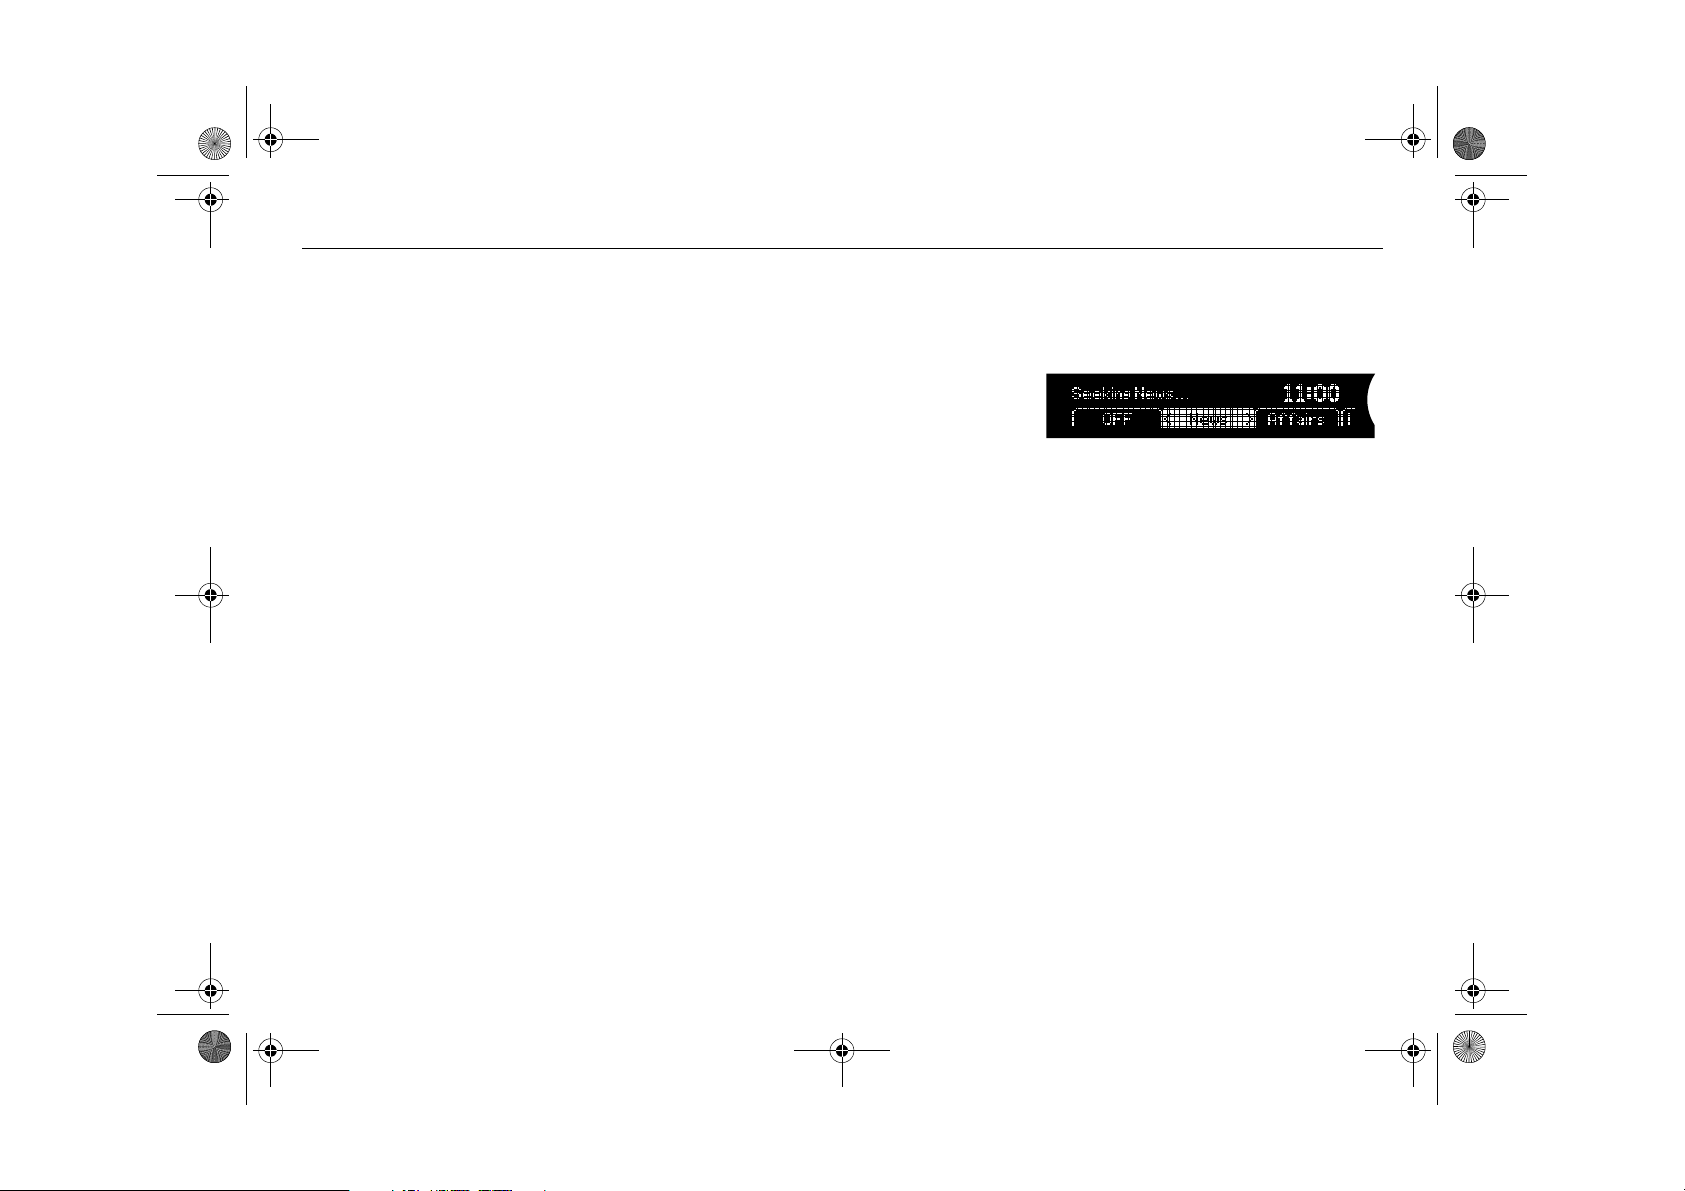
3 Press the menu button directly under-
neath the desired programme type. The
display shows the PTY selection and the
radio seeks that programme type.
Regardless of the search results, the radio
will continue monitoring the airwaves for the
selected programme type.
Deactivating PTY monitoring
To deactivate monitoring for programme
type, press the PTY button and mark
pressing the menu button directly underneath.
PTY list
Broadcast of programme type (PTY
interrupt)
If you have selected monitoring for the programme type Sport and a sports programme starts, the current audio source will
be interrupted by this sports broadcast.
The display shows
broadcasting the sports programme.
Volume is increased to a preset level (see
"Volume for traffic/alarm announcements
and selected programme type broadcasts"
on page 25). After the sports programme,
the audio system automatically resumes
playing the previous audio source at the
previous volume.
PTY and the station
Off by
Page 14

Infotainment460M09.book Page 14 Monday, March 31, 2008 11:15 AM
14 Cadillac BLS Audio System
Cancelling a programme type broadcast
To cancel a programme type broadcast,
press the PTY button or the arrow buttons
or . The audio system resumes playing the previous audio source at the previous volume.
Press BAND or CD AUX for direct selection
of audio source.
Listening to the selected programme
type only
If you do not wish to listen to the audio
system but still wish to hear a certain programme type:
1 Switch on the audio system.
2 Activate the PTY function.
3 Turn the volume right down.
Current programme types
News News
Current Affairs Current affairs
Information Information
Sport Sport
Education Education
Drama Drama
Culture Culture
Science Science
Varied Speech Entertainment
Pop Music Pop music
Rock Music Rock music
Easy Listening Easy listening
Light Classics Light classical
Serious Classics Classical music
Other Music Other music
Weather & Metr. Weather
Finance Finance
Children's Progs Children’s progs
Social Affairs Social affairs
Religion Religion
Phone In Phone-in
Travel & Touring Travel & Touring
Leisure & Hobby Leisure & Hobby
Jazz Music Jazz music
Country Music Country music
National Music National music
Oldies Music Golden oldies
Folk Music Folk music
Documentary Documentary
Page 15

Infotainment460M09.book Page 15 Monday, March 31, 2008 11:15 AM
15Cadillac BLS Audio System
Programme type ALARM!
The ALM programme type is always activated. It is used by public authorities and
emergency services to broadcast information regarding major incidents and disasters. PTY ALM broadcasts are given highest
priority and these will therefore interrupt
other radio broadcasts or CD playback.
The display shows
ALM and the station
transmitting the alarm announcement.
Volume is increased to a preset level (see
"Volume for traffic/alarm announcements
and selected programme type broadcasts"
on page 25). After the alarm announcement, the audio system automatically
resumes playing the previous audio source
at the previous volume.
If the telephone is in use, the telephone will
be muted and the ALM announcement will
be played through the phone. If a mobile
phone is in use, the phone will be muted, but
the call will not be disconnected. To resume
the call, cancel the alarm announcement by
pressing the TP button.
Cancelling an alarm announcement
To cancel an alarm announcement, press
the TP button or the arrow buttons or .
The audio system resumes playing the previous audio source at the previous volume.
Traffic programme (TP/TA)
If TP (Traffic Programme) is activated, the
radio automatically monitors the airwaves
and plays traffic announcements (TA), even
from radio stations other than the current
station. Any traffic announcements are
given priority and will interrupt radio or CD
playback.
Switching TP on and off
The TP button is used to activate or deactivate the TP function. When TP is activated,
TP appears at the bottom right of the dis-
play.
The radio station you are listening to when
you press TP may not be able to transmit
traffic announcements, in which case the
following will appear on the display:
No TP
Push TP to Seek TP Station
This message is displayed for 5 seconds.
If you should wish to hear traffic announcements, press TP while the message shown
above is displayed. The radio will then
search for a station that transmits traffic
announcements. The following will be
shown on the display while this search is in
progress:
If you do not press the TP button, the radio
will stay tuned to the original station.
Seeking TP Station...
Broadcast of traffic
announcements (TA)
When a traffic announcement is transmitted, the current audio source is interrupted
and the display briefly shows
TA and the sta-
tion transmitting the traffic announcement.
The volume is turned up to a preset level if
set (see "Volume for traffic/alarm
announcements and selected programme
type broadcasts" on page 25).
At the end of the traffic announcement, the
audio system will resume playing the previous audio source at the previous volume.
Page 16

Infotainment460M09.book Page 16 Monday, March 31, 2008 11:15 AM
16 Cadillac BLS Audio System
Cancelling a traffic announcement
To cancel a programme type broadcast,
press the TP button or the arrow buttons
or . The audio system resumes playing
the previous audio source at the previous
volume.
Press BAND or CD AUX for direct selection
of audio source.
To hear traffic announcements only
To hear traffic announcements only and
mute the audio system:
1 Switch on the audio system.
2 Activate TP.
3 Turn the volume right down.
Interrupt priorities
The priority given to functions that can interrupt the current radio broadcast or CD playback is as follows:
1 Programme type ALM (highest priority).
2 Traffic announcement.
3 Other programme types.
For instance, a PTY broadcast (e.g. News)
will interrupt the current radio broadcast or
CD playback, a traffic announcement will
interrupt a PTY broadcast, and so on. At the
end of the current broadcast, the system will
return to the preceding function.
Page 17
Infotainment460M09.book Page 17 Monday, March 31, 2008 11:15 AM
17Cadillac BLS Audio System
CD player
NOTICE
Do not use CDs with labels or stickers.
These labels could detach and cause the
audio system to malfunction.
Activate the CD player by inserting a disc in
the slot or by pressing the CD AUX button if
a CD is already loaded.
CD player menu
Loading CDs
Insert the disc in the slot with the text side
up until the mechanism loads the disc. The
first track is played. If the disc is wrong-sideup, it will be ejected automatically.
Once all the tracks have been played, the
CD player will restart from the beginning
again.
The CD player is turned off by pressing
ON/OFF to turn off the audio system or by
selecting another audio source.
Removing CDs
Press the EJECT button to eject the CD. If
you press EJECT without removing the
ejected disc, the player will reload the disc
after 10 seconds for reasons of safety.
Selecting and changing tracks
Turn the tone control or press the SEEK buttons to select or change to the preceding or
next track. The track number appears in the
display.
If the current track has played for at least
10 seconds, you can start the track from the
beginning by pressing SEEK (arrow left).
If you press SEEK (arrow right) while the
last track of the disc is playing, the first track
will play.
If you press SEEK (arrow left) while the first
track of the disc is playing, the last track will
play.
The same function applies for the steering
wheel controls, or .
Rapid playing of tracks
To rapid play the current track, hold REV or
FWD depressed. Release the button to stop
rapid play and return to normal playback.
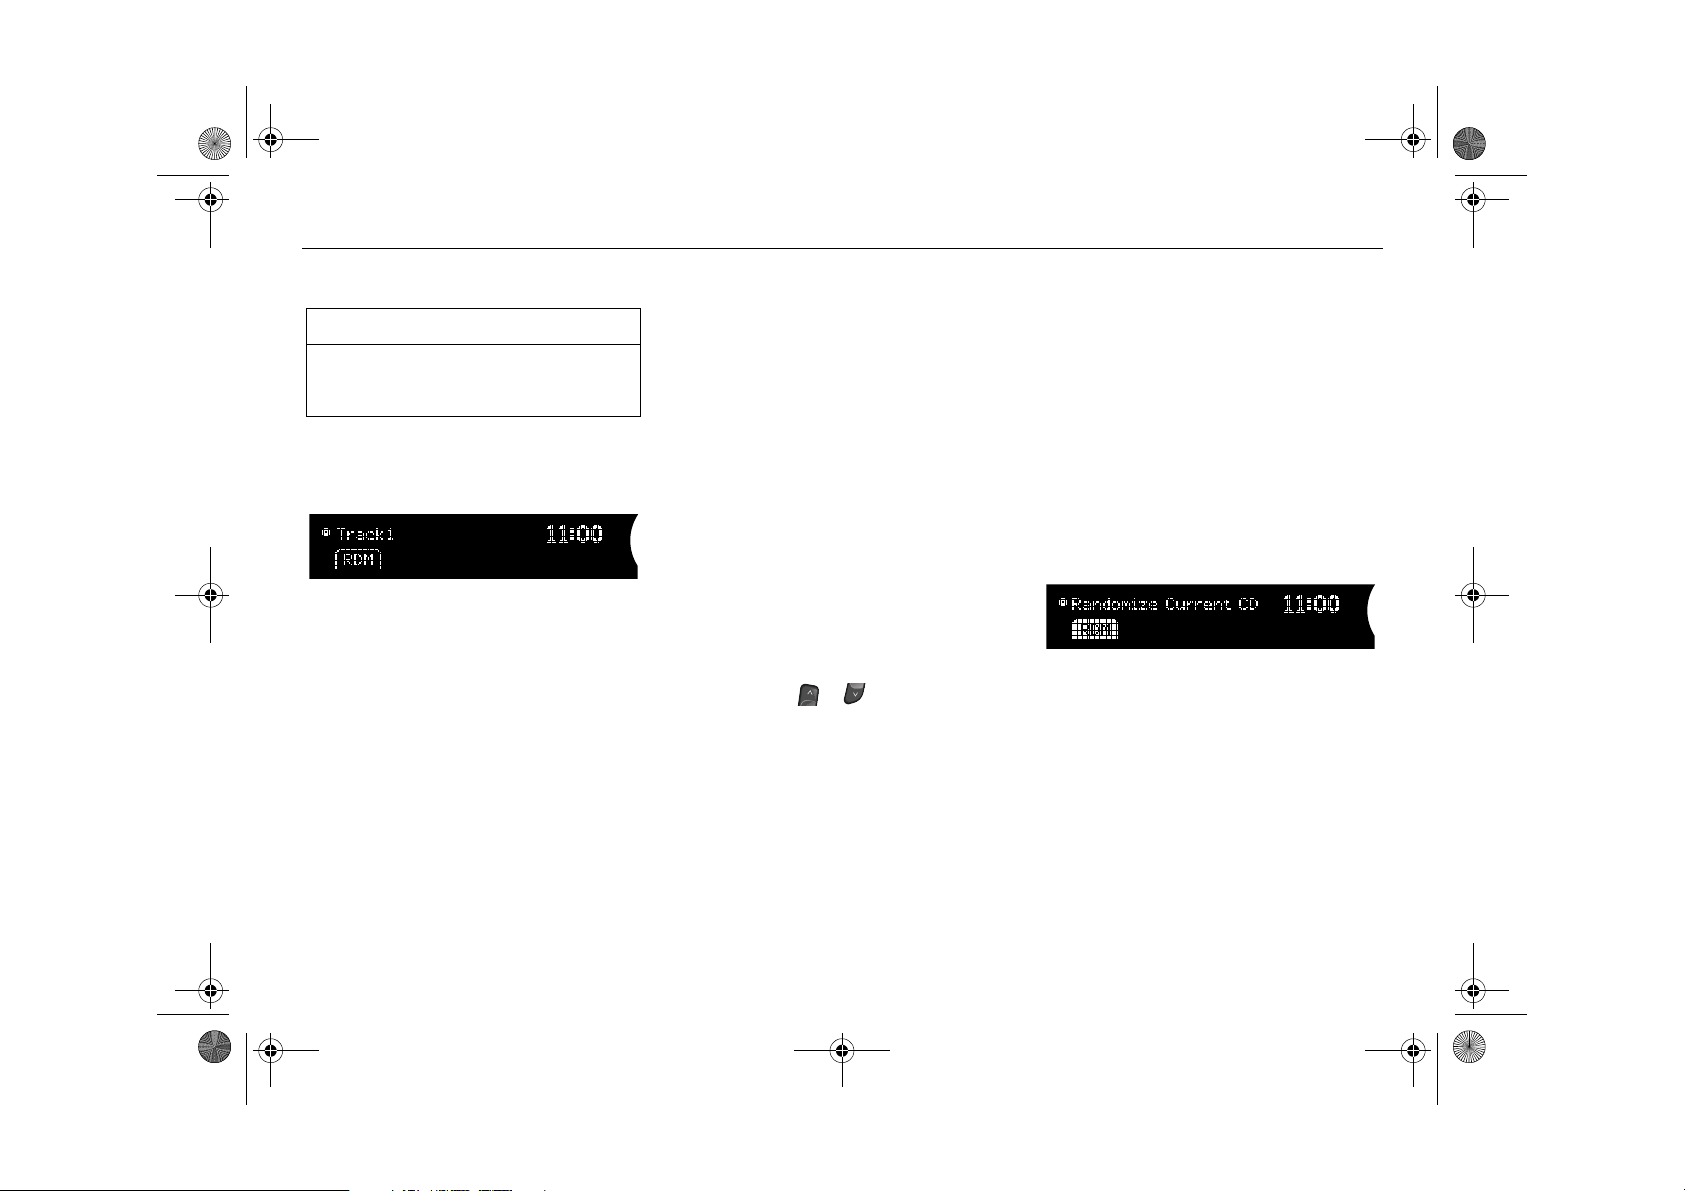
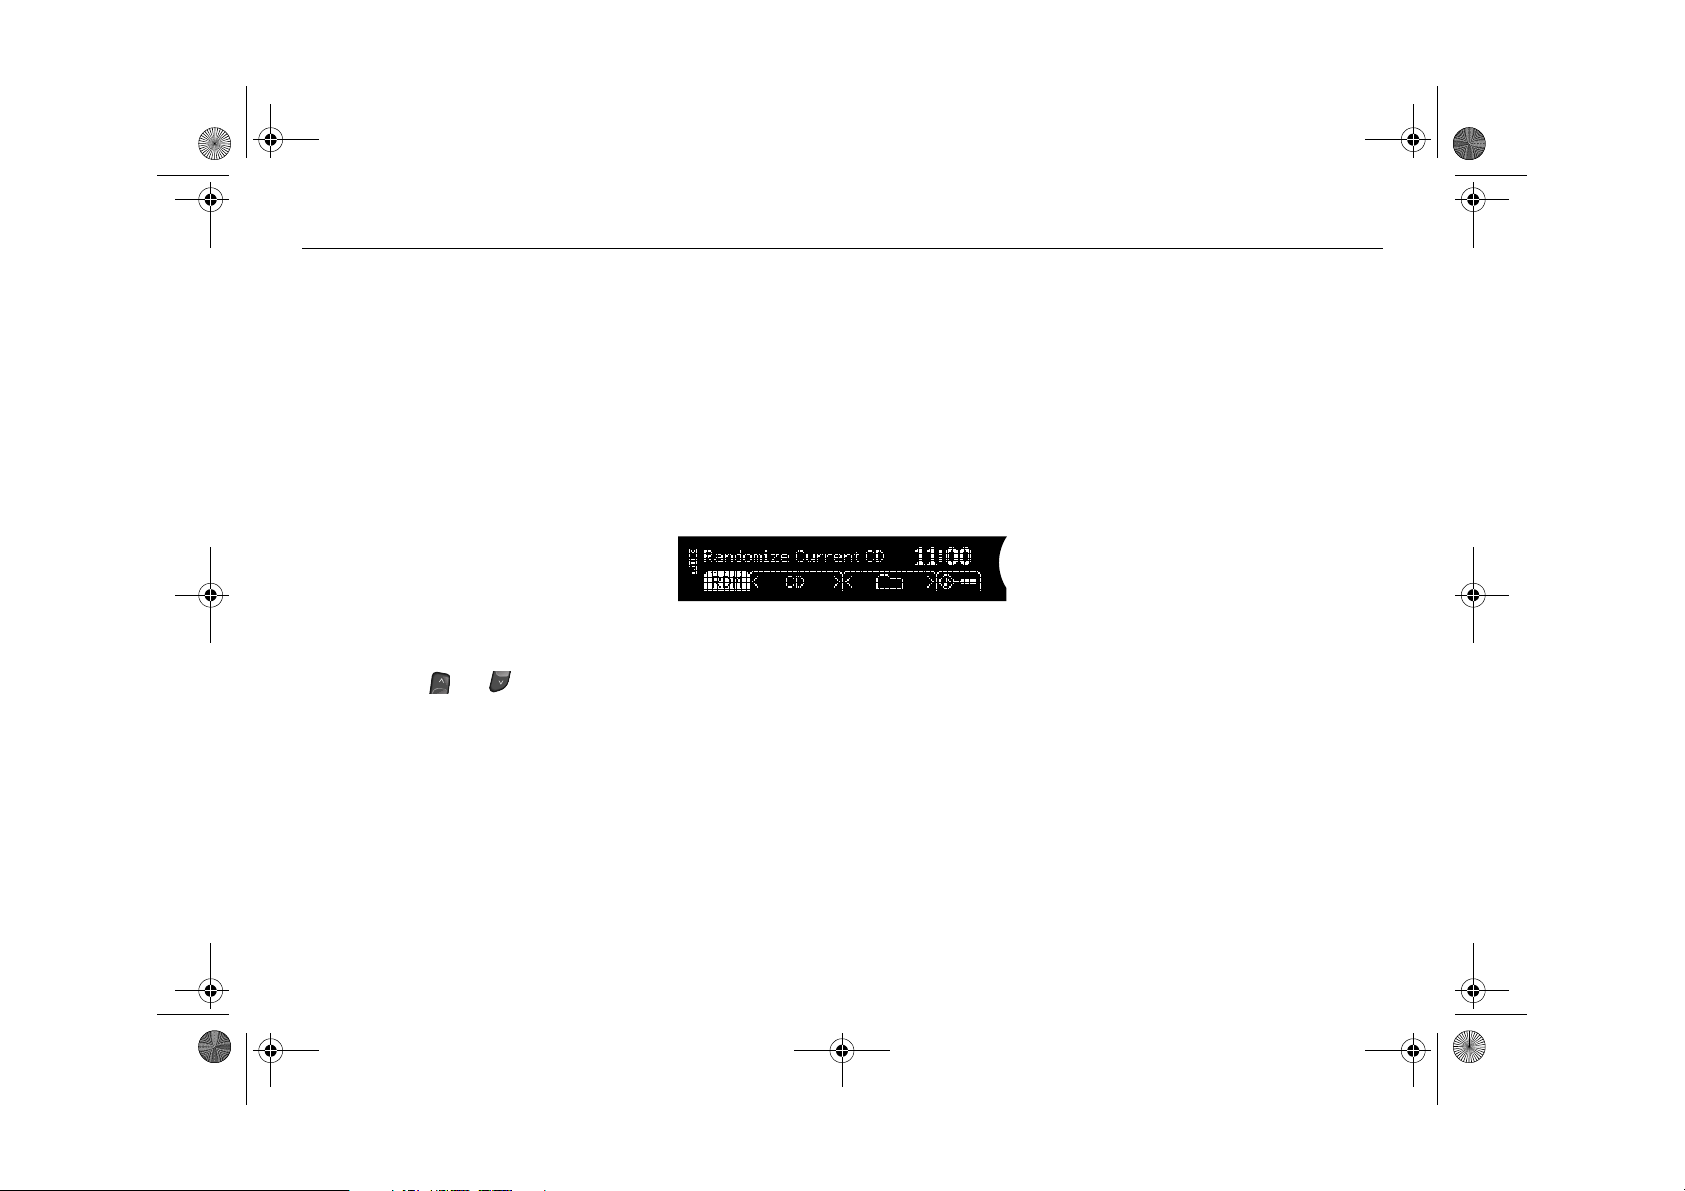
Random playback
You can allow the CD player to choose
tracks randomly, i.e. not to play the tracks in
numerical order.
• To play tracks randomly, press the menu
button directly underneath menu option
RDM.
• To resume playing tracks in numerical
order, press the menu button directly
below menu option
Random playback
RDM again.
Page 18
Infotainment460M09.book Page 18 Monday, March 31, 2008 11:15 AM
18 Cadillac BLS Audio System
CD changer 3
NOTICE
Do not use CD or CD-R discs with labels
or stickers. These labels could detach
and cause the audio system to malfunction.
Activate the CD changer by inserting one or
more CD/MP3 discs in the slot or by pressing the CD AUX button if one or more discs
is already loaded.
Loading CDs
Loading a CD
1 Press the LOAD button. The following
appears on the display:
2 Wait until the loading mechanism is
ready for the disc. The following appears
on the display:
3 Insert the disc in the slot with the text
side up until the mechanism loads the
disc. The following appears on the display:
Loading
If the disc is wrong-side-up, it will be ejected
automatically.
Insert CD
Please Wait…
Loading several CDs
The CD changer can be loaded with up to 6
discs. To load several discs in the CD
changer:
1 Hold the LOAD button depressed for
2 seconds. A chime is heard and
Please Wait… appears on the display.
2 Follow the instructions on the display to
load the discs.
3 If you do not wish to load more CDs,
press LOAD to cancel.
CD changer menu
The CD changer is turned off by pressing
ON/OFF to turn off the audio system or by
selecting another audio source.
Removing CDs
Removing a CD
1 Press EJECT to eject the disc. A chime
sounds and the following appears on the
display:
2 Remove the ejected disc when the fol-
lowing appears on the display:
CD
If you press EJECT without removing
the ejected disc, the player will reload
the disc after 10 seconds for reasons of
safety.
Removing several CDs
Hold the EJECT button depressed for
2 seconds to eject all the discs from the
CD changer. A chime is heard and the display shows:
Ejecting
Remove
Ejecting All
Page 19
Infotainment460M09.book Page 19 Monday, March 31, 2008 11:15 AM
19Cadillac BLS Audio System
Selecting and changing tracks
Turn the tone control or press the SEEK buttons to select or change to the preceding or
next track. The track number appears in the
display.
If the current track has played for at least
10 seconds, you can start the track from the
beginning by pressing SEEK (arrow left).
If you press SEEK (arrow right) while the
last track of the disc is playing, the first track
will play.
If you press SEEK (arrow left) while the first
track of the disc is playing, the last track will
play.
The same function applies for the steering
wheel controls, and .
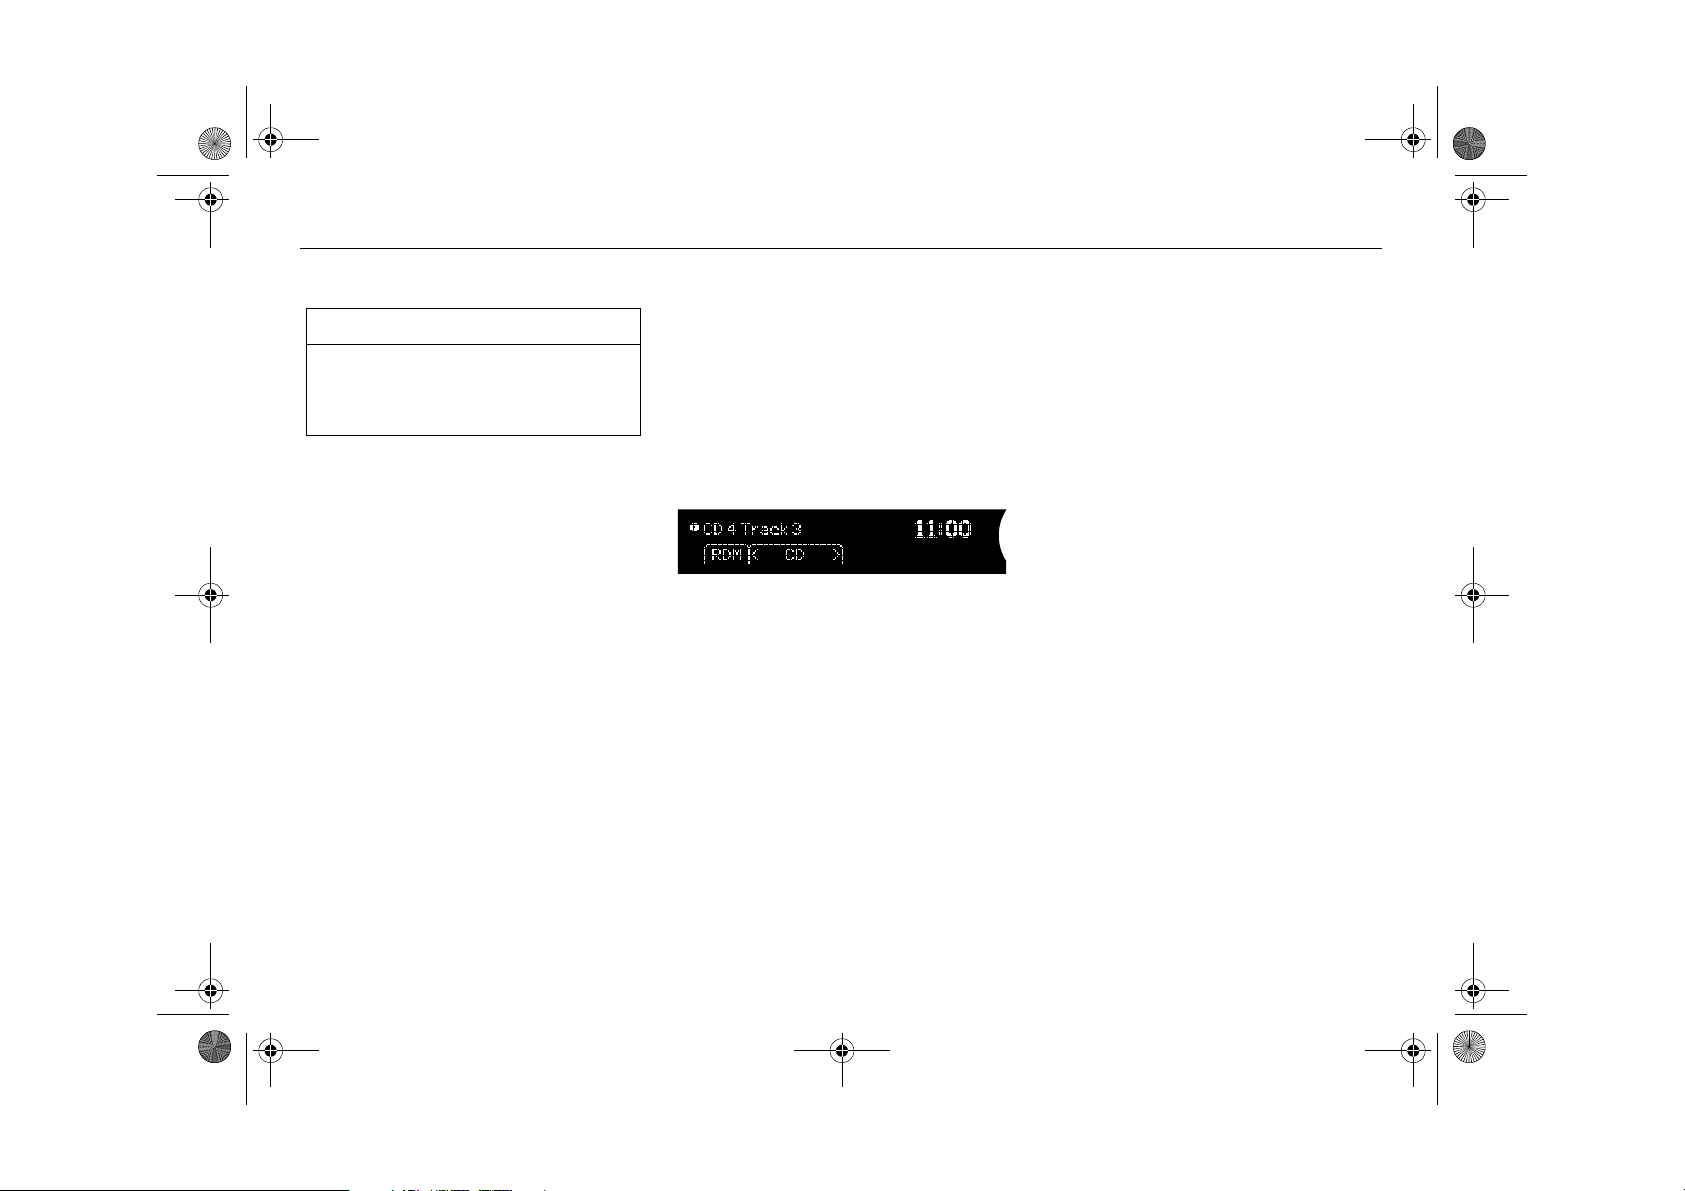
Selecting/changing CD
Press the menu buttons below menu option
CD in the display to change CDs.
For selecting/changing MP3 folder, see
page 20.
Selecting/changing CD
Rapid playing of tracks
To rapid play the current track, hold REV or
FWD depressed. Release the button to stop
rapid play and return to normal playback.
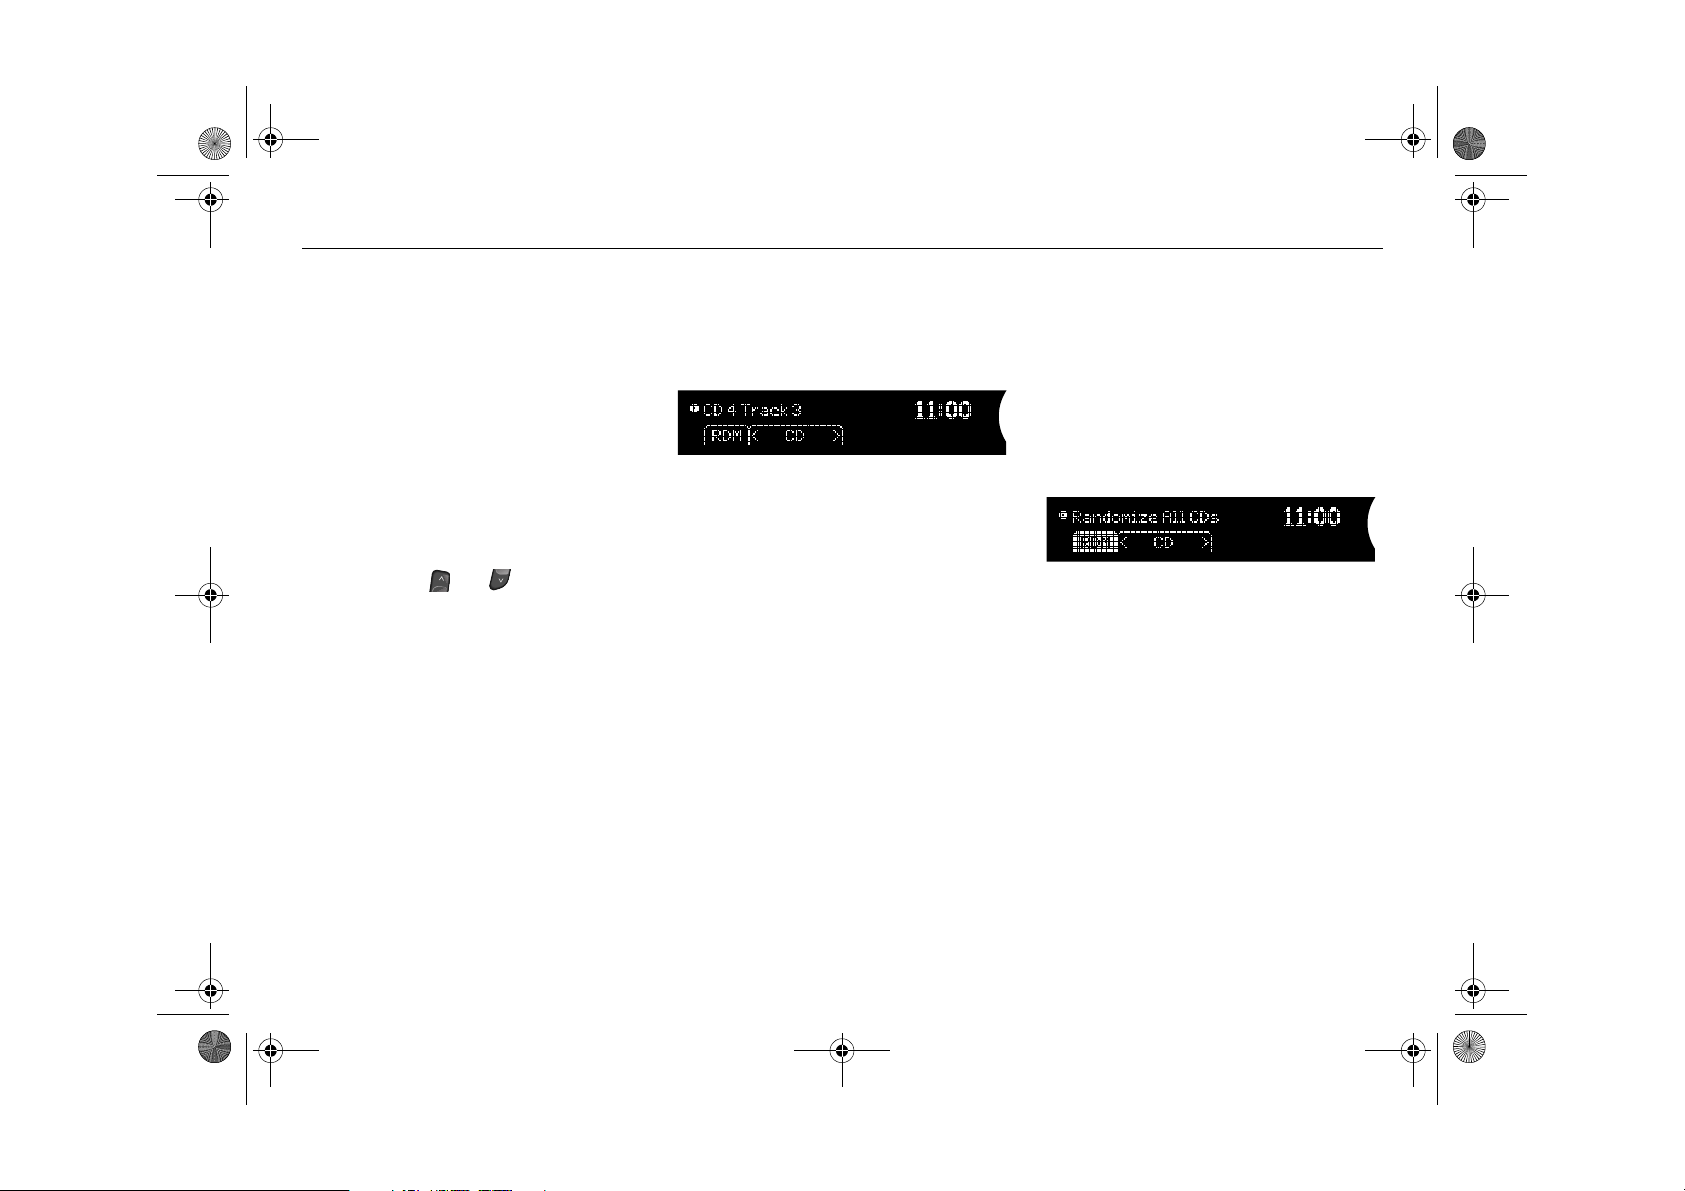
Random playback
You can allow the CD changer to choose
tracks randomly from one or all CDs, i.e. not
to play the tracks in numerical order.
• To play tracks randomly, press the menu
button directly underneath menu option
RDM.
• To resume playing tracks in numerical
order, press the menu button directly
below menu option
Random playback from all CDs
RDM again.
Page 20
Infotainment460M09.book Page 20 Monday, March 31, 2008 11:15 AM
20 Cadillac BLS Audio System
MP3/WMA player
NOTICE
Do not use CD-R discs with labels or
stickers. These labels could detach and
cause the audio system to malfunction.
The audio system can play MP3/WMA files
recorded on a CD-R disc with the following
bit speed: 32 - 320 kbps. Sound quality may
vary depending on the quality of the CD-R
disc, recording method and quality of the
recorded music.
The audio system can read and play a maximum of 50 folders, 50 playlists, 10 sessions
and 255 MP3/WMA files. Discs containing
several folders, playlists, sessions and files
can be played up to the max. limit. Anything
over the max. limit will be ignored.
Activating the MP3/WMA
player
Activate the MP3/WMA player by inserting
a CD-R disc with MP3/WMA files into the
slot or by pressing the CD AUX button if a
disc with MP3/WMA files is already loaded.
The first file in the first playlist on the disc is
played and the following appears on the display:
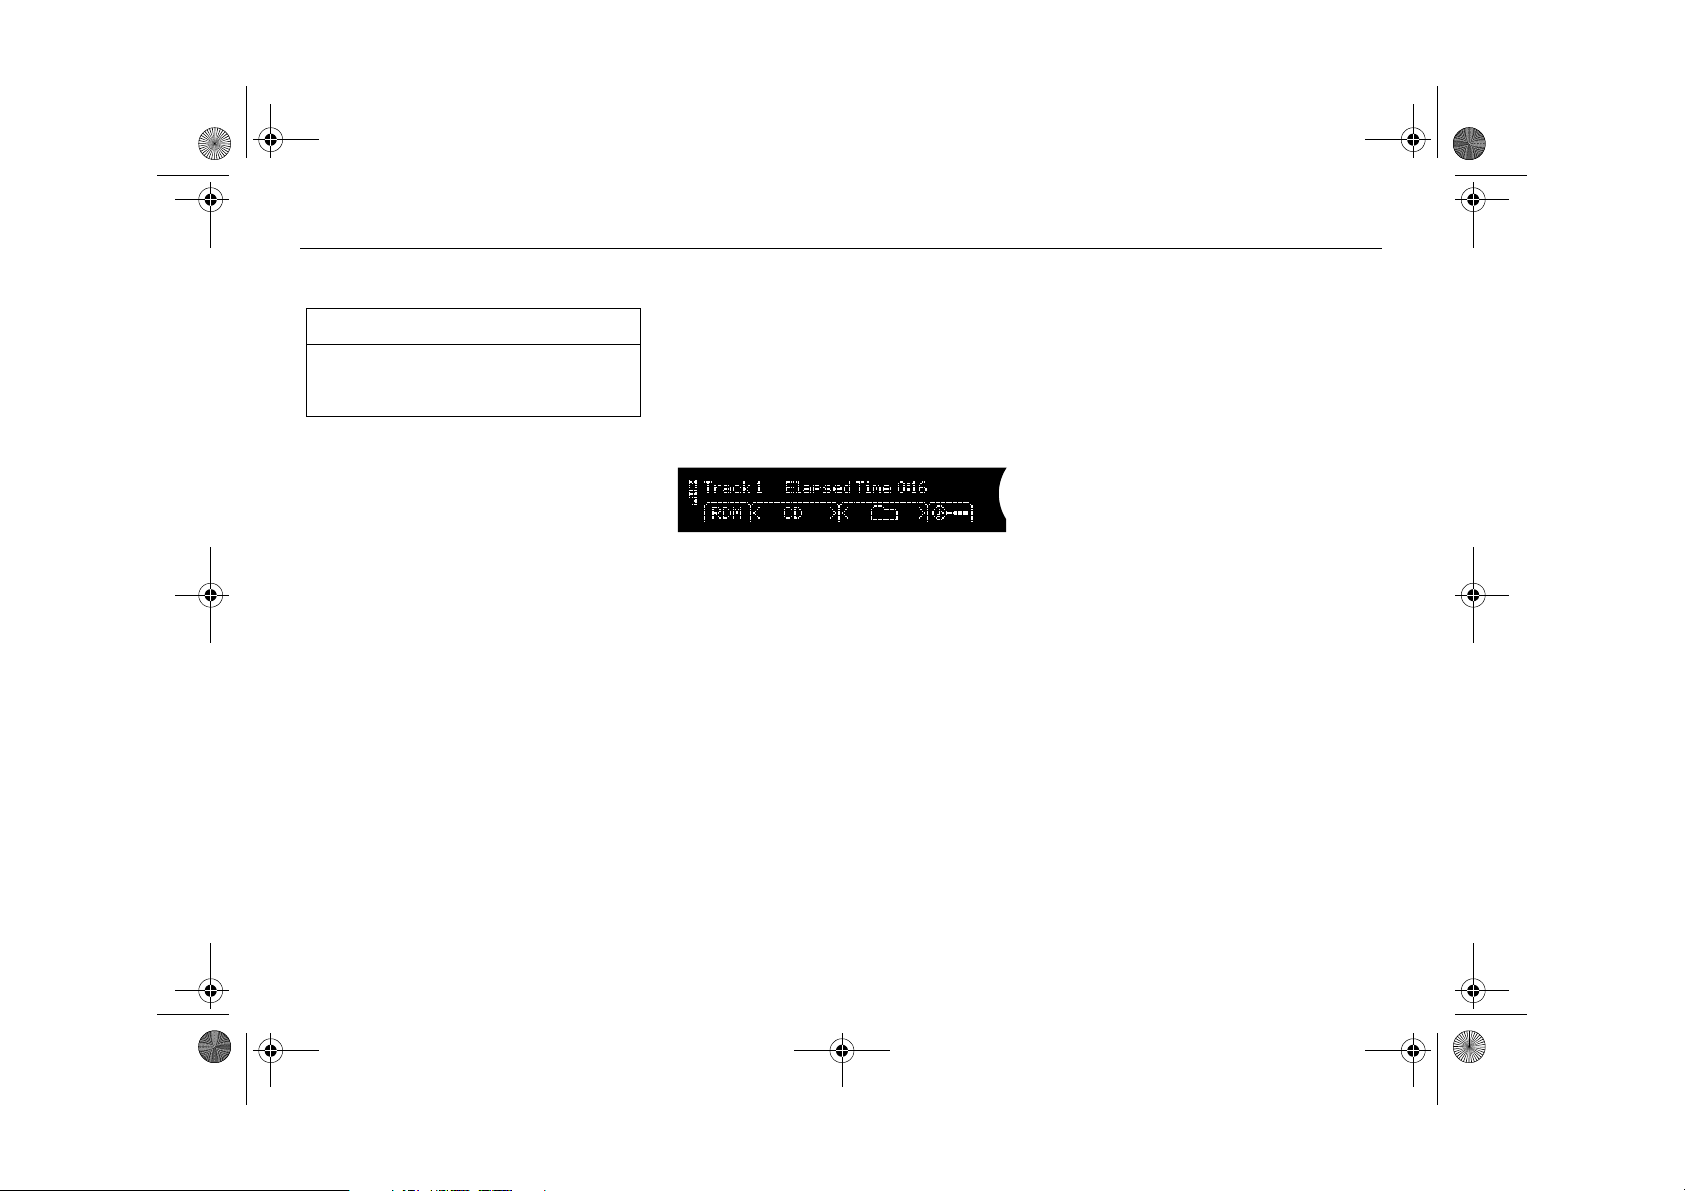
MP3/WMA player
Loading MP3/WMA discs
To load an MP3/WMA disc, insert the disc in
the slot with the text side up until the mechanism loads the disc. The first MP3/WMA
file in the first playlist of the disc will then be
played.
If the disc is wrong-side-up, it will be ejected
automatically.
For loading one or more MP3/WMA discs in
the CD changer, see page 18.
Removing MP3/WMA discs
Press the EJECT button to eject the disc.
If you press EJECT without removing the
ejected disc, the player will reload the disc
after 10 seconds for reasons of safety.
To remove one or more MP3/WMA discs
from the CD changer, see page 18.
Selecting/changing MP3
folder
• Press the left menu button below the
Folder symbol to play the first MP3/WMA
file in the preceding folder on the disc.
• Press the right menu button below the
Folder symbol to play the first MP3/WMA
file of the next folder on the disc.
Page 21
Infotainment460M09.book Page 21 Monday, March 31, 2008 11:15 AM
21Cadillac BLS Audio System
Selecting/changing
MP3/WMA file
Turn the tone control or press the SEEK buttons to select or change to the preceding or
next MP3/WMA file in the current folder or
playlist. The MP3/WMA file number
appears in the display.
If the current MP3/WMA file has played for
at least 10 seconds, you can start the
MP3/WMA file from the beginning by pressing SEEK (arrow left).
If you press SEEK (arrow right) while the
last MP3/WMA file in a folder or playlist is
playing, the first MP3/WMA file of the folder
or playlist will play.
If you press SEEK (arrow left) while the first
MP3/WMA file in a folder or playlist is playing, the last MP3/WMA file of the folder or
playlist will play.
The same function applies for the steering
wheel controls, and .
Rapid playing an
MP3/WMA file
To rapid play the current MP3/WMA file,
hold REV or FWD depressed. Release the
button to stop rapid play and return to
normal playback.
Random playback of
MP3/WMA files
You can allow the MP3/WMA player to randomly select MP3/WMA files, i.e. not to play
the files in numerical order.
• For random playback of MP3/WMA files,
press the menu button directly underneath menu option
• To resume playing MP3/WMA files in
numerical order, press the menu button
directly underneath menu option
again.
Random playback of MP3/WMA files
RDM.
RDM
Playback order
Files on a CD-R disc will be played in the following order:
• The first MP3/WMA file in the first playlist
will be played, followed by all files in each
playlist. When the last MP3/WMA file in
the last playlist has been played, playback
starts from the beginning with the first
MP3/WMA file in the first playlist.
• The first MP3/WMA file in the first folder
will be played, followed by all files in each
folder. When the last MP3/WMA file in the
last folder has been played, playback
starts again from the beginning with the
first MP3/WMA file in the first folder.
Page 22
Infotainment460M09.book Page 22 Monday, March 31, 2008 11:15 AM
22 Cadillac BLS Audio System
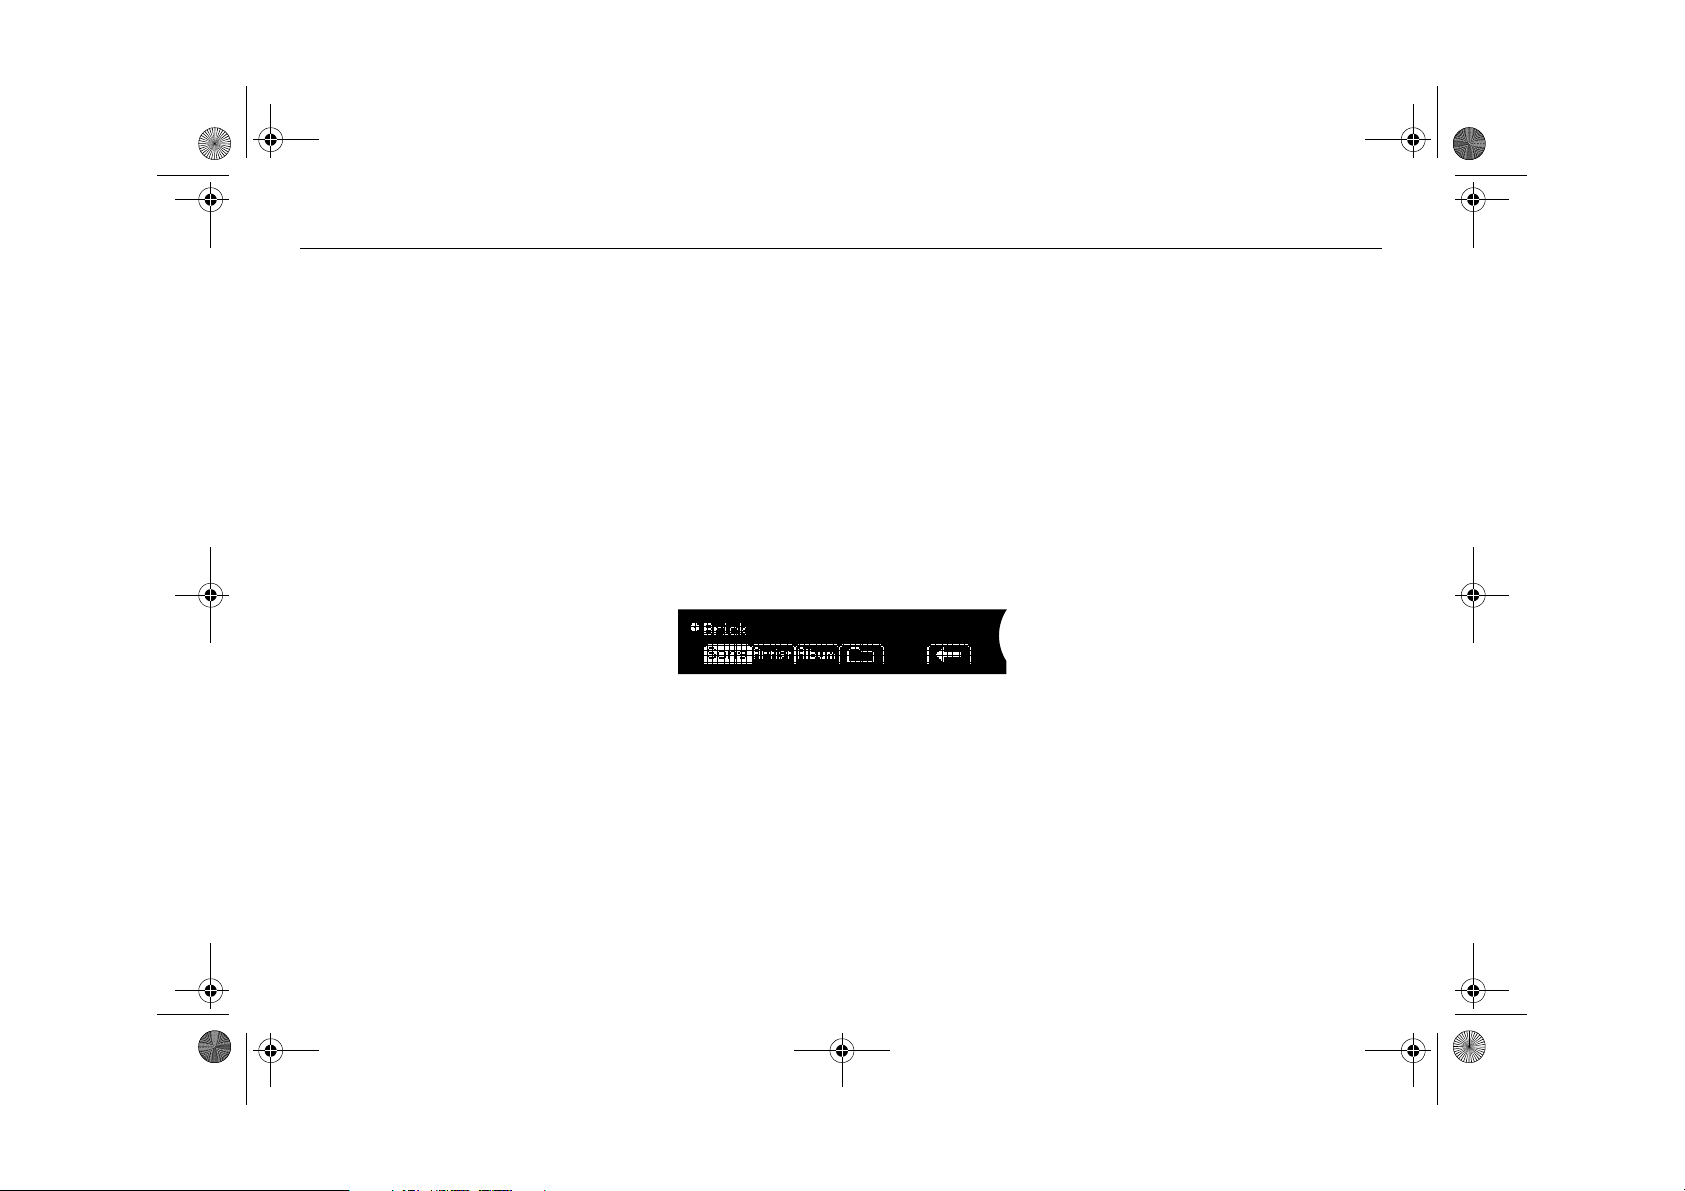
Sorting music
To play MP3/WMA files sorted by artist or
album, press the menu button directly
underneath the magnifying glass in the display.
The CD player searches through the disc
and sorts files by artist and album. This
could take several minutes depending on
the number of MP3/WMA files on the disc.
Once the sort is complete, select sort order
by pressing the menu button directly underneath
Sort in the display.
• To sort and play MP3/WMA files by artist,
press the menu button directly underneath
Artist in the display.
• To sort and play MP3/WMA files by
album, press the menu button directly
under-neath
Album in the display.
Song title, artist name, etc.
If a disc has been recorded with ID3 data
(version 1 & 2), the song title, artist name,
album title and MP3/WMA folder name can
be shown in the display.
1 Press the i button.
2 Press the menu button directly under-
neath the desired menu option. The
song title, artist name, album title or
MP3/WMA folder name appears in the
display.
3 Press the menu button directly under-
neath the arrow symbol in the menu to
return to the previous menu.
File names with more than 32 characters or
four pages will be abbreviated.
Information menu
MP3/WMA
For discs containing both CD tracks and
MP3/WMA (Windows Media Audio) files the
player will play the CD tracks first.
To play the MP3/WMA files on the disc:
1 Press the PTY button.
2 Press the menu button directly under-
neath
MP3/WMA.
To return to playing the CD tracks:
1 Press the PTY button.
2 Press the menu button directly under-
neath
CD-DA.
Page 23
Infotainment460M09.book Page 23 Monday, March 31, 2008 11:15 AM
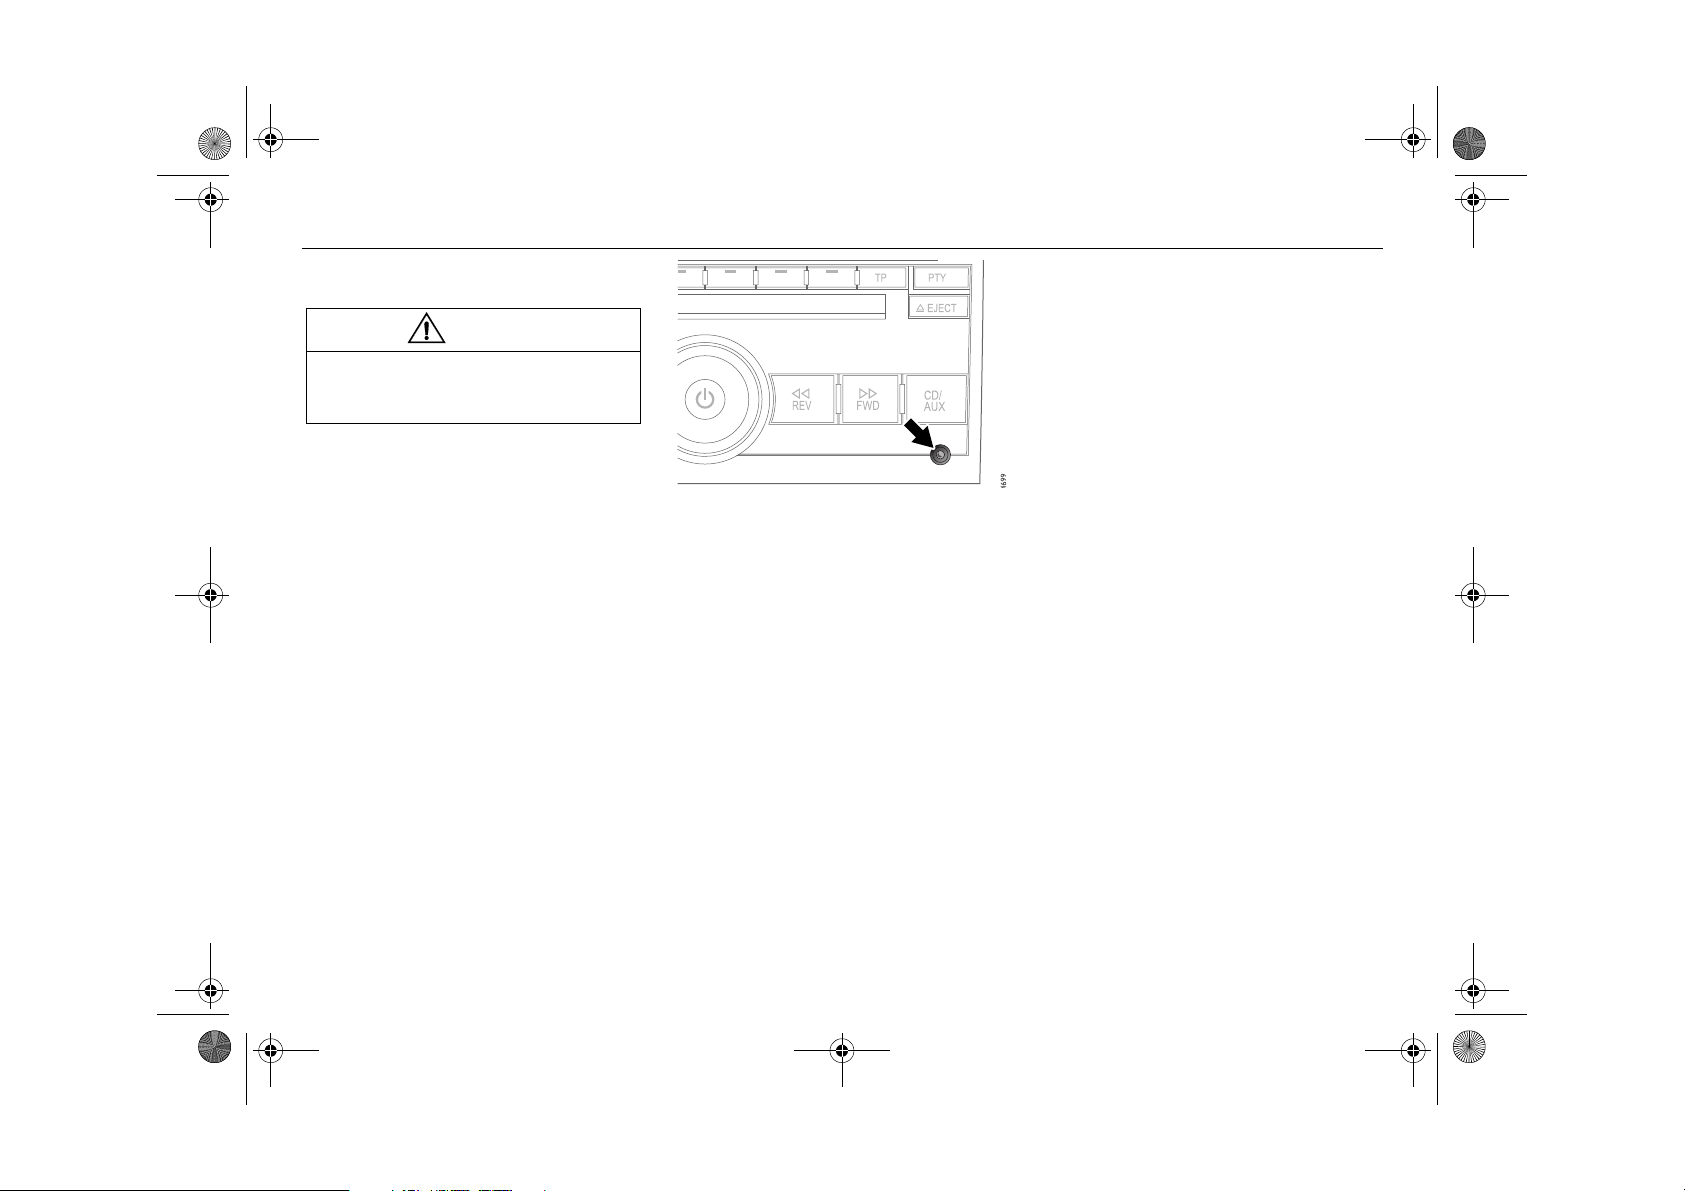
Portable player
WARNING
Place the portable player where it cannot
be thrown around and cause personal
injury in the event of a collision.
AUX input 3
The AUX input is located at the bottom right
of the audio system. It can be used to connect a portable unit, such as an MP3 player,
to the audio system.
Adjust the audio settings using the control
panel or the steering wheel controls. To
change tracks, fast forward, etc., use the
controls on the portable player.
AUX input at the bottom right of the audio
system
Connecting and activating a
portable player
1 Connect the unit to the audio system via
2 Press the CD AUX button to activate the
23Cadillac BLS Audio System
the AUX input.
portable player.
Page 24
Infotainment460M09.book Page 24 Monday, March 31, 2008 11:15 AM
24 Cadillac BLS Audio System
General functions
WARNING
Adjustments should be made when the
car is stationary so that attention to traffic
is not reduced, increasing the likelihood
of an accident.
Setting time and date
Cars without CD changer
1 Press the Clock button.
2 Press the menu button directly under-
neath the menu option you wish to
change.
3 Press the menu button again to increase
time or date one increment at a time.
You can also adjust time and date by
pressing the SEEK, FWD or REV
buttons.
Cars with CD changer
1 Press the MENU button.
2 Press the menu button directly under-
neath the clock symbol in the display.
3 Press the menu button directly under-
neath the menu option you wish to
change.
4 Press the menu button again to increase
time or date one increment at a time.
You can also adjust time and date by
pressing the SEEK, FWD or REV
buttons.
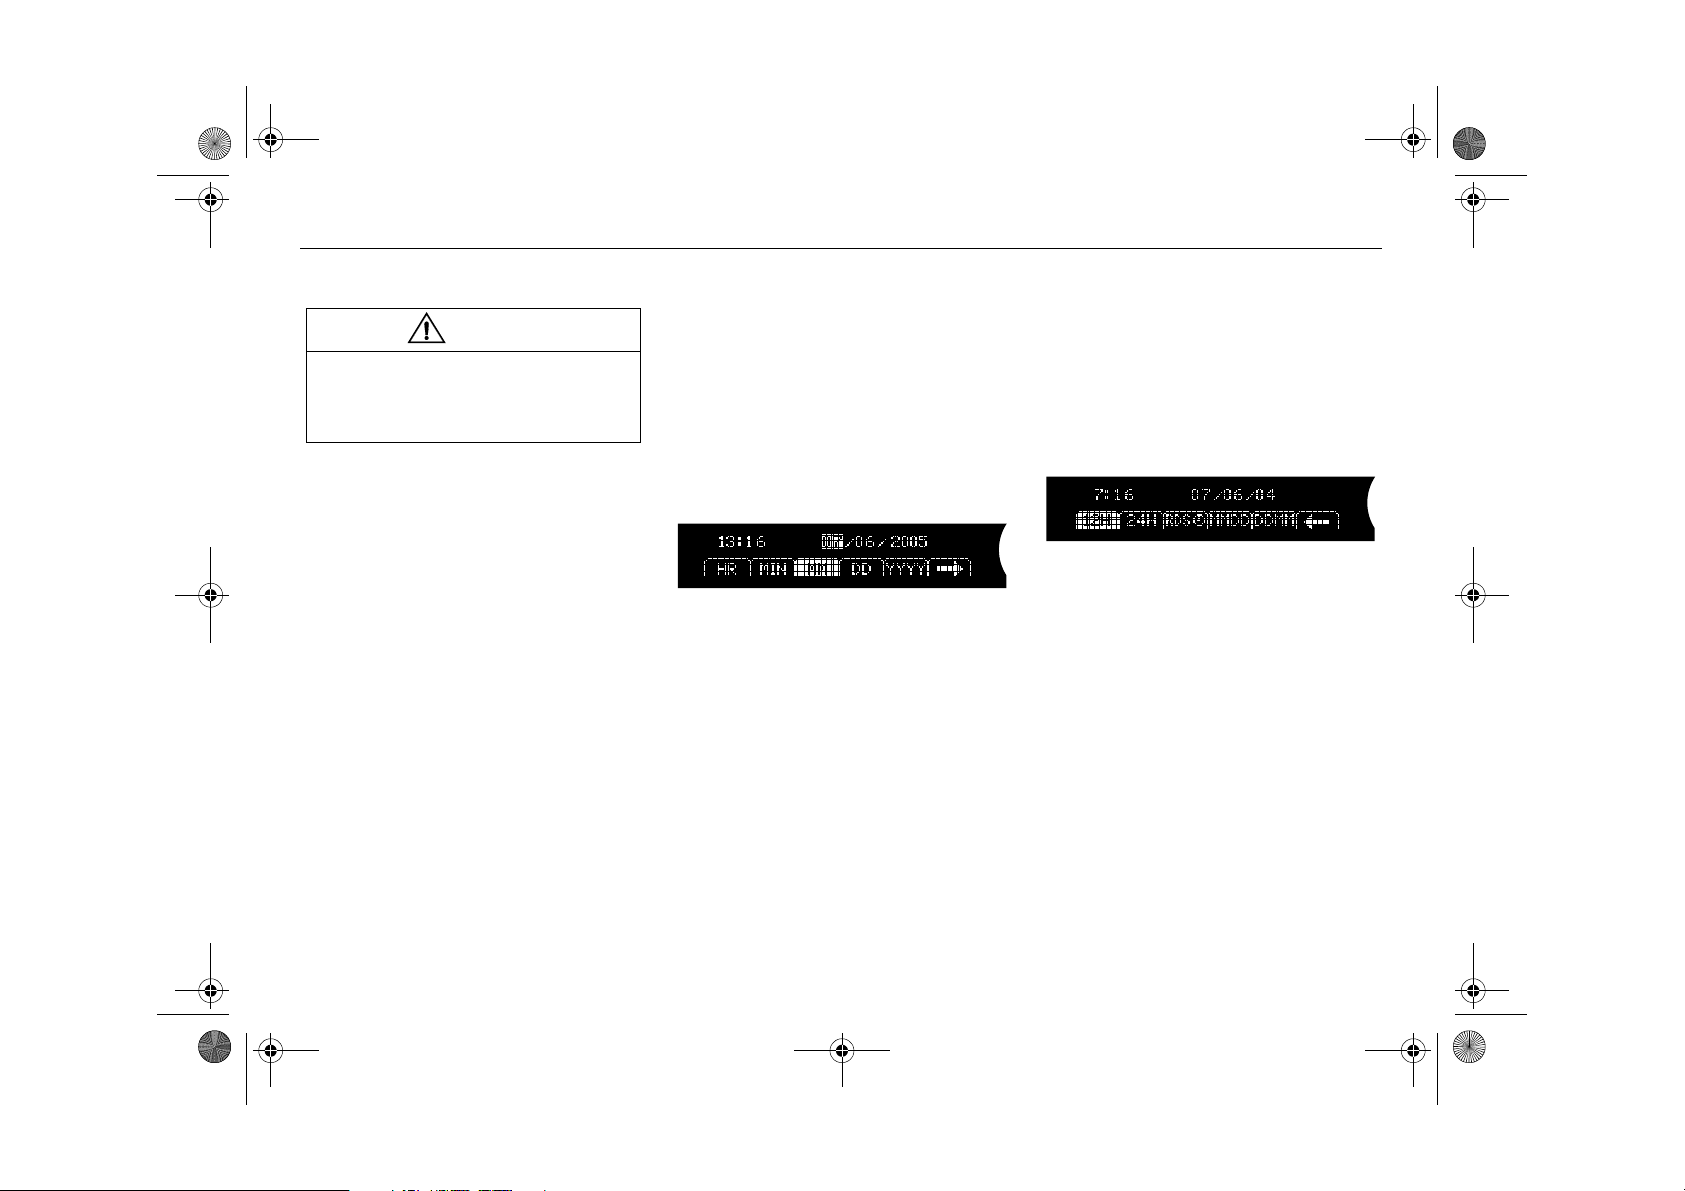
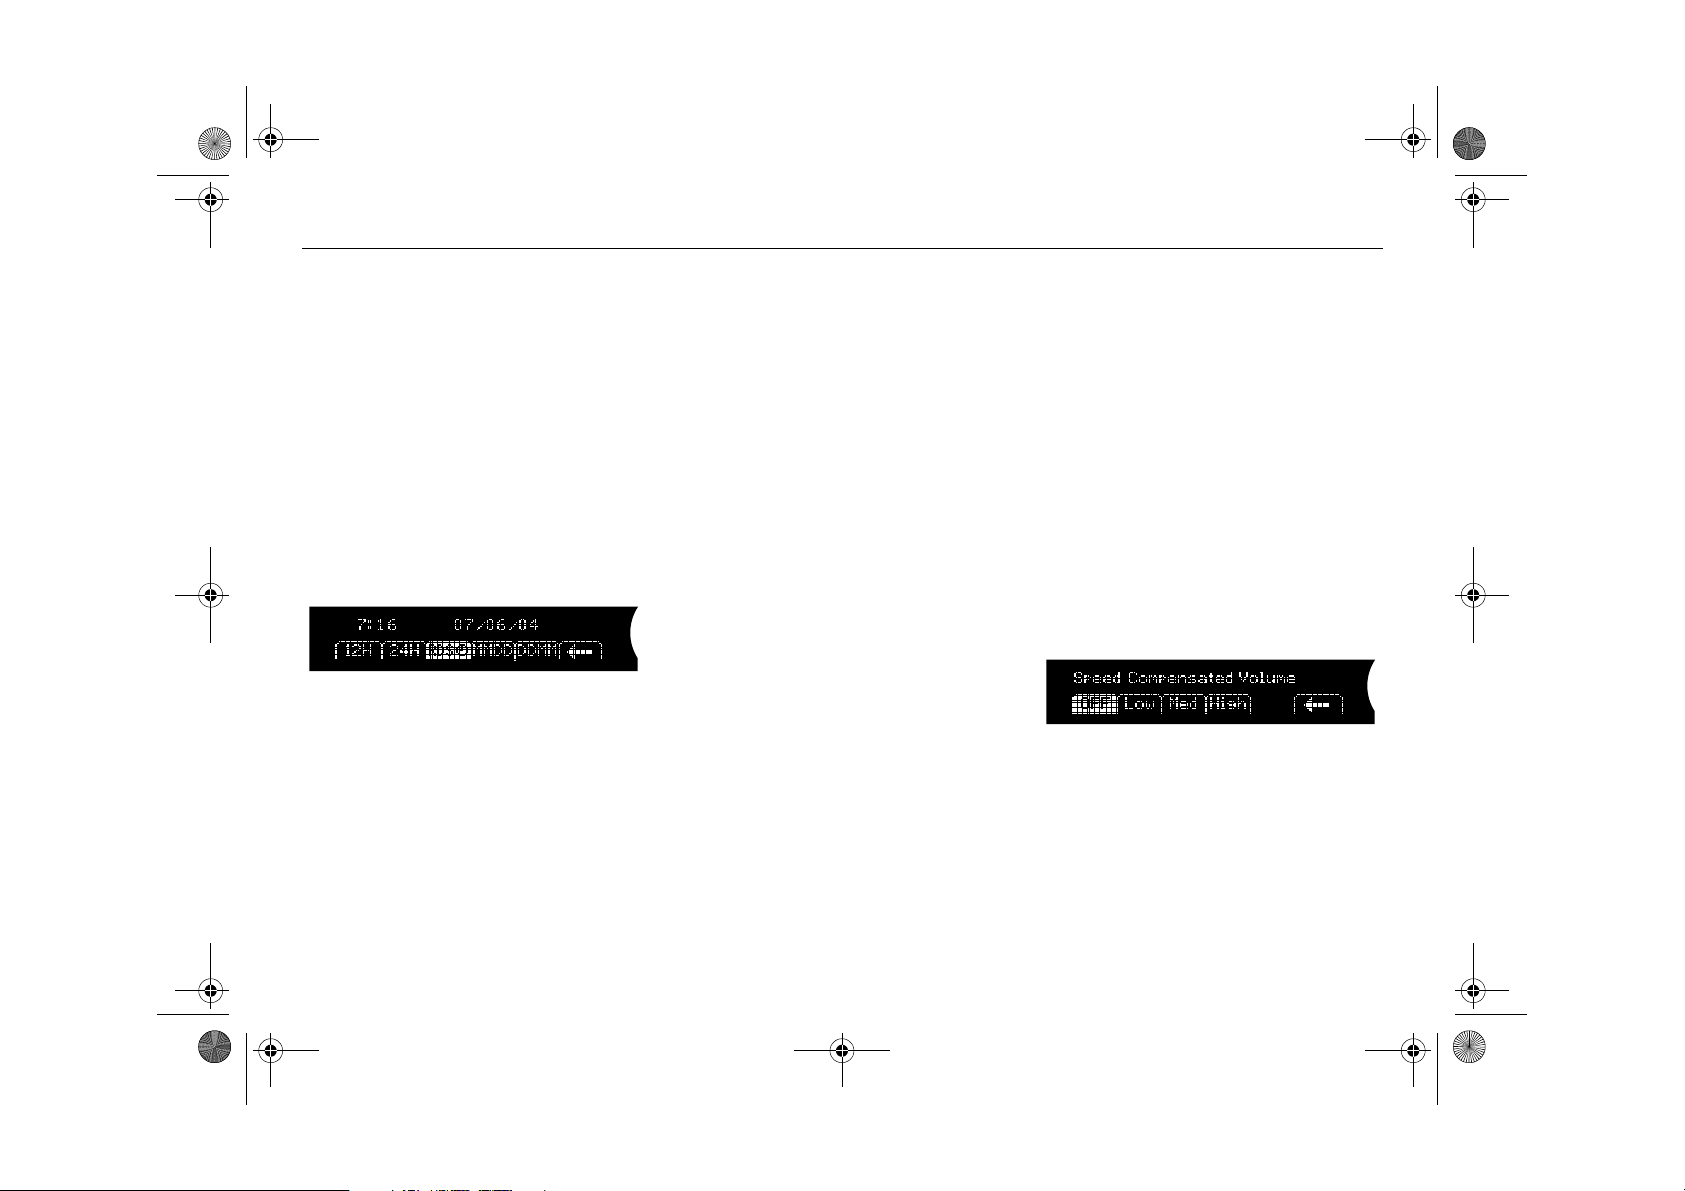
Setting time and date
Time and date display
1 In the clock menu, press the menu
button directly underneath the arrow
symbol in the display.
2 Specify whether time should be dis-
played with the 12-hour or 24-hour
system and in which order date is to be
indicated by pressing the menu button
directly underneath the desired menu
option.
Time and date display
Page 25
Infotainment460M09.book Page 25 Monday, March 31, 2008 11:15 AM
25Cadillac BLS Audio System
RDS time
To obtain RDS time (Clock Time, CT), the
reception must be good and the currently
tuned station must be transmitting RDS time
signals.
1 In the clock menu, press the menu
button directly underneath the arrow
symbol in the display.
2 Press the menu button directly under-
neath menu option RDS time.
3 Adjusting the clock now takes place
automatically and the display shows:
Adjusting to RDS Time...
In the event of poor RDS reception or if
there is no time information the display
shows:
No RDS Time Available
RDS time
Volume for traffic/alarm
announcements and selected
programme type broadcasts
Set the minimum volume for traffic/alarm
announcements and selected programme
type broadcasts by turning the ON/OFF
knob to the desired volume during an
announcement. The set volume is saved
until the next time an announcement is
broadcast.
If the radio volume is lower than the saved
volume when the radio/CD is interrupted for
a traffic/alarm announcement or selected
programme type broadcast, the volume will
be increased. If the volume is higher, there
is no change.
Speed dependent volume
compensation
As vehicle speed increases, ambient noise
also increases. If you do not wish to continually adjust the volume, the audio system
can automatically adjust volume based on
an increase or decrease in vehicle speed.
Select one of four settings:
•
Off (no compensation)
•
Low (low compensation)
• Med (medium compensation)
• High (maximum compensation)
1 Press the MENU button.
2 Press the menu button directly under-
neath the menu option
3 Press the menu button directly under-
neath the desired speed compensation.
Speed dependent volume compensation
AUTO VOLUME.
Page 26
Infotainment460M09.book Page 26 Monday, March 31, 2008 11:15 AM
26 Cadillac BLS Audio System
Audio system
The audio system is available in different
versions: Sound System and Bose
Centerpoint
Loudness is controlled automatically by the
audio system, boosting the highest and
lowest frequency ranges to compensate the
sound image when the volume is set to a low
level. Sound reproduction is therefore
excellent whatever the volume.
®
Surround Sound System.
®
Security lock
The audio system is equipped with an electronic security lock. The special code is
unique to the car in which the audio system
is installed.
Each time the audio system is switched on,
a check is made to ensure that the code is
correct.
If not, the following will appear on the display:
Locked
If the audio system is to be transferred to
another car (Cadillac BLS), a Cadillac
dealer must be contacted to provide the
right code for the audio system.
Error codes
NOTICE
Proceed with care if rectifying a fault. If in
doubt, contact a workshop. We recommend that you contact an authorised
Cadillac workshop.
The audio system has a built-in diagnostics
function. If a fault is detected, an error code
is generated to help workshop technicians
to diagnose the fault. Below is an error code
that you might be able to rectify yourself.
Error code Possible cause
Check CD • CD is dirty, scratched,
loaded wrong-side-up
or defective.
• The CD may be
improperly burned.
WARNING
The CD player/CD changer is classified
as Class 1 laser equipment.
• Service and repair work must only be
carried out by authorised technicians.
• If the casing is damaged, hazardous
laser radiation can occur.
NOTICE
All work on the Audio system must be
carried out by a workshop. We recommend that you contact an authorised
Cadillac workshop.
Page 27
Infotainment460M09.book Page 27 Monday, March 31, 2008 11:15 AM
27Cadillac BLS Navigation System
Cadillac BLS Navigation System
Navigation ___________ 31
Navigation Audio System 57
Voice recognition _____ 75
3 Asterisk means: equipment not fitted in all cars
(can depend on model variant, engine variant,
market specification, options or accessories).
Page 28
Infotainment460M09.book Page 28 Monday, March 31, 2008 11:15 AM
28 Cadillac BLS Navigation System
Cadillac BLS
Navigation System
Cadillac BLS Navigation System consists of
a main unit with navigation, radio and CD
player for CD and MP3/WMA discs. The
audio system is available with different
amplifier and speaker options, see page 73.
The audio/navigation system is operated
using the steering wheel controls and via
the control panel buttons.
WARNING
Safety first!
Cut off power immediately and contact
your Cadillac dealer if the system begins
to emit smoke or smells strange.
All work on the Audio system must be carried out
by a workshop. We recommend that you contact
an authorised Cadillac workshop.
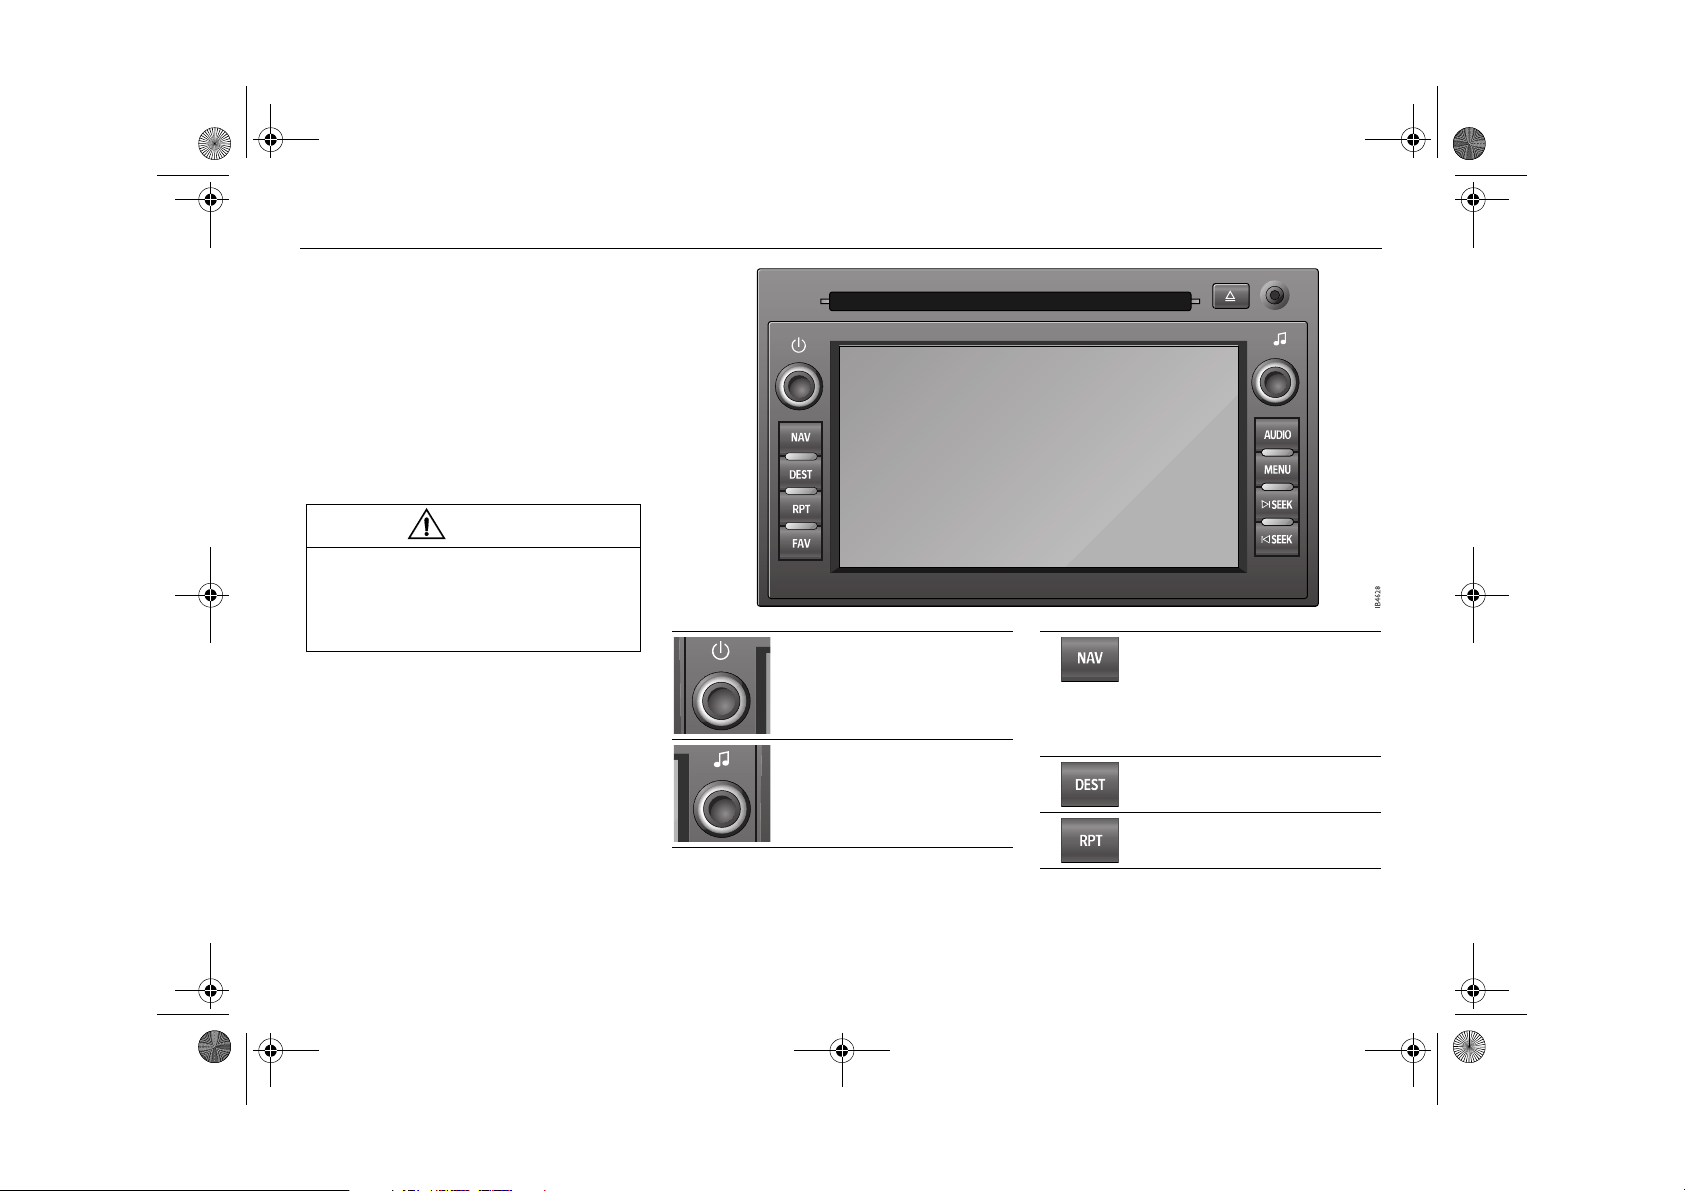
Audio/navigation system activation/deactivation.
Volume adjust.
Tone control used to adjust the
tone and speaker setting,
change track/file on CDs or
MP3 discs and manual frequency setting.
Return to the navigation map
with the car’s current position.
Change the map’s display
mode (whole map, TMC or
map combined with the current audio source).
State a destination.
Repeat the last voice instruction.
Page 29
Infotainment460M09.book Page 29 Monday, March 31, 2008 11:15 AM
29Cadillac BLS Navigation System
Scroll among preset pages.
Activation of the menu for AM,
FM, CD or portable player.
Setup menu for audio, radio,
navigation, display or clock.
Eject CD or MP3 discs.
Press and hold the eject button to open the display and
access the slot for the DVD
map.
Auto tuning up and change
track/file forward in order of
play on CD or MP3 disc.
Auto tuning down and change
track/file going back in order of
play on CD or MP3 disc.
Steering wheel controls
l
Activate the voice control
system.
Cancel voice control session.
Change radio station preset,
change track on CD or MP3 disc.
Volume adjust.
Page 30

Infotainment460M09.book Page 30 Monday, March 31, 2008 11:15 AM
30 Cadillac BLS Navigation System
(This page has been left blank.)
Page 31

Infotainment460M09.book Page 31 Monday, March 31, 2008 11:15 AM
31Cadillac BLS Navigation System
Navigation
Safety rules __________ 32
Introduction__________ 33
DVDs _______________ 35
Quick guide __________ 38
Following on the map__ 39
State a destination ____ 40
Alternative to a route __ 46
Save a destination in the
address book________ 49
Save or change a preset 49
Navigation settings____ 50
Other settings ________ 54
FAQ ________________ 56
Page 32

Infotainment460M09.book Page 32 Monday, March 31, 2008 11:15 AM
32 Cadillac BLS Navigation System
Safety rules
Follow the safety rules for safe use of the
navigation system.
WARNING
• Carefully read the User Manual before
you start to use the navigation system
and follow the instructions in the User
Manual.
• Cadillac is not responsible for problems or accidents caused by noncompliance with the User Manual
instructions.
• The use of the navigation system
does not free the driver from responsibility. It is more important to follow
traffic regulations than the suggested
route!
• Traffic regulations and the current traf-
fic situation always take precedence
over the directions provided by the
navigation system. The driver must
observe the highway code applicable
to that place.
• Check that the volume of the system is
not so high that it drowns out external
sound. If you cannot hear external
sounds then your reaction time in
certain traffic situations will deteriorate, which could cause an accident.
WARNING
WARNING
• Do not poke into the disc tray with
fingers and foreign objects as this can
cause both personal injury and
damage to the unit.
• Switch off the power immediately and
contact a workshop if the unit starts to
emit smoke or unusual smells. We
recommend that you contact an
authorised Cadillac workshop.
• Never try to dismantle or change the
navigation equipment as this can
cause both personal injury and
damage to the unit.
Page 33

Infotainment460M09.book Page 33 Monday, March 31, 2008 11:15 AM
33Cadillac BLS Navigation System
Introduction
Getting started
Carefully read the User Manual before you
start to use the navigation system and follow
the instructions in the User Manual.
Remember, if you are distracted while driving you can cause an accident and you and
others may be injured or killed. Before using
this system, read the manual and learn how
it works. Always concentrate first and foremost on driving by keeping your eyes on the
road and hands on the steering wheel. Read
the manual for more information.
Warning box
Every fiftieth time the car is started and the
navigation system is activated a warning
box will be displayed.
1 When the warning box is displayed,
select
OK to load information from the
map-DVD.
2 If
OK is not selected, all the display but-
tons will be available except NAV (Navigation) and DEST (Destination). Press
NAV to display the warning box.
3 Read through the warning text in the
warning box and select
information from the map-DVD.
OK to load the
How the navigation system
works
The integrated navigation system uses the
Global Positioning System (GPS). GPS
uses signals from satellites that orbit the
earth.
The car’s electronics incorporate direction
and speed sensors that, along with GPS
and the digital maps, are used to calculate
the position of the vehicle.
Reception of GPS signals can be disrupted
and is sometimes not possible at all:
– between high-rise buildings and in park-
ing garages.
– when travelling through tunnels, along
tree-lined alleys or between high-sided
vehicles,
– during thunderstorms or very heavy
precipitation,
– if the GPS antenna is blocked by a roof
load,
– if the satellites are switched off for main-
tenance or repairs.
NOTICE
Using the navigation system at extremely
high or low temperatures can damage the
unit.
The unit can also be damaged by powerful vibrations.
Page 34

Infotainment460M09.book Page 34 Monday, March 31, 2008 11:15 AM
34 Cadillac BLS Navigation System
The digital road maps
In order to plan a route, the navigation
system not only needs to know the position
of the car but also requires a digital road
map of the destination and relevant roads.
The digital map for Europe is stored on two
DVD discs.
Due to local conditions and/or incomplete
data, route calculation errors may arise. The
calculated route may differ from actual conditions since the data on the DVD discs
dates from when the digital road maps were
created.
USER TIP
We recommend that you always use the
current editions of the digital maps for
navigation.
We recommend that you contact a
Cadillac dealer for updated road maps.
Map database information
Coverage area of the discs
Select
Map Database Information to see the
coverage area of the loaded DVD disc.
Page 35

Infotainment460M09.book Page 35 Monday, March 31, 2008 11:15 AM
DVDs
35Cadillac BLS Navigation System
NOTICE
WARNING
The DVD player is classified as a Class 1
Laser Product.
• Service and repair work must only be
carried out by authorised technicians.
• If the casing is damaged, hazardous
laser radiation can occur.
Loading a Nav DVD disc
To load a Nav DVD:
1 Press the ON/OFF control to activate
the navigation system.
2 If the warning box is displayed select
to confirm that you have read and accept
the warning text.
3 Press NAV and select
fold out the screen and access the slot
for the Nav DVD disc.
4 Insert the Nav DVD disc in the slot with
the text side up until the mechanism
loads the disc. Audio signals indicate
that the screen can once again be folded
in.
Insert Nav DVD to
OK
5 Fold in the screen by carefully pressing
the two top outer corners until the screen
is vertical. Now move the screen by
pressing the four outer corners against
the panel until you hear a clicking sound.
The screen can be damaged by folding it
in by directly pressing on the Navigation
screen.
NOTICE
At ambient temperatures below 0o C you
may need to wait for 10 minutes with the
Navigation system activated before the
display can be folded out and you can
change the Nav DVD disc.
Page 36

Infotainment460M09.book Page 36 Monday, March 31, 2008 11:15 AM
36 Cadillac BLS Navigation System
Changing a Nav DVD disc
Removing or changing the Nav DVD disc.
1 MENU
2 The screen is folded out automatically
Î Nav Î Map Database
Information
hold the CD player’s eject button to the
right of the slot for 10 seconds.
and the slot for the Nav disc is made
accessible.
Î Nav DVD or press and
3 Eject the Nav DVD disc using the eject
button below the slot. Remove the
ejected disc.
Two audio signals indicate that screen
can be folded in again.
4 Fold in the screen by carefully pressing
the two top outer corners until the screen
is vertical. Now move the screen by
pressing the four outer corners against
the panel until you hear a clicking sound.
USER TIP
We recommend that you contact a
Cadillac dealer for updated maps/new
DVDs.
NOTICE
Only the accompanying DVD map or
DVD maps from your Cadillac dealer can
be used.
Page 37

Infotainment460M09.book Page 37 Monday, March 31, 2008 11:15 AM
37Cadillac BLS Navigation System
Caring for DVDs
• Do not store DVDs in direct sunlight or
heat.
• Carefully wipe away dust and dirt from the
playing surface (side without label) using
a clean, soft, dry cloth. Wipe in straight
lines from the centre of the disc to the outside.
• Do not touch the playing surface. Hold
the disc by its outer edge or by holding
one finger on the outer edge and inserting
one finger into the hole.
• Do not use chemical cleaning products.
•Do not write or apply labels onto the play-
ing surface.
•Do not use a cracked or deformed disc.
Page 38

Infotainment460M09.book Page 38 Monday, March 31, 2008 11:15 AM
38 Cadillac BLS Navigation System
Quick guide
The quick guide covers the most common
ways to operate the navigation system.
System Overview
Touch screen - Select the buttons on the
screen to confirm a selection, start a function or display a sub menu. An audio signal
will be heard when a button on the screen
has been selected. The screen buttons are
marked when they are available.
NAV - Return to the navigation map with the
car’s current position. Each press of the Nav
button browses through the tabs
TMC and the tabs that show the active audio
source (AM, FM, CD, etc.).
WARNING
Traffic regulations and the current traffic
situation always take precedence over
the directions provided by the navigation
system. Think about the risk of an acci-
dent!
Full Map,
New route
In order to specify an address the correct
country must be selected. To change or
check country select:
1DEST
2 Press on the screen button that displays
the country code.
3 Scroll through the list with the help of the
arrow keys and select the country.
4 To confirm, select
Entering an address
Enter an address by searching for it in the
address register.
1DEST
Î Address Entry
2 Check that the right country has been
selected.
3Select
Town and enter the name of the
required town or select Last 5 Towns and
select one of five most recently stated
towns.
4 Enter the street name in the correspond-
ing text field by pressing the letters.
5Select
House No. and enter the house
number. The system displays the house
numbers that are available for the stated
street.
6Select
Map. The stated destination is
shown on the map.
7Select
Go and select route criteria
(
Fastest, Shortest or Other). The route is
calculated and displayed on the map.
OK.
Select a point of interest
Select a destination from the points of interest.
1DEST
Î POI - Point of Interest
2 Check that the right country has been
selected.
3Select
POI Name and enter a POI name.
4Select Go from the list to the right of the
required POI name. The stated destination is displayed on the map.
5 Select the route criteria (
Shortest or Other). The route is calcu-
Fastest,
lated and displayed on the map.
6Select
Start Guidance to start guidance.
Preferred route
Set the criteria for how a route is to be calculated.
1 Press MENU until the tab Nav is
selected or select Nav.
2Select
Route Preference.
3 Select, e.g. Avoid major roads to avoid
major roads when the route is calculated.
Page 39

Infotainment460M09.book Page 39 Monday, March 31, 2008 11:15 AM
39Cadillac BLS Navigation System
The Map
Following on the map
To follow the car’s current position on the
map without having started guidance on a
route, proceed as follows:
Press NAV to display the map.
Map view
Change map scale
You change the scale of the digital map by
using +/ - on the map scale.
•Select + to zoom in and display a more
detailed map.
•Select
Enlarged map
- to zoom out and display a larger
area on the map.
Map orientation
You can change the map orientation by
choosing to show the map with the car’s
direction of travel upward, the map with the
North upward or three-dimensional (3D)
map view. Select:
for the car’s upward direction of
travel. Press again to see a 3D
map view.
to display the map with north
upwards.
Map with car’s direction of travel upwards.
Page 40

Infotainment460M09.book Page 40 Monday, March 31, 2008 11:15 AM
40 Cadillac BLS Navigation System
State a destination
Press DEST to activate the destination
menu. Here you can select from five different options to state a final destination or
stop.
1 Press DEST.
State a destination
2 Select one of the following options to
state a destination:
•
Address Entry - Specify an address by
searching for it in an address index, see
page 40.
•
POI - Point of Interest - Select a destina-
tion from points of interest, see
page 42.
•
Address Book - Select an address that
has been saved in the address book,
see page 43.
•
Previous Destination - Select one of the
20 most recent final destinations, see
page 44.
•
From Map - Select a destination using
the map, see page 44.
Entering an address
Enter an address by searching for it in the
address index.
Change the country
Select or check the country.
1DEST
2 Press on the screen button that displays
the country code.
3 Scroll through the list with the help of the
arrow keys and select the country.
4 To confirm, select
OK.
Page 41

Infotainment460M09.book Page 41 Monday, March 31, 2008 11:15 AM
41Cadillac BLS Navigation System
City
Select a destination by first stating a town.
1DEST Î Address Entry
Entering an address
2 Check that the right country has been
selected.
3Select
Town and enter the name of the
required town or select
Last 5 Towns and
select one of five most recently stated
towns.
4 Enter the street name in the correspond-
ing text field by pressing the letters.
5Select
House No. and enter the house
number. The system displays the house
numbers that are available for the stated
street.
6Select
Map. The stated destination is
shown on the map.
7Select
Go and select route criteria
(
Fastest, Shortest or Other). The route is
calculated and displayed on the map.
Route criteria
8Select Start Guidance to start guidance.
USER TIP
Available letter options shown in the
alphabet are controlled by the availability
of addresses on the Nav DVD disc.
Page 42

Infotainment460M09.book Page 42 Monday, March 31, 2008 11:15 AM
42 Cadillac BLS Navigation System
Street name
Select a destination by first stating a street
name.
1DEST Î Address Entry
2 Check that the right country has been
selected.
3Select
Street and enter the name of the
required street or select Last 5 Streets
and select one of five most recently
stated street names.
4Select
House No. and enter the house
number. The system displays the house
numbers that are available for the stated
street.
5 When a house number is selected, the
street name will automatically be displayed. If there is more than one town to
choose from, a list of selectable towns
will be displayed. Select the town.
6Select
Map. The stated destination is
shown on the map.
7Select
Go and select route criteria
(
Fastest, Shortest or Other). The route is
calculated and displayed on the map.
8Select
Start Guidance to start guidance.
Intersection
State a destination by searching for a street
intersection.
1DEST Î Address Entry
2 Check that the right country has been
selected.
3Select
Street and enter the name of the
required street or select Last 5 Streets
and select one of five most recently
stated street names.
4 When street is selected, select
Junction
and start to enter the name of the intersecting street. Select the required street
from the list.
5Select
Map. The stated destination is
shown on the map.
6Select
Go and select route criteria
(
Fastest, Shortest or Other). The route is
calculated and displayed on the map.
7Select
Start Guidance to start guidance.
Point of interest (POI)
Select a destination from the points of interest.
POI name
State a destination by selecting a POI
name.
1DEST
2 Check that the right country has been
3Select
4Select Go from the list to the right of the
5 Select the route criteria (
6Select
Î POI - Point of Interest
selected.
POI Name and enter a POI name.
required POI name. The stated destination is displayed on the map.
Fastest,
Shortest or Other). The route is calcu-
lated and displayed on the map.
Start Guidance to start guidance.
Page 43

Infotainment460M09.book Page 43 Monday, March 31, 2008 11:15 AM
43Cadillac BLS Navigation System
Point of interest category
Select a destination from the POI category.
1DEST Î POI - Point of Interest
2Select Browse POI Categories to show
the list of POI categories.
3 To state other towns to search from,
select
Browse POI Categories Î Change
Location
. Select the required town. A list
of POI categories close to the stated
town will be displayed.
4 Select a category and then select a sub
category. The system shows available
POI names in the selected sub category.
Select the required POI name.
5Select
Browse POI Categories followed
by List All Categories to display a list of
all POI categories.
6 Select a category from the list to see a
list of all places in a special area where
the selected category is available.
Select a place.
7Select
Go to the right of the required POI
name. The stated destination is displayed on the map.
8 Select the route criteria (
Shortest or Other). The route is calcu-
Fastest,
lated and displayed on the map.
9Select
Start Guidance to start guidance.
Address book
State a destination by selecting an address
that has been saved in the address book.
1DEST Î Address Book
A list with the address book’s addresses
is displayed.
Address book
2 From the list, select the required
address. Use the arrow keys to scroll
through the list.
3Select
4 Select the route criteria (
5Select
To add an address to the address book, see
page 49.
Go to the right of the required
address. The stated destination is displayed on the map.
Fastest,
Shortest or Other). The route is calcu-
lated and displayed on the map.
Start Guidance to start guidance.
Page 44

Infotainment460M09.book Page 44 Monday, March 31, 2008 11:15 AM
44 Cadillac BLS Navigation System
Most recent destination
State a destination by selecting one of the
20 most recent final destinations.
1DEST Î Previous Destination
A list with the most recent destinations is
displayed.
Most recent destination
2 From the list, select the required most
recent destination. Use the arrow keys
to scroll through the list.
3Select
4 Select the route criteria (
5Select
Go to the right of the required
most recent destination. The stated destination is displayed on the map.
Fastest,
Shortest or Other). The route is calcu-
lated and displayed on the map.
Start Guidance to start guidance.
Via the map
Select a destination with the help of the
map.
1DEST Î From Map
A map view with a scroll symbol is displayed on the screen.
2Use + / - to zoom in/out on the map.
Place your finger on the screen and
move your finger across the map until
you have reached the selected destination. The map shows the address
information.
3Select
4Select
Go and select route criteria
(
Fastest, Shortest or Other). The route is
calculated and displayed on the map.
Start Guidance to start guidance.
Map coordinates
State a destination by stating the location’s
longitudinal and latitude.
1DEST
Î From Map Î Map Coordinates
2Select Latitude and select either N
(North) or
S (South) to state the direction
for the latitude coordinates. State the latitude.
3Select
Longtitude and select either E
(East) or
W (West) to state the direction
of the longitude coordinates. State the
longitudinal.
4 When both coordinates have been
stated, select
Go.
5Select Go and select route criteria
(
Fastest, Shortest or Other). The route is
calculated and displayed on the map.
6Select
Start Guidance to start guidance.
Page 45

Infotainment460M09.book Page 45 Monday, March 31, 2008 11:15 AM
45Cadillac BLS Navigation System
Preset stations
Select one of your saved presets as a destination. To save a route as a preset, see
page 49.
1 Press DEST.
2 Select the required preset button. The
preset buttons show the name that was
chosen when the preset was saved. The
stated destination is shown on the map.
3 Select the route criteria (
or Other). The route is calculated
test
and displayed on the map.
4Select
Start Guidance to start guidance.
Fastest, Shor-
Guidance
By changing the view mode on the map
during an active guidance you can adapt the
guidance on the screen to make it as clear
as possible.
Select on the screen to switch
between whole map and divided view.
If you have chosen divided view and are
travelling on a motorway, information about
approaching exits automatically appears to
the right of the map.
Page 46

Infotainment460M09.book Page 46 Monday, March 31, 2008 11:15 AM
46 Cadillac BLS Navigation System
Alternative to a route
During an active guidance you can change,
stop or check the route.
1 Press DEST to access the Route menu.
•
• Voice Volume - Set the volume for the
•
•
•
•
Detour - Calculate an alternative route,
see page 47.
voice instruction, see page 47.
Add Waypoint - Add up to three stops on
the existing route, see page 47.
Suspend Guidance - Pause the guid-
ance in progress.
Resume Guidance - Resume a tempo-
rary stopped guidance.
Cancel Guidance - Cancel a guidance in
progress.
Itinerary
Show the itinerary for the calculated group.
To avoid a side road, select:
1DEST Î Turn List
2 Select between the following menu
options:
•
Turn List - Show the itinerary for the cal-
culated route, see page 46.
•
Route Preview - Preview the calcu-
lated route on screen, see page 47.
2 Scroll through the itinerary list with the
help of the arrow keys.
3Select
Avoid to the right of the side road
you wish to avoid. The route is calculated and displayed on the map.
Page 47

Infotainment460M09.book Page 47 Monday, March 31, 2008 11:15 AM
47Cadillac BLS Navigation System
Show route
Preview the calculated route on screen.
1DEST Î Turn List Î Route Preview
Go to the starting point of the
route or to the previous stop.
Fast rewind to the starting point
or to the previous stop.
Stop the preview.
Fast wind to the next stop or to
the final destination.
Go to the next stop or to the final
destination.
Detour
Select Detour to calculate an alternative
route with a detour of either a stated distance from the car’s current position or from
the whole route. State the distance of the
detour:
•
1 km or
•
3 km or
• 5 km or
• Whole Route
USER TIP
If you drive off the route then a detour
cannot be calculated.
Voice volume
Select Voice Volume to adjust or activate/deactivate the volume of the voice
instruction.
For more information, see page 50.
Adding stops
Add up to three stops on an existing route
between the starting point and the final destination. The stops on a route can be
changed or removed.
To add a stop:
1 Press DEST.
2Select
3 Use the required option to state a stop,
4 Select the route criteria (
5Select
Add or Add Waypoint (this button
is only active if the route has been calculated).
see page 44.
Fastest,
Shortest or Other). The route is calcu-
lated and displayed on the map.
Start Guidance to start guidance.
Page 48

Infotainment460M09.book Page 48 Monday, March 31, 2008 11:15 AM
48 Cadillac BLS Navigation System
Add more stops
1 Press DEST.
2Select Add from the list where you wish
to add a stop.
3 Select the route criteria (
Shortest or Other). The route is calcu-
lated and displayed on the map.
4Select
Start Guidance to start guidance.
Fastest,
USER TIP
When a stop has been added the
distance to the stop is shown on the map.
Press the distance icon on the map to see
the distance to the final destination.
Remove a stop from the route
1 Press DEST.
2Select
3Select OK to confirm or Cancel to cancel.
Delete to delete a stop.
Guidance pause
Select Suspend Guidance to make a pause
in a guidance in progress.
Resume guidance
Select Resume Guidance to resume a temporarily stopped guidance.
Cancel guidance
Select Cancel Guidance to cancel a guidance in progress.
Page 49

Infotainment460M09.book Page 49 Monday, March 31, 2008 11:15 AM
49Cadillac BLS Navigation System
Save a destination in the
address book
There are two ways to save a destination in
the address book:
• To save the current destination in the
address book, select
The current destination is automatically
saved in the address book.
•Select
To change an address in the address book,
see page 51.
Add to Address Book when this
alternative is available. The destination is
automatically saved in the address book.
Mark on the map.
Save or change a preset
Here you can save or change a preset.
To select one of your saved presets as a
destination, see page 45.
Save the current destination as a preset
1Select Mark on the map to save the cur-
rent destination in the address book.
The address book menu is displayed.
2Select
3 Press and hold the required preset but-
Name. Enter a suitable name.
ton. Successful storage is indicated
when the name is shown on the preset
button.
Save an address in the address book as
a preset
1 Press MENU and then press MENU until
Nav is selected or select the Nav tab
directly.
2Select
3 Select the required address to save as a
4Select
5 Press and hold the required preset but-
Edit/View.
preset.
Name. Enter a suitable name.
ton. Successful storage is indicated
when the name is shown on the preset
button.
Page 50

Infotainment460M09.book Page 50 Monday, March 31, 2008 11:15 AM
50 Cadillac BLS Navigation System
Navigation settings
Press MENU until the tab Nav is selected or
select
Nav and one of the following setting
options:
• Voice Prompt - Adjust the level of voice
guidance and voice recognition prompts.
•
Route Preference - Set the criteria for how
a route is to be calculated.
•
Edit Address Book:
• Adding - Show information about how
you add a record to the address book.
•
Edit/View - Change/display address
book information
•
Map Database Information - See the cover-
age area of the DVD disc, see page. 34.
•
Traffic Information - Show traffic
announcements and use traffic information to calculate a route, see page 51.
•
Off-Road mode - Show the car’s itinerary,
if you leave a digitalised road, see
page 53
Voice prompt
Adjust the level of the voice guidance and
voice recognition prompts. Activate/deactivate voice guidance.
Voice prompt
Volume - Select + (plus) or - (minus) to adjust
the level of the voice recognition prompts.
Voice Guidance - Select On or Off to acti-
vate/deactivate voice guidance.
Preferred route
Set the criteria for how a route is to be calculated.
Avoid major roads
Avoid toll roads
Avoid ferries
Avoid motorails
Avoid time and seasonal restricted roads
Preferred route
Check one or more of the following alternatives:
Avoid major roads to avoid major roads.
Avoid toll roads to avoid road charges.
Avoid ferries to avoid ferries.
Avoid motorails to avoid motorail services.
Avoid time and seasonal restricted roads to
avoid time/season restricted roads.
USER TIP
Even if you have chosen to avoid major
roads, ferries and such like, the system
may all the same suggest taking such a
route if other alternatives are unrealistic.
Page 51

Infotainment460M09.book Page 51 Monday, March 31, 2008 11:15 AM
51Cadillac BLS Navigation System
Edit the address book
Add
Select
Adding to display information how to
add a record to the address book.
Change the name
1Select
2 Select the required record in the
3Select
4Select OK to confirm.
Adding/changing a phone number
1Select
2 Select the required record in the
3Select
4Select
Edit/View.
address book.
Name and change the name.
Edit/View.
address book.
Phone No. and change the tele-
phone number.
OK to confirm.
Change the map icon
1Select Edit/View.
2 Select the required record in the
address book.
3Select
Icon.
4 Select an icon from the list.
Add voice marker
1Select
2Select
Edit/View.
Add Voice Tag.
3 The system asks you to read in a voice
marker. You have four seconds to read
in a voice marker. The system repeats
the read voice marker.
Delete a record
1Select
Edit/View.
2 Select the required record in the
address book.
3Select
Delete to delete a record.
4Select OK to delete or No to cancel.
Delete all records
1Select
Edit/View.
2 A list containing all the address book
records is shown. Press and hold
.
All
Clear
3Select OK to delete or No to cancel.
Traffic information
The navigation system receives traffic information via RDS/TMC. This traffic information can be presented on the screen and
used during route calculation.
One condition in order for the navigation
system to receive traffic information is that
there is reception of an RDS/TMC station.
When the active radio station transmits, a
TMC indication on the TMC tab comes on.
USER TIP
The Traffic Message Channel (TMC) is a
analogue channel for coded traffic
announcements, which are not broadcast
on the radio. The codes are translated
and text messages regarding the incident
displayed.
Cadillac is not responsible for the content
of TMC information.
Page 52

Infotainment460M09.book Page 52 Monday, March 31, 2008 11:15 AM
52 Cadillac BLS Navigation System
TMC status icon
A car symbol is shown on the TMC tab,
where the colour varies depending on the
status of the traffic announcement.
Without a calculated route
Green
car
Yellow
car
No traffic incidents within 5 km
of the car’s current position.
Traffic incident within 5 km of
the car’s current position.
With a calculated route
Green
car
Yellow
car
No traffic incidents on the calculated route.
One or more traffic incidents on
the calculated route.
Red car Traffic incident announce-
ments of a type that the route
should be recalculated.
Traffic settings
Traffic settings
Nav Î Traffic Information
1
2 Select between the following menu
options:
• Traffic Information on Map - Show TMC
icons and arrows on the map.
•
Voice Notification - Obtain voice
instructions for a traffic incident on the
route.
• Dynamic Route Guidance - Let the
system take traffic announcements into
consideration when calculating a route.
•
Display Confirmation - Show a confir-
mation when a route has been recalculated. This menu option is only
available when
Guidance
•
Preferred Station - Select Auto to auto-
matically retrieve traffic information
from an RDS/TMC station or select
which RDS/TMC station that traffic
information should be taken from (if
there is more than one station available).
Dynamic Route
is active.
Traffic on the calculated route
Press NAV until the tab TMC is selected or
select the TMC tab directly to display information about all the traffic announcements
on the calculated route.
To sort the list, select from the following
menu options:
•
Dist. - Distance to the traffic incident.
•
Icon - TMC icons.
• Name - Alphabetical order.
Select On Route to switch between display-
ing the list of traffic incidents on the route
and to display a list with all traffic incidents.
The menu option
On Route is only active
when there is a traffic announcement on the
calculated route.
Page 53

Infotainment460M09.book Page 53 Monday, March 31, 2008 11:15 AM
53Cadillac BLS Navigation System
Traffic information
Select a traffic announcement from the list
or select a TMC icon on the map and then
select
Info to show the traffic information.
Traffic information
Select between the following menu options:
• Map - Show the traffic incident on the map.
•
Detail - Show detailed information about
the traffic incident
TMC icons
The table explains the meaning of the TMC
icons that are shown in conjunction with traffic announcements.
Stationary traffic
Queues
Accident
Road closed
Roadworks
Danger
Road conditions
Weather
Delays
Off-road mode
If you are currently outside of a digitalised
road, i.e. a road that is not included in the
map database, the car’s direction of travel
will be shown by a dashed line on the map.
The screen shows both map view and compass view.
Parking
Information
Page 54

Infotainment460M09.book Page 54 Monday, March 31, 2008 11:15 AM
54 Cadillac BLS Navigation System
Other settings
Press MENU to make settings for Sound,
Radio, Nav (navigation), Display or the
clock. Press MENU to browse through the
different tabs.
Audio
Press MENU until the tab Sound is selected
or select the Sound tab directly to adjust the
tone and speaker settings.
For more information see Audio settings 3
on page 58.
Radio
Press MENU until the tab Radio is selected
or select the Radio tab directly to adjust
among others the automatic volume control
and FM RDS settings.
For more information see Radio menu on
page 63.
Screen
Press MENU until the tab Display is
selected or select the Display tab directly.
Brightness/Contrast/Mode
Select
Brightness/Contrast/Mode to adjust
the screen contrast and brightness.
(Brightness) - Select and hold
+ (plus) or - (minus) to increase or
decrease the screen brightness.
(Contrast) - Select and hold
+ (plus) or - (minus) to increase or
decrease the screen contrast.
Auto - This screen light settings are adjusted
automatically depending on the ambient
light conditions.
Night - The screen has permanent night set-
tings.
Day - The screen has permanent day set-
tings.
Screen OFF
Select
Display OFF to switch off the naviga-
tion system’s screen.
Set the clock
Press MENU until the tab to set the clock is
selected or select the clock symbol tab
directly.
Hours - Select and hold + (plus) or - (minus)
to increase or decrease the number of
hours.
Minutes - Select and hold + (plus) or
- (minus) to increase or decrease the
number of minutes.
12/24 Format - Select whether the time is to
be shown as 12h or 24h.
RDS time - Adjust the clock to RDS time.
Normal reception conditions are necessary
to obtain RDS time and that the radio station
in question transmits signals for RDS time,
(CT-Clock Time).
Page 55

Infotainment460M09.book Page 55 Monday, March 31, 2008 11:15 AM
55Cadillac BLS Navigation System
Point of interest (POI)
Select POI to display or hide POI icons on
the map. Select from the following menu
options:
•
Show POI - Show or hide POI icons on the
map.
•
POI Close to - Show a list of available POIs
in the selected POI category.
•
Show genre - Shown more POI catego-
ries.
• Clear List - Delete all selected POI categories.
•
OK - Display map view.
Show POI
Show or hide POI icons on the map.
1Select
2 Select a POI category to be shown or
3Select Show POI to show/hide POI icons.
POI (Point of Interest).
hidden on the map.
Selected POI icons are shown in the top,
left-hand corner of the screen. Up to five
POI categories can be selected.
Selected POI icons are shown/hidden
on the map.
Nearby POI
Search for a nearby POI.
1Select
POI Close to to show a list of the
nearest POIs in the selected POI category.
2 To sort the list, select from the following
menu options:
•
Dist. - Distance to the POI.
• Icon - POI icons.
• Name - POI name
• On Route - POIs on route
Show genre
Show more POI categories.
1Select
POI (Point of Interest).
2Select Show genre.
3 A list of all POI categories is shown.
4 Select a POI category to be shown or
hidden on the map.
5Select
OK to display map view with the
selected POI category.
POI Information
Select a POI name from the list or select a
POI icon on the map and then select Info to
show POI information. The following menu
options are available:
•
Add to Address Book - Add the selected
POI to the address book.
•
Map - Display a map view with the
selected POI.
•
Go - Make the selected POI a stop or a
final destination.
Page 56

Infotainment460M09.book Page 56 Monday, March 31, 2008 11:15 AM
56 Cadillac BLS Navigation System
FAQ
• The map doesn’t show what’s actually
there, why? Due to continuous construc-
tion work, changes to the road network
and suchlike, the digital maps are not
always complete. For more information,
contact your Cadillac dealer.
• The position of the car is incorrect
after it having been towed or transported, why? If the car has been transpor-
ted, such as on a train or ferry, or if GPS
reception has not been possible, it can
take up to 30 minutes to calculate the
position of the car.
• The system doesn’t calculate the
quickest/shortest route, why? Expe-
rience and local knowledge can sometimes produce a better route than that
calculated by the system.
• The position of the car on the map is
wrong, why? GPS reception can be dis-
rupted. Local conditions and/or incomplete data can cause calculation errors.
• The position of the car on the map is
wrong after the battery is reconnected,
why? If the power supply to the GPS
antenna has been cut, it may take up to 30
minutes before the system can receive
GPS signals and calculate the correct
position of the car.
• The position of the car on the map is
wrong after the tyres have been changed, why? The system automatically
recalibrates after a tyre change. The time
required for this varies depending on the
type of road and speed of the car.
• Do I need to start the car to use the
navigation system? No, you only need
to insert the key.
• The traffic information is incorrect,
why? Cadillac is not responsible for the
content of TMC information.
Page 57

Infotainment460M09.book Page 57 Monday, March 31, 2008 11:15 AM
57Cadillac BLS Navigation System
Navigation Audio System
Switching the audio
system On/Off _______ 58
Radio _______________ 61
CD player ____________ 66
MP3/WMA player______ 68
Error codes __________ 71
Security lock _________ 71
Portable player _______ 72
Audio system ________ 73
Page 58

Infotainment460M09.book Page 58 Monday, March 31, 2008 11:15 AM
58 Cadillac BLS Navigation System
Navigation Audio
System
To get the best out of your Navigation Audio
System, we recommend that you read
through this entire section.
The Navigation Audio System consists of a
main unit with radio, CD player for CD and
MP3/WMA discs. The Audio System is
available with different amplifier and
speaker options, see page 73.
The audio system is operated using the
steering wheel controls or the control panel
buttons.
WARNING
Safety first!
Cut off power immediately and contact
your Cadillac dealer if the system begins
to emit smoke or smells strange.
All work on the Audio system must be carried out
by a workshop. We recommend that you contact
an authorised Cadillac workshop.
Switching the audio
system On/Off
Switching the audio system
on
Switch on the audio system by turning the
key in the ignition switch to position 3 and/or
press the ON/OFF control once.
ON/OFF control
Switching the audio system
off
The audio system is switched off:
• When the ON/OFF control is pressed.
• When the ignition key is removed.
• One hour after the ignition was switched
OFF, if the ignition key has not been
removed.
• 1 hour after the audio system has been
switched on if the key is not in the ignition
switch.
Audio settings 3
Volume
Turn the ON/OFF control until the desired
volume is obtained.
Tone controls
Press the tone control to open the menu for
tone and speaker settings.
Tone and speaker settings
Page 59

Infotainment460M09.book Page 59 Monday, March 31, 2008 11:15 AM
59Cadillac BLS Navigation System
TREBLE - Select and hold + (plus) or
- (minus) to adjust the treble. If a station is
weak or noisy, increase the treble.
MID (Midrange) - Select and hold + (plus) or
- (minus) to adjust the midrange.
BASS - Select and hold + (plus) or - (minus)
to adjust the bass.
Personal tone settings
Select and save your personal tone settings.
• Press
Custom. to select your saved save
your personal tone settings. To adjust the
settings, select and hold
+ (plus) or
• - (minus) for each respective tone setting,
see Tone controls on page 58.
Speaker settings
L/R (Left/Right) (Balance) - Select and hold
L or R to balance the sound between the left
and right-hand speakers.
Front/Rear (Fader) - Select and hold Front or
Rear to balance the sound between the front
and rear speakers.
Automatic tone setting
You can select to automatically adapt your
tone settings for the programme you are listening to or the disc you are playing.
1 Press the tone control to open the menu
for tone and speaker settings.
2 Select the required tone setting.
Automatic tone setting
Page 60

Infotainment460M09.book Page 60 Monday, March 31, 2008 11:15 AM
60 Cadillac BLS Navigation System
Audio settings
Bose® Centerpoint®
Surround Sound System 3
Volume
Turn the ON/OFF control until the desired
volume is obtained.
Tone controls
Press the tone control to open the menu for
tone and speaker settings.
Centerpoint
Tone and speaker settings
TREBLE - Select and hold + (plus) or
- (minus) to adjust the treble. If a station is
weak or noisy, increase the treble.
MID (Midrange) - Select and hold + (plus) or
- (minus) to adjust the midrange.
BASS - Select and hold + (plus) or - (minus)
to adjust the bass.
Speaker settings
L/R (Left/Right) (Balance) - Select and hold
L or R to balance the sound between the left
and right-hand speakers.
Front/Rear (Fader) - Select and hold Front or
Rear to balance the sound between the front
and rear speakers.
Centerpoint
With the Bose® Centerpoint® Surround
Sound System, Centerpoint
®
signal processing circuitry
®
signal
processing circuitry creates a surround
sound listening experience from stereo
CDs, MP3 CDs, satellite radio and auxiliary
audio sources. AM/FM is not supported by
the surround function.
Press
Centerpoint
®
to activate the surround
function. Other tone and speaker settings
can be adjusted even when the surround
function is active, although not the Fader
setting.
The surround function settings are saved for
each individual audio source (CD, MP3 and
AUX).
Automatic tone setting
You can select to automatically adapt your
tone settings for the programme you are listening to or the disc you are playing.
1 Press the tone control to open the menu
for tone and speaker settings.
2Select
Talk.
Personal tone settings
Save and reset your personal tone settings.
Press
Custom. to select your saved save
your personal tone settings. To adjust the
settings, select and hold
- (minus) for each respective tone setting,
+ (plus) or
see Tone controls on page 60.
Page 61

Infotainment460M09.book Page 61 Monday, March 31, 2008 11:15 AM
61Cadillac BLS Navigation System
Radio
Selecting a radio station
You can choose between three different
screen display modes to select/change
radio stations:
• Whole map - In screen mode with the
whole map only the steering wheel
controls, or are used to
select/change to another preset station.
• Divided map - In screen mode with the
whole map, select one of the audio tabs to
divide the screen and show both the map
view and the menu for the active audio
source (
play mode all functions to select/change
the radio station are available.
• Active audio source - Press AUDIO to
only show the menu for the active audio
source (
Selecting a frequency band
Select
frequency band.
AM, FM, etc.). In this screen dis-
AM, FM, etc.).
AM, FM or press AUDIO to select the
AM/FM categories
You can choose to search for all available
radio stations within a specific category, for
example, POP, where you are currently
located.
1 Select the screen button in the centre of
the screen to display a list of all available
radio stations within a specific category
e.g. POP, where you are currently
located.
2 Scroll through the list with the help of the
arrow keys.
3 Select the required radio station.
To perform a new search and update the
list, select
Selecting a preset station
Browse to the required preset page by
pressing the FAV button and then select the
required preset station (1-5).
You can also press the steering wheel controls, or to select another preset station.
Refresh List.
Tuning
Fine tuning
Turn the tone control one step to fine tune
the current frequency by an increment of
0.1 MHz.
Automatic tuning
Press one of the SEEK buttons to perform
automatic tuning. The radio searches for the
closest, strong station upwards or downwards in the frequency band and stops at
this frequency.
Manual tuning
Turn the tone control to manually tune a frequency.
Page 62

Infotainment460M09.book Page 62 Monday, March 31, 2008 11:15 AM
62 Cadillac BLS Navigation System
Storing presets
You can store up to 15 FM stations and
15 AM stations as presets by using the
preset buttons on the screen and the FAV
button. Press the FAV button to browse
through up to 3 pages with 5 stored presets
per page.
Storing the current station as a preset
To store the current station as a preset:
1Select
2 Press the FAV button until you come to
3 Select and hold the preset (1-5) where
AM, FM or press AUDIO to select
the frequency band.
the preset page (1-3) at which the station is to be stored.
you wish to store the station for more
than 2 seconds. An audio signal can be
heard when the station is stored.
Preset stations
Page 63

Infotainment460M09.book Page 63 Monday, March 31, 2008 11:15 AM
63Cadillac BLS Navigation System
Radio menu
Radio menu
Press MENU until the tab Radio is selected
or select the Radio tab directly and one of
the following setting options:
•
Additional Information Displayed - Select
whether detailed information is to be
shown on the audio screen when available.
•
TP - Switching TP on and off
• FM RDS Setup - Select between the following menu options:
• Alternative Freq.
• Regionalt
• PS-Name Freeze
• Remove/Add FM Categories
• Automatic Volume Control - Select
whether to allow the audio system to automatically compensate as the car accelerates or decelerates.
Show detailed information
Select Additional Information Displayed
whether detailed information is to be shown
on the audio screen when available.
Automatic Volume Control
As vehicle speed increases, ambient noise
also increases. If you do not wish to continually adjust the volume, the audio system
can automatically adjust volume based on
an increase or decrease in vehicle speed.
Select one of four settings:
•
Off (no compensation)
•
Low (low compensation)
• Med (medium compensation)
• High (maximum compensation)
1Select Automatic Volume Control.
2 Select required speed compensation.
Traffic programme (TP/TA)
If TP (Traffic Programme) is activated, the
radio automatically monitors the airwaves
and plays traffic announcements (TA), even
from radio stations other than the current
station. Any traffic announcements are
given priority and will interrupt radio or CD
playback.
Switching TP on and off
Select TP to switch the TP function on/off.
When TP is on
hand corner of the screen.
The radio station you are listening to when
you press TP may not be able to transmit
traffic announcements. The screen then
shows:
TP is currently not available. Search for TP
Station?
If you select Yes when the text above is
shown, the radio will tune to a station that
supports traffic announcements. While
tuning is in progress the screen shows:
Searching TP Station
TP is shown in the top left-
Page 64

Infotainment460M09.book Page 64 Monday, March 31, 2008 11:15 AM
64 Cadillac BLS Navigation System
FM RDS settings
The Radio Data System (RDS) transmits
information in parallel with radio programmes broadcast over the FM network in
Europe. The signal from such FM stations
enables the automatic selection of the
transmitter providing the strongest signal,
thereby achieving the best possible reception.
Automatic traffic information and programme type monitoring are examples of
functions enabled by RDS.
Good reception is necessary for the RDS to
work well.
FM RDS settings
Alternative Frequency (AF)
The Alternative Frequency (AF) function
means that the radio will automatically seek
the strongest station to maintain good
reception.
• To switch on AF: select
Alternative Freq..
• To switch off AF: deselect
Alternative Freq..
When the function is switched on the indication
AF is shown in the top left-hand corner
of the screen.
USER TIP
We recommend that AF is always activated in order to maintain as good reception as possible.
Regional frequencies (REG)
To prevent the radio switching between various regional radio stations REG, which is
normally inactive, can be turned on. This
limits the available frequencies to those
within the same regional broadcast as the
current station.
• To switch on REG: select
• To switch off REG: deselect
When the function is active, REG appears
on the screen.
Regionalt.
Regionalt.
Rolling advertisements
Some radio stations present rolling advertisements on the screen.
• To prevent rolling advertisements, select
PS-Name Freeze.
• To allow rolling advertisements, deselect
PS-Name Freeze.
Page 65

Infotainment460M09.book Page 65 Monday, March 31, 2008 11:15 AM
65Cadillac BLS Navigation System
Show/hide FM categories
You can choose to show/hide FM categories.
1Select
2 Select or deselect the appropriate FM
Reset all FM categories
To reset all FM categories, select
All Categories
Remove/Add FM Categories.
categories in the list that are to be shown
or hidden.
Restore
.
Current FM categories
News News
Current Affairs Current affairs
Information Information
Sport Sport
Education Education
Drama Drama
Culture Culture
Science Science
Varied Speech Entertainment
Pop Music Pop music
Rock Music Rock music
Easy Listening Easy listening
Light Classics Light classical
Serious Classics Classical music
Other Music Other music
Weather & Metr. Weather
Finance Finance
Children's Progs Children’s progs
Social Affairs Social affairs
Religion Religion
Phone In Phone-in
Travel & Touring Travel & Touring
Leisure & Hobby Leisure & Hobby
Jazz Music Jazz music
Country Music Country music
National Music National music
Oldies Music Golden oldies
Folk Music Folk music
Documentary Documentary
Page 66

Infotainment460M09.book Page 66 Monday, March 31, 2008 11:15 AM
66 Cadillac BLS Navigation System
CD player
NOTICE
Do not use CDs with labels or stickers.
These labels could detach and cause the
audio system to malfunction.
Loading CDs
Insert the disc in the slot with the text side
up until the mechanism loads the disc. The
first track is played. If the disc is wrong-sideup, it will be ejected automatically.
Once all the tracks have been played, the
CD player will restart from the beginning
again.
The CD player is turned off by pressing
ON/OFF to turn off the audio system or by
selecting another audio source.
Removing CDs
Press the EJECT button to eject the CD. If
you press EJECT without removing the
ejected disc, the player will reload the disc
after 10 seconds for reasons of safety.
Play a CD
CD menu
In screen mode with the whole map, select
CD to divide the screen and show both the
map view and the CD menu. To only show
the CD menu, press AUDIO or select
Select the pause button to pause playback.
Press the play button to continue playing the
CD.
CD.
Selecting and changing tracks
Turn the tone control or press the SEEK buttons to select or change to the preceding or
next track. The track number appears on the
screen.
If the current track has played for at least
8 seconds, you can start the track from the
beginning by pressing SEEK (arrow left).
If you press SEEK (arrow right) while the
last track of the disc is playing, the first track
will play.
If you press SEEK (arrow left) while the first
track of the disc is playing, the last track will
play.
The same function applies for the steering
wheel controls, or .
Page 67

Infotainment460M09.book Page 67 Monday, March 31, 2008 11:15 AM
67Cadillac BLS Navigation System
Rapid playing of tracks
To rapid play the current track, press and
hold or on the screen.
Release the button to stop rapid play and
return to normal playback.
Random playback
You can allow the CD player to choose
tracks randomly, i.e. not to play the tracks in
numerical order.
• To play tracks randomly, select Random.
• To resume playing tracks in numerical
order, select
Random playback
Random again.
Page 68

Infotainment460M09.book Page 68 Monday, March 31, 2008 11:15 AM
68 Cadillac BLS Navigation System
MP3/WMA player
NOTICE
Do not use CD-R discs with labels or
stickers. These labels could detach and
cause the audio system to malfunction.
The audio system can play MP3/WMA files
recorded on a CD-R disc with the following
bit speed: 32 - 320 kbps. Sound quality may
vary depending on the quality of the CD-R
disc, recording method and quality of the
recorded music.
The audio system can read and play a
maximum of 50 folders, 10 sessions and
255 MP3/WMA files. Discs that contain
more folders, playlists, sessions and files
will be able to play up to the maximum limit,
however everything else will be ignored.
Folder names with more than 12 characters
will be abbreviated.
Play an MP3/WMA disc
MP3/WMA player
In screen mode with the whole map, select
CD to divide the screen and show both the
map view and the CD menu. To only show
the CD menu, press AUDIO or select
Select the pause button to pause playback.
Press the play button to continue playing the
MP3/WMA disc.
CD.
Loading MP3/WMA discs
To load an MP3/WMA disc, insert the disc in
the slot with the text side up until the mechanism loads the disc. The first MP3/WMA
file in the first playlist of the disc will then be
played.
If the disc is wrong-side-up, it will be ejected
automatically.
Removing MP3/WMA discs
Press the EJECT button to eject the disc. If
you press EJECT without removing the
ejected disc, the player will reload the disc
after 10 seconds for reasons of safety.
Page 69

Infotainment460M09.book Page 69 Monday, March 31, 2008 11:15 AM
69Cadillac BLS Navigation System
Select/change folder, artist or
album
Select the left-hand or right-hand arrow
on the screen to play the previous or next
folder, artist or album.
Selecting/changing
MP3/WMA file
Turn the tone control or press the SEEK buttons to select or change to the preceding or
next MP3/WMA file in the current folder or
playlist. The MP3/WMA file number
appears on the screen.
If the current MP3/WMA file has played for
at least 8 seconds, you can start the
MP3/WMA file from the beginning by pressing SEEK (arrow left).
If you press SEEK (arrow right) while the
last MP3/WMA file in a folder or playlist is
playing, the first MP3/WMA file of the folder
or playlist will play.
If you press SEEK (arrow left) while the first
MP3/WMA file in a folder or playlist is playing, the last MP3/WMA file of the folder or
playlist will play.
The same function applies for the steering
wheel controls, and .
Rapid playing an
MP3/WMA file
To rapid play the current MP3/WMA file,
select and hold or on the
screen. Release the button to stop rapid
play and return to normal playback.
Random playback of
MP3/WMA files
You can allow the MP3/WMA player to randomly select MP3/WMA files, i.e. not to play
the files in numerical order.
• To play MP3/WMA files randomly, select
Random.
• To resume playing MP3/WMA files in
numerical order, press
Random playback of MP3/WMA files
Random again.
Page 70

Infotainment460M09.book Page 70 Monday, March 31, 2008 11:15 AM
70 Cadillac BLS Navigation System
Playback order
Files on a CD-R disc will be played in the following order:
• The first MP3/WMA file in the first playlist
will be played, followed by all files in each
playlist. When the last MP3/WMA file in
the last playlist has been played, playback
starts from the beginning with the first
MP3/WMA file in the first playlist.
• The first MP3/WMA file in the first folder
will be played, followed by all files in each
folder. When the last MP3/WMA file in the
last folder has been played, playback
starts again from the beginning with the
first MP3/WMA file in the first folder.
Song title, artist name, etc.
If a disc is recorded with ID3 data (V.1.0 or
V.1.1) the song title, artist name, name of
the album and name of the folder can be
shown on the screen. Filenames with more
than 32 characters will be abbreviated.
Music navigator
To play MP3/WMA files sorted by artist or
album, select Folder in the middle of the
screen.
The CD player searches through the disc
and sorts files by artist and album. This
could take several minutes depending on
the number of MP3/WMA files on the disc.
Scroll through the list with the help of the
arrows on the screen.
Music navigator
MP3/WMA
If you have disc containing both CDA tracks
and MP3/WMA (Windows Media Audio)
files, the player will play the CDA tracks first.
Select
MP3/WMA to switch and play the
MP3/WMA files.
Page 71

Infotainment460M09.book Page 71 Monday, March 31, 2008 11:15 AM
71Cadillac BLS Navigation System
Error codes
NOTICE
Proceed with care if rectifying a fault. If in
doubt, contact a workshop. We recommend that you contact an authorised
Cadillac workshop.
The audio system has a built-in diagnostics
function. If a fault is detected, an error code
is generated to help workshop technicians
to diagnose the fault. Below are a few error
codes that you might be able to rectify yourself.
Error code Possible cause
CD Error • CD is dirty, scratched or defective.
• The CD may be improperly burned.
CD turned over • The CD disc is wrong side up.
The CD player/CD changer is classified
as Class 1 laser equipment.
• Service and repair work must only be
carried out by authorised technicians.
• If the casing is damaged, hazardous
laser radiation can occur.
NOTICE
All work on the Audio system must be
carried out by a workshop. We recommend that you contact an authorised
Cadillac workshop.
WARNING
Security lock
The audio system is equipped with an electronic security lock. The special code is
unique to the car in which the audio system
is installed.
Each time the audio system is switched on,
a check is made to ensure that the code is
correct.
If not, the following will appear on the
screen:
If the audio system is to be transferred to
another car (Cadillac BLS), a Cadillac
dealer must be contacted to provide the
right code for the audio system.
THEFTLOCK ACTIVATED
Page 72

Infotainment460M09.book Page 72 Monday, March 31, 2008 11:15 AM
72 Cadillac BLS Navigation System
Portable player
WARNING
Place the portable player where it cannot
be thrown around and cause personal
injury in the event of a collision.
AUX input
The AUX input is located at the top right of
the audio system. It can be used to connect
a portable unit, such as an MP3 player, to
the audio system.
Adjust the audio settings using the control
panel or the steering wheel controls. To
change tracks, fast forward, etc., use the
controls on the portable player.
Connecting and activating a
portable player
1 Connect the unit via the AUX input on
the audio system.
2 Press AUDIO until the tab AUX is
selected or select the AUX tab directly.
A portable player must be connected via the
AUX input on the audio system for the AUX
menu to be available on the screen.
AUX input at the top right of the audio
system
Page 73

Infotainment460M09.book Page 73 Monday, March 31, 2008 11:15 AM
Audio system
The audio system is available in different
versions: Sound System and Bose
Centerpoint
Loudness is controlled automatically by the
audio system, boosting the highest and
lowest frequency ranges to compensate the
sound image when the volume is set to a low
level. Sound reproduction is therefore
excellent whatever the volume.
®
Surround Sound System.
®
73Cadillac BLS Navigation System
Page 74

Infotainment460M09.book Page 74 Monday, March 31, 2008 11:15 AM
74 Cadillac BLS Navigation System
(This page has been left blank.)
Page 75

Infotainment460M09.book Page 75 Monday, March 31, 2008 11:15 AM
75Cadillac BLS Navigation System
Voice recognition
Introduction__________ 76
Voice commands _____ 76
Page 76

Infotainment460M09.book Page 76 Monday, March 31, 2008 11:15 AM
76 Cadillac BLS Navigation System
Introduction
Voice recognition means that the audio navigation system can be operated with the
help of voice commands.
Voice recognition offers many advantages.
Most importantly, it requires less attention
than conventional controls allowing the
driver to concentrate on the traffic.
A map DVD must be loaded and the navigation system activated in order for voice recognition to be used.
Activating voice recognition
The voice recognition system is activated by
pressing the PTT button on the steering
wheel. Any audio source is muted. A tone
indicates that the system is listening and
ready to receive a voice command.
Some sounds will still be audible after the
voice recognition system has been activated for reasons of safety.
Press the PTT button to end the voice session.
PTT button (PTT=Push-To-Talk)
Voice commands
When you give a voice command, remember to look forward and speak clearly at a
normal speed. A voice command can consist of one word or several consecutive
words.
After the tone that indicates the system is
ready you have 7 seconds to give a voice
command.
If you do not give a voice command during
the time the system is listening, the system
will request a voice command. The voice
session will be ended if you do not give a
voice command.
The voice recognition system is sensitive to
individual pronunciation, e.g. different dialects, and cannot be taught to understand
different pronunciations. The system alerts
you to voice commands it does not recognise.
Alternative voice commands
There are alternative voice commands that
can be used if the system has difficulty in
understanding a particular voice command.
Alternative commands are written with /
between, e.g. CD / Disc, i.e. you can choose
to say either CD or Disc. Commands that
can be omitted are written inside braces,
e.g. Radio [band] [select] FM, i.e. you can
choose to say Radio band FM, Radio select
FM or Radio FM.
Page 77

Infotainment460M09.book Page 77 Monday, March 31, 2008 11:15 AM
77Cadillac BLS Navigation System
Navigation, voice commands
Navigation go to [destination], Navigation select [destination]: Using these
voice commands you start guidance to a
destination saved as a voice marker.
The system will ask for a voice marker.
State a voice marker.
If the route is not active, the system will
make the spoken voice marker the final destination. If a group is active, a voice marker
will be added to the route as a stop. Up to
three stops can be added to a route.
To save a destination as a voice marker,
see page 51.
Navigation help: Receive help with voice
commands for navigation.
Screen, voice commands
With the help of the voice commands below
you can make screen settings.
Display [set] day [mode]: The screen has
permanent day settings.
Display [set] night [mode]: The screen
has permanent night settings.
Display [set] auto [mode]: This screen’s
light settings are adjusted automatically
depending on the ambient light conditions.
System help: Receive help with voice commands for the screen.
Radio, voice commands
Radio: Activate the radio.
Radio [band] [select] AM, Radio [band]
[select] FM: Select frequency band.
Radio [select] <frequency> [AM], Radio
[select] <frequency> [FM]: Select a radio
frequency.
Radio help: Receive help with voice com-
mands for the radio.
Page 78

Infotainment460M09.book Page 78 Monday, March 31, 2008 11:15 AM
78 Cadillac BLS Navigation System
CD player, voice commands
The voice commands below apply to
CDs/MP3s.
CD / Disc: Activate the CD/MP3 player.
CD / Disc [select] track <y>: Select a track
on the CD/MP3 disc.
CD / Disc [select] next folder: Go to the
next folder on the MP3 disc.
CD / Disc [select] previous folder: Go to
the previous folder on the MP3 disc.
CD / Disc Help: Receive help with voice
commands for the CD/MP3 player.
AUX input, voice commands
The voice commands below are available
when a portable player is connected to the
AUX input.
AUX / Auxiliary: Activate the portable
player.
Phone
If the car is equipped with navigation system
and Bluetooth Universal Handsfree Phone
(UHP) 3 then you must say TELEPHONE
to access the phone’s voice recognition. For
phone voice commands, see page 93.
Voice recognition help
Voice help / Help: Help you get to grips with
voice recognition.
Cancel
Cancel: Cancel voice recognition.
Page 79

Infotainment460M09.book Page 79 Monday, March 31, 2008 11:15 AM
79Mobile phone 3
Mobile phone 3
The Cadillac BLS Infotainment system has
provisions for the installation of a mobile
phone.
• Hands-free provision (TEL 1)
USER TIP
• Installation must be carried out by a
workshop. We recommend that you
contact an authorised Cadillac workshop.
• We recommend that you contact your
Cadillac dealer for information on
which mobile phones are suitable for
this type of installation.
• A mobile phone cradle is available as
an accessory.
WARNING
• Using a mobile phone while driving
can easily distract one’s attention from
the road, creating a safety hazard.
• Do not use the phone if your full attention is required by the traffic situation.
Switch the phone off in heavy traffic.
• Stop the car in a convenient place
when you receive or before making a
call.
• Never take written notes while driving.
• Use the hands-free equipment.
• Use the redial and speed dial functions to allow you to maintain your
attention on the traffic.
• Keep calls brief. Let the person you
are talking to know that you are driving. Avoid stressful and involving telephone conversations.
• Acquaint yourself with the legal provisions governing the use of mobile
phones while driving. In many countries it is forbidden under penalty of a
heavy fine to use a mobile phone while
driving.
• Do not use a mobile phone while
refuelling. Petrol fumes can be highly
explosive.
• Do not use a phone during thunderstorms to a void damaging you hearing in the event of lightning.
3 Asterisk means: equipment not fitted in all cars
(can depend on model variant, engine variant,
market specification, options or accessories).
Page 80

Infotainment460M09.book Page 80 Monday, March 31, 2008 11:15 AM
80 Mobile phone 3
Hands-free provision
(TEL 1) 3
WARNING
To reduce the risk of head injuries in the
event of a collision, the roof pillars and
headlining incorporate cushioning material. These areas must not be modified in
any way. Work on these areas must only
be carried out at a workshop. We recommend that you contact an authorised
Cadillac workshop.
• Mobile phone/hands-free unit connected
to the car’s circuitry.
• External roof antenna fitted.
• Antenna cable for roof antenna is
prefitted.
• Microphone for hands-free phone use
incorporated in front overhead panel.
• Audio system muted when phone activated.
• Phone conversation amplified through
audio system speakers.
• You can adjust the volume of a phone
conversation using the volume controls
on the steering wheel or the volume knob
on the audio system.
• If the sound is a bit fuzzy, adjust the
volume control on the phone.
• Phone battery on charge when ignition is
in position 3 and phone in its cradle.*)
*) Requires this feature to be supported by
the hands-free equipment.
Page 81

Infotainment460M09.book Page 81 Monday, March 31, 2008 11:15 AM
81Mobile phone 3
Mobile phones and
communication radio 3
When fitting and using mobile phones, the
installation instructions issued by Cadillac
and the phone manufacturer must follow the
EU Directive 95/54/EC.
Recommended conditions for use without
malfunctions:
1 Professionally fitted outside antenna, so
that maximum range is achieved.
2 Maximum transmitter output 10 W.
3 Fitting the phone in a suitable location.
Obtain advice when it comes to the installation location for the outside antenna and the
apparatus holder respectively, as well as for
the possibilities of using apparatus with
transmitter output exceeding 10 W. We recommend that you contact an authorised
Cadillac workshop. There you can find console accessories and different installation
kits that are fitted in the prescribed manner.
The use of a handsfree system without outside antenna for the mobile phone standards GSM 900/1800/1900 must only take
place if the maximum transmitter output of
the mobile phone does not exceed 2 watts
for GSM 900 or otherwise 1 watt. The operating instructions from the manufacturer of
the mobile phone and the handsfree system
must always be followed.
For safety reasons we recommend that you
do not use the phone while driving. Even if
you use handsfree your attention may be
drawn away from the traffic. Follow the legal
provisions specific to the country in question.
WARNING
The use of mobile phones and communication radio in the car’s cabin without
outside antenna could lead to malfunctions in the car’s electronics if the instructions above are not followed.
Mobile phones that do not fulfil the above
standards and the radio apparatus must
only be used with an antenna that is fitted
on the outside of the car.
USER TIP
Roof loads can adversely affect telecommunication.
Page 82

Infotainment460M09.book Page 82 Monday, March 31, 2008 11:15 AM
82 Mobile phone 3
(This page has been left blank.)
Page 83

Infotainment460M09.book Page 83 Monday, March 31, 2008 11:15 AM
Bluetooth Universal Handsfree Phone (UHP) 3
83Bluetooth Universal Handsfree Phone (UHP) 3
Introduction__________ 84
Functions of steering
wheel controls_______ 86
Connect the mobile phone
to the car ___________ 87
Bluetooth
Call functions ________ 91
Voice recognition _____ 93
TM
connection 89
3 Asterisk means: equipment not fitted in all cars
(can depend on model variant, engine variant,
market specification, options or accessories).
Page 84

Infotainment460M09.book Page 84 Monday, March 31, 2008 11:15 AM
84 Bluetooth Universal Handsfree Phone (UHP) 3
Introduction
.
Always put road safety first when driving.
The Bluetooth Universal Handsfree Phone
(UHP) facilitates many aspects of telephoning and makes it possible to connect your
mobile phone to the car’s audio system and
the steering wheel controls. Voice recognition promotes more comfortable and safer
operation.
It is possible to adapt Bluetooth UHP for different telephones models by changing the
telephone cradle. For information regarding
specific mobile telephone cradles contact
your Cadillac dealer.
The Bluetooth
TM
technology makes it possible to connect your own mobile phone to
the car’s audio system and steering wheel
controls without first placing the mobile
phone in the cradle and in the docking
station.
It must however be remembered that
phoning while driving will reduce your
attention to traffic to some degree.
• Using a mobile phone while driving
can easily distract one’s attention from
the road, creating a safety hazard.
• Do not use the phone if your full attention is required by the traffic situation.
Switch the phone off in heavy traffic.
• Stop in a convenient place when you
receive or before making a call.
• Never take written notes while driving.
• Use the redial and speed dial functions to allow you to maintain your
attention on the traffic.
WARNING
• Keep calls brief. Let the person you
are talking to know that you are driving. Avoid stressful and involving telephone conversations.
• Acquaint yourself with the legal provisions governing the use of mobile
phones while driving. In many countries it is forbidden under penalty of a
heavy fine to use a mobile phone while
driving.
Page 85

Infotainment460M09.book Page 85 Monday, March 31, 2008 11:15 AM
Components
1 Driver Information Center (DIC)
2 Microphone
3 Steering wheel controls
4 Antennas
5 Docking station, own mobile phone and
mobile phone specific cradle
Some of the above components must be
purchased separately. For more information contact your Cadillac dealer.
85Bluetooth Universal Handsfree Phone (UHP) 3
Page 86

Infotainment460M09.book Page 86 Monday, March 31, 2008 11:15 AM
86 Bluetooth Universal Handsfree Phone (UHP) 3
Functions of steering
wheel controls
The steering wheel controls can have different functions depending on your current
position in the menu system.
Steering wheel controls
INFO - Scroll through menus,
lists and between different
options using the arrows.
SET - Press and hold: Access
the menus.
Touch: Confirm menu selection. Show telephone numbers connected to a name in
the phone book, etc.
PTT/ Green handset - Acti-
vate voice recognition system. Cancel a voice recognition session.
Answer an incoming call.
Call a number from the phone
book and call list
Activate/switch off the micro-
phone during a call.
Press and hold: Activate call
lists.
Red handset/ CLR - End cur-
rent call.
Refuse the incoming call.
Back up in steps in the menu
structure.
Bypass voice feedback in a
voice recognition session to
speak the next voice command.
VOL - Adjusts volume.
Page 87

Infotainment460M09.book Page 87 Monday, March 31, 2008 11:15 AM
Connect the mobile
phone to the car
A connection between your own mobile
phone and car can either be created using
a phone specific cradle or through a Blue-
TM
tooth
this function, see page 89.
The following criteria applies:
• Bluetooth UHP must be activated either
• The mobile phone’s SIM card must be
• You must be within an area with GSM
connection if the phone supports
by turning the ignition switch to position 2
or start the audio system. Bluetooth UHP
is then active as long as the key is in the
ignition switch or if the key is removed
from the ignition switch during a call,
however for 60 minutes at the most.
fitted and the PIN code entered correctly.
coverage. An emergency call can even be
made when you are in areas where your
own mobile phone operator does not
have coverage. However, the mobile
phone must be in an area where at least
one operator does have coverage for it to
be used.
Install the phone cradle
Install the phone cradle in the docking station by inserting it from below and then
upwards. Now press the phone cradle in
position until a click is heard and the cradle
sits firmly.
87Bluetooth Universal Handsfree Phone (UHP) 3
Place the mobile phone in the
cradle
Remove any protection from the phone’s
base connector and any antenna connector. Place the mobile phone in the phone
specific cradle at an angle so the phone’s
base connector fits into the cradle’s phone
connector. Now angle the phone towards
the cradle and push it into position.
NOTICE
Check that the contacts on the phone are
undamaged and clean. Clean as set out
in the manual from the phone manufacturer if necessary.
Page 88

Infotainment460M09.book Page 88 Monday, March 31, 2008 11:15 AM
88 Bluetooth Universal Handsfree Phone (UHP) 3
Remove the mobile phone
from the cradle
Remove the mobile phone from the cradle
by pressing the button on top of the cradle
and remove the phone.
Remove the cradle from the
docking station
Remove the cradle from the docking station
by pressing the button on top of the docking
station and at the same time moving the
cradle downwards.
Charge the phone battery
Battery charging starts when
Bluetooth UHP has been activated and the
phone and cradle are in the docking station.
Cleaning
Clean the cradle and docking station using
a damp cloth. The electrical connectors on
the cradle and docking station are cleaned
using a dry cloth and/or a soft brush. See the
manual provided by the phone manufacture
for details how to clean the phone.
NOTICE
Do not use chemicals or cleaning agents
when cleaning as this can damage the
plastic and connectors.
Page 89

Infotainment460M09.book Page 89 Monday, March 31, 2008 11:15 AM
89Bluetooth Universal Handsfree Phone (UHP) 3
BluetoothTM connection
In order to connect your mobile phone to the
car using Bluetooth
TM
tooth
function must first be activated, see
the manual accompanying the mobile
phone. Bluetooth UHP supports Blue-
TM
tooth
Bluetooth
Handsfree Profile, V.1.5.
TM
connections between, for example, a
mobile phone and other units. This means
your own
mobile phone can be connected to
the car’s Audio
controls without being placed in the cradle
and docking station.
USER TIP
The mobile phone connected to the car
using BluetoothTM must be within a radius
of up to 10 metres.
TM
, your phone’s Blue-
is a radio standard for wireless
system and steering wheel
Switching Bluetooth on and
off
1 From the Setup menu, press and hold
the SET button.
2 Scroll to
the steering wheel controls, or
and press the SET button.
3 Scroll to
button.
• To activate Bluetooth
press the SET button.
• To switch off Bluetooth
and press the SET button.
Phone/Settings with the help of
Bluetooth and press the SET
TM
, select ON and
TM
, select OFF
Pair a mobile phone
A mobile phone must be recognised by the
system to prevent unauthorised persons
from connecting their mobile phone to the
car using Bluetooth
phone has been paired it is known to the
system and does not need to be paired the
next time it is to be used.
The car supports up to 5 paired units. Pairing can be performed when you make the
car searchable for mobile phones with Blue-
TM
tooth
, these mobile phones can then
send a pairing request to the car.
USER TIP
If there is a mobile phone already in the
docking station, then you cannot connect
a new mobile phone to the car with the
help of Bluetooth
TM
. When a mobile
TM
.
Bluetooth is a trademark owned by Bluetooth
SIG, Inc. USA and is used under license.
Page 90

Infotainment460M09.book Page 90 Monday, March 31, 2008 11:15 AM
90 Bluetooth Universal Handsfree Phone (UHP) 3
Pair a new telephone
1 From the Setup menu, press and hold
the SET button.
2 Scroll to
the steering wheel controls, or
and press the SET button.
3 Scroll to
SET button.
4 Scroll to
5 The DIC display shows:
Car discoverable for 3 minutes
Telephones with BluetoothTM can now
seek out the car and send a pairing
request.
6 State the following password on your
mobile phone: 0000 (4 zeros). Select
UHP from the list of paired units.
7 When a telephone sends a pairing
request, this is shown on the DIC dis-
play. Answer
to refuse pairing to the unit.
Phone/Settings with the help of
Phone Devices and press the
NEW and press the SET button.
YES to pair the unit or NO
Selection of paired phone
The system searches for the last used
phone in the list of paired units. If this phone
is not within the connection radius then the
system will automatically search for the next
unit in the list.
If several of the list’s paired phones are
within the connection radius then you can
select which phone unit to use.
1 From the Setup menu, press and hold
the SET button.
2 Scroll to
the steering wheel controls, or
and press the SET button.
3 Scroll to
SET button.
4 Scroll to the right telephone in the list
and press the SET button.
5Mark
The DIC display shows: Please wait...
6 Successful pairing is shown on the DIC
display by:
phone is now ready to be used.
Phone/Settings with the help of
Phone Devices and press the
SELECT and press the SET button.
Connection ok. The mobile
Removing a paired telephone
1 From the Setup menu, press and hold
the SET button.
2 Scroll to
the steering wheel controls, or
and press the SET button.
3 Scroll to
SET button.
4 Scroll to the right telephone in the list
and press the SET button.
5Mark
to remove the selected phone.
Phone/Settings with the help of
Phone Devices and press the
DELETE and press the SET button
Page 91

Infotainment460M09.book Page 91 Monday, March 31, 2008 11:15 AM
91Bluetooth Universal Handsfree Phone (UHP) 3
Call functions
WARNING
Telephone function settings should be
made when the car is stationary so that
attention to traffic is not reduced, increasing the likelihood of an accident.
This section describes the various options
for making and receiving calls.
Outgoing calls
The steering wheel controls allow you to call
a number from the phone book or from the
call list.
Phone book
1 In the telephone menu, press and hold
the SET button.
the DIC display.
2 Scroll through the phone book’s tabs
using the steering wheel controls, or
. Select a tab by pressing the SET
button.
3 Scroll to the required name/number
using the steering wheel controls, or
. Press the SET button to show the
telephone number associated to a
name. The number is shown for
5 seconds.
4 Press the green handset button to make
the call. The name/number appears on
the DIC display.
USER TIP
When the mobile phone is paired with the
car the phone book is transferred to the
car. This can take up to 3 minutes
depending on the mobile phone.
Phone Book is shown on
Call list
This list shows the numbers of dialled,
missed and received calls.
1 Press and hold the Green handset but-
ton.
Call List is shown on the DIC dis-
play.
2 Scroll through the call list using the
steering wheel controls, or .
3 Press the Green handset button to make
the call. The name/number appears on
the DIC display.
USER TIP
The numbers of missed and received
calls can only be shown if this service is
supported by your operator. Contact your
GSM operator for more information. The
call list can display between 40-80 calls
depending on the number of stored characters for the name and telephone
number.
Page 92

Infotainment460M09.book Page 92 Monday, March 31, 2008 11:15 AM
92 Bluetooth Universal Handsfree Phone (UHP) 3
Incoming call
If you receive a call a ring tone is heard on
the car’s audio system and the radio or other
audio source will be lowered.
shown on the audio system display. The
DIC display shows:
and number. If it is an ex-directory or
unknown number the DIC display shows
Phone and Call.
Answering a call
To answer an incoming call press the green
handset button on the steering wheel.
Declining a call
To refuse an incoming call press the red
handset button on the steering wheel.
Phone and the name
Phone is
Active call
The active call is the one presently in
progress.
To end the active call, press the red handset
button on the steering wheel.
Switch off the microphone
The microphone can be activated/switched
off during a call by using the green handset
button. When the microphone is switched
off the DIC display shows:
Mic muted...
Switch the call between the
car and the mobile phone
During an active call you can choose to
transfer the sound from the car’s loudspeakers to the mobile phone, appropriate for a
private call for example or when you leave
the car and want to continue the call on your
mobile phone.
• To switch the call from the car’s loudspeakers to the mobile phone, press the
SET button. The DIC display shows:
in mobile
• To switch the call back from the mobile
phone to the car’s loudspeakers, press
the SET button. The DIC display shows:
Call in car for 2 seconds.
for 2 seconds.
USER TIP
If you do not choose to transfer the sound
to the mobile phone using the SET button
then the sound will remain in the car as
long as the phone is in the connection
radius.
Call
Returning to the car with an active call
(Only applies if Bluetooth
the mobile phone is in the list of paired
units.)
If you get into the car with an active call and
start the car then the mobile phone is automatically paired with the car.
A number of mobile phones automatically
transfer the sound to the car’s loudspeakers
when it is paired with the car, this function is
phone specific. For other mobile phones
you need to press the SET button to transfer
the sound from the mobile phone to the car’s
loudspeakers.
TM
is activated and
Page 93

Infotainment460M09.book Page 93 Monday, March 31, 2008 11:15 AM
93Bluetooth Universal Handsfree Phone (UHP) 3
Voice recognition
Voice recognition means that a Bluetooth
Universal Handsfree Phone can be operated using voice commands.
Voice recognition offers many advantages.
Most importantly, it requires less attention
than conventional controls allowing the
driver to concentrate on the traffic.
USER TIP
It is not possible to use voice recognition
if the navigation system is switched off.
Activating voice recognition
The voice recognition system is activated
with a press on the PTT button in the steering wheel. Any audio source mutes and
Voice is shown on the DIC display. A tone
indicates that the system is listening and is
ready to receive a voice command. If the car
is equipped with a navigation system then
you must say TELEPHONE to access the
phone’s voice recognition.
For safety reasons, some sounds will still be
heard while the voice recognition system is
activated. Similarly, messages that are
important from a safety aspect will be displayed on the DIC display.
Press the PTT button to end the voice session.
PTT button (PTT = Push-To-Talk)
USER TIP
Voice commands cannot be given during
a phone conversation. Pressing the PTT
button during a call switches off or activates the phone microphone in the
phone.
Voice sessions are interrupted by incoming calls.
Voice feedback
To facilitate the use of voice recognition, the
system provides feedback for voice commands.
Feedback is given via the audio system as
voice feedback or audio feedback.
Cancel the current voice feedback and go
directly to the next voice command by
pressing the CLR button.
Volume
The volume of the voice and audio feedback
can be adjusted with the volume controls on
the steering wheel and the VOL knob.
Nametags
You can save a telephone number together
with a nametag, for example, a name, for
speed dialling.
Page 94

Infotainment460M09.book Page 94 Monday, March 31, 2008 11:15 AM
94 Bluetooth Universal Handsfree Phone (UHP) 3
Voice commands
The voice recognition system works best in
a quiet environment. Background noise can
make it difficult for the system to understand
a voice command. Speak clearly and at a
normal pace while facing straight ahead. A
voice command can consist of one word or
several words in succession.
After the tone that indicates the system is
ready you have 7 seconds to give a voice
command.
If you do not give a voice command during
the time the system is listening, the system
will request a voice command. The voice
session will be ended if you do not give a
voice command.
The voice recognition system is sensitive to
individual pronunciation, e.g. different dialects, and cannot be taught to understand
different pronunciations. The system alerts
you to voice commands it does not recognise.
General commands
These commands can always be used while
voice recognition is active, except when the
system is waiting for a nametag.
Voice command Explanation
• HELP Request information on how to proceed with a voice
session.
• CANCEL End the current
voice session.
Digits and characters
Verbally enter the digits in the telephone
number one by one or in a group of three
digits for example. If you enter an incorrect
digit and use the voice command CHANGE
then the last entered group of digits is
deleted. Digits and characters that can be
entered verbally are shown on the SID display.
Voice command Characters
• ZERO The digit 0
• 1-9 The digits 1-9
•PLUS +
Example of voice command
Dialling a number
1 Press the PTT button. Wait for the tone.
2 Say CALL. Wait for "NAME OR
NUMBER?".
3 Say NUMBER. Wait for "THE NUMBER,
PLEASE!". Speak in the numbers of the
telephone number. Say, e.g. "ZERO,
FIVE, FOUR" pause "TWO, SEVEN,
THREE" pause "EIGHT, ONE, ONE".
4 The system repeats the phone number
at each pause.
5Say CALL.
Save a nametag
Save a number together with a nametag for
speed dialling.
1 Press the PTT button. Wait for the tone.
2 Say SAVE. Wait for "THE NAME,
PLEASE!".
3 Say a nametag, e.g. "ADAM". Wait for
"THE NUMBER, PLEASE!".
4 Say the telephone number. The system
repeats the telephone number.
5 Say SAVE.
Page 95

Infotainment460M09.book Page 95 Monday, March 31, 2008 11:15 AM
95Bluetooth Universal Handsfree Phone (UHP) 3
Other commands
Voice command Explanation
• CALL The system asks for the name or telephone number. The following commands can be used:
• NAME - To dial a nametag.
• NUMBER - To state a telephone
number. Verbally enter a telephone
number, preferably in groups of
three digits. Once a digit has been
entered verbally the following commands can be used:
• CHANGE - Deletes the last group
of numbers spoken in.
• DELETE - Deletes all numbers
spoken in.
• CALL - Dials the number.
• REDIAL Dials that last number called.
• SAVE Save a number together with a nametag for speed dialling.
• DELETE Deletes a nametag. The system asks
for the appropriate nametag. Answer
YES to confirm or NO to cancel.
• PHONEBOOK All available nametags are read out
along with their associated phone
numbers. The following commands
can be used in the pause between
nametags:
• DELETE - Delete nametag.
• CALL - Call the nametag.
If a name in the phone book has an
associated nametag, the name is displayed on the DIC display instead of
the number.
USER TIP
• The phone number will be displayed on the DIC display when
the system prompts you to say YES or NO by way of confirmation, or following REDIAL, SAVE CALL or DELETE. If the
phone number is stored in the phone book, the name associated with this number will be shown instead.
• The voice recognition catalogue is independent of the phone
book. Nametags are not stored on the SIM card.
Page 96

Infotainment460M09.book Page 96 Monday, March 31, 2008 11:15 AM
96 Bluetooth Universal Handsfree Phone (UHP) 3
(This page has been left blank.)
Page 97

Infotainment460M09IOM.fm Page 97 Monday, March 31, 2008 11:51 AM
97Index
Index
A
Activating Bluetooth ______________ 89
Activating the MP3/WMA player,
Audio System __________________ 20
Activating voice recognition _________ 93
Activating voice recognition,
Navigation System ______________ 76
Active call ______________________ 92
Add stops ______________________ 47
Address book ___________________ 43
AF, Audio System ________________ 12
AF, Navigation System ____________ 64
Alternative frequency, Audio System _ 12
Alternative frequency,
Navigation System ______________ 64
Alternative to a route ______________ 46
Antennas ________________________ 4
Audio settings Bose
Navigation System ______________ 60
Audio settings, Navigation System ___ 58
Audio system, Audio System _______ 26
Audio system, Navigation System ____ 73
Automatic volume control,
Navigation System ______________ 63
AutoStore, Audio System __________ 11
AUX input, Audio System __________ 23
AUX input, Navigation System ______ 72
®
Surround System,
B
BluetoothTM connection ____________ 89
C
Call functions ____________________ 91
Cancel guidance _________________ 48
Caring for DVDs _________________ 37
CD changer, Audio System _________ 18
CD player, Audio System __________ 17
CD player, Navigation System ______ 66
Change map scale _______________ 39
Changing a Nav DVD disc __________ 36
Changing language ________________ 3
Charge the phone battery __________ 88
Cleaning the units _________________ 3
Cleaning, Bluetooth UHP __________ 88
Clock, Audio System ______________ 24
Connect the mobile phone to the car _ 87
Connecting a portable player,
Audio System __________________ 23
Connecting and activating a portable
player, Navigation System ________ 72
D
Date display, Audio System _________ 24
Date, Audio System _______________ 24
Detour _________________________ 47
Disc information, Audio System ______ 22
DVDs __________________________ 35
E
Edit the address book _____________ 51
Error codes, Audio System _________ 26
F
FAQ, Navigation System ___________ 56
Find radio station, Audio System _____ 10
FM RDS settings, Navigation System _ 64
Folder, artist or album,
Navigation System ______________ 69
Frequency band, Audio System _____ 10
Frequency band, Navigation System __ 61
G
General functions, Audio System ____ 24
General voice commands __________ 94
Guidance pause _________________ 48
Page 98

Infotainment460M09.book Page 98 Monday, March 31, 2008 11:15 AM
98 Index
H
Hands-free provision ______________ 80
I
Incoming call ____________________ 92
Install the phone cradle ____________ 87
Installation/replacement ____________ 3
Itinerary ________________________ 46
L
Loading a DVD disc ______________ 35
Loading an MP3/WMA disc,
Navigation System ______________ 68
Loading CDs, Audio System _____ 17, 18
Loading CDs, Navigation System ____ 66
Loading MP3/WMA discs,
Audio System __________________ 20
M
Map ___________________________ 34
Map database information __________ 34
Map orientation __________________ 39
Mobile phone ____________________ 79
Monitoring programme type (PTY) ___ 13
MP3/WMA ___________________ 22, 70
MP3/WMA player, Audio System ____ 20
MP3/WMA player, Navigation System 68
Music navigator, Navigation System __ 70
N
Nametags ______________________ 93
Nav (Navigation) _________________ 50
Navigation Audio System __________ 58
Navigation map __________________ 34
Navigation settings _______________ 50
O
Other settings, Navigation System ___ 54
Outgoing calls ___________________ 91
P
Pair a mobile phone _______________ 89
Place the mobile phone in the cradle _ 87
Play a CD, Navigation System ______ 66
Play a MP3/WMA disc,
Navigation System ______________ 68
Playback order, Audio System ______ 21
Playback order, Navigation System ___ 70
Point of interest (POI) _____________ 42
Points of Interest, Navigation System _ 55
Portable player, Audio System ______ 23
Portable player, Navigation System __ 72
Preferred route __________________ 50
Preset stations ___________________ 45
Programme type ALARM ___________ 15
PTY, Audio System _______________ 13
Q
Quick Guide, Navigation System _____ 38
Page 99

Infotainment460M09.book Page 99 Monday, March 31, 2008 11:15 AM
99Index
R
Radio ___________________________ 4
Radio menu, Navigation System _____ 63
Radio reception ___________________ 4
Radio text, Audio System __________ 13
Radio, Audio System ______________ 10
Radio, Navigation System __________ 61
Random CD playback, Audio System _ 17
Random CD playback,
Navigation System ______________ 67
Random playback of MP3/WMA files,
Audio System __________________ 21
Random playback of MP3/WMA files,
Navigation System ______________ 69
Random playback, CD changer _____ 19
Rapid playing an MP3/WMA file,
Audio System __________________ 21
Rapid playing an MP3/WMA file,
Navigation System ______________ 69
Rapid playing CD tracks, Audio System 17
Rapid playing CD tracks,
Navigation System ______________ 67
Rapid playing of tracks, CD changer __ 19
RDS (Radio Data System),
Audio System __________________ 12
RDS time, Audio System ___________ 25
Regional frequencies (REG),
Navigation System ______________ 64
Regional frequencies, Audio System _ 12
Remove the cradle from
the docking station ______________ 88
Remove the mobile phone from
the cradle _____________________ 88
Removing a paired telephone _______ 90
Removing an MP3/WMA disc,
Navigation System ______________ 68
Removing CDs, Audio System ___ 17, 18
Removing CDs, Navigation System __ 66
Removing MP3/WMA discs,
Audio System __________________ 20
Resume guidance ________________ 48
Road map ______________________ 34
Rolling advertisements, Audio System 13
Rolling advertisements,
Navigation System ______________ 64
Route alternative _________________ 46
S
Safety rules, Navigation System _____ 32
Save a destination in the address book 49
Save or change a preset ___________ 49
Save preset, Audio System _________ 10
Save preset, Navigation System _____ 62
Security lock ____________________ 26
Security lock, Audio System ________ 26
Select radio station, Audio System ___ 10
Select radio station, Navigation System 61
Select/change MP3/WMA file,
Navigation System ______________ 69
Selecting and changing tracks,
CD changer ____________________ 19
Selecting/changing CD tracks,
Audio System __________________ 17
Selecting/changing CD tracks,
Navigation System ______________ 66
Selecting/changing discs, CD changer 19
Selecting/changing MP3 folder,
Audio System __________________ 20
Selecting/changing MP3/WMA file,
Audio System __________________ 21
Setting the clock, Audio System _____ 24
Setting the clock, Navigation System _ 54
Setting the date, Audio System ______ 24
Setting the time, Audio System ______ 24
Show route _____________________ 47
Song title, artist name, etc.,
Navigation System ______________ 70
Song title, Audio System ___________ 22
Sorting music, Audio System ________ 22
Speed dependent volume,
Audio System __________________ 25
State a destination ________________ 40
Steering control buttons, Audio System 7
Steering wheel controls,
Navigation System ______________ 29
Stop ___________________________ 47
Switch off Bluetooth _______________ 89
Switch off the microphone __________ 92
Switch the Audio System on/off,
Navigation System ______________ 58
Switch the call between the car
and the phone __________________ 92
Page 100

Infotainment460M09.book Page 100 Monday, March 31, 2008 11:15 AM
100 Index
T
TEL 1 __________________________ 80
Time display, Audio System ________ 24
TP, Audio System ________________ 15
Traffic programme ________________ 15
Traffic programme, Audio System ____ 15
Traffic settings ___________________ 52
Tuning a radio station,
Navigation System ______________ 61
V
Via the map _____________________ 44
Voice commands _________________ 94
Voice commands, Navigation System _ 76
Voice feedback __________________ 93
Voice prompt ____________________ 50
Voice recognition _________________ 93
Voice recognition help,
Navigation System ______________ 78
Voice recognition, Navigation System _ 76
Volume for selected programme type
broadcasts, Audio System ________ 25
Volume for the traffic and alarm
announcements, Audio System ____ 25
W
Weak signal strength, Audio System __ 12
WMA (Windows Media Audio) ____ 22, 70
 Loading...