

Page 1
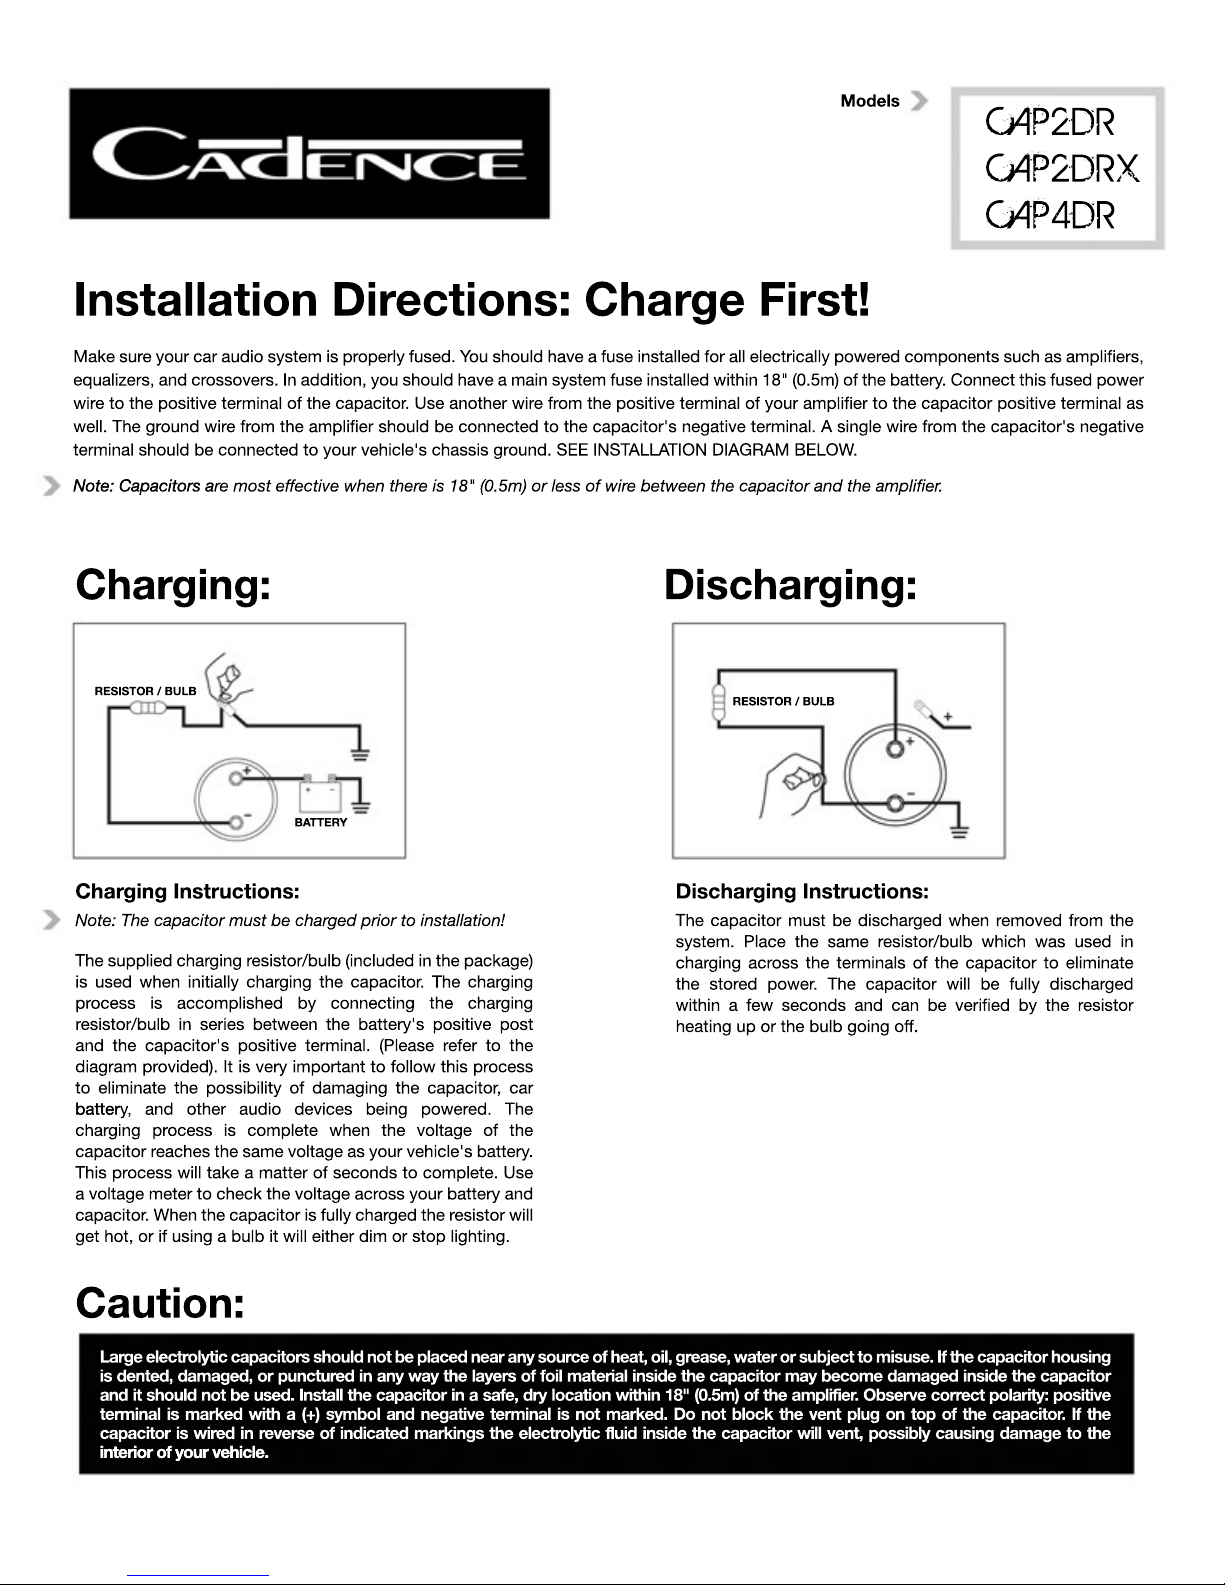
Charging Instructions:
Note: The capacitor must be charged prior to installation!
TheThe supplied charging resistor/bulb (included in the package)
is used when initially charging the capacitor. The charging
process is accomplished by connecting the charging
resistor/bulb in series between the battery's positive post
and the capacitor's positive terminal. (Please refer to the
diagram provided). It is very important to follow this process
to eliminate the possibility of damaging the capacitor, car
batterbattery, and other audio devices being powered. The
charging process is complete when the voltage of the
capacitor reaches the same voltage as your vehicle's battery.
This process will take a matter of seconds to complete. Use
a voltage meter to check the voltage across your battery and
capacitor. When the capacitor is fully charged the resistor will
get hot, or if using a bulb it will either dim or stop lighting.
Discharging Instructions:
TheThe capacitor must be discharged when removed from the
system. Place the same resistor/bulb which was used in
charging across the terminals of the capacitor to eliminate
the stored power. The capacitor will be fully discharged
within a few seconds and can be verified by the resistor
heating up or the bulb going off.
Make sure your car audio system is properly fused. You should have a fuse installed for all electrically powered components such as amplifiers,
equalizers, and crossovers. In addition, you should have a main system fuse installed within 18" (0.5m) of the battery. Connect this fused power
wire to the positive terminal of the capacitor. Use another wire from the positive terminal of your amplifier to the capacitor positive terminal as
well. The ground wire from the amplifier should be connected to the capacitor's negative terminal. A single wire from the capacitor's negative
terminal should be connected to your vehicle's chassis ground. SEE INSTALLATION DIAGRAM BELOW.
Note: Capacitors aNote: Capacitors are most effective when there is 18" (0.5m) or less of wire between the capacitor and the amplifier.
Installation Directions: Charge First!
Large electrolytic capacitors should not be placed near any source of heat, oil, grease, water or subject to misuse. If the capacitor housing
is dented, damaged, or punctured in any way the layers of foil material inside the capacitor may become damaged inside the capacitor
and it should not be used. Install the capacitor in a safe, dry location within 18" (0.5m) of the amplifier. Observe correct polarity: positive
terminal is marked with a (+) symbol and negative terminal is not marked. Do not block the vent plug on top of the capacitor. If the
capacitor is wired in reverse of indicated markings the electrolytic fluid inside the capacitor will vent, possibly causing damage to the
interior of your vehicle. interior of your vehicle.
Caution:
Charging: Discharging:
Models
RESISTOR / BULB
RESISTOR / BULB
BATTERY
CAP2DR
CAP2DRX
CAP4DR
 Loading...