

Page 1
USER INSTRUCTIONSASSEMBLY INSTRUCTIONS
Meridian 3 with side burner
98500
Meridian 4 with side burner
98501
MERIDIAN 4 WITH SIDE BURNER
MERIDIAN 4 WITH SIDE BURNER
0063/09
PIN: 0063BU7867
98501
98501
PATIO LIVING
Please note: Your product may differ from the
Please note: Your product may differ from the
on the front cover
image
image on the front cover
503-0061 LEV2
Page 2

CADAC EUROPE
Ratio 26, 6921 RW Duiven, The Netherlands
Tel: +31 26 319 7740 . Fax: +31 26 319 7743 . Email: info@cadaceurope.nl
Website: www.cadaceurope.com
CADAC UK
Aven Works, Capel Street, Sheffield, 26 2HN
Tel: +44 1142 301 166 . Fax: +44 1179 866 643 . Email: info@cadacsales.com
Website: www.cadaceurope.com
CADAC GERMANY
Bellenstraße 58, 68163 Mannheim
Tel: +49 621 319 7410 . Fax: +49 621 319 7408 . Email: office@cadaceurope.de
Website: www.cadaceurope.com
CADAC FRANCE
9 Bis Rue du Cot Pilot, 92200 Neuilly Sur Seine
Tel: +33 603 704 673 . Email: info@cadaceurope.nl
Website: www.cadaceurope.com
CADAC SCANDINAVIA
GASVÆRKSVEJ 26C, DK-9000 AALBORG
Tel: +45 7219 3280 . Fax: +45 9813 0086 . Email: info@cadac.dk
Website: www.cadac.dk
CADAC SOUTH EAST EUROPE
Cara Urosa 50, 11 000 Belgrade, Serbia
Tel: +381 11 3230074 . Email: miloshd@cadac.rs
Website: www.cadac.rs
CADAC AUSTRALIA
CADAC-BBQ Pty Ltd . Australia
Tel: 0420 503 967 . Email: info@cadacbbq.com.au
Website: www.cadacbbq.com.au
CADAC NORTH AMERICA
1342 South Powerline Road, Bldg. 1 Deerfield Beach, FL 33442, USA
Toll Free: 1-888 602 2322 or Tel: 1 954 956 2272
Fax: 1 954 971 3725 . Email: jburke@cadacnorthamerica.com
Website: www.cadac-barbecues.com
CADAC MIDDLE EAST
Island View Distributors FZCO, Room 104, LOB 17, jebel Ali Free Zone Authority, Jebel Ali, Dubai, UAE
Tel: +971 4887 3870 . Fax: +971 4887 3871 . Email: cadac@ivdxb.com
Website: www.ivdxb.com
CADAC ZAMBIA
Yunipat Distributors (Z) Ltd. Zambia
P.O. Box 32327 Lusaka ZAMBIA
Tel/Fax: +260211 845733 . Email: p.urzi@yunipatdistributors.co.zm
Website: www.yunipatdistributors.co.zm
CADAC NEW ZEALAND
The Hot Smoke Company Ltd
Factory: 2 Newnham Street Rangiora (CHCH) New Zealand
Tel: 0064 3 313 0076 . Fax: 0064 3 313 6890
Email: dave@hotsmoke.co.nz . jeremy@hotsmoke.co.nz . jayne@hotsmoke.co.nz
Website: www.hotsmoke.co.nz
CADAC SA
P.O. Box 43196, Industria, 202, South Africa
Tel: +27 11 473 8600 . Fax: +27 11 474 3875 . Email: info@cadac.co.za
Website: www.cadac.co.za
Page 3
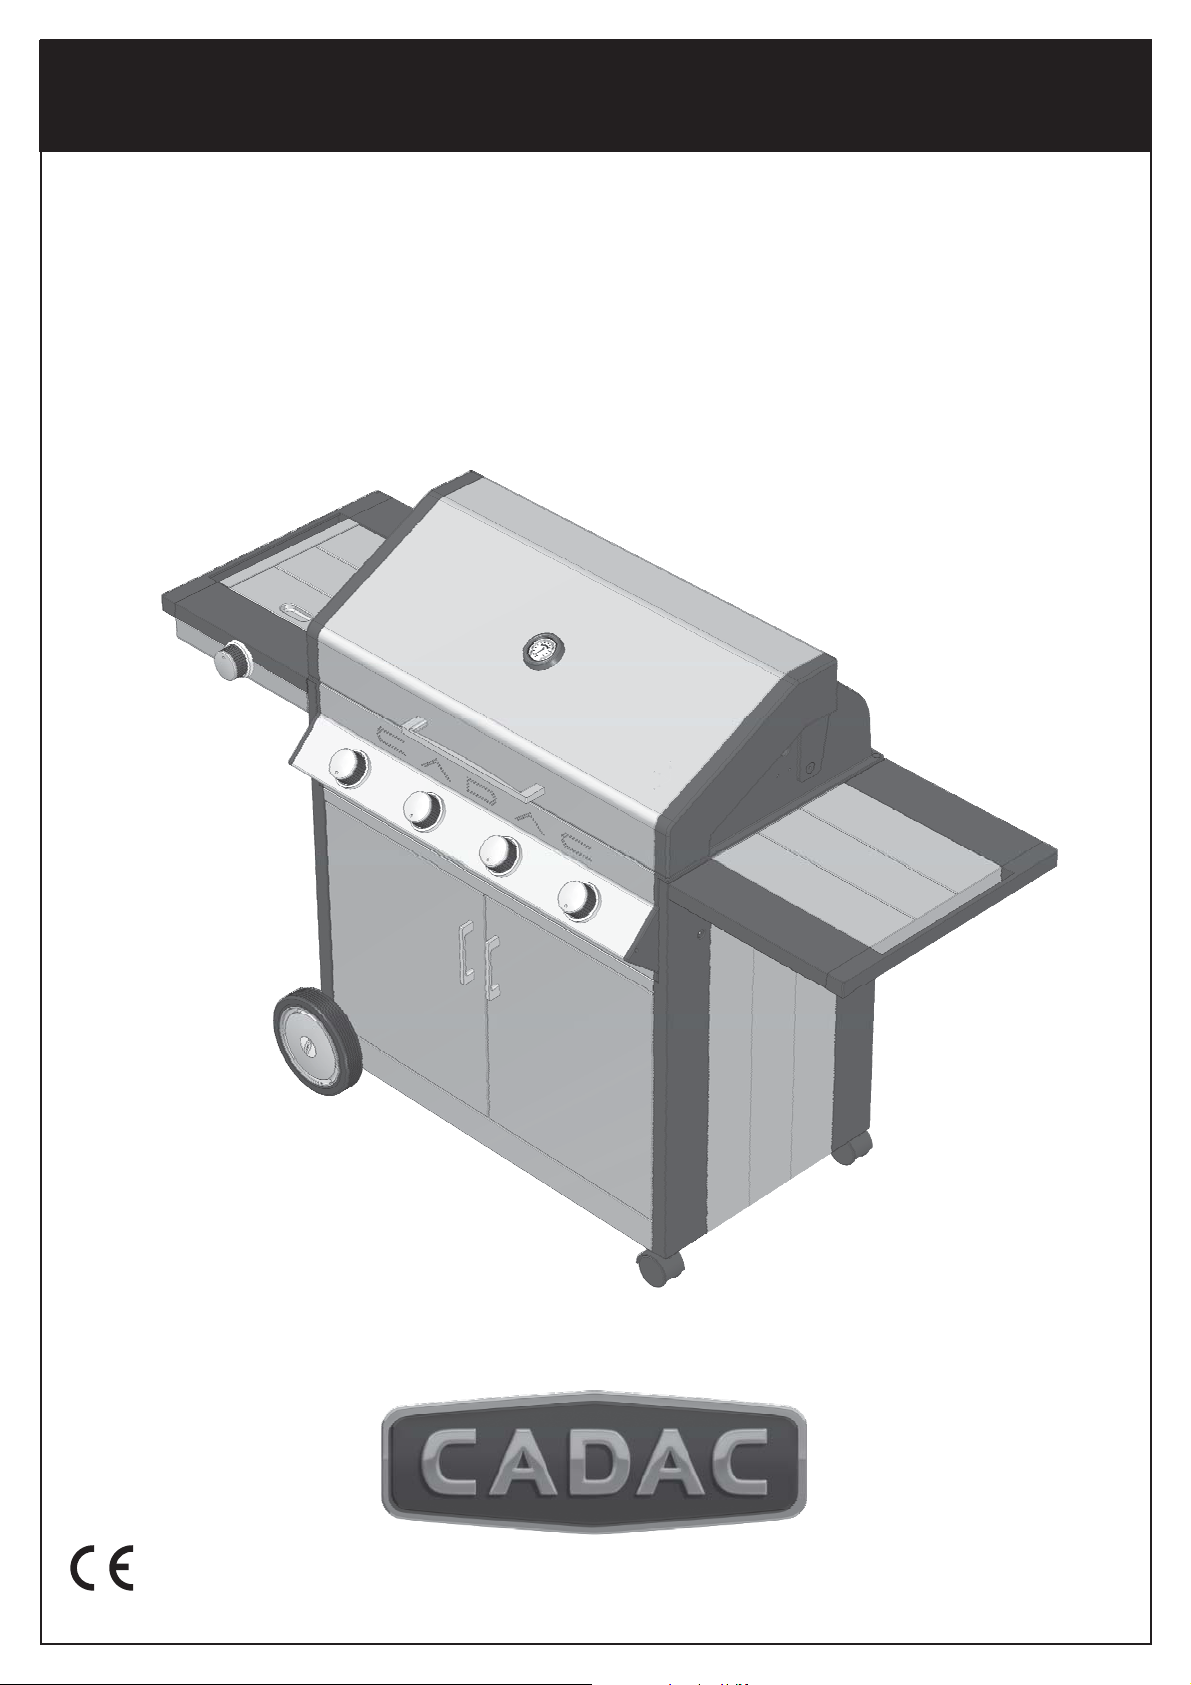
Part No. Description Photo Qty
GB
1 Warming Rack
2
Side Burner
Assembly
3 Side Table
4 Bottom Panel
5 Bottom Beam
1
1
1
1
1
6 Wheel
7 Wheel Cap
8 Wheel Axle
2
2
2
Page 4
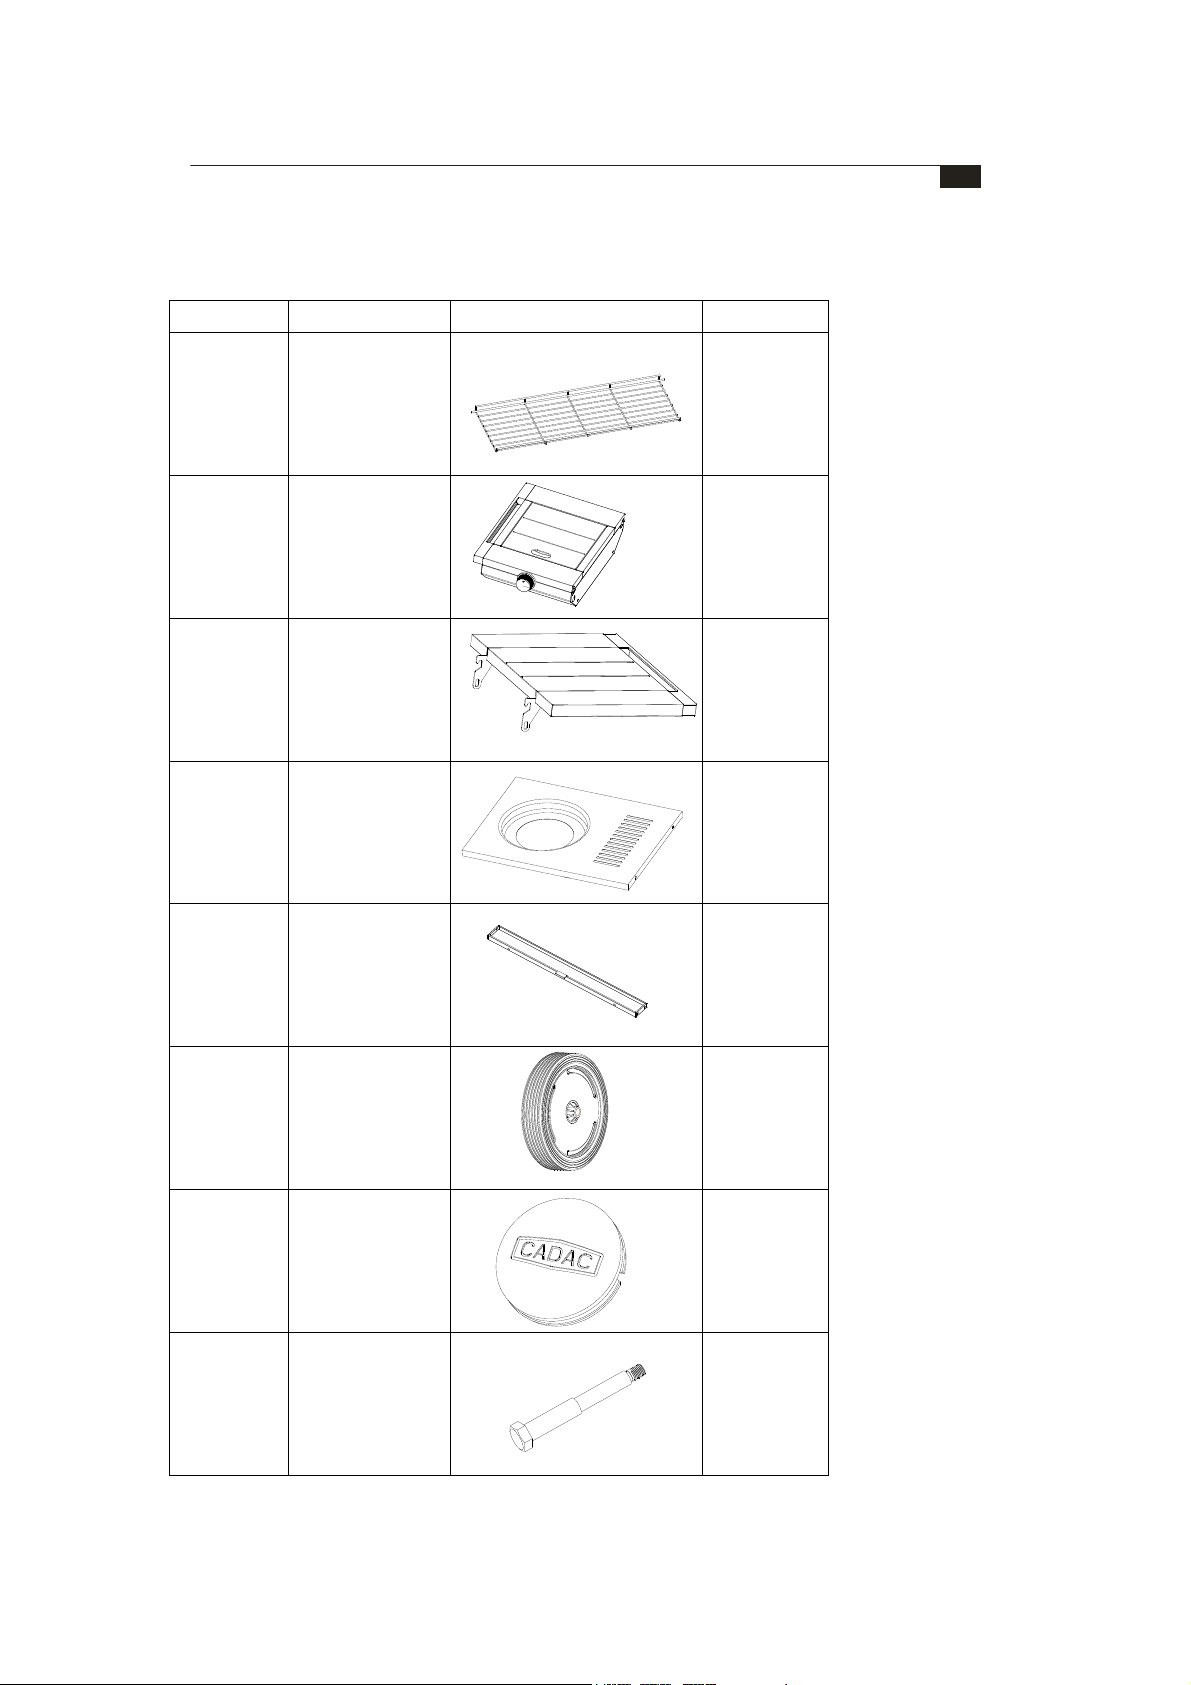
9 Back Panel
10 Door Beam
11 Drip Bowl
12 Drip Pan
13 Flame Tamer
1
1
1
1
3
14
Large Grids
(265mm)
15 Right Door
16 Left Door
17
Dome & Burner
Box
1
1
1
1
Page 5
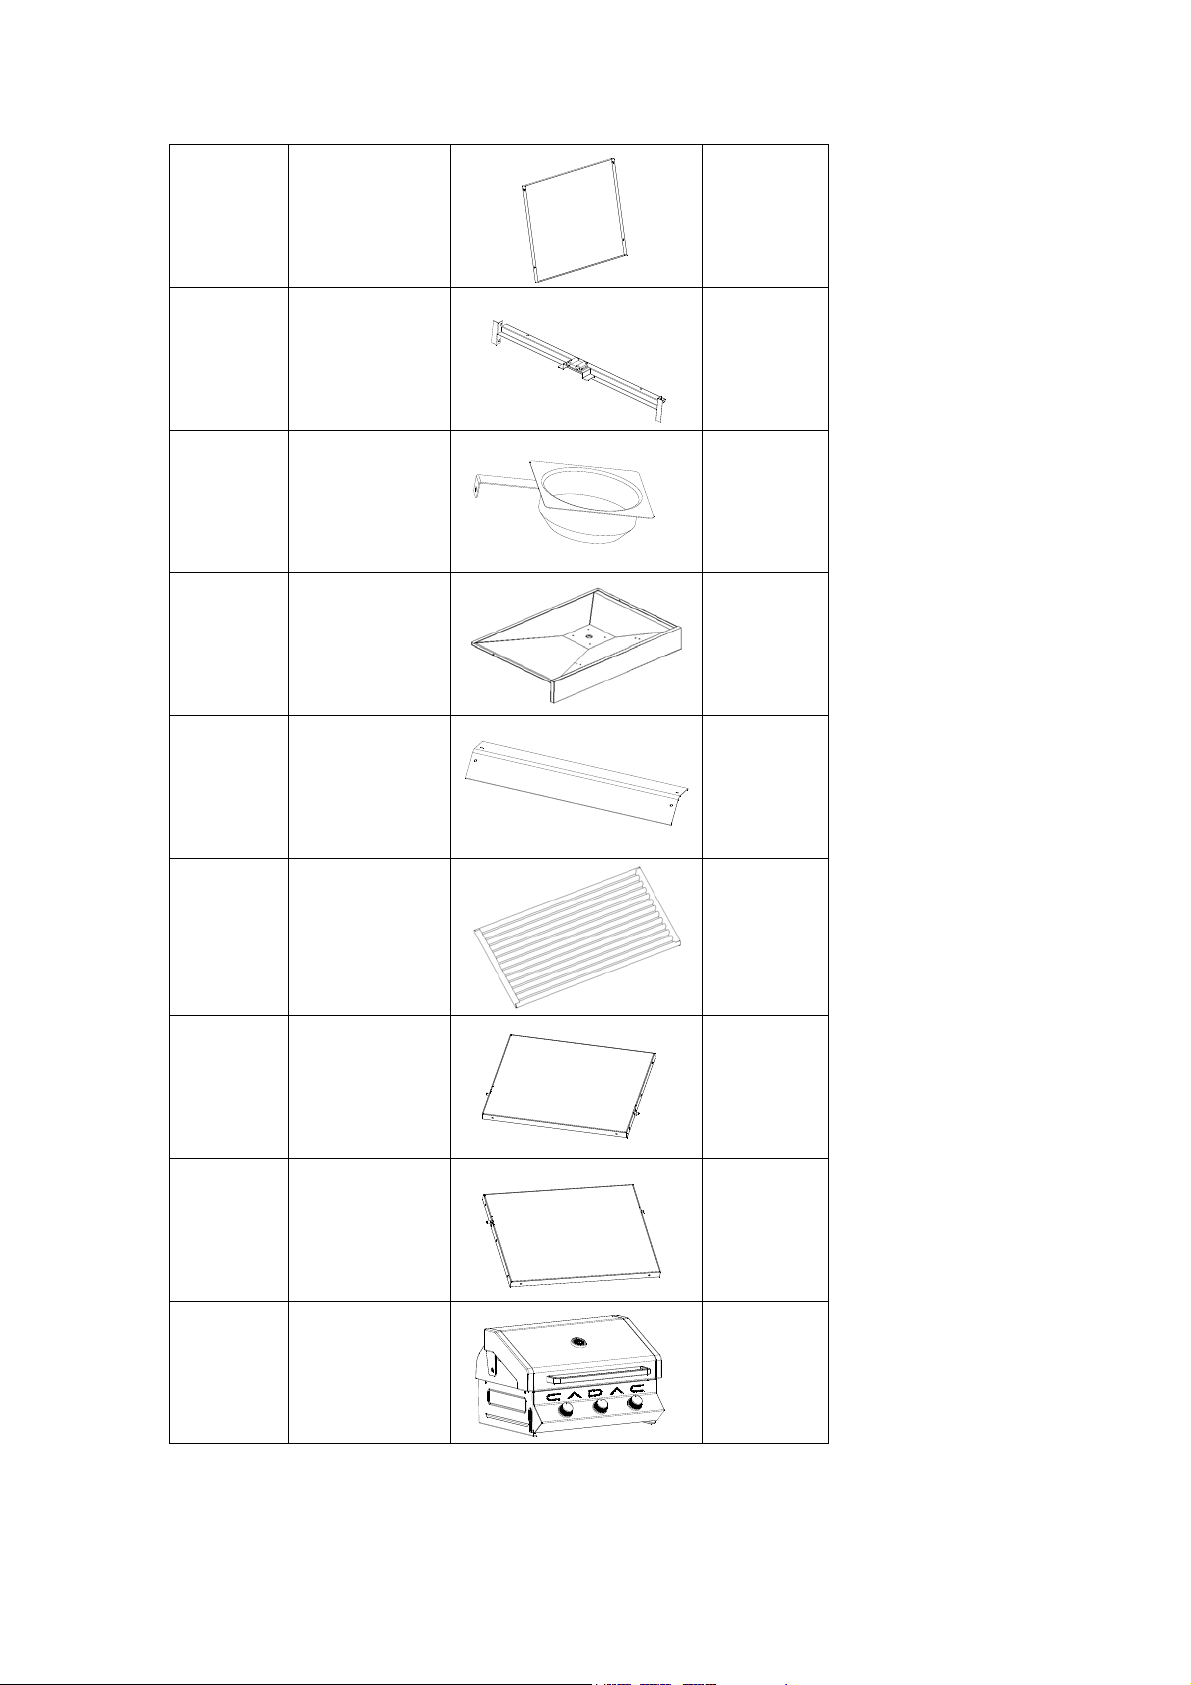
18 Castor
19
20 Left Side Panel
21 Fire Box
22
Right Side
Panel
Seperation
Panel
2
1
1
2
1
23
24
25 Grill Plate
Drip Pan
Handle
Small Grids
(105mm)
1
1
1
Page 6

HARDWARE
A M6*16 Bolt
B M6*12 Bolt
C Door Pin
D φ10 Washer
E φ6 Elastic Washer
F φ10 Elastic Washer
G φ6 Washer
H Specific Screw
I VE Washer
J
ST3.9*10
Self-Tapping Screw
4pcs
16pcs
2pcs
2pcs
18pcs
2pcs
20pcs
4pcs
4pcs
4pcs
K M4*10 Bolt
L φ4 Elastic Washer
M φ4 Washer
4pcs
4pcs
4pcs
Page 7

Step 1: Screw the two Castors(18) onto Right Side Panel(19)
Step 2: Use the M6*12 Bolt (B), through the φ6 Spring Washer (E), φ6 Washer (G) to join the
Back Panel (9) and Side Panels (19,20).
Page 8

Step 3: Push axle (8) through the Wheel (6), φ10 Spring Washer (F), φ10 Washer(D) and hole
on the Left Side Panel (20). Screw it onto the weld-nut and clip on the Wheel Cap (7).
Step 4 : Push the M6*12 Bolt (B) through the φ6 Spring Washer (E), φ6 Washer (G) and fix
Bottom Beam (5) to the two side panels (19 & 20) by screwing it into the riv-nuts on the side
panels.
Page 9

Step 5: Push the M6*12 Bolt (B) through the φ6 Spring Washer (E), φ6 Washer (G) and fix the
Bottom Panel (4) in position by screwing it into the riv-nuts on the side panels.
Step 6: Use the M6*12 Bolts, Ø6 Spring Washers and Ø6 Washers to fix the Door Beam(10) to
the frame by screwing it onto the Side Panels in the position shown below.
Page 10

Step 7: Align the slots in the brackets underneath the side tray with the studs in the Right Hand
Side Panel (19). Push the bracket inwards, just enough to clear the studs, and clip the bracket
onto the studs.
Step 8: To fix the Side Burner Assembly (2) to the Left Side Panel (20), take Screw (H) and
place it through Ø6 Spring Washer (E), Ø6 Washer (G) and holes in Left Side Panel (20) and
screw it into the riv-nuts on the left Side Panel.
Page 11

Step 9: Use the ST9*10 Self-Tapping screws (J) to fix the Top Plate (22) in place. Ensure the
cut-outs face forward as shown below.
Step 10: Place the Dome & Burner Assembly (17) onto the Frame Assembly and use the
M6*16 Bolts (A) and Vitreous Enameled Washers (I) to fix the Dome & Burner Assembly (17)
to the Frame Assembly. Refer to the below diagram.
Page 12

Step 11: Route the flexible hose underneath the Side Burner through the hole situated at the
back of the Left Side panel (20). Connect the Side Burner flexible hose connection to the
Burner Box inlet fitting situated at the rear of the Burner Box, see the below diagram. Use a
spanner to tighten the connection. After assembling is complete and before use, connect the
approved Hose and Regulator assembly onto the downward facing fitting underneath the side
table. Use a spanner to tighten the connection. Ensure all connections are gas tight before
using the appliance.
Page 13

Step 12: Fit the Fire Boxes (21) to the BBQ and bend the tags underneath the Fire Boxes over
to permanently fix it in place.
Step 13: Place a Flame Tamer (13) over each burner.
Zoom View
Page 14

Step 14: Place the Grids, Grill Plates and Warming Rack into the BBQ as shown below.
Step 15: Fit the Drip Pan Handle (23) onto the Drip Pan (12) by sing the M4*10 Bolts (K), Ø4
Spring Washer and Ø4 Washer supplied. Refer to the below diagram.
Page 15

Step 16: Align the pin underneath the Right hand Door (15) with the corresponding hole on the
Bottom Beam Assemble the door in place by aligning the hole on top of the door with the
corresponding hole on the Beam and push the Door Pin (C) into the hole. Assemble the Left
hand Door (16) the same way.
Step 17: Slide the Drip Pan (12) into position as shown below.
Page 16

Step 18: Hang the Drip Bowl (11) onto the Drip Pan (12) as shown below.
 Loading...