

Page 1

Title Page
WPIM-T1/DDS
User’s Guide
9032750
T1
WPIM
T1/DDS
DDS
Page 2

Page 3

Only qualified personnel should perform installation
procedures.
NOTICE
Cabletron Systems reserves the right to make changes in specifications and other information
contained in this document without prior notice. The reader should in all cases consult Cabletron
Systems to determine whether any such changes have been made.
The hardware, firmware, or software described in this manual is subject to change without notice.
IN NO EVENT SHALL CABLETRON SYSTEMS BE LIABLE FOR ANY INCIDENTAL,
INDIRECT, SPECIAL, OR CONSEQUENTIAL DAMAGES WHATSOEVER (INCLUDING BUT
NOT LIMITED TO LOST PROFITS) ARISING OUT OF OR RELATED TO THIS MANUAL OR
THE INFORMATION CONTAINED IN IT, EVEN IF CABLETRON SYSTEMS HAS BEEN
ADVISED OF, KNOWN, OR SHOULD HAVE KNOWN, THE POSSIBILITY OF SUCH
DAMAGES.
1998 by Cabletron Systems, Inc., P.O. Box 5005, Rochester, NH 03866-5005
All Rights Reserved
Printed in the United States of America
Order Number: 9032750 December 1998
Cabletron Systems, SecureFast, QuickSET,
CyberSWITCH
All other product names mentioned in this manual may be trademarks or registered trademarks of
their respective companies.
is a trademark of Cabletron Systems, Inc.
and
LANVIEW
are registered trademarks, and
FCC NOTICE
This device complies with Part 15 of the FCC rules. Operation is subject to the following two
conditions: (1) this device may not cause harmful interference, and (2) this device must accept any
interference received, including interference that may cause undesired operation.
NOTE:
This equipment has been tested and found to comply with the limits for a Class A digital
device, pursuant to Part 15 of the FCC rules. These limits are designed to provide reasonable
protection against harmful interference when the equipment is operated in a commercial environment.
This equipment uses, generates, and can radiate radio frequency energy and if not installed in
accordance with the operator’s manual, may cause harmful interference to radio communications.
Operation of this equipment in a residential area is likely to cause interference in which case the user
will be required to correct the interference at his own expense.
WARNING:
party responsible for compliance could void the user’s authority to operate the equipment.
Changes or modifications made to this device which are not expressly approved by the
WPIM-T1/DDS User’s Guide i
Page 4

Notice
INDUSTRY CANADA NOTICE
This digital apparatus does not exceed the Class A limits for radio noise emissions from digital
apparatus set out in the Radio Interference Regulations of the Canadian Department of
Communications.
Le présent appareil numérique n’émet pas de bruits radioélectriques dépassant les limites applicables
aux appareils numériques de la class A prescrites dans le Règlement sur le brouillage radioélectrique
édicté par le ministère des Communications du Canada.
NOTICE:
equipment meets telecommunications network protective, operational and safety requirements as
prescribed in the appropriate Terminal Equipment Technical Requirements documents (s). The
department does not guarantee the equipment will operate to the user’s satisfaction.
Before installing this equipment, users should ensure that it is permissible to be connected to the
facilities of the local telecommunications company. The equipment must also be installed using an
acceptable method of connection. The customer should be aware that compliance with the above
conditions may not prevent degradation of service in some situations.
Repairs to certified equipment should be coordinated by a representative designated by the supplier.
Any repairs or alterations made by the user to this equipment, or equipment malfunctions, may give
the telecommunications company cause to request the user to disconnect the equipment.
Users should ensure for their own protection that the electrical ground connections of the power
utility, telephone lines and internal metallic water pipe system, if present, are connected together. This
precaution may be particularly important in rural areas.
such connections themselves, but should contact the appropriate electric inspection authority, or
electrician, as appropriate.
NOTICE:
indication of the maximum number of terminals allowed to be connected to a telephone interface. The
termination on an interface may consist of any combination of devices subject only to the requirement
that the sum of the ringer equivalence Numbers of all the devices does not exceed 5.
The Industry Canada label identifies certified equipment. This certification means that the
Caution:
The Ringer Equivalence Number (REN) assigned to each terminal device provides an
Users should not attempt to make
VCCI NOTICE
This is a Class A product based on the standard of the Voluntary Control Council for Interference by
Information Technology Equipment (VCCI). If this equipment is used in a domestic environment,
radio disturbance may arise. When such trouble occurs, the user may be required to take corrective
actions.
ii WPIM-T1/DDS User’s Guide
Page 5

Notice
CABLETRON SYSTEMS, INC. PROGRAM LICENSE AGREEMENT
IMPORTANT:
This document is an agreement between you, the end user, and Cabletron Systems, Inc. (“Cabletron”)
that sets forth your rights and obligations with respect to the Cabletron software program (the
“Program”) contained in this package. The Program may be contained in firmware, chips or other
media. BY UTILIZING THE ENCLOSED PRODUCT, YOU ARE AGREEING TO BECOME
BOUND BY THE TERMS OF THIS AGREEMENT, WHICH INCLUDES THE LICENSE AND
THE LIMITATION OF WARRANTY AND DISCLAIMER OF LIABILITY. IF YOU DO NOT
AGREE TO THE TERMS OF THIS AGREEMENT, PROMPTLY RETURN THE UNUSED
PRODUCT TO THE PLACE OF PURCHASE FOR A FULL REFUND.
Before utilizing this product, carefully read this License Agreement.
CABLETRON SOFTWARE PROGRAM LICENSE
1. LICENSE
package subject to the terms and conditions of this License Agreement.
You may not copy, reproduce or transmit any part of the Program except as permitted by the
Copyright Act of the United States or as authorized in writing by Cabletron.
2. OTHER RESTRICTIONS. You may not reverse engineer, decompile, or disassemble the
Program.
3. APPLICABLE LA W. This License Agreement shall be interpreted and governed under the laws
and in the state and federal courts of New Hampshire. You accept the personal jurisdiction and
venue of the New Hampshire courts.
. You have the right to use only the one (1) copy of the Program provided in this
EXCLUSION OF WARRANTY AND DISCLAIMER OF LIABILITY
1. EXCLUSION OF
writing, Cabletron makes no warranty, expressed or implied, concerning the Program (including
its documentation and media).
CABLETRON DISCLAIMS ALL WARRANTIES, OTHER THAN THOSE SUPPLIED TO
YOU BY CABLETRON IN WRITING, EITHER EXPRESSED OR IMPLIED, INCLUDING
BUT NOT LIMITED TO IMPLIED WARRANTIES OF MERCHANTABILITY AND
FITNESS FOR A PARTICULAR PURPOSE, WITH RESPECT TO THE PROGRAM, THE
ACCOMP ANYING WRITTEN MA TERIALS, AND ANY A CCOMP ANYING HARDWARE.
2. NO LIABILITY FOR CONSEQUENTIAL DAMAGES. IN NO EVENT SHALL
CABLETRON OR ITS SUPPLIERS BE LIABLE FOR ANY DAMAGES WHATSOEVER
(INCLUDING, WITHOUT LIMITATION, DAMAGES FOR LOSS OF BUSINESS,
PROFITS, BUSINESS INTERRUPTION, LOSS OF BUSINESS INFORMATION, SPECIAL,
INCIDENTAL, CONSEQUENTIAL, OR RELIANCE DAMAGES, OR OTHER LOSS)
ARISING OUT OF THE USE OR INABILITY TO USE THIS CABLETRON PRODUCT,
EVEN IF CABLETRON HAS BEEN ADVISED OF THE POSSIBILITY OF SUCH
DAMAGES. BECAUSE SOME STATES DO NOT ALLOW THE EXCLUSION OR
LIMITATION OF LIABILITY FOR CONSEQUENTIAL OR INCIDENTAL DAMAGES, OR
ON THE DURATION OR LIMITATION OF IMPLIED WARRANTIES, IN SOME
INSTANCES THE ABOVE LIMITATIONS AND EXCLUSIONS MAY NOT APPLY TO
YOU.
WARRANTY. Except as may be specifically provided by Cabletron in
WPIM-T1/DDS User’s Guide iii
Page 6

Notice
UNITED STATES GOVERNMENT RESTRICTED RIGHTS
The enclosed product (a) was developed solely at private expense; (b) contains “restricted computer
software” submitted with restricted rights in accordance with Section 52227-19 (a) through (d) of the
Commercial Computer Software - Restricted Rights Clause and its successors, and (c) in all respects
is proprietary data belonging to Cabletron and/or its suppliers.
For Department of Defense units, the product is licensed with “Restricted Rights” as defined in the
DoD Supplement to the Federal Acquisition Regulations, Section 52.227-7013 (c) (1) (ii) and its
successors, and use, duplication, disclosure by the Government is subject to restrictions as set forth in
subparagraph (c) (1) (ii) of the Rights in Technical Data and Computer Software clause at
252.227-7013. Cabletron Systems, Inc., 35 Industrial Way, Rochester, New Hampshire 03867-0505.
iv WPIM-T1/DDS User’s Guide
Page 7

DECLARATION OF CONFORMITY
Notice
Application of Council Directive(s):
Manufacturer’s Name:
Manufacturer’s Address:
European Representative Name:
European Representative Address:
Conformance to Directive(s)/Product Standards:
Equipment T ype/Environment:
W e the undersigned, hereby declare, under our sole responsibility, that the equipment packaged
with this notice conforms to the above directives.
Manufacturer Legal Representative in Europe
89/336/EEC
73/23/EEC
Cabletron Systems, Inc.
35 Industrial Way
PO Box 5005
Rochester, NH 03867
Mr. J. Solari
Cabletron Systems Limited
Nexus House, Newbury Business Park
London Road, Newbury
Berkshire RG13 2PZ, England
EC Directive 89/336/EEC
EC Directive 73/23/EEC
EN 55022
EN 50082-1
EN 60950
Networking Equipment, for use in a
Commercial or Light
Environment.
Industrial
Mr. Ronald Fotino Mr. J. Solari
___________________________________ ___________________________________
Full Name Full Name
Principal Compliance Engineer Managing Director - E.M.E.A.
___________________________________ ___________________________________
Title Title
Rochester, NH, USA Newbury, Berkshire, England
___________________________________ ___________________________________
Location Location
WPIM-T1/DDS User’s Guide v
Page 8

Notice
vi WPIM-T1/DDS User’s Guide
Page 9

CONTENTS
INTRODUCTION
Using This Manual..........................................................................ix
Structure of This Guide...................................................................ix
Related Manuals..............................................................................x
Document Conventions..................................................................xi
Getting Help...................................................................................xii
CHAPTER 1 OVERVIEW
1.1 Firmware Revision.......................................................................1-2
1.2 WPIM-T1/DDS Features..............................................................1-2
1.3 WAN Protocols............................................................................1-3
1.4 MIB Support.................................................................................1-3
CHAPTER 2 SETUP AND INSTALLATION
2.1 Installing the WPIM-T1/DDS........................................................2-1
2.1.1 Unpacking the WPIM-T1/DDS........................................2-1
2.1.2 Pre-Installation................................................................2-2
2.1.3 Installing the WPIM-T1/DDS...........................................2-2
2.1.4 Post-Installation ..............................................................2-3
2.2 LEDs............................................................................................2-4
2.3 Required Operations ................................................................... 2-4
2.3.1 Choosing T1 or DDS Mode............................................. 2-4
2.3.2 WAN Configuration.........................................................2-5
2.4 Connecting the WAN cable to the WPIM-T1/DDS.......................2-6
......................................................................................ix
CHAPTER 3 LOCAL MANAGEMENT FOR T1 SERVICE
3.1 The WAN Physical Configuration Screen....................................3-2
3.1.1 WAN Physical Configuration Screen Fields.................... 3-3
3.1.2 WPIM Line Configuration Fields .....................................3-4
3.1.3 The WPIM Timeslot Configuration Table........................3-5
3.2 The WAN Interface Configuration Screen...................................3-7
3.2.1 WAN Interface Configuration Screen Fields...................3-8
3.2.1.1 Frame Relay as the Protocol Manager...........3-8
3.2.1.2 PPP as the Protocol Manager........................ 3-9
3.2.1.3 Command and Interface Table Fields..........3-10
WPIM-T1/DDS User’s Guide vii
Page 10

Contents
3.3 Full T-1 Configuration Using PPP..............................................3-11
3.3.1 T1 Service Physical Configuration ................................3-12
3.3.2 T1 Interface Configuration.............................................3-13
3.4 Fractional T-1 Configuration Using PPP....................................3-14
3.4.1 T1 Physical Configuration .............................................3-15
3.4.2 T1 Interface Configuration.............................................3-17
3.5 Frame Relay Configuration........................................................3-17
3.5.1 Frame Relay Physical Configuration.............................3-18
3.5.2 Frame Relay Interface Configuration ............................3-20
CHAPTER 4 LOCAL MANAGEMENT FOR DDS SERVICE
4.1 The WAN Physical Configuration Screen ....................................4-2
4.1.1 WAN Physical Configuration Screen Fields....................4-2
4.1.2 WPIM Line Configuration Fields......................................4-4
4.2 WAN Interface Configuration Screen...........................................4-5
4.2.1 WAN Interface Configuration Screen Fields....................4-5
4.2.1.1 Frame Relay as the Protocol Manager...........4-6
4.2.1.2 PPP as the Protocol Manager.........................4-7
4.2.1.3 Command and Interface Table Fields.............4-8
4.3 DDS Service Configuration..........................................................4-9
4.3.1 DDS Service Physical Configuration...............................4-9
4.3.2 DDS Service Interface Configuration ............................4-10
APPENDIX A SPECIFICATIONS
A.1 Physical Properties ..................................................................... A-1
A.2 Environmental Requirements...................................................... A-1
A.3 Regulatory Compliance............................................................... A-1
A.4 T1 Interface Cabling.................................................................... A-2
A.4.1 Cable Assemblies and Pinouts....................................... A-2
A.5 DDS Port Assignment.................................................................A-4
APPENDIX B FCC PART 68 - USER’S INFORMATION
viii WPIM-T1/DDS User’s Guide
Page 11

INTRODUCTION
Welcome to the Cabletron Systems WPIM-T1/DDS User’s Guide. This
manual provides hardware information and explains the use of Local
Management to control and manage the Cabletron Systems
WPIM-T1/DDS.
The WPIM-T1/DDS is installed in and provides connectivity and
functionality to the CSX400 and the HSIM-W6. The WPIM-T1/DDS
provides full or fractional T1, or a DDS interface to these platforms.
The WPIM-T1/DDS uses the same connector to provide T1 and DDS
connectivity and therefore will only support one service at a time.
Refer to Chapter 1 for more detailed information on the WPIM-T1/DDS
capabilities.
NOTE
The device in which the WPIM-T1/DDS is to be installed may
be referred to as the host platform in this document.
USING THIS MANUAL
Read through this manual completely to familiarize yourself with its
content and to gain an understanding of the features and capabilities of
the WPIM-T1/DDS. You should have a general working kno wledge of the
following data communications networks and their physical layer
components before using the WPIM-T1/DDS:
•
WAN
•
Ethernet and IEEE 802.3
STRUCTURE OF THIS GUIDE
The following list briefly explains each chapter of the WPIM-T1/DDS
manual:
Chapter 1,
protocols that the WPIM-T1/DDS supports.
Chapter 2,
documentation to prepare the WPIM-T1/DDS for proper setup. It also
describes cabling requirements.
Overview
, describes the WPIM-T1/DDS features and the
Setup and Installation
, directs the user to appropriate
WPIM-T1/DDS User’s Guide ix
Page 12

Introduction
Chapter 3,
Local Management for T1 Service
, describes how to use
Local Management to set up T1 service with the WPIM-T1/DDS.
Chapter 4,
Local Management for DDS Service
, describes how to use
Local Management to set up DDS service with the WPIM-T1/DDS.
Appendix A,
Specifications
, provides information on physical properties,
environmental requirements, regulatory compliance, pinouts and LED
definitions.
Appendix B,
FCC Part 68 - User’s Inf ormation
, explains FCC Rules for
the WPIM-T1/DDS.
RELATED MANUALS
Refer to the manual included with the host platform in which the
WPIM-T1/DDS is installed to supplement the procedures and other
technical data provided in this manual. This manual references procedures
in these manuals, where appropriate, but does not repeat them.
The following manuals may help the user to set up and manage the
WPIM-T1/DDS:
Cabletron Systems
Cabletron Systems
HSIM-W6 Installation Guide
HSIM-W84 Installation Guide
Cabletron Systems
QuickSET Configuration Guide for CSX200, CSX400,
CSX400-DC, HSIM-W6, and HSIM-W84
Cabletron Systems
CyberSWITCH CSX400 and CSX400-DC Installation
Guide
Cabletron Systems
Local Management for CSX200, CSX400,
CSX400-DC, HSIM-W6, and HSIM-W84
The
HSIM-W6 Installation Guide
the
Local Management for CSX200, CSX400, CSX400-DC, HSIM-W6,
and HSIM-W84
guide are contained on the QuickSET CD-ROM, and
, the
HSIM-W84 Installation Guide
, and
along with the other manuals listed above, can be obtained from the
World Wide Web in Adobe Acrobat Portable Document Format (PDF) at
the following site:
http://www.cabletron.com/
x WPIM-T1/DDS User’s Guide
Page 13

Introduction
DOCUMENT CONVENTIONS
The following conventions are used throughout this document:
Note
NOTE
TIP
symbol. Calls the reader’s attention to any item of
information that may be of special importance.
Tip
symbol. Conveys helpful hints concerning procedures or
actions.
Caution
damage to the equipment.
!
CAUTION
Electrical Hazard Warning
that could result in personal injury or death due to an electrical
hazard.
bold type
RETURN Indicates either the ENTER or RETURN key, depending on your
ESC Indicates the keyboard Escape key.
SPACE bar Indicates the keyboard space bar key.
BACKSPACE Indicates the keyboard backspace key.
arrow keys Refers to the four keyboard arrow keys.
[-] Indicates the keyboard – key.
DEL Indicates the keyboard delete key.
italic type
n.nn A period in numerals signals the decimal point indicator. (e.g.,
x
Emphasizes important information, indicates variables, and
symbol. Contains information essential to avoid
symbol. Warns against an action
Bold type can denote either a user input or a highlighted screen
selection.
keyboard.
indicates complete document titles.
1.75 equals one and three fourths, or the Decimal Dotted Notation
(DDN) for an IP address.
Indicates the generic use of a letter. (e.g.,
combination of three alphabetic characters.)
xxx
indicates any
WPIM-T1/DDS User’s Guide xi
Page 14

Introduction
n
[] In the Local Management screens, the brackets indicate that a
<> In the format descriptions in the Network Tools section, optional
Indicates the generic use of a number. (e.g., 19
four-digit number in which the last two digits are unknown.)
value may be entered or selected. In the format descriptions in the
Network Tools section, required arguments are enclosed in [].
arguments are enclosed in <>.
nn
indicates a
GETTING HELP
For additional support related to this device or document, contact
Cabletron Systems:
World Wide Web http://www.cabletron.com/
Phone (603) 332-9400
Internet mail support@cabletron.com
FTP ftp://ftp.cabletron.com
Login
Password
To send comments or suggestions concerning this document, contact the
Cabletron Systems Technical Writing Department via the following
email address:
Make sure to include the document Part Number in the email message.
TechWriting@cabletron.com
anonymous
your email address
Before calling Cabletron Systems, have the following information
ready:
•
Your Cabletron Systems service contract number
•
A description of the failure
•
A description of any action(s) already taken to resolve the problem
(e.g., changing mode switches, rebooting the unit, etc.)
•
The serial and revision numbers of all involved Cabletron Systems
products in the network
•
A description of your network environment (layout, cable type, etc.)
•
Network load and frame size at the time of trouble (if known)
•
The device history (i.e., have you returned the device before, is this a
recurring problem, etc.)
•
Any previous Return Material Authorization (RMA) numbers
xii WPIM-T1/DDS User’s Guide
Page 15

CHAPTER 1
OVERVIEW
This chapter describes the features of the WPIM-T1/DDS. It also briefly
explains the WAN protocols supported by the WPIM-T1/DDS.
Some steps for successful operation of this device are:
•
Install the WPIM-T1/DDS in a Wide Area Network host platform.
Refer to Chapter 2 for direction on installation procedures. Refer to the
appropriate host manual (i.e., the Cabletron Systems
CSX400 and CSX400-DC Installation Guide
troubleshooting procedures.
•
Access Local Management. Refer to the appropriate host platform
Local Management User’s Guide for instructions on setting up and
accessing Local Management.
•
Select the service desired, T1 or DDS, using Network Tools.
•
Once the desired service has been chosen, refer to the appropriate
chapter in this document for setup information.
Due to the automation of setup features, it is strongly recommended to
use the Graphical User Interface, QuickSET , to fully configure the de vice.
QuickSET is the desired method for configuring the WPIM-T1/DDS,
after using Local Management to choose T1 or DDS service. Check the
Release Notes for the availability of QuickSET for configuration. Use
Local Management, described in this manual, if QuickSET is not
available.
for other installation and
CyberSWITCH
NOTE
WPIM-T1/DDS User’s Guide 1-1
The device in which the WPIM-T1/DDS is to be installed may
be referred to as the host platform in this documentation.
Page 16
Chapter 1:
Overview
1.1 FIRMWARE REVISION
Important Notice
Depending on the firmware version used in the WPIM-T1/DDS, some
features described in this document may not be supported. Refer to the
Release Notes shipped with the WPIM-T1/DDS to determine which
features are supported.
This manual covers Firmware Revision level 02.01.XX. Later revisions
may be reflected in an updated manual. Please check carefully to verify
the revision lev el of your device, to ensure that this manual will meet your
needs.
1.2 WPIM-T1/DDS FEATURES
The WPIM-T1/DDS extends the functionality of the Wide Area Network
host platform to provide a full or fractional T1 or a DDS interface for the
host platform (CSX400 or the HSIM-W6) into which the WPIM-T1/DDS
(Figure 1-1) can be installed.
T1
Figure 1-1 WPIM-T1/DDS
WPIM
T1/DDS
DDS
In the T1 service mode, the WPIM-T1/DDS provides a T1 interface that
includes a built-in Channel Service Unit/Digital Service Unit (CSU/DSU)
for direct connection to a T1 line.
In the DDS service mode, the WPIM-T1/DDS extends the functionality
of the Wide Area Network module to allow remote connectivity using
Digital Data Service (DDS). It provides a DDS interface that includes a
built-in Channel Service Unit/Digital Service Unit (CSU/DSU) for direct
connection to a DDS line, and supports remote CSU diagnostic loopback
and Non-Latching remote DSU diagnostic loopback.
1-2 WPIM-T1/DDS User’s Guide
Page 17

WAN Protocols
NOTE
A connection can only be chosen for either T1 or DDS service
in Local Management. Both services cannot operate at the
same time.
1.3 WAN PROTOCOLS
The module in which the WPIM-T1/DDS is installed supports the
following WAN protocols (refer to the Release Notes included with the
host MIM or standalone hub for a list of current protocols):
• Point to Point Protocol (PPP) and as defined by RFC 1661
• Frame Relay as defined by RFC 1490
• ISDN as defined by Q.921 and Q.931
1.4 MIB SUPPORT
Refer to the Release Notes included with the host platform for a list of all
MIBs supported by the WPIM-T1/DDS. For information about how to
extract and compile individual MIBs, contact Cabletron Systems (refer to
Getting Help).
WPIM-T1/DDS User’s Guide 1-3
Page 18

Chapter 1: Overview
1-4 WPIM-T1/DDS User’s Guide
Page 19

CHAPTER 2
SETUP AND INSTALLATION
Only qualified personnel should install the WPIM-T1/DDS. This
User’s Guide is intended for the experienced network
equipment installer.
This chapter details set up and installation of the WPIM-T1/DDS into a
host platform.
NOTE
QuickSET or Local Management must be used to set up the
WPIM-T1/DDS in management before any connections are
made to the WAN. Follow the directions carefully.
2.1 INSTALLING THE WPIM-T1/DDS
For additional support related to the WPIM-T1/DDS, refer to the host
platform manual into which the WPIM-T1/DDS is being installed. Locate
the guide by clicking on the Cabletron Systems QuickSET program group
icon after installing the QuickSET CD on your computer, or see Related
Manuals in the Introduction.
NOTE
Some WPIMs require version 1.02 or greater of QuickSET to
participate and function correctly in your network. Contact
Cabletron Systems to obtain the latest version of QuickSET if
you do not have it. Refer to Getting Help in the Introduction for
more information.
2.1.1 Unpacking the WPIM-T1/DDS
Both the WPIM-T1/DDS and the host platform in which the
WPIM-T1/DDS is installed are static sensitive devices. Use a
grounding strap and follow all static-safe precautions during
installation. Failure to do so could result in damage to the
WPIM-T1/DDS and the host platform receiving it.
1. Carefully remove the WPIM-T1/DDS from the shipping box.
2. Visually inspect the WPIM-T1/DDS. If there are any signs of damage,
contact Cabletron Systems immediately. Refer to Getting Help.
WPIM-T1/DDS User’s Guide 2-1
Page 20

Chapter 2: Setup and Installation
2.1.2 Pre-Installation
To prepare the host platform for the WPIM-T1/DDS, proceed as follows:
1. Turn off and disconnect the host platform from the power source.
2. Mark all network cables attached to the host platform for ease of
re-installation.
3. Disconnect all network cables attached to the host platform.
4. Refer to detailed instructions contained in the host platform’s user
guide to remove the chassis cover. This procedure must be completed
before installing the WPIM-T1/DDS.
2.1.3 Installing the WPIM-T1/DDS
To install the WPIM-T1/DDS into the device, refer to Figure 2-1 and
complete the following steps:
When removing an existing WPIM, make sure to pull the
module straight up to avoid damaging the connector.
!
CAUTION
1. Remove the blank faceplate from the appropriate WAN slot by
removing the three WPIM screws that secure it to the standoffs.
2. Orient the WPIM-T1/DDS as shown in Figure 2-1.
3. Carefully insert the WPIM-T1/DDS connector into the WPIM
connector pins on the device.
4. Press down firmly on the WPIM-T1/DDS until the pins slide all the
way into the connector. Ensure that the WPIM-T1/DDS seats flush on
the standoffs.
5. Secure the WPIM-T1/DDS to the three standoffs with the WPIM
screws.
2-2 WPIM-T1/DDS User’s Guide
Page 21

WPIM
Figure 2-1 Installing the WPIM-T1/DDS
2.1.4 Post-Installation
T1
WPIM Screws
DDS
WPIM
WPIM-RT1
T1/DDS
Installing the WPIM-T1/DDS
WPIM
Connector
WPIM
Connector Pins
Standoffs
1. Reinstall the cover as applicable.
2. Refer to the host platform user’s guide to reinstall the network cables
and refer to Appendix A for cabling information for the
WPIM-T1/DDS. Do not connect the WAN cable until instructed to
do so.
3. Refer to instructions contained in the host platform user’s guide to
reapply power.
4. After reapplying power, check the LEDs for the following conditions:
• Verify that the PWR LED is on, indicating that the device is
receiving power.
• After the host platform runs a self test, the CPU LED blinks green
indicating normal operation.
• If the CPU LED remains red, contact Cabletron Systems.
WPIM-T1/DDS User’s Guide 2-3
Page 22

Chapter 2: Setup and Installation
2.2 LEDs
The LEDs on the WPIM-T1/DDS indicate the service that the
WPIM-T1/DDS is providing. (See Figure 2-2.) If the T1 LED is lit, the
WPIM-T1/DDS is operating in T1 mode. If the DDS LED is lit, the
WPIM-T1/DDS is operating in DDS mode.
DDS ServiceT1 Service
T1
Figure 2-2 LED Indicators
WPIM
T1/DDS
DDS
The host platform displays LED indications of the WPIM-T1/DDS’s
operation. For more information on host platform LEDs, refer to the host
platform manual.
2.3 REQUIRED OPERATIONS
The WPIM-T1/DDS must be configured before connecting to the WAN.
The configuration must be performed in the following order:
• Choose T1 or DDS mode (Section 2.3.1)
• WAN configuration, using QuickSET or Local Management
(Section 2.3.2)
2.3.1 Choosing T1 or DDS Mode
The mode (T1 or DDS) must be chosen before either QuickSET or Local
Management is used to configure the WAN set up.
NOTE
at the same time. The user must choose one or the other
service, but can change it when desired.
When the WPIM-T1/DDS is first powered up, the default is T1.
2-4 WPIM-T1/DDS User’s Guide
The WPIM-T1/DDS cannot operate in both T1 and DDS mode
Page 23

Required Operations
This is done using Network Tools, or MIB Navigator, depending on the
host platform. Refer to the host platform user’s guide for information on
how to navigate through the Local Management screens in order to access
Network Tools.
Follow these steps to configure the WPIM-T1/DDS for T1 or DDS
service:
1. Once in Network Tools, choose between T1 and DDS setup using this
command:
t1dds <SLOT> <T1/DDS>
where SLOT is either 1 for slot one of the host platform for the WPIM,
or 2 for slot two, and T1/DDS is either 1 for DDS service, or 2 for T1
service.
2. Assuming the WPIM-T1/DDS is installed in slot 1, use the following
command to allow the WPIM-T1/DDS in slot 1 to perform T1 service:
t1dds 1 2
To perform DDS service, use the following command, also for slot 1:
t1dds 1 1
3. Press the ENTER key. The unit automatically reboots and the user
must re-enter Local Management.
2.3.2 WAN Configuration
The WPIM-T1/DDS must be configured for WAN operation using either
QuickSET or Local Management before the WAN is connected.
Refer to the QuickSET manual for specific instructions on how to access
the Wide Area configuration for the WPIM-T1/DDS. Refer to Related
Manuals in order to obtain the QuickSET manual.
For Local Management configuration, refer to Chapter 3 for T1
configuration, or Chapter 4 for DDS configuration.
The WAN configuration from QuickSET or either Chapter 3 or Chapter 4
must be completed before proceeding to the next step.
WPIM-T1/DDS User’s Guide 2-5
Page 24

Chapter 2: Setup and Installation
2.4 CONNECTING THE WAN CABLE TO THE
WPIM-T1/DDS
Before connecting any cabling to the WPIM-T1/DDS, the WAN
configuration must be complete. Refer to the previous section for
information (Section 2.3.2) if the WAN configuration has not been
completed.
DO NOT plug the WAN cable into the external WAN connection
until you have properly completed the WAN setup in software. If
!
CAUTION
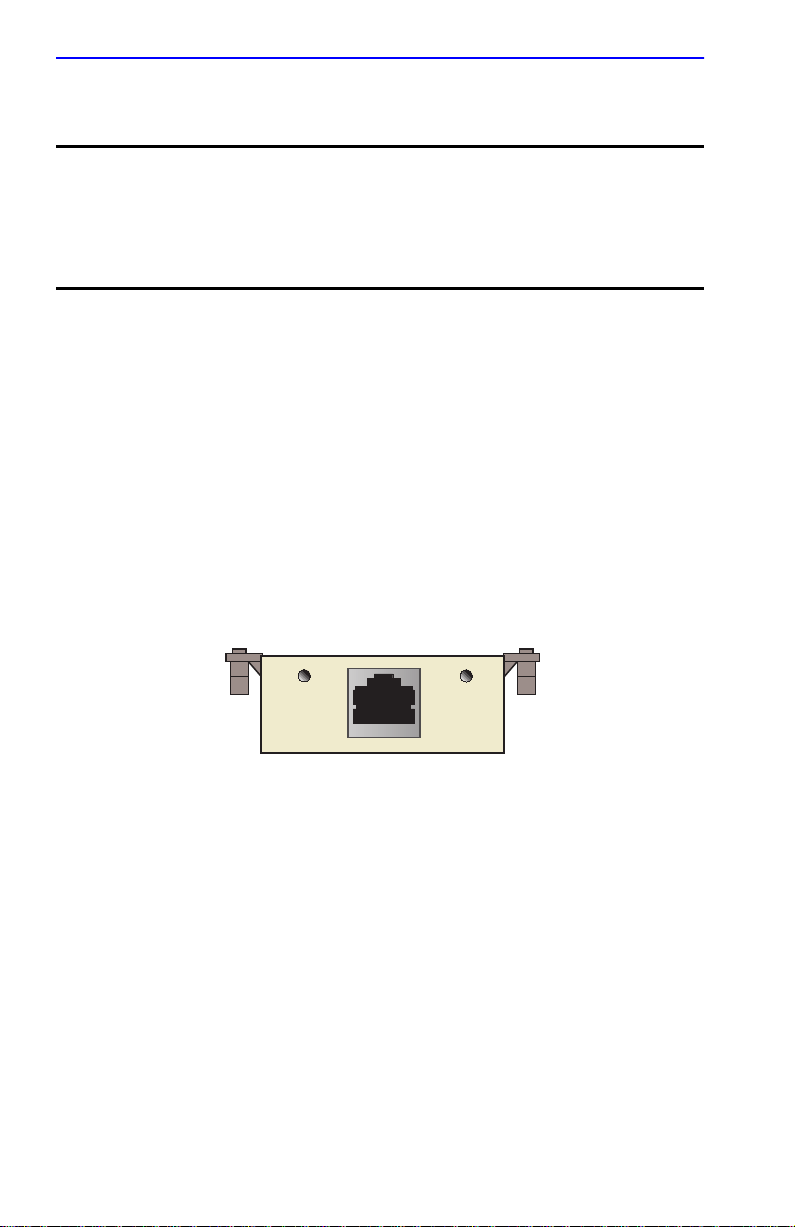
The RJ45 cable from the WPIM-T1/DDS must be plugged into the WAN
connection wall jack (see Figure 2-3, below). The cables are not supplied
with the WPIM-T1/DDS, but may be ordered separately from Cabletron
Systems (cable part number 9372094 for T1, and part number 9360119
for DDS service). Refer to Appendix A for details.
this cable is plugged in prematurely, before the host unit is
configured, the telephone company can disable the WAN line
for a period of time. The cable will be plugged in as a final step
once you run the QuickSET configuration, or the Local
Management configuration.
WAN Connection Wall Jack
Host Platform
T1
Figure 2-3 WAN Connection to the WPIM-T1/DDS
WPIM
T1/DDS
DDS
connect
2-6 WPIM-T1/DDS User’s Guide
Page 25

CHAPTER 3
LOCAL MANAGEMENT FOR T1 SERVICE
This chapter explains how to configure the WPIM-T1/DDS through Local
Management for T1 service.
The WAN Physical Configuration screen and the WAN Interface
Configuration screen appear as Local Management menu selections
when you install the WPIM-T1/DDS into a host module. Refer to the host
platform User’s Guide for instructions about how to set up and access
Local Management.
Sections of this chapter include:
• The WAN Physical Configuration screen, Section 3.1
• The WAN Interface Configuration screen, Section 3.2
• Full T1 Configuration using PPP, Section 3.3
• Fractional T1 Configuration using PPP, Section 3.4
• Frame Relay Configuration, Section 3.5
Read Section 3.1 and Section 3.2 to gain an understanding of the
WPIM-T1/DDS Local Management screens for T1. Section 3.3 through
Section 3.5 provide examples for setting up the WPIM-T1/DDS for full or
fractional T1 in a PPP environment, or for configuring the
WPIM-T1/DDS for Frame Relay in the T1 mode.
Navigate through the WPIM Local Management screens using
TIP
NOTE
WPIM-T1/DDS User’s Guide 3-1
the following keyboard commands:
Arrow keys to move up, down, right or left within the screen.
SPACE bar to toggle between selections in a field.
ENTER (RETURN) to implement a selection.
The WPIM-T1/DDS cannot operate in both T1 and DDS mode
at the same time. The user must choose one or the other
service, but can change it when desired. Refer to Section 2.3.1
to choose the mode.
When the WPIM-T1/DDS is first powered up, the default is T1.
Page 26

Chapter 3: Local Management for T1 Service
3.1 THE WAN PHYSICAL CONFIGURATION SCREEN
To access the WAN Physical Configuration screen, use the arrow keys to
highlight the WAN SETUP menu item, then press ENTER. The screen
shown in Figure 3-1 displays.
NOTE
platform, information for the second WPIM will display next to
WPIM 1.
<host name> Local Management Flash Image Version: xx.xx.xx
WAN PHYSICAL CONFIGURATION
WPIM 1
Type: T1
WPIM #: 1
Mgr Type: [PPP]
Max VCs: 024
Next IF: 003
When there is more than one WPIM installed into the host
WPIM 1 Line Configuration
T1 Timeslot View:
T1 Line Coding:
T1 Frame Type:
T1 Tx Clock Source:
T1 Line Buildout:
T1 Loopback:
SAVE WAN INT CONFIG RETURN
[WPIM 1]
[Active]
[B8ZS]
[ESF]
[Loop-Timing]
[0 db]
[None]
01-08
09-16
17-24
WPIM 1 Timeslot Configuration
000 000 000 000 000000 000 000
000 000 000 000 000000 000 000
000 000 000 000 000000 000 000
REMOTE SETUP
275002
Figure 3-1 WAN Physical Configuration Screen
3-2 WPIM-T1/DDS User’s Guide
Page 27

The WAN Physical Configuration Screen
3.1.1 WAN Physical Configuration Screen Fields
The following sections describe WAN Physical Configuration screen
fields and provide instructions for setting them. The WAN Physical
Configuration screen lets you configure the WPIM or “Physical
Interface.”
NOTE
The Type field displays either T1 or DDS, depending on the
mode selected using Network Tools.
To select the WPIM you wish to configure, proceed as follows:
1. Use the arrow keys to highlight the WPIM X command field at the
bottom of the screen.
2. Use the SPACE bar to select the appropriate WPIM, then press
ENTER. The WAN Configuration screen automatically displays
unique configuration fields for each WPIM as shown in Figure 3-1.
The WAN Physical Configuration screen displays the following
information for each WPIM:
WPIM
1-2
(Read-Only)
Displays configuration information for up to two different WPIMs.
Type (Read-Only)
Displays the type of WPIM installed. For the WPIM-T1/DDS, the Type
field displays the service selected. When T1 service is selected, T1 is
displayed. When DDS service is selected, DDS is displayed.
WPIM # (Read-Only)
Displays the number of the slot in which the WPIM resides.
Mgr Type (Selectable)
Used to select the type of protocol manager. For the T1 mode of the
WPIM-T1/DDS, the available options are PPP, FR PtoMP, FR PtoP,
HDLC and NONE. The field defaults to NONE.
Max VCs (Modifiable)
Displays the maximum number of virtual circuits (interfaces) available to
be configured. The default number displayed depends on the Protocol
Manager chosen.
Next IF (Read-Only)
Displays the next interface available to be used.
WPIM-T1/DDS User’s Guide 3-3
Page 28

Chapter 3: Local Management for T1 Service
SAVE (Command)
Saves the chosen configuration.
WPIM X (Toggle)
Enables the user to select the WPIM to be configured. Once it is selected,
the user can enter the screens of the WPIM selected to modify the data.
WAN INT CONFIG (Command)
When this field is highlighted and the ENTER key is pressed, the WAN
Interface Configuration screen displays. Refer to Section 3.2 for details.
REMOTE SETUP (Command)
Used to modify the remote profiles.
RETURN (Command)
Returns user to the previous screen in the hierarchy.
3.1.2 WPIM Line Configuration Fields
The configuration fields displayed on the WAN Physical Configuration
screen shown in Figure 3-1 are specific to the T1 mode of the
WPIM-T1/DDS.
NOTE
T1 Timeslot View (T oggle)
The service provider (i.e., AT&T, Sprint, MCI, Bell Atlantic, etc.)
determines the settings for the following fields. Consult the
service provider for the correct settings.
Displays the status of the Timeslot Configuration Table. This field toggles
between Active and New. The field comes up with the default setting
Active. The Active setting displays current Timeslot Configuration table
settings. The New setting allows you to change Timeslot Configuration
table settings. The default setting for the Timeslot Configuration table is
all Timeslots not assigned (000).
T1 Line Coding (Toggle)
Displays the line coding for the physical T1 line. This field toggles
between B8ZS and AMI. The default setting is B8ZS.
T1 Frame Type (Toggle)
Displays the T1 Frame type. This field toggles between ESF and D4. The
default setting is ESF.
3-4 WPIM-T1/DDS User’s Guide
Page 29

The WAN Physical Configuration Screen
T1 Tx Clock Source (Toggle)
Displays the T1 Transmit Clock Source. This field toggles between
Loop-Timing (Extracted Line Data) and Local-Timing (Internal Clock).
The default setting is Loop-Timing.
T1 Line Buildout (Selectable)
Displays the line coding for the physical T1 line. Set this to 0 dB unless
the service provider recommends another setting. The default setting for
this field is 0 dB. The following settings are available in this field:
• 0 dB
• -7.5 dB
• -15 dB
• -22.5 dB
• 133-266 Ft
• 267-399 Ft
• 400-533 Ft
• 534-655 Ft
T1 Loopback (Selectable)
Network Loopback is a testing procedure that segments the line and
allows the user to isolate faults. The selections for this field are None,
Line-Loop, and Payload-Loop. In Line-Loop the entire T1 line is looped
back, including the framing bits, CRC, and the facility data link. This
happens before the framer. In Payload-Loop, only the 24 time slots are
looped back, which happens behind the framer, and does not include the
framing bits, CRC, and facility data link. The WPIM-T1/DDS must be in
Loop-Timing mode to use this option. The default setting is None.
3.1.3 The WPIM Timeslot Configuration T able
The WPIM Timeslot Configuration table allows the user to configure the
way in which the Cabletron Systems WAN module uses the T1 line. The
configuration table consists of 24 Timeslots. Each Timeslot must be
assigned an Interface number (for example, 002 for an active Interface
number or 000 if the Timeslot is not used). When an entire T1 line is
leased, all 24 Timeslots (the full T1 bandwidth) can be used. If only a
fraction of the T1 line is leased, the service provider indicates which
Timeslots to use.
WPIM-T1/DDS User’s Guide 3-5
Page 30

Chapter 3: Local Management for T1 Service
Timeslots can be utilized in any way chosen. The WPIM-T1/DDS in T1
mode supports Time Division Multiplexing (TDM) allowing
channelization of circuits (Timeslots) within the public network. For
example, if the WPIM-T1/DDS has access to a full T1 (24 T imeslots), and
the user wants to communicate with two other sites, the configuration
might look like that shown in Figure 3-2.
SITE #2
SITE #1
16 Timeslots
Telco Cloud
24 Timeslots
SITE #3
8 Timeslots
1482_02
Figure 3-2 Sample Timeslot Configuration
Figure 3-3 shows a sample configuration for three sites. Of the 24
Timeslots, Site #1 uses 16 to communicate with Site #2 and the remaining
8 to communicate with Site #3. This configuration varies tremendously
depending on how the service provider maps out the T1 Timeslots. The
service provider indicates which Timeslots are active.
005
005
005
005
005
005
005
005
000
000
005
000
000
005
005
000
000
01-08
09-16
17-24
005
005
006
005
005
006
005
005
006
005
005
006
005
005
006
005
005
006
005
005
006
005
005
006
01-08
09-16
17-24
01-08
005
000
000
005
000
000
005
000
000
005
005
000
000
SITE #2
000
000
SITE #1
09-16
17-24
006
006
006
006
006
SITE #3
006
006
006
1482_03
000
000
000
000
000
000
000
000
Figure 3-3 Sample Configuration
3-6 WPIM-T1/DDS User’s Guide
Page 31

The WAN Interface Configuration Screen
Site #1 is using the full T1, so all the Timeslots must have an Interface
assignment. Site #2 and Site #3 use only a fraction of the T1, but the total
quantity of Timeslots must match those of Site #1. Unused Timeslots
receive an Interface number of 000.
NOTE
have to match. Only the quantity and position of Timeslots
must match (the service provider assigns the Timeslots).
3.2 THE WAN INTERFACE CONFIGURATION SCREEN
The following sections describe the features of the WAN Interface
Configuration screen. Access the screen by using the arrow keys to
highlight the WAN INT CONFIG command field at the bottom of the
WAN Physical Configuration screen, then press ENTER. The WAN
Interface Configuration screen shown in Figure 3-4 displays.
<host name> Local Management Flash Image Version: xx.xx.xx
WAN INTERFACE CONFIGURATION
The Interface numbers of Site #1, Site #2 and Site #3 do not
Interface Number: 000
Max Xmit Unit: 0
ProtMgr Iface: [0]
Active Protocol: FR
FR LMI: [ANSI_94]
DLCI Address: 0
DLCI DCP En:
DLCI DCP Stat:
Comp Ratio:
Circuit State: [Invalid]
PORTS:
SAVE
[1-32 ]
RETURN
CKT# IF# LID STATE
001
001 Enet UP
002
002
Enet DOWN
003
004
005
006
007
008
009
010
011
012
013
014
015
016
CKT# IF# LID STATE
017
018
019
020
021
022
023
024
025
026
027
028
029
030
031
032
2750_04
Figure 3-4 WAN Interface Configuration Screen
WPIM-T1/DDS User’s Guide 3-7
Page 32

Chapter 3: Local Management for T1 Service
3.2.1 WAN Interface Configuration Screen Fields
This section describes the WAN Interface Configuration screen fields.
Interface Number (Modifiable)
Displays the active Interface Number. Used to configure the Interface
Numbers that were assigned to the Timeslots on the WAN Physical
Configuration screen.
Max Xmit Unit (Modifiable)
Displays the maximum packet size that can be transmitted on the selected
interface. The default settings for this field depend on the Protocol
Manager chosen.
ProtMgr Iface (Modifiable)
Interface number used for the Protocol Manager chosen.
Active Protocol (Read-Only)
Displays the active OSI layer protocol (Protocol Manager) chosen for the
WPIM-T1/DDS. There is one set of parameters displayed for FR, and one
set for PPP. Refer to Section 3.2.1.1 for information on the Active
Protocol set to Frame Relay, and Section 3.2.1.2 for PPP information.
3.2.1.1 Frame Relay as the Protocol Manager
Refer to Figure 3-4 for the following parameters displayed for FR.
FR LMI (Selectable)
Frame Relay Link Management Interface. This field displays ANSI_94,
NO LMI, T1.617-D or Q.933-A. The NO LMI setting is for specialized
applications in which no Frame Relay Link Management is available or
required.
DLCI Address (Modifiable)
Data Link Connection Identifier given by the Service Provider. Can be set
to values from 0-1023, depending on the protocol, when available for
modification with certain protocol modes. The values 0-15 and 1008-1022
are reserved DLCI addresses. When using FR PtoMP as the Protocol
Manager, the WPIM-T1/DDS can learn the DLCIs dynamically from the
switch.
DLCI DCP En (Toggle)
Enables the user to turn Data Compression Protocol On or Off on an
application port per application port basis when available. The DLCI port
must be entered to change compression.
3-8 WPIM-T1/DDS User’s Guide
Page 33

The WAN Interface Configuration Screen
DLCI DCP Stat (Read-Only)
Displays the current negotiated status of compression.
Comp Ratio (Read-Only)
Displays the Compression Ratio, which is the ratio of uncompressed to
compressed data.
Circuit State (Selectable)
The field initially displays the state of the DLCI circuit, and can be
modified. Steps through Active, Inactive and Invalid.
3.2.1.2 PPP as the Protocol Manager
<host name> Local Management Flash Image Version: xx.xx.xx
WAN INTERFACE CONFIGURATION
Interface Number: 003
Max Xmit Unit: 1526
ProtMgrIface: [0]
Active Protocol: PPP
PPP MRU: 1520
ECP Enable: [Off]
ECP Status: Off
CCP Enable: [Off]
CCP Status: Off
Comp Ratio: 1:1
PORTS:
SAVE
[1-32]
RETURN
CKT# IF# LID STATE
001
001 Enet UP
002
Enet
002
003
004
005
006
007
008
009
010
011
012
013
014
015
016
CKT# IF# LID STATE
017
018
DOWN
019
020
021
022
023
024
025
026
027
028
029
030
031
032
2750_02
Figure 3-5 WAN Interface Configuration Screen (PPP)
Refer to Figure 3-5 for the following parameters displayed for PPP.
PPP MRU (Modifiable)
Displays the Maximum Receive Units that PPP can handle, modifiable by
the user.
ECP Enable (Toggle)
Toggles between On and Off to enable or disable encryption.
ECP Status (Read-Only)
Displays the status of encryption.
WPIM-T1/DDS User’s Guide 3-9
Page 34

Chapter 3: Local Management for T1 Service
CCP Enable (Toggle)
Toggles between On and Off to enable or disable compression.
CCP Status (Read-Only)
Displays the status of compression.
Comp Ratio (Read-Only)
Displays the Compression Ratio, which is the ratio of uncompressed to
compressed data.
3.2.1.3 Command and Interface Table Fields
SAVE (Command)
Saves the configuration changes.
PORTS: [1-32] (Command)
Interface table displays the range of circuits shown in the command field.
Use the SPACE bar and either the BACKSPACE or DELETE key to step
through the displays.
RETURN (Command)
Returns user to the previous screen.
CKT# (Read-Only)
Displays the circuit number of the application ports available from the
host platform. If the active protocol is PPP or FR PtoP, only one
application port per interface number (IF#) is assigned. If the active
protocol is FR PtoMP, the available WAN ports from the host platform
may be assigned, one per DLCI.
IF# (Read-Only)
Displays the MIB II Interface number that is associated with the
application port (CKT#).
LID (Read-Only)
Displays the Link Identifier. If the active protocol is Frame Relay, the
Data Link Connection Identifier is displayed. If the active protocol for
this interface is PPP, then PPP displays in this field. For Ethernet ports,
Enet is displayed.
STATE (Read-Only)
Displays the status of the application port. If the active protocol is Frame
Relay, this field displays the status as Active, Inactive, or Invalid
(no LMI). If the active protocol is PPP or Ethernet, this field displays UP
(active) or DOWN (inactive).
3-10 WPIM-T1/DDS User’s Guide
Page 35

Full T1 Configuration Using PPP
3.3 FULL T1 CONFIGURATION USING PPP
This section provides step-by-step instructions for configuring the
WPIM-T1/DDS to use a full T1 circuit in a PPP environment. This
simplified example assumes the setup shown in Figure 3-6 using a
CSX400 with a WPIM-T1/DDS installed at Site #1. Configurations may
vary depending on the host platform.
SITE #1
24 Timeslots
Figure 3-6 Full T1 Configuration
Telco Cloud
SITE #2
24 Timeslots
1482_05
The line configuration information shown in Table 3-1 must be supplied
by the service provider.
Table 3-1 Telco Configuration Information
Configuration Information
Required by User
Line Coding B8ZS or AMI
Frame Type ESF or D4
Clock Source Loop Timing or Local Timing
Configuration Information
Supplied by Service Provider
WPIM-T1/DDS User’s Guide 3-11
Page 36

Chapter 3: Local Management for T1 Service
3.3.1 T1 Service Physical Configuration
Begin the T1 configuration by accessing the WAN Physical Configuration
screen through Local Management (Figure 3-1). Access the W AN
Physical Configuration screen from the WAN SETUP menu item in the
host platform.
Proceed with the following steps:
1. Use the arrow keys to highlight the WPIM X field at the bottom of the
screen. Press the SPACE bar to select the number of the WPIM to be
configured, then press ENTER.
2. Use the arrow keys to highlight MgrType. Select PPP.
NOTE
When changing from one protocol to another on a
WPIM-T1/DDS that has been operational, save NONE as the
protocol before changing to another protocol.
3. Use the arrow keys to highlight Timeslot View. Press the SPACE bar
to select New, then press ENTER. The cursor moves to Timeslot #1 of
the Timeslot Configuration Table.
4. Insert an interface number (refer to NOTE below) into every timeslot
as needed. Type the number, press ENTER, then use the arrow keys to
highlight the next timeslot field. Exit this field by using the arrow
keys. The cursor automatically moves to the T1 Line Coding field.
NOTE
The value assigned to the timeslots is the interface being used
for WAN communication. The next available interface is
displayed on the WAN Physical Configuration screen in the
Next IF field (see Figure 3-1). The Next IF number shown must
be used to add a new interface. The Next IF will increment as
interfaces are added. The previously entered interfaces can be
modified by entering the interface number.
The following four steps are based on information supplied by the service
provider. Consult the service provider for the correct settings.
5. Use the arrow keys to highlight T1 Line Coding. Press the SPACE bar
to select B8ZS or AMI, then press ENTER.
6. Use the arrow keys to highlight T1 Frame Type. Press the SPACE bar
to select ESF or D4, then press ENTER.
3-12 WPIM-T1/DDS User’s Guide
Page 37

Full T1 Configuration Using PPP
7. Use the arrow keys to highlight T1 TX Clock Source. Press the
SPACE bar to select Local (no clock source provided by telephone
company) or Loop-Timing (clock source provided by telephone
company), then press ENTER.
If you are using a Local clock source, set only one end of the
circuit for Local, and the other end must be set for Loop.
!
CAUTION
8. Use the arrow keys to highlight T1 Line Buildout (LBO). Press the
SPACE bar to select 0 dB unless the service provider recommends
another setting, then press ENTER.
9. Use the arrow keys to highlight T1 Network Loopback. Press the
SPACE bar to select None, then press ENTER.
10. Use the arrow keys to highlight the SAVE command, then press
ENTER. The message “SAVE DONE!” displays and Local
Management saves the changes to memory. “REBOOT IN
PROGRESS......” displays and the host platform reboots. Re-entry to
management is necessary for any further configuration.
11. Proceed to Section 3.3.2 to continue configuration.
3.3.2 T1 Interface Configuration
The WAN Interface Configuration screen is accessed through the WAN
Physical Configuration screen. Access the WAN Interface Configuration
screen by using the arrow keys to highlight the WAN INT CONFIG
command and press ENTER. Refer to Figure 3-4 and proceed with the
following steps to configure the WAN Interface.
1. Set the WAN connection Interface Number by typing the same
number into the Interface Number field that was input into the
timeslots in the WAN Physical Configuration screen, then press
ENTER (refer to the Note on page 3-12).
2. Unless the user sets the Max Xmit Unit, the WPIM-T1/DDS
automatically sets the Max Xmit Unit to 1526 (default for PPP) after
the protocol manager type is selected.
3. Make any changes to the available settings as desired.
WPIM-T1/DDS User’s Guide 3-13
Page 38

Chapter 3: Local Management for T1 Service
4. Use the arrow keys to highlight the SAVE command, then press
ENTER. The message “Save Done!” appears and Local Management
saves the changes to memory.
The WAN configuration is complete. It takes up to 60 seconds for the
WAN Interface to come out of standby and for communications to begin.
3.4 FRACTIONAL T1 CONFIGURATION USING PPP
This section provides step-by-step instructions for configuring the
WPIM-T1/DDS to use a fractional T1 circuit in a PPP environment. This
example assumes the setup shown in Figure 3-7 using two CSX400s with
each containing a WPIM-T1/DDS. Configurations may vary depending
on the host platform. In a fractional T1 setup, only a portion of the 24
Timeslots or DS-0s are used.
NOTE
synonymously in this guide to represent a standard 64,000 bps
channel.
SITE #1
with WPIM-T1/DDS
16 Timeslots
The terms DS-0 (Digital Signal, level 0) and Timeslot are used
SITE #2
with WPIM-T1/DDS
16 Timeslots
Telco Cloud
1482_06
Figure 3-7 Fractional T1 Configuration
3-14 WPIM-T1/DDS User’s Guide
Page 39

Fractional T1 Configuration Using PPP
The line configuration information shown in Table 3-2 must be supplied
by the service provider.
Table 3-2 Telco Configuration Information
Configuration Information
Required by User
Line Coding B8ZS or AMI
Frame Type ESF or D4
Clock Source Loop Timing or Local Timing
DS-0s (Timeslots) Timeslots being used for each end of
Configuration Information
Supplied by Service Provider
the circuit
3.4.1 T1 Physical Configuration
Begin the WPIM-T1/DDS physical configuration by accessing the WAN
Physical Configuration screen through Local Management (Figure 3-1).
Proceed with the following steps:
1. Use the arrow keys to highlight the WPIM X field at the bottom of the
screen. Press the SPACE bar to select the number of the WPIM being
configured, then press ENTER.
2. Use the arrow keys to highlight MgrType. Select PPP.
NOTE
When changing from one protocol to another on a
WPIM-T1/DDS that has been operational, save NONE as the
protocol before changing to another protocol.
3. Use the arrow keys to highlight Timeslot View. Press the SPACE bar
to select New, then press ENTER. The cursor moves to Timeslot #1 of
the Timeslot Configuration Table.
4. Insert an interface number (refer to Note below) into every Timeslot
being used (in the example shown back in Figure 3-7, 16 Timeslots are
used, the rest have zeros in them). Type the number, press ENTER,
then use the arrow keys to highlight the next Timeslot field. Exit this
field by using the arrow keys.The cursor automatically moves to the
T1 Line Coding field.
WPIM-T1/DDS User’s Guide 3-15
Page 40

Chapter 3: Local Management for T1 Service
NOTE
The value assigned to the timeslots is the interface being used
for WAN communication. The next available interface is
displayed on the WAN Physical Configuration screen in the
Next IF field (see Figure 3-1). The Next IF number shown must
be used to add a new interface. The Next IF will increment as
interfaces are added. The previously entered interfaces can be
modified by entering the interface number.
The following four steps are based on information supplied by the service
provider. Consult the service provider for the correct settings.
5. Use the arrow keys to highlight T1 Line Coding. Use the SPACE bar
to select B8ZS or AMI, then press ENTER.
6. Use the arrow keys to highlight T1 Frame Type. Use the SPACE bar
to select ESF or D4, then press ENTER.
7. Use the arrow keys to highlight T1 Tx Clock Source. Use the SPACE
bar to select Local (no clock source provided by telephone company)
or Loop-Timing (clock source provided by telephone company), then
press ENTER.
If you are using a Local clock source, set only one end of the
circuit for Local, the other end must be set for Loop.
!
CAUTION
8. Use the arrow keys to highlight T1 Line Buildout (LBO). Press the
SPACE bar to select 0 dB unless the service provider recommends
another setting, then press ENTER.
9. Use the arrow keys to highlight T1 Network Loopback. Press the
SPACE bar to select None, then press ENTER.
10. Use the arrow keys to highlight the SAVE command, then press
ENTER. The message “Save Done!” appears and Local Management
saves the changes to memory. The host platform reboots, and re-entry
to Local Management is necessary for any further configuration.
11. Proceed to the Section 3.4.2 to continue configuration.
3-16 WPIM-T1/DDS User’s Guide
Page 41

Frame Relay Configuration
3.4.2 T1 Interface Configuration
The WAN Interface Configuration screen is accessed through the WAN
Physical Configuration screen. Access the WAN Interface Configuration
screen by using the arrow keys to highlight the WAN INT CONFIG
command and press ENTER. Refer back to Figure 3-4 and proceed with
the following steps to configure the WAN Interface.
1. Set the WAN connection Interface Number by typing the same
number into the Interface Number field that was input into the
timeslots in the WAN Physical Configuration screen, then press
ENTER (refer to the Note on page 3-16).
2. Unless the user sets the Max Xmit Unit, the WPIM-T1/DDS
automatically sets the Max Xmit Unit to 1526 (default) after the
active protocol (PPP) is selected.
3. Make any changes to the available settings as desired.
4. Use the arrow keys to highlight the SAVE command, then press
ENTER. The message “Save Done!” appears and Local Management
saves the changes to memory.
The WAN configuration is complete. It takes up to 60 seconds for the
WAN Interface to come out of standby and for communications to begin.
3.5 FRAME RELAY CONFIGURATION
This section provides step-by-step instructions for configuring the
WPIM-T1/DDS to use a T1 circuit in a Frame Relay environment. This
example assumes the setup shown in Figure 3-8 using two CSX400s, each
with a WPIM-T1/DDS installed. Configurations may vary depending on
the host platform.
SITE #1
24 Timeslots
Figure 3-8 Frame Relay Configuration
WPIM-T1/DDS User’s Guide 3-17
Telco Cloud
SITE #2
24 Timeslots
1482_05
Page 42

Chapter 3: Local Management for T1 Service
The line configuration information shown in Table 3-3 must be supplied
by the service provider.
Table 3-3 Telco Configuration Information
Configuration Information
Required by Customer
Line Coding B8ZS or AMI
Frame Type ESF or D4
Clock Source Loop Timing or Local Timing
DS-0s (Timeslots) Timeslots being used for each end of
Information Supplied by Service
Provider
the circuit
3.5.1 Frame Relay Physical Configuration
Begin the WPIM-T1/DDS physical configuration by accessing the WAN
Physical Configuration screen through Local Management (Figure 3-1).
Proceed with the following steps:
1. Use the arrow keys to highlight the WPIM X field at the bottom of the
screen. Press the SPACE bar to select the number of the WPIM to be
configured, then press ENTER.
Use the arrow keys to highlight the MgrType field. Configure Protocol
Manager Type as either FR PtoMP or FR PtoP. There are two settings for
Frame Relay, Point to Point (FR PtoP) and Point to Multipoint (PtoMP).
Frame Relay Point to Point has one Interface per DLCI assigned when
DLCIs are created by the Service Provider. In Frame Relay Point to
Multipoint, there is one interface to multiple DLCIs, and the DLCIs are
dynamically learned. Backup can only be run on FR PtoP, not FR PtoMP.
NOTE
When changing from one protocol to another on a
WPIM-T1/DDS that has been operational, save NONE as the
protocol before changing to another protocol.
2. Use the arrow keys to highlight Timeslot View. Press the SPACE bar
to select New, then press ENTER. The cursor moves to the first
timeslot available in the Timeslot Configuration Table.
3-18 WPIM-T1/DDS User’s Guide
Page 43

Frame Relay Configuration
3. Insert the interface number (refer to NOTE below) into the timeslot
being used. Type the number, press ENTER, then exit this field by
using the arrow keys. The cursor automatically moves to the T1 Line
Coding field.
NOTE
The value assigned to the timeslots is the interface being used
for W AN communication. Only one interface can be assigned to
the timeslot when running Frame Relay.
The next four steps are based on information supplied by the service
provider. Consult the service provider for the correct settings.
4. Use the arrow keys to highlight T1 Line Coding. Press the SPACE bar
to select B8ZS or AMI, then press ENTER.
5. Use the arrow keys to highlight T1 Frame Type. Press the SPACE bar
to select ESF or D4, then press ENTER.
6. Use the arrow keys to highlight T1 Tx Clock Source. Press the
SPACE bar to select Local (no clock source provided by telephone
company) or Loop-Timing (clock source provided by telephone
company), then press ENTER.
7. Use the arrow keys to highlight T1 Line Buildout (LBO). Press the
SPACE bar to select to 0 dB unless the service provider recommends
another setting, then press ENTER.
8. Use the arrow keys to highlight the SAVE command, then press
ENTER. The message “SAVE DONE!” displays and Local
Management saves the changes to memory. “REBOOT IN
PROGRESS......” displays and the host platform reboots. Re-entry to
management is necessary for any further configuration.
9. Proceed to Section 3.5.2 to continue the configuration.
WPIM-T1/DDS User’s Guide 3-19
Page 44

Chapter 3: Local Management for T1 Service
3.5.2 Frame Relay Interface Configuration
Access the WAN Interface Configuration screen through the WAN
Physical Configuration screen, by using the arrow keys to highlight the
WAN INT CONFIG command, then press ENTER. Proceed with the
following steps to configure the WAN Interface.
1. Set the Interface Number that is being used for the WAN connection
by typing the same number into the Interface Number field that was
input into the timeslots in the WAN Physical Configuration screen,
then press ENTER (refer to the Note on page 3-19). For Frame Relay
PtoP, the interfaces are assigned when DLCIs are created (in this case
a zero needs to be entered in this field).
2. Use the arrow keys to highlight FR LMI. Press the SPACE bar to
select ANSI_94, T1.617-D or Q.933-A, then press ENTER.
NOTE
The choice NO LMI under FR LMI is a test mode only and
should not be used in a practical application.
3. Make any changes to the available settings as desired.
4. Use the arrow keys to highlight SAVE, then press ENTER. The
message “SAVE DONE!” displays and Local Management saves the
changes to memory.
In FR PtoP , the DLCIs must be entered statically, as they will not come up
dynamically as in FR PtoMP.
In FR PtoMP, there is an option to statically enter the DLCIs in
association with a Protocol Manager, the physical port and MIB II, using
the DLCI field in the Interface screen. If the DLCI is not static, it will be
deleted if the Frame Relay switch determines that the DLCI has been
eliminated. If the Frame Relay switch previously reported status on a
DLCI, when it does not report the status of the DLCI, the DLCI and its
associated information is deleted from the platform. Static entries are
never deleted automatically. They must be deliberately deleted by the
user. To enter a DLCI, it is set to “Inactive” and saved, but to delete a
DLCI, it must be accessed and entered as “Invalid” and saved.
3-20 WPIM-T1/DDS User’s Guide
Page 45

Frame Relay Configuration
The WAN configuration is complete. Communications between the
WPIM-T1/DDS and the service provider’s switch takes approximately
one or two minutes to complete. A status of Inactive displays on a DLCI
per DLCI basis by default until both ends of the DLCI are configured
correctly. Once both end devices have negotiated link management with
the switches, and are configured correctly on a DLCI per DLCI basis, the
status field displays Active.
WPIM-T1/DDS User’s Guide 3-21
Page 46

Chapter 3: Local Management for T1 Service
3-22 WPIM-T1/DDS User’s Guide
Page 47

CHAPTER 4
LOCAL MANAGEMENT FOR DDS SERVICE
This chapter explains how to configure the WPIM-T1/DDS through Local
Management. The WAN Physical Configuration screen and the WAN
Interface Configuration screen display as Local Management menu
selections after the WPIM-T1/DDS is installed into a host platform. Refer
to the host platform User’s Guide for instructions about how to set up and
access Local Management.
Sections of this chapter include the following:
• The WAN Physical Configuration Screen, Section 4.1
• The WAN Interface Configuration Screen, Section 4.2
• WPIM-DDS Configuration, Section 4.3
Read Section 4.1 and Section 4.2 to gain an understanding of the
WPIM-T1/DDS Local Management screens. Section 4.3 provides
examples for setting up the WPIM-DDS in a PPP or Frame Relay
environment.
NOTE
WPIM-T1/DDS User’s Guide 4-1
The WPIM-T1/DDS cannot operate in both T1 and DDS mode
at the same time. The user must choose the appropriate
service, but can change it when desired. Refer to Section 2.3.1
to choose the mode.
When the WPIM-T1/DDS is first powered up, the default is T1.
Page 48

Chapter 4: Local Management for DDS Service
4.1 THE WAN PHYSICAL CONFIGURATION SCREEN
To access the WAN Physical Configuration screen in Local Management,
use the arrow keys to highlight the WAN SETUP menu item, then press
ENTER. The screen shown in Figure 4-1 displays, with the
WPIM-T1/DDS in DDS mode.
<host name> Local Management Flash Image Version: xx.xx.xx
WAN PHYSICAL CONFIGURATION
WPIM 1
Type: DDS
WPIM #: 1
MgrType: [None]
Max VCs: 000
Next IF: N/A
WPIM 1 Line Configuration
DDS Line Mode:
DDS Tx Clock Source:
DDS Loop-Back:
[DDS-PRI]
[Loop-Timing]
[NONE]
DDS In-Speed:
DDS Out-Speed:
56000
56000
SAVE WAN INT CONFIG RETURN
[WPIM 1]
REMOTE SETUP
2750_01
Figure 4-1 WAN Physical Configuration Screen
4.1.1 WAN Physical Configuration Screen Fields
The following sections describe WAN Physical Configuration screen
fields and provide instructions for setting them. The WAN Physical
Configuration screen lets you configure the WPIM or “Physical
Interface.”
NOTE
4-2 WPIM-T1/DDS User’s Guide
When there is more than one WPIM installed into the host
platform, information for the second WPIM will display next to
WPIM 1.
The Type field displays either T1 or DDS, depending on the
mode selected using Network Tools.
Page 49

The WAN Physical Configuration Screen
To select the WPIM-T1/DDS you wish to configure, proceed as follows:
1. Use the arrow keys to highlight the WPIM X command field at the
bottom of the screen.
2. Use the SPACE bar to select the appropriate WPIM, then press
ENTER. The WAN Configuration screen automatically displays
unique configuration fields for the WPIM-T1/DDS as shown in
Figure 4-1.
The WAN Physical Configuration screen displays the following fields:
WPIM
1-2
(Read-Only)
Displays configuration information for two different WPIMs.
Type (Read-Only)
Displays the type of WPIM installed. For the WPIM-T1/DDS, the Type
field displays the service selected. When T1 service is selected, T1 is
displayed. When DDS service is selected, DDS is displayed.
WPIM # (Read-Only)
Displays the number of the slot in which the WPIM resides.
Mgr Type (Selectable)
The type of protocol manager is chosen in this field. For the DDS mode of
the WPIM-T1/DDS, the available options are NONE, PPP, FR PtoMP,
FR PtoP, and HDLC. The field defaults to NONE.
Max VCs (Modifiable)
Displays the maximum number of virtual circuits (interfaces) that the
WPIM-T1/DDS may have with the protocol chosen.
Next IF (Read-Only)
Displays the next interface available to be used.
SAVE (Command)
Saves the chosen configuration.
WPIM X (Toggle)
User selects the WPIM to be configured. Once it is selected, the user can
enter the screens of the WPIM selected to modify the data.
WAN INT CONFIG (Command)
When this field is highlighted and the ENTER key is pressed, the WAN
Interface Configuration screen displays. Refer to Section 4.2 for details.
WPIM-T1/DDS User’s Guide 4-3
Page 50

Chapter 4: Local Management for DDS Service
REMOTE SETUP (Command)
Not used for the WPIM-T1/DDS.
RETURN (Command)
Returns user to the previous screen.
4.1.2 WPIM Line Configuration Fields
The configuration fields displayed on the WAN Physical Configuration
screen shown in Figure 4-1 are specific to the DDS mode of the
WPIM-T1/DDS.
DDS Line Mode (Toggle)
Displays the DDS Line Mode. The selections toggle between DDS-PRI
(primary) and DDS-CC (clear channel). This field should be set according
to information from the service provider. The default setting for this field
is DDS-PRI.
DDS Tx Clock Source (Toggle)
Displays the clock source as either Loop-Timing or Local-Timing. The
Loop-Timing setting allows the WPIM-T1/DDS to receive its timing
information from the service provider, and the Local-Timing setting
allows the WPIM-T1/DDS to receive its timing information internally. If
DDS-CC is chosen for the DDS Line Mode then this field must be set to
Loop. The default setting is Loop.
DDS Loop-back (Toggle)
Displays the internal Loopback as either Line-Loop or None. Line
loopback is reserved for network diagnostics only. The default is None.
DDS In-Speed (Read-Only)
Displays 56000 (bps) for Primary DDS Line Mode and 64000 (bps) for
Clear Channel DDS Line Mode upon startup.
DDS Out-Speed (Read-Only)
Displays 56000 (bps) for Primary DDS Line Mode and 64000 (bps) for
Clear Channel DDS Line Mode upon startup.
4-4 WPIM-T1/DDS User’s Guide
Page 51

WAN Interface Configuration Screen
4.2 WAN INTERFACE CONFIGURATION SCREEN
This section describes the features of the WAN Interface Configuration
screen. Access the screen by using the arrow keys to highlight the WAN
INT CONFIG command field at the bottom of the WAN Physical
Configuration screen, then press ENTER. The WAN Interface
Configuration screen shown in Figure 4-2 displays.
<host name> Local Management Flash Image Version: xx.xx.xx
WAN INTERFACE CONFIGURATION
Interface Number: 000
Max Xmit Unit: 0
ProtMgrIface: [0]
Active Protocol: FR
FR LMI: [ANSI_94]
DLCI Address: 0
DLCI DCP En:
DLCI DCP Stat:
Comp Ratio:
Circuit State: [Invalid]
PORTS:
SAVE
[1-32]
RETURN
CKT# IF# LID STATE
001
001 Enet UP
002
Enet
002
003
004
005
006
007
008
009
010
011
012
013
014
015
016
CKT# IF# LID STATE
017
018
DOWN
019
020
021
022
023
024
025
026
027
028
029
030
031
032
2750_02
Figure 4-2 WAN Interface Configuration Screen
4.2.1 WAN Interface Configuration Screen Fields
The following sections describe WAN Interface Configuration screen
fields.
Interface Number (Modifiable)
Displays the active Interface Number. Use this field to configure the
Interface Number assigned to the timeslots on the WAN Physical
Configuration screen.
Max Xmit Unit (Modifiable)
User configured field that displays the maximum packet size that can be
transmitted on the selected interface. The default settings for this field
(1526 for PPP and 4095 for Frame Relay) depend on the Protocol
Manager selected.
WPIM-T1/DDS User’s Guide 4-5
Page 52

Chapter 4: Local Management for DDS Service
ProtMgrIface (Modifiable)
Interface number used for the Protocol Manager chosen.
Active Protocol (Read-Only)
Displays the active OSI layer protocol chosen for the WPIM-T1/DDS.
There is one set of parameters displayed for FR, and one set for PPP.
Refer to Section 4.2.1.1 for information on the Active Protocol set to
Frame Relay, and Section 4.2.1.2 for PPP information.
4.2.1.1 Frame Relay as the Protocol Manager
Refer to Figure 4-2 for the following parameters displayed for FR.
FR LMI (Selectable)
Frame Relay Link Management Interface. This field displays ANSI_94,
NO LMI, T1.617-D or Q.933-A. The NO LMI setting is for specialized
applications in which no Frame Relay Link Management is available or
required.
DLCI Address (Modifiable)
Data Link Connection Identifier given by the Service Provider. The Telco
switch assigns a virtual port to each DLCI. Can be set to values from
0-1023, depending on the protocol, when available for modification with
certain protocol modes. The values 0-15 and 1008-1022 are reserved
DLCI addresses.
DLCI DCP En (Toggle)
Enables the user to turn Data Compression Protocol On or Off when
available.
DLCI DCP Stat (Read-Only)
Displays the current negotiated status of compression.
Comp Ratio (Read-Only)
Displays the Compression Ratio, which is the ratio of uncompressed to
compressed data.
Circuit State (Selectable)
The field initially displays the state of the circuit, and can be modified.
Steps through Active, Inactive and Invalid.
4-6 WPIM-T1/DDS User’s Guide
Page 53

WAN Interface Configuration Screen
4.2.1.2 PPP as the Protocol Manager
<host name> Local Management Flash Image Version: xx.xx.xx
WAN INTERFACE CONFIGURATION
Interface Number: 003
Max Xmit Unit: 1526
ProtMgrIface: [0]
Active Protocol: PPP
PPP MRU: 1520
ECP Enable: [Off]
ECP Status: Off
CCP Enable: [Off]
CCP Status: Off
Comp Ratio: 1:1
PORTS:
SAVE
[1-32]
RETURN
CKT# IF# LID STATE
001
001 Enet UP
002
Enet
002
003
004
005
006
007
008
009
010
011
012
013
014
015
016
CKT# IF# LID STATE
017
018
DOWN
019
020
021
022
023
024
025
026
027
028
029
030
031
032
2750_02
Figure 4-3 WAN Interface Configuration Screen (PPP)
Refer to Figure 4-3 for the following parameters displayed for PPP.
PPP MRU (Modifiable)
Displays the modifiable Maximum Receive Units that PPP can handle.
ECP Enable (Toggle)
Toggles between On and Off to enable or disable encryption.
ECP Status (Read-Only)
Displays the status of encryption.
CCP Enable (Toggle)
Toggles between On and Off to enable or disable compression.
CCP Status (Read-Only)
Displays the status of compression.
Comp Ratio (Read-Only)
Displays the Compression Ratio, which is the ratio of uncompressed to
compressed data.
WPIM-T1/DDS User’s Guide 4-7
Page 54

Chapter 4: Local Management for DDS Service
4.2.1.3 Command and Interface Table Fields
SAVE (Command)
Saves the configuration changes.
PORTS: [1-32] (Command)
Interface table displays the range of circuits shown in the command field.
Use the SPACE bar and either the BACKSPACE or DELETE key to step
through the displays.
RETURN (Command)
Returns user to the previous screen.
CKT# (Read-Only)
Displays the circuit number of the application ports available from the
host platform. If the active protocol is PPP or FR PtoP, only one
application port per interface number (IF#) is assigned. If the active
protocol is FR PtoMP, the available WAN ports from the host platform
may be assigned, one per DLCI.
IF# (Read-Only)
Displays the MIB II Interface number that is associated with the
application port (CKT#).
LID (Read-Only)
Displays the Link Identifier. If the active protocol is Frame Relay, the
Data Link Connection Identifier is displayed. If the active protocol for
this interface is PPP, then PPP displays in this field. For Ethernet ports,
Enet is displayed.
STATE (Read-Only)
Displays the status of the application port. If the active protocol is Frame
Relay, this field displays the status as Active, Inactive, or Invalid
(no LMI). If the active protocol is PPP or Ethernet, this field displays UP
(active) or DOWN (inactive).
4-8 WPIM-T1/DDS User’s Guide
Page 55

DDS Service Configuration
4.3 DDS SERVICE CONFIGURATION
This section provides step-by-step instructions for connecting the
WPIM-T1/DDS to a Digital Data Service circuit in a PPP or Frame Relay
environment. This example assumes the setup shown in Figure 4-4 using
two CSX400s with WPIM-T1/DDS modules installed.
Host Platform
Host Platform
WPIM-T1/ DDS
in DDS mode
Site #1
Figure 4-4 WPIM-DDS Interface Configuration for PPP
Telco Cloud
WPIM-T1/ DDS
in DDS mode
Site #2
2750_03
The line configuration information shown in Table 4-1, must be supplied
by the service provider.
Table 4-1 Telco Configuration Information
Configuration Information
Required By User
Clock Source Telco provided or no clock source
Line Mode Primary or Clear Channel
FR-LMP (Frame Relay Only) Telco provided or user requested
Configuration Information
Supplied By Service Provider
4.3.1 DDS Service Physical Configuration
Begin the DDS configuration by accessing the WAN Physical
Configuration screen (Figure 4-1) through Local Management. To access
the WAN Physical Configuration screen, use the arrow keys to highlight
the WAN Setup option, then press ENTER. The screen shown in
Figure 4-1 displays. Proceed with the following steps:
1. Use the arrow keys to highlight the WPIM X field at the bottom of the
screen. Press the SPACE bar to select the number of the WPIM being
configured, then press ENTER.
WPIM-T1/DDS User’s Guide 4-9
Page 56

Chapter 4: Local Management for DDS Service
2. Use the arrow keys to highlight MgrType, and choose the Protocol
Manager from PPP, FR PtoMP, FR PtoP, or HDLC using the space
bar to toggle the selections.
NOTE
When changing from one protocol to another on a
WPIM-T1/DDS that has been operational, save NONE as the
protocol before changing to another protocol.
3. Use the arrow keys to highlight DDS Line Mode. Press the SPACE
bar to set the DDS Line Mode to DDS-PRI or DDS-CC, then press
ENTER.
4. Use the arrow keys to highlight DDS Tx Clock Source. Press the
SPACE bar to set to Loop-Timing, then press ENTER.
5. Use the arrow keys to highlight DDS Loop-back. Press the SPACE
bar to set to NONE, then press ENTER.
6. Use the arrow keys to highlight the SAVE command. Then press
ENTER. The message “SAVE DONE!” displays and Local
Management saves the changes to memory. “REBOOT IN
PROGRESS......” displays and the host platform reboots. Re-entry to
management is necessary for any further configuration.
4.3.2 DDS Service Interface Configuration
The WAN Interface Configuration screen is accessed through the WAN
Physical Configuration screen. Access the WAN Interface Configuration
screen (Figure 4-2) by using the arrow keys to highlight the WAN INT
CONFIG command, then press ENTER. Proceed with the following
steps to configure the WAN Interface through Local Management.
1. Use the arrow keys to highlight Interface Number. Set the WAN
connection Interface Number by typing the same number found in the
Interface field on the WAN Physical Configuration screen into the
Interface Number field, then press ENTER.
4-10 WPIM-T1/DDS User’s Guide
Page 57

DDS Service Configuration
2. If Frame Relay was selected, use the arrow keys to highlight FR LMI.
Press the SPACE bar to select ANSI_94, NO LMI, T1.617-D, or
Q.933-A, then press ENTER.
If NO LMI was selected, complete the following:
• Use the arrow ke ys to highlight DLCI Address. This field can be
set to values from 0-1023. The v alues 16-991 are typically used for
virtual circuits.
• Use the arrow keys to highlight Circuit State. Press the SPACE
bar to select Active, then press ENTER.
3. If PPP was selected as the Protocol Manager instead of Frame Relay,
the Max Xmit Unit setting may be changed from the default of 1526 if
desired.
4. Make any changes to the available settings as desired.
5. Use the arrow keys to highlight the SAVE command. Press ENTER.
The message “Save Done!” appears and Local Management saves the
changes to memory.
The WAN configuration is complete. Communication between the
WPIM-T1/DDS and the service provider’s switch takes approximately
one to two minutes to complete. A status of Inactive displays on a DLCI
per DLCI basis by default until both ends of the DLCI are configured
correctly. Once both end devices have negotiated link management with
the switches, and are configured correctly on a DLCI per DLCI basis, the
status field displays Active.
WPIM-T1/DDS User’s Guide 4-11
Page 58

Chapter 4: Local Management for DDS Service
4-12 WPIM-T1/DDS User’s Guide
Page 59

APPENDIX A
SPECIFICATIONS
This appendix provides operating specifications for the Cabletron
Systems WPIM-T1/DDS. Cabletron Systems reserves the right to change
these specifications at any time without notice.
A.1 PHYSICAL PROPERTIES
Dimensions
Weight 113.6 g (4 ounces)
MTBF (Predicted) 200,000 hours
1.94 H x 6.2 W x 15.06 D (cm)
.762 H x 2.44 W x 5.93 D (in)
A.2 ENVIRONMENTAL REQUIREMENTS
Operating Temperature 5°C to 40°C (41°F to 104°F)
Storage Temperature -30°C to 90°C (-22°F to °F)
Relative Humidity 5% to 95% (non-condensing)
A.3 REGULATORY COMPLIANCE
This equipment meets the following safety and electromagnetic
compatibility (EMC) requirements:
Safety
Electromagnetic Compatibility
(EMC)
UL 1950, CSA C22.2 No. 950,
EN 60950, IEC 950, and 73/23/EEC
FCC Part 15, EN 55022, VCCI V-3,
CSA C108.8, EN 50082-1,
AS/NZS 3548, 89/336/EEC
Telecommunications FCC CFR47 Part 68, CS-03
WPIM-T1/DDS User’s Guide A-1
Page 60

Appendix A: Specifications
A.4 T1 INTERFACE CABLING
This appendix provides the Cabletron Systems part number and connector
information for the Interface Cables used in both the T1 and DDS modes
of the WPIM-T1/DDS.
T able A-1 lists Cabletron Systems part numbers for the interface cables
for T1 mode. A standard 20-foot cable is available or the customer may
specify the length of cable when ordering.
Table A-1 Cabletron T1 Cable Part Numbers
Interface Cable Cabletron Part Number
T1 Line Interface Cable 9372094-20
9372094-L
1. Standard 20 foot T1 Line Interface Cable.
2. (L denotes length required in feet or meters). For example: 9372094-3
denotes a 3 foot cable; 9372094-3M denotes a 3 meter cable.
1
2
A.4.1 Cable Assemblies and Pinouts
The following section provides connector information for the T1 interf ace
cable.
Table A-2 T1 Connector Information
Cabletron interface cable part number 9372094
Description T1 line interface cable
Connector 1 RJ48C
Connector 2 RJ48C
A-2 WPIM-T1/DDS User’s Guide
Page 61

T1 Interface Cabling
Table A-3 T1 RJ48 Connector Pin Assignments
Pin Signal
1 Receive Ring
2 Receive Tip
3 Not Used
4 Transmit Ring
5 T ransmit Tip
6 Not Used
7 Shield Ground
8 Shield Ground
Table A-4 T1 RJ48 DTE Pin Assignments
Pin Signal
1 Receive Ring
2 Receive Tip
3 Not Used
4 Transmit Ring
5 T r ansmit Tip
6 Not Used
7 Shield Ground
8 Shield Ground
Table A-5 T1 RJ48 Network Pin Assignments
Pin Signal
1 Receive Ring
2 Receive Tip
3 Not Used
4 Transmit Ring
5 T r ansmit Tip
6 Not Used
7 Not Used
8 Not Used
WPIM-T1/DDS User’s Guide A-3
Page 62

Appendix A: Specifications
A.5 DDS PORT ASSIGNMENT
The DDS mode of the WPIM-T1/DDS features the RJ45 port to enable
any Cabletron Systems product supporting the WPIM architecture to
connect directly to a single Digital Data Service (DDS) circuit. The
pinout information for the DDS mode of the port is shown in T able A-6,
below . Table A-7 lists the Cabletron Systems part number for the DDS
mode interface cable.
Table A-6 DDS Mode Network Pinout Assignments
PIN SIGNAL
1 Transmit Ring
2 T ransmit Tip
3 Not Used
4 Not Used
5 Not Used
6 Not Used
7 Receive Tip
8 Receive Ring
Table A-7 DDS Mode Interface Cable Part Number
Interface Cable Cabletron Part Number
DDS Line Interface Cable 9360119-x
A-4 WPIM-T1/DDS User’s Guide
Page 63

APPENDIX B
FCC Part 68 - USER’S INFORMATION
The following instructions are provided to ensure compliance with the
Federal Communications Commission (FCC) Rules, Part 68.
1. This device must only be connected to the ISDN Basic Rate network
behind an FCC Part 68 registered channel service unit. Direct
connection is not allowed.
a. All direct connections to T1 lines must be made using standard
plugs and jacks.
b. All direct connections to DDS lines must be made using standard
plugs and jacks.
2. Before connecting your unit, you must inform the telephone company
of the following information:
Port ID REN/SOC FIC USOC
WPIM-T1/DDS 6.0N 04DU9-BN
04DU9-DN
04DU9-1KN
04DU9-1SN
04DU9-1ZN
04DU5-56
04DU5-64
3. If the unit appears to be malfunctioning, it should be disconnected
from the telephone lines until you learn if your equipment or the
telephone line is the source of the trouble. If your equipment needs
repair, it should not be reconnected until it is repaired.
4. If the telephone company finds that the equipment is exceeding
tolerable parameters, the telephone company can temporarily
disconnect service, although they will attempt to give you advance
notice if possible.
WPIM-T1/DDS User’s Guide B-1
RJ48C
RJ48S
Page 64

Appendix B: FCC Part 68 - User’s Information
5. Under the FCC Rules, no customer is authorized to repair this
equipment. This restriction applies regardless of whether the
equipment is in or out of warranty.
6. If the telephone company alters their equipment in a manner that will
affect use of this device, they must give you advance warning so as to
give you the opportunity for uninterrupted service. You will be
advised of your right to file a complaint with the FCC.
7. The attached affidavit must be completed by the installer.
8. In the event of equipment malfunction, all repairs should be performed
by our Company or an authorized agent. It is the responsibility of the
users requiring service to report the need for service to our Company
or to one of our authorized agents.
Service can be obtained at Cabletron Systems Technical Support:
Address: Cabletron Systems, Inc.
35 Industrial Way,
Rochester, NH 03867-0505
Phone: (603) 332-9400
Internet mail: support@cabletron.com
B-2 WPIM-T1/DDS User’s Guide
Page 65

FCC Part 68 - User’s Information
AFFIDAVIT FOR THE CONNECTION OF
CUSTOMER EQUIPMENT TO 1.544 MBPS AND/OR
SUBRATE DIGITAL SERVICES
For the work to be performed in the certified territory of
Telco’s name:
State of:
Country of:
I, , of
(Name of Authorized Representative) (Customer Name)
,
(Customer’s Address) (Telephone Number)
being duly sworn, state:
I have responsibility for the operation and maintenance of the terminal
equipment to be connected to _______________________Subrate digital
services. The terminal equipment to be connected complies with Part 68
of the Commission’s rules except for the encoded analog content and
billing protection specifications. With respect to encoded analog content
and billing protection:
• I attest that all operations associated with the establishment,
maintenance and adjustment of the digital CPE with respect to
encoded analog content and encoded billing information
continuously complies with Part 68 of the FCC’s Rules and
Regulations.
• The digital CPE does not transmit digital signals containing encoded
analog or billing information which is intended to be decoded within
the telecommunications network.
• The encoded analog and billing protection is factory set and is not
under the control of the customer.
WPIM-T1/DDS User’s Guide B-3
Page 66

Appendix B: FCC Part 68 - User’s Information
I attest that the operator(s) maintainer(s) of the digital CPE responsible
for the establishment, maintenance and adjustment of the encoded analog
content and billing information has (have) been trained to perform these
functions by successfully completing one of the following: Check
appropriate one(s).
a. A training course provided by the manufacturer/grantee of the
equipment used to encode analog signals; or
b. A training course provided by the customer or authorized
representative, using training materials and instructions provided
by the manufacturer/grantee of the equipment used to encode
analog signals; or
c. An independent training course (e.g. trade school or technical
institution) recognized by the manufacturer/grantee of the
equipment used to encode analog signals; or
d. In lieu of the proceeding training requirements, the operator(s)
maintainer(s) is (are) under the control of a supervisor trained in
accordance with
above.
I agree to provide
(Telco’s Name)
with proper documentation
to demonstrate compliance with the information as provided in the
proceeding paragraph, if so requested.
Subscribed and sworn to me this
(Signature)
(Title)
(Date)
day of , 19 .
(Notary Public)
My commission expires:
B-4 WPIM-T1/DDS User’s Guide
 Loading...