

Quick Start Guide
For more help visit Caavo.com/help
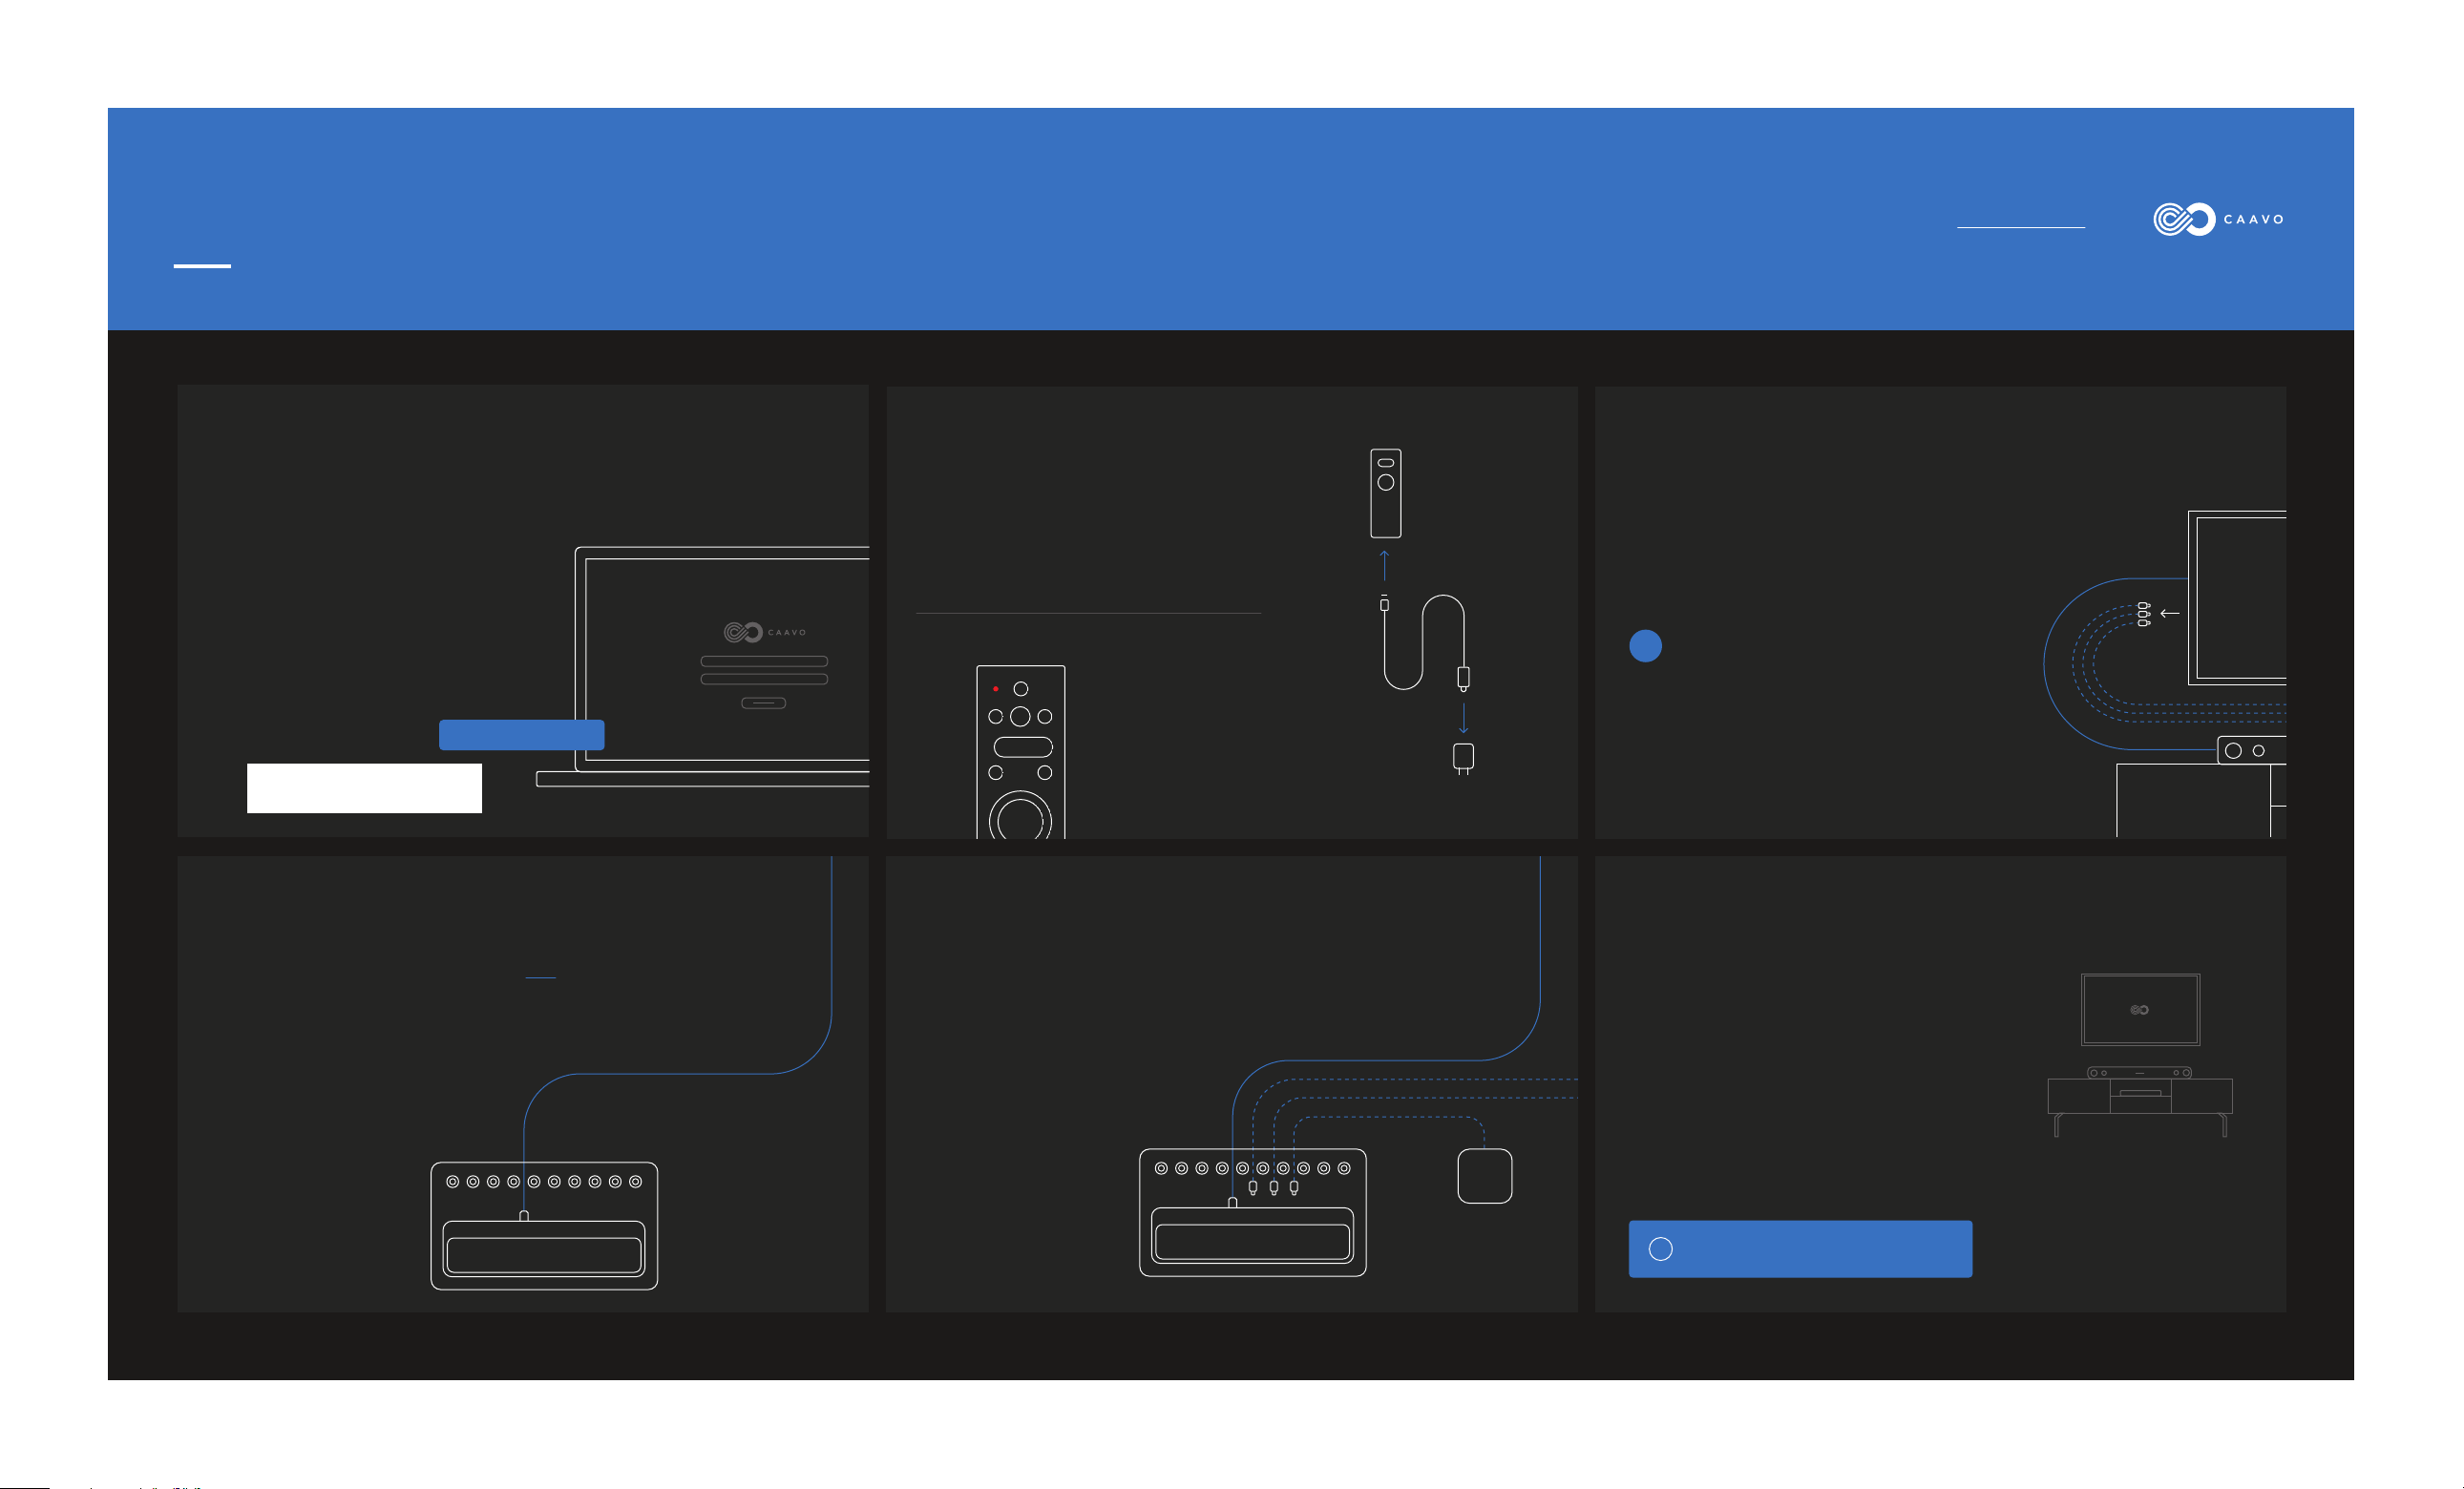
STEP 1
Create your Caavo Account
If you’ve already created your Caavo Account,
then skip this step and give yourself a pat on
the back!
If you haven’t already created your Caavo
Account online, go to https://setup.caavo.com
and create one. Have your service credentials
handy to make setup go faster. Use the MAC ID
pasted below to pair your account to this
Caavo.
STEP 4
HTTP://SETUP.CAAVO.COM
Connect Caavo to your TV or AVR
Connect an HDMI cable between the Caavo OUT
port and one of the inputs on the TV, AVR or
Sound Bar you disconnected in Step 3.
Remember which input you used - this will
help you in Step 6.
STEP 2
Charge the Caavo Remote
Unpack your remote, USB cable and wall
charger and connect to a wall outlet to charge.
The LED on the remote
will illuminate red to
indicate it is charging.
STEP 5
Connect your Source Devices to Caavo
Connect all your source devices to Caavo using
any of the 8 numbered HDMI ports. If you use a
HDMI streaming stick, use the HDMI extender
to help you connect to Caavo.
STEP 3
Disconnect your Source Devices
If you have an AVR or Sound Bar connected to your TV
via HDMI, leave it connected on both ends. Then,
disconnect all your HDMI source devices from your
AVR or Sound Bar. You will connect Caavo to your AVR
or Sound Bar in Step 4.
OR
If you do not have an AVR or Sound Bar or your
AVR/Sound Bar is connected via RCA or optical,
disconnect all your HDMI source devices from your TV.
You will connect Caavo directly to your TV in Step 4.
STEP 6
Power, Network, and TV On!
Connect the Caavo power cord to a wall outlet.
Connect the supplied ethernet cable from
Caavo to your router for best results. If a wired
ethernet connection is unavailable, WiFi can be
setup later.
If you connected Caavo directly to your
TV, do not use the input label “ARC”.
Turn on your TV with your TV’s remote (and
AVR/Sound Bar too). Follow the on-screen
instructions to complete your setup experience.
Make sure you are on the active input(s) you used
!
in Step 4 on your TV, AVR, or Sound Bar.
Quick Start Guide
For more help visit Caavo.com/help
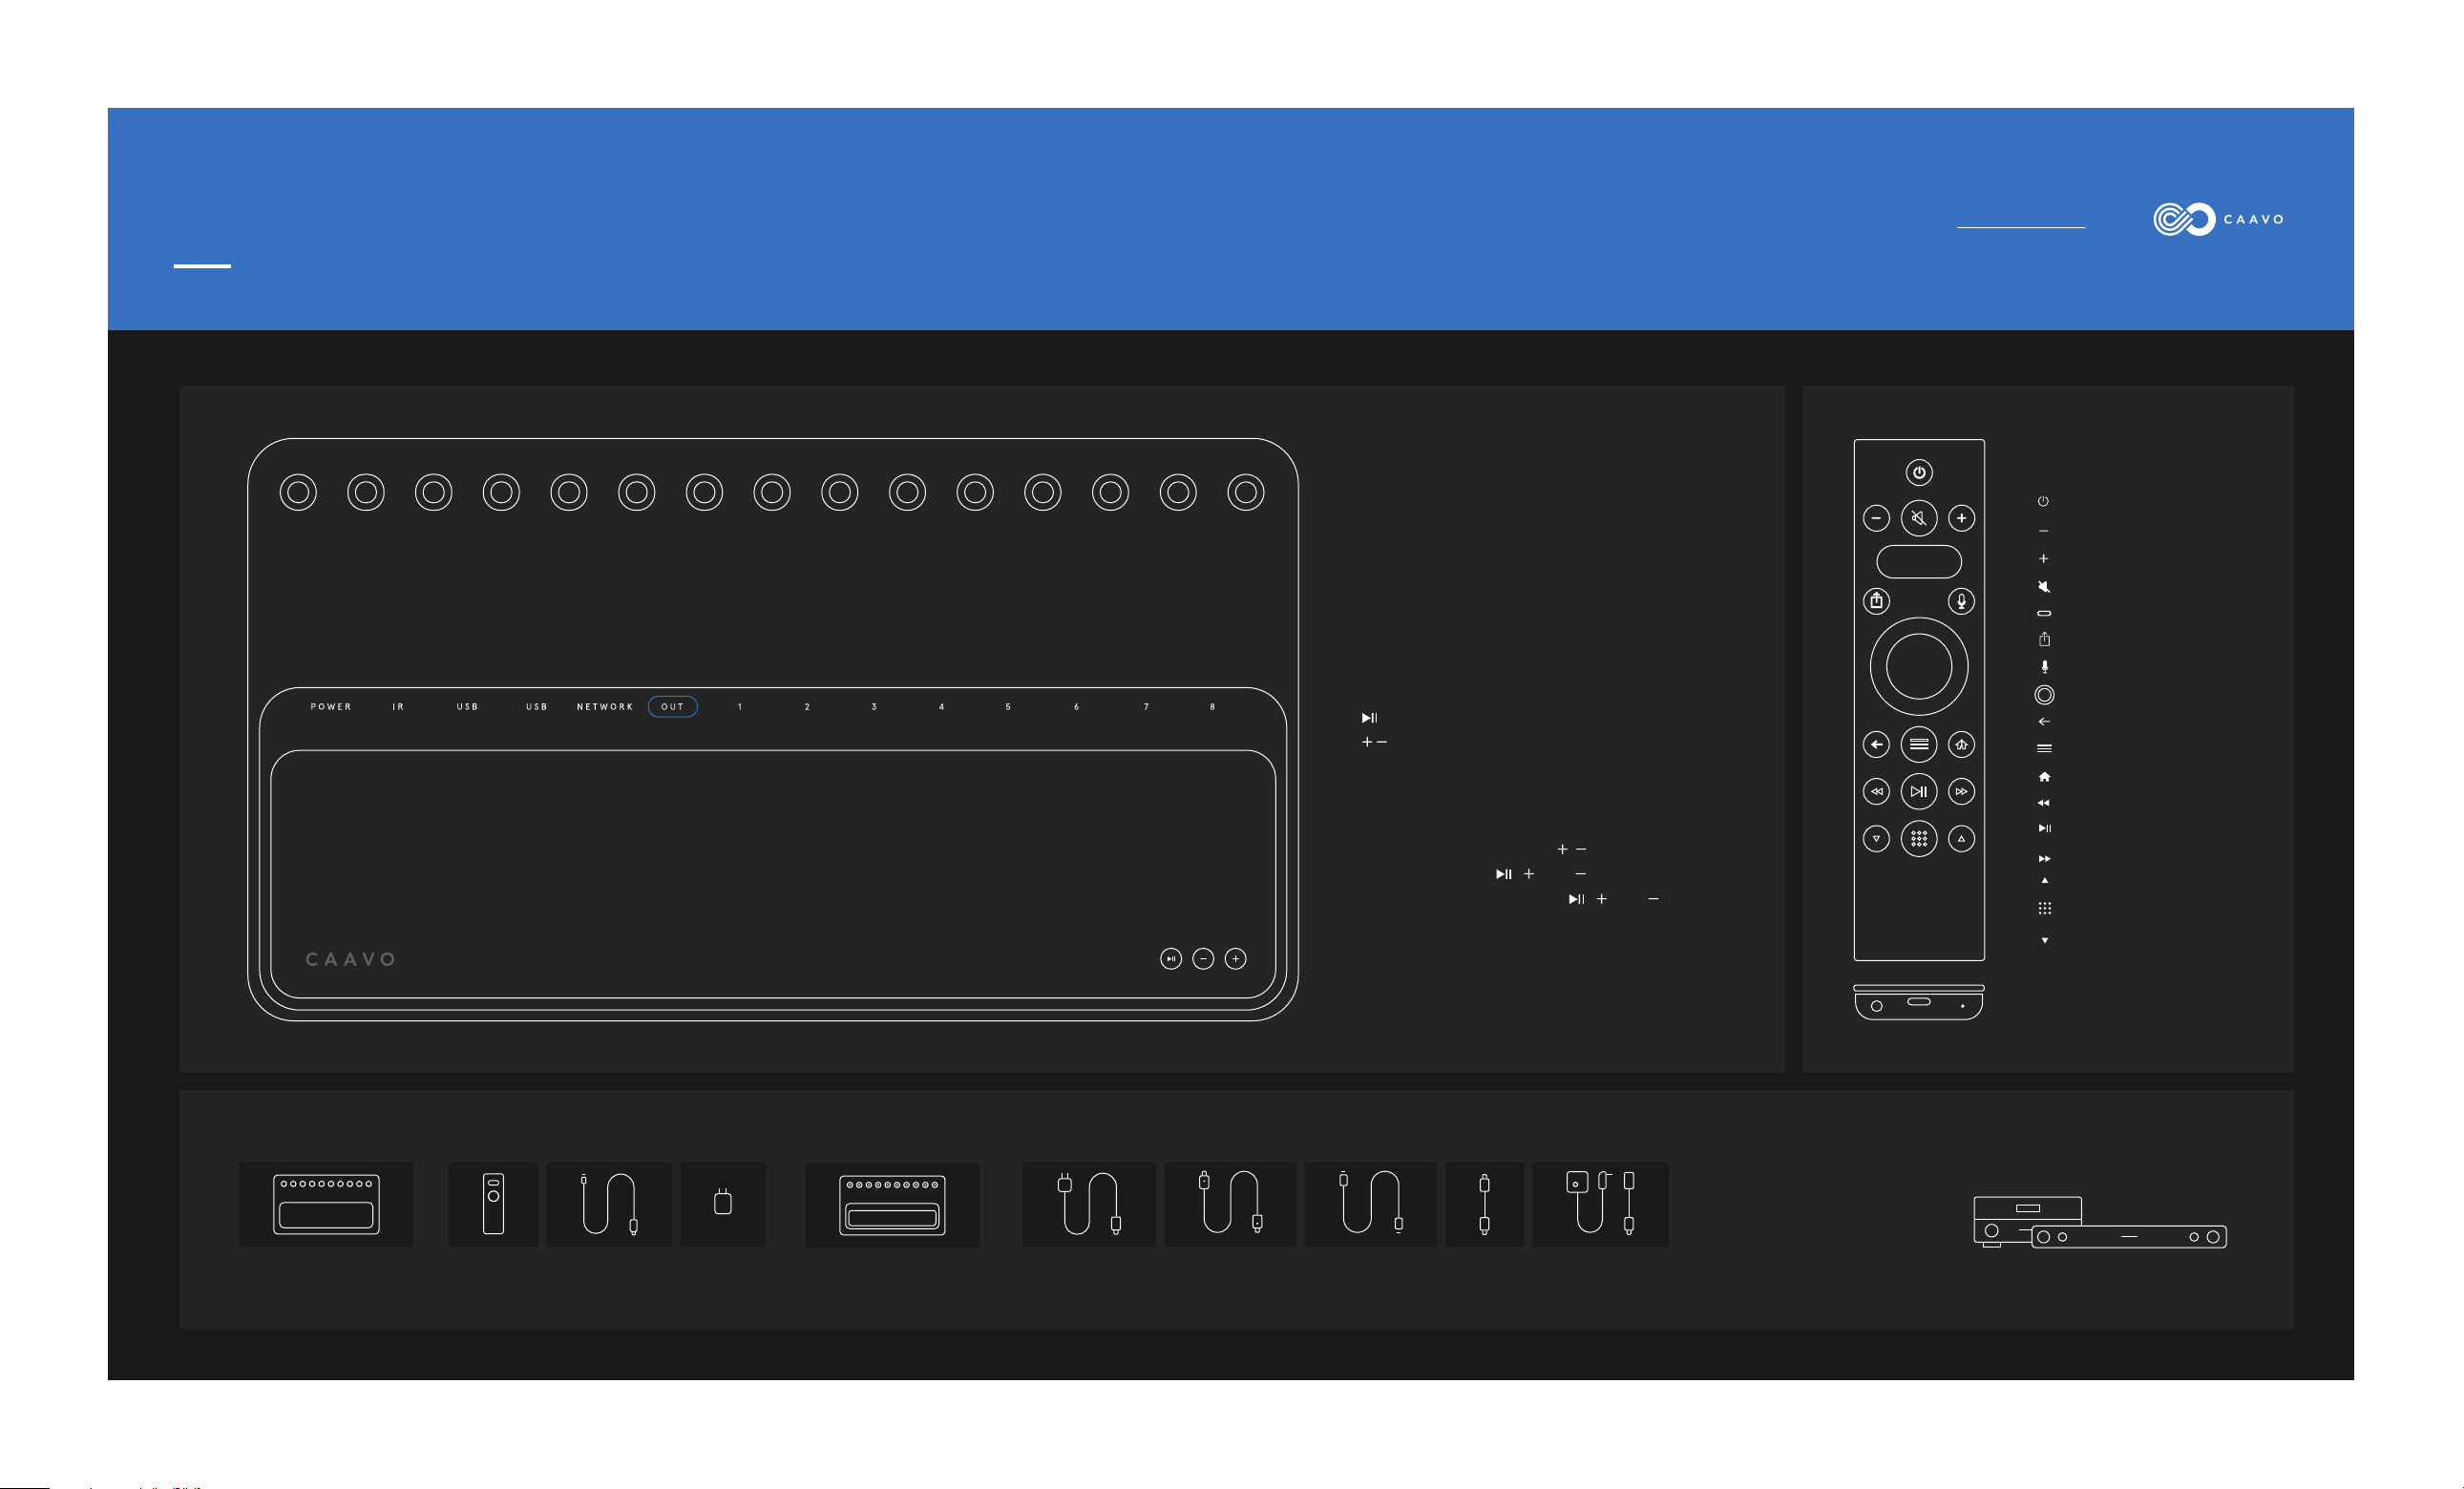
!"#$% &'( &'( )$*#"%+
&)HHIJKLIM&NO&BPQIR
!"#
Connections
•Power: ~AC : 100-240 V , 50/60 Hz, 30W
• USB(2): Supplies 5V, 500mA
• IR: For optional “closed cabinet” accessory
• Network: Used to connect to wired networks
• OUT: Connect to your TV/AVR/Sound Bar
• 1—8: Connect your source devices.
Buttons
Power
Volume down
Volume up
Mute
Caavo button
Sources/Feedback
Buttons
Microphone
Dpad/Select
, - . / 0 1 2 34%
!)(&<#'&//'.9'A6'/?'#)'44
G5@'
!B=CD/EF/.///./.
• : Will play/pause active source
• : Used to adjust source volume
Back
Menu
Home
Advanced
Rewind
Play/Pause
Pair remote: press and hold , for 5 seconds
Find remote: press , , and quickly
Factory reset: press and hold , , and for
10 seconds
Fastforward
Page up
Keypad/More
Page down
Component list
WOOD TOP CASE REMOTE USB CABLE POWER CORD HDMI CABLE ETHERNET
WALL
CHARGER
CAAVO
CABLE
FOR WIRED
CONNECTIONS
HDMI
EXTENDER
FOR HDMI
STICKS
IR
CONTROLLER
FOR HIDDEN
SOURCES
Headphone Charger Reset
Source devices: Xfinity, Dish,
DirecTV, Roku, AppleTV, FireTV,
Xbox, Playstation, etc.
Audio video receiver (AVR) or Sound Bar:
 Loading...