


C4Line C4L6400-2W-U Quick Start Guide
Technical Support Contact
Address : 2F, 628, Donghang-ri, Yangseong-myeon, Anseong-Si, Gyeonggi-Do, Korea.
Tel : +82 70 4100 8847 / Fax : +82 31 674 6608
E-mail : info@c4line.com
Website : www.c4line.com
Copyrightⓒ 2015 C4Line Co.
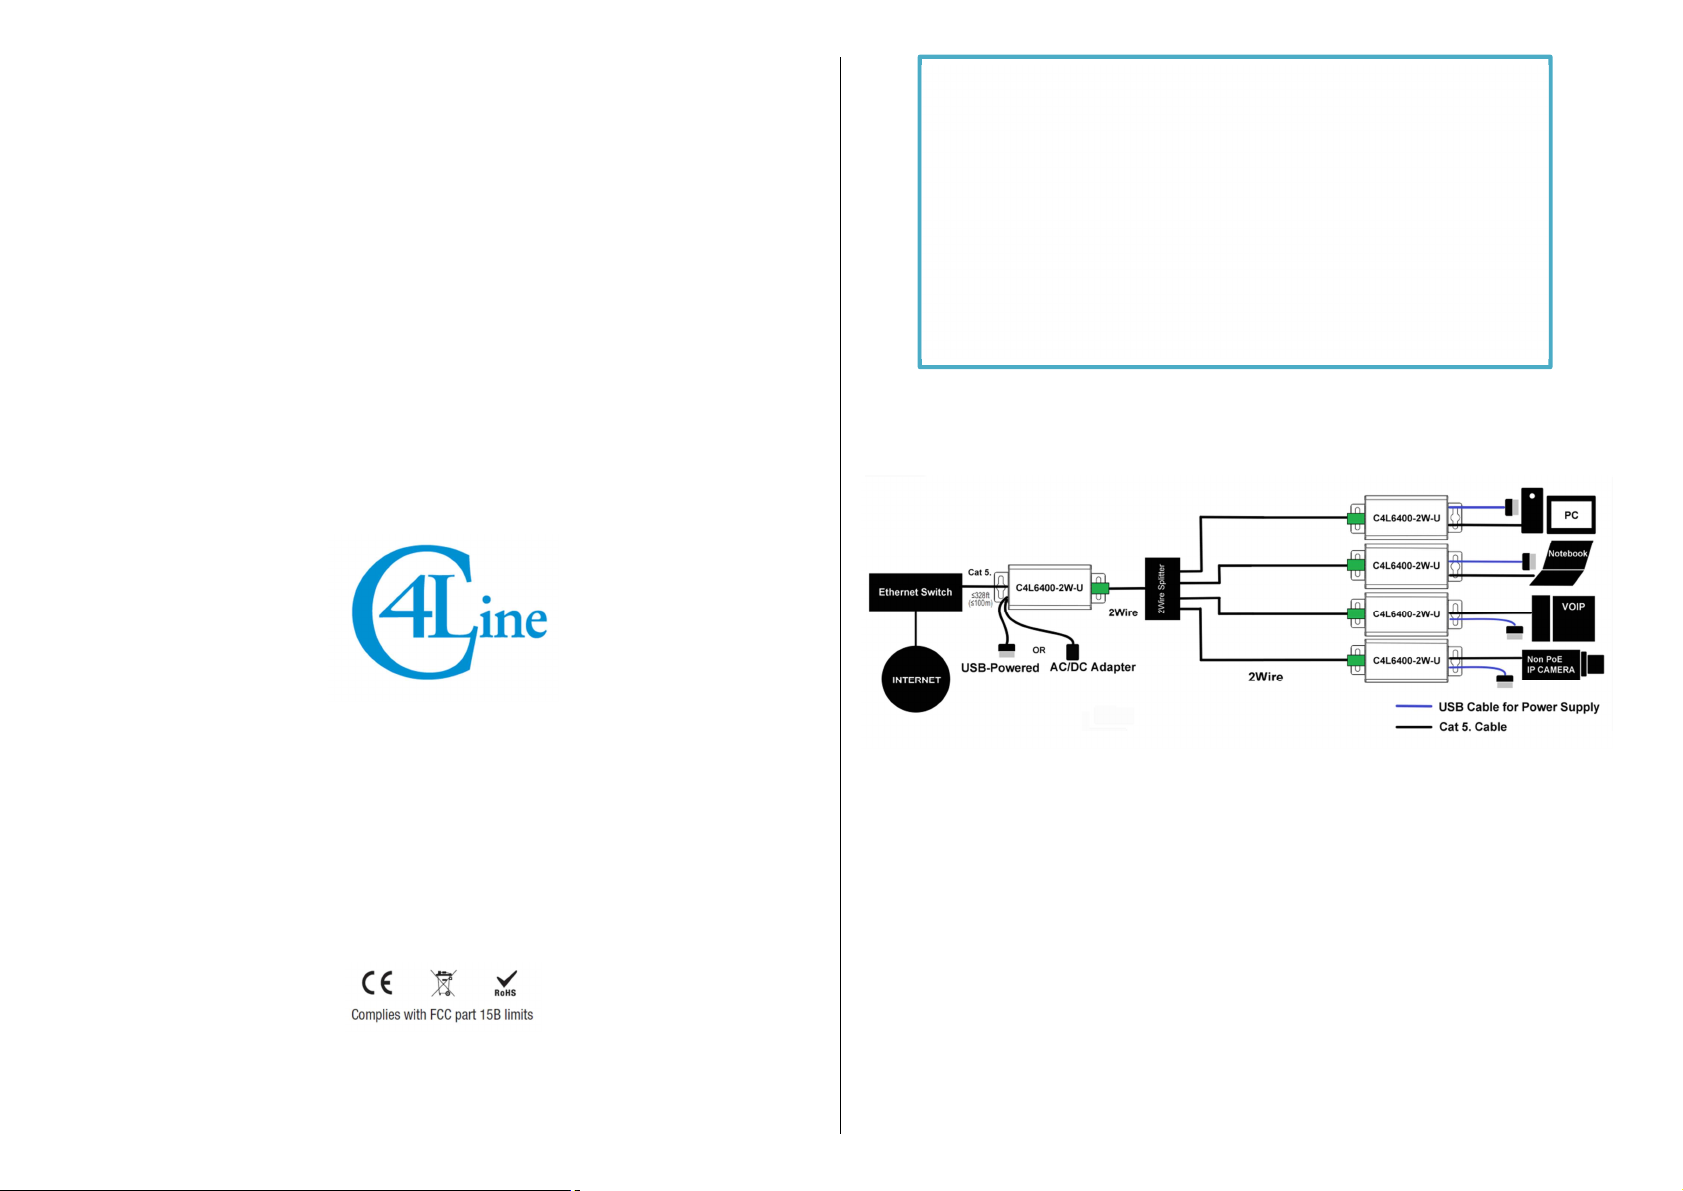
C4L6400-2W-U Transceiver Field Application
C4L6400-2W-U transceivers are used to extend the Ethernet IP signals via 2Wire cable in the existing
2Wire network in building.
C4L6400-2W-U designed to be conveniently powered by any USB port of computer and Notebook so that
no extra AC/DC power adapter is required and no AC outlet is needed to get this device powered.
C4L6400-2W-U transceiver could reduce the cabling costs to upgrade from the installed analog devices to
IP devices ( VoiP, Network Printer and IP Camera) with the existing 2Wire cables.
For the other field applications, C4L6400-2W-U transceivers could be applied to connect, distribute and
convert the IP devices(PC, Notebook and Wireless AP, etc.) signals via the 2Wire cable with 128bit AES
Encryption and guaranteed QoS for loss sensitive application.
C4L6400-2W-U Transceiver
Quick Start Guide
•
Both transceivers are now in Joining mode. They will find each other
and establish encrypted communication. In about 10 seconds, the
TWP LEDs on both transceivers will illuminate (blinking or steady on),
indicating a successful Join.
C4L6400-2W-U connection diagram
C4L6400-2W-U Installation Steps
Step 1. Hardware Check and Preparation
• Please check the product physical defects. If you find the defects, do not operate the product.
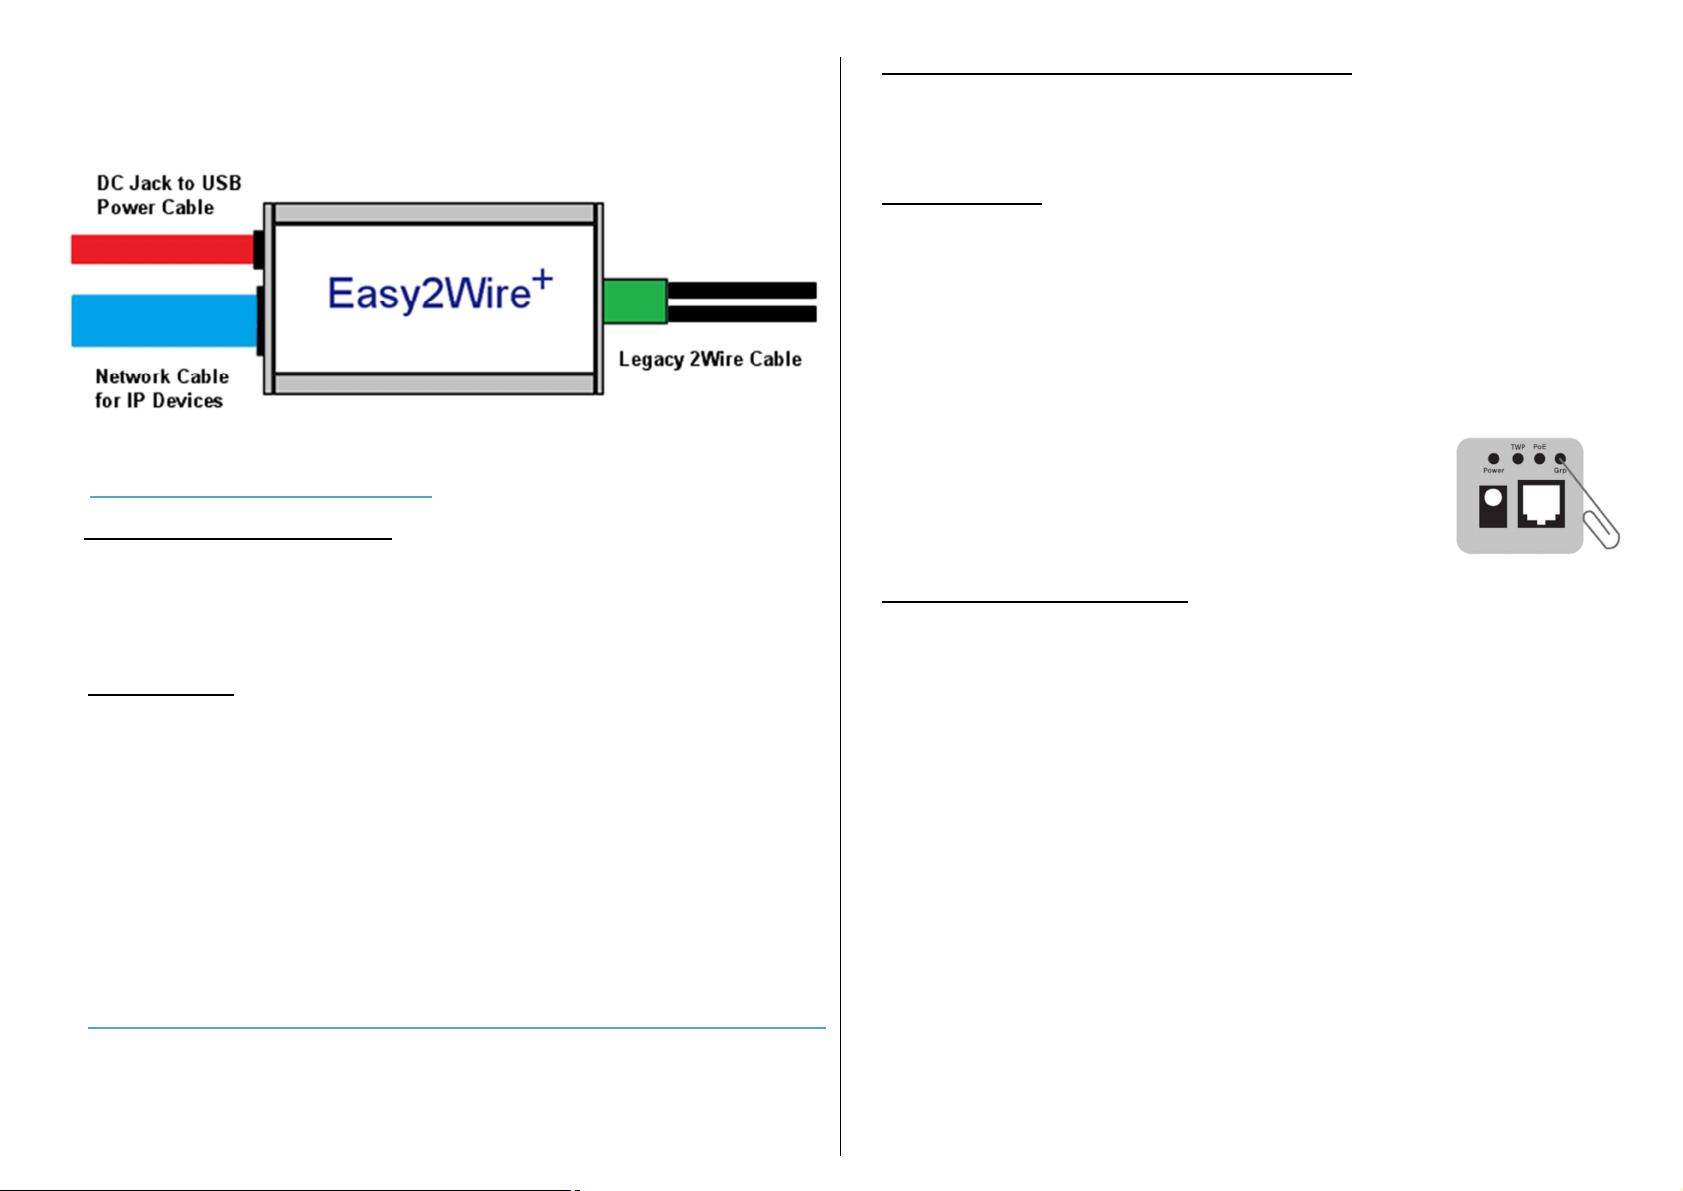
• Prepare 1) Network cable, 2) Legacy 2Wire cable, 3) 5.5x2.1mm DC Plug to USB A Male
Extension Cord. (Please check the cable short, Spec. and connection status), 4)’-’ Screw Driver
Step 2 . Installation
• Use one C4L6400-2W-U transceiver at each end of the 2Wire cable.
Up to four remote transceivers and 2Wire runs may be connected to a fifth transceiver at the
control room using 4unit of BNC to 2Wire connectors.
• Connect the UTP network cable to each side of IP devices (PC, Notebook, VoiP and etc.) for
operating the entire network system.
• Connect the DC Jack to USB cable to each side of power sources (PC, Notebook, VoiP and etc.)
for operating the entire power system.
• All transceivers are in Join Mode. They will find each other and establish basic level encrypted
communication.
Un-Joining and Joining Transceivers for Encrypted communication(Optional)
If you want to build enhanced encrypted communication Network Group to another, it must be returned
to an un-joined state.
Step 1.Un-Joining mode to build enhanced encrypted network
• Do this by applying power, and pressing the small push-button (Grp) for 10 seconds until the TWP
and ETH LEDs illuminate and then go out, about one seconds. The transceiver is now ready to be
joined to build encrypted Network Group.
Step 2. Joining mode
• For more transceivers in an enhanced encrypted network, disconnect the joined transceiver from
grouped 2Wire cable and connect the new un-joined transceiver.
• On the new un-joined transceiver, momentarily depress the small push-button(Grp) using the
straightened paper-clip. The ETH LED will blinking.
• Depress the small push-button(Grp) on the any transceiver within existing encrypted Network
Group .
Step 3. Adding Transceivers (if required)
• Disconnect one of the transceivers and replace it with a new un-joined transceiver.
• Repeat step 2 to add additional transceivers to the same Network Group.
C4L6400-2W-U Installation Warnings
• Do not use the transceiver near the harsh (temperature, humidity, cabling quality) installation site.
• If transceiver flooded by water or other liquid materials, please turn off the power source and
disconnect all of cables from transceiver. And request to C4Line technical team for after service..
• Do not use transceiver over 120℉ (50℃) temperature condition for transceiver’s operation
performance and lifetime.
• Do not disassemble transceiver at a person’s service.
• Please use 1meter of the 5.5x2.1mm DC Plug to USB A Male Extension Cord.