

Byron SX-36, SX-41, SX-201, SX-4 Installation Manual
Important
1. Mounting any wire free object onto UPVC will reduce the operating range-as UPVC doors contain metal and act as a shield to the wire free signal.
2. Do not expose the Door Chime unit to rain or immerse in water.
3. Do not mount the either unit close to a fireplace or expose to high temperatures.
4. Do not drop the units or subject them to excessive blows.
5. The Converter and Door Chime units are designed for indoor use only.
6. Make sure no naked flame sources, such as lighted candles are placed on the unit.
7. The unit should not be exposed to dripping or splashing and no objects filled with liquids, such as vases should be placed on the unit.
8. Do not place near a PIR. It may interfere with your Door Chime.
9. Always use recommended batteries as these will give longer service and are less likely to leak.
10. Do not use different type of batteries, or mix up old and new batteries.
11. Do not leave exhausted batteries in either unit. If leaving the doorbell for long periods, remove the battery from the compartment to prevent
leakage.
12. Please dispose of old, defective batteries in an environmentally friendly manner in accordance with the relevant legislation.
13. CAUTION: Replace only with the same or equivalent type of battery that is recommended by the manufacturer.
14. CAUTION: Danger of explosion if battery is incorrectly installed or replaced.
Problem
Door Chime does not sound but LED
lights up on the Bell push.
Possible Causes
1. Units out of range (max. range 100m).
2. Bell push and Door Chime units are not on same
digital code.
Suggested Remedy
1. Operate the Door Chime unit within the
operation range (100m).
2. Re-set the digital code (see: Dip Switch
Settings).
Door Chime does not sound plus
no light on Bell push LED.
1. Flat bell push battery.
2. Wrong polarity of battery in Bell push.
1. Change the battery.
2. Re-insert battery as internal marking in right
polarity.
Door Chime sounds without Bell
Push being pressed.
A similar Wire Free Door Chime product is
operating nearby on the same frequency digital
code.
1. Re-set the digital code (see: Dip Switch
Settings).
Specification
irefree rechargeable chime ki
t
X-20
1
00
m
peratin
g
stanc
e
Door chime unit
CR2032
Wire Free
Batte
ries
Included
Batte
ries
Included
Ope
ratin
g
Di
stance
L
oudness
Open Field
80db
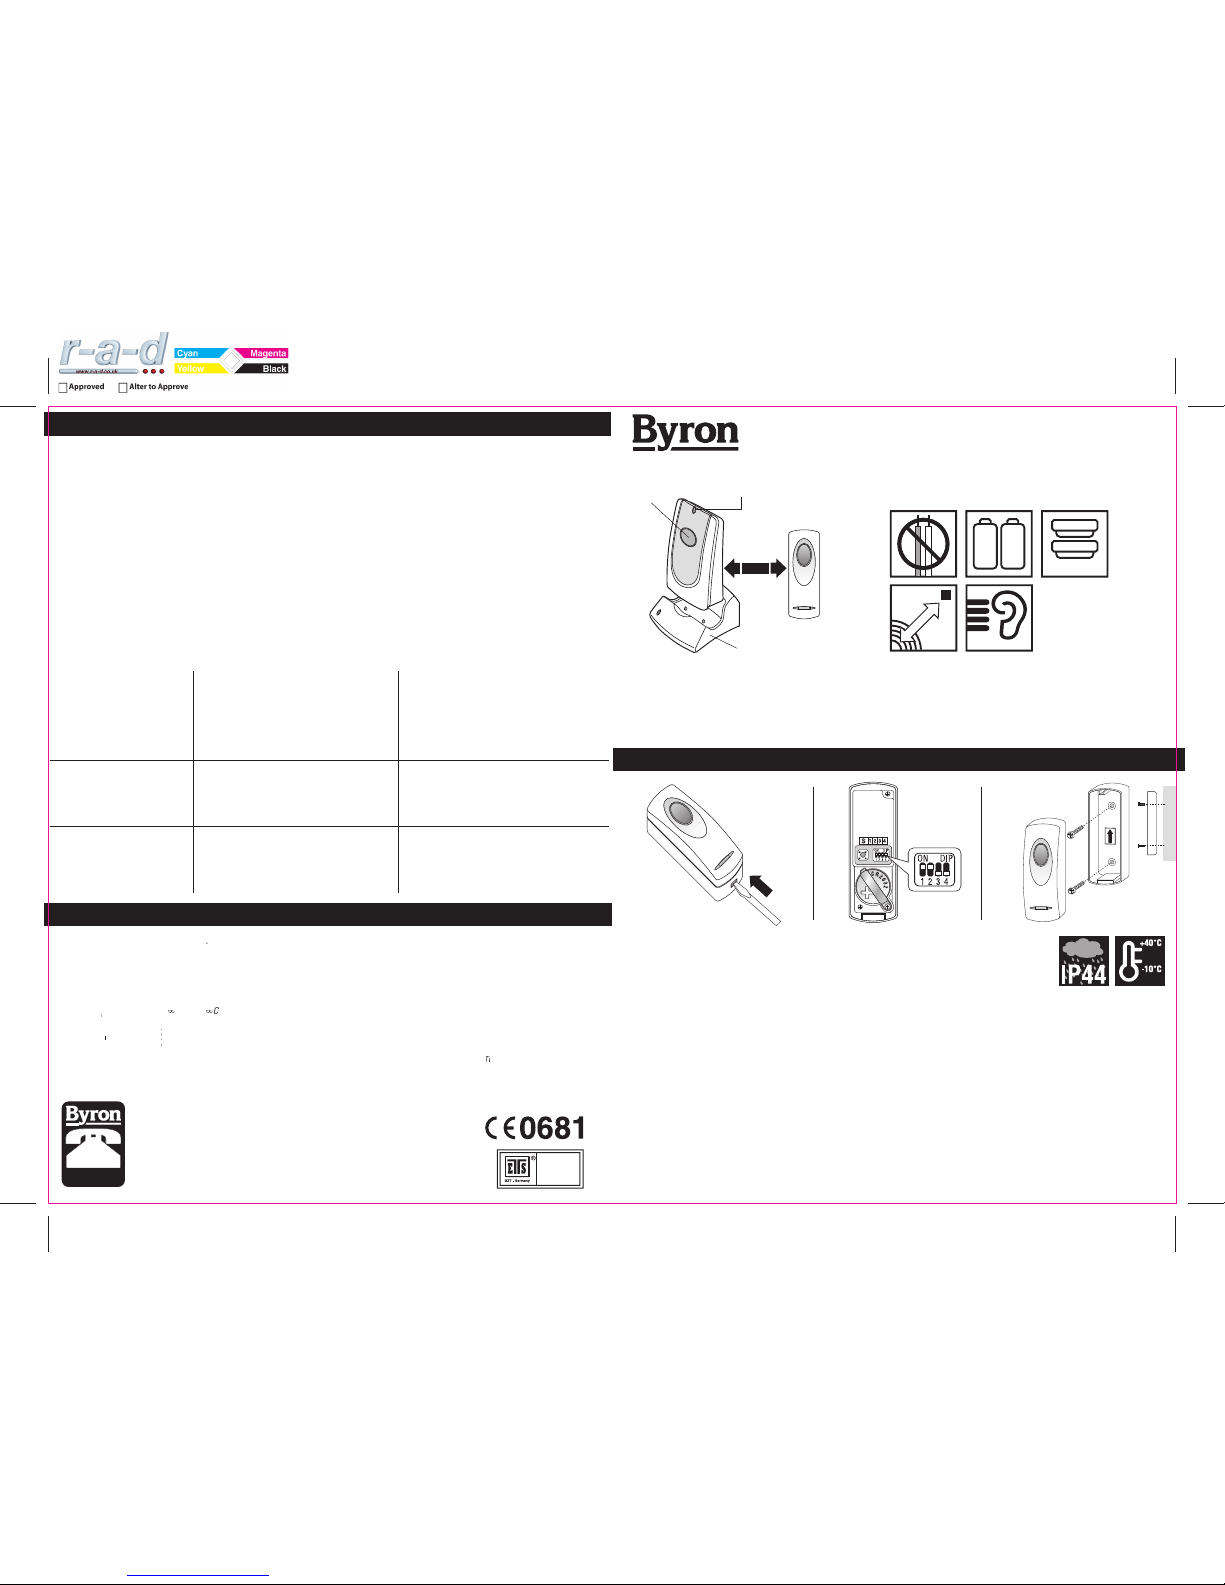
No wiring is required for this Wire Free portable Door Chime Kit. When the Bell Push is pressed, it sends a wire free signal to the Door Chime
unit that activates the chime. As the operating range is up to 100 meters (320ft. approx. – in open field), you can mount or take the Door
Chime virtually anywhere in the home. However, the transmission range of the wire free signal will be reduced if the signal is transmitted
through a number of walls or ceilings. Metal and UPVC doors and doorframes will also reduce the operating range.
Bell push unit
A
Bell Push Unit
2 x 3 volt Lithium batteries (CR2032) have already been installed.
Your Bell Push is ready to use.
Channel Selection – Dip Switch Settings
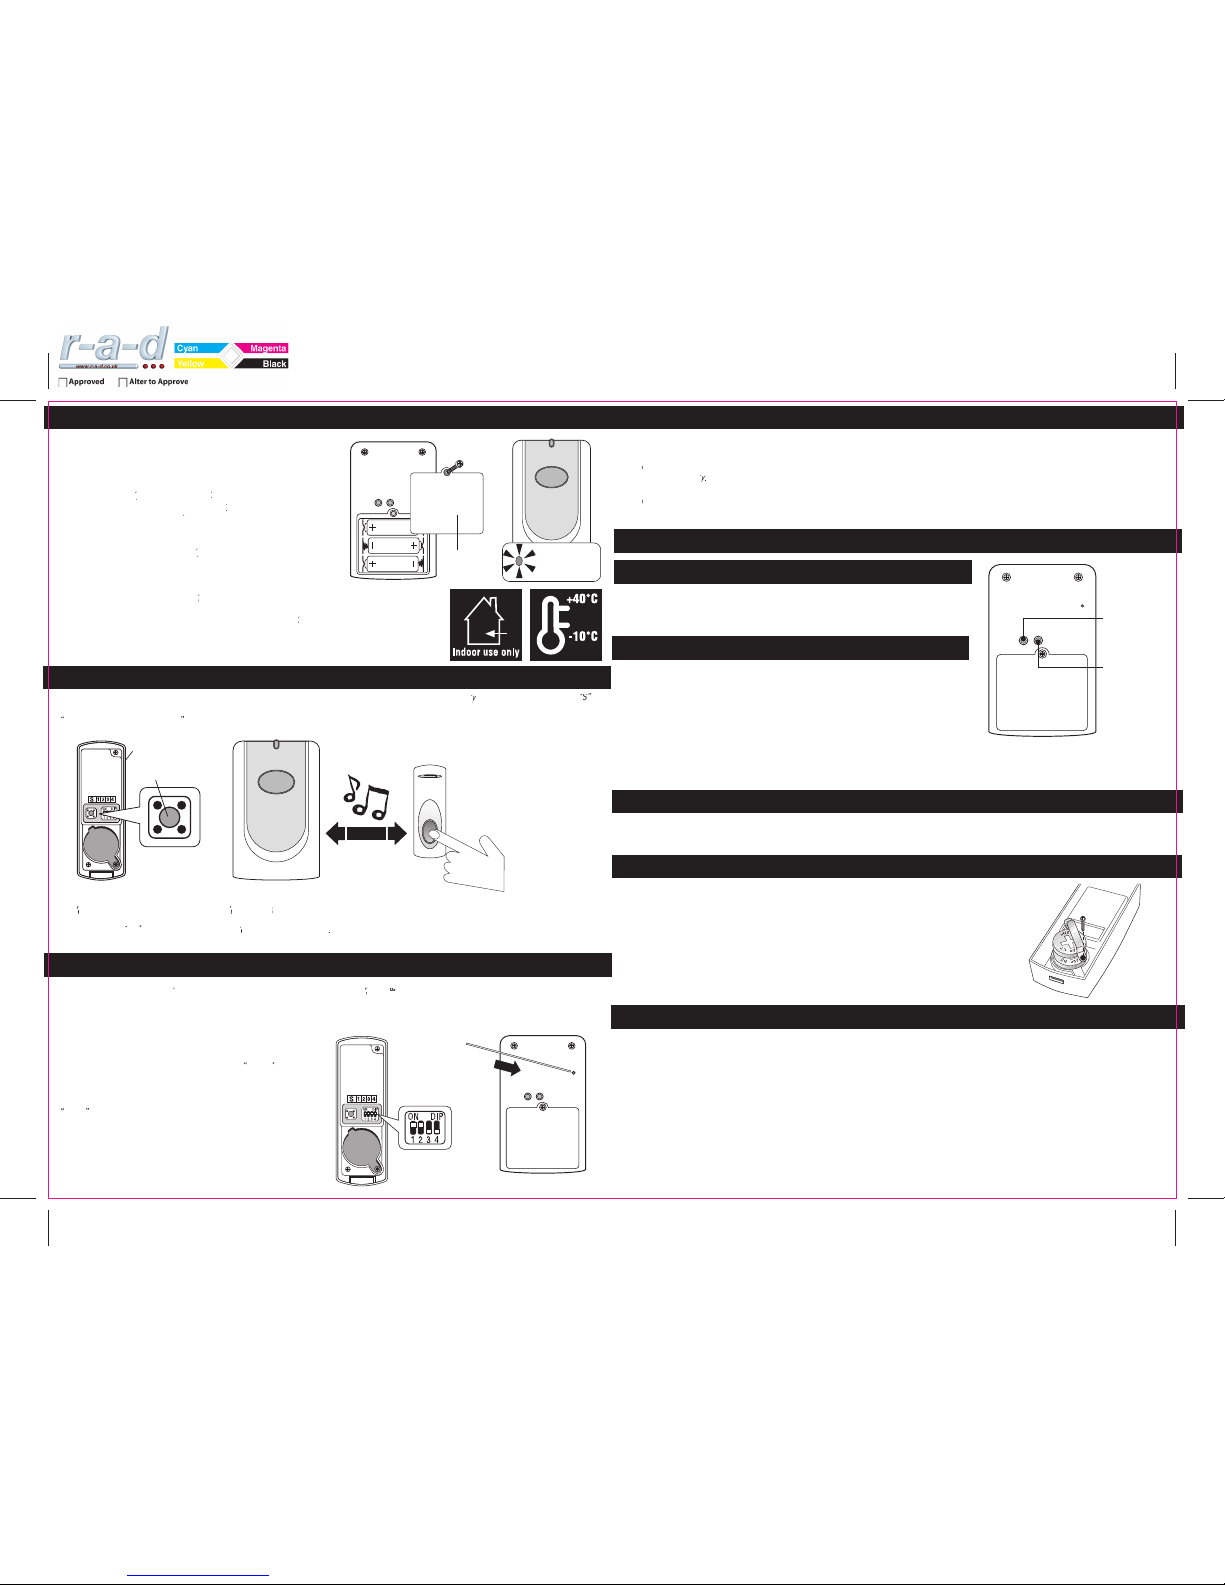
Before installing the Bell Push you should create your own combination of dip switch settings.
1. Remove the back of the Bell Push case by pushing in the tab on the bottom with a small, flat screwdriver (dia.A).
2. Inside the Bell Push there is a 4 position dip switch marked 1, 2, 3 & 4. Use a screwdriver to alter the dip switch levers to either “ON” or
“OFF” positions, which can be altered to achieve a total of sixteen (16) possible digital codes.
3. Select any combination (e.g. 2 up 2 down) (dia.B).
Do not refit the front cover of the Bell Push just yet.
Installation Guide
Important: Mounting the Bell Push unit on UPVC doors, doorframes or a metal surface will reduce the broadcasting range and may cause
intermitance.
Using the two holes on the back of Bell Push as a template (you will need to pierce the holes), mark the fixing position for the unit. If fixing into
a solid wall drill 6mm holes, fit wall plugs and secure the Bell Push unit with the 2 x 16mm screws provided. If fixing into timber, use a small
bradawl to make a pilot hole and fix directly with 2 x 16mm screws provided (dia.C).
&
app
rove
d
C H Byron (Electrical) Ltd
www.chbyron.com
e-mail: support@chbyron.com
U
.K.
0845-2301231
Bell push
un
it
Low batter
y
indicator
Flashin
g
light
R
echargeabl
e
base
BC
ype R2 Device - device where the
s
ound output is created by the
initial operation of the control and
here the period of sound output
c
ontinues for designed duration
irrespective of condition of the
co
ntrol.
A. Push B
utton un
it
Powe
r
onsumptio
n
: 2
x 3 volt Lithium batte
r
y (CR2032 - included)
:
7.0mA - ON
0.003mA -
O
FF
B
. Door Chime uni
t
Pow
er
onsumptio
n
3 x 1.5 volt Ni-Mh batteries (included
)
200mA - ON
0
.3mA - Stand B
y
. Charger Uni
t
Po
wer
mperatur
e
perating Distanc
e
electable Digital Cod
e
:
A/C-D/C 9 volt 300mA adaptor (Byron model SX-36 - included
)
: -10
:
100 metres (320 feet approx.) in open fiel
d
: T
Doorchime Unit
Battery
Compartment
R
ed - Chargin
g
Green - Ful
l
, the LED on the charger will
l
ight up Red to indicate that the batteries are
it
i
s indicating that the charging procedure is complete and the chime
nit is ready to use. Replace the doorchime unit on the base when
not in use.
Rechargeable batteries are already inserted on
p
urchase
.
hanging the rechargeable batterie
s
nscrew the screw at the top of the battery compartment.
y compartment door
Insert 3 x 1.2
y polarity matches the
i
nternal markings. It will beep twice to indicate that it is
r
eady for the new operation code registration (Please see
Digital Code Set Up). Close the batter
door and charge
he batteries
before use
.
Melody Selection
Push B
utton
M
elody Selector
Melody
Additional Byron
range products can be pur
. SX-4 & SX-41 models will not work with other SX
models
.
5) Piano
) Harmony
Electro Mechanical - Ding Don
g
2) W
stminster - 8 note
s
3) Jive
4) W
Dog Barkin
g
8
) Ringe
r
y
ompartment marked with .
ress the switch once, the melody will change to the next one on the list, there are a total of 8 melodies for selection. The Push Button is pre-set to
Electro Mechanical - Ding Dong
therefore, if no change is required, it should not be adjusted.
y on a pre-set radio frequency digital code. However
, should your door chime activate
intermittently for no
r
eason at all, it is possible that a similar unit is operating nearby on the same frequency digital
ode. The encoded frequency of the Push Button (transmitter) can be changed to avoid this problem
.
he Door Chime unit is equipped with advanced self-learning operation code ability therefore no setting is needed
.
Digital code set-up
Push Butt
on
E
g.
R
eset the operation code
Re-Set
. Remove the back of the case from the Bell Push unit.
here is a 4
-
p
osition dipswitch marked 1,2,3 & 4. Use
a
s
crewdriver to alter the
dipswitch l
evers to the
n/Off
position,
hich can be altered to achieve total sixteen (16) possible digital
odes
.
2. Insert a pin into a small hole at the back of Door Chime unit marked
re-set
, then press, it will give 2-beeps sound
o indicate that it is ready for new code registation
.
Door chime unit operation
Sound volume adjustment
Light option control button
Sound Volume Control button is located at the back of item, press the button to adjust the
sound volume up and down. There is a total of 8 different volume level set, 1=mute and
8=max, the Door Chime will start to operate at sound level 6.
It is located at the back of item, press the button to adjust the light function. There are 4 light
display options:
1 – Slow Strobe effect for the duration of 5 seconds.
2 – Fast Strobe effect for the duration of 5 seconds.
3 – LED light will stay on for 2 second then go off for 1 second, twice.
4 – LED light off.
The door chime will start to operate at “Light Off” position
olume
C
ontro
l
g
ht
C
ontro
l
Remove the Bell Push unit front cover. Remove the locking screw from
the battery fastener. Insert 2 x CR2032, 3 volt Lithium batteries (Byron SX100)
in the battery compartment, ensuring the battery polarity matches the internal
markings. Tighten the screw on the battery fastener to hold the batteries firmly
in their compartment and refit the front cover.
C
R
2
0
3
0
3
2
C
R
2
0
3
onnect the charger with A/C-D/C 9 volt 300mA adaptor (Byron model SX-36 - included), then plug the adaptor into
a
ny convenient 13 amp wall socket, then it is ready to use
.
Charger
ed LED indicator on the top of Door Chime unit will flash when the batteries are running low to the point that they
n
eed to recharge. Simply place the chime unit onto the charger to recharge the batteries
.
3. S
elect any combination on the Push Button. Press the Push Button, the Door Chime unit will sound to indicate th
e
n
ew operation code is registerd and memorized, and it w
ill
only work with it
.
y
. Re-insert the batteries into the Door Chime unit, it will give 2-beeps sound to indicate that it is ready for new code
registration. Press the Push Button to confirm the new code is workin
g.
5. T
Digital code set-up
(cont)
Low battery indicator
Replacing the bell push batteries
 Loading...