

Page 1
CR2032
100m
100m
Operating
Distance
Door Chime Unit
Push
Button Unit
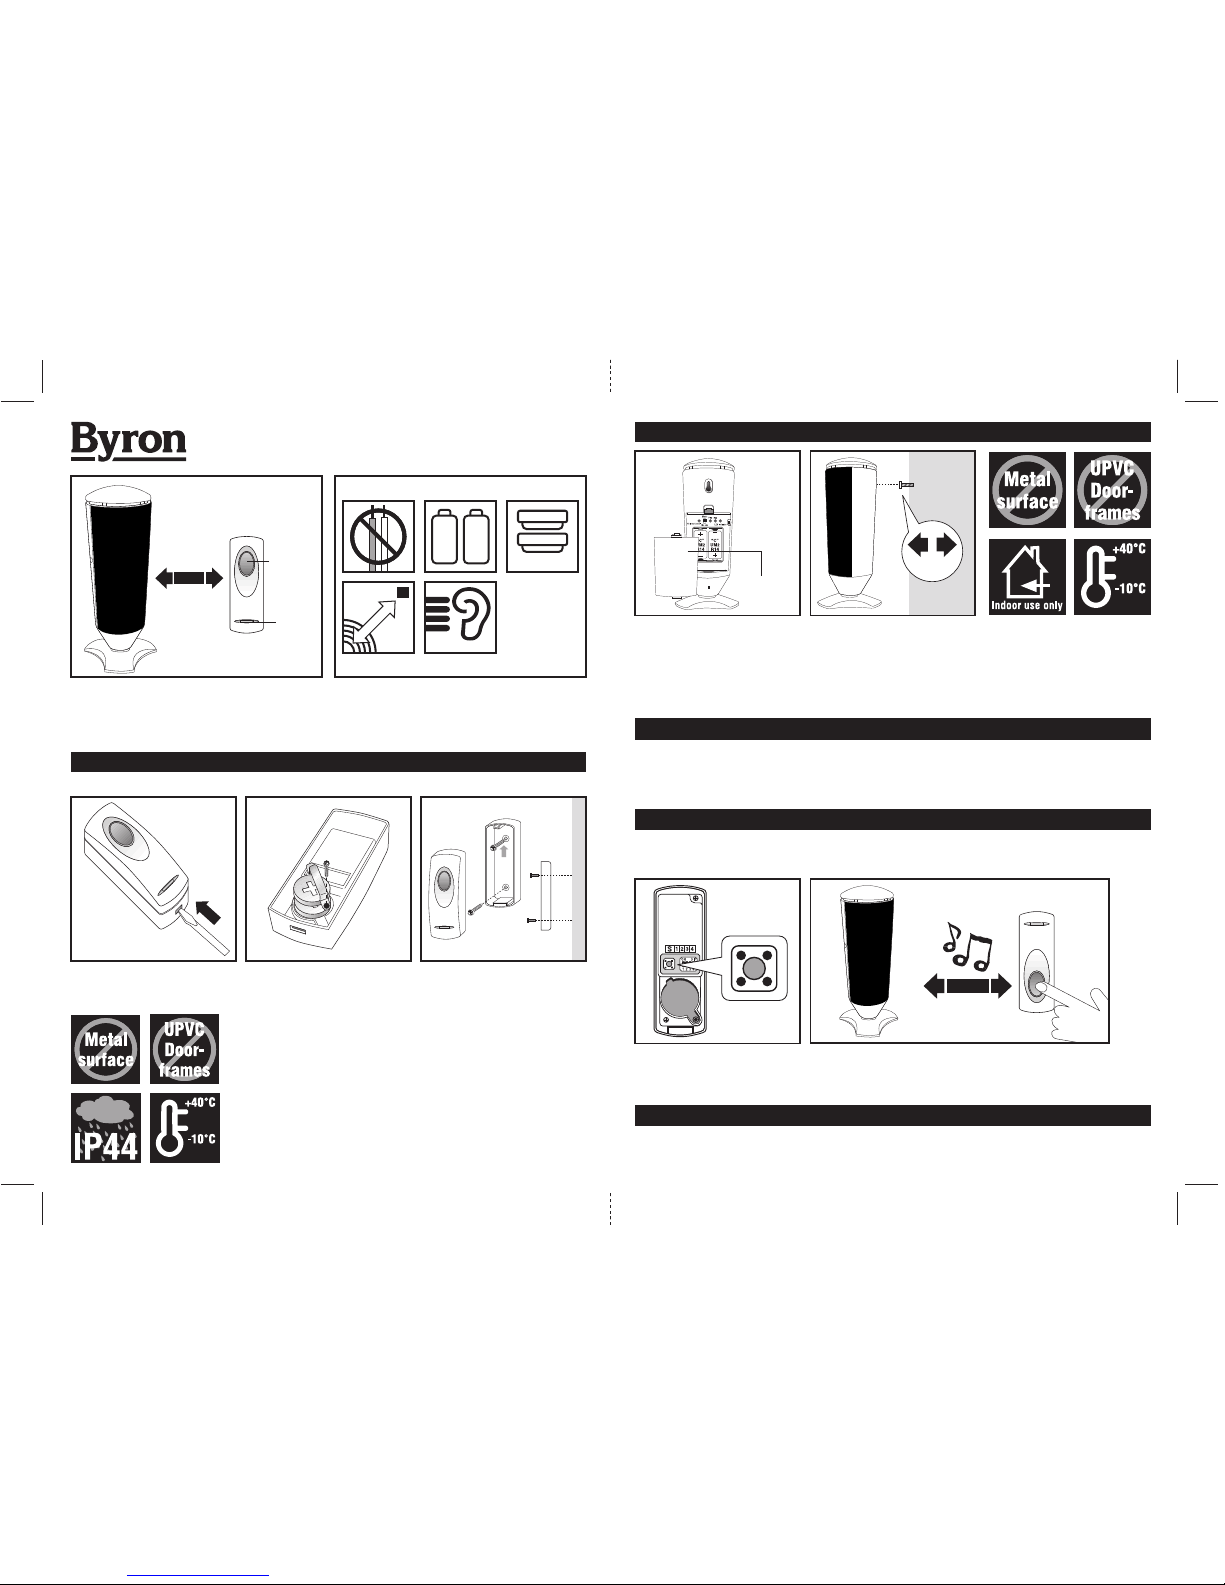
Remove the locking screw from the battery
fastener. Insert 2 x 3 volt CR2032 Lithium
batteries (Byron SX100) in the battery
compartment, ensuring the battery polarity
matches the internal markings, then tighten
the screw on the battery fastener to hold the
batteries firming in their compartment.
No wiring is required for this Wire Free Door Chime Kit. When the Push Button is pressed, it sends a wire free signal to the door chime
unit that activates the chime. As the operating range is up to 100 metres (320 ft. approx. - in open field), you can mount or take the door
chime virtually anywhere in the home. However, the transmission range of the wire free signal will be reduced if the signal is transmitted
through a number of walls or ceilings. Metal, and UPVC doorframes will also reduce the operating range.
Wire Free Portable Door Chime Kit with
Record your own sound SX-203
Push Button Unit
Remove the back of the case by pushing in
the tab on the bottom with a small, flat
screwdriver.
Using the two holes on the back of Push
Button as a template, mark the fixing
position for the unit. Drill holes and fit wall
plugs and secure the Push Button unit with
screws (self-tapping N3 x 16mm screw).
Door Chime Unit
C
R
2
0
3
2
C
R
2
0
3
2
C
R
2
0
3
2
C
R
2
0
3
2
Wire Free
Batteries
Included
Batteries
Included
Operating
Distance
Loudness
O
p
en
Fie
l
d
2 x 3 volt Lithium batteries (CR2032) have already been installed. Your Push Button is ready to use.
To channge
the battery
82db
Push
Button
Model No. SX-203
This
way
up
Battery
Compartment
To change the batteries
Slides open the battery compartment door. Insert 2 x 1.2 volt alkaline batteries (“AA”, UM3 & LR6 - included) into the battery
compartment, ensuring the battery polarity matches the internal markings. It will beep twice to indicate that it is ready for the new
operation code registration (Please see Digital Code Set Up). Close the battery door, then the chime unit is ready to use.
It has a slotted hang hole on the rear of the unit, this will enable the chime unit to be hooked onto a screw and easily removed or
relocated to another room. Drill a hole and fit a wall plug (if fixing to masonry) and screw (self-tapping 3 x 16mm screw) to fixing
position. Leave a gap of 3mm between the screw head and the wall. Locate the keyhole slot on the back of the unit over the screw.
Operation
Indicator
To mount
“AA”, UM3
LR6
“AA”, UM3
LR6
3mm
To mount
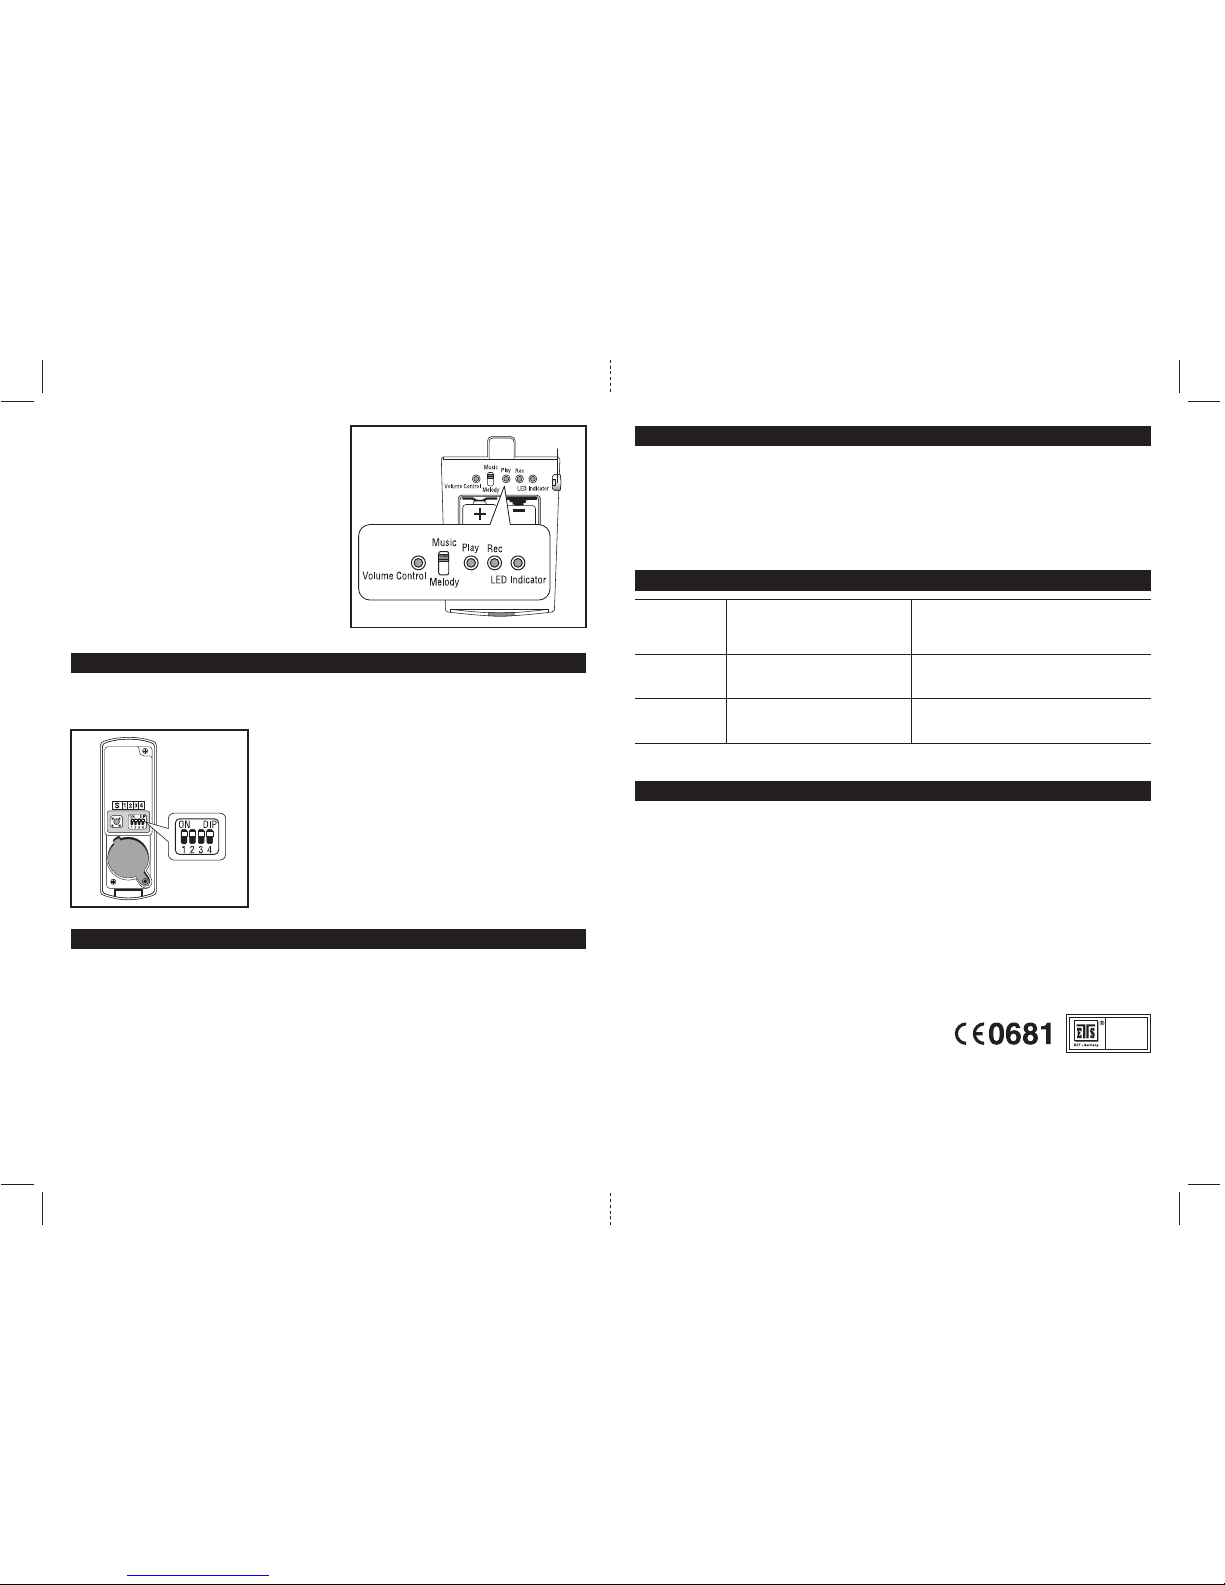
The Melody Selector is located inside the Push Button unit, a small switch in the top left corner of battery compartment marked with “S”.
Press the switch once, the melody will change to play the next one on the list, there are a total 8 melodies for selection. The Push Button
is pre-set to “Electro Mechanical - Ding Dong” therefore, if no change is required, it should not be adjusted.
Melody Selection
Push Button
Melody Selector
Melody
Additional Byron “SX” range products can be purchased for compatibility. SX-4 & SX-41 models will not work with other SX
models
5) Piano
6) Harmony
1) Electro Mechanical - Ding Dong
2) Westminster - 8 notes
3) Jive
4) Wedding March
7) Dog Barking
8) Ringer
There are 2 ways to select the desired melodies as your doorbell sound either by switching the sound selection switch to “Music” or
Melody”.
a) Music: Doorbell will play the recorded music as the doorbell sound.
b) Melody: Doorbell will play the preset melody as the doorbell sound, there are total of 8 melodies stored.
Sound Selection
You can record 10 seconds of your favourite music as your doorbell sound.
1) Firstly switch the sound selection switch (located at the back of doorbell) to the position marked “Music”.
2) There are 2 ways to record your own music:
Record Your Favourite Music as Door Chime Melody
Page 2
Model No. SX-203
R&TTE
approved
1. Remove the back of case from the Bell Push unit.
2. There is a 4-position dipswitch marked 1,2,3 & 4. Use an screwdriver to alter the
dipswitch levers to the “On/Off” position, which can be altered to achieve total
sixteen (16) possible digital codes.
3. Select any combination on the Push Button. Press the Push Button, the Door Chime
unit will sound to indicate that new operation code is registerd and memorized, and
it will only work with it.
4. To re-set the operation code, simply remove the batteries from the Door Chime unit
and rest for 30 seconds, it will erase the memory. Re-insert the batteries into the
Door Chime unit, it will give 2-beeps sound to indicate that it is ready for new code
registration. Press the Push Button to confirm the new code is working.
5. Test to ensure correct operation before final installation.
Push Button
Eg.
Type R2 Device - device where the sound output is created by the initial operation of the control and where the period of sound output
continues for designed duration irrespective of condition of the control.
It is located at the back of the chime unit, press the the button to adjust the sound volume up or down. There is total 8 different volume
levels set, 1=mute and 8=max, the door chime will start operating at sound level 6.
Sound Volume Adjustment
A. Push Button unit
Power
Consumption
: 2 x 3 volt Lithium battery (CR2032 - included)
: 7.0mA - ON
0.003mA - OFF
Problem
Chime does not
sound but LED lights
on Push Button
Chime does not
sound plus no lights
on Push Button LED
Chime sounds without
Push Button being
pressed
Possible Causes
1. Units is out of range (max. range 100M)
2. Push Button and Chime units are not on
same digital code
1. Flat Push Button battery
2. Wrong polarity of battery in Push Button
A similar Wire Free Door Chime product is
operating nearby on the same frequency
digital code
Suggest Remedy
1. Operate the Chime unit within the operation range (100M)
2. Re-set the digital code (see Digital Code Set Up)
1. Change the battery
2. Re-insert battery as internal marking in right polarity
Change the digital code (see Digital Code Set Up)
Important: There are no serviceable parts in the unit, do not attempt to repair it.
Trouble Shooting & User Hints
Specification
B. Door Chime Unit
Power
Consumption
Operating Temperature
Operating Distance
Selectable Tone
Selectable Digital Code
: 2 x 1.5 volt alkaline batteries (“C”, UM2 & R14 - not included)
: 100mA - ON
0.3mA - Stand By
: -10∞C to +40∞C
: 100 metres (320 feet approx.) in open field
: Total eight (8) tones available
: Total sixteen (16) possible digital codes
1. Do not mount either unit close to fireplace or expose to high temperatures.
2. Do not expose the Door Chime unit to direct sunlight or moisture.
3. Always use alkaline battery. Please dispose of old, defective batteries in an environmentally friendly manner in accordance with the
relevant legislation.
4. Make sure that no naked flame sources, such as lighted candles, sare placed on the unit.
5. The unit should not be exposed to dripping or splashing and that no objects filled with liquids, such as vases, shall be placed on the
unit.
6. CAUTION: Replace only with the same or equivalent type of battery that is recommended by the manufacturer.
7. CAUTION: Danger of explosion if battery is incorrectly installed or replaced.
Important
The unit comes from the factory on a pre-set radio frequency digital code. However, should your door chime activate intermittently for no
reason at all, it is possible that a similar unit is operating nearby on the same frequency digital code. The encoded frequency of the Push
Button (transmitter) can be changed to avoid this problem. The Door Chime unit is equipped with advanced self-learning operation code
ability therefore no setting is needed.
Digital Code Set Up
a) Line-In Recording: Link up the sound source with the chime unit
by the cable provided. Plug one end of the cable into the line-in
jack located at the side of chime unit, plug another end in to the
earphone jack of the sound source. Adjust the sound volume of the
sound source to a suitable level, so that the quality of sound is
good enough to be used as chime sound. Start playing the music
from the sound source and press & hold the “Record” button on
the chime unit for 10 seconds at the same time. During recording,
the Red LED Light at the back of the chime unit will light up, and
turn off after the recording procedure is completed.
b) Using the built-in microphone: Point the microphone to the music
source, press and hold the “Record” button for 10 seconds.
During recording, the Red LED Light at the back of the chime unit
will light up, and turn off after the recording procedure is
completed.
3) Press the “Test” button once to hear the recorded music, if no change
is required, then the doorbell will play this music as your doorbell
melody whenever the bell push is pressed.
Line-In Jack
 Loading...