

1
Instruction Manual
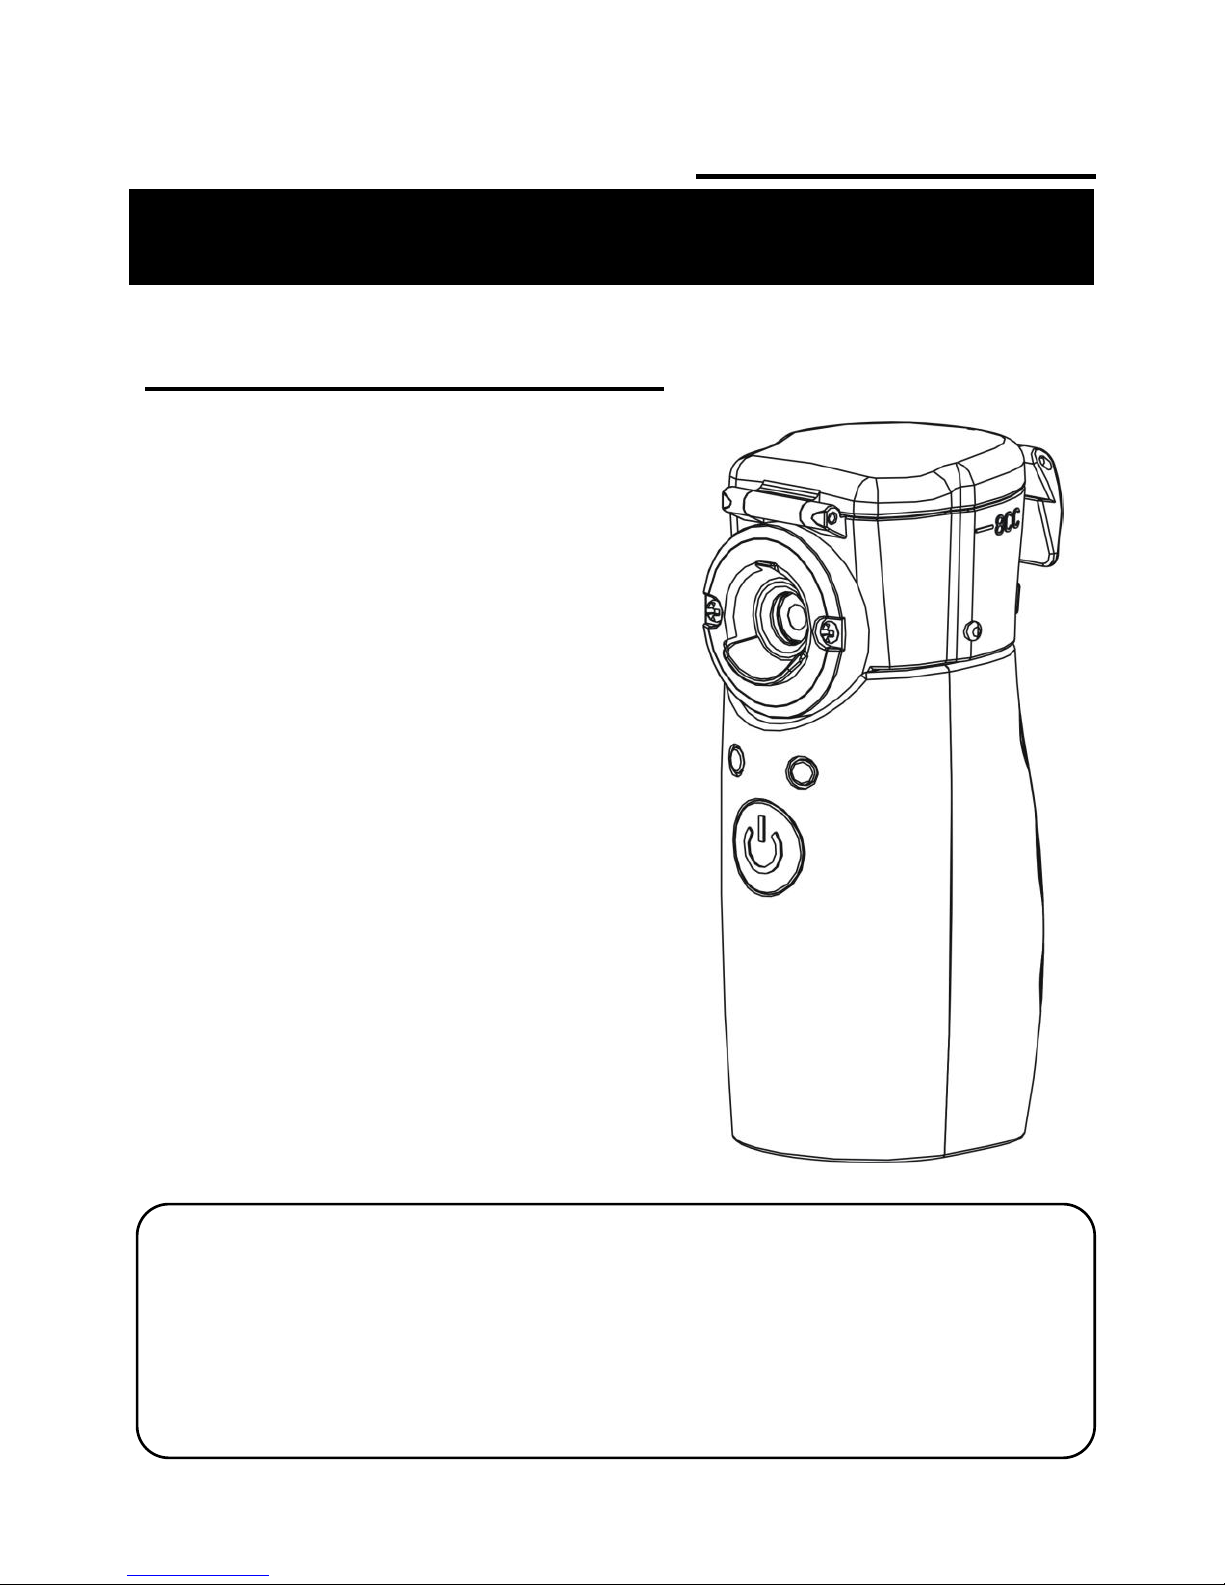
VIB-MESH NEBULIZER
■ Intended Use:
This device utilizes state-of-the-art
electrospray technology that sprays liquid
medication in aerosol form and delivers it
directly to the patient for breathing.
■ Intended User:
Adult and pediatric patients suffer from
asthma, Chronic Obstructive Pulmonary
Disease (COPD) such as emphysema and
chronic bronchitis, or other respiratory
diseases that are characterized by
obstruction to air flow.
CAUTION: Federal law restricts this device
to sale by or on the order of a physician.
◆ Thank you for purchasing this product. To ensure safe and correct use of
this product, please read the instruction manual carefully before using.
◆ Please keep the instruction manual at a proper place for future reference.
◆ This is a single patient device. Do not allow multiple patients to use the
same device.
Model HL100
Nebulisers.net.au

2
VIB
-MESH
NEBULIZER
Contents
• A nebulizer is a type of medical apparatus. Please follow a doctor’s
instructions on choosing the correct type, dose, and regimen of
medication.
• The nebulization characteristics of the unit differ by the properties
of medication. The nebulization rate may vary with using different
medicine.
◆ IMPORTANT CAUTION:
As with any mechanical device, this product may become unusable
due to an electrical outage, battery depletion, or mechanical failure.
We recommend that you have spare batteries and a backup device
available to you.
Before Using
◆ Safety Precautions ·············································
3
◆ Product Features ···············································
4
◆ Components ·····················································
4
◆ Component Names and Functions ·························
5
Usage
◆ How to assemble the nebulizer ·····························
6
◆ How to connect to the power supply ·······················
7
◆ How to fill the medication ·····································
9
◆ How to operate the nebulizer ································
11
Cleaning
◆ How to clean after using ······································
14
◆ How to replace the medication chamber ·················
17
How to Carry
◆ How to carry the nebulizer ···································
18
Troubleshooting
◆ Troubleshooting ················································
20
Specifications
◆ Specifications ···················································
23
◆ Technical data ··················································
24
◆ Accessories / Optional part ··································
25
◆ Note ·······························································
26
◆ Appendix A: EMC information ·······························
28
Nebulisers.net.au

3
Safety Precautions
To ensure safe and correct use of this product, please read the instruction manual
carefully before using.
Warning
◆ Please follow a doctor’s instructions on choosing the correct type, dose, and regimen
of medicine.
◆ Do not place any liquid in the medication chamber that is not prescribed by a
physician.
◆ This is a single patient device. Do not allow multiple patients to use the same device.
◆ If you are using the nebulizer for the first time after purchasing it or you have not used
it for a long time, please clean the nebulizer parts. (Please see page 13-14)
◆ After each use, please clean the medication chamber, mask adapter, and mouthpiece
with distilled water. Dry the cleaned parts immediately and store in a clean place.
(Please see page 13-14)
◆ The inhalation mask and connecting tube must be cleaned with distilled water and
dried prior to first use. These parts are only for single use. Please do not reuse them.
◆ Do not plug or unplug the AC adapter with wet hands.
Caution
◆ If device does not shut off automatically when medication is depleted and gives off a
high frequency sound, press the “START/STOP” button to turn the power off
immediately to avoid the mesh breaking. Please go to page 18 for troubleshooting.
◆ Please clean the nebulizer parts carefully after each use. Otherwise it may not
function.
◆ Water is not applicable for use. If you fill water in the medication chamber, the
nebulizer cannot be turned on. The distilled water can be used for cleaning the
medication chamber under “clean mode”.
◆ Please do not allow q-tips or any foreign objects to come in contact with the mesh of
the medication chamber. Otherwise the unit may not function.
◆ Do not drop the nebulizer. Avoid severely impacting the nebulizer. Otherwise it may
not function.
◆ Do not use the AC adapter other than the one specifically designed for this product
◆ Do not mix different types of batteries.
◆ Do not store or carry a nebulizer with liquid medication or water remaining in it.
◆ Do not immerse the nebulizer main unit and AC adapter in water.
◆ Keep the device out of the reach of infants and children. Children should use only
under adult’s supervision.
Nebulisers.net.au

4
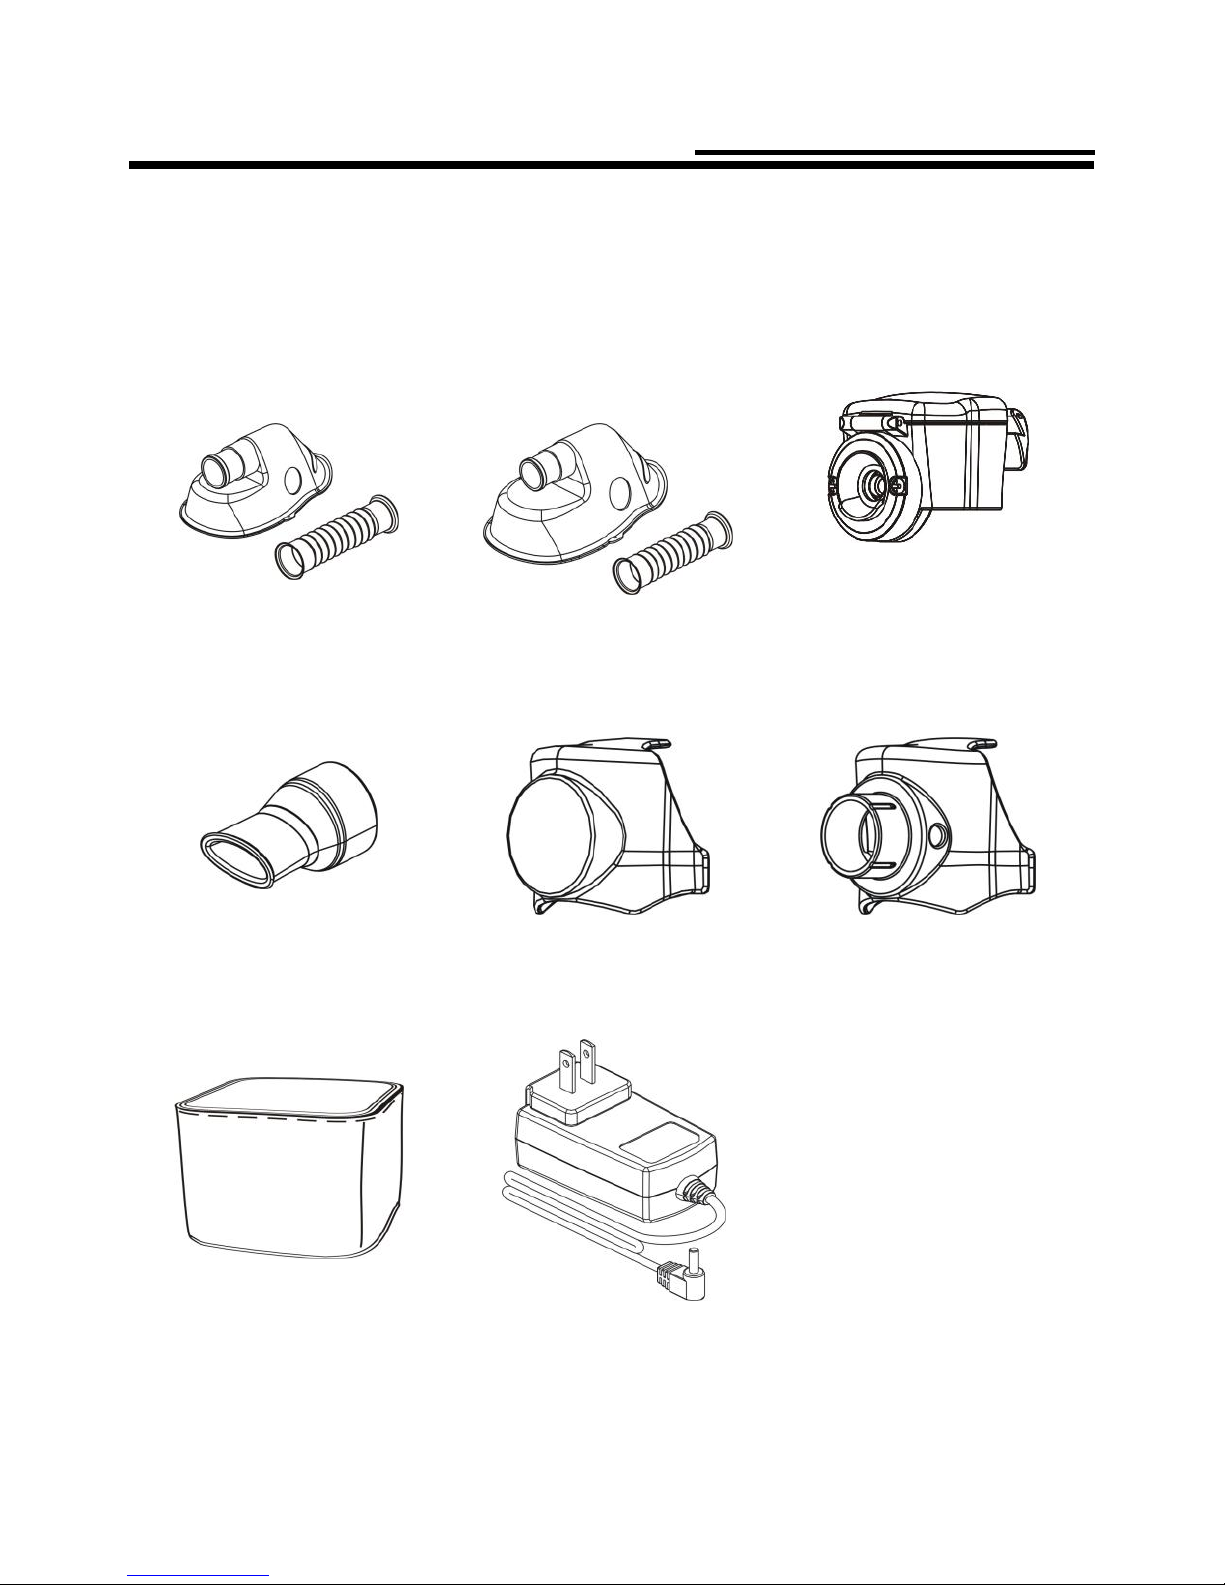
Components
Product Features
1. Pocket-sized and easy to carry.
2. Low power consumption and low residual medication volume.
3. The nebulizer can function properly for a short time after being rotated to any
angle. When the nebulizer is rotated such that the medication does not contact
the mesh, it can nebulize properly for about 10 seconds. (Time varies
depending on specific medication types.)
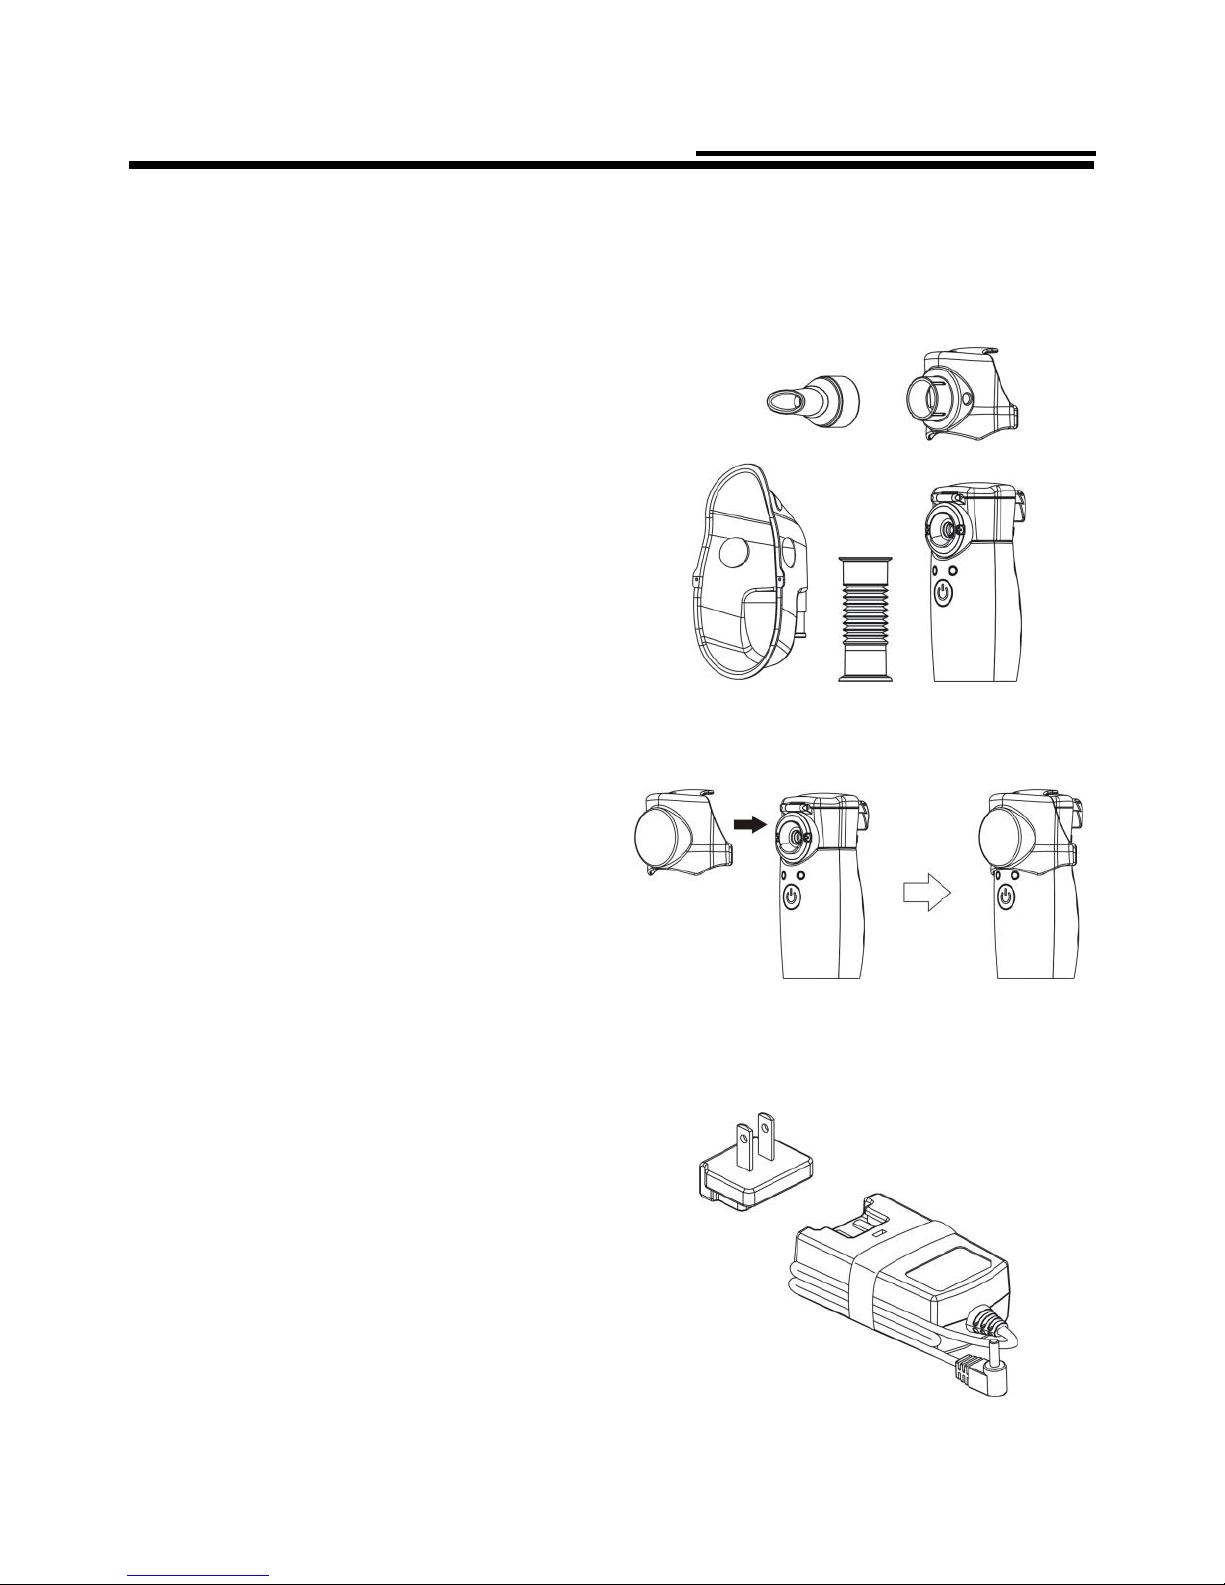
The package contains the following components. If you find any components
missing, please immediately contact the retailer from which you purchased the
product.
1. Main unit
2. Main unit cover
3. Mask adapter
4. Medication
chamber
5. Alkaline
batteries
AA 1.5Vx2(Optional)
6. Mouthpiece
7. Carrying pouch
8. AC adapter
(Optional)
9. Inhalation mask (S) with
connecting tube
(Optional – For Single Use)
10. Inhalation mask (L)
with connecting tube
(Optional – For Single Use)
Nebulisers.net.au

5
Component Names and Functions

6
Attention
How to assemble the nebulizer
Please clean and dry the nebulizer’s parts before using. (See pages 13-14)
1. Attach the medication chamber
to the main unit:
Attach the medication chamber while
it gives off a sound “Click”.
• Please ensure that the
medication chamber is attached
correctly; otherwise, it may result
in a bad connection and the
nebulizer may not function
properly.
• Please keep the electrodes of
main unit and medication
chamber clean; otherwise, the
nebulizer may not function
properly.
2. Attach the mask adapter:
Please securely attach the mask adapter to the main unit.
3. Attach the inhalation
mask or mouthpiece:
• Attach the connecting
tube to the inhalation mask.
• Inhalation mask for children
is S size.
• Inhalation mask for adults is L size.
• Attach the mouthpiece.
Nebulisers.net.au

7
How to connect to the power supply
This product can use either batteries or an AC adapter (optional) as its power
supply.
■ How to install batteries
Please open the battery cover and insert 2 “AA” alkaline batteries.
1. Open the battery
cover.
2. Insert the batteries
so that the polarities
are oriented
correctly, as
indicated.
3. Close the battery
cover.
Battery life and replacement
.Brand-new alkaline batteries can last about 4 days.
(if used daily for 20 minutes)
.When the low-power indicator starts blinking (orange
color), it means the batteries need to be replaced.
Please immediately replace with new alkaline batteries.
(Under normal circumstances, the nebulizer can be
used for roughly another 10 minutes with alkaline
batteries.)
.If the low-power indicator lights on constantly (orange color), it means that
extremely low power caused the nebulizer not to work. Please immediately

8
Attention
replace with new alkaline batteries.
• Do not mix different types of batteries.
• Battery life may be different depending on type of the batteries used.
■ How to use the AC adapter
1. Plug the AC adapter’s DC
connector into the main unit’s
power supply inlet.
2. Plug the AC adapter into an
electric outlet.
• Please purchase the AC adapter specifically designed for this product. Do
not purchase and use AC adapters of other brands.
• Please unplug the AC adapter after using. Do not leave it connected to the
power supply for a long time.
General Recommendations
Nebulisers.net.au
9
How to fill the medication
Please remove the main unit cover, mask adapter, and mouthpiece or connecting
tube and inhalation mask first.
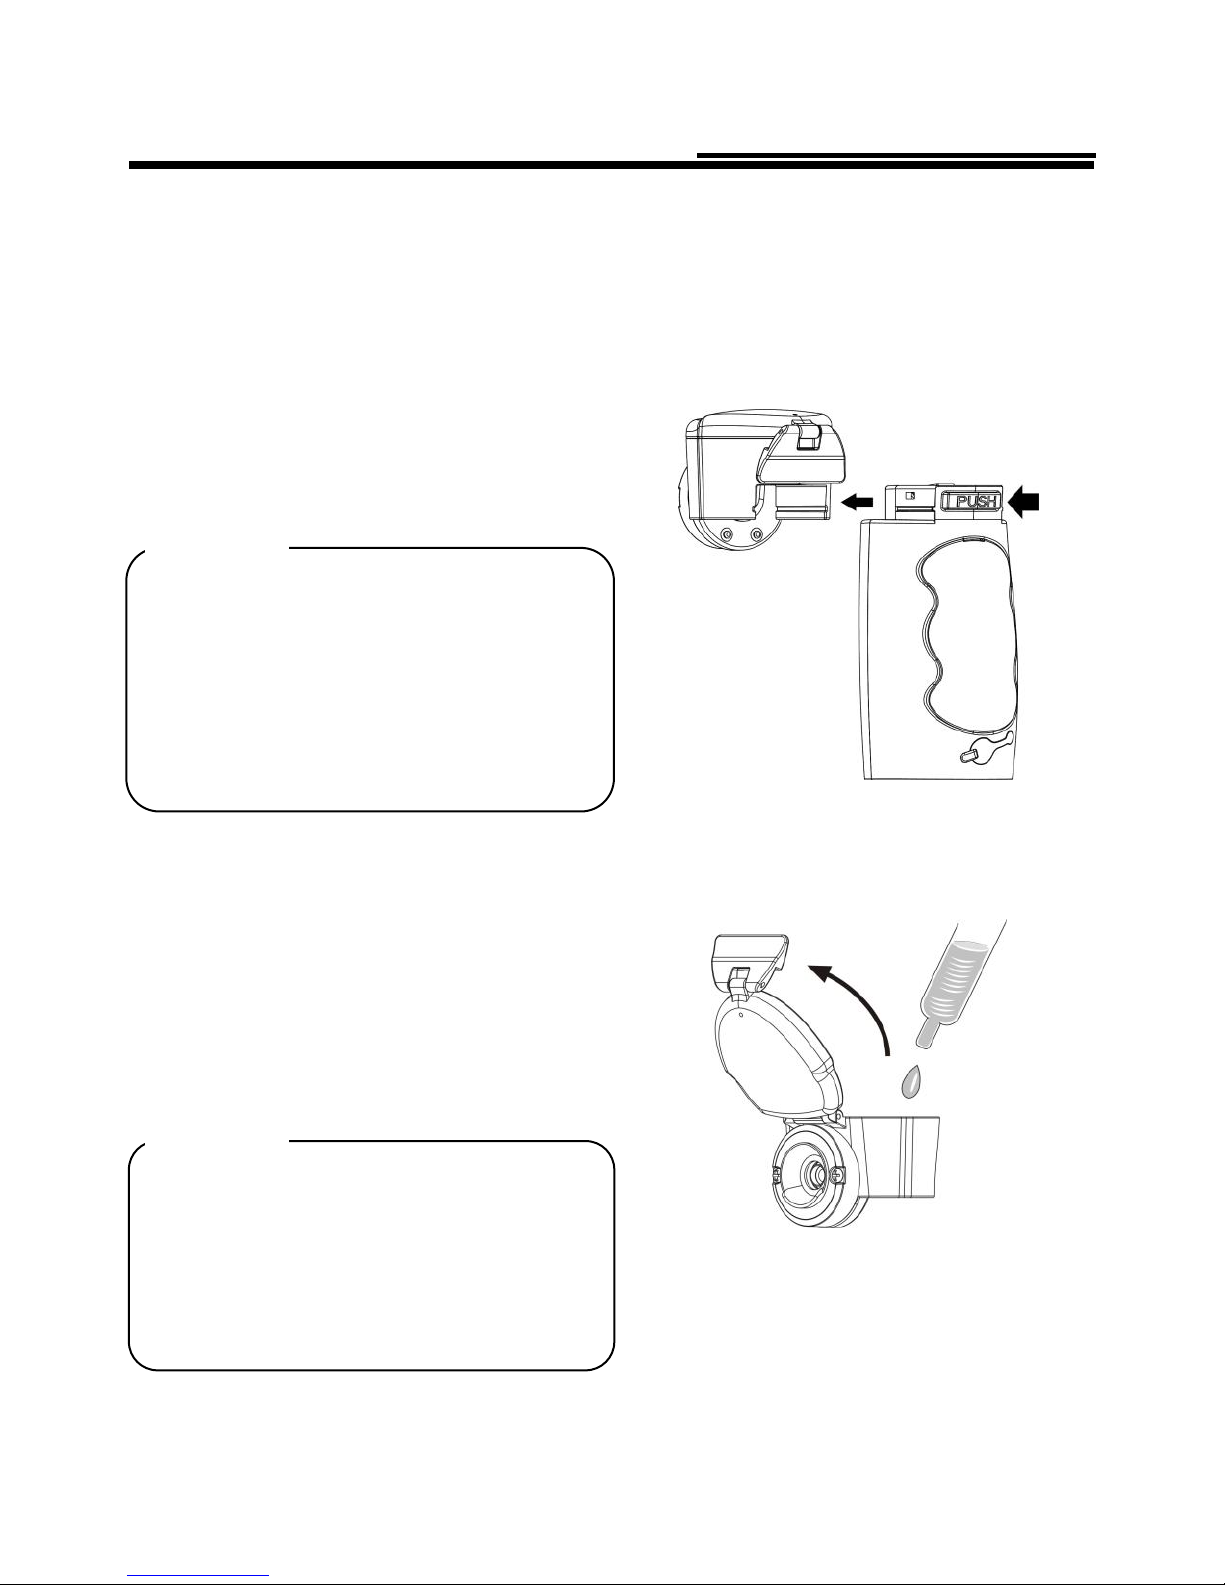
1. Remove the medication
chamber from the main unit:
Press the PUSH button on the rear
side of the main unit and push the
medication chamber toward the
front side of the main unit.
• To avoid damaging the nebulizer,
please ensure the PUSH button is
pressed down before pushing the
medication chamber forward.
• To avoid rupturing the mesh,
please do not poke it with your
finger or other objects.
2. Fill the medication:
• Fill the medication as shown in
the figure. (Recommended fill
volume: Approx. 8 ml maximum /
0.5 ml minimum)
• Please close the cover of the
medication chamber.
• To prevent the medication leaking
from the chamber, ensure the
cover is closed securely.
• The filling process should be done
while the chamber is detached
from the main unit.
Attention
Press
Push forward
Attention
Nebulisers.net.au

10
3. Re-attach the medication
chamber to the main unit:
Attach the medication chamber
while it gives off a sound “Click”.
4. Attach the mask adapter:
Please securely attach the mask adapter to the main unit.
5. Attach the inhalation
mask or mouthpiece:
• Attach the connecting
tube to the inhalation mask.
• Inhalation mask for children
is S size.
• Inhalation mask for adults is L size.
• Attach the mouthpiece.
• Make sure the medication
chamber is attached correctly or
the bad connection may result in
malfunction.
• To ensure the nebulizer will
function properly, keep the
electrodes of the main unit and the
medication chamber clean.
Attention
Nebulisers.net.au

11
How to operate the nebulizer
You can also fill a 0.9 % Sodium Chloride (Table salt) solution in the medication
chamber and then press “START/STOP” button for a function test after
reassembly and before use. If the nebulizer can not spay out, please go to page 18
for troubleshooting.
1. Turn on the power:
Press the “START/STOP” button, and
the power indicator (green) will light
constantly.
• If there is no medication inside the
medication chamber and the power is
turned on, the nebulizer’s power
indicator (green) will blink for 1 second
and shut off automatically.
• Water is not applicable for use. If you fill
the water in the medication chamber,
the nebulizer’s can be not turned on.
• It is normal for the nebulizer spraying 1
second then having 0.5 second pause
after turning power on. However, it will
spray continuously after that 0.5
second pause.
• Press and hold on the “START/STOP”
button to change into the “cleaning
mode”, and the device manually
nebulizes. Do not use the “cleaning
mode” for the medication inhalation.
2. Inhalation:
Hold the nebulizer in your hand stably
and start inhalation.
Attention
Press
Nebulisers.net.au

12
• If the device detects no medication in medication chamber, it will shut off
automatically.
• If the device does not shut off automatically when medication depleted and
give off a high frequency sound, press the “START/STOP” button to turn
the power off immediately to avoid the mesh breaking. Please go to page
18 for troubleshooting.
• During the treatment, you may adjust the nebulizer to any angle. However,
make sure the medication stays in contact with the mesh; otherwise, the
nebulizer will shut off automatically after approximately 10 seconds.
• When the medication is about to be depleted, it is recommended that you tilt
the nebulizer (the buttons side) slightly toward you. This allows the
remaining medication to contact the mesh to nebulization.
• Do not shake the nebulizer strongly in the usage. Otherwise, the nebulizer
may shut off automatically.
• Provide close supervision when the nebulizer is used by children.
Attention
Attention!
Do not cover the vent when
you inhale. Otherwise, that will
decrease the nebulization rate.
Nebulisers.net.au

13
3. Turn off the power:
• The nebulizer shuts off automatically
after the medication is depleted.
• If you wish to halt the treatment, press
the “START/STOP” button to turn the
power off. The power indicator light will
go out.
• If the AC adapter is being used, please
unplug from the wall outlet after
turning off the power.
• The unit will give off a high frequency
sound and turn off the power
automatically when the medication is
depleted.
Press
Nebulisers.net.au

14
Attention
How to clean after using
Attention
After each use, make sure to clean the nebulizer instantly with the distilled water
before storing or carrying.
1. Clean the remaining medication:
• Open the cover of the medication
chamber and discard the remaining
medication.
• Pour a small amount of distilled water
into the medication chamber and
close the cover.
• Press and hold on the
“START/STOP” button of the device
(the power indicator (blue) lighted up)
to change into “cleaning mode” to
manually nebulize the distilled water
for 1 to 2 minutes to remove the
residual medication in the medication
chamber until the distilled water
depleted.
• If the device give off the high
frequency sound and the
distilled water is depleted,
please release the
“START/STOP” button to
turn the power off.
Otherwise, the mesh of the
medication chamber may be
broken.
• Please clean the remaining
medication after each use.
Otherwise, the mesh of the
medication chamber may
become blocked.
2. Dismantle the nebulizer:
Remove the medication chamber, mask
adapter, connecting tube, and
inhalation mask or mouthpiece from the
nebulizer.
• The inhalation mask and connecting
tube in first use must be cleaned with
distilled water and dried. These parts
are only for single use. Please do not
reuse them.
3. Clean the parts with sufficient
amounts of distilled water:
Clean the medication chamber, mask
adapter, mouthpiece, inhalation mask
and connecting tube with distilled water.
Nebulisers.net.au
Nebulisers.net.au

15
4. Dry the cleaned parts
thoroughly:
After the parts are cleaned, dry with
new gauze and air dry thoroughly.
• Please do not dry with cotton or
cloths of other materials; otherwise,
dust or cloth fiber may be left on the
mesh, causing the nebulizer to
malfunction.
• Please do not allow q-tips or foreign
objects in contact with the mesh of
the medication chamber.
5. Wipe off the main unit with new
gauze:
• Dab a piece of gauze with water and
lightly wipe off the stains from the
main unit. Then, use new gauze to
dry.
• Please clean the electrodes on the
main unit and medication chamber.
This ensures a normal electrical
conduction and hence a normal
nebulization.
• Please do not clean the nebulizer
with a volatile liquid such as benzene
or thinner.
6. Attach the medication chamber
and put on the main unit cover.
Store all parts in a clean place.
Attention
Attention
Nebulisers.net.au

16
How to replace the medication chamber
Attention
Attention
The medication chamber is a maintenance part and does not carry any warranty.
Under normal conditions, the lifetime of the medication chamber is approximately
6 months (three times usage per day or 30 minutes per day). However, the
nebulization performance may start deteriorating in less than 6 months depending
on the way you use it or the use of certain types of medication. If the nebulizer can
not nebulize or the nebulization rate decreases significantly after clean, you must
replace the medication chamber with a new one. (If you want to purchase a
medication chamber, please contact the retailer from which you purchased the
product or any nearby retailers.)
1. Remove the medication
chamber from the nebulizer:
Press the PUSH button on the rear
side of the main unit, and push the
medication chamber toward the
front side of the main unit.
2. Re-attach the medication
chamber to the nebulizer
Attach the medication chamber
correctly as shown in the figure.
• To avoid damaging the nebulizer,
please ensure the PUSH button is
pressed down before pushing the
medication chamber forward.
• To avoid rupturing the mesh,
please do not poke it with your
finger or other foreign object.
• Please ensure that the medication
chamber is attached correctly;
otherwise, it may result in a bad
connection and cause the
nebulizer to not function properly.
• Please keep the electrodes of the
main unit and medication chamber
clean; otherwise, the nebulizer
may not function properly.
• Please clean the medication
chamber before using.
Press
Push forward
17
How to carry the nebulizer
Please follow the steps below to dismantle the components first. Then, store them
in the carrying pouch for carrying.
1. Dismantle the nebulizer:
Please remove the mask adapter,
mouthpiece or connecting tube and
inhalation mask as shown in the
figure.
2. Put on the main unit cover:
Please put on the main unit cover as
shown in the figure. This will protect
the nebulizer from possible damage
during carrying.
3. AC adapter:
For easy carrying, please bind the
AC adapter and its electric wire
together with a ribbon band as
shown in the figure.
Nebulisers.net.au

18
Attention
4. Place the main unit and
associated parts into the
carrying pouch for carrying.
• Please do not carry a nebulizer
that still contains medication or
water. The medication may leak
out and damage or stain the
nebulizer.
• Do not store the nebulizer in an
area with high temperature or
humidity, or in direct sunlight.
Nebulisers.net.au
19
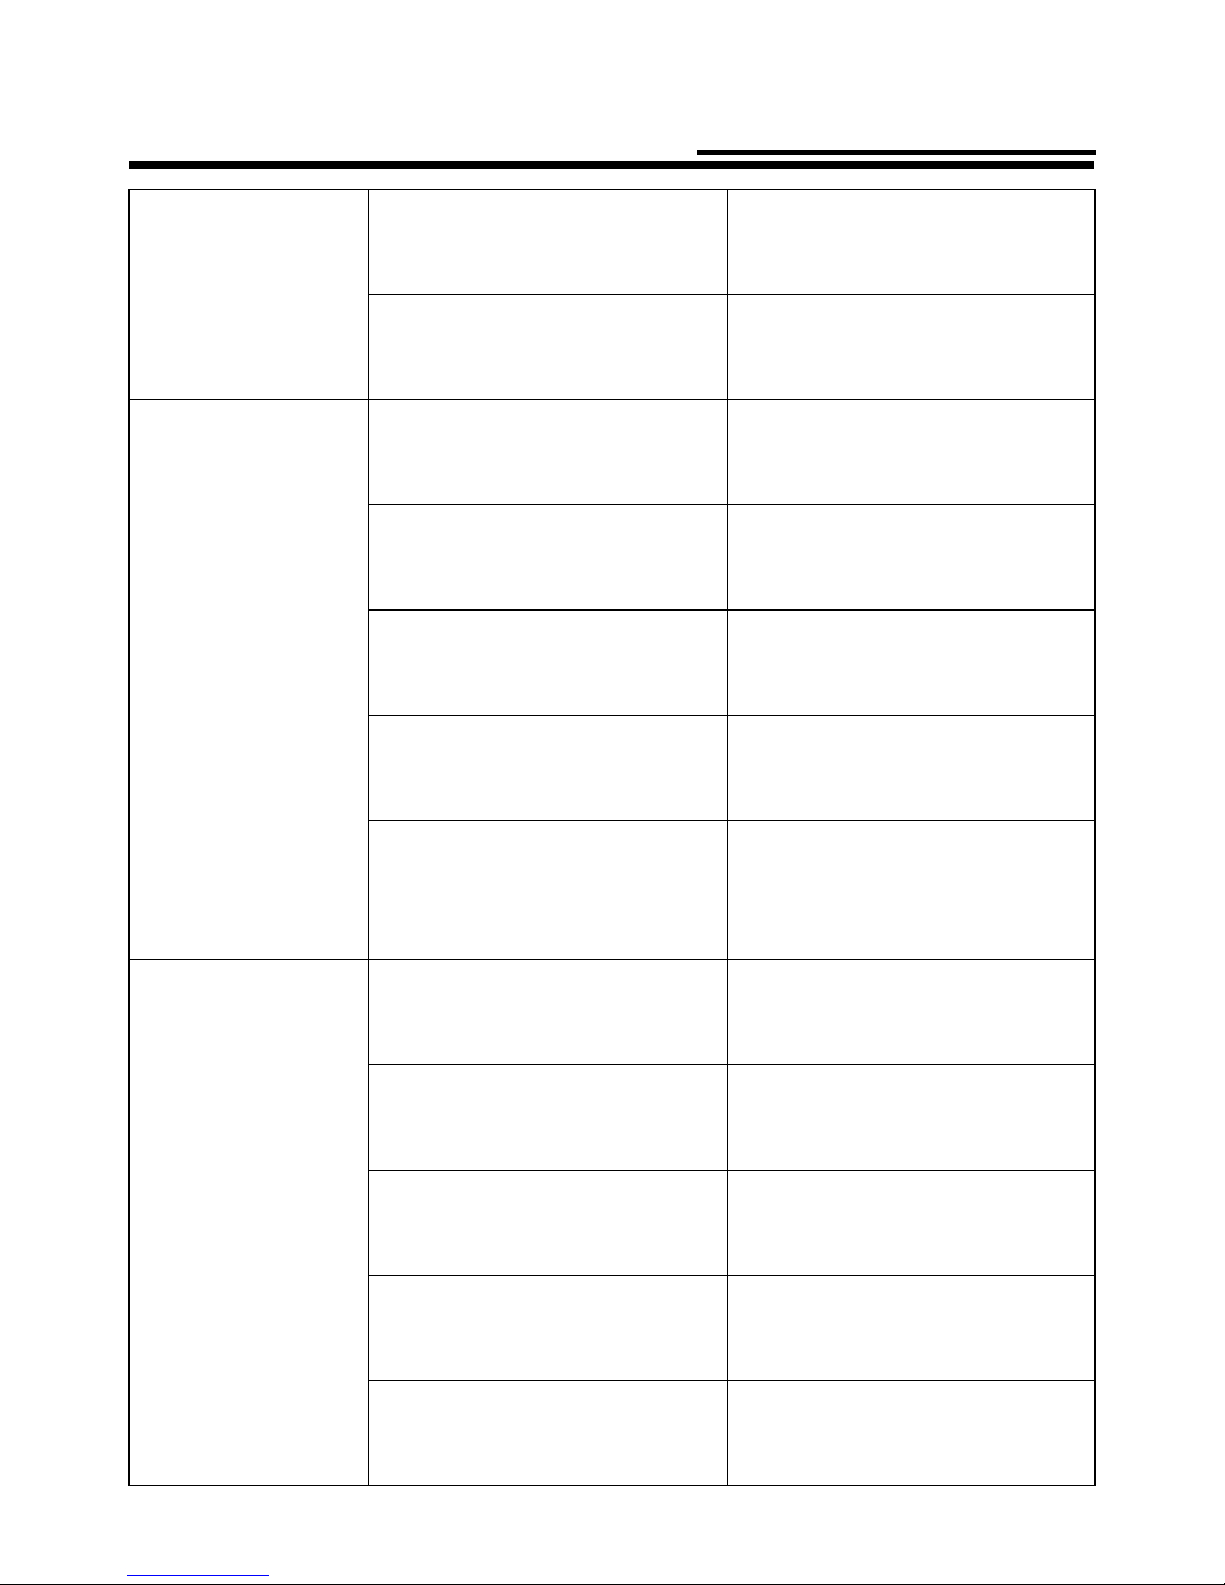
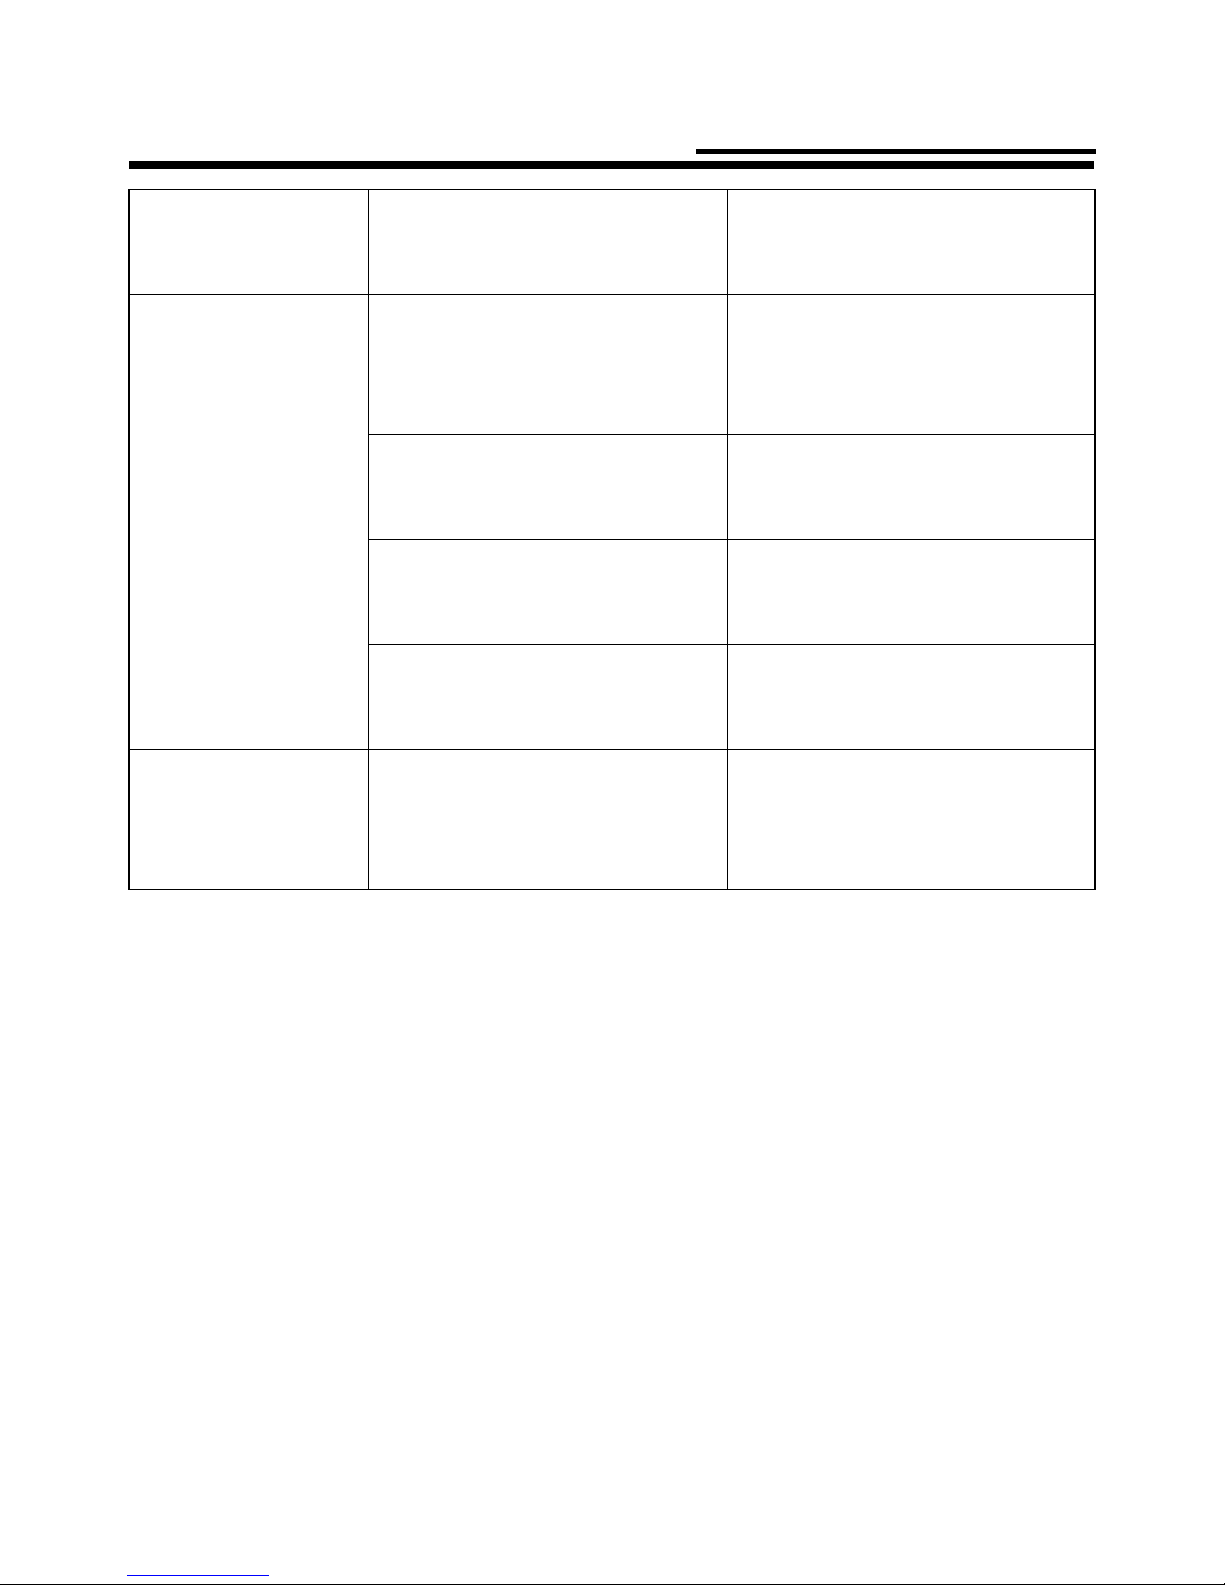
Troubleshooting
Please refer to the table below to troubleshoot any problems you may encounter
when using the nebulizer.
Problems
Possible Causes
Solutions
Extremely low
nebulization.
Medication chamber is not
completely attached.
Re-attach the medication
chamber correctly and restart
the power. (See page 6)
No contact between
medication and mesh for more
than 10 seconds.
Adjust the nebulizer’s angle so
the medication can come in
contact. (See page 11)
Mesh of medication chamber is
clogged.
Clean the medication chamber.
If it still cannot be used after
cleaning, please replace with a
new medication chamber.
(See page 13~15)
Electrodes on medication
chamber are clogged with
medication or water.
Clear the electrodes of clogged
medication or water and restart
the power. (See page 14)
Electrodes on nebulizer and
medication chamber are
stained.
Remove the stains and restart
the power. (See page 14)
After turning power
on, power indicator
lights for one
second and then
immediately goes
out.
Medication chamber is not
completely attached.
Re-attach the medication
chamber correctly and restart
the power. (See page 6)
No medication in medication
chamber.
Put in the medication in the
medication chamber.
(See page 9~10)
No contact between
medication and mesh.
Adjust the nebulizer’s angle so
the medication can come in
contact. (See page 11)
Electrodes on nebulizer and
medication chamber are
stained.
Remove the stains and restart
the power. (See page 14)
Power indicator is
not lit and nebulizer
is not nebulizing.
Batteries installed backwards.
Re-install the batteries in the
correct orientation and restart
the power. (See page 7~8)
Nebulisers.net.au
20
Low battery power.
Replace with new batteries and
restart the power.
(See page 7~8)
Incorrect connection of AC
adapter to nebulizer.
Re-connect in the correct
manner and restart the power.
(See page 8)
Power indicator is
lit and nebulizer is
not nebulizing.
Low-power indicator is lit
constantly, insufficient battery
power, or battery has run out.
Replace with new batteries and
restart the power.
(See page 7~8)
Rupture of mesh of medication
chamber.
Replace with a new medication
chamber and then put in the
medication. (See page 15)
Electrodes on medication
chamber are clogged with
medication or water.
Clear the electrodes of clogged
medication or water and restart
the power. (See page 14)
Electrodes on nebulizer and
medication chamber are
stained.
Remove the stains and restart
the power. (See page 14)
Mesh of medication chamber is
severely clogged.
If it still cannot be used after
cleaning, please replace with a
new medication chamber.
(See page 13~15)
Nebulizer shuts off
in usage.
Medication chamber is
loosened and not completely
attached.
Re-attach the medication
chamber correctly and restart
the power. (See page 6)
Connection of AC adapter to
nebulizer is loosened.
Re-connect in the correct
manner and restart the power.
(See page 8)
Medication has run out.
Put in the medication in the
medication chamber.
(See page 9~10)
No contact between
medication and mesh for more
than 10 seconds.
Adjust the nebulizer’s angle so
the medication can come in
contact. (See page 11)
Nebulizer is being shaken in
the use.
Hold the nebulizer in the hand
stably. (See page 11)
Nebulisers.net.au
21
Medication chamber is broken.
Replace with a new medication
chamber and then put in the
medication. (See page 15)
Nebulizer does not
shut off
automatically while
medication
depleted.
Some type of medications for
nebulization maybe cause to
produce a lot of foam in the
medication chamber.
Clean the foam and restart the
power. (See page 12)
Electrodes on medication
chamber are clogged with
medication or water.
Clear the electrodes of clogged
medication or water and restart
the power. (See page 14)
Electrodes on nebulizer and
medication chamber are
stained.
Remove the stains and restart
the power. (See page 14)
Medication chamber is broken.
Purchase and replace with a
new medication chamber.
(See page 15)
Overflow of
medication from
medication
chamber.
Rupture of medication
chamber or ageing of silicone
ring.
Replace with a new medication
chamber and then put in the
medication. (See page 15)
If your nebulizer still does not function properly after taking the solution mentioned
above, please contact the retailer from which you purchased the product.
Nebulisers.net.au
22
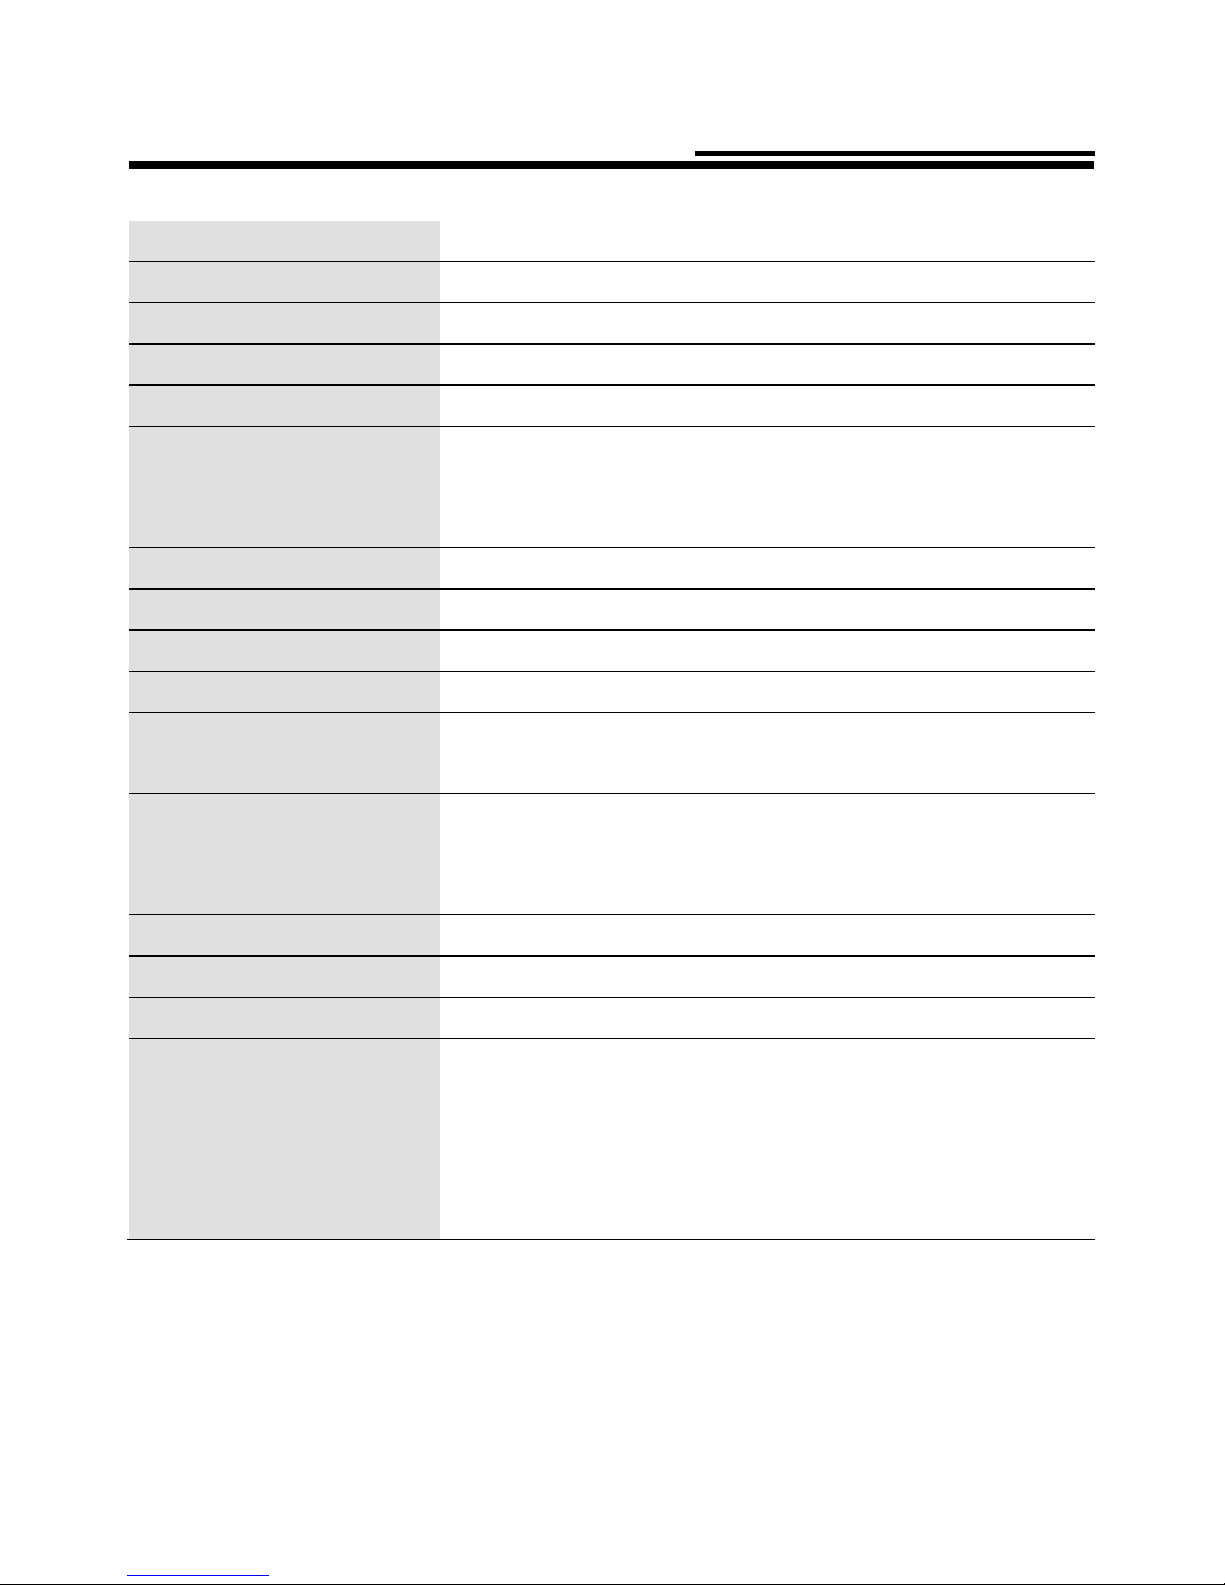
Specifications
Product Name
Ultrasonic Nebulizer
Model
HL100
Method of Operation
Ultrasonic
Dimensions
Approx. 55.6 mm(L) × 42 mm(W) × 109.2 mm(H)
Weight
Approx. 98 g (Exclude batteries)
Power Supply
3V DC (“AA” 1.5V alkaline battery x 2)
AC adapter (Input: 100-240VAC, 50/60Hz, 0.4A
Output: 3V DC, 1A)
Power Consumption
Approx. 2.0 W
Vibrating Frequency
Approx. 120kHz
Nebulization Rate
0.2 ml/min minimum
Particle Size
MMAD approx. 5 microns
Recommended fill
volume
Approx. 8 ml maximum
Approx. 0.5 ml minimum
Battery Life
Up to 1.5 hour if used continuously.
4 days if used daily for 20 minutes.
(Use 2 “AA” alkaline batteries)
Warranty
2 years. (Excluded medication chamber and tubes)
Operating Conditions
10~40 °C (50~104 °F),30~85%R.H.
Storage Conditions
-20~70 °C (-4~158 °F),≦85%R.H.
Accessories
Main unit cover, mouthpiece, mask adapter, alkaline
batteries, carrying pouch, instruction manual.
inhalation mask(S) with connecting tube (optional),
inhalation mask(L) with connecting tube (optional),
AC adapter (optional)
The nebulizer gives off the high frequency sound and shuts off automatically if the
medication is not in contact with the mesh of the medication chamber for more
than 10 seconds (time varies for different types of medication) or the medication is
depleted. This is to help prevent damage to the Mesh
Nebulisers.net.au
23
Technical data:
Particle Size:
MMAD 2.1 microns (2ml, 2.5% NaF)
Nebulization Rate:
0.32 ml/min (by weight loss)
Aerosol Output:
0.88 ml (2ml,1% NaF)
Aerosol Output Rate:
0.076 ml/min (2ml,1% NaF)
Sound
Noise level (at 1 m distance) 50 dB
Note:
.Performance may vary with different drugs such as suspensions or high viscosity.
See drugs supplier’s data sheet for further details.
.MMAD = Mass Median Aerodynamic Diameter.
Particle size distribution compliant with EN 13544-1
Test result of cascade impactor measurements for particle size.
Nebulisers.net.au
24
Accessories / Optional parts
Accessories / Optional parts are shown below. If you wish to purchase any of them,
please contact the retailer from which you purchased the nebulizer.
HL100-MS:
Inhalation mask (S) with
connecting tube
(For single use)
(For Children)
HL100-ML:
Inhalation mask (L) with
connecting tube
(For single use)
(For Adult)
HL100-MB:
Medication chamber
HL100-MP:
Mouthpiece
HL100-MC:
Main unit cover
HL100-MA:
Mask adapter
HL100-CP:
Carrying pouch
HL100-AC:
AC adapter
Nebulisers.net.au
25
Note:
The device complies with the FDA, CE, and TGA Reviewer Guidance for Nebulizers,
Metered Dose Inhalers, Spacers and Actuators.
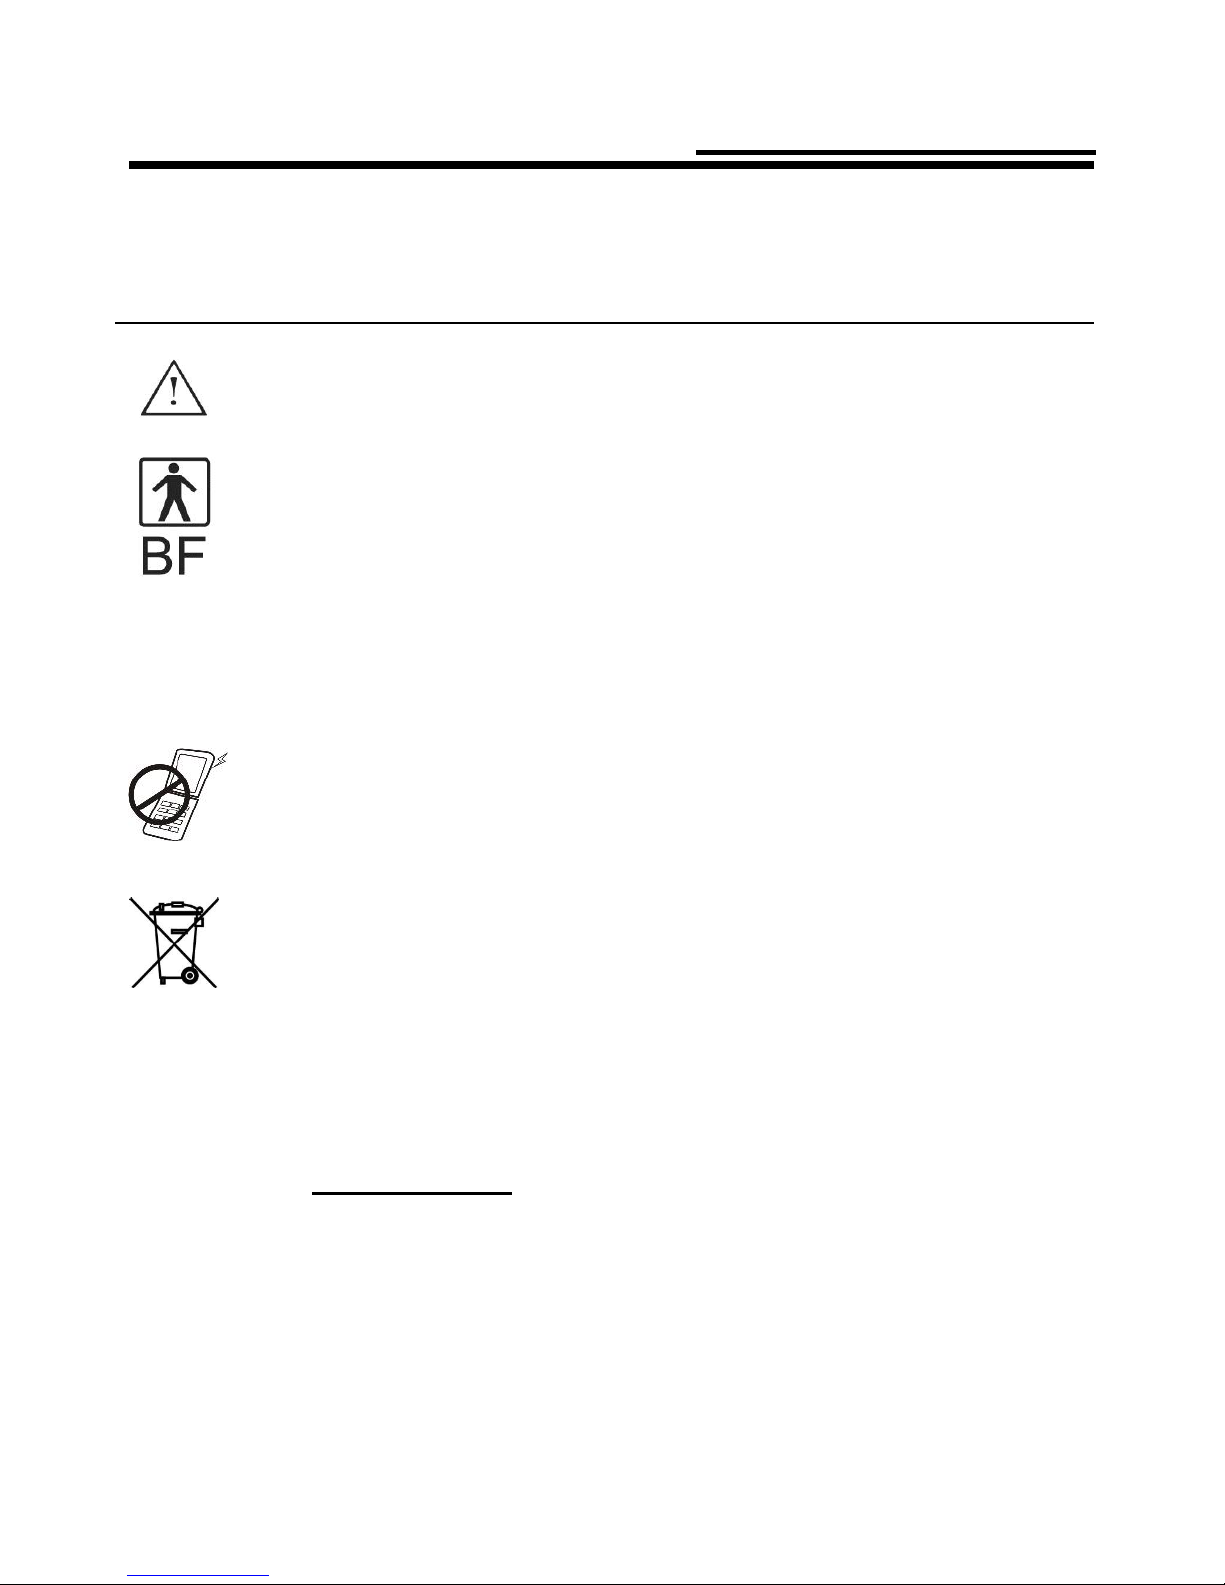
Important / Caution / Note!
Read the instruction manuals.
Classification:
- Internally powered equipment
- BF type applied part
- IPX1
- Not suitable for use in presence of flammable anesthetic mixture with oxygen
or nitrous oxide.
- Continuous operation.
To avoid nebulizer’s abnormal operation caused by electromagnetic
interference between electrical and electronic equipments, do not use the
device near a cell phone or microwave oven.
Discard the used product to the recycling collection point according to local
regulations.
Distributor: Chipsharbour Electronics Pty. Ltd.,
4/17 Evans Avenue, Eastlakes, NSW 2018, Australia
Web: Nebulisers.net.au
Phone: (02) 8011 4618
IMPORTANT NOTE
This equipment has been tested and found to comply with the limits for a Class B digital
device, pursuant to Part 15 of the FCC Rules. These limits are designed to provide
Nebulisers.net.au

26
Appendix: EMC information
reasonable protection against harmful interference in a residential installation. This
equipment can generate, use and radiate radio frequency energy and, if not installed and
used in accordance with the instructions, may cause harmful interference to radio
communications. However, there is no guarantee that inference will not occur in a particular
installation. If this equipment does cause harmful inference to radio or television reception,
which can be determined by turning the equipment off and on, the user is encouraged to try
to correct the inference by one or more of the following measures:
- Reorient or relocate the receiving antenna.
- Increase the separation between the equipment and receiver.
- Connect the equipment into an outlet on a circuit different from that to which the receiver is
connected.
- Consult the dealer or an experienced radio/TV technician for help.
Changes or modifications not expressly approved by the party responsible for compliance
could void the user’s authority to operate the equipment.
Guidance and Manufacturer’s declaration – electromagnetic emissions
The device is intended for use in the electromagnetic environment specified below. The
customer or the user of the device should assure that it is used in such an environment.
Emissions test
Compliance
Electromagnetic environment – guidance
RF emissions
CISPR 11
Group 1
The device uses RF energy only for its internal
function. Therefore, its RF emissions are very
low and are not likely to cause any interference
in nearby electronic equipment.
RF emissions
CISPR 11
Class B
The device is suitable for use in all
establishments, including domestic
establishments and those directly connected to
the public low-voltage power supply network
that supplies buildings used for domestic
purposes.
Harmonic emissions
IEC 61000-3-2
Class A
Voltage fluctuations/
flicker emissions
IEC 61000-3-3
Complies
Nebulisers.net.au

27
Guidance and Manufacturer’s declaration – electromagnetic immunity
The device is intended for use in the electromagnetic environment specified below. The
customer or the user of the device should assure that it is used in such an environment.
Immunity test
IEC 60601
test level
Compliance
level
Electromagnetic
environment – guidance
Electrostatic
discharge (ESD)
IEC 61000-4-2
Floors should be wood,
concrete or ceramic tile. If
floors are covered with
synthetic material, the relative
humidity should be at least 30
%.
Electrical fast
transient/burst
IEC 61000-4-4
supply lines
input/output
lines
supply lines
input/output
lines
Mains power quality should be
that of a typical commercial or
hospital environment.
Surge
IEC 61000-4-5
line(s)
kV line(s) to
earth
line(s)
earth
Mains power quality should be
that of a typical commercial or
hospital environment.
interruptions and
voltage
variations on
power supply
input lines
IEC 61000-4-11
<5 % UT
(>95 % dip in
UT)
for 0,5 cycle
40 % UT
(60 % dip in UT)
for 5 cycles
70 % UT
(30 % dip in UT)
for 25 cycles
<5 % UT
(>95 % dip in
UT)
for 5 sec
<5 % UT
(>95 % dip in
UT)
for 0,5 cycle
40 % UT
(60 % dip in UT)
for 5 cycles
70 % UT
(30 % dip in UT)
for 25 cycles
<5 % UT
(>95 % dip in
UT)
for 5 sec
Mains power quality should be
that of a typical commercial or
hospital environment. If the
user of the device requires
continued operation during
power mains interruptions, it is
recommended that the device
be powered from an
uninterruptible power supply or
a battery.

28
Power
frequency
(50/60 Hz)
magnetic field
IEC 61000-4-8
3 A/m
3 A/m
Power frequency magnetic
fields should be at levels
characteristic of a typical
location in a typical commercial
or hospital environment.
NOTE UT is the AC mains voltage prior to application of the test level.

29
Guidance and manufacturer’s declaration – electromagnetic immunity – for device
that is not LIFE-SUPPORTING.
Guidance and manufacturer’s declaration – electromagnetic immunity
The device is intended for use in the electromagnetic environment specified below. The
customer or the user of the device should assure that it is used in such an environment.
Immunity test
IEC 60601 test
level
Compliance
level
Electromagnetic environment –
guidance
Conducted RF
IEC 61000-4-6
Radiated RF
IEC 61000-4-3
3 Vrms
150 kHz to 80
MHz
3 V/m
80 MHz to 2,5
GHz
3 Vrms
3 V/m
Portable and mobile RF
communications equipment should
be used no closer to any part of the
device, including cables, than the
recommended separation distance
calculated from the equation
applicable to the frequency of the
transmitter.
Recommended separation
distance
d = 1,2
d = 1,2 80 MHz to 800 MHz
d = 2,3 800 MHz to 2,5 GHz
where P is the maximum output
power rating of the transmitter in
watts (W) according to the
transmitter manufacturer and d is
the recommended separation
distance in meters (m).
Field strengths from fixed RF
transmitters, as determined by an
electromagnetic site survey, should
be less than the compliance level in
each frequency range.
Interference may occur in the vicinity
of equipment marked with the
Nebulisers.net.au

30
following symbol:
NOTE 1 At 80 MHz and 800 MHz, the higher frequency range applies.
NOTE 2 These guidelines may not apply in all situations. Electromagnetic propagation is
affected by absorption and reflection from structures, objects and people.
Field strengths from fixed transmitters, such as base stations for radio (cellular/cordless)
telephones and land mobile radios, amateur radio, AM and FM radio broadcast and TV
broadcast cannot be predicted theoretically with accuracy. To assess the electromagnetic
environment due to fixed RF transmitters, an electromagnetic site survey should be
considered. If the measured field strength in the location in which the device is used
exceeds the applicable RF compliance level above, the device should be observed to verify
normal operation. If abnormal performance is observed, additional measures may be
necessary, such as reorienting or relocating the device.
b Over the frequency range 150 kHz to 80 MHz, field strengths should be less than 3 V/m.
Nebulisers.net.au

31
Recommended separation distances between portable and mobile RF
communications equipment and the device – for device that is not
LIFE-SUPPORTING
Recommended separation distances between portable and mobile RF
communications equipment and the device
The device is intended for use in an electromagnetic environment in which radiated RF disturbances
are controlled. The customer or the user of the device can help prevent electromagnetic interference by
maintaining a minimum distance between portable and mobile RF communications equipment
(transmitters) and the device as recommended below, according to the maximum output power of the
communications equipment.
Rated maximum
output power of
transmitter
W
Separation distance according to frequency of transmitter
m
150 kHz to 80 MHz
d = 1,2
80 MHz to 800 MHz
d = 1,2
800 MHz to 2,5 GHz
d = 2,3
0,01
0,12
0,12
0,23
0,1
0,38
0,38
0,73
1
1,2
1,2
2,3
10
3,8
3,8
7,3
100
12
12
23
For transmitters rated at a maximum output power not listed above, the recommended separation
distance d in meters (m) can be estimated using the equation applicable to the frequency of the
transmitter, where P is the maximum output power rating of the transmitter in watts (W) according to the
transmitter manufacturer.
NOTE 1 At 80 MHz and 800 MHz, the separation distance for the higher frequency range applies.
NOTE 2 These guidelines may not apply in all situations. Electromagnetic propagation is affected by
absorption and reflection from structures, objects and people.
P/N: 323101752 VER: 001 20110830
Nebulisers.net.au
 Loading...