

Page 1
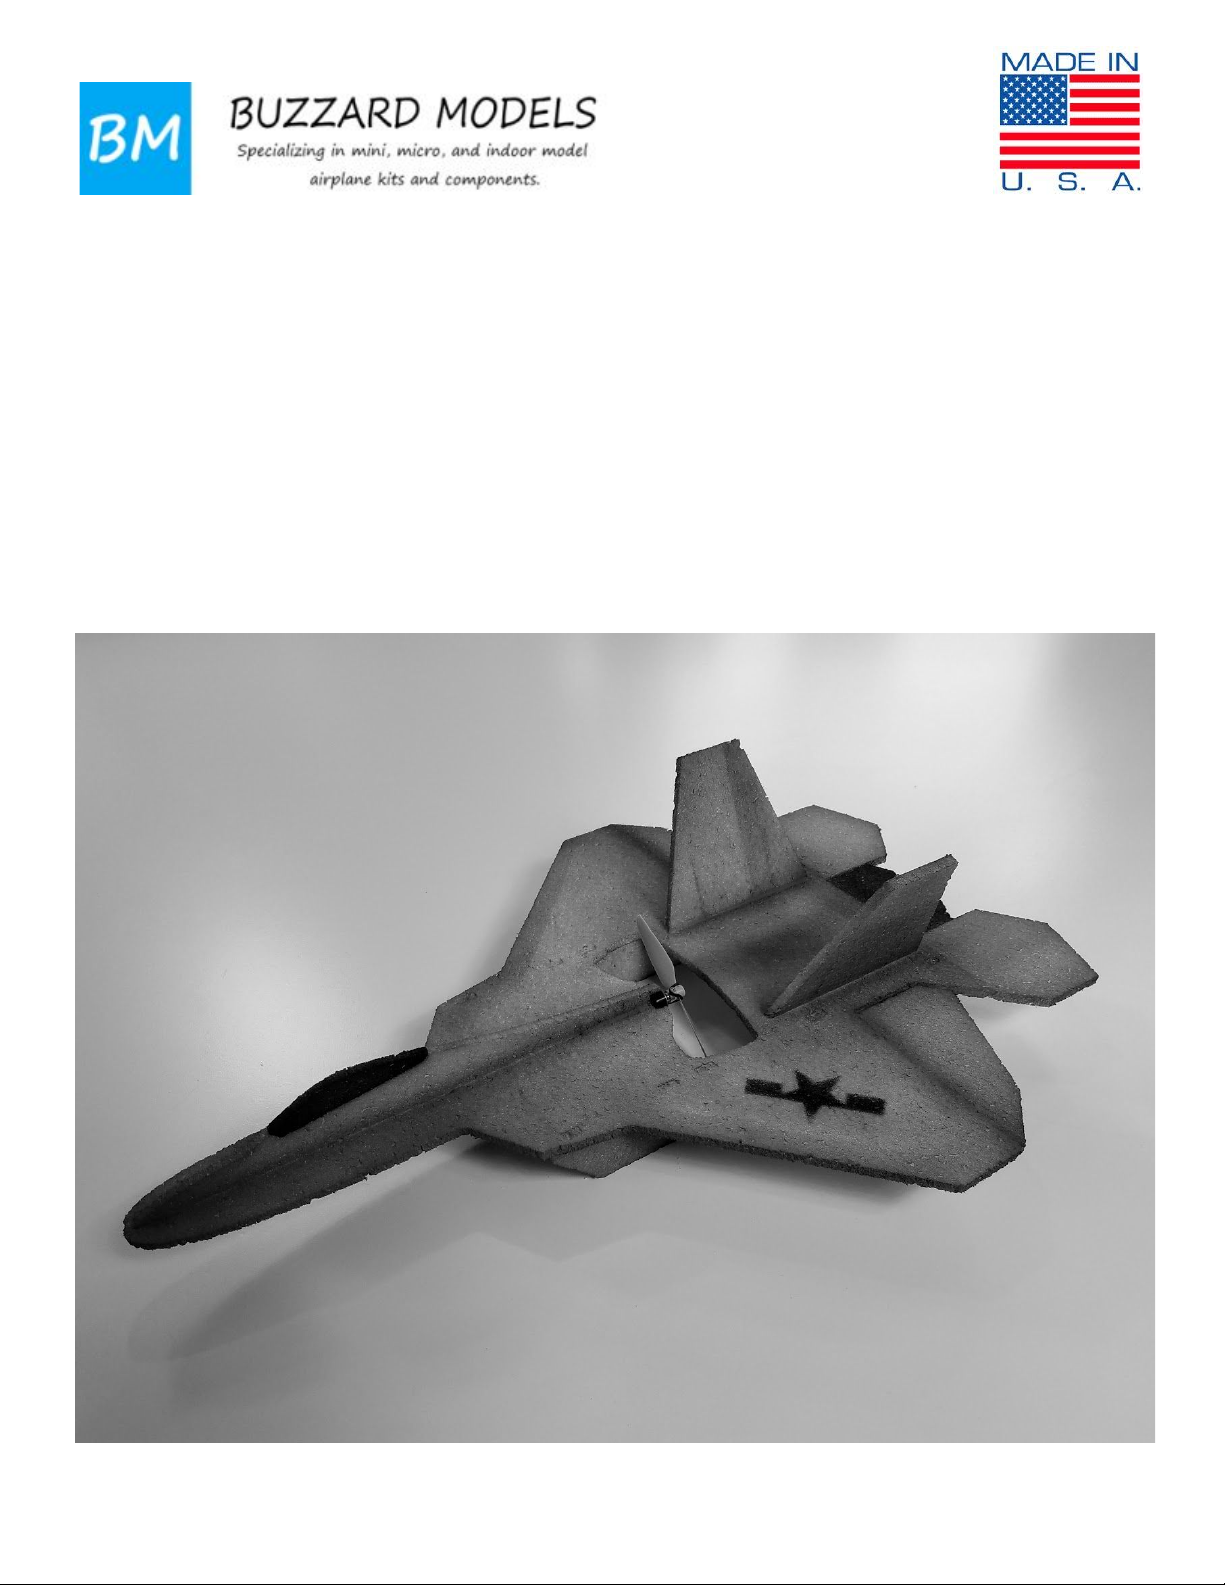
F-22 Gym Flyer
Available from buzzardmodels.com
A fun to fly jet, sized for indoor and backyard flying. Flies very smoothly and is also capable of extreme
aerobatics. Constructed of extremely durable 6mm EPP foam this airframe will last a long time. Assembly is
very easy, and can be completed in a few hours.
Specs-
● Wingspan: 16.25”
● Length: 23.5”
● Weight: approx. 55 grams without battery, 70 grams AUW with battery
● Battery: 2S 300mah
1
Page 2
Please read and understand all steps to these instructions before beginning assembly. This plane is not a toy
and is potentially dangerous to operate. Children should not operate this aircraft without adult supervision.
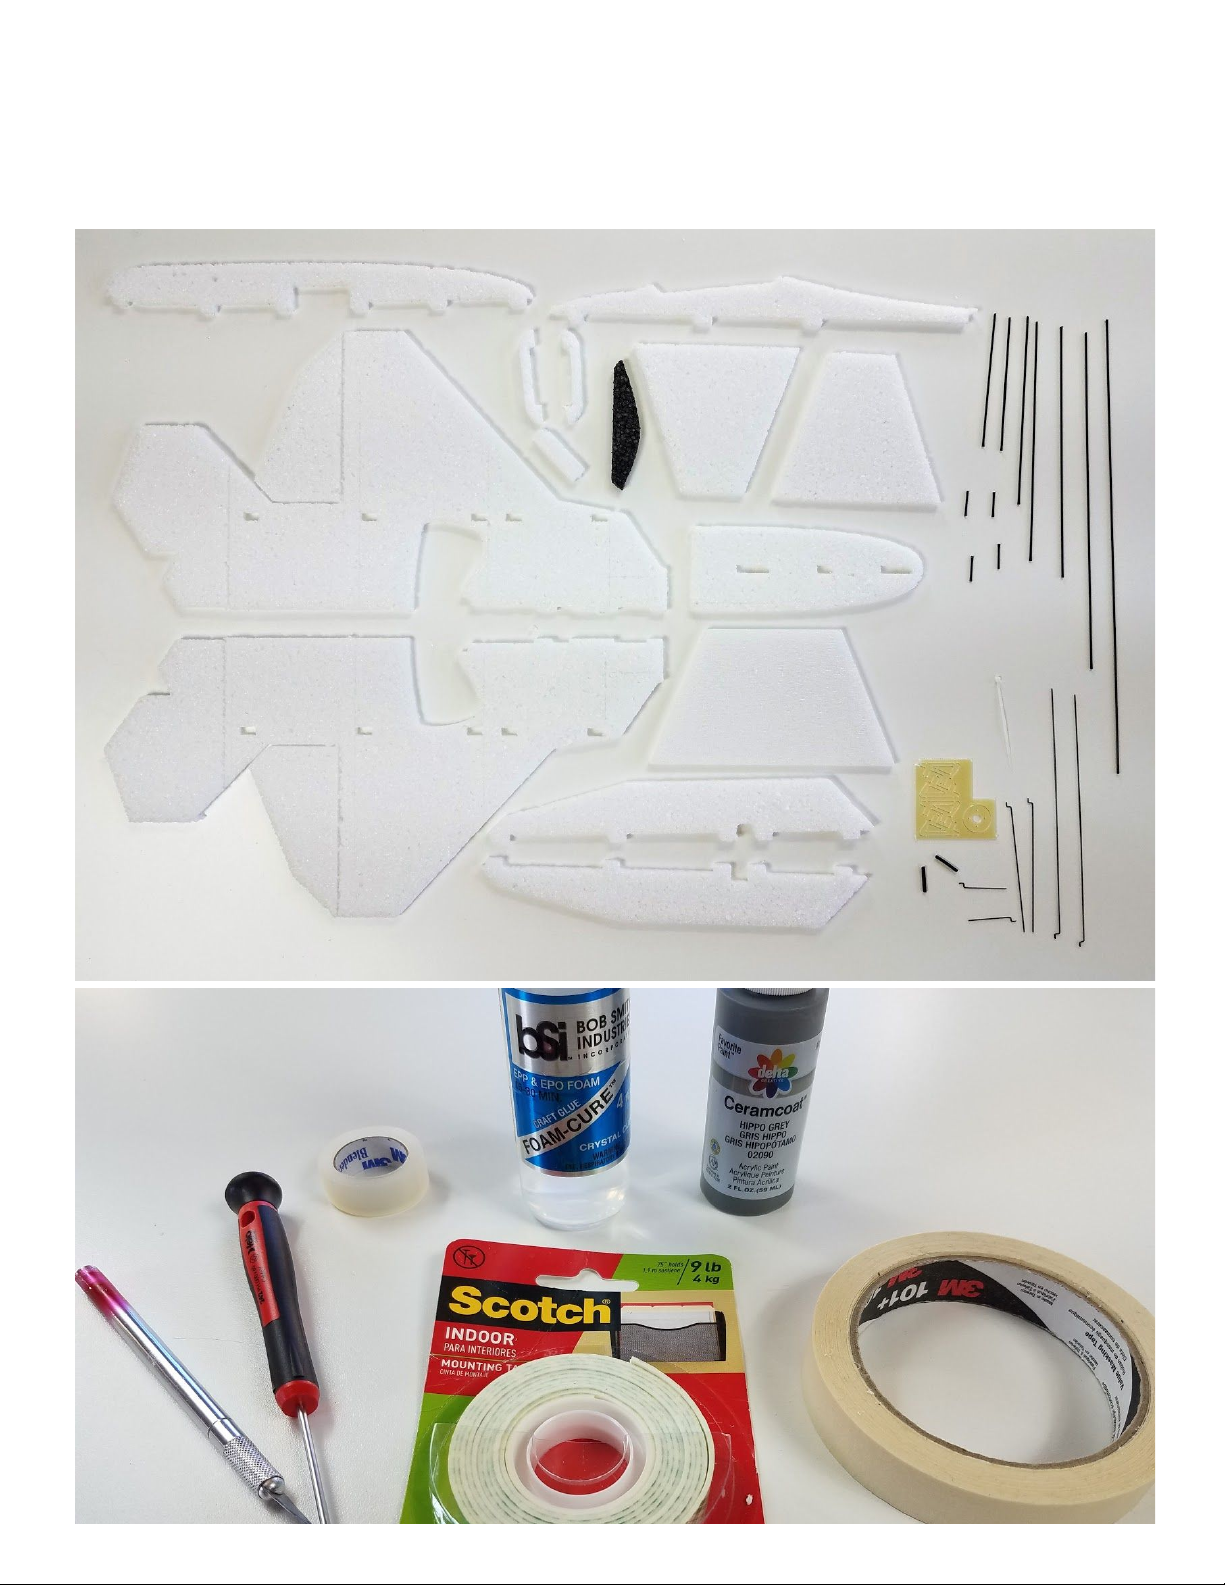
To start assembly, gather the required electronic hardware and building supplies. You will need some
foam-safe glue, some tape, and optional paint. Look for the recommended electronic hardware at the end
of these instructions.
Kit contents-
2
Page 3
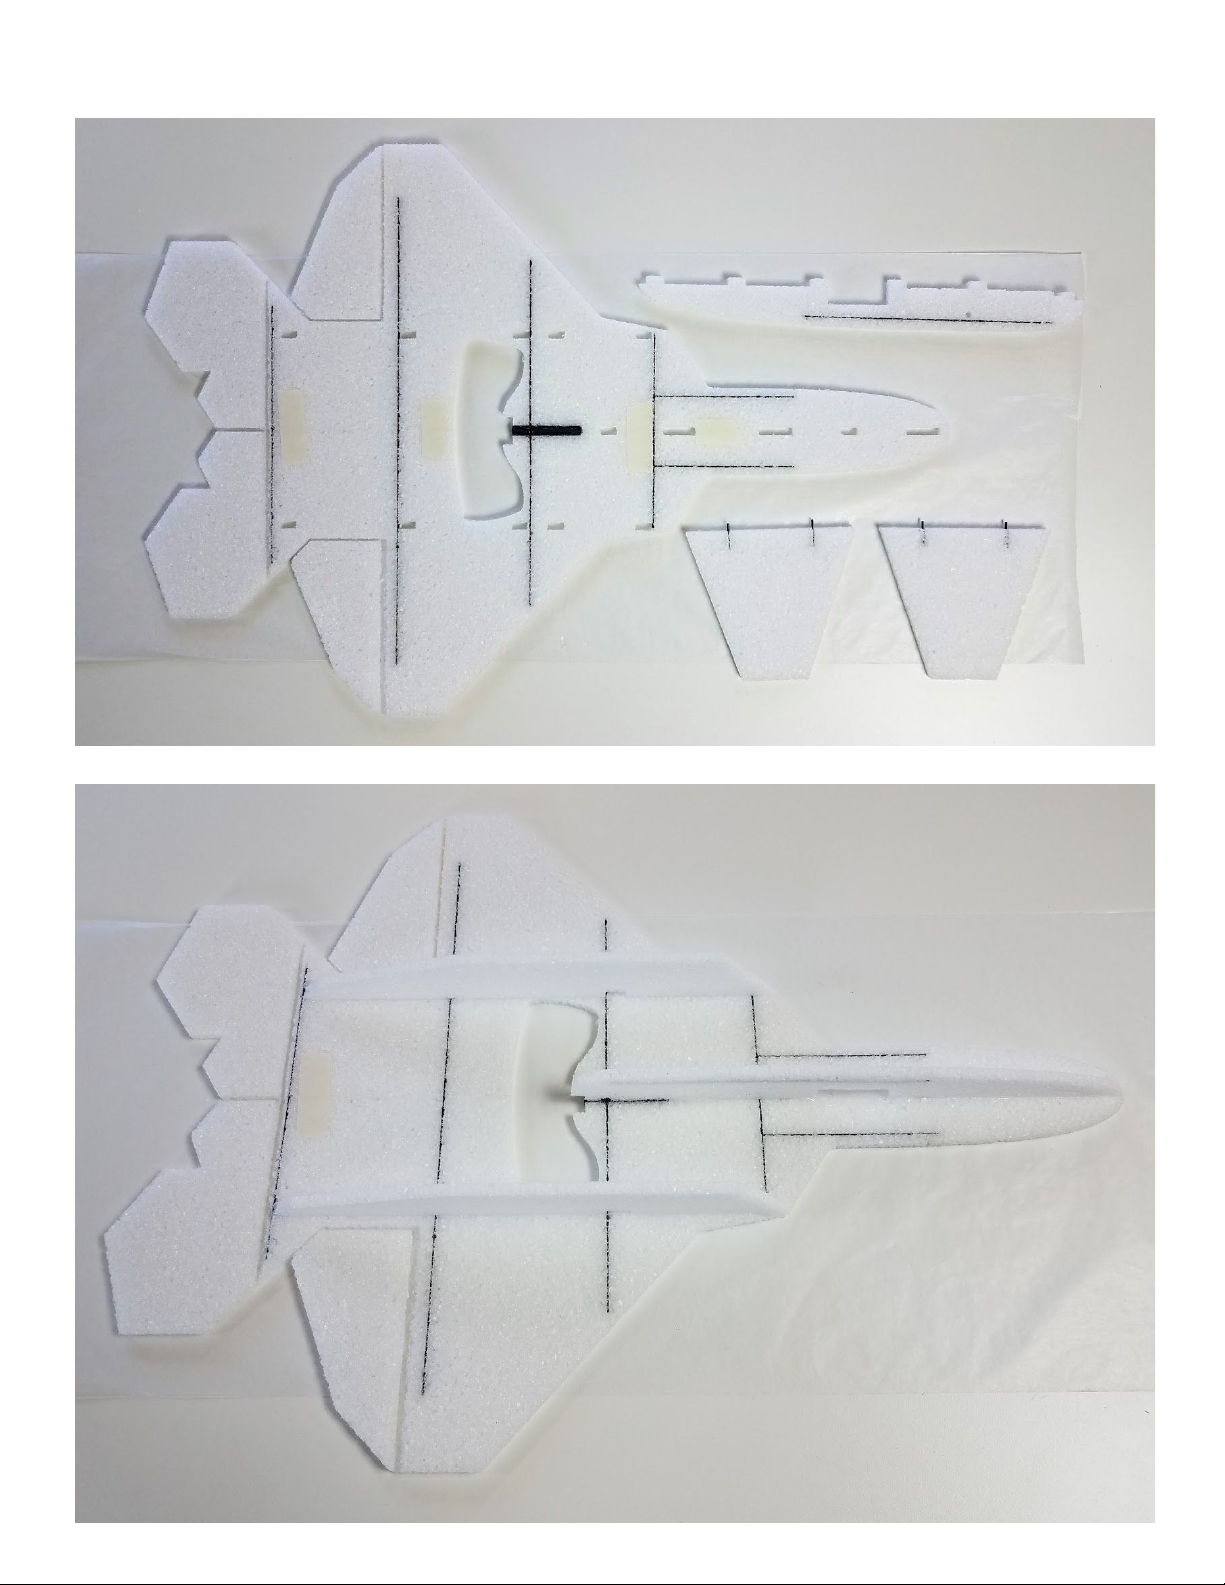
Assembly fuselage sides and install carbon - Glue the two fuselage sides together, a little tape can help
hold them together until the glue dries. Glue all of the carbon rod reinforcements in place, they are all the
same diameter. It is a good idea to do this on a very flat surface, keep parts flat while glue dries.
Install lower fuselage and booms - sure to keep main fuselage, wings and elevons flat as the glue dries.
3
Page 4
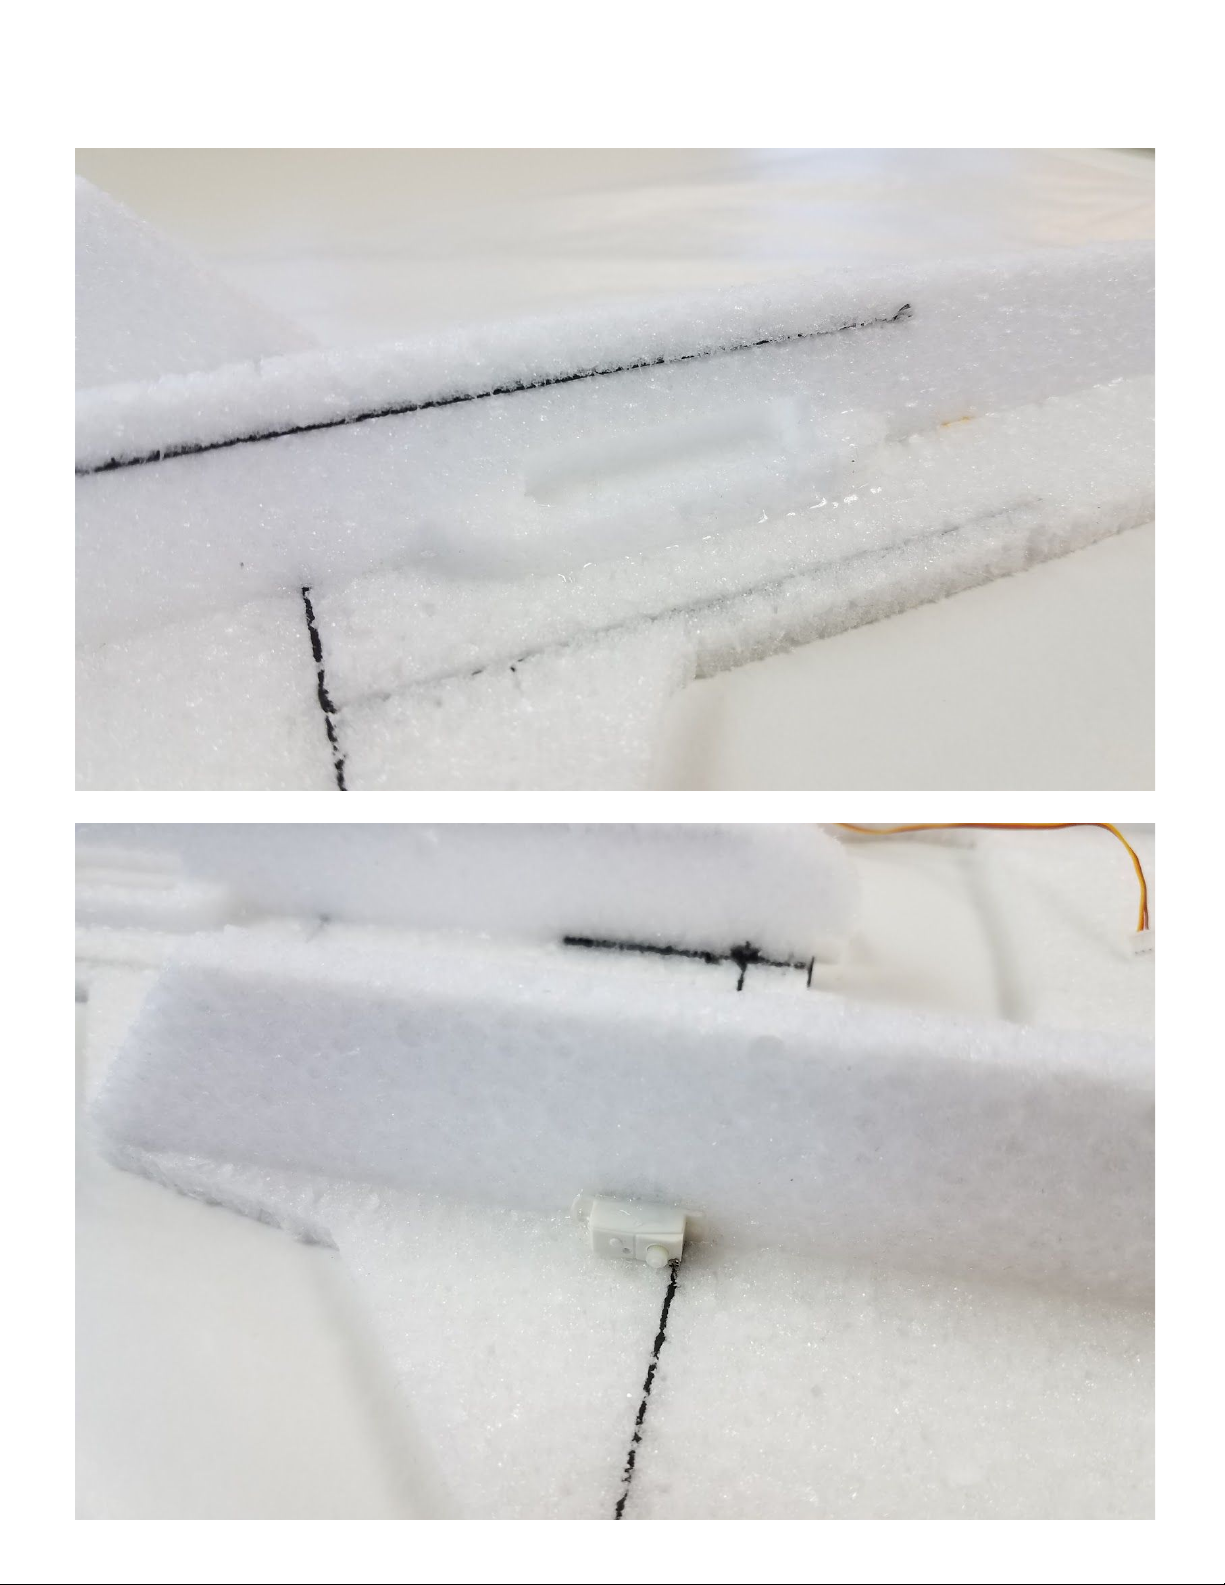
Install battery holder - Glue the right and left battery holders to the lower fuselage and main fuselage, add
a small glue fillet to both sides.
Install servos- Glue servos into place with output shaft towards the rear.
4
Page 5
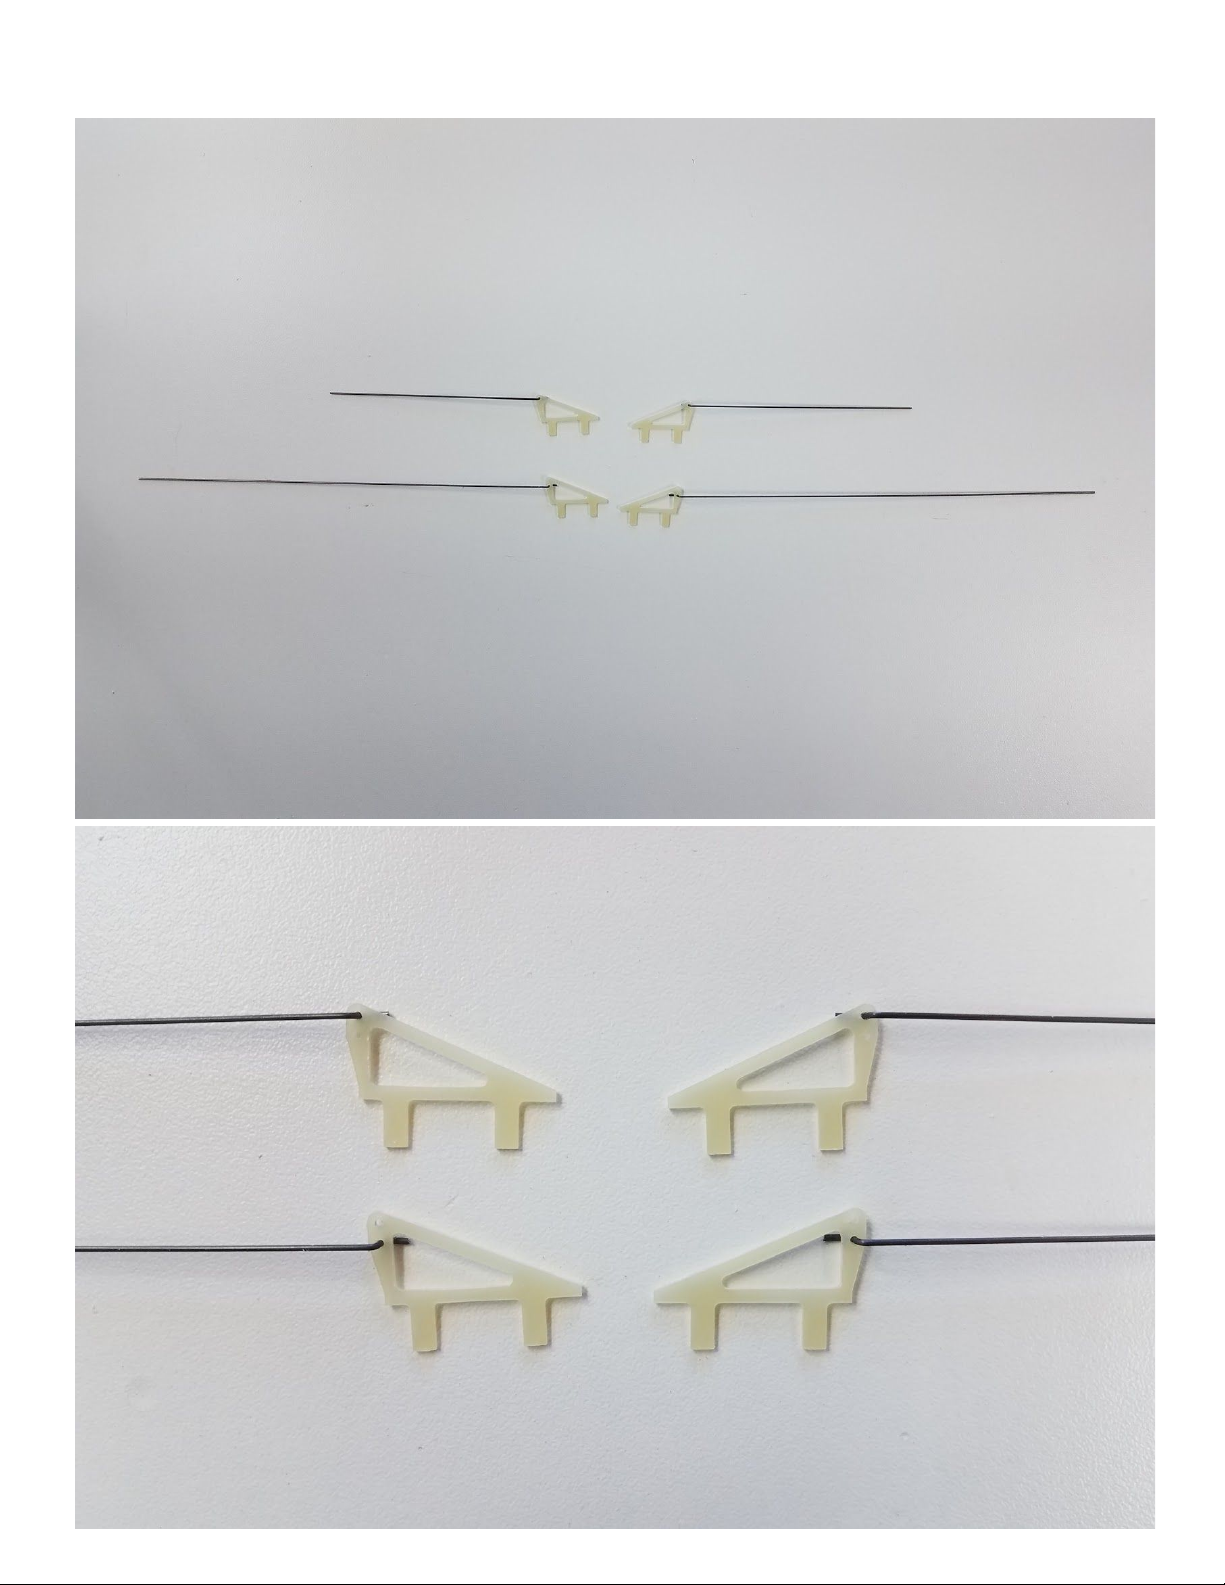
Assemble pushrods- insert the longer elevon pushrods into the innermost hole on two control horns,
making both a right and a left by alternating which side of the horn the pushrod is on. Do the same for the
shorter aileron pushrods, but use the outermost holes.
5
Page 6
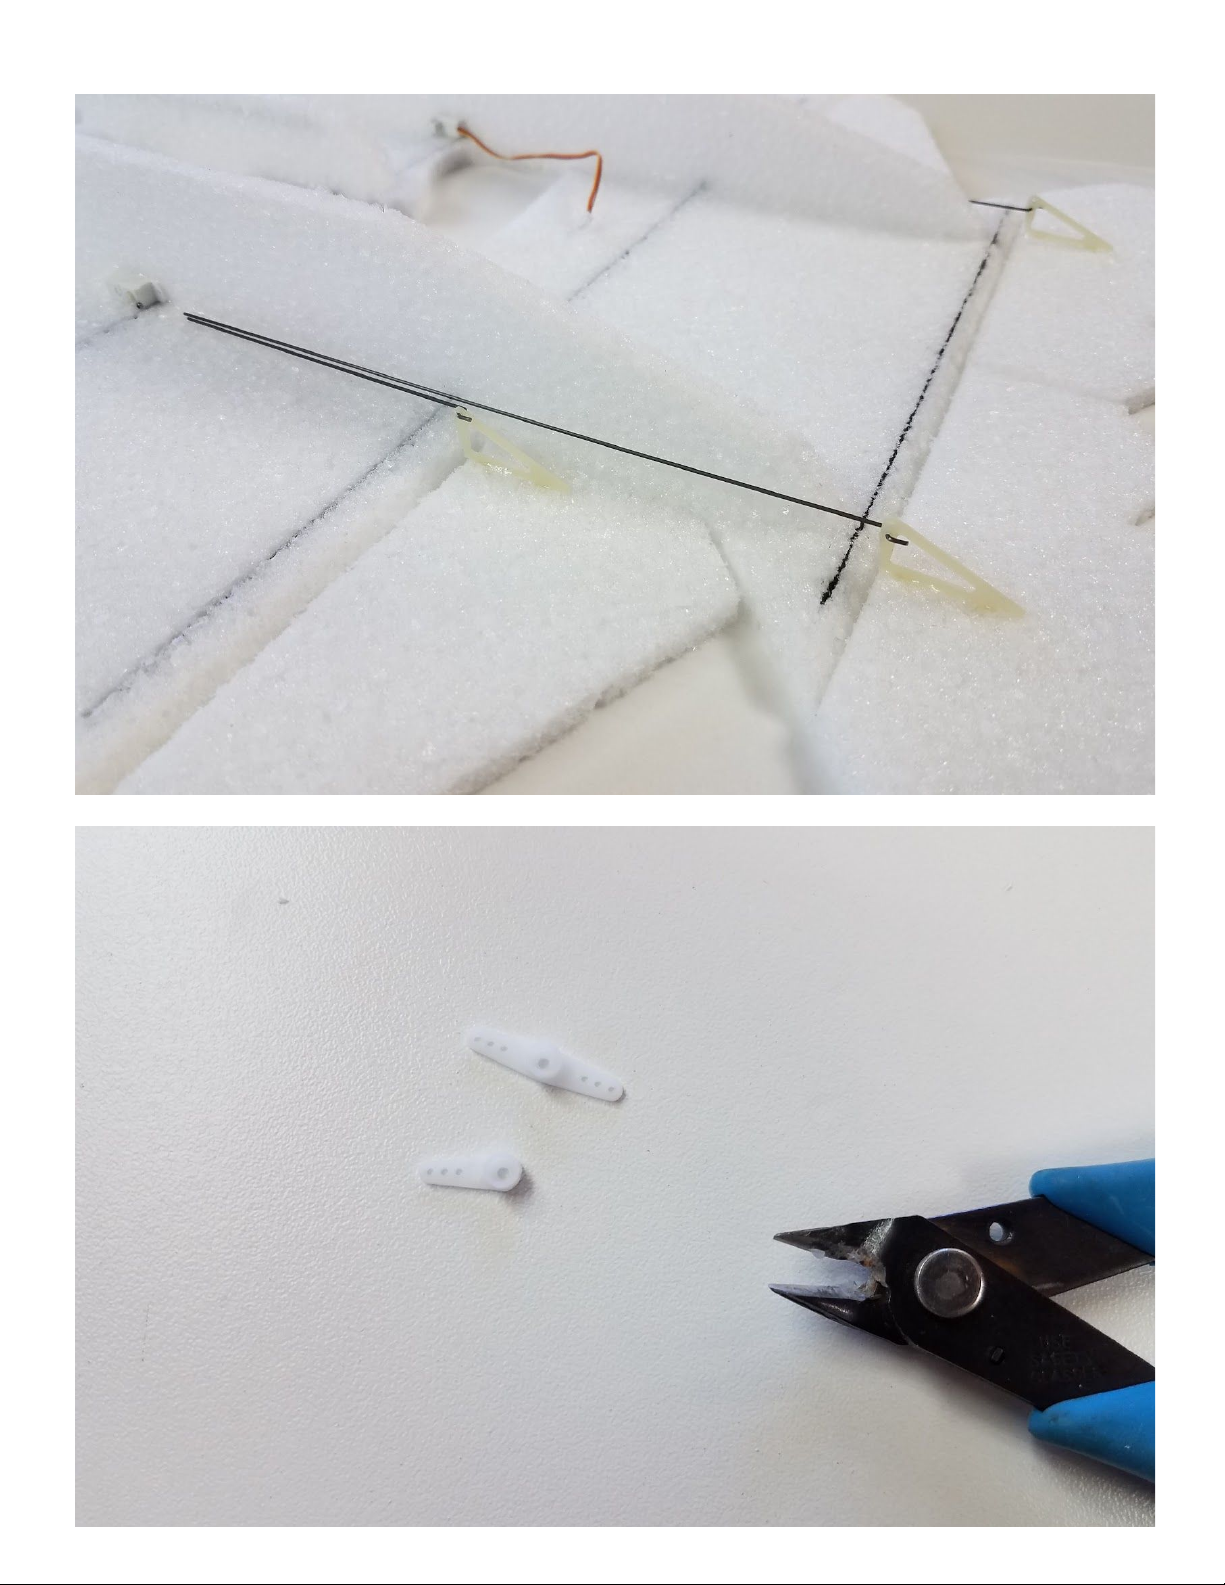
Install pushrods- Glue the assembled pushrods and control horns into the precut slots on the elevons and
ailerons. Keep the pushrods to the inside of the control horns.
Connect pushrods to servos- For both servos, find the long straight servo arms, and trim away one side.
6
Page 7
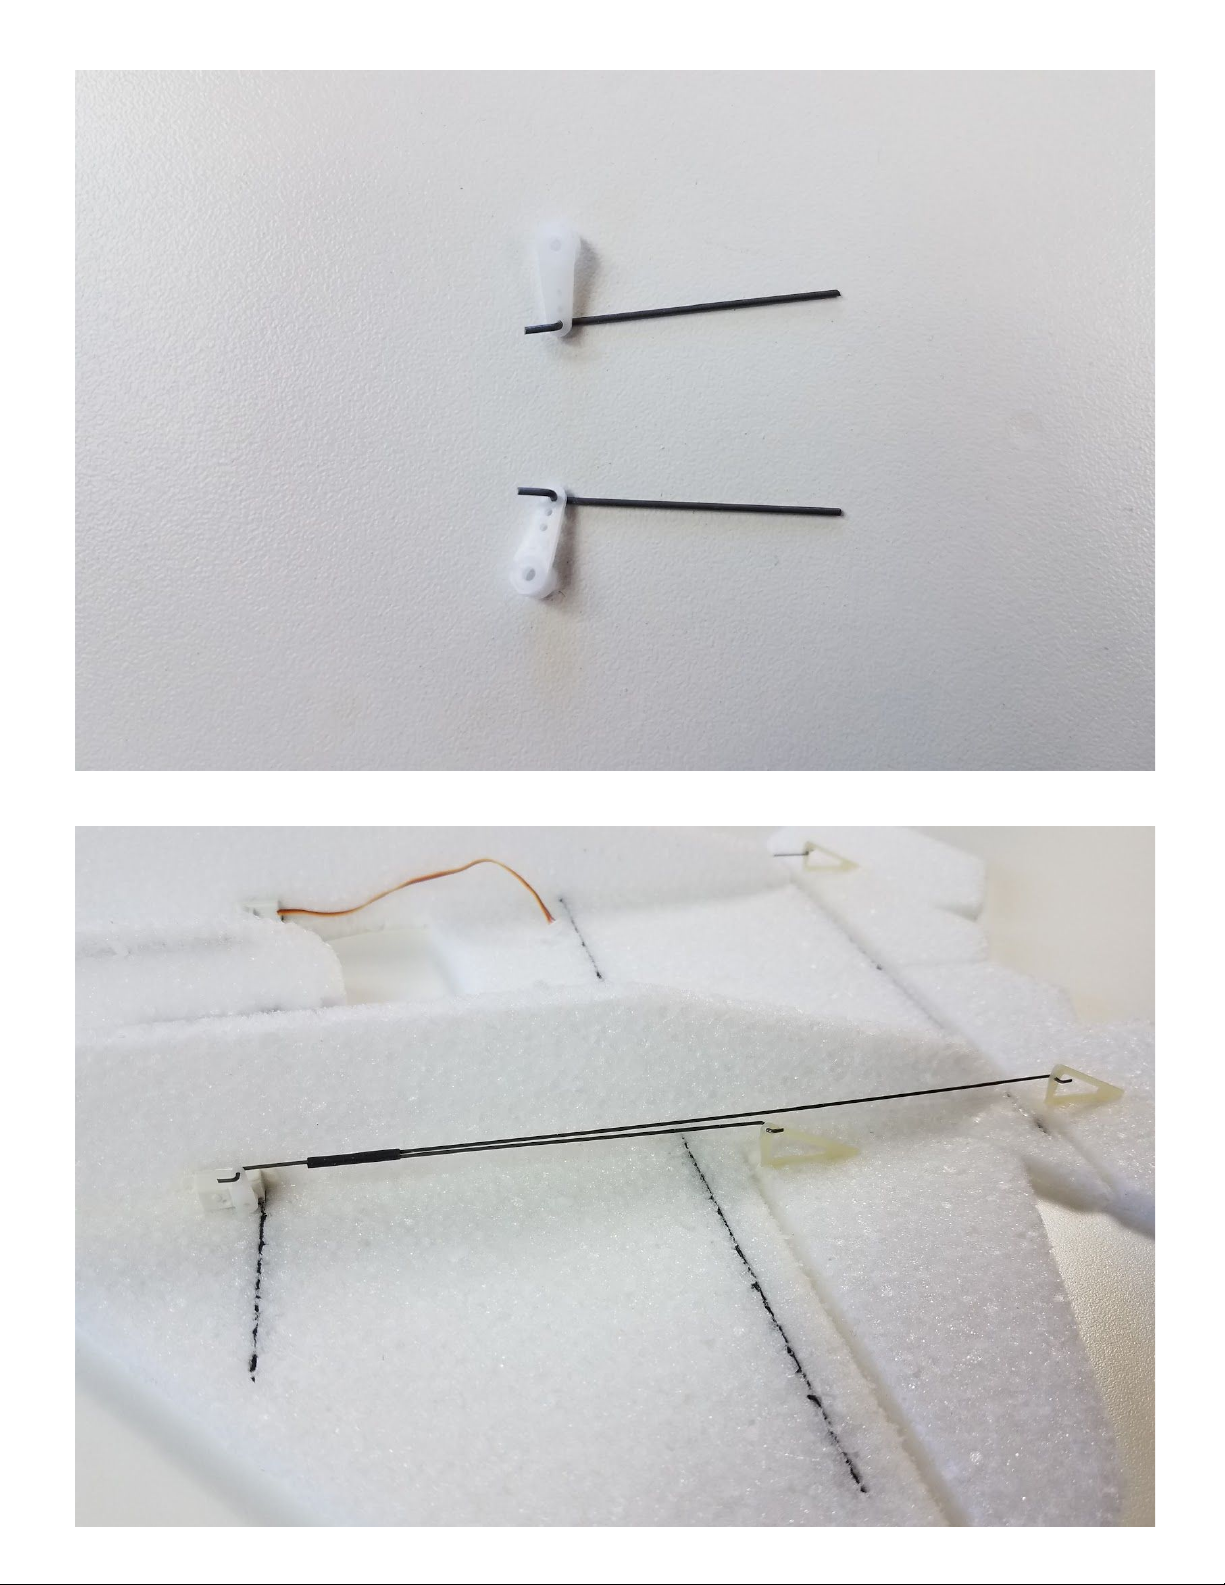
Connect pushrods to servos- Insert the short pushrod into the outermost hole, from the servo side.
Connect pushrods to servos- Push each servo arm onto it’s servo so it is exactly vertical, slide ¾” length of
heat shrink tubing over all three pushrod pieces.
7
Page 8
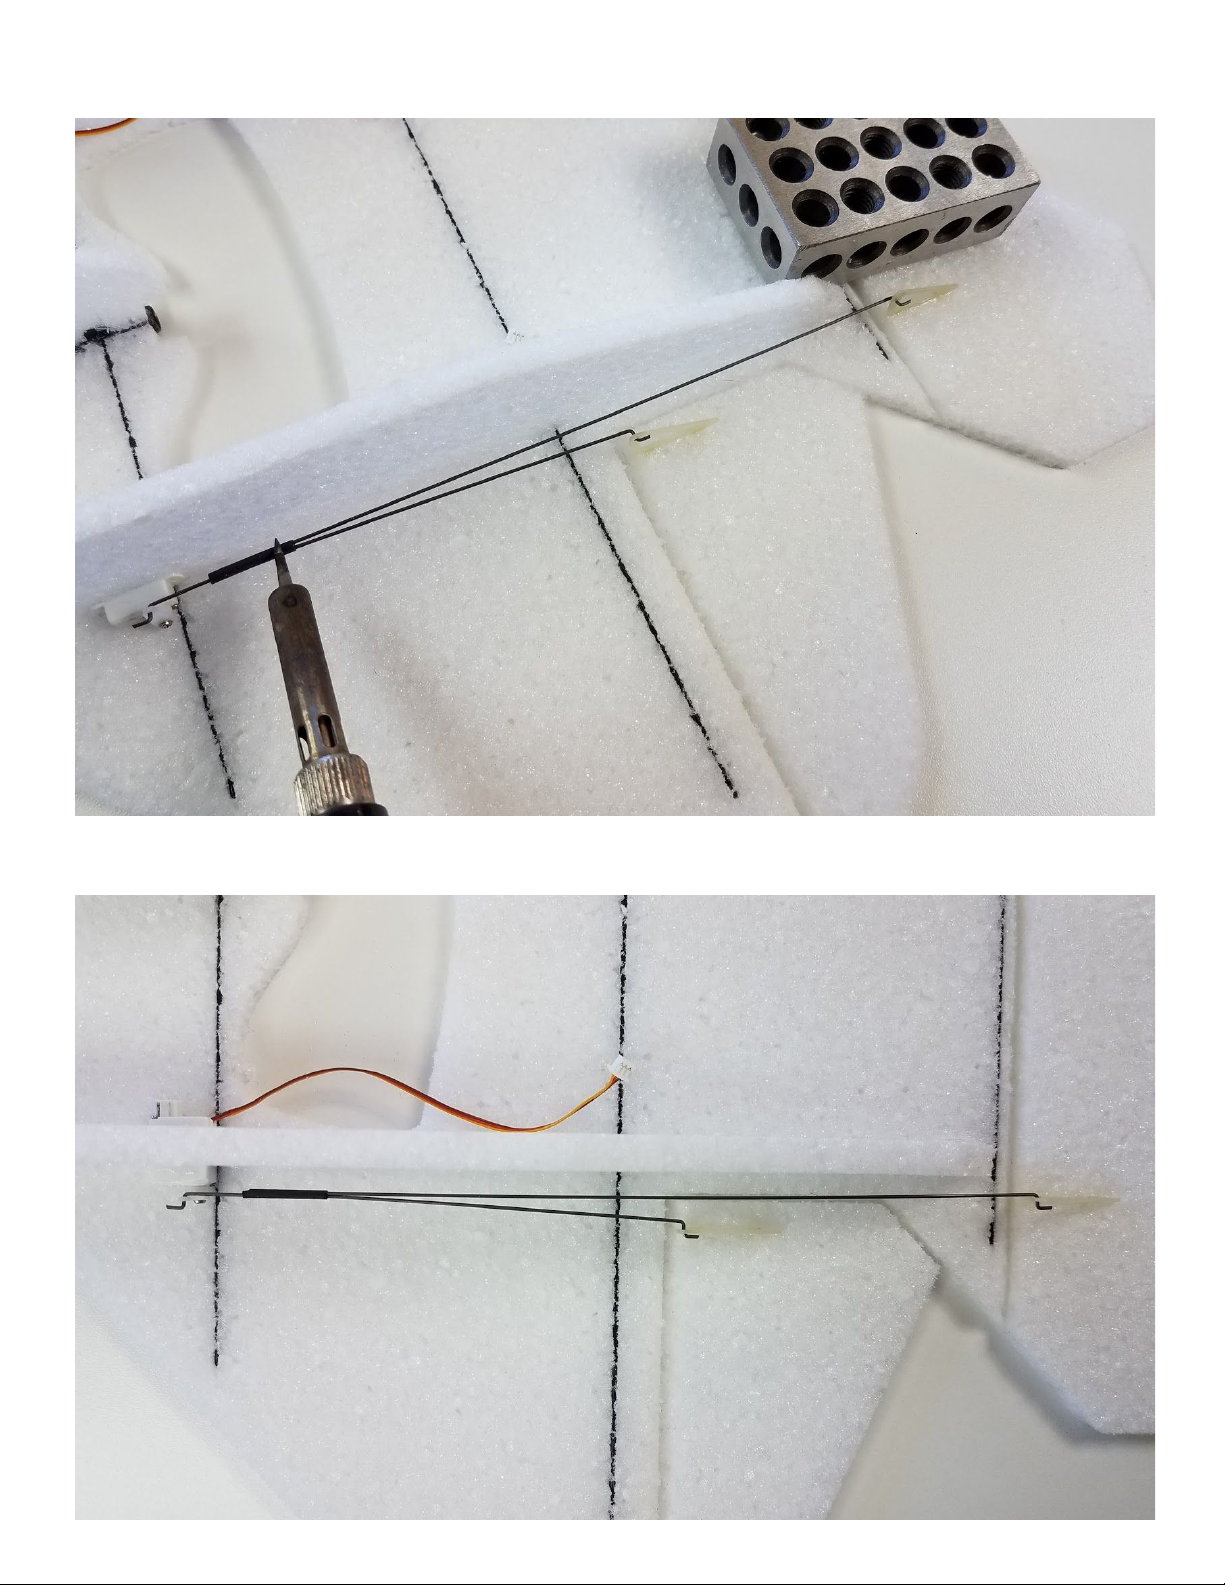
Connect pushrods to servos- While ensuring the fuselage, elevons, and ailerons are all aligned flat with your
work surface, use a soldering iron or other means to shrink the heat shrink tubing. Wick a small amount of
thin CA glue into the heat shrink tubing to lock it in place.
Connect pushrods to servos- Once completed, your installation should look like this, with the other side
being a mirror image. Note that all of the pushrod wires are to the inside of the control horns and the servo
horn. This eliminates the elevon pushrods from contacting the ailerons when deflected.
8
Page 9
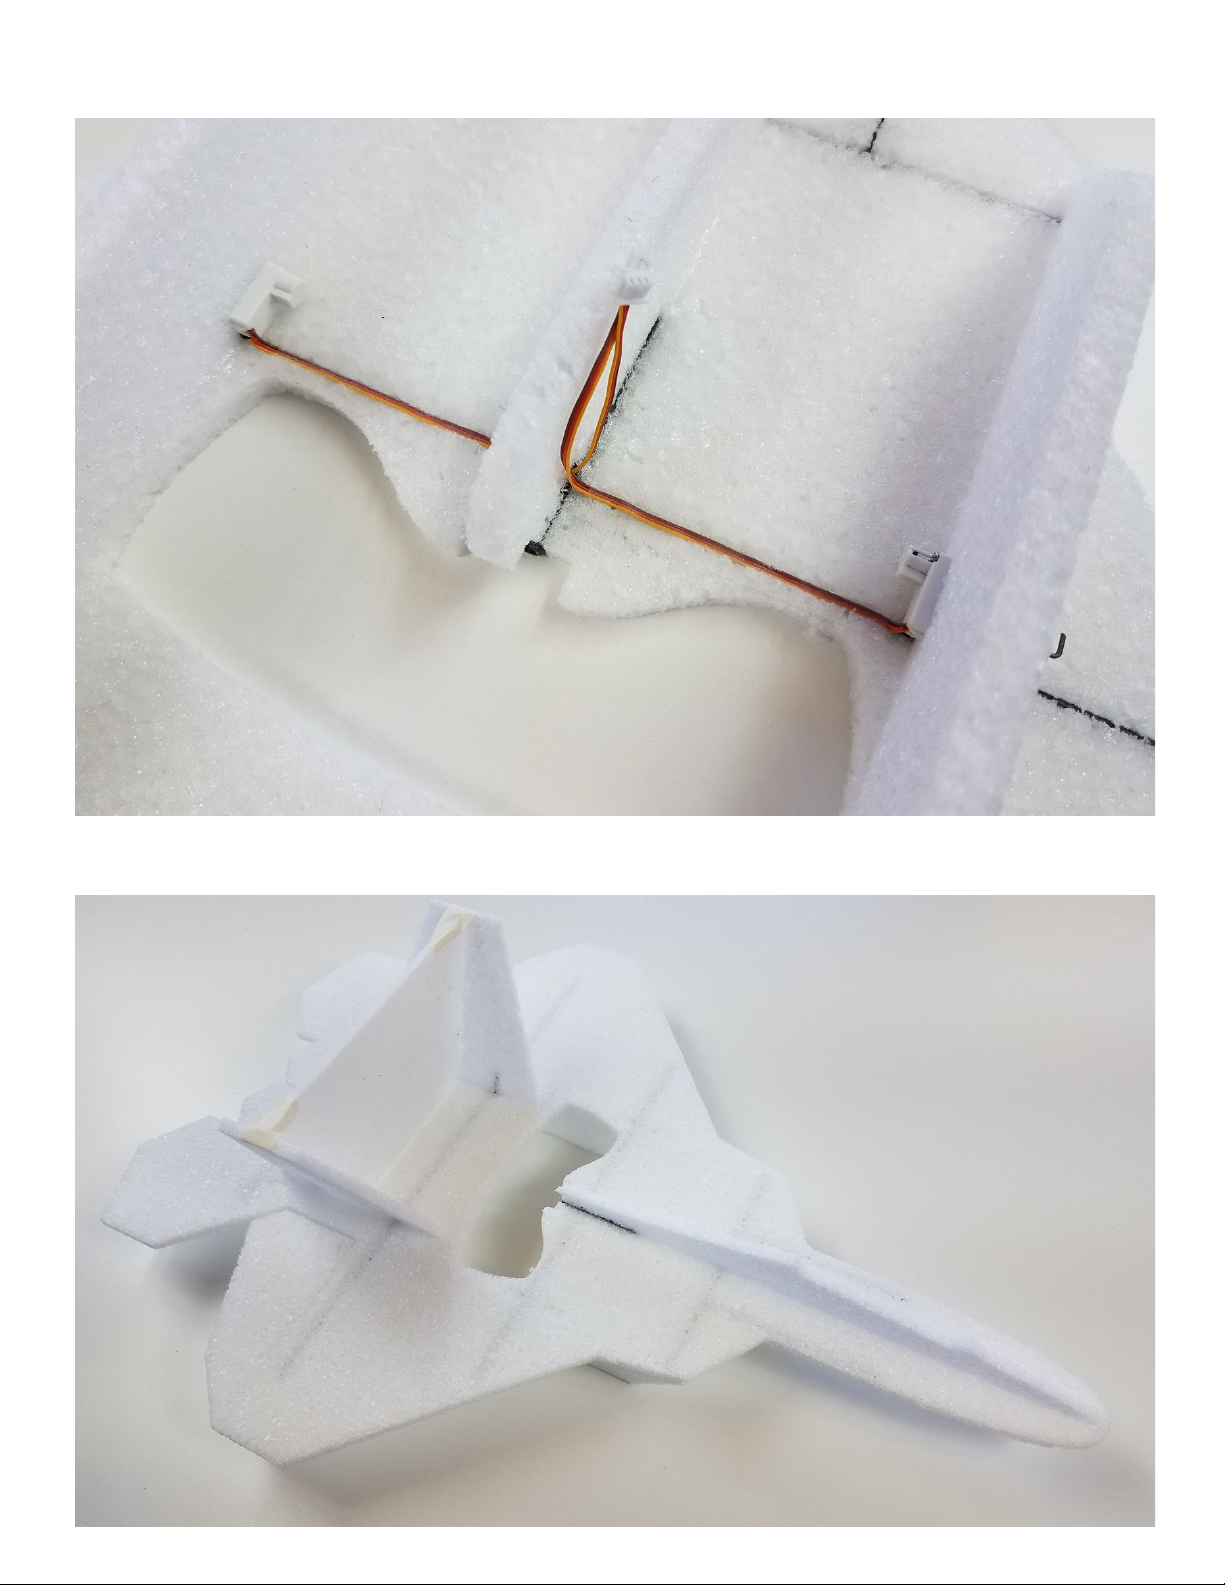
Adhere servo wires- Push RH servo wire through lower fuselage to LH side. Flatten and route the servo wires
in the slots under the main carbon spar, tape into place. I like to use ½” wide 3M blenderm tape, it sticks well
to the epp, and is nearly invisible once applied.
Assemble upper fuselage- glue upper fuselage into place. Glue both vertical stabilizers into place by
inserting the protruding carbon rods into precut holes in main fuselage and using alignment block to ensure
the correct angles.
9
Page 10
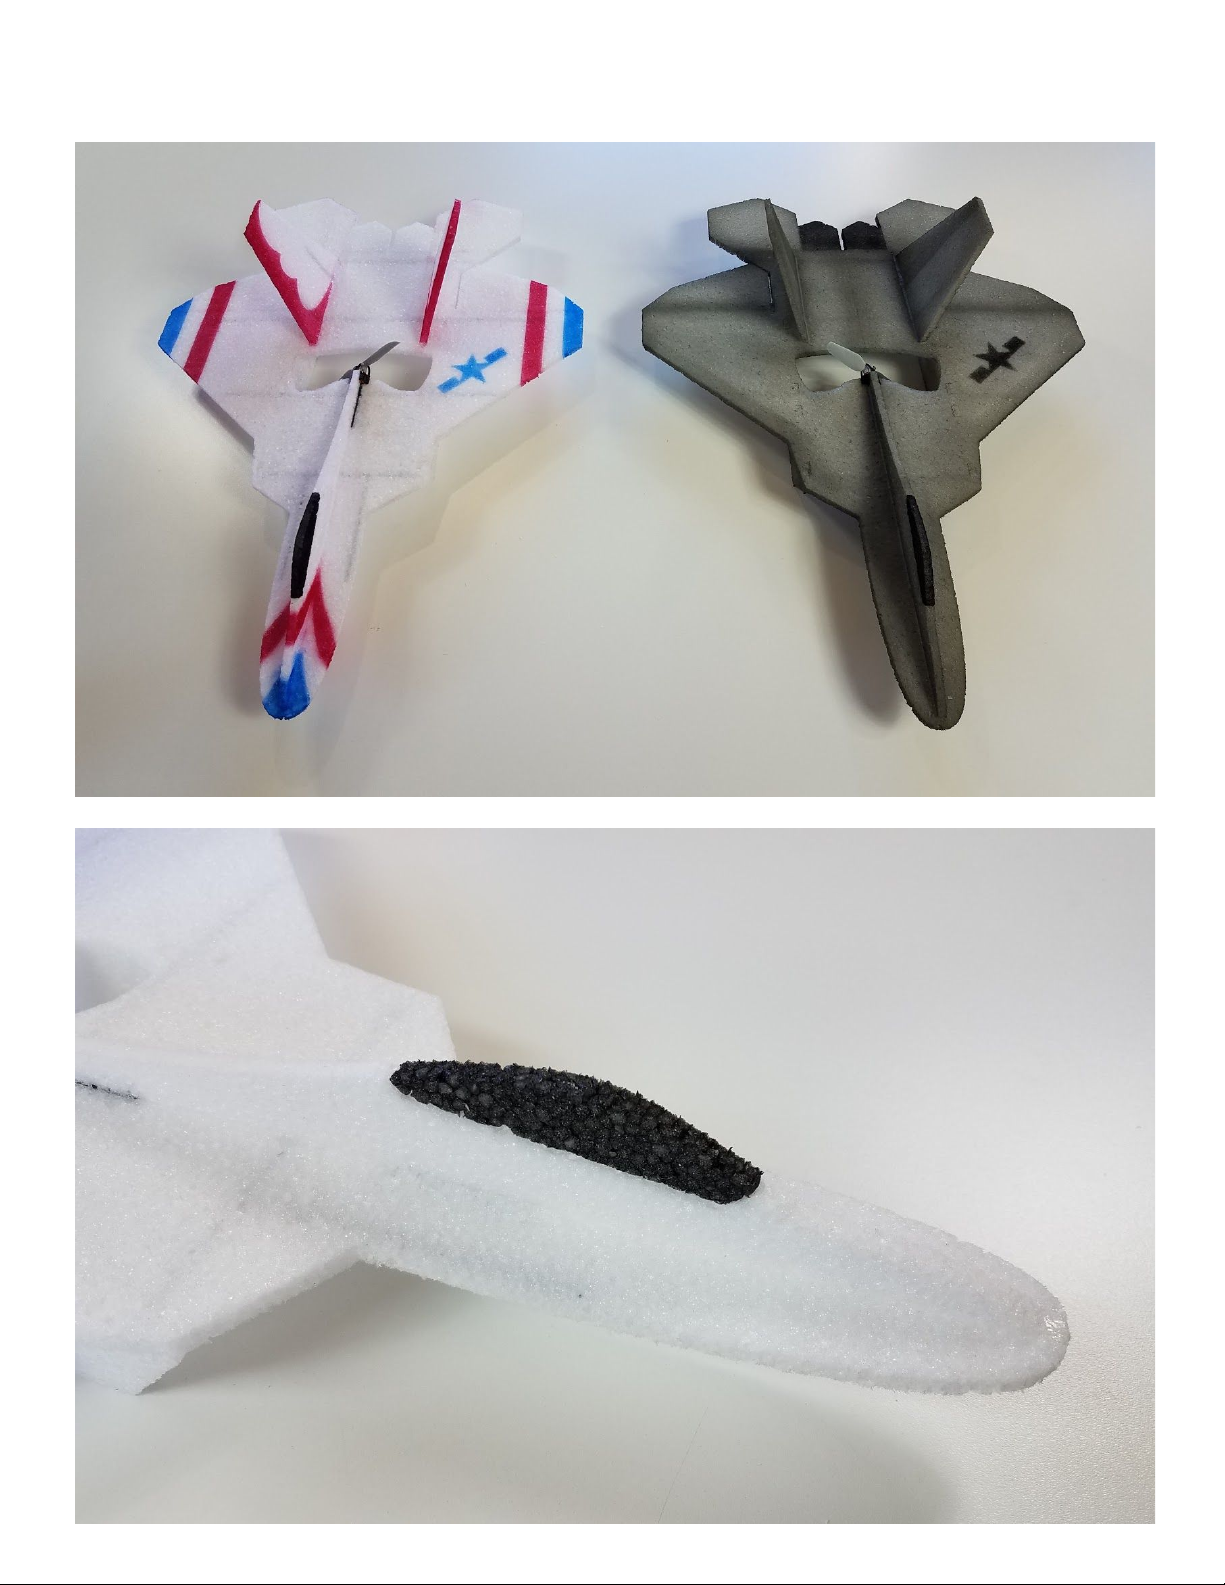
Paint- Now is the time to paint if desired. There are many different ways to paint an EPP aircraft. Basic acrylic
craft paint work great. One of the keys to a good paint job on this type of aircraft is to apply a minimum
amount of paint and consequently weight. Airbrushes work best, but brushed work too. Some aerosol paints
made for plastic also work very well.
Install canopy- Glue canopy into place.
10
Page 11
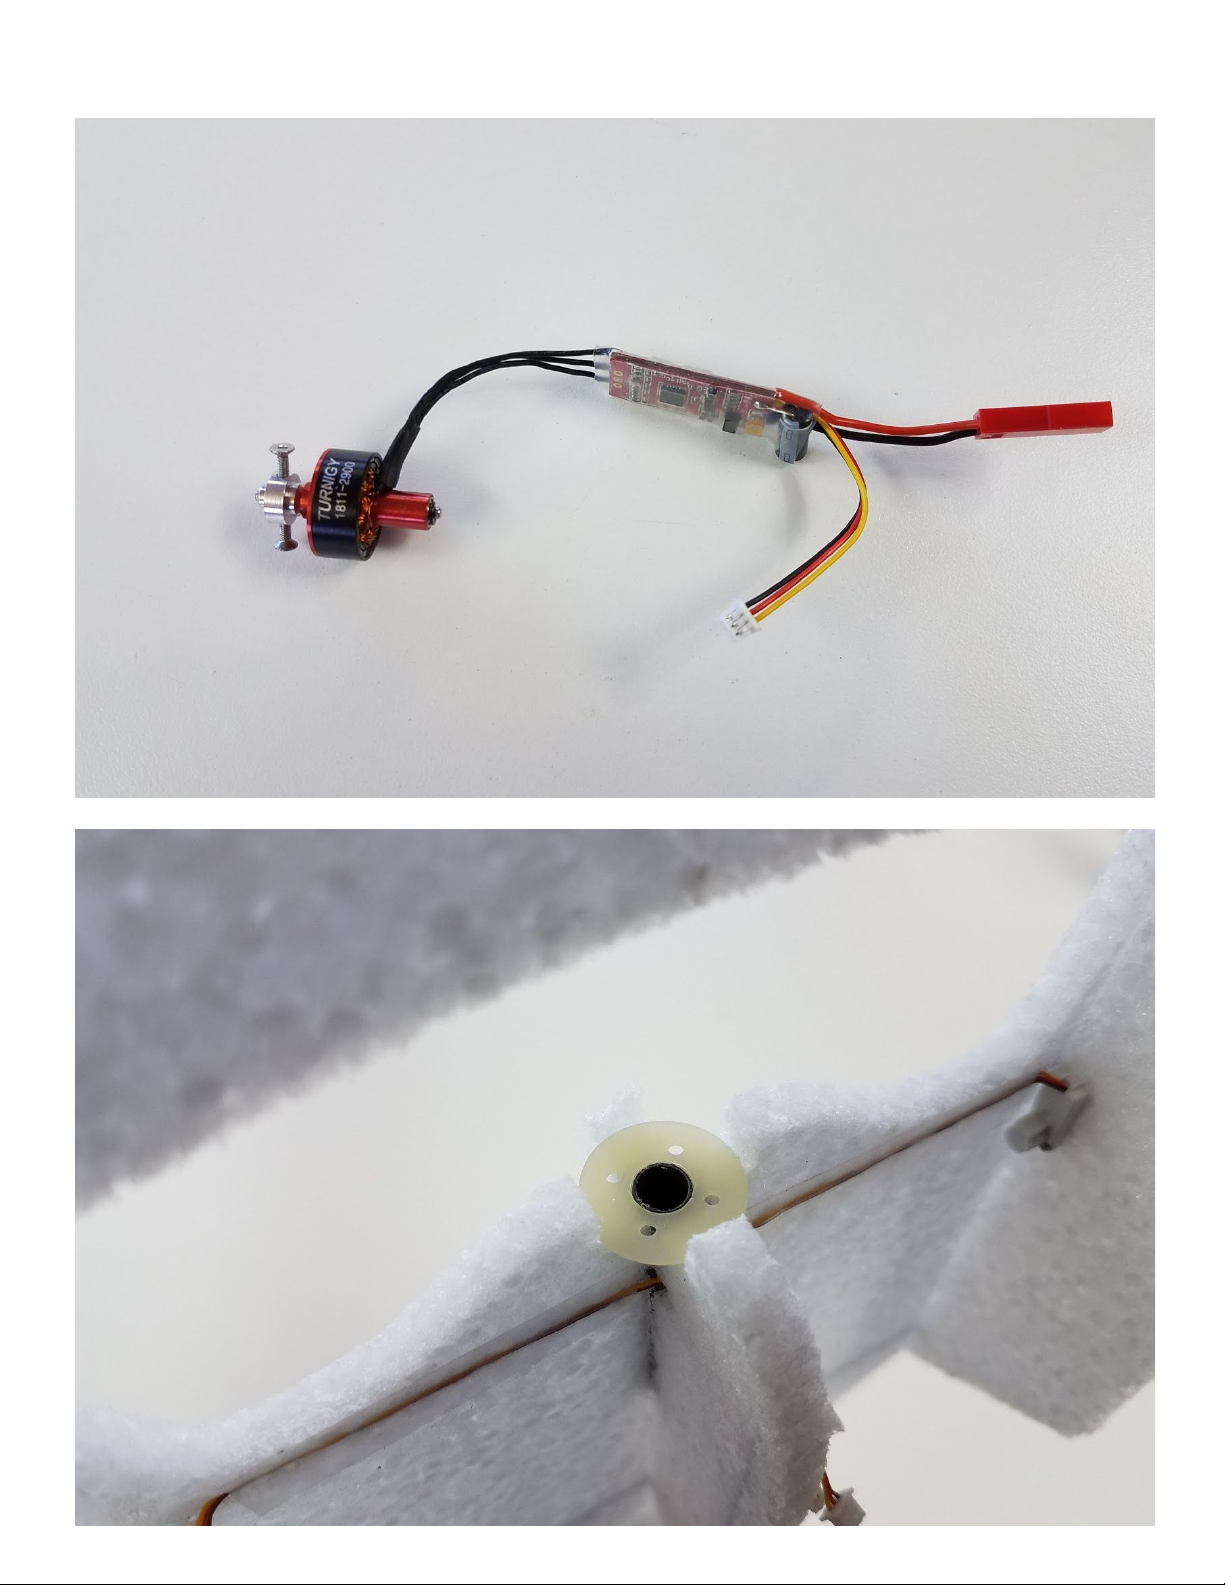
Prep motor and ESC- Solder motor directly to esc. Solder appropriate receiver lead. Add heat shrink tubing. If
using tube mount, test fit motor to tube, you may have to add a bit of packaging tape to the motor tube to
ensure a snug fit in the carbon tube engine mount.
Install motor mount- If using radial mounted motor, glue radial mount into place with epoxy.
11
Page 12
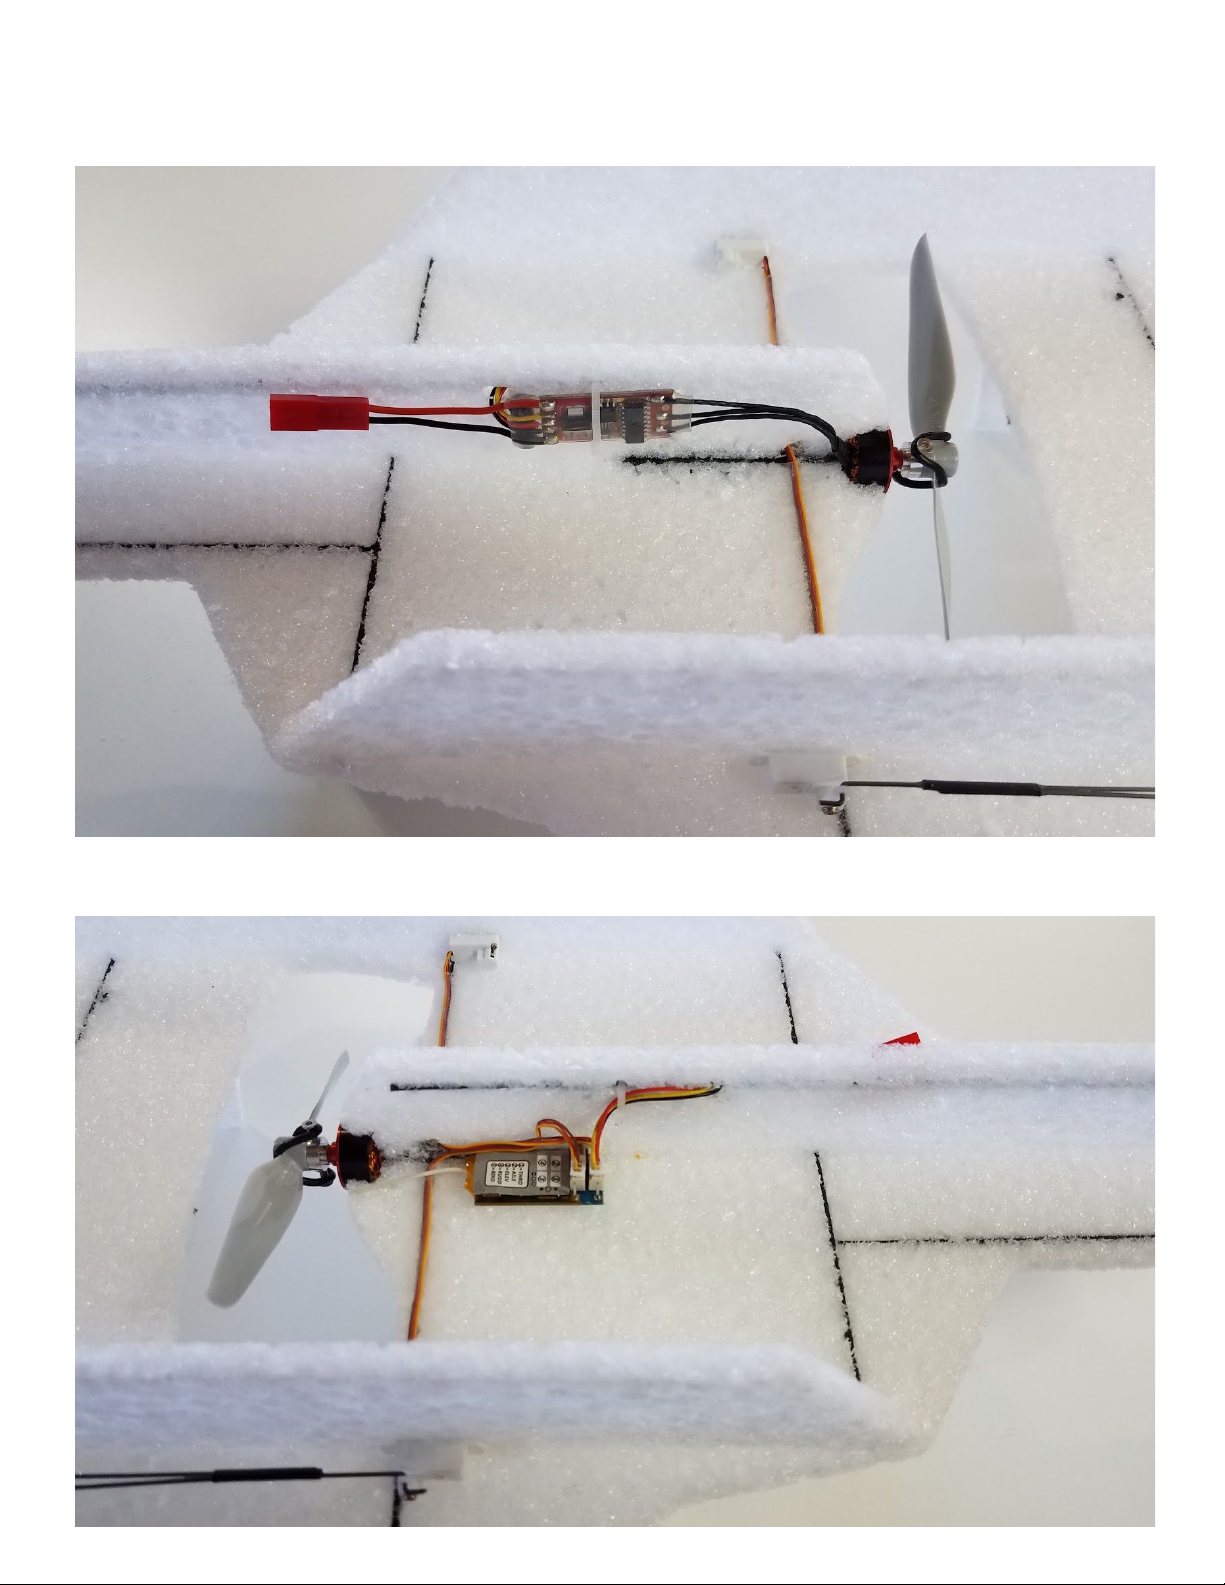
Install motor and esc- Install the motor with the wires exiting as shown on the aircraft’s RH side. If using a
tube mounted motor, apply a very small amount of medium CA glue and insert motor tube into carbon
motor mount. If using radial mounted motor, use screw supplied with the motor and install motor to radiall
mount. Use supplied zip tie and predrilled holes in lower fuselage to secure ESC. Push receiver wire though
hole in lower fuselage to the aircraft’s LH side.
Install receiver- Carefully plug in both servos and the esc to the receiver. Bind receiver to your transmitter.
Check function of servos and esc to ensure that you have everything plugged in properly. Carefully route
receiver wires, and stick receiver to the bottom of the wing with double sided tape.
12
Page 13
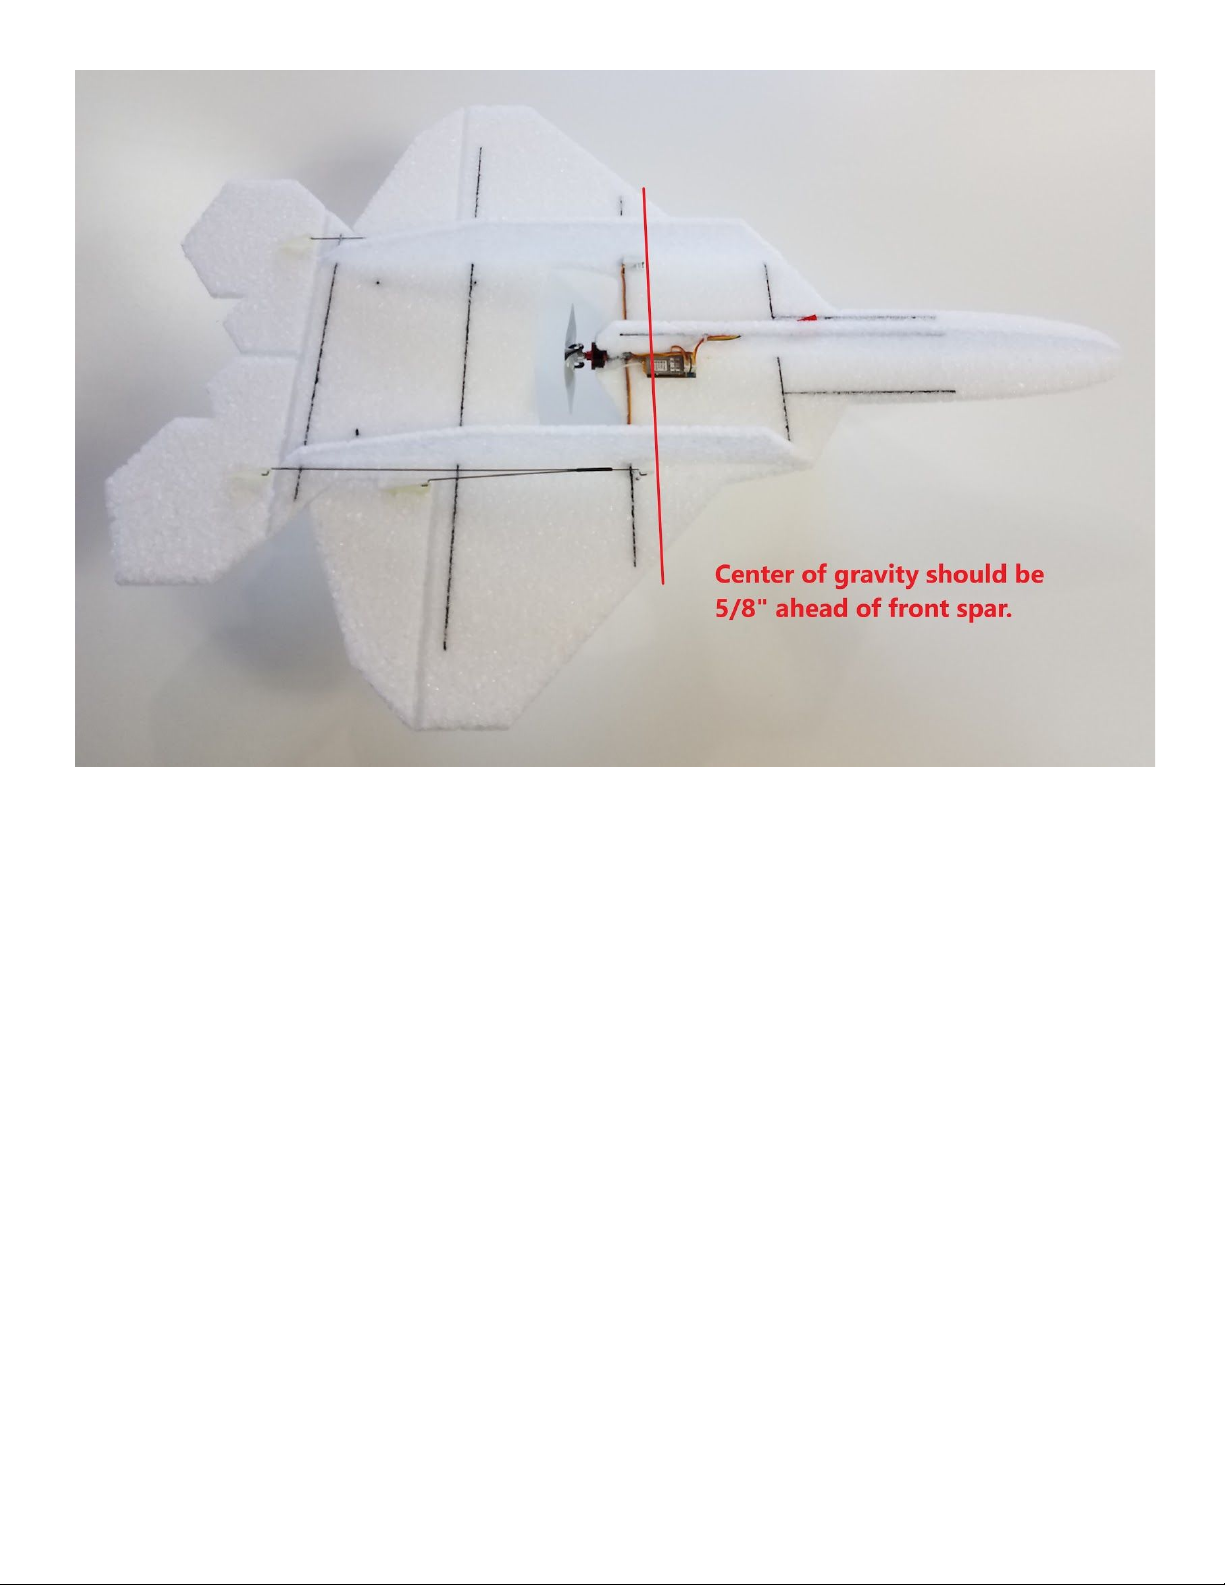
Center of Gravity- should be located ⅝” ahead of the front spar.
Program radio - Here are the spektrum parameters
Aircraft type:
● Wing: Elevon-B
● Tail: Normal
D/R & Expo
● Aileron:
○ Expo: 30%
● Elevator:
○ Expo: 60%
Travel:
● Adjust travel to approx. 40 degrees of elevon travel on high rates.
Final checklist:
● Center of Gravity located ⅝” ahead of the front spar.
● Check controls for proper direction and free movement.
● Charge battery.
● Range check transmitter, refer to transmitter instructions.
Flying Tips - The Buzzard Models F-22 has a rather low wing loading and does not like much wind.
For your first flight, I would recommend flying either in a large indoor area such as a gymnasium, or wait for a dead calm
day outside. Once you get comfortable with the flying characteristics you will be able to fly in much smaller areas, and
outdoors in more wind.
Recommended hardware -
● 1304 or 1306 3100kv brushless motor, anything around 10grams or less with 5” x 4.3” to 4.6” prop
● 6amp brushless speed controller with BEC
● 1.9 to 3 gram size servos 2ea.
● Radio transmitter and <3 gram micro receiver with a minimum of 3 channels
● 2S 300mah lipo battery, compartment is sized for Turnigy nano-tech 300mah
● Minimum three channels transmitter with elevon mixing
● Glue, some misc. tape.
13
 Loading...