

Page 1
Lit. #: 91-0142/03-01
Harbormaster
™
35 x 60
Refractor
Telescope
Model 78-6035
Thank you for purchasing the Bushnell Harbormaster Telescope! Your new telescope has been designed and crafted
with the highest standards so that you may have years of enjoyment out of this wonderful window to the world. This
instrument comes complete with a vintage solid brass telescope crafted and polished to perfection, a solid wood tripod with
antique cherry finish, and a precision ground 60mm lens.
We would like to take this time to illustrate some of the
inherent traits of brass. Brass has a tendency to have minor
imperfections that should not be considered as defective.
Rather, these should be considered just for what they are-common occurrences within the brass that add to the
character and antiquity of this product.
It is our hope that you will enjoy and appreciate this fine
example of Old World craftsmanship and its authentic
design for years to come.
STANDARD EQUIPMENT
• Solid Brass Telescope
• Solid Wood Tripod
• Altazimuth Yoke Mount
• Accessory Tray
• Hardware Pack:
Tripod leg: 3-2 1/2"bolts, 6-11/16 washers and 3wingnuts
Accessory tray: 3-1/2" bolts, 6-11/16" washers and 3wingnuts
Tripod Leg Lock Screws: 3 pc.
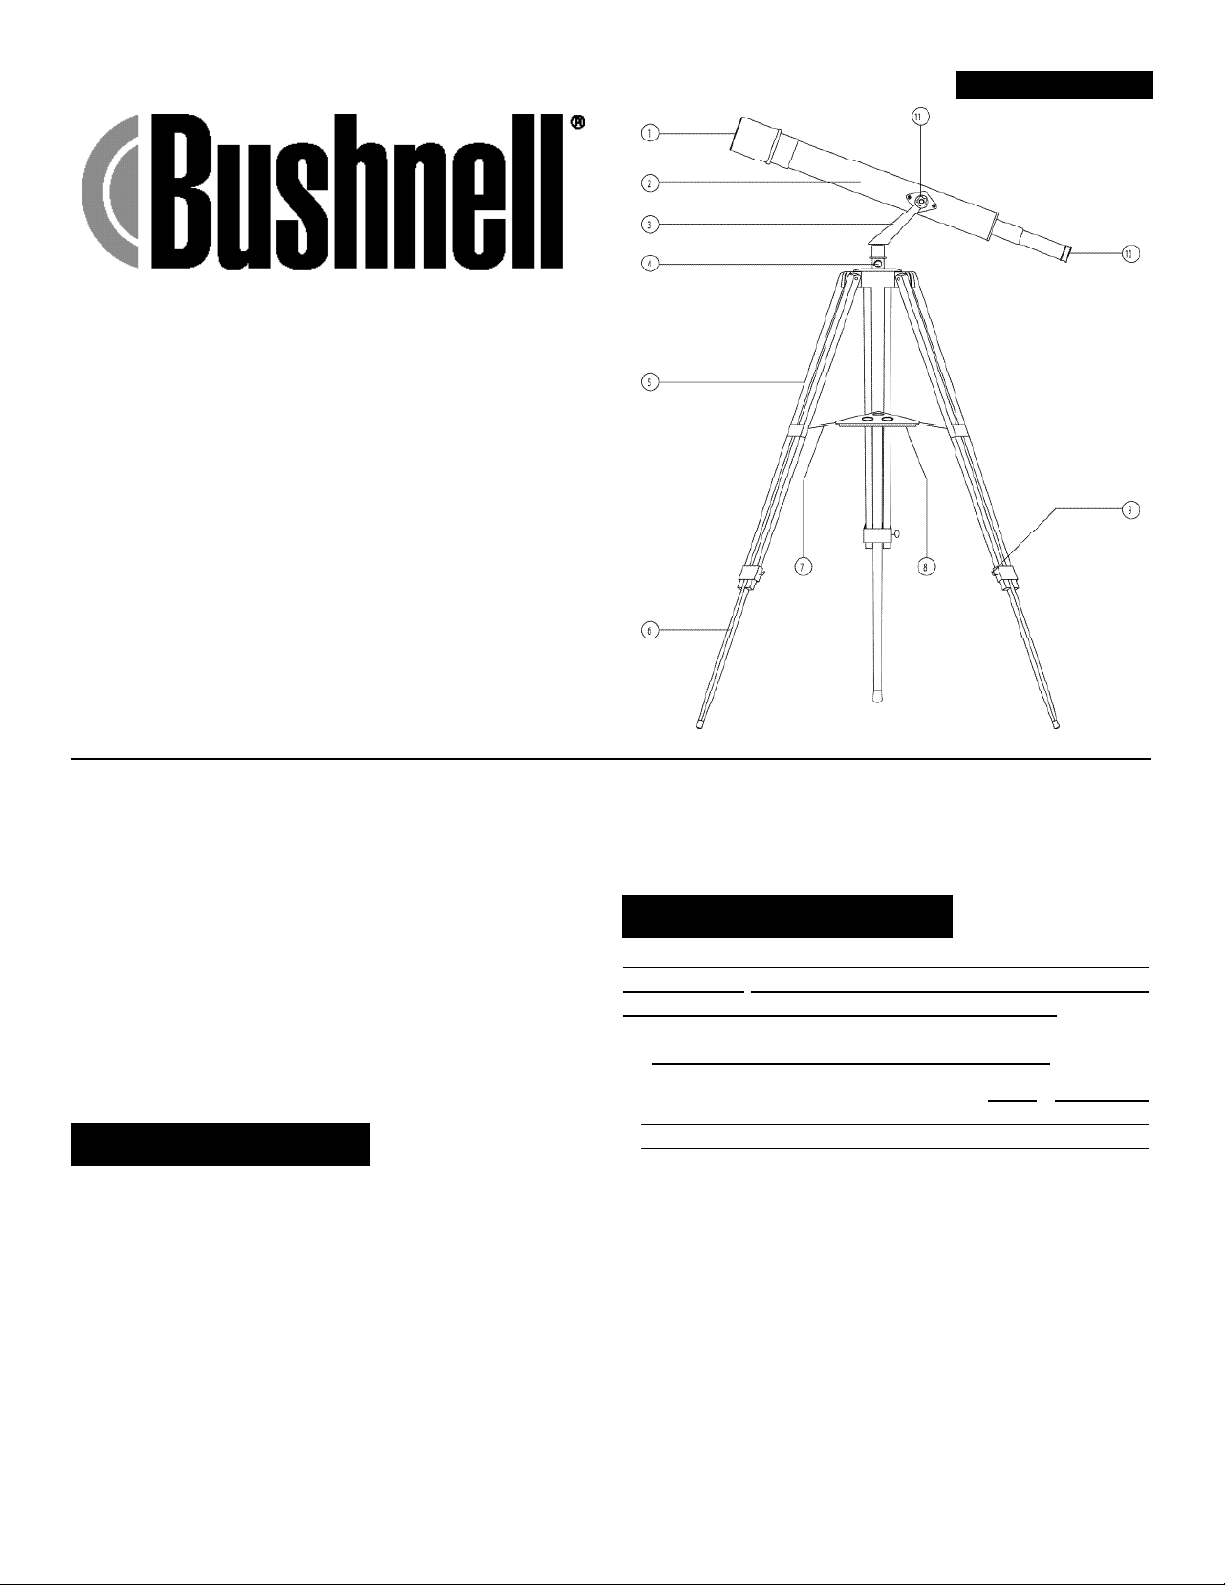
TELESCOPE ASSEMBLY
Remove all components from the carton and identify all
components. READ THROUGH ASSEMBLY INSTRUCTION
BEFORE YOU ASSEMBLE YOUR TELESCOPE.
1. Set-Up Tripod, Mount and Accessory Tray
• Locate the Altazimuth Yoke Mount (3). Note: B e f o r e
assembling tripod legs to Altazimuth Yoke Mount,
make sure the Accessory Tray Braces (7) face inward.
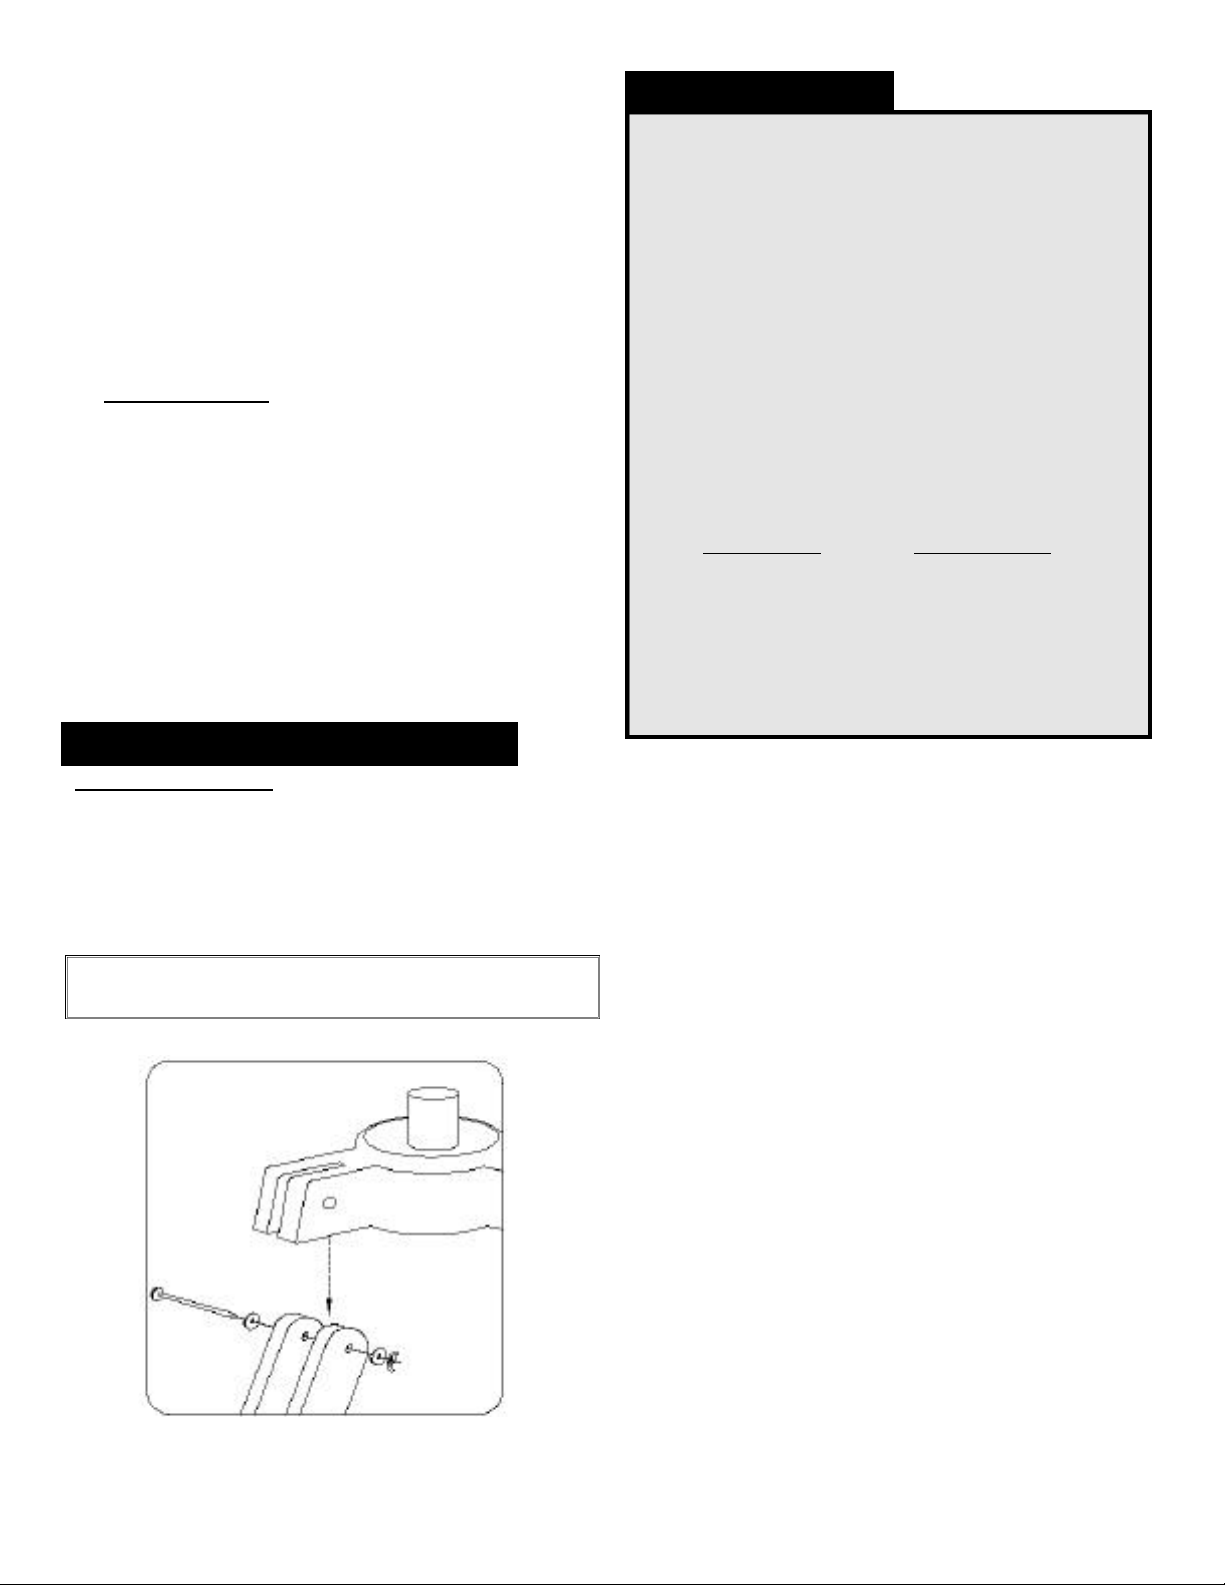
Locate the long bolts and washers from the hardware
pack. Position the mount over the Tripod Leg (5) as
shown (fig. 1) and align the holes in the Tripod Leg with
the holes in the mount. Insert the bolts through the holes
at the top of a Tripod Leg. Awasher should be positioned
on both outer sides of the Tripod Leg.Attach a wing nut
to th e bolt, but do not tighten it all the way. Repeat on the
remaining two Tripod Legs. Once you have attached all
Tripod Legs to the mount, securely tighten a ll wing nuts.
• Locate the Accessory Tray (8). Using the accessory tray
bolts, wingnuts and washers ( 3-2 1/2" bolts, 6-11/16
washers and 3 - wingnuts) connect the Accessory Tray
to the Accessory Tray Braces (7). Start with one Tripod
Continued on page 2
Page 2
Leg and attach wingnut. Wingnuts should be positioned
beneath the Accessory Tray. Do not tighten wingnuts
until all Accessory Tray Braces are attached as some
adjustments may be required.
• Select one Tripod Leg (5) and extend the Tripod Leg
Middle Section (6). Using Tripod Leg Lock Screws (9)
included in the hardware pack, insert the Tripod Leg
Lock Screw into the lower brackets on the Tripod Leg.
Tighten the Tripod Leg Lock Screws so that the middle
section is securely in place. Repeat on remaining
two legs.
2. Attach Telescope
• Locate Telescope Main Tube (2). Secure telescope to
Altazimuth Yoke Mount (3) by positioning the telescope
between yoke. Carefully insert the Altitude Lock Knobs
(11) through the yoke mount and into the threaded
brackets on the side of telescope tube and remove lens
cover from 60mm Objective Lens (1).
Your Bushnell Telescope is now ready to be used.
To obtain the fullest enjoyment from your
telescope, please refer to the additional
information below.
WARRANTY / REPAIR
TELESCOPE LIFETIME LIMITED WARRANTY
Your Bushnell®telescope is warranted to be free of defects in materials and
workmanship for the lifetime of the original owner. The Lifetime Limited
Warranty is an expression of our confidence in the materials and mechanical
workmanship of our products and is your assurance of a lifetime of
dependable service.
If your telescope contains electrical components the electronic components
are warranted to be free of defects in materials and workmanship for one
year after the date of purchase.
In the event of a defect under this warranty, we will, at our option, repair or replace
the product, provided that you return the product postage prepaid. This warranty
does not cover damages caused by misuse or improper handling, installation or
maintenance of the product.
Any return made under this warranty
must be accompanied by the items listed below:
1) A check in the amount of $15.00 to cover the cost of handling
2) Name and address for product return
3) An explanation of the defect
4) Product should be well packed in a sturdy outside shipping
carton to prevent damage in transit and return postage prepaid
to the address listed below:
IN U.S.A. Send To:
Bushnell Performance Optics
8500 Marshall Drive
Lenexa, Kansas 66214
For products purchased outside the United States and Canada please contact
your local dealer for applicable warranty information. This warranty gives
you specific legal rights. You may have other rights which vary from country
to country.
©2001 Bushnell Performance Optics
IN CANADA Send To:
Bushnell Performance Optics
25A East Pearce Street, Unit 1
Richmond Hill, Ontario L4B 2M9
HOW TO USE YOUR NEW TELESCOPE
Focusing Telescope:
1.After assembly, aim Telescope Tube (2) at a land-based
target at least 200 yards away (e.g. a lighthouse or
landscape). Fully extend focusing tube (10).
2.While looking through eyepiece slowly adjust focusing
tube (10) by sliding telescoping tube inward until object
comes into focus in the eyepiece.
Never Look Directly At The Sun With Your Telescope
Permanent Damage To Your Eyes May Result.
(fig. 1)
2
 Loading...