

Page 1

Instruction Manual
Manuel D'Instructions
Manual de Instrucciones
Bedienungsanleitung
Manuale di Istruzioni
Manual de Instruções
Model #: 70-0002
Lit #: 98-0213/06-03
Digital Compass • Navigateur Numérique • Brújula Digital
Digital Compass • Bussola Digitale • Bússola Digital
Page 2

1
ENGLISH................................................... 2-11
FRANÇAIS.................................................. 12-21
ESPAÑOL....................................................22-31
DEUTSCH.................................................. 32-41
ITALIANO.................................................. 42-51
PORTUGUÊS............................................. 52-61
Page 3

32
Congratulations on your purchase of a Bushnell®Digital Navigation
System (DNS) wrist top compass. It is a precision instrument constructed
of the finest materials and assembled by highly skilled craftsmen for a
lifetime of trouble-free use under the most demanding conditions. This
booklet will help you achieve optimum performance by explaining how
to use its various features.
WHAT THE BUTTONS MEAN
ADJ Use this to adjust your settings
MODE Changes display from one feature to the next
within the time or compass modes
DOWN Lowers a setting
LIGHT Turn light on to illuminate LCD display
COMP Switch from Time Mode to Compass Mode
UP Increases a setting
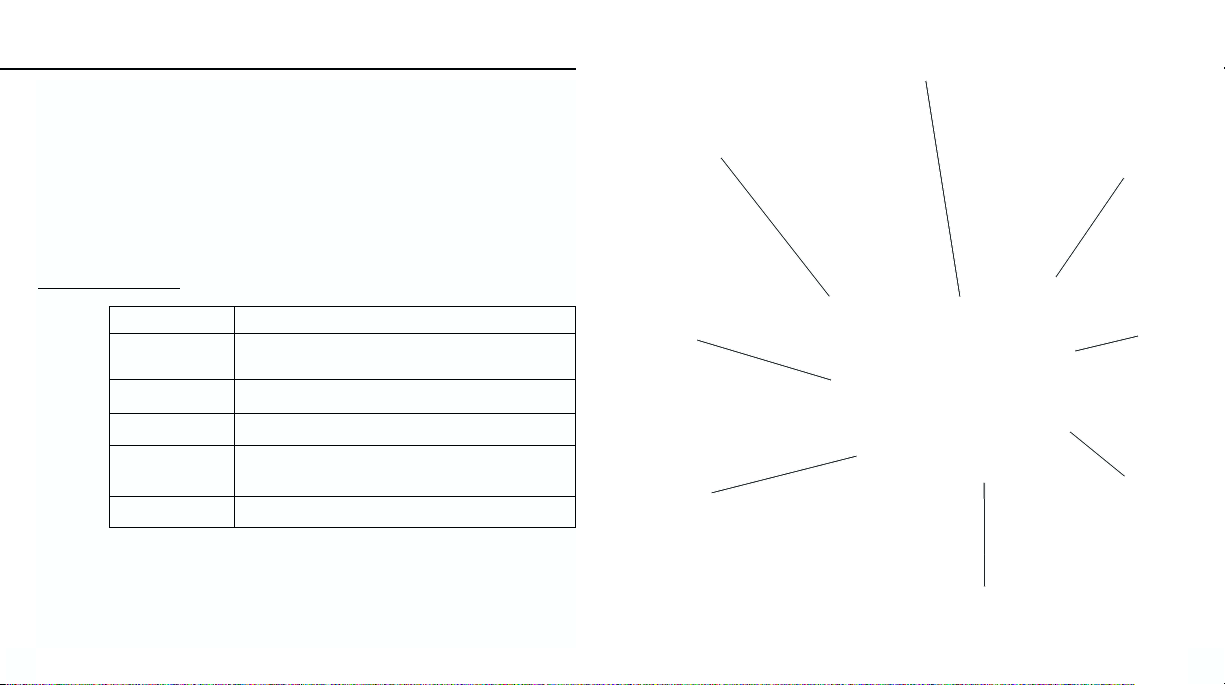
LCD Display
Setting
Adjustment
Button
(ADJ)
Mode Button
(MODE)
Down Button
(DOWN)
Up Button
(UP)
Backlight
(LIGHT)
Compass
Mode Button
(COMP)
Compass Level
ENGLISH
Page 4

New Settings
TEMPERATURE
Temperature Mode
Press MODE/NEXT button until Time Mode is displayed. If
already in Time Mode then just press
MODE/NEXT button and
Temperature Mode is displayed. Press
UP or DOWN button to
toggle between Celsius and Fahrenheit readings.
ALARM
Alarm Setting Mode
Press MODE button until Alarm Mode is displayed. The alarm
consists of 5 alarms, 4 for Time and 1 for Temperature. Press
UP or
DOWN button to scroll through the different alarms. Press and
hold down
ADJ for 3 seconds until the minute blinks, press UP or
DOWN button to adjust to desired values. Press MODE button for
next setting. Press
ADJ button at any time to save changes and exit.
The alarm is activated automatically after adjustments have been
made. To stop the alarm from beeping, press any button.
The alarm can also be turned on or off by going to the relevant alarm
and pressing the
COMP button to activate alarm function, press again
to activate Snooze function, and press again to de-activate alarm.
SETTING THE TIME
Default Time Mode / Time Settings
Press MODE button until Time Mode is displayed. Press and hold down ADJ for 3 seconds. Press
UP or DOWN button until desired value appears, and then press MODE button for next setting.
Press
ADJ button at any time to save changes and exit. When this is done, seconds will be reset
to 00. A small "A" or "P" will be to the lower left of the hours to denote AM or PM.
Date Settings
When setting the date the year is also displayed. Press MODE
button until Time Mode is displayed. Press and hold down ADJ for
3 seconds. Press
MODE button and scroll to desired setting to
change. Press
UP or DOWN button until desired value appears, and
then press
MODE button for next setting. Press ADJ button at any
time to save changes and exit.
For 24/12 hour setting press
MODE button until Time Mode is
displayed. Press and hold down
ADJ for 3 seconds. Press MODE
button and scroll through settings until 24/12 hour setting appears,
then press
UP or DOWN button to enter desired setting. Press ADJ
button at any time to save changes and exit.
5
4
Page 5

COUNTDOWN TIMER ALARM
Countdown / Reverse-Timer Mode
Press the MODE button until Countdown Timer Mode is
displayed, represented by ‘RT’ (reverse timer). To operate press the
UP button to start and press again to stop, then press the DOWN
button to reset the Countdown Timer.
To set the Countdown Timer press and hold down the
ADJ button for
3 seconds, which will cause the seconds setting to blink. Adjust with
the
UP or DOWN button, and then press the MODE button to
adjust next setting. Press the
ADJ button to save settings and exit. Press
the
COMP for ‘AUTO’ to allow Countdown Timer to repeat function
automatically, and press
COMP again to turn off ‘AUTO’ function.
Press any button when alarm sounds to stop the Countdown Timer.
If nothing is pressed the Countdown Timer will stop beeping after
10 seconds, but it will continue if the ‘AUTO’ function is set on. To
stop the Countdown Timer if the ‘Auto’ function is on, you must go
to the Countdown Timer Mode and press
COMP to turn off the
‘Auto’ function and then press
UP button to stop it.
DIGITAL COMPASS
Compass Mode
Press the MODE button until Time Mode is displayed, and then
press the
COMP button. If already in Time Mode, simply press the
COMP button and Compass Mode is displayed. Hold the compass
level using the bubble level to get a reading. If the Cardinal Points
blink then the compass probably needs to be calibrated. (See trouble
shooting tips.)
Compass Calibration
In Compass Mode, hold down ADJ button for 3 seconds.
Calibration Mode is displayed. Put the compass on a level, nonmagnetic surface and press the
COMP button. The word CAL will
start blinking. Then, rotate the compass 2 full circles slowly
WHILE
HOLDING THE COMPASS LEVEL
. When done, press COMP
again. When completed, the display shows ‘DONE’ and it will then
go automatically into Declination Setting Mode. If Calibration is
Temperature Alarm
Sets the alarm to sound when the temperature measurement reaches
the programmed level. In the Alarm Mode, the Temperature alarm
uses the same measurement units (ºC or F) that were last set in the
Temperature Mode. To change this you must first change the
temperature units in the Temperature Mode. Using the
UP or
DOWN buttons once changes the temperature in tenths of a degree.
Holding either button down changes the temperature in increments
of 1 degree.
Beep Function
In the Alarm mode, a Beep function is also available. When
activated, the beep function causes a beep sound to be made
whenever a button is depressed, even when the Alarm function is
turned off. To activate the function go to the Beep function in the
Alarm Mode, press the
COMP button and ‘ON’ is displayed. Press
again and ‘OFF’ is displayed.
Stopwatch Mode
Press the MODE button until Stop Watch Mode is displayed. To
operate, press the
UP button to start and press again to stop.
Pressing the
DOWN button will reset the Stop Watch.
For split timing function, press the
DOWN button while the Stop
Watch is operating in order to stop the display and press again to
continue. You can also press the
DOWN button while the Stop
Watch is operating to stop the display and then press the
UP button
to stop the Stop Watch and display the final reading. Press the
DOWN button again to reset the Stop Watch.
Stop Watch Mode / Split Timing Function
Split timing function is displayed as ‘SPL’ when activated and the
display returns to normal when
DOWN button is pressed.
7
6
Page 6

To conserve energy the display in the Homing Mode will show 3
‘bars’ instead of the current bearing, and the segments will not be
displayed after 1minute. To activate the display again you must press
COMP. To exit the Homing Mode press MODE again to return to
default Compass Mode.
AUTO BACK LIGHT
Press the LIGHT button to turn on LCD backlight for 5 seconds.
Night Mode
Night Mode allows the backlight to come on automatically when any of the function keys are
pressed except when the compass is in Compass Mode. Press and hold down
LIGHT button for
3 seconds, and the Night Mode icon (represented by the light symbol) appears. To turn off press
and hold down
LIGHT button until the light symbol disappears.
BATTERY
Installing a Battery
To open the battery compartment cover, insert a coin in the coin slot
and rotate cover in a clockwise direction until it lifts open. Insert the
lithium cell (battery type: CR2430) into the compartment, making
sure that the negative polarity faces downwards. Close battery
compartment cover until it clicks shut.
Low Battery Indicator
A blinking battery icon will appear when the battery is low. The
battery compartment is on the back of the compass. Replace the
used battery with a CR2430 lithium battery. Note: The watch is
automatically reset when the battery is removed.
Battery Life
Your DNS is designed for continuous use and batteries will last over one year with regular usage.
Heavy use of the alarms, light, or compass will shorten battery life.
unsuccessful, the Cardinal Points will blink and you will have to repeat the previous 4 steps again.
To skip setting the declination, press the
ADJ button to return to the Compass Mode.
Declination Setting
Declination adjusts the compass for the local magnetic fields. In
some areas, magnetic declination can be considerable, so it is a good
idea to check for declination on your map or on the Internet. To
adjust the compass declination angle, go to Compass Mode and hold
down
ADJ button for 3 seconds, and the Compass Homing Mode
is displayed. Press
MODE button until you get into Declination
Setting Mode displayed as ‘DEC’. Press
UP or DOWN button for
desired value then just press
ADJ button to save settings and exit the
mode. Declination is sometimes measured as degrees positive and
negative. Degrees East are considered positive and Degrees West are
considered negative. For example, to change from 3 degrees East
(positive) declination to 3 degrees West (negative) press the
DOWN
button until 3W appears.
Self Homing Mode
Allows you to preset a reference bearing which tells the Compass to
alert you to the direction you should be heading. Go into Compass
Mode and press
MODE button to display compass Homing. To
adjust homing bearing, press and hold
ADJ button for three
seconds. Press
UP button or DOWN button to adjust to desired
bearing setting. Pressing
UP or DOWN will increase or decrease
bearing by increments of ten. A single push of
UP or DOWN moves
bearing by 1 degree. When done, press
ADJ to return to Homing
mode. To return to Compass Mode press
MODE button.
To operate the compass in Homing Mode go into the Compass Mode first, then press
MODE
button to get into Homing Mode.
The main reading displays the actual bearing and the lower reading shows the ‘home’ bearing. The
segments on the circumference show the difference between the two bearings, which can be used
to redirect you to stay on course.
98
Page 7

WARRANTY / REPAIR
11
TROUBLE SHOOTING
If the Cardinal points (N, NE, E, SE etc.) on your compass blink - Try holding the compass
LEVEL using the bubble level as a guide. The Cardinal points may also blink when the Compass
encounters magnetic interference from the surrounding areas. The Cardinal points blink because
the Compass is unable to measure bearings accurately. If this does not fix the blinking, please
recalibrate your compass. (Go to page 7 for Compass Calibration.) Remember to keep the
Compass away from metal objects which may cause magnetic interference. Double check that
your declination is properly set (In general, zero degrees should be the default setting).
Three dashes are displayed – Your compass has gone into a "sleep" mode to save batteries. Press
COMP to reactivate the compass.
Can’t turn unit off – This unit is designed to be constantly on and the batteries will last about a
year assuming normal usage.
Reset compass - If, during operation, an external electrodischarge occurs near the compass, the
unit may exhibit erroneous readings. To solve this problem, the watch must be reset and
recalibrated. Note: The watch is automatically reset when the battery is removed.
If your wristtop goes into a test mode after inserting the battery – You will need to re-install
your battery. Remove battery. Wait 10 seconds then carefully re-insert the battery making sure
that it is well placed in the battery compartment. Close battery door.
You will know that your wristtop has gone into test mode – If you see the LCD segments around
the display turning on one-by-one and moving in an counter-clockwise direction. After the test
mode is completed, your wristtop will return to normal. The test mode will not harm your
wristtop's normal operation.
10
TWO-YEAR LIMITED WARRANTY
Your Bushnell® product is warranted to be free of defects in materials and workmanship
for two years after the date of purchase. In the event of a defect under this warranty, we
will, at our option, repair or replace the product, provided that you return the product
postage prepaid. This warranty does not cover damages caused by misuse, improper
handling, installation, or maintenance provided by someone other than a Bushnell
Authorized Service Department.
Any return made under this warranty must be accompanied by the items listed below:
1) A check/money order in the amount of $10.00 to cover the
cost of postage and handling
2) Name and address for product return
3) An explanation of the defect
4) Proof of Date Purchased
5) Product should be well packed in a sturdy outside shipping carton, to prevent
damage in transit, with return postage prepaid to the address listed below:
IN U.S.A. SEND TO: IN CANADA SEND TO:
Bushnell Performance Optics Bushnell Performance Optics
Attn.: Repairs Attn.: Repairs
8500 Marshall Drive 25A East Pearce Street, Unit 1
Lenexa, Kansas 66214 Richmond Hill, Ontario L4B 2M9
For products purchased outside the United States or Canada please contact your local dealer
for applicable warranty information. In Europe you may also contact Bushnell at:
BUSHNELL Performance Optics Gmbh
European Service Centre
MORSESTRASSE 4
D- 50769 KÖLN
GERMANY
Tél: +49 (0) 221 709 939 3
Fax: +49 (0) 221 709 939 8
This warranty gives you specific legal rights.
You may have other rights which vary from country to country.
©2003 Bushnell Performance Optics
Page 8
Félicitations et merci de votre achat d'une montre-bracelet navigateur
numérique Bushnell
®
. C'est un instrument de précision, fabriqué avec les
matériaux de la meilleure qualité, assemblé par des artisans hautement
spécialisés, pouvant assurer toute une vie de service sans problème, dans
les conditions les plus rudes. Ce livret vous permettra d'en obtenir
les performances les meilleures car il explique comment utiliser ses
diverses fonctions.
R
ÔLE DES BOUTONS
ADJ Sert à ajuster les réglages.
MODE Fait passer l'affichage d'une fonction à la suivante, à
l'intérieur des modes temps et navigateur numérique.
DOWN Diminue un réglage.
LIGHT Sert à éclairer l'affichage à cristaux liquides.
COMP Fait passer de Time Mode (mode temps) à
Compass Mode (mode navigateur).
UP Augmente un réglage.
12
FRENCH
13
Ecran à Cristaux Liquides
Bouton
de Réglage
(ADJ)
Bouton
« Down » (bas)
(DOWN)
Bouton
« Up » (haut)
(UP)
Bouton de Mode
Navigateur Numérique
(COMP)
Niveau du
Navigateur
Numérique
Rétroéclairage
(LIGHT)
Bouton de Mode
(MODE)
Page 9

Nouveaux Réglages (New Settings)
TEMPÉRATURE
Mode Température (Temperature Mode)
Appuyez sur le bouton MODE/NEXT jusqu'à ce que Time Mode
(mode temps) soit affiché. Si l'instrument est déjà dans Time Mode
(mode temps), appuyez simplement sur le bouton
MODE/NEXT et
Temperature Mode (mode température) s'affiche. Appuyez sur le
bouton
UP ou DOWN pour alterner entre les degrés Celsius et les
degrés Fahrenheit.
ALARME
Mode Réglage Alarme (Alarm Setting Mode)
Appuyez sur le bouton MODE jusqu'à ce que Alarm Mode (mode
alarme) soit affiché. Ce mode comprend 5 alarmes, 4 pour le temps
et 1 pour la température. Appuyez sur le bouton
UP ou DOWN
pour faire défiler les différentes alarmes. Maintenez ADJ enfoncé
pendant 3 secondes jusqu'à ce que le chiffre de la minute clignote ;
appuyez sur
UP ou DOWN pour ajuster les valeurs souhaitées.
Appuyez sur le bouton
MODE pour le réglage suivant. Appuyez sur
le bouton
ADJ à n'importe quel moment pour sauvegarder les
changements et sortir. L'alarme s'active automatiquement une fois
les réglages effectués. Pour faire taire l'alarme, appuyez sur n'importe
quel bouton.
Il est aussi possible d'activer et de désactiver l'alarme en accédant à
l'alarme appropriée et en appuyant sur le bouton
COMP pour
activer la fonction d'alarme, en rappuyant pour activer la fonction de
Rappel et en rappuyant pour désactiver l'alarme.
15
RÉGLAGE DE L'HEURE
Mode Temps par Défaut / Réglages de L'heure (Default Time Mode / Time Settings)
Appuyez sur le bouton MODE jusqu'à ce que Time Mode (mode temps) soit affiché. Maintenez
ADJ enfoncé pendant 3 secondes. Appuyez sur le bouton UP ou DOWN jusqu'à ce que la valeur
souhaitée apparaisse puis appuyez sur le bouton
MODE pour le réglage suivant. Appuyez sur le
bouton
ADJ à n'importe quel moment pour sauvegarder les changements et sortir. Cela fait, les
secondes sont remises à 00. Un petit "A" ou "P" apparaît en bas, à gauche des heures pour indiquer
AM (avant midi) ou PM (après midi).
Réglages de date (Date Settings)
Lors du réglage de la date, l'année est aussi affichée. Appuyez sur le
bouton
MODE jusqu'à ce que Time Mode (mode temps) soit
affiché. Maintenez
ADJ enfoncé pendant 3 secondes. Appuyez sur le
bouton
MODE et faites défiler jusqu'au réglage à changer. Appuyez
sur le bouton
UP ou DOWN jusqu'à ce que la valeur souhaitée
apparaisse puis appuyez sur le bouton
MODE pour le réglage
suivant. Appuyez sur le bouton
ADJ à n'importe quel moment pour
sauvegarder les changements et sortir.
Pour le réglage 24/12 heures, appuyez sur le bouton
MODE jusqu'à
ce que Time Mode (mode temps) soit affiché. Maintenez
ADJ
enfoncé pendant 3 secondes. Appuyez sur le bouton MODE et faites
défiler les réglages jusqu'à ce que le réglage 24/12 heures apparaisse
puis appuyez sur le bouton
UP ou DOWN pour entrer le réglage
souhaité. Appuyez sur le bouton
ADJ à n'importe quel moment pour
sauvegarder les changements et sortir.
14
Page 10

ALARME DE MINUTERIE DE COMPTE À REBOURS
Mode Compte à Rebours/Minuterie Inverse
(Countdown/Reverse-Timer Mode)
Appuyez sur le bouton MODE jusqu'à ce que Countdown Timer
Mode (mode minuterie de compte à rebours) soit affiché, représenté
par ‘RT ’ (minuterie inverse). Pour l'utiliser, appuyez sur le bouton
UP pour démarrer et appuyez de nouveau pour arrêter ; appuyez sur
le bouton
DOWN pour remettre le compte à rebours à zéro.
Pour régler la minuterie de compte à rebours, maintenez le bouton
ADJ enfoncé pendant 3 secondes, ce qui fait clignoter le réglage des
secondes. Ajustez à l'aide du bouton
UP ou DOWN puis appuyez
sur le bouton
MODE pour ajuster le réglage suivant. Appuyez sur le
bouton
ADJ pour sauvegarder les réglages et sortir. Appuyez sur
COMP pour ‘AUTO’ afin de permettre la répétition automatique de
la fonction de minuterie de compte à rebours ; appuyez de nouveau
sur
COMP pour désactiver la fonction ‘AUTO’.
Lorsque l'alarme retentit, appuyez sur n'importe quel bouton pour
arrêter le compte à rebours. Si vous n'appuyez sur aucun bouton, la
minuterie cessera de biper au bout de 10 secondes, mais elle
continuera si la fonction ‘AUTO’ est activée. Pour arrêter le compte
à rebours si la fonction ‘Auto’ est activée, vous devez accéder au Countdown Timer Mode (mode
minuterie de compte à rebours) et appuyer sur
COMP pour désactiver la fonction ‘Auto’ puis
appuyer sur le bouton
UP pour arrêter.
NAVIGATEUR NUMÉRIQUE
Mode Navigateur Numérique (Compass Mode)
Appuyez sur le bouton MODE jusqu'à ce que Time Mode (mode
temps) soit affiché puis appuyez sur le bouton
COMP. Si vous êtes
déjà au Time Mode (mode temps), appuyez simplement sur le
bouton
COMP et Compass Mode (mode navigateur) est affiché.
Maintenez le navigateur horizontal à l'aide du niveau à bulle pour
obtenir un relevé. Si les points cardinaux clignotent, il est
probablement nécessaire d'étalonner le navigateur numérique. (Voir
les conseils de dépannage).
17
Alarme Température (Temperature Alarm)
Programme le déclenchement de l'alarme quand la température atteint
la valeur programmée. Au Alarm Mode (mode alarme), l'alarme de
température utilise les unités (ºC ou F) qui ont été programmées en
dernier au Temperature Mode (mode température). Pour changer cela,
vous devez d'abord changer les unités de température au Temperature
Mode (mode température). Une seule pression sur le bouton
UP ou le
bouton
DOWN change la température par paliers d'un dixième de
degré. Si vous maintenez l'un ou l'autre bouton enfoncé, la
température change par paliers de 1 degré.
Fonction Bip (Beep Function)
Au Alarm mode (mode alarme), la fonction bip est aussi disponible.
Lorsqu'elle est activée, la fonction bip fait retentir un bip chaque fois
que vous appuyez sur un bouton, même si la fonction alarme est
désactivée. Pour activer la fonction, allez à la fonction bip au Alarm
Mode (mode alarme), appuyez sur le bouton
COMP et ‘ON’ (activé)
est affiché. Appuyez de nouveau et ‘OFF’ (désactivé) est affiché.
Mode Chronomètre (Stopwatch Mode)
Appuyez sur le bouton MODE jusqu'à ce que Stop Watch Mode
(mode chronomètre) soit affiché. Pour le faire fonctionner, appuyez
sur le bouton
UP pour démarrer et appuyez de nouveau pour arrêter.
Appuyez sur le bouton
DOWN pour remettre le chronomètre à zéro.
Pour la fonction de chronométrage fractionné, appuyez sur le
bouton
DOWN pendant le fonctionnement du chronomètre afin
d'arrêter l'affichage et appuyez de nouveau pour continuer. Vous
pouvez aussi appuyer sur le bouton
DOWN pendant le
fonctionnement du chronomètre afin d'arrêter l'affichage puis
appuyer sur le bouton
UP pour arrêter le chronomètre et afficher le
relevé final. Appuyez de nouveau sur le bouton
DOWN pour
remettre le chronomètre à zéro.
Mode Chronomètre/Fonction de chronométrage fractionné
(Stop Watch Mode/Split Timing Mode)
La fonction de chronométrage fractionné s'affiche ‘SPL’ quand elle
est activée et l'affichage retourne à la normale quand vous appuyez
sur le bouton
DOWN.
16
Page 11

Une seule poussée sur UP ou DOWN change le relèvement de 1
degré. Cela fait, appuyez sur
ADJ pour retourner au Homing mode
(mode autoguidage). Pour retourner au Compass Mode (mode
navigateur numérique), appuyez sur le bouton
MODE.
Pour utiliser le navigateur numérique au Homing Mode (mode
autoguidage), passez d'abord au Compass Mode (mode navigateur)
puis appuyez sur le bouton
MODE pour accéder au mode
autoguidage.
L'affichage principal indique le relèvement présent et l'affichage inférieur indique le relèvement
d'autoguidage. Les segments de la circonférence représentent la différence entre les deux
relèvements, ce qui vous permet de corriger votre trajectoire.
Pour économiser l'énergie, l'affichage au Homing Mode (mode autoguidage) indiquera 3 « barres
» au lieu de la valeur du relèvement présent et les segments disparaîtront au bout d'une minute.
Pour réactiver l'affichage, vous devez appuyer sur
COMP. Pour sortir du Homing Mode (mode
autoguidage), appuyez de nouveau sur
MODE pour retourner au default Compass Mode (mode
navigateur numérique par défaut).
RÉTROÉCLAIRAGE
Appuyez sur le bouton LIGHT pour allumer le rétroéclairage de l'affichage à cristaux liquides
pendant 5 secondes.
Mode Nuit (Night Mode)
Mode Nuit (Night Mode) permet au rétroéclairage de s'allumer automatiquement lorsque l'une des
touches de fonctions est actionnée, sauf lorsque le navigateur numérique est au Compass Mode (mode
navigateur). Maintenez le bouton
LIGHT enfoncé pendant 3 secondes
; l'icône Night Mode (mode nuit) (symbole de l'ampoule d'éclairage)
apparaît. Pour le désactiver, maintenez le bouton
LIGHT enfoncé
jusqu'à ce que le symbole de l'ampoule d'éclairage disparaisse.
PILE
Installation de la pile (Installing a Battery)
Pour ouvrir le couvercle du compartiment de pile, insérez une pièce de
monnaie dans l'encoche et tournez le couvercle dans le sens horaire,
jusqu'à ce qu'il se soulève et s'ouvre. Insérez la pile au lithium (type de
pile : CR2430) dans le compartiment, en vérifiant que le pôle négatif est
vers le bas. Fermez le couvercle du compartiment de pile jusqu'à ce qu'il s'encliquette.
19
Étalonnage du Navigateur Numérique (Compass Calibration)
Au Compass Mode (mode navigateur), maintenez le bouton ADJ
enfoncé pendant 3 secondes. Calibration Mode (mode étalonnage)
est affiché. Placez le navigateur numérique sur une surface
horizontale, non magnétique et appuyez sur le bouton
COMP. Le
mot CAL doit commencer à clignoter. Tournez alors le navigateur
numérique de 2 tours complets, lentement,
TOUT EN LE
MAINTENANT HORIZONTAL
. Cela fait, appuyez de nouveau
sur
COMP. Cela terminé, l'affichage indique ‘DONE’ (FAIT) et il
passe automatiquement au Declination Setting Mode (mode de
réglage de déclinaison). Si l'étalonnage échoue, les points cardinaux continuent de clignoter et
vous devrez répéter les 4 opérations précédentes. Pour sauter le réglage de la déclinaison, appuyez
sur le bouton
ADJ pour retourner au Compass Mode (mode navigateur numérique).
Réglage de Déclinaison (Declination Setting)
La déclinaison règle le navigateur numérique pour les champs
magnétiques locaux. Dans certaines régions, la déclinaison
magnétique peut être considérable ; il est donc recommandé de
vérifier la déclinaison sur votre carte ou sur l'Internet. Pour régler
l'angle de déclinaison du navigateur numérique, allez au Compass
Mode (mode navigateur numérique) et maintenez le bouton
ADJ
enfoncé pendant 3 secondes ; le Compass Homing Mode (mode
autoguidage du navigateur) est affiché. Appuyez sur le bouton
MODE jusqu'à ce que vous accédiez au Declination Setting Mode
(mode de réglage de déclinaison) affiché ‘DEC’. Appuyez sur le
bouton
UP ou DOWN pour entrer la valeur appropriée et appuyez sur le bouton ADJ pour
sauvegarder les réglages et sortir du mode. La déclinaison est parfois mesurée en degrés positifs et
degrés négatifs. Les degrés vers l'est sont considérés positifs et les degrés vers l'ouest sont considérés
négatifs. Par exemple, pour passer d'une déclinaison de 3 degrés est (positifs) à une déclinaison de
3 degrés ouest (négatifs), appuyez sur le bouton
DOWN jusqu'à ce que 3W apparaisse.
Mode Autoguidage (Self Homing Mode)
Il vous permet de programmer un relèvement de référence qui indique au navigateur numérique
de vous prévenir de la direction vers laquelle vous devez vous diriger. Accédez au Compass Mode
(mode navigateur numérique) et appuyez sur le bouton de
MODE pour afficher l'autoguidage du
navigateur. Pour régler le relèvement d'autoguidage, maintenez le bouton
ADJ enfoncé pendant 3
secondes. Appuyez sur le bouton
UP ou DOWN pour entrer le réglage de relèvement approprié.
Une pression sur
UP ou DOWN augmente ou diminue la valeur du relèvement par paliers de dix.
18
Page 12

GARANTIE / RÉPARATION
21
Indicateur de Tension Faible de Pile (Low Battery Indicator)
Une icône clignotante de pile apparaît quand la tension de pile est faible. Le compartiment de pile
se trouve à l'arrière du navigateur numérique. Remplacez la pile usée par une pile au lithium
CR2430. Remarque : La montre est automatiquement réinitialisée lorsque la pile est retirée.
Durée de Vie des Piles (Battery Life)
Votre navigateur numérique est conçu pour un usage continu et les piles doivent durer plus d'un
an en étant utilisées régulièrement. L'utilisation intense des alarmes, de l'éclairage et du navigateur
numérique raccourcit la durée de vie des piles.
DÉPANNAGE
Si les points cardinaux (N, NE, E, SE, etc.) du navigateur numérique clignotent, essayez de le
tenir HORIZONTAL en utilisant le niveau à bulle comme guide. Il est également possible que les
points cardinaux clignotent lorsque le navigateur numérique rencontre des parasites magnétiques
venant des zones voisines. Les points cardinaux clignotent parce que le navigateur numérique ne
peut mesurer les relèvements avec précision. Si cela ne corrige pas le clignotement, veuillez refaire
l'étalonnage de l'instrument. (Voir la page 18 de l'étalonnage du navigateur numérique).
N'oubliez pas de garder le navigateur éloigné des objets métalliques pouvant causer des parasites
magnétiques. Vérifiez aussi que le réglage de la déclinaison est correct (en général, zéro degré doit
être le réglage par défaut).
Trois tirets sont affichés – Votre navigateur numérique est passé au mode de « repos » pour
économiser l'énergie des piles. Appuyez sur
COMP pour réactiver l'instrument.
Impossible de désactiver l'instrument – Il est conçu pour rester constamment activé et les piles
durent environ un an avec un usage normal.
Réinitialisation du navigateur numérique - Si, durant l'utilisation, une décharge électrique
externe se produit près du navigateur, l'instrument risque d'indiquer des mesures inexactes. Pour
résoudre ce problème, réinitialisez et étalonnez à nouveau l'instrument. Remarque : La montre
est automatiquement réinitialisée lorsque la pile est retirée.
Si votre navigateur-montre passe au mode test après la mise en place de la pile – Vous devrez
la remettre en place. Sortez-la ; attendez 10 secondes puis remettez-la dans son compartiment en
vérifiant qu'elle est bien placée. Fermez le compartiment.
Vous saurez que votre navigateur-montre est passé au mode test – Si vous voyez les segments
de l'affichage à cristaux liquides s'allumer un par un et se déplacer dans le sens inverse des aiguilles
d'une montre. À la fin du mode test, le navigateur-montre doit revenir au mode normal. Le mode
test n'affecte pas le fonctionnement normal de l'instrument.
20
GARANTIE LIMITÉE de DEUX ans
Votre produit Bushnell® est garanti exempt de défauts de matériaux et de fabrication pendant deux
ans après la date d'achat. Au cas où un défaut apparaîtrait sous cette garantie, nous nous réservons
l'option de réparer ou de remplacer le produit, à condition de nous le renvoyer en port payé. La
présente garantie ne couvre pas les dommages causés par une utilisation, une manipulation, une
installation incorrecte(s) ou un entretien incorrect ou fourni par quelqu'un d'autre qu'un centre de
réparation agréé par Bushnell.
Tout retour effectué dans le cadre de la présente garantie doit être accompagné des articles indiqués
ci-dessous :
1) un chèque ou mandat d'une somme de 10,00 $ US pour couvrir les frais d'envoi
et de manutention
2) le nom et l'adresse pour le retour du produit
3) une description du défaut constaté
4) la preuve de la date d'achat
5) Le produit doit être emballé soigneusement, dans un carton d'expédition solide, pour
éviter qu'il ne soit endommagé durant le transport ; envoyez-le en port payé, à
l'adresse indiquée ci-dessous :
Aux États-Unis, envoyez à: Au CANADA, envoyez à:
Bushnell Performance Optics Bushnell Performance Optics
Attn.: Repairs Attn.: Repairs
8500 Marshall Drive 25A East Pearce Street, Unit 1
Lenexa, Kansas 66214 Richmond Hill, Ontario L4B 2M9
Pour les produits achetés en dehors des États-Unis et du Canada, veuillez contacter votre distributeur
local pour tous renseignements concernant la garantie. En Europe, vous pouvez aussi contacter
Bushnell au: BUSHNELL Performance Optics Gmbh
European Service Centre
MORSESTRASSE 4
D- 50769 Cologne
Allemagne
Tél: +49 (0) 221 709 939 3
Fax: +49 (0) 221 709 939 8
La présente garantie vous donne des droits légaux spécifiques.
Vous pouvez avoir d'autres droits qui varient selon les pays.
©2003 Bushnell Performance Optics
Page 13

Felicidades por la compra de una brújula de muñeca Digital Navigation
System (DNS) de Bushnell
®
. Es un instrumento de precisión fabricado
con materiales más selectos y ensamblado por artesanos altamente
cualificados para disfrutarlo toda una vida sin problemas en las
condiciones más exigentes. Este folleto le ayudará a lograr un
rendimiento óptimo explicando cómo se usan sus diferentes funciones.
Q
UÉ SIGNIFICAN LOS BOTONES
ADJ Sirve para ajustar las posiciones
MODE Cambia la pantalla de una función a la siguiente
dentro de las modalidades de tiempo o brújula
DOWN Baja una posición
LIGHT Enciende la luz para iluminar la pantalla LCD
COMP Cambia de Modalidad de tiempo (Time Mode)
a Modalidad de brújula (Compass Mode)
UP aumenta una posición
22
SPANISH
23
Pantalla LCD
Botón de
Ajuste de
Configuración
(ADJ)
Botón
"Down" (abajo)
(DOWN)
Botón "Up"
(arriba)
(UP)
Botón de Modalidad
de Brújula (COMP)
Nivel de Brújula
Iluminación
de Fondo
(LIGHT)
Botón de Modalidad
(MODE)
Page 14

Nuevas Configuraciones
(New Settings)
TEMPERATURA
Modalidad de Temperatura (Temperature Mode)
Pulse el botón MODE/NEXT hasta que se visualice Modalidad de
Tiempo (Time Mode). Si ya está en la Modalidad de Tiempo, sólo
tiene que pulsar el botón
MODE/NEXT y se visualizará Modalidad
de Temperatura (Temperature Mode). Pulse el botón
UP o DOWN
para bascular entre las lecturas de grados Celsius y Fahrenheit.
ALARMA
Modalidad de Configuración de Alarma (Alarm Setting Mode)
Pulse el botón MODE hasta que se visualice Alarm Mode
(Modalidad de Alarma). La alarma consta de 5 alarmas, 4 de Tiempo
y 1 de Temperatura. Pulse el botón
UP o DOWN para desplazarse
en pantalla por las diferentes alarmas. Pulse y mantenga pulsado el
botón
ADJ durante 3 segundos hasta que destellen los minutos,
pulse el botón
UP o DOWN para ajustar los valores deseados. Pulse
el botón
MODE para la siguiente configuración. Pulse el botón ADJ
en cualquier momento para guardar los cambios y salir. La alarma se
activa automáticamente después de haber hecho los ajustes. Para
detener la señal acústica de la alarma, pulse cualquier botón.
La alarma también se puede encender o apagar si va a la alarma
pertinente y pulsa el botón
COMP para activar la función de alarma;
pulse el botón otra vez para activar la función Snooze (alarma
repetitiva), y vuelva a pulsarlo para desactivar la alarma.
25
24
CÓMO SE AJUSTA EL TIEMPO
Modalidad de tiempo predeterminada/Ajustes de tiempo (Default Time Mode/Time Settings)
Pulse el botón MODE hasta que se visualice Modalidad de Tiempo (Time Mode). Pulse y
mantenga pulsado el botón
ADJ durante 3 segundos. Pulse el botón UP o DOWN hasta que
aparezca el valor deseado, y luego pulse el botón
MODE para la siguiente posición. Pulse el botón
ADJ en cualquier momento para guardar los cambios y salir. Cuando haga esto, los segundos se
reajustarán en cero, 00. Aparecerán una "A" o "P" pequeñas en el lado inferior izquierdo de las
horas para indicar AM o PM.
Configuraciones de Fecha (Date Settings)
Cuando se configura la fecha, el año también se visualiza. Pulse el
botón
MODE hasta que se visualice Modalidad de Tiempo (Time
Mode). Pulse y mantenga pulsado el botón
ADJ durante 3 segundos.
Pulse el botón
MODE y desplace la pantalla hasta la configuración
que desee cambiar. Pulse el botón
UP o DOWN hasta que aparezca
el valor deseado, y luego pulse el botón
MODE para la siguiente
configuración. Pulse el botón
ADJ en cualquier momento para
guardar los cambios y para salir.
Para una configuración de 24/12 horas, pulse el botón
MODE hasta
que se visualice Modalidad de Tiempo (Time Mode). Pulse y
mantenga pulsado el botón
ADJ durante 3 segundos. Pulse el botón
MODE y desplace la pantalla por las configuraciones hasta que
aparezca 24/12, entonces pulse el botón
UP o DOWN para
introducir la configuración deseada. Pulse el botón
ADJ en cualquier
momento para guardar los cambios y para salir.
Page 15

ALARMA DEL TEMPORIZADOR DE CUENTA ATRÁS
Modalidad de Cuenta Atrás / Temporizador Regresivo
(Countdown Reverse / Timer Mode)
Pulse el botón MODE hasta que se visualice Modalidad de
temporizador regresivo (Countdown Timer Mode), representado
por ‘RT’ (temporizador regresivo). Para operar pulse el botón
UP
para empezar y vuelva a pulsarlo para parar, luego pulse el botón
DOWN para reajustar el Temporizador Regresivo.
Para ajustar el Temporizador Regresivo pulse y mantenga pulsado el
botón
ADJ durante 3 segundos, lo cual hará que los segundos
destellen. Ajuste pulsando los botones
UP o DOWN, y luego pulse
el botón
MODE para ajustar la siguiente configuración. Pulse el
botón
ADJ para guardar las configuraciones y salir. Pulse el botón
COMP para que la función ‘AUTO’ permita que el Temporizador
Regresivo repita la función automáticamente, y pulse
COMP otras
vez para desactivar la función ‘AUTO’.
Pulse cualquier botón cuando suene la alarma para detener el
Temporizador Regresivo. Si no pulsa nada, el Temporizador
Regresivo dejará de emitir señales acústicas a los 10 segundos, pero seguirá emitiéndolas si está
activada la función ‘AUTO’. Para detener el Temporizador Regresivo si está activada la función
‘Auto’, tiene que ir a la Modalidad de Temporizador Regresivo y pulsar
COMP para desactivar la
función ‘Auto’ y luego pulsar
UP para detenerlo.
BRÚJULA DIGITAL
Modalidad de Brújula (Compass Mode)
Pulse el botón MODE hasta que se visualice Modalidad de Tiempo
(Time Mode), y luego pulse el botón
COMP. Si ya está n la
Modalidad de Tiempo, sólo tiene que pulsar el botón
COMP y se
visualizará la Modalidad de Brújula. Mantenga la brújula horizontal
usando el nivel de burbuja como ayuda. Si destellan los Puntos
Cardinales, puede que la brújula necesite una calibración. (Consulte
los consejos útiles para la correción de anormalidades).
27
Alarma de Temperatura (Temperature Alarm)
Fija la alarma para que suene cuando la medida de la temperatura
alcanza el nivel programado. En la Modalidad de Alarma, la alarma
de Temperatura utiliza las mismas unidades de medida (ºC o F) que
se fijaron por último en la Modalidad de Temperatura. Para
cambiarla tiene que cambiar primero las unidades de temperatura en
la Modalidad de Temperatura. Si pulsa los botones
UP o DOWN
una vez, se cambia la temperatura en décimas de grado. Si mantiene
pulsado cualquiera de estos botones la temperatura cambia en
incrementos de 1 grado.
Función de Señal Acústica (Beep Function)
También hay disponible una función de Señal Acústica en la
modalidad de Alarma. Cuando se activa, la función de señal acústica
hace que suene un pitido siempre que se pulsa un botón, aun cuando
la función de Alarma esté apagada. Para activar esta función vaya a
la función de Señal Acustica en la Modalidad de Alarma, pulse el
botón
COMP y se visualizará ‘ON’(activado). Si lo pulsa otra vez se
visualizará ‘OFF’ (desactivado).
Modalidad de Cronómetro (Stopwatch Mode)
Pulse el botón MODE hasta que se visualice Modalidad de
Cronómetro (Stop Watch Mode). Para que funcione, pulse el botón
UP para empezar y vuelva a pulsarlo para parar. Si se pulsa el botón
DOWN se reajustará el Cronómetro.
Para la función de medición de tiempos parciales, pulse el botón
DOWN mientras está funcionando el Cronómetro detener la
pantalla y vuelva a pulsarlo para continuar. También puede pulsar el
botón
DOWN mientras está funcionando el Cronómetro para
detener la pantalla y luego pulsar el botón
UP para detener el
Cronómetro y visualizar la lectura final. Pulse el botón
DOWN otra
vez para reajustar el Cronómetro.
Modalidad de Cronómetro/Función de Medición de Tiemps Parciales
(Stopwatch Mode/Split Timing Mode)
La función de medición de tiempos parciales se visualiza como ‘SPL’
cuando está activada y la pantalla vuelve a normal cuando se pulsa el
botón
DOWN.
26
Page 16

rumbo en incrementos de diez. Una simple pulsación del botón UP o DOWN mueve el rumbo
1 grado. Cuando termine, pulse el botón
ADJ para regresar a la Modalidad de indicación del
rumbo. Para volver a la Modalidad de Brújula pulse el botón
MODE.
Para operar la brújula en las Modalidad de indicación del rumbo, vaya primero a la Modalidad de
Brújula, luego pulse el botón
MODE para entrar en la Modalidad de indicación del rumbo.
La lectura principal presenta el rumbo real y la lectura inferior muestra el rumbo que lleva a ‘casa".
Los segmentos de la circunferencia muestran la diferencia entre los dos rumbos, que se pueden
utilizar para poder mantener el curso.
Para conservar energía, la pantalla de la Modalidad de indicación del
rumbo mostrará 3 ‘barras’ en lugar del rumbo presente, y los
segmentos no se visualizarán después de 1 minuto. Para activar la
pantalla otra vez, tiene que pulsar
COMP. Si quiere salir de la
Modalidad de indicación del rumbo, pulse otra vez el botón
MODE
para regresar a la Modalidad de Brújula predeterminada.
LUZ DE FONDO AUTOMÁTICA
Pulse el botón LIGHT para encender la iluminación de fondo de la pantalla LCD durante 5
segundos.
Modalidad Nocturna (Night Mode)
La Modalidad Nocturna (Night Mode) permite que la iluminación de fondo se encienda
automáticamente al pulsar cualquiera de las teclas de función, excepto cuando la brújula está en
la Modalidad de Brújula. Pulse y mantenga pulsado el botón
LIGHT durante 3 segundos, y
aparecerá el icono de Modalidad Nocturna (representado por el símbolo de la luz). Para apagarlo,
pulse y mantenga pulsado el botón
LIGHT hasta que desaparezca el símbolo de la luz.
PILA
Cómo se instalan las pilas (Installing a Battery)
Para abrir la cubierta del compartimiento de las pilas, inserte una moneda en la ranura y gire la
cubierta en el mismo sentido que las agujas del reloj hasta que pueda levantarse y abrirse. Inserte
la pila de litio (tipo de pila: CR2430) en el compartimiento, cerciorándose de que la polaridad
negativa mire hacia abajo. Cierre la cubierta del compartimiento hasta que se encaje y se cierre
completamente.
29
Calibración de la Brújula (Compass Calibration)
En la Modalidad de Brújula, mantenga pulsado el botón ADJ
durante 3 segundos. Se visualizará la Modalidad de Calibración.
Ponga la brújula en una superficie horizontal que no sea magnética
y pulse el botón
COMP. Empezará a destellar la palabra CAL.
Entonces, gire lentamente la brújula 2 círculos completos,
MIENTRAS MANTIENE LA BRÚJULA HORIZONTAL.
Después, pulse
COMP otra vez. Cuando termine, la pantalla
mostrará ‘DONE’ (HECHO) y pasará automáticamente a
Declination Setting Mode (Modalidad de Configuración de
Declinación). Si la Calibración no tiene éxito, los Puntos Cardinales destellarán y tendrá que
repetir los 4 pasos previos. Si quiere saltarse el paso de configurar la declinación, pulse el botón
ADJ para regresar a la Modalidad de Brújula.
Configuración de la Declinación (Declination Setting)
La declinación ajusta la brújula de acuerdo con los campos
magnéticos locales. En algunas áreas, la declinación magnética puede
ser considerable, de modo que siempre es bueno comprobar la
declinación en un mapa o en Internet. Para ajustar el ángulo de
declinación de la brújula, vaya a la Modalidad de Brújula y
mantenga pulsado el botón
ADJ durante 3 segundos; entonces se
visualizará la Modalidad de indicación del rumbo de la brújula
(Compass Homing Mode). Pulse el botón
MODE hasta que la
Modalidad de Configuración de la Declinación (Declination Setting
Mode) se visualice como ‘DEC’. Pulse el botón
UP o DOWN para fijar el valor deseado y luego
pulse el botón
ADJ para guardar las configuraciones y salir de la modalidad. La declinación se
mide algunas veces en grados positivos y negativos. Los grados Este se consideran positivos y los
grados Oeste, negativos. Por ejemplo, para cambiar desde 3 grados Este (positivo) hasta 3 grados
Oeste (negativo) pulse el botón
DOWN hasta que aparezca 3W.
Modalidad de Indicación del Rumbo (Self Homing Mode)
Permite preseleccionar un rumbo de referencia que indica a la
Brújula que le alerte hacia la dirección que debe seguir. Vaya a la
Modalidad de Brújula y pulse el botón
MODE para visualizar el
indicador de rumbo. Para ajustar el rumbo en el indicador, pulse y
mantenga pulsado el botón
ADJ durante tres segundos. Pulse el
botón
UP o DOWN para ajustar la configuración del rumbo
deseado. Si pulsa el botón
UP o DOWN aumentará o disminuirá el
28
Page 17

GARANTÍA / REPARACIÓN
31
Indicador de nivel bajo de las pilas (Low Battery Indicator)
Un icono de pilas destellante aparecerá cuando la pila esté baja. El
compartimiento de ls pilas se encuentra en la parte posterior de la
brújula. Sustituya la pila gastada por una pila de litio CR2430. Nota:
El reloj se reajusta automáticamente cuando se quita la pila.
Vida útil de la pila (Battery Life)
Su unidad DNS se ha diseñado para utilizarse constantemente y las
pilas durarán más de un año con un uso normal. Si se usan mucho
las alarmas, la luz o la brújula, disminuirá la vida útil de las pilas.
CORRECCIÓN DE ANORMALIDADES
Si destellan los puntos cardinales (N, NE, E, SE etc.)en su brújula – Trate de sujetar la brújula
NIVELADA usando el nivel de burbuja como guía. Puede que los puntos cardinales destellen
también cuando la brújula encuentre interferencias magnéticas en los alrededores. Los puntos
cardinales destellan porque la Brújula no puede medir el rumbo con precisión. Si no se corrigen
los destellos, vuelva a calibrar la brújula. (Consulte la Calibración de Brújula en la página 28).
Recuerde que no debe acercar la brújula a objetos metálicos que puedan causar interferencias
magnéticas. Vuelva a verificar si la declinación está debidamente ajustada. (En general, el ajuste
predeterminado debe ser de cero grados).
Se visualizan tres rayas – La brújula ha entrado en la modalidad de "letargo" para evitar el
consumo innecesario de las pilas. Pulse el botón
COMP para reactivar la brújula.
No se puede apagar la unidad – Esta unidad se ha diseñado para mantenerse constantemente
encendida y las pilas durarán aproximadamente un año siempre que someta a un uso normal.
Reajuste la brújula – Si durante la operación se produce una descarga eléctrica externa cerca de
la brújula, la unidad podría presentar lecturas erróneas. Para resolver este problema, el reloj tiene
que reajustarse y recalibrarse. Nota: El reloj se reajusta automáticamente cuando se quita la pila.
Si su brújula de muñeca entra en la modalidad de prueba después de insertar la pila – tendrá
que reinstalar la pila. Saque la pila, espere 10 segundos y luego reinserte la pila cerciorándose de
que esté bien colocada en el compartimiento de las pilas. Cierre la puerta de las pilas.
Podrá saber que su brújula de muñeca ha entrado en la modalidad de prueba – Si ve que los
segmentos LCD que hay alrededor de la pantalla giran uno a uno en dirección contraria a las agujas
del reloj. Después de completar la modalidad de prueba, la brújula de muñeca regresará a la modalidad
normal. La modalidad de prueba no perjudicará la operación de la brújula de muñeca.
30
GARANTÍA LIMITADA DE DOS AÑOS
Su producto Bushnell® está garantizado contra defectos de material y fabricación durante dos años
a partir de la fecha de compra. En caso de defectos bajo esta garantía, nosotros, a nuestra opción,
repararemos o sustituiremos el producto siempre que lo devuelva con portes pagados. Esta garantía
no cubre defectos causados por el uso indebido, ni por un manejo, instalación o mantenimiento del
producto inapropiados o el mantenimiento hecho por otro que no sea un Centro de Servicio
Autorizado de Bushnell.
Cualquier envío que se haga bajo garantía deberá venir acompañado por lo siguiente:
1) Un cheque/giro postal por la cantidad de 10 dólares para cubrir los gastos de manejo y envio
2) Nombre y dirección donde quiere que se le envíe el producto
3) Una explicación del defecto
4) Prueba de fecha de compra
5) El producto debe empaquetarse bien en una caja resistente para evitar que se dañe
durante el transporte, y enviarse con portes pagados a la dirección que se muestra
a continuación:
En EE UU, enviar a: En CANADÁ, enviar a:
Bushnell Performance Optics Bushnell Performance Optics
Attn.: Repairs Attn.: Repairs
8500 Marshall Drive 25A East Pearce Street, Unit 1
Lenexa, Kansas 66214 Richmond Hill, Ontario L4B 2M9
En el caso de los productos comprados fuera de los Estados Unidos o Canadá, llame al distribuidor
local para la información pertinente sobre la garantía. En Europa también puede llamar al:
BUSHNELL Performance Optics Gmbh
European Service Centre
MORSESTRASSE 4
D- 50769 KÖLN
ALEMANIA
Tél: +49 (0) 221 709 939 3
Fax: +49 (0) 221 709 939 8
Esta garantía le ofrece derechos legales específicos.
Puede que tenga otros derechos que varían de un país a otro.
©2003 Bushnell Performance Optics
Page 18

Herzlichen Glückwunsch zum Erwerb eines digitalen Navigationssystems
(DNS) im Armbandformat von Bushnell®. Dieses Präzisionsinstrument
wurde aus hochwertigsten Materialien von fachkundigen Händen sorgfältig
gefertigt und ist für den lebenslangen störungsfreien Gebrauch auch unter
anspruchsvollsten Einsatzbedingungen bestimmt. Diese Bedienungsanleitung
enthält wichtige Hinweise zu den verschiedenen Merkmalen des Instruments,
damit Sie den Kompass optimal nutzen können.
ERLÄUTERUNG DER BUTTON-FUNKTIONEN
ADJ Dient zum Einstellen der Funktionen
MODE Dient zum Wechseln der Funktionen innerhalb
der Modi Zeit oder Kompass
DOWN Stellt eine Einstellung niedriger
LIGHT Schaltet die Beleuchtung des LCD ein
COMP Wechselt vom Modus Zeit zum Modus Kompass
UP Stellt eine Einstellung höher
32
GERMAN
33
LCD-Display
Einstellungsknopf
(ADJ)
Down-Knopf
(DOWN)
Up-Knopf
(UP)
Knopf
Kompassfunktion
(COMP)
Kompass-Level
Hintergrundbeleuchtung
(LIGHT)
Modus Schalter
(MODE)
Page 19

Neue Einstellungen
(New Settings)
TEMPERATUR
Modus Temperatur (Temperature Mode)
Drücken Sie die Taste MODE/NEXT, bis der Modus Zeit angezeigt
ist. Wenn Sie sich bereits in diesem Modus befinden, einfach nur die
Taste
MODE/NEXT drücken, bis der Modus Temperatur erscheint.
Drücken Sie die Taste
UP oder DOWN, um zwischen Celsius und
Fahrenheit hin- und herzuschalten.
ALARM
Modus Alarmeinstellung (Alarm Setting Mode)
Drücken Sie die Taste MODE, bis der Modus Alarm angezeigt wird.
Der Alarm besteht aus 5 Alarmmöglichkeiten: 4 für Zeit und 1 für
Temperatur. Drücken Sie die Taste
UP oder DOWN, um durch die
verschiedenen Alarmmöglichkeiten zu blättern. Halten Sie die Taste
ADJ 3 Sekunden lang gedrückt, bis die Minute aufblinkt. Drücken
Sie dann die Taste
UP oder DOWN, um die gewünschten Werte
einzustellen. Drücken Sie die Taste
MODE für die nächste
Einstellung. Zum Speichern von Änderungen und zum Verlassen
stets die Taste
ADJ drücken. Der Alarm wird automatisch aktiviert,
nachdem die Einstellungen durchgeführt wurden. Das Alarmsignal
kann durch Drücken einer beliebigen Taste ausgeschaltet werden.
Der Alarm kann auch an- oder ausgeschaltet werden, indem man
den gewünschten Alarmbereich aufruft und die Alarmfunktion
durch Drücken der Taste
COMP aktiviert. Erneut drücken, um die
Schlummerfunktion zu aktivieren. Durch erneutes Drücken der
Taste wird der Alarm deaktiviert.
35
ÉINSTELLEN DER ZEIT
Modus voreingestellte Zeit / Zeiteinstellungen (Default Time Mode / Time Settings)
Drücken Sie die Taste MODE, bis der Modus Zeit angezeigt wird. Halten Sie die Taste ADJ 3
Sekunden lang gedrückt. Drücken Sie die Taste
UP oder DOWN, bis der gewünschte Wert
erscheint. Drücken Sie dann die Taste
MODE für die nächste Einstellung. Zum Speichern von
Änderungen und zum Verlassen stets die Taste
ADJ drücken. In diesem Fall werden die Sekunden
auf 00 zurückgestellt. Ein kleines A oder P erscheint unten links neben der Stundenanzeige, um
vor 12 Uhr mittags (AM) oder nach 12 Uhr mittags (PM) anzuzeigen.
Datumseinstellung (Date Settings)
Beim Einstellen des Datums wird auch das Jahr angezeigt. Drücken
Sie die Taste
MODE, bis der Modus Zeit erscheint. Halten Sie die
Taste
ADJ 3 Sekunden lang gedrückt. Drücken Sie die Taste MODE
und blättern Sie bis zu der Einstellung, die Sie ändern wollen.
Drücken Sie die Taste
UP oder DOWN, bis der gewünschte Wert
erscheint. Drücken Sie dann die Taste
MODE für die nächste
Einstellung. Zum Speichern von Änderungen und zum Verlassen
stets die Taste
ADJ drücken.
Für die Einstellung 24/12 hour (12- oder 24-Stunden-System) die
Taste
MODE drücken, bis der Modus Zeit angezeigt wird. Halten
Sie die Taste
ADJ 3 Sekunden lang gedrückt. Drücken Sie die Taste
MODE und blättern Sie durch die Einstellungen, bis die Einstellung
24/12 hour erscheint. Drücken Sie dann die Taste
UP oder DOWN,
um die gewünschte Einstellung einzugeben. Zum Speichern von
Änderungen und zum Verlassen stets die Taste
ADJ drücken.
34
Page 20

COUNTDOWN-TIMER-ALARM
Modus Countdown/Reverse Timer
(Countdown/Reverse-Timer Mode)
Drücken Sie die Taste MODE, bis der Modus Countdown-Timer
angezeigt wird, der als RT (Reverse Timer) dargestellt ist. Um diesen
zu betätigen, die Taste
UP zum Starten drücken und erneut
drücken, um zu stoppen. Dann die Taste
DOWN drücken, um den
Countdown-Timer zurückzusetzen.
Um den Countdown-Timer einzustellen, die Taste
ADJ 3 Sekunden
lang gedrückt halten. Die Sekundeneinstellung beginnt daraufhin zu
blinken. Nehmen Sie die Einstellung mit der Taste
UP oder DOWN
vor. Dann die Taste MODE drücken, um die nächste Einstellung zu
ändern. Zum Speichern der Einstellung und Verlassen die Taste
ADJ
drücken. Drücken Sie COMP für AUTO, damit der CountdownTimer die Funktion automatisch wiederholen kann. Drücken Sie
erneut
COMP, um die Funktion AUTO auszuschalten.
Beim Ertönen eines Alarms eine beliebige Taste drücken, um den
Countdown-Timer zu stoppen. Wenn keine Taste gedrückt wird,
stellt der Countdown-Timer das Alarmsignal nach 10 Sekunden ab,
läuft aber weiter, wenn die Funktion AUTO eingeschaltet ist. Um
den Countdown-Timer bei eingeschalteter Funktion AUTO zu
stoppen, müssen Sie in den Modus Countdown-Timer wechseln und
COMP drücken. Dadurch
wird die Funktion AUTO ausgeschaltet. Dann die Taste
UP zum Stoppen drücken.
DIGITALER KOMPASS
Modus Kompass (Compass Mode)
Drücken Sie die Taste MODE, bis der Modus Zeit erscheint. Dann
die Taste
COMP drücken. Wenn Sie sich bereits im Modus Zeit
befinden, einfach die Taste
COMP drücken und der Modus
Kompass wird angezeigt. Den Kompass mit Hilfe der Libelle
waagerecht halten, um einen Wert zu erhalten. Wenn die
Kardinalpunkte blinken, muss der Kompass wahrscheinlich
kalibriert werden. (Siehe Hinweise zur Fehlerbeseitigung.)
37
Temperaturalarm (Temperature Alarm)
Das Alarmsignal ertönt, wenn die Temperatur den programmierten
Wert erreicht. Im Modus Alarm verwendet der Alarm für die
Temperatur die gleiche Maßeinheit (°C oder F), die zuletzt im
Modus Temperatur eingestellt wurde. Um dies zu ändern, müssen
zunächst die Temperatureinheiten im Modus Temperatur geändert
werden. Durch einmaliges Drücken der Tasten
UP oder DOWN
wird die Temperatur in Zehntelgraden geändert. Hält man eine der
Tasten gedrückt, ändert sich die Temperatur in Schritten von 1 Grad.
Piepfunktion (Beep Function)
Im Modus Alarm gibt es auch eine Piepfunktion. Bei Aktivierung
löst diese Funktion einen Piepton aus, sobald eine Taste gedrückt
wird – auch dann, wenn die Funktion Alarm ausgeschaltet ist.
Gehen Sie zum Aktivieren der Funktion zur Piepfunktion im Modus
Alarm und drücken Sie dann die Taste
COMP. ON wird angezeigt.
Erneut drücken und OFF wird angezeigt.
Modus Stoppuhr (Stopwatch Mode)
Drücken Sie die Taste MODE, bis der Modus Stoppuhr angezeigt
wird. Um diesen zu betätigen, zum Starten die Taste
UP drücken
und zum Stoppen erneut drücken. Durch Drücken der Taste
DOWN wird die Stoppuhr zurückgesetzt.
Für die Funktion Zwischenzeit die Taste
DOWN drücken, während
die Stoppuhr läuft, um die Anzeige anzuhalten. Erneut drücken und
die Anzeige läuft weiter. Sie können auch die Taste
DOWN
drücken, während die Stoppuhr läuft, um die Anzeige anzuhalten,
und dann die Stoppuhr durch Drücken der Taste
UP stoppen, um
den Endstand abzulesen. Die Stoppuhr kann durch erneutes
Drücken der Taste
DOWN zurückgesetzt werden.
Modus Stoppuhr/Funktion Zwischenzeit
(Stopwatch Mode / Split Timing Function)
Die Funktion Zwischenzeit wird bei Aktivierung als SPL angezeigt.
Nach Drücken der Taste
DOWN erscheint wieder die
Standardanzeige.
36
Page 21

reduzieren. Durch einen einzigen Druck auf UP oder DOWN wird der Wert um 1 Grad
verändert. Nach Fertigstellung die Taste
ADJ drücken, um zum Modus Zieleingabe
zurückzugelangen. Um zum Modus Kompass zurückzugelangen, die Taste
MODE drücken.
Um den Kompass im Modus Zieleingabe zu betätigen, zunächst in den Modus Kompass gehen.
Durch Druck der Taste
MODE gelangen Sie dann in den Modus Zieleingabe.
Die Hauptanzeige zeigt den aktuellen Wert, der untere Wert bezieht sich auf den „Zielwert". Die
Segmente auf dem Umkreis zeigen den Unterschied zwischen den beiden Werten. Dieser kann
dazu verwendet werden, Sie wieder auf den richtigen Kurs zu bringen.
Um Energie zu sparen, zeigt das Display im Modus Zieleingabe 3
„Balken" statt des aktuellen Wertes an, wobei die Anzeige der
Segmente nach 1 Minute erlischt. Um das Display erneut zu
aktivieren, müssen Sie die Taste
COMP drücken. Um den Modus
Zieleingabe zu verlassen, erneut
MODE drücken. Sie gelangen zum
standardmäßigen Modus Kompass zurück.
AUTOMATISCHE BELEUCHTUNG
Drücken Sie die Taste LIGHT, um die LCD-Beleuchtung für 5 Sekunden einzuschalten.
Nachtmodus (Night Mode)
Der Nachtmodus macht es möglich, bei Betätigen einer Funktionstaste automatisch die
Beleuchtung einzuschalten, es sei denn, der Kompass befindet sich im Modus Kompass. Halten
Sie die Taste
LIGHT 3 Sekunden lang gedrückt. Das Symbol für den Nachtmodus (dargestellt
durch das Lichtsymbol) erscheint. Zum Abschalten die Taste
LIGHT so lange gedrückt halten,
bis das Lichtsymbol verschwindet.
BATTERIE
Einlegen einer Batterie (Installing a Battery)
Zum Öffnen des Batteriefachs eine Münze in die Rille der Abdeckung stecken und den Deckel
im Uhrzeigersinn drehen, bis er aufgeht. Legen Sie eine Lithiumzelle (Batterietyp: CR2430) in das
Fach ein. Dabei muss der negative Pol nach unten zeigen. Den Deckel des Batteriefachs aufsetzen
und drehen, bis er einrastet.
39
Kompasskalibrierung (Compass Calibration)
Im Modus Kompass die Taste ADJ 3 Sekunden lang gedrückt
halten. Der Modus Kalibrierung (CAL) wird angezeigt. Legen Sie
den Kompass auf eine waagerechte, nicht magnetische Oberfläche
und drücken Sie die Taste
COMP. Der Schriftzug CAL beginnt zu
blinken. Dann den Kompass 2-mal langsam um 360 Grad drehen
UND IHN DABEI GERADE HALTEN. Danach erneut COMP
drücken. Das Display zeigt DONE an und wechselt automatisch in
den Modus Deklinationseinstellung. Bei erfolgloser Kalibrierung
blinken die Kardinalpunkte auf und Sie müssen die vorherigen 4
Schritte wiederholen. Um die Einstellung der Deklination zu überspringen, die Taste
ADJ
drücken und in den Modus Kompass zurückkehren.
Deklinationseinstellung (Declination Setting)
Die Deklination (Missweisung) stellt den Kompass auf die örtlichen
Magnetfelder ein. In einigen Gebieten kann es zu beträchtlichen
Abweichungen kommen. Daher empfiehlt es sich, die Deklination
auf Ihrer Karte oder im Internet zu überprüfen. Um den
Deklinationswinkel des Kompasses einzustellen, in den Modus
Kompass gehen und die Taste
ADJ 3 Sekunden lang gedrückt
halten. Der Modus Kompass-Homing wird angezeigt. Die Taste
MODE drücken, bis Sie zum Modus Deklinationseinstellung
gelangen. Dieser wird als DEC angezeigt. Drücken Sie die Taste
UP
oder DOWN, bis Sie den gewünschten Wert erreichen. Dann die
Taste
ADJ drücken, um die Einstellungen zu speichern und den
Modus zu verlassen. Die Deklination wird manchmal in negativen und manchmal in positiven
Graden gemessen. Grad Ost gilt als positiv und Grad West als negativ. Um z. B. von 3 Grad Ost
(positiv) zu 3 Grad West (negativ) zu wechseln, die Taste
DOWN drücken, bis 3W erscheint.
Modus Zieleingabe (Self Homing Mode)
Mit dieser Funktion können Sie einen Bezugswert einstellen, mit
dessen Hilfe der Kompass Ihnen die richtige Richtung weist.
Wechseln Sie in den Modus Kompass und drücken Sie die Taste
MODE. Die Kompasszieleingabe erscheint. Zum Einstellen der
Zielpeilung die Taste
ADJ 3 Sekunden lang gedrückt halten.
Drücken Sie die Taste
UP oder DOWN, um zur gewünschten
Peilungseinstellung zu gelangen. Durch Drücken von
UP oder
DOWN können Sie die Peilung in Zehnerschritten erhöhen und
38
Page 22

41
Anzeige schwache Batterie (Low Battery Indicator)
Bei zur Neige gehender Batterie erscheint ein blinkendes
Batteriesymbol. Das Batteriefach befindet sich an der Rückseite des
Kompasses. Ersetzen Sie die verbrauchte Batterie durch eine
Lithiumbatterie Typ CR2430. Hinweis: Bei Entfernen der Batterie
wird die Uhr automatisch zurückgestellt.
Batteriehaltbarkeit (Battery Life)
Ihr DNS ist auf Dauerbetrieb ausgelegt. Bei normalem Gebrauch
halten die Batterien1 Jahr. Die Lebensdauer der Batterie verkürzt
sich, wenn Alarmfunktionen, Licht oder Kompass sehr häufig
eingesetzt werden.
HINWEISE ZUR FEHLERBESEITIGUNG
Die Kardinalpunkte auf Ihrem Kompass (N, NE, E, SE usw.) blinken. Halten Sie den Kompass
mit Hilfe der Libelle WAAGERECHT. Die Kardinalpunkte können auch aufblinken, wenn der
Kompass magnetischen Störungen aus dem Umfeld ausgesetzt ist. Das Blinken der
Kardinalpunkte bedeutet, dass der Kompass nicht in der Lage ist, die Peilung präzise zu messen.
Wenn das Blinken nicht aufhört, muss der Kompass neu kalibriert werden. (Hinweise zum
Kalibrieren des Kompasses finden Sie auf Seite 38.) Halten Sie Ihren Kompass von
Metallgegenständen fern, um magnetische Störungen zu verhindern. Vergewissern Sie sich, dass
Sie die Deklination richtig eingestellt haben. (Die Voreinstellung ist normalerweise null Grad).
3 Striche werden angezeigt. Ihr Kompass ist in die Schlummerfunktion gewechselt, um die
Batterie zu schonen. Zum Reaktivieren des Kompasses
COMP drücken.
Der Kompass lässt sich nicht ausschalten. Das Instrument ist auf Dauerbetrieb ausgelegt. Bei
normalem Gebrauch halten die Batterien etwa 1 Jahr.
Kompass zurücksetzen. Bei elektrostatischen Entladungen in der Nähe des Kompasses kann das
Instrument fehlerhafte Anzeigen liefern. Um dieses Problem zu beheben, muss die Uhr
zurückgestellt und neu kalibriert werden. Hinweis: Die Uhr wird bei Entfernen der Batterie
automatisch zurückgesetzt.
Falls Ihr Wristtop nach Einsetzen der Batterie in den Testmodus wechselt, sollten Sie die
Batterie erneut einsetzen. Entfernen Sie dazu die vorherige Batterie. Warten Sie 10 Sekunden lang
und legen Sie die Batterie dann behutsam wieder ein. Achten Sie darauf, dass die Batterie richtig
im Fach sitzt. Schließen Sie den Deckel.
Ihr Wristtop ist in den Testmodus gewechselt, wenn die LCD-Segmente am Display
nacheinander aufleuchten
(angehen) und sich gegen den Uhrzeigersinn bewegen. Nach
Abschluss des Testmodus kehrt Ihr Wristtop in den Normalzustand zurück. Der Testmodus wirkt
sich nicht nachteilig auf den normalen Betrieb Ihres Wristtop aus.
40
GARANTIE / REPARATUR
ZWEIJÄHRIGE BESCHRÄNKTE GARANTIE
Sie erhalten für Ihr Bushnell®-Produkt eine Garantie für einen Zeitraum von zwei Jahren ab dem
Kaufdatum. Die Garantie erstreckt sich auf Material- und Herstellungsfehler. Für den Fall, dass ein
Mangel im Rahmen dieser Garantie auftritt, werden wir das Produkt nach unserer Wahl reparieren
oder austauschen, vorausgesetzt, dass Sie das Produkt freigemacht zurückschicken. Von dieser
Garantie ausgeschlossen sind Schäden, die auf Missbrauch, unsachgemäße Behandlung,
Installations- oder Wartungsarbeiten, die nicht von einer autorisierten BushnellKundendienstabteilung vorgenommen werden, zurückzuführen sind.
Jeder Rücksendung im Rahmen dieser Garantie müssen folgende Dokumente und Angaben
beigefügt werden:
1) Ein Scheck/eine Zahlungsanweisung in Höhe von 10,00 USD zur Abdeckung der
Porto- und Bearbeitungskosten
2) Name und Anschrift für die Rücksendung des Produkts
3) Eine Erläuterung des Mangels
4) Nachweis des Kaufdatums
5) Das Produkt sollte zur Vermeidung von Transportschäden gut verpackt in einem
stabilen Versandkarton an die nachstehend aufgeführte Adresse geschickt werden,
wobei die Gebühren für die Rücksendung im Voraus zu entrichten sind.
Adresse für Rücksendungen in die USA: Adresse für Rücksendungen nach KANADA:
Bushnell Performance Optics Bushnell Performance Optics
Attn.: Repairs Attn.: Repairs
8500 Marshall Drive 25A East Pearce Street, Unit 1
Lenexa, Kansas 66214 Richmond Hill, Ontario L4B 2M9
Bei Produkten, die Sie außerhalb der Vereinigten Staaten oder Kanadas gekauft haben, erhalten Sie
die entsprechenden Informationen zur Garantie von ihrem Händler vor Ort. In Europa erreichen Sie
Bushnell auch unter: BUSHNELL Performance Optics Gmbh
European Service Centre
MORSESTRASSE 4
D- 50769 KÖLN
Deutschland
Tél: +49 (0) 221 709 939 3
Fax: +49 (0) 221 709 939 8
Mit dieser Garantie erwerben Sie bestimmte Rechtsansprüche.
Sie haben möglicherweise darüber hinaus noch andere Rechte, die von Land zu Land variieren.
©2003 Bushnell Performance Optics
Page 23

43
Grazie per avere scelto una bussola da polso Bushnell®DNS (Digital
Navigation System), uno strumento di precisione costruito con materiali
della massima qualità e assemblato da tecnici altamente specializzati, che
vi assicurerà anni e anni di impiego senza problemi nelle condizioni più
difficili. Il presente manuale spiega come usare le varie funzioni dello
strumento e vi consentirà di ottenere prestazioni ottimali.
DESCRIZIONE DEI PULSANTI
ADJ Serve a regolare le impostazioni
MODE Visualizza una dopo l’altra le varie funzioni
della modalità Data/Ora o Bussola
DOWN Riduce un’impostazione
LIGHT Illumina il display
COMP Seleziona alternativamente la modalità
Data/Ora o Bussola
UP Aumenta un’impostazione
42
ITALIANO
Display a Cristalli Liquidi
Tasto
Regolazione
Impostazioni
(ADJ)
Tasto Cambio Modalità
(MODE)
Pulsante Giù
(DOWN)
Pulsante Su
(UP)
Retroilluminazione
(LIGHT)
Pulsante
Modalità Bussola
(COMP)
Bussola, Livella
Page 24

Nuove Impostazioni
TEMPERATURA
Modalità Temperatura
Premete il pulsante MODE/NEXT fino a visualizzare la modalità
Data/Ora. Se siete già in modalità Data/Ora basta premere
MODE/NEXT per visualizzare la modalità Temperatura. Premete
UP o DOWN per selezionare alternativamente le letture in Celsius
o quelle in Fahrenheit.
ALLARME
Modalità di Impostazione Dell’allarme
Premete il pulsante MODE fino a visualizzare la modalità Allarme.
Sono disponibili cinque allarmi acustici: quattro per la data/ora e
uno per la temperatura. Per fare scorrere gli allarmi premete
UP o
DOWN. Premete ADJ e mantenetelo premuto per tre secondi,
finché l’indicazione dei minuti non lampeggia, e premete
UP o
DOWN per regolare i valori prescelti. Premete MODE per passare
all’impostazione successiva. Premete
ADJ in qualsiasi momento per
salvare le modifiche e uscire. L’allarme si inserisce automaticamente
una volta eseguite le regolazioni. Per fare cessare l’allarme, premete
un pulsante qualsiasi.
È possibile anche inserire o disinserire un allarme selezionandolo e
premendo il pulsante
COMP per inserirlo; premendo di nuovo il
pulsante si inserisce la funzione Snooze, premendolo ancora si
disinserisce l’allarme.
IMPOSTAZIONE DELLA DATA E DELL’ORA
Modalità Data/Ora predefinita / Impostazioni
Premete il pulsante MODE fino a visualizzare la modalità Data/Ora. Premete ADJ e mantenetelo
premuto per tre secondi. Premete
UP o DOWN finché non compare il valore prescelto e poi
premete
MODE per passare all’impostazione successiva. Premete ADJ in qualsiasi momento per
salvare le modifiche e uscire. Completate le impostazioni, l’indicazione dei secondi ritorna a 00.
Una piccola "A" o "P" nell’angolo in basso a sinistra delle ore indica AM (ante meridiem) o PM
(post meridiem).
Impostazione della Data
Durante l’impostazione della data si visualizza anche l’anno. Premete
il pulsante
MODE finché non si visualizza la modalità Data/Ora.
Premete
ADJ e mantenetelo premuto per tre secondi. Premete
MODE e fate scorrere le impostazioni fino a quella che desiderate
modificare. Premete
UP o DOWN finché non compare il valore
prescelto e poi premete
MODE per passare all’impostazione
successiva. Premete
ADJ in qualsiasi momento per salvare le
modifiche e uscire.
Per selezionare la notazione 24 / 12 ore, premete il pulsante
MODE
fino a visualizzare la modalità Data/Ora. Premete ADJ e
mantenetelo premuto per tre secondi. Premete
MODE e fate
scorrere le impostazioni fino a visualizzare quella relativa alla
notazione 24 / 12 ore e poi premete
UP o DOWN per immettere il
valore prescelto. Premete
ADJ in qualsiasi momento per salvare le
modifiche e uscire.
44 45
Page 25

ALLARME CONTEGGIO ALLA ROVESCIA
Modalità Conteggio alla Rovescia
Premete il pulsante MODE fino a visualizzare la modalità Conteggio
alla rovescia, indicata dalla sigla ‘RT’ (reverse timer). Per avviare il
conteggio alla rovescia premete
UP; premetelo di nuovo per arrestare
il conteggio e poi premete
DOWN per azzerare il timer del
conteggio alla rovescia.
Per impostare il timer del conteggio alla rovescia premete il pulsante
ADJ e mantenetelo premuto per tre secondi; le cifre dei secondi
cominciano a lampeggiare; regolate l’impostazione con il pulsante
UP o DOWN e poi premete MODE per passare all’impostazione
successiva. Premete
ADJ per salvare le modifiche e uscire. Premete
COMP per inserire la funzione ‘AUTO’, che consente al timer del
conteggio alla rovescia di funzionare automaticamente; premete di
nuovo
COMP per disinserire la funzione ‘AUTO’.
Quando l’allarme suona, premete un pulsante qualsiasi per arrestare
il conteggio alla rovescia. Se non si preme nessun pulsante, l’allarme
cessa dopo 10 secondi ma il timer continua a funzionare se la
funzione ‘AUTO’ è inserita. In quest’ultimo caso, per arrestare il
conteggio alla rovescia occorre passare alla modalità Conteggio alla
rovescia, premere
COMP/+ per disinserire la funzione ‘AUTO’ e poi premere UP per arrestare il
conteggio.
BUSSOLA DIGITALE
Modalità Bussola
Premete il pulsante MODE fino a visualizzare la modalità Data/Ora
e poi premete
COMP/+. Se siete già in modalità Data/Ora basta
premere
COMP/+ per visualizzare la modalità Bussola. Mantenete la
bussola orizzontale mediante la livella a bolla per ottenere una
lettura. Se i punti cardinali lampeggiano, può essere necessario tarare
la bussola (vedi sezione Guida alla soluzione dei problemi).
47
Allarme Temperatura
L’allarme suona quando la temperatura misurata raggiunge il livello
prefissato. Nella modalità di allarme vengono utilizzare le stesse
unità di misura (ºC or F) impostate l’ultima volta in modalità di
misura della temperatura. Per modificare questa impostazione
occorre prima cambiare le unità della temperatura in modalità
Temperatura. Premendo una volta
UP o DOWN si cambia la
temperatura in decimi di grado; se si mantiene premuto l’uno o
l’altro dei pulsanti la temperatura varia in incrementi di 1 grado.
Funzione Bip
In modalità di allarme è disponibile anche una funzione Bip.
Quando questa è inserita, viene emesso un segnale acustico ogni
volta che si preme un pulsante anche se la funzione di allarme è
disinserita. Per inserire la funzione Bip, selezionatela dalla modalità
di allarme e premete il pulsante
COMP; si visualizza ‘ON’.
Premendo di nuovo il pulsante si visualizza ‘OFF’.
Modalità Cronometro
Premete il pulsante MODE fino a visualizzare la modalità
Cronometro. Per azionare il cronometro, premete
UP per avviarlo e
premetelo di nuovo per arrestare il cronometro. Per azzerare il
cronometro premete
DOWN.
Per usare la funzione Tempo parziale, premete il pulsante
DOWN
mentre il cronometro è in funzione, per fermare il display, e
premetelo di nuovo per continuare. Potete anche premere
DOWN
mentre il cronometro è in funzione, per fermare il display, e poi
premere
UP per arrestare il cronometro e visualizzare la lettura
finale. Per azzerare il cronometro premete di nuovo
DOWN.
Modalità Cronometro / Funzione Tempo Parziale
La funzione Tempo parziale è indicata sul display con 'SPL' (split)
quando è inserita; il display ritorna alla visualizzazione normale
quando si preme
DOWN.
46
Page 26

Per usare la bussola in modalità Radiobussola andate prima alla modalità Bussola e poi premete il
pulsante
MODE.
La lettura principale indica la direzione effettiva e quella inferiore
indica la direzione di riferimento. I segmenti sulla circonferenza
mostrano la differenza tra le due direzioni, utilizzabile per correggere
la rotta.
Per consumare meno potenza, in modalità Radiobussola il display
mostra tre barre invece della direzione attuale e i segmenti non
vengono visualizzati dopo un minuto. Per riattivare il display occorre
premere
COMP. Per uscire dalla modalità Radiobussola premete di
nuovo
MODE per ritornare alla modalità Bussola.
RETROILLUMINAZIONE AUTOMATICA
Premete il pulsante LIGHT per attivare per cinque secondi la retroilluminazione del display.
Modalità Notte
Fa sì che la retroilluminazione si attivi automaticamente quando si preme uno qualsiasi dei tasti
funzione, eccetto quando la bussola è in modalità Bussola. Premete il pulsante
LIGHT e mantenetelo
premuto per tre secondi; compare l’apposita icona (il simbolo della lampadina). Per disattivare la
retroilluminazione premete il pulsante
LIGHT e mantenetelo premuto finché l’icona scompare.
PILA
Installazione della Pila
Per aprire il coperchio del vano portapila inserite una moneta nell’apposita scanalatura e girate il
coperchio in senso orario finché si solleva. Inserite nel vano una pila al litio (tipo: CR2430),
accertandovi che il polo negativo sia rivolto verso il basso. Chiudete il coperchio finché non si
blocca con uno scatto.
Indicatore di Bassa Carica della Pila
Quando la carica della pila è bassa lampeggia un’apposita icona. Il
vano della pila è sul retro della bussola. Sostituite la pila usata con
una pila al litio CR2430. Nota: l’orologio si azzera automaticamente
quando si estrae la pila.
Taratura della Bussola
In modalità Bussola, mantenete premuto il pulsante ADJ per tre
secondi; si visualizza la modalità Taratura. Collocate la bussola su
una superficie orizzontale e amagnetica, e premete
COMP/+. La
parola CAL comincia a lampeggiare. Girate lentamente la bussola
per due giri completi MANTENENDOLA ORIZZONTALE. Al
termine premete di nuovo
COMP/+. Completata la procedura, il
display visualizza ‘DONE’ e passa automaticamente alla modalità di
impostazione della declinazione. Se la taratura non riesce, i punti
cardinali lampeggiano e occorre ripetere le quattro fasi precedenti.
Per saltare l’impostazione della declinazione, premete
ADJ per ritornare alla modalità Bussola.
Impostazione della Declinazione
La declinazione regola la bussola in base al campo magnetico locale.
In alcune aree la declinazione magnetica può essere notevole, quindi
è consigliabile verificarne il valore sulla mappa o su Internet. Per
regolare l’angolo di declinazione della bussola andate alla modalità
Bussola e mantenete premuto il pulsante
ADJ per tre secondi, fino a
visualizzare la modalità Radiobussola. Premete
MODE fino a
passare alla modalità di impostazione della declinazione, indicata
dalla sigla ‘DEC’. Premete
UP o DOWN per selezionare il valore
prescelto e poi
ADJ per salvare le modifiche e uscire dalla modalità.
A volte la declinazione viene misurata come gradi positivi e negativi.
I gradi Est sono considerati positivi e quelli Ovest sono considerati negativi. Ad esempio, per
passare da una declinazione di 3 gradi Est (positiva) a una di 3 gradi Ovest (negativa) premete
DOWN finché non si visualizza 3W.
Modalità Radiobussola
Permette di impostare una direzione di riferimento, in modo che la
bussola indichi il punto verso cui dirigersi. Andate alla modalità
Bussola e premete il pulsante
MODE per visualizzare il riferimento;
premete
ADJ e mantenetelo premuto per tre secondi e poi premete
UP o DOWN per modificare l’impostazione della direzione di
riferimento. Premendo
UP o DOWN si aumenta o diminuisce
l’impostazione in incrementi di dieci. Una singola pressione su
UP
o DOWN varia la direzione di riferimento di 1 grado. Al termine
premete
ADJ per ritornare alla modalità Radiobussola. Per ritornare
alla modalità Bussola premete
MODE.
48 49
Page 27

51
Durata della Pila
Lo strumento DNS funziona ininterrottamente e la pila dura oltre un anno in condizioni di
utilizzo normale. Un uso frequente degli allarmi, della retroilluminazione o della bussola accorcia
la durata della pila.
GUIDA ALLA SOLUZIONE DEI PROBLEMI
Se i punti cardinali (N, NE, E, SE ecc..) sulla bussola lampeggiano – I punti cardinali
lampeggiano in quanto la bussola non riesce a misurare con precisione le direzioni. Cercate di
mantenere la bussola ORIZZONTALE mediante la livella a bolla. I punti cardinali possono
lampeggiare anche quando la bussola rileva un’interferenza magnetica dalle aree circostanti. Se
continuano a lampeggiare anche se la bussola rimane orizzontale, taratela di nuovo (vedi sezione
Taratura della bussola). Mantenetela sempre lontano da oggetti metallici, che possono causare
interferenza magnetica. Verificate inoltre che la declinazione sia impostata correttamente (in
genere l’impostazione predefinita deve essere zero gradi).
Si visualizzano tre trattini – La bussola è passata a una modalità di consumo energetico ridotto.
Per riattivarla premete
COMP.
Non è possibile spegnere lo strumento – Questo strumento funziona ininterrottamente e la pila
dura circa un anno in condizioni di utilizzo normale.
Azzeramento della bussola - Se durante il funzionamento si verifica una scarica elettrica esterna
vicino alla bussola, questa può visualizzare letture errate. Per risolvere il problema occorre azzerare
e ritarare l’orologio. Nota: l’orologio si azzera automaticamente quando si estrae la pila.
Se la bussola passa a una modalità di test una volta inserita la batteria – occorre reinstallare
quest’ultima. Estraetela, attendete 10 secondi e poi reinseritela con cautela, accertandovi che sia
collocata bene nel vano. Chiudete il coperchio.
La bussola è in modalità di test se i segmenti intorno al display – Si accendono uno dopo l’altro
e ruotano in senso antiorario. Una volta completata la modalità di test, la bussola ritorna alla
modalità di funzionamento normale. La modalità di test non ha alcun effetto negativo sul normale
funzionamento della bussola.
50
GARANZIA/RIPARAZIONI
GARANZIA LIMITATA PER DUE ANNI
Si garantisce che questo prodotto Bushnell® sarà esente da difetti di materiale e fabbricazione
per due anni a decorrere dalla data di acquisto. In caso di difetto durante il periodo di garanzia,
a nostra discrezione ripareremo o sostituiremo il prodotto purché sia restituito franco
destinatario. Sono esclusi dalla garanzia eventuali danni causati da abuso, maneggiamento
improprio, installazione o manutenzione eseguiti da persone non autorizzate dal servizio di
assistenza Bushnell.
A un prodotto restituito e coperto da questa garanzia occorre allegare quanto segue.
1) Assegno/ordine di pagamento per l’importo di 10 $US per coprire i costi di spedizione.
2) Nome e indirizzo da utilizzare per la restituzione del prodotto.
3) Una spiegazione del difetto.
4) Scontrino riportante la data di acquisto.
5) Il prodotto deve essere imballato in una scatola robusta, per prevenire danni durante il
trasporto, e va spedito franco destinatario a uno dei seguenti indirizzi.
Recapito negli Stati Uniti: Recapito in Canada:
Bushnell Performance Optics Bushnell Performance Optics
Attn.: Repairs Attn.: Repairs
8500 Marshall Drive 25A East Pearce Street, Unit 1
Lenexa, Kansas 66214 Richmond Hill, Ontario L4B 2M9
Per prodotti acquistati fuori degli Stati Uniti o del Canada, rivolgersi al rivenditore per le clausole
pertinenti della garanzia. In Europa si può anche contattare la Bushnell a questo numero:
BUSHNELL Performance Optics Gmbh
European Service Centre
MORSESTRASSE 4
D- 50769 - Cologne
Germania
Tél: +49 (0) 221 709 939 3
Fax: +49 (0) 221 709 939 8
Questa garanzia dà specifici diritti legali.
Eventuali altri diritti variano da una nazione all’altra.
©2003 Bushnell Performance Optics
Page 28

53
Parabéns pela aquisição da bússola de pulso Bushnell®Digital Navigation
System (DNS – Sistema de navegação digital), um instrumento de
precisão construído com os melhores materiais e montado por
especialistas experientes para uma vida útil sem problemas, mesmo sob as
condições mais exigentes. Este livreto o ajudará a obter os melhores
resultados, explicando como usar os diversos recursos.
PARA QUE SERVEM OS BOTÕES
ADJ Use este botão para ajustar suas configurações
MODE Muda o display de um recurso para o próximo
nos modos de horário ou bússola
DOWN (PARA BAIXO) Reduz o valor/quantidade do ajuste
LIGHT (LUZ) Acende a luz para iluminar o display de LCD
COMP Comuta entre os modos de horário e de bússola.
UP (Para cima) Aumenta o valor/quantidade do ajuste
52
PORTUGUÊS
Tela de LCD
Botão de
Ajuste da
Configuração
(ADJ)
Botão de Modo
(MODE)
Botão Down
(para baixo)
(DOWN)
Botão Up
(para cima)
(UP)
Luz de
Fundo
(LIGHT)
Botão de Modo
da Bússola
(COMP)
Nível de Bússola
Page 29

Novas Configurações
TEMPERATURA
Modo de Temperatura
Pressione o botão MODE/NEXT até que seja exibido o Time Mode
(Modo de horário). Caso já se encontre no modo de horário, basta
pressionar o botão
MODE/NEXT e o modo de temperatura será
exibido. Pressione o botão
UP ou DOWN para alternar entre as
leituras em Celsius e Fahrenheit.
ALARME
Modo de Configuração do Alarme
Pressione o botão MODEaté que seja exibido o Alarm Mode (Modo
de alarme). Há cinco alarmes distintos: 4 para o horário e 1 para a
temperatura. Pressione o botão
UP ou DOWN para percorrer os
diferentes alarmes. Pressione e mantenha o botão
ADJ pressionado
por 3 segundos até que a parte correspondente aos minutos comece
a piscar; pressione o botão
UP ou DOWN para ajustar para os
números desejados. Pressione o botão
MODE para a próxima
configuração. Pressione o botão
ADJ a qualquer momento para
salvar as mudanças e sair. O alarme é ativado automaticamente após
os ajustes serem feitos. Pressione qualquer botão para que o alarme
pare de soar.
O alarme também pode ser ligado ou desligado movimentando-se
até o alarme relevante e pressionando o botão
COMP para ativar a
função de alarme; pressione novamente para ativar a função Snooze,
e mais uma vez para desativá-lo.
55
AJUSTE DO HORÁRIO
Modo de Horário Padrão / Configurações do Horário
Pressione o botão MODE até que seja exibido o Time Mode (Modo de horário). Pressione e
mantenha o botão
ADJ pressionado por 3 segundos. Pressione o botão UP ou DOWN até que
apareça o valor desejado. Em seguida, pressione o botão
MODE para o próximo ajuste. Pressione
o botão
ADJ a qualquer momento para salvar as mudanças e sair. Ao fazer isso, os segundos
retornarão para 00. A letra "A" ou "P" aparecerá na parte inferior esquerda das horas para indicar
AM (manhã) ou PM (noite).
Ajustes da Data
Ao ajustar a data, o ano também será exibido. Pressione o botão
MODE até que seja exibido o Time Mode (Modo de horário).
Pressione e mantenha o botão
ADJ pressionado por 3 segundos.
Pressione o botão
MODE e percorra a lista até a configuração a ser
mudada. Pressione o botão
UP ou DOWN até que apareça o valor
desejado. Em seguida, pressione o botão
MODE para o próximo
ajuste. Pressione o botão
ADJ a qualquer momento para salvar as
mudanças e sair.
Para ajustar o horário na configuração de 24/12 horas, pressione o
botão
MODE até que seja exibido Modo de horário. Pressione e
mantenha o botão
ADJ pressionado por 3 segundos. Pressione o
botão
MODE e percorra as configurações até que apareça o ajuste do
horário 24/12. Depois, pressione o botão
UP ou DOWN para
estabelecer o ajuste desejado. Pressione o botão
ADJ a qualquer
momento para salvar as mudanças e sair.
54
Page 30

ALARME DO CRONÔMETRO DE CONTAGEM REGRESSIVA
Modo de Contagem Regressiva / Inversão de Temporizador
Pressione o botão MODE até que seja exibido o modo de
cronômetro de contagem regressiva, o qual é representado por ‘RT’
(reverse timer – inversão de temporizador ). Para operá-lo, pressione
o botão
UP para iniciar e mais uma vez para parar. Depois,
pressione o botão
DOWN para zerar o cronômetro de contagem
regressiva.
Para ajustar o cronômetro de contagem regressiva, pressione e
mantenha o botão
ADJ pressionado por 3 segundos. Isso fará com
que o ajuste dos segundos comece a piscar. Ajuste com o botão
UP
ou DOWN, em seguida pressione o botão MODE para ajustar a
próxima configuração. Pressione
ADJ para salvar os ajustes e sair.
Pressione
COMP para ‘AUTO’ a fim de que o cronômetro de
contagem regressiva repita a função automaticamente e pressione
mais uma vez para desligar essa função.
Quando o alarme soar, pressione qualquer botão para interromper o
cronômetro de contagem regressiva. Se nada for pressionado, o
cronômetro de contagem regressiva parará de soar o bip após 10
segundos, mas continuará caso a função ‘AUTO’ esteja ligada. A fim
de interromper o cronômetro de contagem regressiva se a função
‘Auto’ estiver ligada, você deve entrar em seu modo e pressionar
COMP para desligar essa função. Em seguida, pressione o botão UP
para parar o cronômetro.
BÚSSOLA DIGITAL
Modo de Bússola
Pressione o botão MODE até que seja exibido o Time Mode (Modo
de horário). Em seguida, pressione o botão
COMP. Caso já se
encontre no modo de horário, basta pressionar o botão
COMP e o
modo de bússola será exibido. Mantenha o nível da bússola usando
o nível de bolha para obter uma leitura. Se os pontos cardeais
piscarem, a bússola provavelmente precisa ser calibrada. (Veja as
dicas para resolução de problemas.)
57
Alarme de Temperatura
Configura o alarme para soar quando a temperatura atingir o nível
programado. No modo de alarme, o alarme de temperatura usa as
mesmas unidades de medida (ºC ou F) que foram configuradas no
último ajuste do modo de temperatura. Para mudar isto, primeiro
você deve mudar as unidades de temperatura no modo de
temperatura. Pressionar
UP ou DOWN uma vez muda a
temperatura em décimos de grau. Se qualquer um desses botões for
mantido pressionado, as mudanças de temperatura ocorrerão em
incrementos de um grau.
Função de Bip
Uma função de bip está também disponível no modo de alarme.
Quando ativada, esta função faz com que seja emitido o som de um
bip toda vez que for pressionado algum botão, mesmo quando a
função de alarme estiver desligada. Para ativá-la, vá até a função de
bip no modo de alarme, pressione o botão
COMP e será exibido
‘ON’ (LIGADO). Pressione novamente e será exibido ‘OFF’
(DESLIGADO).
Modo de Cronômetro
Pressione o botão MODE até que seja exibido o Stop Watch Mode
(Modo de cronômetro). Para operá-lo, pressione o botão
UP para
iniciar e mais uma vez para parar. O cronômetro será zerado ao
pressionar o botão
DOWN.
Para acessar a função de divisão de tempo, pressione o botão
DOWN enquanto o cronômetro estiver operando para interromper
o display e pressione novamente para continuar. Você pode também
pressionar o botão
DOWN enquanto o cronômetro estiver
operando para interromper o display e pressionar o botão
UP para
interromper o cronômetro e exibir a leitura final. Pressione o botão
DOWN novamente para zerar o cronômetro.
Modo de Cronômetro / Função de Divisão de Tempo
A função de divisão do tempo é exibida como ‘SPL’ quando ativada
e o display retorna para a exibição normal quando for pressionado o
botão
DOWN.
56
Page 31

incrementos de dez. Cada vez que um desses botões for pressionado, o ângulo de rumo muda em
1 grau. Depois de concluído, pressione
ADJ para retornar ao modo de orientação. Pressione o
botão
MODE para retornar ao modo de bússola.
Para operar a bússola no Modo de orientação, vá primeiro para o modo de bússola e depois
pressione novamente o botão
MODE para entrar no modo de orientação.
A leitura principal exibe o rumo verdadeiro e a leitura inferior mostra o rumo ‘orientado’. Os
segmentos na circunferência mostram a diferença entre os dois ângulos de direção, o que pode ser
usado para redirecioná-lo a fim de manter-se no curso correto.
Para economizar energia, o display no modo de orientação mostrará
3 ‘barras’ em vez do rumo atual e os segmentos não serão exibidos
após 1 minuto. Você deverá pressionar
COMP novamente para
reativar o display. Para sair do modo de orientação e retornar ao
modo de bússola padrão, pressione
MODE novamente.
LUZ DE FUNDO AUTOMÁTICA
Pressione o botão LIGHT para acender a luz de fundo do LCD por 5 segundos.
Modo Noturno
O modo noturno permite que a luz de fundo acenda automaticamente quando qualquer uma das
teclas de função for pressionada, exceto quando a bússola estiver no modo de bússola. Pressione e
mantenha o botão
LIGHT pressionado por 3 segundos. Aparecerá o ícone do modo noturno
(representado pelo símbolo de luz). Para desligá-lo, pressione e mantenha o botão
LIGHT
pressionado até que o símbolo de luz desapareça.
PILHA
Instalação da Pilha
Para abrir a tampa do compartimento da pilha, insira uma moeda na
ranhura e gire a tampa no sentido horário até levantar e abrir. Insira
a célula de lítio (pilha tipo CR2430) no compartimento, tomando
cuidado para que a polaridade negativa fique voltada para baixo.
Feche a tampa do compartimento da pilha até trancar.
59
Calibragem da Bússola
No modo de bússola, pressione o botão ADJ por 3 segundos. Será
exibido o Calibration Mode (Modo de calibragem). Coloque a
bússola sobre uma superfície nivelada, não magnética, e pressione o
botão
COMP. A palavra CAL começará a piscar. Em seguida, gire
a bússola lentamente por duas voltas completas SEMPRE
MANTENDO-A NIVELADA. Depois disso, pressione
COMP
novamente. Quando concluído, o display exibe ‘DONE’
(PRONTO) e passará automaticamente para o Declination Setting
Mode (Modo de configuração da declinação). Caso a calibragem não
tenha sido bem sucedida, os pontos cardeais piscarão e você deverá repetir as 4 etapas anteriores
novamente. Para pular a etapa de configuração da declinação, pressione o botão
ADJ retornando
ao modo da bússola.
Configuração de Declinação
A declinação ajusta a bússola para os campos magnéticos locais. Em
algumas áreas, a declinação magnética pode ser considerável. Por
este motivo, é sempre uma boa idéia verificar a declinação em seu
mapa ou pela Internet. Para ajustar o ângulo de declinação da
bússola, vá para o módulo da bússola e mantenha o botão
ADJ
pressionado por 3 segundos. O modo de orientação da bússola será
exibido. Pressione o botão
MODE até chegar no modo de ajuste
de declinação que aparece como ‘DEC’. Pressione o botão
UP ou
DOWN para obter o valor desejado e após pressione o botão ADJ
para salvar os ajustes e sair desse módulo. Às vezes, a declinação é
medida em ângulos positivos e negativos. Graus Leste (em inglês East, abreviado E) são
considerados positivos ao passo que Graus Oeste (em inglês West, abreviado W) são negativos.
Por exemplo, para mudar a declinação de 3 graus Leste (positivo) para 3 graus Oeste (negativo)
pressione o botão
DOWN até aparecer 3W.
Modo de Orientação Automática
Permite pré-configurar a direção de referência que pede à bússola
para lhe alertar sobre a direção que você deve seguir. Vá para o modo
de bússola e pressione o botão
MODE para exibir a orientação da
bússola. Para ajustar a direção da orientação, pressione e mantenha o
botão
ADJ pressionado por três segundos. Pressione o botão UP ou
DOWN para ajustar a configuração do rumo desejado. Pressionar
UP ou DOWN aumentará ou diminuirá o ângulo de rumo em
58
Page 32

61
Indicador de Baixa Carga da Pilha
Um ícone de pilha piscando aparecerá quando ela estiver com baixa carga. O compartimento da
pilha fica localizado na parte posterior da bússola. Troque a pilha usada por uma pilha de lítio
CR2430. Observação: O relógio é automaticamente reinicializado quando a pilha for removida.
Vida Útil da Pilha
A sua bússola DNS foi projetada para uso contínuo e as pilhas durarão por um ano com o uso
regular. O uso muito freqüente dos alarmes, luz ou bússola reduzirá a vida útil da pilha.
RESOLUÇÃO DE PROBLEMAS
Se os pontos cardeais (N, NE, E, SE, etc.) da bússola estiverem piscando – tente manter a
bússola NIVELADA, usando o nível de bolha como guia. Os pontos cardeais poderão também
piscar quando a bússola encontra interferência magnética de áreas próximas. Isso acontece porque
a bússola não consegue medir os ângulos de rumo com precisão. Caso isso não solucione o
problema, recalibre a bússola. (Consulte a página 7 quanto à calibragem da bússola.) Não esqueça
de manter a mesma afastada de objetos metálicos que possam causar interferência magnética.
Certifique-se também de que a declinação foi ajustada corretamente (em geral, zero grau deve ser
o ajuste padrão).
São exibidos três traços – a bússola entrou no “modo de dormir” para poupar pilha. Pressione o
botão
COMP para reativar a bússola.
Não pode ser desligada – a unidade foi projetada para ficar constantemente acesa e as pilhas
durarão por aproximadamente um ano com uma utilização normal.
Restaurar a bússola – se, durante a operação, uma descarga elétrica externa ocorrer próxima à
bússola, a unidade poderá exibir leituras errôneas. Para solucionar este problema, o relógio deverá
ser reinicializado e recalibrado. Observação: O relógio é automaticamente reinicializado quando
a pilha for removida.
Será necessário reinstalar a pilha se a bússola de pulso entrar no modo de teste após a
inserção da pilha
. Retire a pilha. Aguarde 10 segundos e depois recoloque a pilha
cuidadosamente, certificando-se de que esteja bem assentada no compartimento. Feche o
compartimento da pilha.
Vo cê saberá que a bússola de pulso entrou no modo de teste – se os segmentos de LCD ao redor
do display girarem um de cada vez movimentando no sentido anti-horário. Após a conclusão do
modo de teste, a bússola retornará ao normal. O modo de teste não prejudicará a sua operação.
60
GARANTIA/CONSERTO
GARANTIA LIMITADA DE DOIS ANOS
Garantimos que seu produto Bushnell® estará isento de defeitos materiais e de fabricação. por
dois anos após a data de aquisição. Caso tenha algum um defeito sob esta garantia, iremos a
nossa opção, consertar ou trocar este produto desde que o produto seja devolvido com porte
pago. Esta garantia não abrange danos causados por uso indevido, operação, instalação, ou
manutenção incorretas efetuadas a não ser que seja do Departamento do Serviço de
Manutenção Autorizada da Bushnell.
Qualquer devolução efetuada sob esta garantia deve incluir os itens relacionados a seguir:
1) Um cheque/ordem de pagamento no montante de $10,00 para cobrir as despesas de
porte e gastos administrativos
2) Nome e endereço para a devolução do produto
3) Uma explicação do defeito
4) Comprovante da Data de Aquisição
5) O produto deve ser cuidadosamente embalado, numa caixa de papelão resistente para
prevenir danos enquanto em trânsito e enviado para os endereços indicados a seguir
com porte de devolução pago:
NOS EUA REMETER PARA: NO CANADÁ REMETER PARA:
Bushnell Performance Optics Bushnell Performance Optics
Attn.: Repairs Attn.: Repairs
8500 Marshall Drive 25A East Pearce Street, Unit 1
Lenexa, Kansas 66214 Richmond Hill, Ontario L4B 2M9
Para produtos adquiridos fora dos Estados Unidos ou do Canadá favor contatar seu revendedor
local quanto a informações aplicáveis referentes a sua garantia. A Bushnell também pode ser
contatada na Europa pelo telefone: BUSHNELL Performance Optics Gmbh
European Service Centre
MORSESTRASSE 4
D- 50769 KÖLN
Alemanha
Tél: +49 (0) 221 709 939 3
Fax: +49 (0) 221 709 939 8
Esta garantia lhe dá direitos legais específicos.
Poderá ter outros direitos que podem variar de país para país.
©2003 Bushnell Performance Optics
Page 33

www.bushnell.com
 Loading...