

Lit #: 98-1296/01-14


CONTENTS
English
Français
Español
Deutsch
Italiano
Português
4 - 6
7 - 9
10 - 12
13 - 16
17 - 20
21 - 24

Congratulations on the purchase of your new Bushnell binocular. The Excursion HD features fully
multi-coated optics and high performance BaK-4 prisms with a PC-3
®
phase coating to stretch
available light and produce images with the highest level of edge-to-edge clarity. Their wide field
of view lets you take in the entire scene with one look. This precision viewing system is contained
ENGLISH
in a rugged yet lightweight, well balanced, double-bridge housing that’s nitrogen purged and fully
sealed against all forms of moisture, then wrapped in rubber armor.
This manual will help you optimize performance by explaining how to adjust the binocular for your
eyes, using features and accessories, and how to care for this fine optical instrument. Read the
instructions carefully before using your binocular.
Fig. 1
Fig. 2
Fig. 3
Unlocked
Locked
Interpupillary Distance Diopter Setting
Fig. 4
Twist-Up Eyecups
Fig. 5
Neckstrap Tripod Mount
Focus Lock Feature
Fig. 6
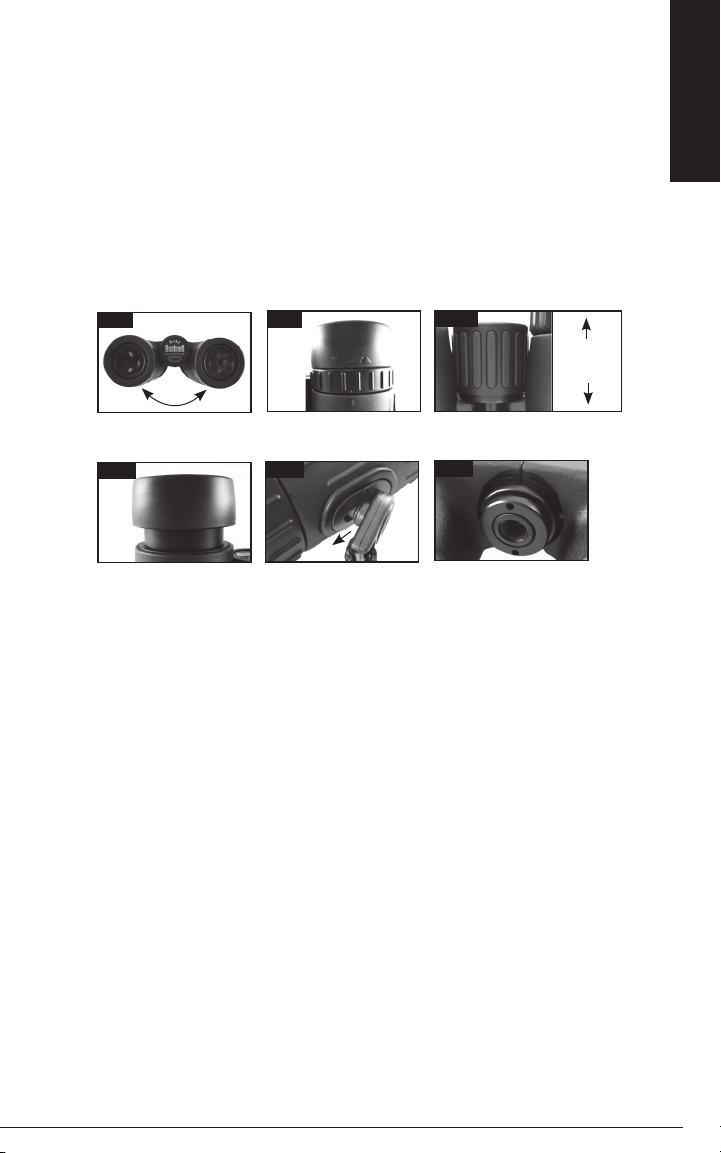
EYE ADJUSTMENTS (Fig. 1)
How to Adjust for Distance Between Your Eyes
The distance between the eyes, called “interpupillary distance,” varies from person to person.
To achieve perfect alignment of lens to eyes, follow these simple steps:
• Hold your binocular in the normal viewing position.
• Grasp each barrel firmly. Move the barrels closer together or further apart until you
see a single circular field. Always re-set your binocular to this position before using it.
How to Adjust for Individual Eye Strength
As individual eyesight varies from one person to another, your Bushnell Excursion HD binocular
has a diopter setting feature which allows you to fine-tune the binocular to your vision.
Follow the focusing instructions below.
FOCUSING
1. Adjust the interpupillary distance (Fig. 1) until you see a single circular image.
2. The diopter adjustment ring is located on the right side, directly below the eyecup.
3. Make sure the diopter adjustment is set to “zero” to start (index dot on diopter
adjustment ring is lined up with index mark on right side of the binocular (Fig. 2).
4. Keep both eyes open at all times.
5. Using the lens cap or your hand, cover the objective (front) lens of the right side
of the binocular.
4
6. Make sure the center focus knob is pulled up, into the unlocked position-it should be
able to rotate freely (Fig 3).
7. Using the center focus knob, focus on a distant object with fine detail (e.g., brick wall,
tree branches, etc.), until it appears as sharp as possible.
8. Uncover the objective lens on the right side, then cover the left objective lens, and view
the same object.
9. Rotate the diopter adjustment ring to focus the same distant object in the right side. Avoid
over turning or forcing the diopter mechanism-if you are unable to bring the object into
focus with the diopter adjustment, make sure the left side is still focused correctly with the
center knob. The diopter adjustment only affects the right side.
10. Your binocular should now be adjusted for your eyes. Focusing for any distance can
now be done simply by turning the center focus wheel. Make a note of the diopter
setting for your eyesight (line on the diopter dial that is lined up with the index mark)
for future reference.
FOCUS LOCK
The Excursion HD also features a special focus lock feature. After focusing on a subject, the
setting can be locked by simply pushing the knob in (down) (Fig.3). This is useful when you will
be observing a subject at a consistent distance for an extended time period, to make sure you
don’t accidently shift or bump the focus setting unintentionally, or when you want to pass the
binoculars around in a group that is taking turns viewing the same subject.
WATERPROOF/FOGPROOF
Your Bushnell Excursion HD binocular has been designed and built utilizing the latest waterproof
and fogproof technology. Excursion HD binoculars are O-ring sealed for complete moisture
protection. Fogproof protection is achieved from dry nitrogen purging that removes all internal
moisture.
EYECUP ADJUSTMENT: (Fig. 4)
Your Bushnell Excursion HD binocular is fitted with twist-up eyecups designed for your comfort and
to exclude extraneous light. For users without eyeglasses, rotate the eyecups counter-clockwise
until they lock into the fully “up” position (
in the fully down position- this will bring your eyes closer to the binocular lens, allowing you to see
the full field of view. To lower the eyecups from the full “up” position, rotate them clockwise. It is
also possible to set the eyecups to a middle position “in between” fully up and fully down, which
may suit some individuals better.
Fig. 4
). If you wear glasses, make sure the eyecups are
NECKSTRAP: (Fig. 5)
To attach the neckstrap, first align the strap with the plastic fastener positioned as shown in
Fig. 5. Push the fastener straight down into the socket, then pull it up toward the eyepieces.
You will feel the fastener latch into place. To remove the strap, return the fastener to the original
position (Fig. 5), and pull it straight up out of the socket.
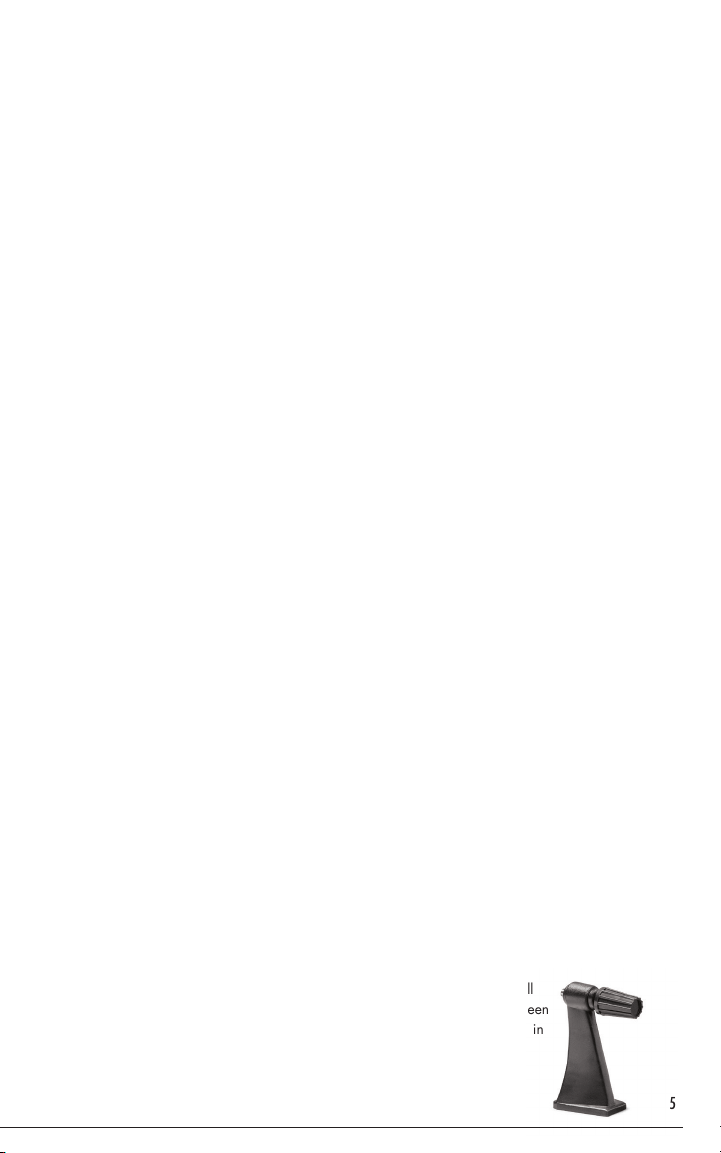
TRIPOD MOUNT*: (Fig. 6)
To attach the
cap which covers the threaded socket inside the center hinge
a safe place. Use a compatible binocular tripod adapter, such as the Bushnell
model #161002CM, (an accessory bracket, shown below, which goes between
the binocular and tripod) to attach your
a horizontal position to provide a stable image during prolonged viewing.
Excursion HD
to a tripod or monopod, unscrew (counter-clockwise) the “B” logo
(Fig. 6)
, and set it aside in
Excursion HD
*Tripod Adaptor (not included)
to any standard tripod in
5

INSTRUCTIONS FOR CARE
Your Bushnell Excursion HD binocular will provide years of trouble-free service if it receives the
normal care you would give any fine optical instrument.
• Avoid banging and dropping.
• Store in a cool, dry place.
CLEANING
1. Blow away any dust or debris on the lenses (using a soft lens brush or “canned air”).
2. To remove skin oil or finger prints, breathe on the lens and wipe it dry with a microfiber
cloth, rubbing gently in a circular motion. Use of a coarse cloth or unnecessary rubbing
may scratch the lens surface and eventually cause permanent damage. The gray drawstring
bag included with your Excursion HD is made of soft microfiber cloth, ideal for the routine
cleaning of your optics.
3. If a more thorough cleaning is needed, photographic lens tissue and photographic-type lens
cleaning fluid or isopropyl (not rubbing) alcohol may be used. Always apply the fluid to
the cleaning cloth – never directly on the lens.
NEVER LOOK DIRECTLY AT THE SUN WITH YOUR BINOCULAR
AS IT MAY CAUSE SERIOUS DAMAGE TO YOUR EYES
WARRANTY/REPAIR
Your Bushnell® product is warranted to be free of defects in materials and workmanship for the lifetime of the original owner. The Lifetime Limited
Warranty is an expression of our confidence in the materials and mechanical workmanship of our products and is your assurance of a lifetime of
dependable service. In the event of a defect under this warranty, we will, at our option, repair or replace the product, provided that you return
the product postage prepaid. This warranty does not cover damages caused by misuse, improper handling, installation, or maintenance provided
by someone other than a Bushnell Authorized Service Department.
Any return in the U.S. or Canada made under this warranty must be accompanied by the items listed below:
1) A check/money order in the amount of $10.00 to cover the cost of postage and handling
2) Name and address for product return
3) An explanation of the defect
4) Proof of Purchase
5) Product should be well packed in a sturdy outside shipping carton, to prevent damage in transit, with return postage prepaid to the
address listed below:
IN U.S.A. Send To: IN CANADA Send To:
Bushnell Outdoor Products Bushnell Outdoor Products
Attn.: Repairs Attn.: Repairs
9200 Cody 140 Great Gulf Drive, Unit # B
Overland Park, Kansas 66214 Vaughan, Ontario L4K 5W5
For products purchased outside the United States or Canada please contact your local dealer for applicable warranty information. In Europe you
may also contact Bushnell at:
Bushnell Germany GmbH
European Service Centre
Mathias-Brüggen-Str. 80
D-50827 Köln
GERMANY
Tel: +49 221 995568-0
Fax: +49 221 995568-20
LIFETIME LIMITED WARRANTY
This warranty gives you specific legal rights.
You may have other rights which vary from country to country.
©2014 Bushnell Outdoor Products
6
Félicitations pour l’achat de vos nouvelles jumelles Bushnell. L’Excursion HD possède une optique
complètement multi traitée et des prismes Bak-4 hautes performance avec un traitement phase PC-
®
pour étirer la lumière disponible et produire des images avec le plus haut niveau de clarté bord
3
à bord. Leur large champ de vision vous permette d’avoir une vue d’ensemble d’un seul coup. Le
système de vue de précision est contenu dans un boitier léger et rugueux, bien équilibré, à double
pont de Tomson qui est purgé de nitrogène et complètement étanche à toute forme d’humidité,
ensuite enveloppé avec du caoutchouc renforcé.
Ce manuel vous aidera à optimiser les performances en expliquant comment régler les jumelles
pour vos yeux, en utilisant les dispositifs et les accessoires, et comment prendre soin de ce bel
instrument d’optique. Lisez ces instructions attentivement avant d’utiliser vos jumelles.
FRANÇAIS
Fig. 1
Fig. 2
Fig. 3
déverrouillé
verrouillé
Distance Interpupillaire Réglage Dioptrique
Fig. 4
Oeilletons D’oculaires
Fig. 5
Bandoulière Monture de trépied
Dispositif Zoom
Fig. 6
Roulables
RÉGLAGE DE L’ÉCART INTERPUPILLAIRE (Fig. 1)
Comment ajuster l’écart entre vos deux yeux
La distance entre les deux yeux, également appelée “écart interpupillaire”, varie d’une personne
à l’autre. Pour que les yeux soient parfaitement en face des lentilles, suivez ces quelques étapes
très simples:
• Tenez vos jumelles normalement, comme si vous vouliez regarder au loin.
• Tenez fermement chacune des bagues d’ajustement. Rapprochez les bagues
d’ajustement ou éloignez-les l’une de l’autre jusqu’à ce que vous puissiez voir un seul
champ circulaire. Remettre toujours vos jumelles sur cette position avant de les utiliser.
Comment ajuster la dioptrie
La vue varie d’un individu à l’autre, c’est pourquoi vos jumelles Bushnell Excursion HD sont
équipées d’un dispositif d’ajustement dioptrique qui vous permettra de régler les jumelles à
votre vue de manière très précise. Suivez les instructions ci-dessous pour régler la mise au point.
MISE AU POINT
1. Réglez la distance interpupillaire (Fig. 1) jusqu’à ce que vous observiez un seul champ
circulaire.
2. La molette de réglage dioptrique est située sur le coté droit, directement sous les œilletons.
3. Assurez vous que le réglage dioptrique est réglé sur “zéro” pour démarrer (la graduation
sur la molette de réglage dioptrique est alignée avec la marque sur le coté droit des
jumelles (Fig.2).
4. Gardez les deux yeux ouverts pendant la durée du réglage.
5. A l’aide du couvre-objectif ou de votre main, recouvrez la lentille droite (devant)
des jumelles.
7

6. Assurez vous que la molette est tirée dans la position déverouillée- elle doit pouvoir
tourner librement (Fig.3).
7. Utilisez la molette centrale de mise au point pour faire la mise au point sur un objet
lointain doté d’une multitude de détails (par exemple un mur de briques, la branche
d’un arbre, etc.) jusqu’à ce que celui-ci soit le plus net possible.
8. Découvrez la lentille de droite, puis recouvrez la lentille de gauche et observez le
même objet.
9. Faites tourner la bague d’ajustement dioptrique pour faire la mise au point sur le
même objet du côté droit. Éviter de trop tourner ou de forcer le mécanisme de réglage
dioptrique. Si vous ne parvenez pas à faire la mise au point sur l’objet à l’aide du
dispositif d’ajustement dioptrique, vérifiez que le côté gauche est toujours correctement
réglé à l’aide de la molette centrale. L’ajustement dioptrique n’affecte que le côté droit.
10. Vos jumelles sont maintenant ajustées à votre vue.
La mise au point pour toute distance peut maintenant être effectuée en tournant simplement
la molette centrale de mise au point. Noter le réglage dioptrique pour votre vue (ligne sur
le cadran de dioptrie qui est aligné avec la marque de l’index) comme référence.
VERROUILLAGE DE LA MISE AU POINT
L’Excursion HD possède aussi un dispositif spécial de vérrouillage de la mise au point. Après la
mise au point sur un sujet, le réglage peut être vérrouillé en pressant simplement la molette (vers
le bas) (Fig.3). Ceci est utile quand vous observerez un sujet à une distance constante pendant
une longue période, pour vous assurer que vous ne décalerez accidentellement le réglage de la
mise au point, ou quand vous passerez les jumelles à un groupe pour qu’il voie le même sujet.
IMPERMEABILITE ET ETANCHEITE AU BROUILLARD
Vos jumelles Bushnell Excursion HD ont été concues et construites en utilisant les dernières
technologies d’imperméabilité et d’étancheité au brouillard. Les jumelles Bushnell Excursion HD
sont gardées étanches par joints toriques pour une protection contre l’humidité. La protection
etanche au brouillard est réalisé à partir de nitrogéne sec purgant qui ôte toute humidité interne.
AJUSTEMENT DES ŒILLETONS: (Fig. 4)
Vos jumelles Bushnell Excursion HD sont équipées d’œilletons twist-up conçus pour votre confort
et éliminer toute lumière superflue. Pour les utilisateurs ne portant pas de lunettes, tourner les
œilletons dans le sens contraire des aiguilles d’une montre jusqu’à ce qu’ils soient vérrouillés
en position “haute” (Fig.4). Si vous portez des lunettes, assurez-vous que les œilletons soient en
position basse, de manière à rapprocher vos yeux des lentilles des jumelles et vous permettre
d’avoir un champ de vision parfait. Pour abaisser les œilletons de la position “haute”, faites-les
simplement tourner dans le sens des aiguilles d’une montre.
les œilletons sur une position “intermédiaire” entre la position haute et la position basse, qui
pourrait mieux convenir à certaines personnes.
BANDOULIÈRE: (Fig. 5)
Pour attacher la courroie, aligner tout d’abord cette courroie avec l’attache plastique positionnée
comme indiqué en Fig.5. Pousser l’attache tout droit vers le bas dans l’articulation, ensuite tirer
le vers le haut vers les œilletons. Vous ressentirez l’attache vérrouillée et en place. Pour retirer
la courroie, remettre l’attache dans sa position d’origine (Fig.5), et la tirer tout droit vers le haut
hors de l’articulation.
MONTURE DE TRÉPIED*: (Fig. 6)
Pour fixer l’Excursion HD au trépied ou au pied, dévisser (dans le sens inverse des aiguilles
d’une montre) le couvercle logo “B” qui couvre l’articulation du manchon à vis à l’intérieur
de la charnière centrale (Fig. 6). Utiliser un adaptateur de trépied de jumelles compatible, comme
8
le modèle Bushnell #161002CM, (un support accesosire, présenté ci-dessous, qui se place entre
Il est également possible de régler
 Loading...