

Page 1
808
$10.00
50066586
MODEL
4430
OFF ROAD UTILITY VEHICLE
Operator’s Manual
ASSEMBLY • OPERATION • MAINTENANCE
BUSH HOG
®
Page 2

CONGRATULATIONS!
You have invested in the best vehicle of its type on the market today.
The care you give your Bush Hog vehicle will greatly determine your
satisfaction with its performance and its service life. We urge a careful study of this manual to provide you with a thorough understanding
of your new vehicle before operating, as well as suggestions for operation and maintenance.
If your manualshould become lost or destroyed,Bush Hog will be glad
to provideyouwith a new copy. Order fromBushHog,P.O.Box1039,
Selma, Alabama 36702-1039.Mostof our manuals can also be downloaded from our website at www.bushhog.com.
As an authorized Bush Hog dealer, we stock genuine Bush Hog parts
which are manufactured with the same precision and skill as our original equipment. Our trained service personnel are well informed on
methods required to service Bush Hog equipment, and are ready and
able to help you.
Should you require additional information or assistance, please contact us.
YOUR AUTHORIZED BUSH HOG DEALER
BECAUSE BUSH HOG MAINTAINS AN ONGOING PROGRAM OF
PRODUCTIMPROVEMENT,WE RESERVETHERIGHT TO MAKE
IMPROVEMENTS IN DESIGNORCHANGES IN SPECIFICATIONS
WITHOUT INCURRINGANYOBLIGATIONTOINSTALLTHEMON
UNITS PREVIOUSLY SOLD.
BECAUSE OF THE POSSIBILITY THAT SOME PHOTOGRAPHS
IN THIS MANUAL WERE TAKEN OF PROTOTYPE MODELS,
PRODUCTION MODELS MAY VARY IN SOME DETAIL. IN ADDITION, SOME PHOTOGRAPHS MAY SHOW SHIELDS REMOVED
FOR PURPOSES OF CLARITY. NEVER OPERATE THIS IMPLEMENT WITHOUT ALL SHIELDS IN PLACE.
Page 3

BUSH HOG
®
4430 Utility Vehicle
TABLE OF CONTENTS
SECTION PAGE
Retail Customer’s Responsibility 2
Warranty 3
Dealer Preparation Check List 5
Safety Alert Symbols 6
Safety Precautions 7
I INTRODUCTIONANDDESCRIPTION 20
Introduction 20
Description 20
Specifications 27
II OPERATION 29
General Safety 29
Pre-Operation Checklist 29
Vehicle Break-In Period 29
Starting The Engine 30
Driving The Vehicle 30
Braking 31
Stopping The Engine 31
Using The Cargo Box 32
Load Distribution 33
Driving Safely 34
Driving On Slippery Surfaces 34
Driving Uphill 35
Sidehilling 36
Driving Downhill 36
Driving Through Water 36
Driving Over Obstacles 38
Driving In Reverse 39
Parking On An Incline 40
Hauling Cargo 41
Emptying The Cargo Box 42
Towing Loads 43
Parking The Vehicle 43
4-Wheel Drive 44
Disengaging 4-Wheel Drive 44
Noise Emission Control System 45
Spark Arrestor 46
SECTION PAGE
III MAINTENANCE 46
Periodic Maintenance Schedule 47
Lubrication Recommendations 50
Engine Oil 51
Engine Oil Filter Change 52
Transaxle 52
Front Differential 53
Right Angle Drive 54
Constantly Variable Transmission 55
Vehicle Immersion 56
Engine Air Filter 57
CVT Enclosure Air Filter 57
Fuel filter 58
Spark Plugs 58
Spark Arrestor 59
Throttle System 60
Brake Inspection 61
Parking Brake Adjustment 62
Steering Wheel Inspection 63
Seat Belts 63
Tires 64
Wheel Lug Nuts 64
Wheel Installation 65
Lights 65
Cleaning Your Vehicle 66
Storage 67
Removal From Storage 67
Battery 67
Replenishing Battery Fluid 68
Battery Removal 68
Battery Installation 69
Battery Storage 69
IVASSEMBLY 70
Attaching Occupant Protection
Structure 70, 71
Optional Equipment 70
Items To Check 70
Seat Belt Installation 71
Rubber Bumper Pad Adjustment 72
Troubleshooting CheckList 73
Safety Decals 74
Torque Specifications 76
1
Page 4

RETAIL CUSTOMER’S
RESPONSIBILITY
UNDER THE
BUSH HOG WARRANTY
It is the Retail Customer and/or Operator’s responsibility
to read the Operator’s Manual, to operate, lubricate, maintain and store the product in accordance with all instructionsand safetyprocedures. Failureof the operatorto read
the Operator’s Manual is a misuse of this equipment.
It is the Retail Customer and/or Operator’s responsibility
to inspect the product and to have any part(s) repaired or
replaced when continued operation would cause damage
or excessive wear to other parts or cause a safety hazard.
It is the Retail Customer’sresponsibility to deliver the product to the authorized Bush Hog Dealer, from whom he purchased it, for service or replacement of defective parts
which are covered by warranty. Repairs to be submitted
for warranty consideration must be made within thirty (30)
days of failure.
It is the Retail Customer’s responsibility for any cost incurred by the Dealer for traveling to or hauling of the product for the purpose of performing a warranty obligation or
inspection.
2
Page 5

LIMITED WARRANTY
OOOOOOOOOOOOOOOOOOOO
OOOOOOOOOOO
Bush Hog warrants to the original purchaser of any new Bush
Hog equipment, purchased from an authorized Bush Hog dealer, that
the equipment be free from defects in material and workmanship for
a period of one (1) year for non-commercial, state, and municipalities’
use and ninety (90) days for commercial use from date of retail sale.
Model 4430 also carries a three (3) year limited drive train warranty.
This three (3) year limited drive train warranty covers the CVT
clutches, transaxle, driveline, front differential, and all four CV shaft
assemblies.The obligation of Bush Hog to the purchaser under this
warranty is limited to the repair or replacement of defective parts.
Replacement or repair parts installed in the equipment covered by this limited warranty are warranted for ninety (90) days from
the date of purchase of such part or to the expiration of the applicable
new equipment warranty period, whichever occurs later. Warranted
parts shall be provided at no cost to the user at an authorized Bush
Hog dealer during regular working hours. Bush Hog reserves the right
to inspect any equipment or parts which are claimed to have been defective in material or workmanship.
DISCLAIMER OF IMPLIED WARRANTIES & CON-
SEQUENTIAL DAMAGES
Bush Hog’s obligation under this limited warranty, to the extent allowed by law, is in lieu of all warranties, implied or expressed,
INCLUDING IMPLIED WARRANTIES OF MERCHANTABILITY AND
FITNESS FOR A PARTICULAR PURPOSE and any liability for inci-
dental and consequential damages with respect to the sale or use of
the items warranted. Such incidental and consequential damages
shall include but not be limited to: transportation charges other than
normalfreight charges;costofinstallationotherthan cost approvedby
Bush Hog; duty; taxes; charges for normal service or adjustment; loss
of crops or any other loss of income; rental of substitute equipment,
expenses due to loss, damage, detention or delay in the delivery of
equipment or parts resulting from acts beyond the control of Bush
Hog.
CONTINUED
3
Page 6

CONTINUED
THIS LIMITED WARRANTY SHALL NOT APPLY:
1. To vendor itemswhichcarry theirownwarranties,suchasengines,
tires, and tubes.
2. If the vehicle has been subjected to misapplication,abuse, misuse,
negligence, racing, fire or other accident.
3. If parts not made or supplied by Bush Hog have been used in connection with the vehicle, if, in the sole judgement of Bush Hog such
use affects its performance, stability or reliability.
4. If the vehicle has been altered or repaired outside of an authorized
Bush Hog dealership in a manner which, in the sole judgement of
Bush Hog, affects its performance, stability or reliability.
5. To normal maintenance service and normal replacement items to
include, but not limited to gearbox lubricant, engine oil, all filters, and
spark plugs, or to normal deterioration of such things as belts and
exterior finish due to use or exposure.
6. To expendable or wear items to include, but not limited to teeth,
chains, sprockets, belts, brake pads, springs and any other items that
in the company’s sole judgement is a wear item.
7. To CV boots nor damageto the shaft assembliesfromrunning with
damaged or missing boots.
NO EMPLOYEE OR REPRESENTATIVE OF BUSH HOG IS
AUTHORIZED TO CHANGE THIS LIMITED WARRANTY IN ANY
WAY OR GRANT ANY OTHER WARRANTY UNLESS SUCH
CHANGE IS MADE IN WRITING AND SIGNED BY BUSH HOG’S
SERVICE MANAGER, POST OFFICE BOX 1039, SELMA,
ALABAMA 36702-1039.
OOOOOOOOOOOOOOOOOOOO
Recordthe model number,serial numberanddatepurchased.This information will be helpful to your dealer if parts or service are required.
MODEL NUMBER
SERIALNUMBER
DATE OF RETAIL SALE
4
Page 7

DEALER PREPARATION CHECK
LIST
UTILITY VEHICLE
BEFORE DELIVERING MACHINE — The following
check list should be completed. Use the Operator’s
Manual as a guide.
r 1. Engine has been serviced.
r 2. Battery fluid level is checked.
r 3. All warning lights checked for operation.(Engine oil, park
brake, & neutral light)
r 4. Assembly completed
r 5. All fittings lubricated.
r 6. All shields in place and in good condition.
r 7. All fasteners torqued to specifications given in
Torque Chart.
r 8. All decals in place and readable. (See decal page.)
r 9. Overall condition good (i.e. paint, welds)
r 10.Parking brake checked and adjusted, if necessary.
r 11.Steering checked and adjusted, if necessary.
r 12.Check tire pressure.
r 13.Operators manual has been delivered to owner and
he has been instructed on the safe and proper use
of the utility vehicle.
Dealer’s Signature
Purchaser’s Signature
THIS CHECKLIST TO REMAIN IN
OWNER’S MANUAL
It is the responsibility of the dealer to complete the procedures listed above before delivery of this vehicle to the
customer.
5
Page 8
Safety Alert Symbol
Safety Signs Signal Words
The signal words DANGER, WARNING, AND CAUTION are used on
the equipment safety signs. These words are intended to alert the
viewer to the existence and the degree of hazard seriousness.
This signal word indicates a potentially hazardous situation which, if
not avoided, will result in death or
serious injury.
This signal word indicates a potentially hazardous situation which, if
not avoided, could result in death
or serious injury
This signal word indicates a potentially hazardous situation exist
which, if not avoided, may result in
minor or moderate injury. It may
alsobeused to alertagainst unsafe
practices.
6
This Safety Alert Symbol means:
“ATTENTION!BECOMEALERT! YOURSAFETY IS
INVOLVED!”
This symbol is used to call attention to safety pre-
cautions thatshould be followedbytheoperatorto
avoid accidents. When you see this symbol, carefullyreadthe message thatfollowsand heed itsadvice. Failure to comply with safety precautions
could result in death or serious bodily injury.
Page 9

IMPORTANT SAFETYPRECAUTIONS
In addition to the design and configuration of equipment, hazard control and accident prevention are dependent upon the awareness, concern, prudence and proper training of personnel in the operation,
transport, maintenance and storage of equipment. Lack of attention
to safety can result in accident, personal injury, reduction of efficiency
and worst of all—loss of life. Watch for safety hazards and correct deficiencies promptly. Use the following safety precautions as a general
guide to safe operations when using this machine. Additional safety
precautions are used throughout this manual for specific operating
and maintenance procedures.Read this manual and review the safety
precautions often until you know the limitations.
IMPORTANT OPERATOR SAFETY PRACTICES:
BEFORE OFF-ROAD UTILITY VEHICLE USE:
• Read, understand and follow all the Operator’s Manual instruc-
tions.
• Explain all instructions to operators who cannot read or under-
stand the instructions.
• Only allow vehicles to be operated by trained persons.
• Allow no persons younger than 16 years old to operate.
• Do not operate under the influence of alcohol or drugs.
• Inspect vehicle for safe operating condition.
DURING OFF-ROAD UTILITY USE:
• Fasten seat belt.
• Use vehicle only for off-road operations.
• Avoid sudden starts, stops, turns, or direction reversals to prevent
load shifts, endanger passengers, or losing vehicle control.
• Use speeds to allow vehicle to stop safely and be under control
in all travel conditions.
• Reduce speeds for wet, slippery, loose surfaces, steep grades
and unfamiliar terrain.
• Never operate vehicle on hills steeper than 15 degree slope.
• Use proper loading and securing material for loads in cargo box
and trailers.
• Use proper towing practices.
7
This symbol is used to call attention
to safety precautions that should be
followed by the operator to avoid accidents. When you see this symbol,
carefully read the message that follows and heed its advice. Failure to
comply with safety precautions
could result in serious bodily injury.
Page 10

• Do not tow heavy loads on hills steeper than 5 degree slope.
• Avoid driving through water exceeding floorboard height.
• Before leaving, servicing, or adjusting the vehicle, stop engine,
set parking brake, remove key, wait for engine and all moving
parts to stop.
AVOIDVEHICLERUNOVERANDRIDEROROPERATORFALLOFF:
• Only allow persons to ride in seats equipped with seat belts.
• All persons fasten seat belts when riding.
• Allow no riders in cargo box or on vehicle.
• Keep all persons clear of operating vehicle.
• Keep alert forstumps, holes,ruts,wet,slippery and uneven terrain.
• Before backing up or turning, look behind and around vehicle for
persons.
AVOID VEHICLE UPSETS AND ROLLOVER:
• Avoid sudden starts, stops, or turns.
• Use very slow speed when turning.
• Always use brakes when going down slope.
• Reduce speed and load on rough or hilly terrain.
• Avoid overloading vehicle and shifting loads.
• Keepalertforstumps,holes, ruts, wet,slipperyand uneven terrain.
AVOID FUEL FIRE AND EXPLOSIONS:
• Stop engine and allow to cool before refueling.
• Do not smoke while refueling.
• Never fill fuel tank indoors.
• Clean up spilled fuel before starting engine.
• Only use approved Underwriter’s Laboratory (U.L.) or American
Society for Testing & Material (ASTM) non-metal portable fuel
containers.
• Remove fuel containers from vehicle beds or trunks and placing
on the ground before filling.
• Keep nozzle in contact with fuel container opening while filling.
• Remove utility vehicle and equipment from truck beds or trailers
and re-fuel on the ground.
CARGO BOX LOAD OPERATIONS:
LOADING:
• Do not exceedvehicle’s Gross Vehicle Weight(GVW) rating. This
includes vehicle operating weight, material load (cargo box load),
personnel weight, options weight, accessories weight, and
attachments weight (towing loads).
• Do not exceed cargo box load rating.
• Confine loads to cargo box physical dimensions.
• Spread load evenly and securely anchor all loads in cargo box.
Shifting and uneven loads will effect vehicle controland stability.
• Avoid sudden starts, stops, and turns which could cause load
shifts.
8
Page 11

• Reduce loads and speed when operating over rough or hilly terrain.
• Use low vehicle speeds when operating with cargo box loads.
Heavy loads will affect steering, braking, stability, and overall
handling of the vehicle. Limit loads to those that can be safely
controlled.
• Allow for increased braking distance.
UNLOADING:
• Stop vehicle on level ground, set parking brake before raising
cargo box.
• Avoid unloading or dumping on slopes, hills or inclines.
MANUALLY RAISED CARGO BOX UNITS:
• Unload manual lift cargo box before raising cargo box by
hand.
• Securely lock manual support lift rod before working beneath
raised cargo box.
• Fully lower cargo box and securely re-latch lift rod before operating vehicle.
OPTIONAL ELECTRIC POWER LIFT CARGO BOX UNITS:
• Operate switch while seated in operator seat.
• Keep body parts away from cargo box and all bystanders away
from vehicle.
• Do not dump or unload vehicle parked on an incline, slopes, hills,
or with rear wheels at an edge of a drop-off. The cargo box
weight may shift and cause the vehicle to tip or rollover.
• Fully lower cargo box before operating vehicle.
TOWING OPERATIONS:
• Do not exceed vehicle’s Gross Vehicle Weight (GVW) rating. This
includes vehicle operating weight, material load (cargo box load),
personnel weight, options weight, accessories weight, and attachmentweight(towingloads).
• Always use approved rear hitch point.
• Do not tow a load weight (trailer weight and cargo weight) that
exceeds towing weight rating.
• Do not exceed the tongue weight rating.
• Never exceed 16 km/h (10 mph)when towing loads. Use slow
speeds to maintain control of vehicle and towing load.
• Allow for increased braking distance from towed load weight.
• Do not tow heavy loads on slopes greater than 5 degree incline.
• Heavy towed equipment may jackknife and cause utility vehicle
to overturn when going downhill or turning.
9
Page 12

CONTROLLING PARTY INFORMATION
(Reference: SAE J2258-DEC 2003-Light-Utility Vehicle, APPENDIX B,
PART II - For the Controlling Party.) The Controlling Party is the person(s) or organization(s) responsible for the operation and maintenance of a vehicle.
MAINTENANCE AND OPERATIONS:
The Controlling Party should perform the following:
• Properly use and maintain utility vehicle to avoid serious injury or
death.
• Follow additional specific safety practices as may reasonably be
required for safe operations.
• Perform periodic safety survey of vehicle operating areas.
• Identify operating area hazards.
• Identify areas where vehicle should not be operated.
SAFETY SURVEY:
The Controlling Party should conduct an operating area safety survey
to identify possible hazards:
• Steep Grade Hazards:
• Restrict vehicle operations to designated pathways in steep
grade areas.
• Erect steep grade warning signs.
• State: “Warning, steep grade, descend slowly” on signs.
• Loose Terrain Hazards:
• Keep vehicle traction, steering, stability and braking under
control by avoiding loose terrain areas.
• Wet area Hazards:
• Keep vehicle traction, steering, stability and braking under
control by avoiding wet areas.
• Sharp Turns, Blind Corners, Bridge Approaches Hazards:
• Erect warning signs,
• State precautions to avoid the hazards on signs.
• Pedestrian and Utility Vehicle Traffic Hazards:
• Erect warning signs.
• State warnings of traffic conditions and use caution on signs.
• Reroute vehicle or pedestrian traffic to avoid interference.
10
Page 13

OPERATOR TRAINING:
The controllingParty shoulddevelop, conductan operator-trainingprogram and permit only properly trained persons to operate the utility vehicle.
OPERATOR-TRAINING PROGRAM:
The program should include, as a minimum, the following:
Review:
• Vehicle operator’s manual instructions.
• Vehicle’s safety decals.
• Safe loading practices.
• Proper use of vehicle’s controls and consequences of
improper use.
• Controlling Party’s safety practices developed from operating
area safety survey.
Review conditions that affect vehicle’s stability and may cause
its instability:
• Operator’s failure to follow safety practices.
• Operator’s exercise of judgement.
• Operating area slopes, grades, and terrain conditions.
• Vehicle’s speed, turning, braking, loadings, towing and
dynamic forces.
• Attachments and improper loading.
TheControlling Party should trainand evaluatevehicleoperator’s competency to comply with these practices.
MAINTENANCE AND INSPECTION PROCEDURES:
• Review and perform vehicle manufacturer’s recommended
procedures.
• Use a scheduled preventive maintenance, lubrication, and
inspection program.
• Use trained and authorized personnel to maintain, repair,
adjust, and inspect vehicles
• Conduct recommended procedures in a properly ventilated
work area.
• Use original vehicle manufacturer’s replacement parts.
• Use recommended procedures for returning vehicle to service.
• Use recommended procedures for returning vehicle to service.
• Conduct vehicle performance checks in an area free of vehicular and pedestrian traffic.
• Use vehicle manufacturer’s engine shut down and vehicle
immobilization recommended procedures before undertaking
maintenance or repairs.
• Chock wheels and block chassis before working underneath
vehicle.
• Do not use open flames to check level or leakage of fuel,
battery electrolyte, or coolant.
• Equip work area with fire extinguisher equipment.
• Follow vehicle manufacturer’s recommended inspection and
maintenance procedures.
11
Page 14

FUEL SYSTEM:
• Check for leaks and condition of parts.
• Before disconnection fuel system parts and making repairs:
• Allow engine to run until fuel system is depleted.
• Allow engine to stop.
• Allow engine to cool.
• Disconnect battery.
CONDUCTPERIODIC INSPECTIONONTHEFOLLOWINGSYSTEMS:
• Brake system.
• Steering system.
• Electrical system.
• Transmission system.
• Exhaust system.
• Warning system.
• Switches and devices.
• Follow vehicle manufacturer’s recommended inspection maintenance procedures.
• Keep vehicle clean to reduce fire hazards and allow ease of
vehicle inspection.
VEHICLE INSTRUCTION AND SAFETY DECALS:
• Keep clean and legible.
• Replace illegible decals.
VEHICLE MODIFICATION AND ADDITIONS:
• Contact vehicle manufacturer before making modifications
that affect vehicle capacity and safe vehicle operations.
12
Page 15
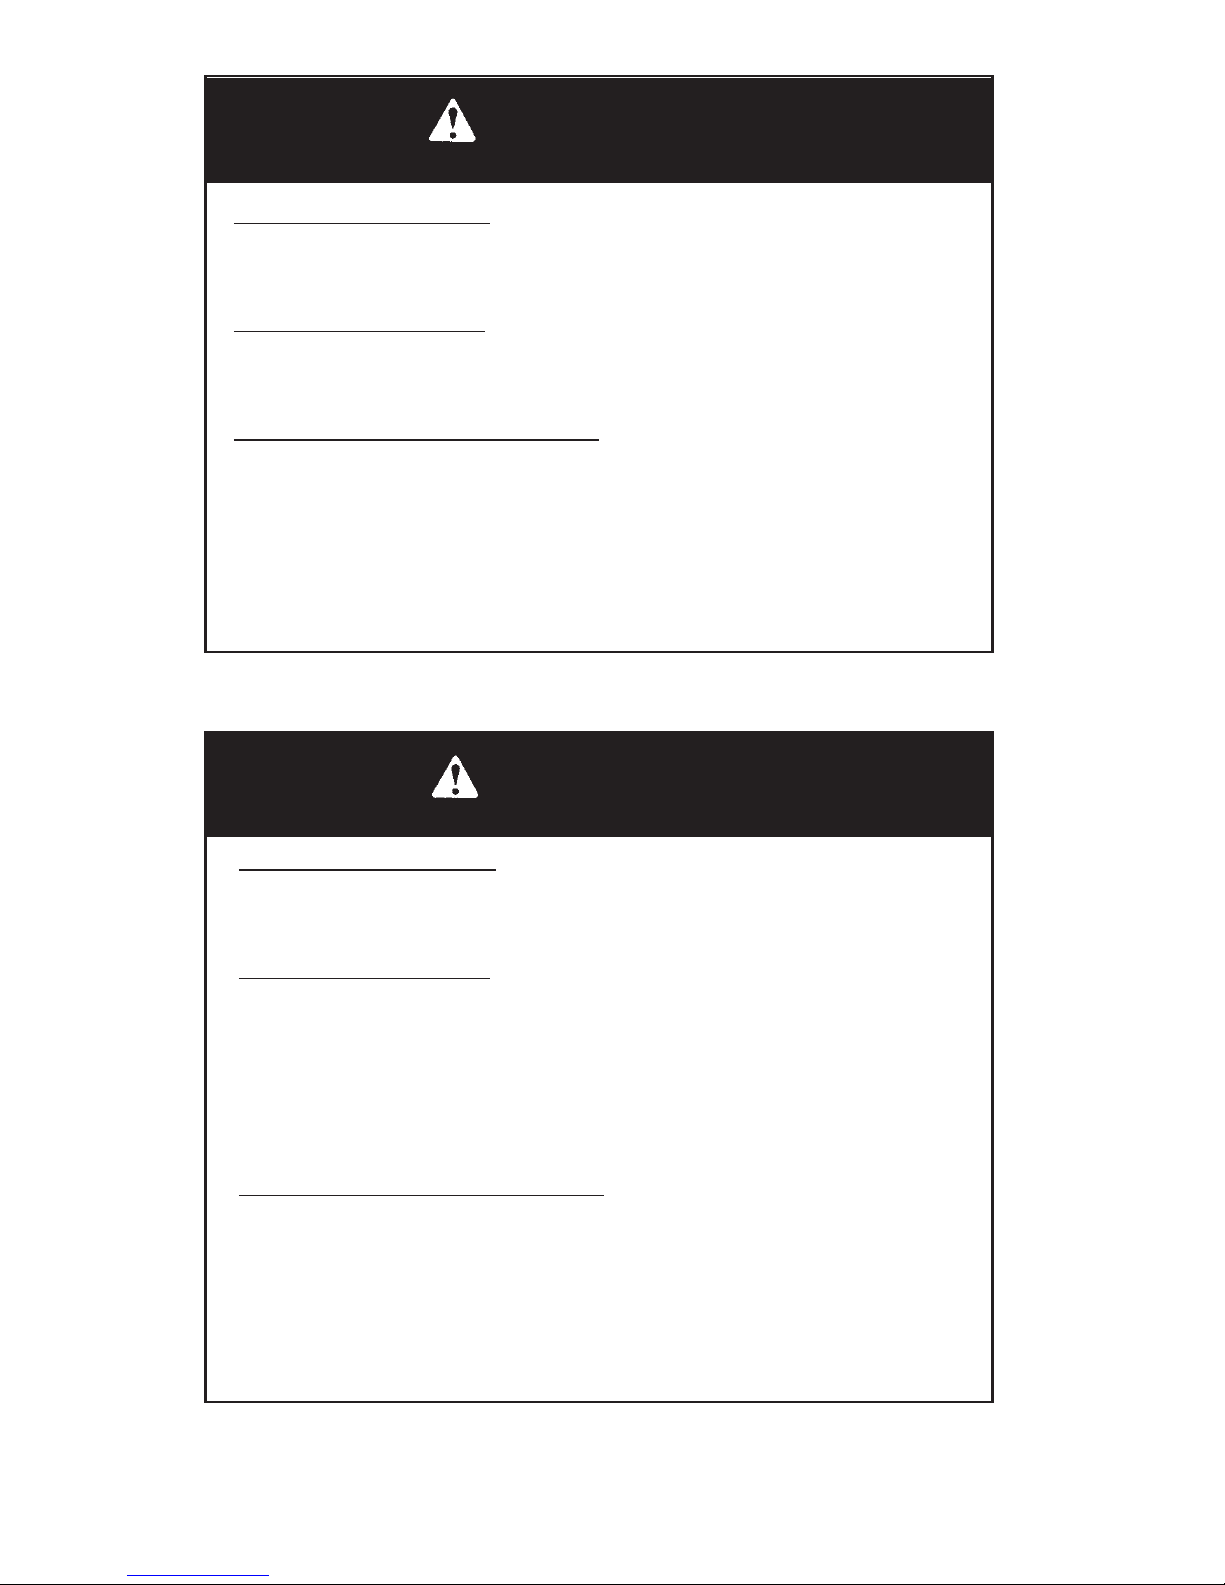
WARNING
13
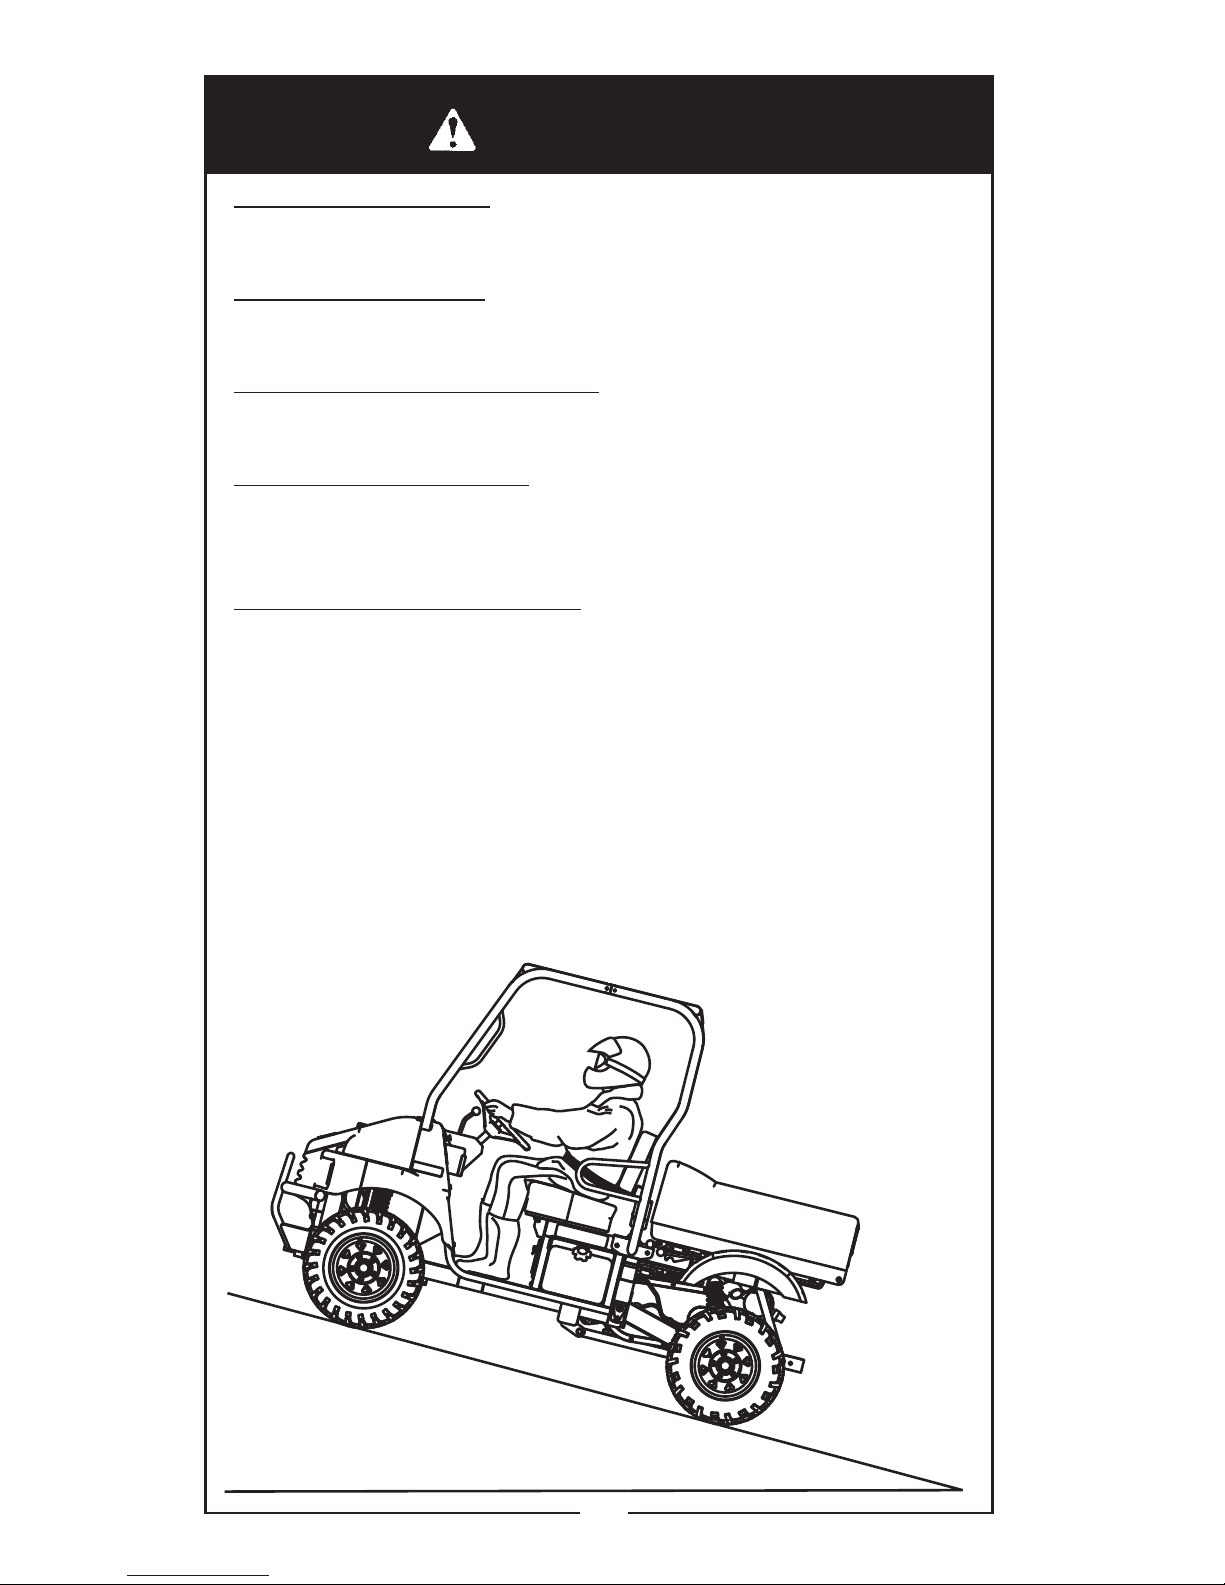
POTENTIAL HAZARD
Stalling, rolling backwards while climbing a hill
WHAT CAN HAPPEN
Vehicle overturn
HOW TO AVOID THE HAZARD
Maintain a steady speed when climbing a hill
If you lose forward speed:
Apply the brakes.
Lock the parking brake after fully stopped.
If you begin rolling backwards:
Never apply engine power.
Apply the service brake gradually.
When fully stopped, lock parking brake.
In the event of an accident, have a qualified service dealer
check the complete vehicle for possible damage, including (but
not limited to) brakes, throttle and steering.
Page 16
WARNING
WARNING
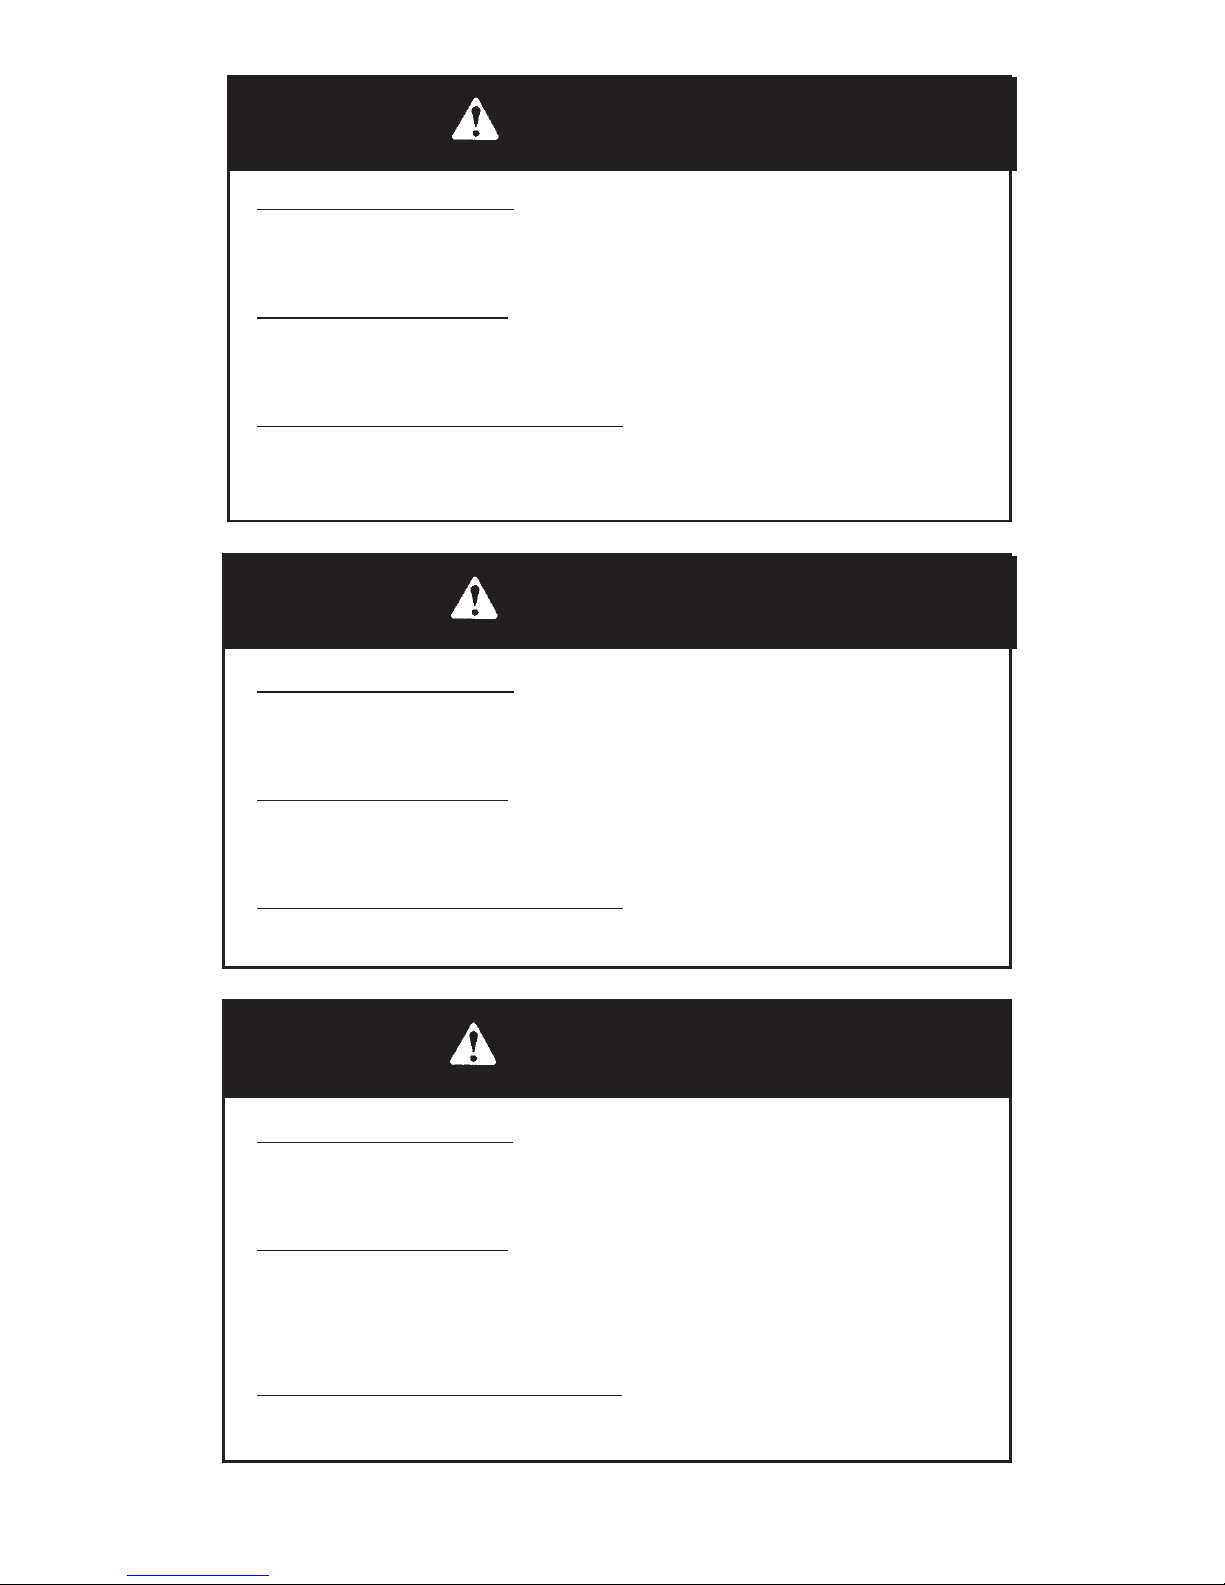
POTENTIAL HAZARD
Operating this vehicle on paved surfaces
WHAT CAN HAPPEN
Loss of control
HOW TO AVOID THE HAZARD
This vehicle’s tires are designed for off-road use only, not for
use on pavement. Paved surfaces may seriously affect handling and control of the vehicle, and may cause the vehicle to
go out of control.
Avoid operating the vehicle on pavement. If you must operate
on a paved surface, travel slowly and do not make sudden
turns or stops.
POTENTIAL HAZARD
Operating this vehicle without proper instruction
WHAT CAN HAPPEN
Loss of control, accident
HOW TO AVOID THE HAZARD
The risk of an accident is greatly increased if the operator does
not know how to operate the vehicle properly in different situations and on different types of terrain.
Allopertorsmust read andunderstand the Operator’smanual and
allwarning andinstruction labelsbefore operating the vehicle.
14
Page 17
WARNING
WARNING
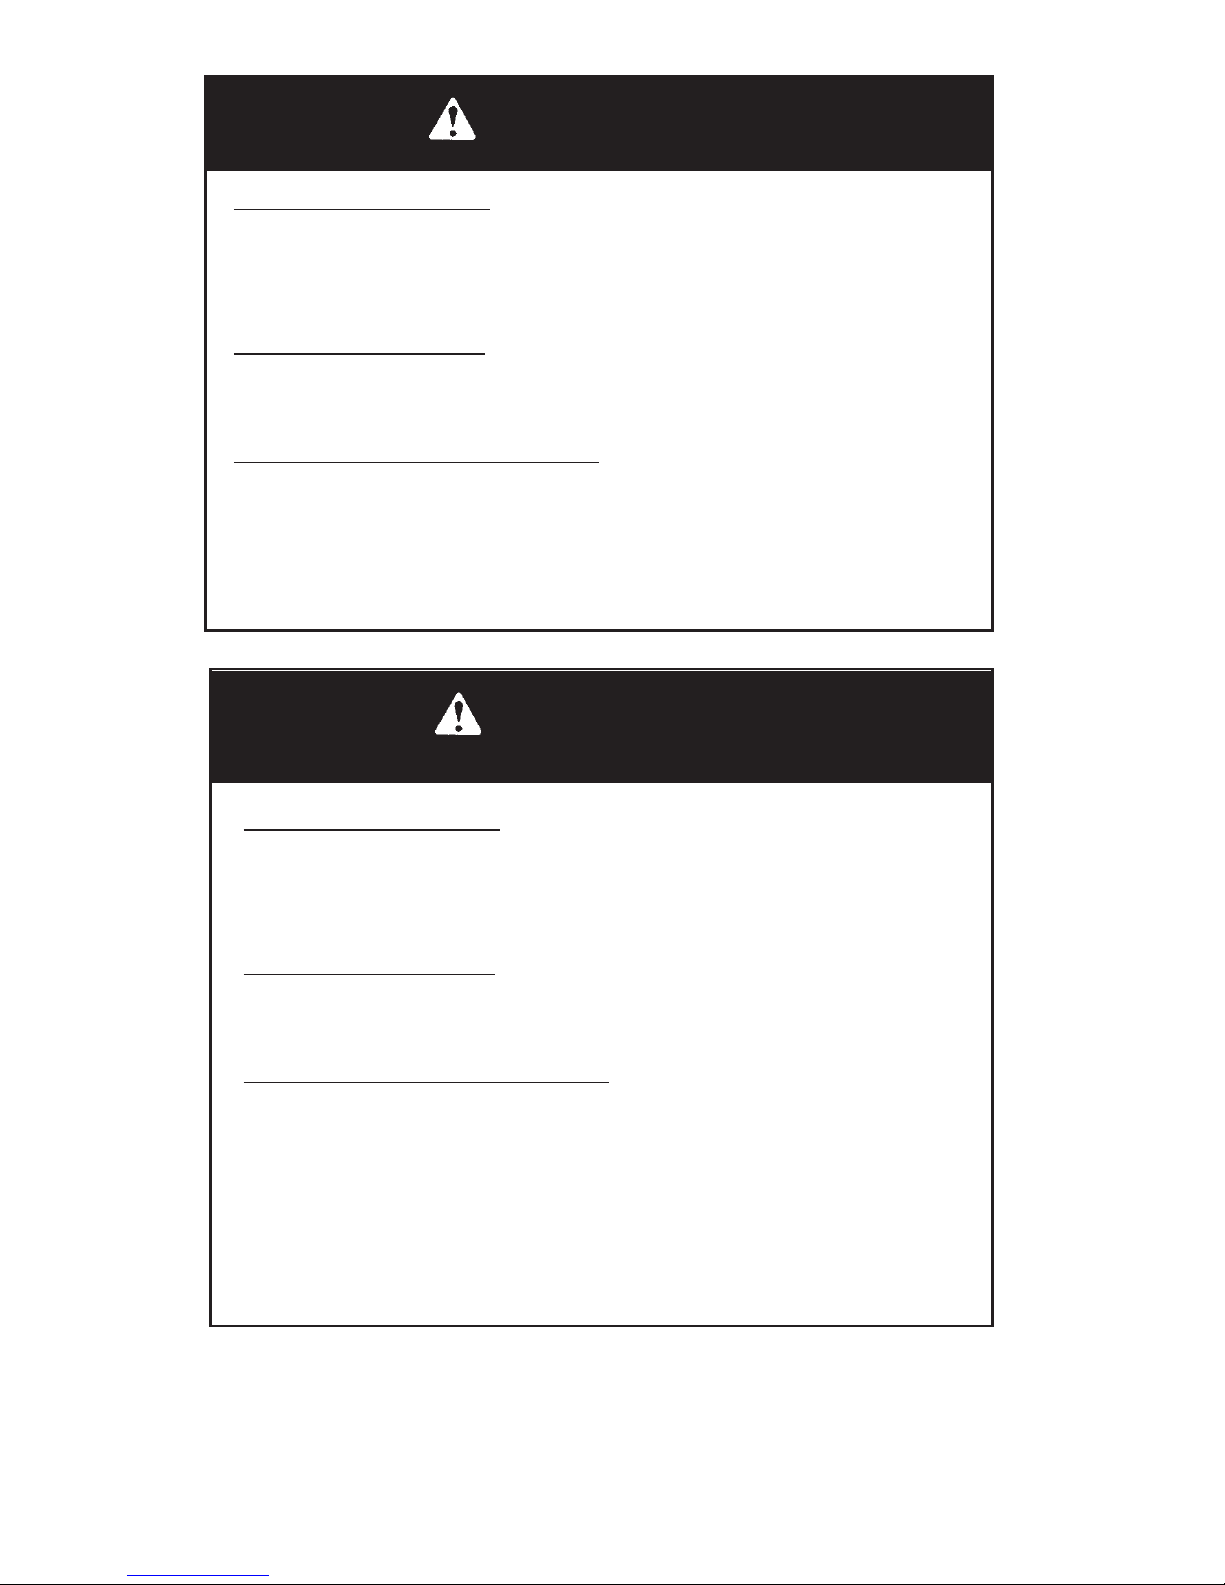
POTENTIAL HAZARD
Operating this vehicle on public streets, roads or highways
WHAT CAN HAPPEN
Collision with another vehicle
HOW TO AVOID THE HAZARD
Never operate this vehicle on any public street, road or highway, including dirt or gravel.
In many states it’s illegal to operate vehicles of this type on
public streets, roads and highways.
POTENTIAL HAZARD
Operating this vehicle after consuming alcohol or drugs
WHAT CAN HAPPEN
Could seriously affect your judgment.
Could cause you to react more slowly.
Could affect your balance and perception.
Could result in an accident.
HOW TO AVOID THE HAZARD
Driving this vehicle requires your full attention. DO NOT drink
alcohol or use drugsor medications beforeor while driving. They
willreduceyour alertness and slowyour reaction time.In most
states and provinces,it’s prohibited by law to drivewhile intoxicated or under the influence of drugs.
15
Page 18
WARNING
WARNING
POTENTIAL HAZARD
Operating this vehicle at excessive speeds
WHAT CAN HAPPEN
Loss of control, accident
HOW TO AVOID THE HAZARD
Always travel at a speed proper for the terrain, visibility and operating conditions, and your experience.
POTENTIAL HAZARD
Attempting jumps and other stunts
WHAT CAN HAPPEN
Loss of control, accident and/or vehicle overturn
HOW TO AVOID THE HAZARD
Never attempt jumps and other stunts. Avoid exhibition driving.
WARNING
POTENTIAL HAZARD
Operating on frozen bodies of water.
WHAT CAN HAPPEN
Severe injury or death can result if the vehicle and/or the operator fall through the ice.
HOW TO AVOID THE HAZARD
Never operate the vehicle on a frozen body of water.
16
Page 19
WARNING
WARNING
POTENTIAL HAZARD
Failure to inspect the vehicle before operating
Failure to properly maintain the vehicle
WHAT CAN HAPPEN
Accident, equipment damage
HOW TO AVOID THE HAZARD
Always inspect your vehicle before each use to make sure it’s
in safe operating condition.
Always follow the inspection and maintenance procedures and
schedules described in the Operator’s Manual.
POTENTIAL HAZARD
Failure to use extra caution when operating this vehicle on unfamiliar terrain
WHAT CAN HAPPEN
Loss of control, vehicle overturn
HOW TO AVOID THE HAZARD
Travel slowly and use extra caution when operating on unfamiliar terrain.
always be alert to changing terrain conditions when operating
the vehicle. May come upon hidden conditions when operating
the vehicle. You may come upon hidden rocks, bumps, or
holes suddenly, without enough time to react.
17
Page 20

WARNING
WARNING
POTENTIAL HAZARD
Failure to follow the minimum age recommendations for this vehicle.
WHAT CAN HAPPEN
Serious injury or death (the child or others)
HOW TO AVOID THE HAZARD
Only persons with a valid driver’s license should operate this
vehicle.
Even though a child may be within the age group for which
some vehicles are recommended, he or she may not have the
skills, abilities, or judgement needed to operate the vehicle
safely and may be involved in a serious accident.
POTENTIAL HAZARD
Operating this vehicle with improper tires or with improper or
uneven tire pressure
WHAT CAN HAPPEN
Loss of control, accident and/or overturn
HOW TO AVOID THE HAZARD
Always use the size and type of tires specified in the Operator’s
Manual for this vehicle.
always maintain proper tire pressure as described on the decal
and in the Operator’s Manual.
18
Page 21
19
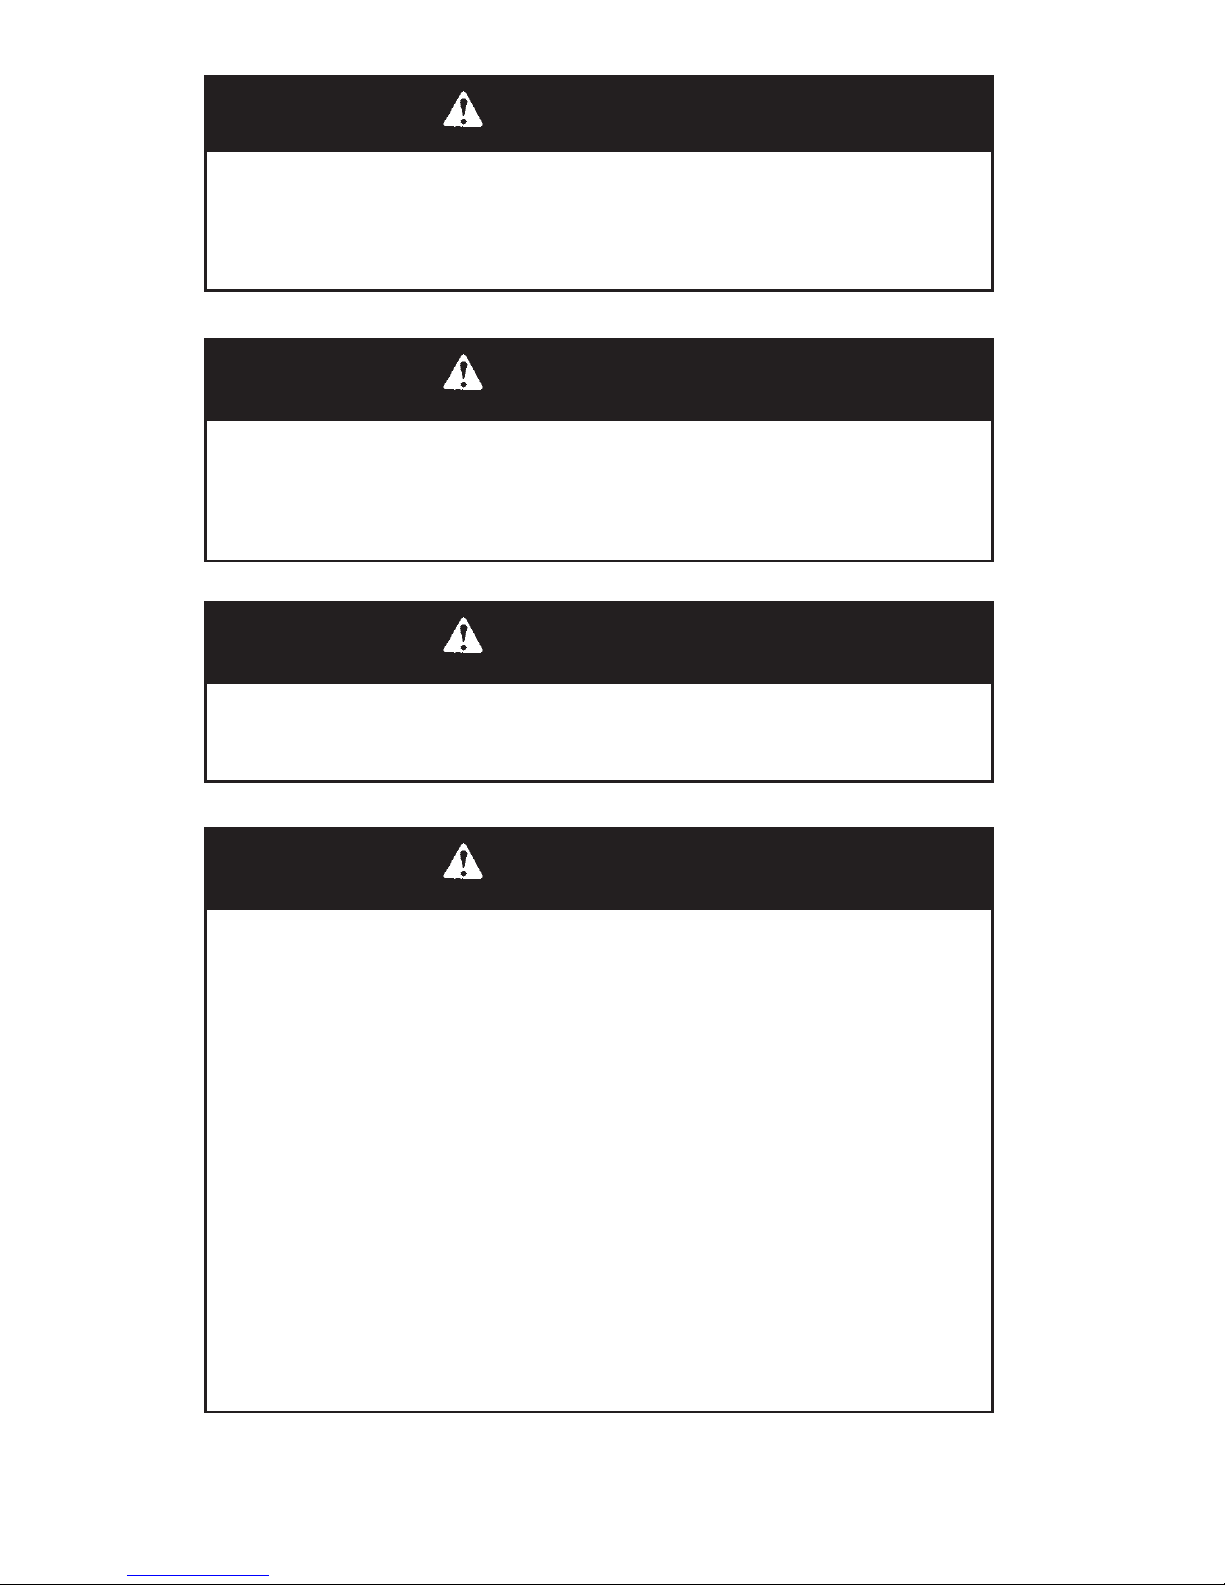
WARNING
Leaving the keys in the ignition can lead to unauthorized use of
the vehicle resulting in serious injury or death. Always remove
the ignition key when the vehicle is not in use.
WARNING
After any overturn or accident, have a qualified service dealer inspect the entire vehicle for possible damage, including (but not
limited to) brakes, throttle and steering systems.
WARNING
Always keep combustible materials away from the exhaust system. Exposure to the hot components could result in a fire.
WARNING
Gasoline is highly flammable and is explosive under certain conditions. Always exercise extreme caution whenever handling
gasoline.
Always stop the engine when refueling.
Always refuel outdoors or in a well ventilated area.
Do not smoke or allow open flames or sparks in or near the refueling area or where gasoline is stored.
Do not over fill the tank. Do not fill the tank neck.
If gasoline spills on your skin or clothing, immediately wash it off
with soap and water and change clothing.
Never start the engine or let it run in an enclosed area. Gasoline
powered engine exhaust fumes are poisonous and can cause
loss of consciousness and death in a short time.
Page 22

SECTION I
INTRODUCTION AND DESCRIPTION
INTRODUCTION
We are pleased to have you as a Bush Hog customer. Your Bush Hog
Trail Series utility vehicle has been carefully designed to give maximum service with minimumdown time. This manual is provided to give
you the necessary operatingand maintenanceinstructions for keeping
your vehicle in top operating condition. Please read this manual thoroughly.Understand what eachcontrolis for and how to useit. Observe
all safety precautions decaled on the machine and noted throughout
the manual for safe operation of the vehicle. If any assistance or additionalinformationis needed, contactyour authorizedBush Hog dealer.
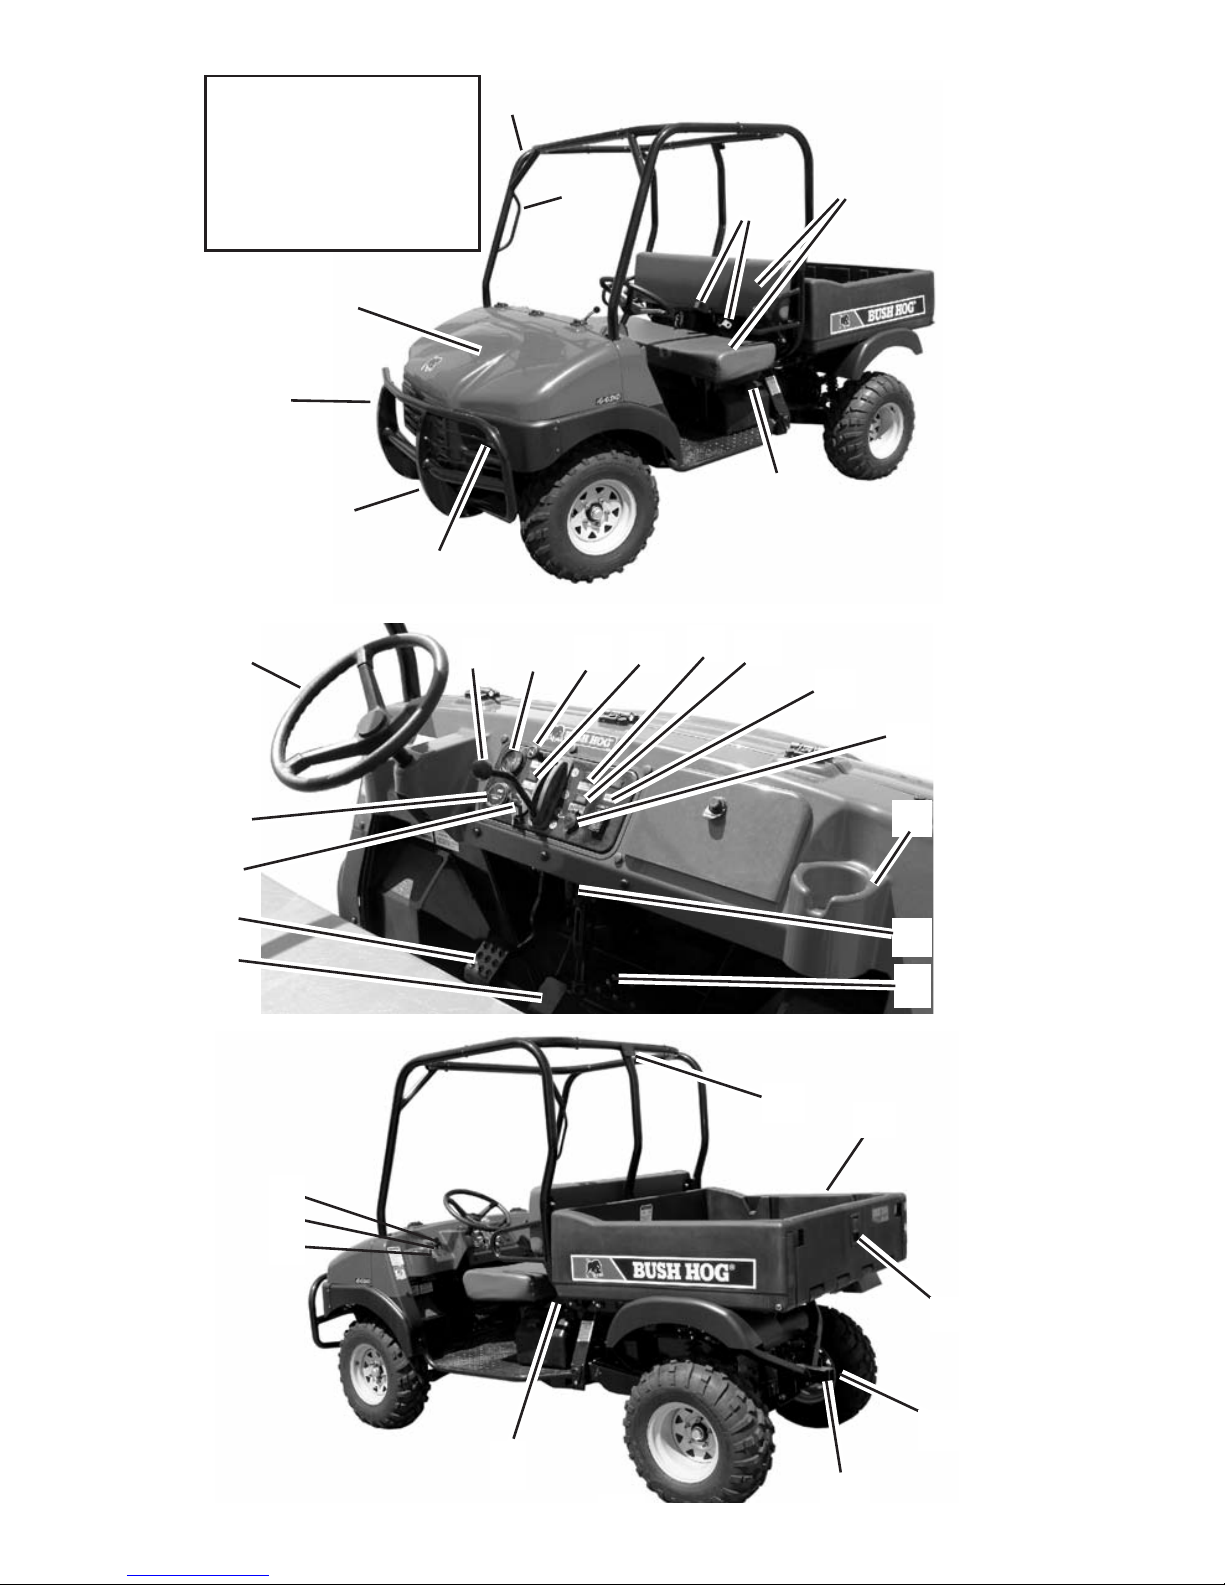
DESCRIPTION (Model 4430 shown on next page)
1. Occupant Protection
Structure (O.P.S.)
2. Hand hold
3. Gear Selector
4. Steering wheel
5. Seat
6. Seat Belt
7. Fuel Tank Cap
8. Battery (Under Hood)
9. Headlights
10.Front Bumper/
Brush Guard
11.PowerWinch
(Optional-NotShown)
12.CargoLight
(Optional- Not Shown)
13.Cargo Box
14.Hitch Receiver
15.Winch Wiring Pigtail
16.Cup Holder
17.Ignition Key
20
18.Fuel Gauge
19.Hour Meter
20.Choke Knob
21.
Power Bed Lift Switch
(Optional)
22.Neutral Light
23.4-Wheel Drive Switch
and Light
24.WinchSwitch
(Optional- Not Shown)
25.Driving Light Switch
26.Cargo Bed Light Switch
27.Parking Brake Light
28.Oil Pressure Light
29.DC Power Outlet
30.Parking Brake
31.Brake Pedal
32.Throttle Pedal
33.Tailgate Latch
34.CargoBoxReleaseHandle
Page 23
1
8
10
11
9
2
6
5
7
24
18
17
19
29
4
3
30
31
32
16
34
14
13
12
NOTICE!
LOCATIONS OF CON-
TROLS AND FEATURES
MAYVARY SLIGHTLY ON
DIFFERENT MODELS.
21
20
28
27
22
23
25
26
21
33
15
Page 24
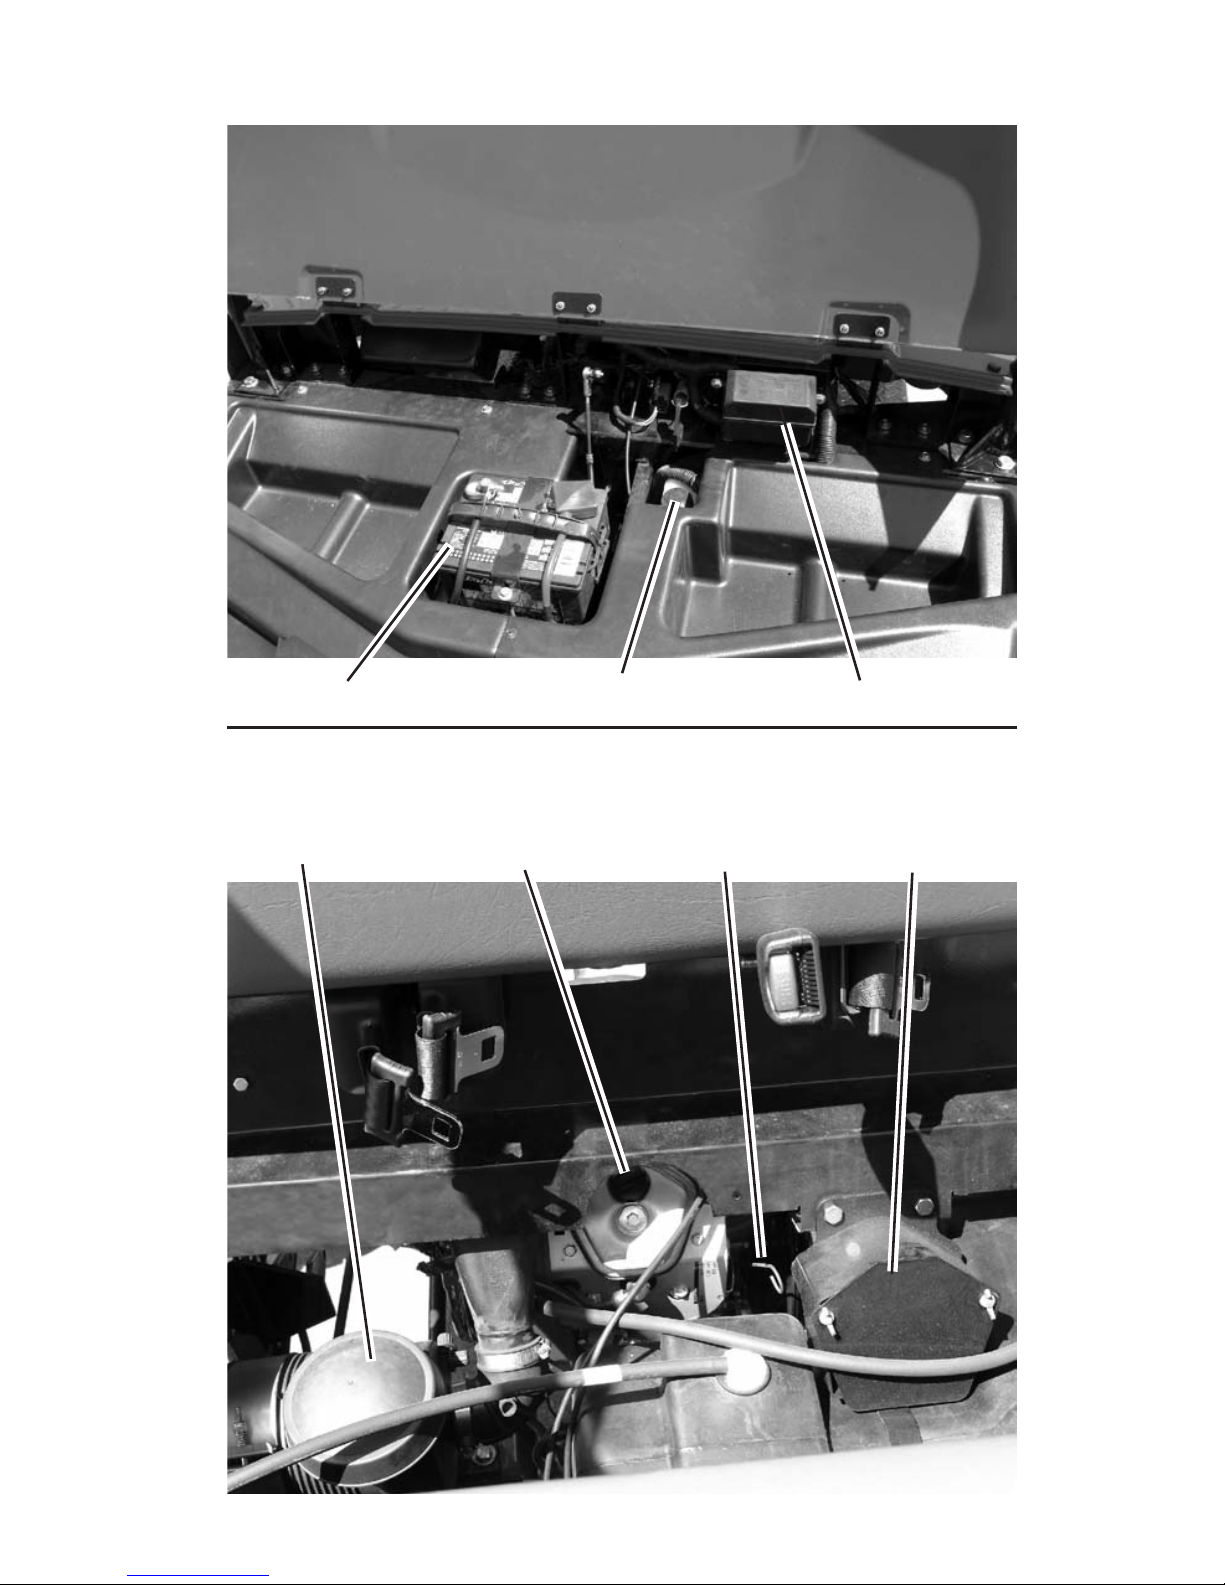
UNDER HOOD AREA
UNDER SEAT AREA
Battery Brake Fluid Reservoir Fuses and Relays
Engine Air
Intake
Engine Oil
Filler Cap
Engine Oil
Dipstick
CVT Enclosure
Air Cleaner
22
Page 25
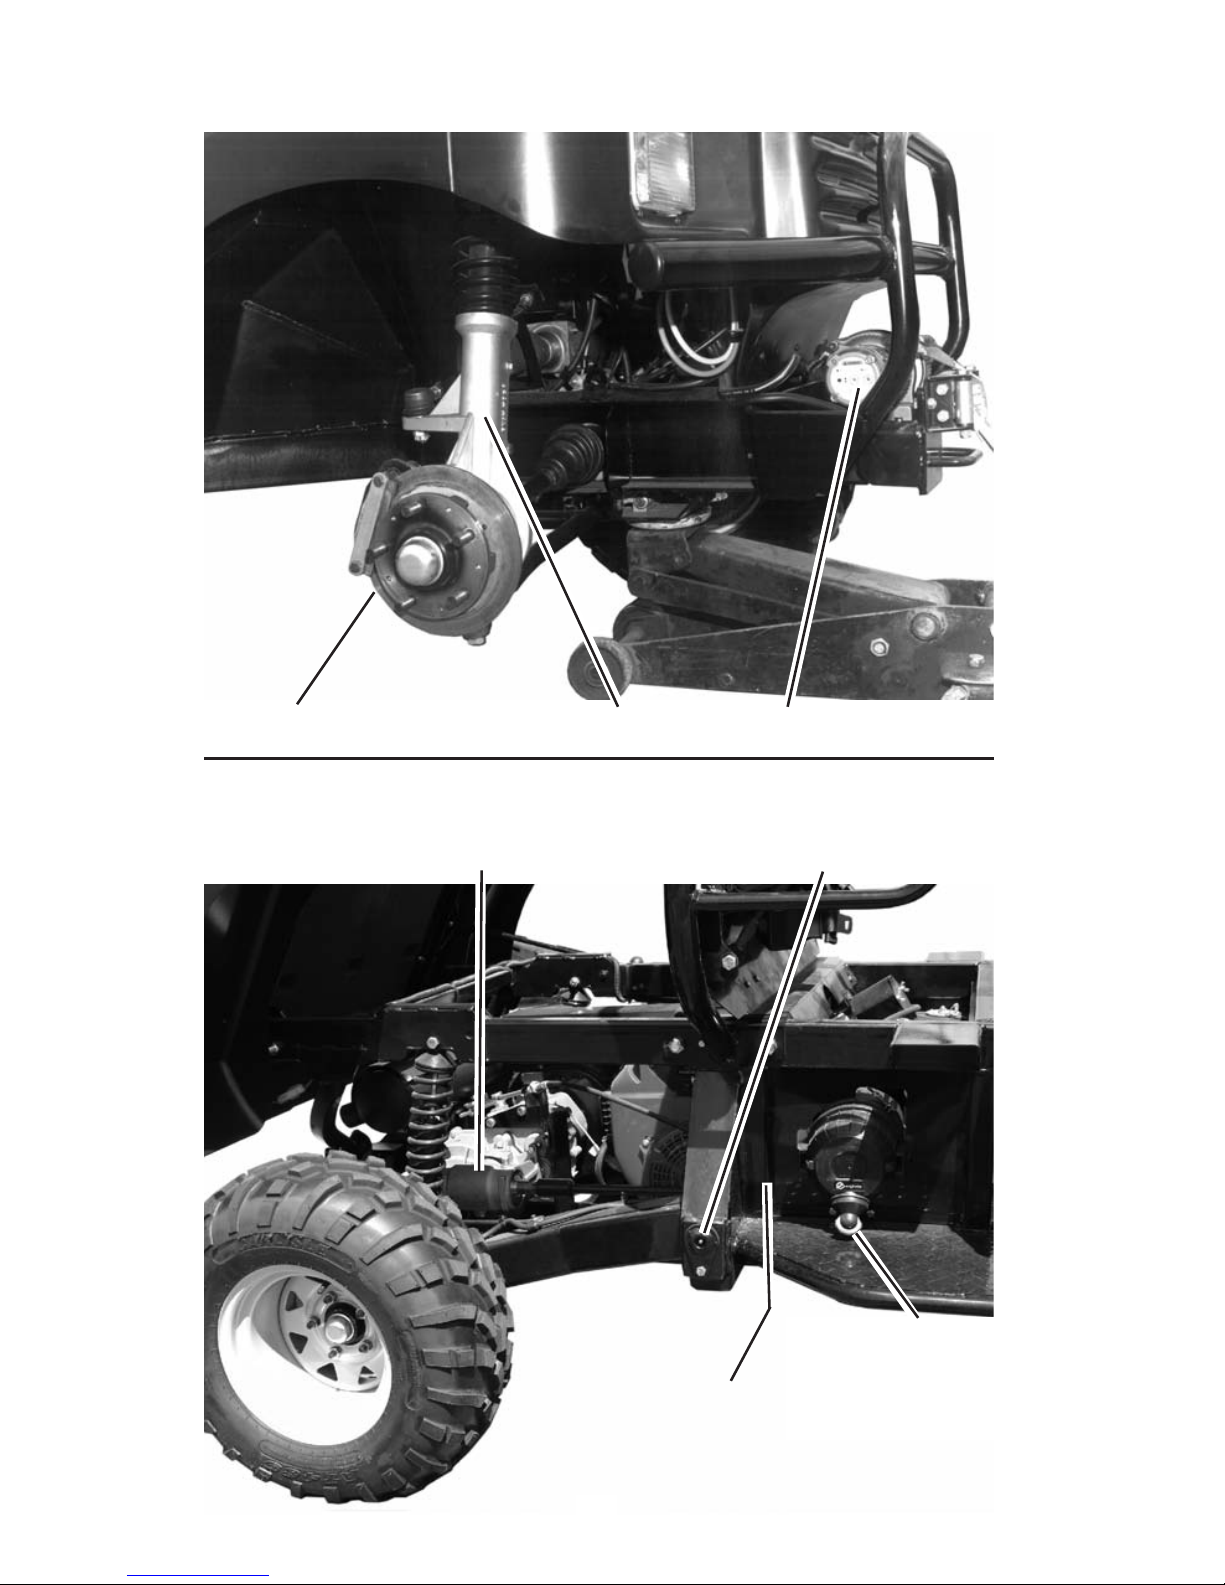
RIGHT FRONT WHEEL REMOVED
Disc Brake Assembly Front Strut Assembly Winch (Optional)
CARGO BED RAISED (SHOWING ENGINE COMPARTMENT)
Engine Air
Cleaner Housing
with
Evacuator Valve
Transfer Gearbox Trailing Arm Pivot Grease Fitting
Grease Fitting
For Pillow Block
Hidden From View
23
Page 26

FEATURES
DC Power Outlet
The 12 volt accessory port is provided to power auxiliary lights or
other accessories.
Indicator Lights
Lights on the dash indicate when the transmission is in neutral. Four
wheel drive models have a light that indicates when 4- wheel drive is
engaged. An oil pressure light indicates when oil pressure is lower
than normal and oil level needs to be checked.
Trailer Hitch Receiver
This vehicle is equipped with receiver hitch brackets at the front and
rear for use with trailer hitches or the optional winch kit. Trailer towing equipment if not supplied with this vehicle.
To avoid injury and property damage, observe the precautions on
page 43.
Seat Belts
The Bush Hog 4300 UTV is equipped with lap-style seat belts for the
operator and passengers.
24
WARNING
Falling from a moving vehicle could result in serious injury or
death. Always fasten your seatbelt securely before operating or
riding in the vehicle.
Passengers under five years of age require special restraints,
which are not available on this vehicle. No person under the age
of five years may ride in the Bush Hog utility vehicle.
To wear the seat belt properly, follow this procedure:
1. Place the belt acrossyour lap as low on your hips as possible,
takingcare that the belt is not twisted.
2. Push the latch plate into the buckle until it clicks.
3. Release the strap, it will self tighten.
To unfasten, press the red button on the side of the buckle.
Page 27

CONTROLS
Switches
Ignition Switch
The ignition switch is a three position, key-operated switch. The key
can be removed from the switch when it is in the OFF position.
OFF Engine off. All electrical circuits are off
except ACC. 12V.
ON Electrical circuits are on. Electrical equipment
can be used
START Electric starter is engaged by holding ignition
switch key in this position. Upon release,
the key will return to the ON position.
WARNING
LEAVING THE KEYS IN THE IGNITION CAN LEAD TO
UNAUTHORIZED USE OF THE VEHICLE RESULTING IN
SERIOUS INJURY OR DEATH. ALWAYS REMOVE THE IGNITION KEY WHEN THE VEHICLE IS NOT IN USE.
Light Switch
Turn the headlights and tailights on by flipping the rocker switch up
(the ignition switch must be in the ON position). Flip the switch down
to turn the lights off.
Cargo Bed Light Switch (Optional)
Flip the rocker switch up to turn on and down to turn off.
Power Bed Lift Switch (Optional)
Push and hold the spring loaded rocker switch up to raise the bed or
down to lower the bed.
4-Wheel Drive Switch (On 4-wheel drive models only)
Flip the rocker switch up to engage 4-wheel drive at any time and
down to disengage 4-wheel drive.
Winch Switch (Optional)
Push and hold the spring loaded rocker switch to the left to unwind
the cable or push and hold to the right to wind in the cable.
25
Page 28

CAUTION
DO NOT ATTEMPT TO SHIFT THE TRANSMISSION
WHILE THE VEHICLE IS MOVING OR DAMAGE TO THE
TRANSMISSION COULD RESULT.
ALWAYSPLACETHETRANSMISSIONINGEARWITHTHE
PARKINGBRAKEAPPLIEDANDTURNTHEVEHICLEOFF
WHENEVER THEVEHICLEISLEFT UNATTENDED.
Brake Pedal
The brake pedal is the left pedal on the floor board. Depressthe brake
pedal to slow or stop the vehicle.
Throttle Pedal
The throttle pedal is the right pedal on the floor board. Push the pedal
down to increase engine speed. Spring pressure returns the pedal to
the rest position when released. Always check to make sure that the
pedal returns normally before starting the engine.
Parking Brake Lever
The parking brake lever is located under the dash and is rotated back
and upward to engage and pushed down and forward to release. .
Make sure the parking brake is working properly before each operation. Always depress service brake pedal before engagingpark brake.
Gear Selector
The transmission gear selector is located on the console to the right
of the steering wheel. It has four positions: high, low, neutral, and reverse.
NOTE: Low gear is the primary driving range on this vehicle. High is
intended for use in hard packed surfaces with light loads
To changegears, stop the vehicleand with the engineidling, move the
gear lever to the desired gear. Do not attempt to shift gears with the
engine speed above idle or while the vehicle is moving.
Always place the transmission in gear with the parking brake locked
whenever the vehicle is left unattended.
Maintaining shift linkage adjustment is important to assure proper
transmission function. See your dealer if you experience any shifting
problems.
26
Page 29

SPECIFICATIONS
Bush Hog
4430 UTV
ENGINE
Type 4-cycle, OHV V-twin, air-cooled gas
Make Honda
HP / (cc) 24 hp (670cc)
Lubrication Full Pressure with automotive style spin-on canister
Air Cleaner Remote,2-stagecyclonetypewithreplacementdualelements
Electrical Systems 12 volt DC with 20-amp alternator
CHASSIS
Suspension, Front MacPherson strut, single A-Arm
Suspension, Rear Independent trailing arm, coil-over-shock
Wheel travel, Frt/Rr 5.7 inches / 6.0 inches
Steering Rack and Pinion
Turning Radius 13 ft
Front Tires AT 25 x 10.0 - 12 NHS
Rear Tire AT 25 x 11.0 - 12 NHS
Brakes 4-wheel hydraulic disc brakes; self-adjusting with
tandem master cylinder
Park Brake Rear mechanical disc
GroundClearance 9-inches
27
Page 30

DRIVE TRAIN
Transmission Continuously Variable Transmission (CVT)
CVT Protection Fully enclosedpressurized withfiltered airintake.
Final Drive
BushHogDual-Rangetransaxlewith High, Low,Neutral andReverse
Differential Lock Truck-Style, automatic positive lockingdifferential;
featuringDetroit Gearless Locker
TM
Ground Speed 0 - 25mph
4WD True On-Demand 4-wheel drive; switch engage
(4wd models only)
DIMENSIONS
Dry Weight 1,500 lbs.
Wheel Base 76 inches
Vehicle 1,500 lbs.
Load Capacity
Cargo Box 1,000 lbs.
Load Capacity
Towing Capacity 1,500 lbs.
Fuel Capacity 7 gallons
Seating Capacity 3
Lights
Dual 37-watt halogen headlights, tail lights and brake lights
Colors Classic Bush Hog Red. Deep Forest Green and
Mossy Oak’s Obsession™ camouflage
WARRANTY •One-year limited.
•Two-year engine limited warranty administered
through engine manufacturers.
•Three-year limited drivetrain warranty.
•See dealer for complete details.
28
SPECIFICATIONS
Bush Hog
4430 UTV
Page 31

SECTION II
OPERATION
GENERAL SAFETY
Only qualified people familiar with this operator’s manual should operate this machine.
PRE-OPERATION CHECKLIST
1. Fill the fuel tank with unleaded regular gasolIne.
2. Make sure dirt and foreign matter are kept out of fuel tank. Use
a clean funnel and fuel can.
3. Do not mix oil with gasoline.
4. Do not use white, high test or premium gasoline. Do not use
de-icers, carburetor cleaners or other such additives.
5. Check the crankcase oil level. Make sure the engine is off. The
vehicle should be parked on a level area. Do not overfill. (See
your engine manual for more detailed instructions.)
6. Check battery fluid level.
7. Checktirepressure:12psi inall fourtires.
8. Clean the air intake screen on the engine if necessary.
9. Perform any other maintenance as it becomes necessary. (See
“Maintenance” section)
VEHICLE BREAK-IN PERIOD
The break-in period for your new Bush Hog Utility Vehicle is defined
as the first24 hours of operation,or the time it takes to use the firsttwo
tanks full of fuel. A proper break-in procedure will result in more efficient performance and longer life for the engine. Carefully perform the
following procedures.
WARNING
IF A PROPER INSPECTION IS NOT DONE BEFORE EACH
USE, SEVERE INJURY OR DEATH COULD RESULT. ALWAYS INSPECT THE VEHICLE BEFORE EACH USE TO
ENSURE IT’S IN PROPER OPERATING CONDITION.
29
Page 32

Starting The Engine
1. Sit in the driver’s seat and fasten the seat belt.
2. Lock the parking brake
3. Place the transmission in neutral.
4. Pull the choke control all the way out.
5. Turntheignitionkeyto STARTandcrankfor10secondsmaximum.
6. If engine does not start, release ignition switch and wait five seconds; then turn the ignition switch for another five seconds.
Repeat this procedure until engine starts. NOTE: do not
press the accelerator pedal while starting the engine.
7. If the engine slows or stops, push the choke knob in half way.
8. Vary the engine RPM slightly with the throttle to aid in warm up
until engine idles smoothly. Then push the choke all the way in.
Starting A Warm Engine
Warm engines do not normally require the use of the choke. Overuse
of the choke can cause the spark plugs to become fouled.
1. Place the transmission in neutral and lock the parking brake.
2. Sit in the driver’s seat with the seat belt fastened.
3. Turn the ignition key to START.
4. If the engine has cooled and does not readily start, intermittent
use of the choke knob (pulled half way out) may be necessary.
5. If the engine is over-choked when warm, depress the throttle
pedal fully while cranking to aid in starting.
6. Release the throttle pedal immediately after the engine starts.
NOTE: If the engine does not start and all conditions are favorable,
change the spark plugs.
Driving The Vehicle
1. Check the surrounding area and determine your path of travel.
Select an area which is open and will give you room to familiarize yourself with the operation and handling of the vehicle.
2. With foot on brake pedal, release parking brake and shift transmission into low gear.
ENGINE EXHAUST GASES CONTAIN
POISONOUS CARBON MONOXIDE.
ll
NEVER RUN ENGINE IN A CLOSED BUILDING OR CONFINED AREA.
ll
AVOID INHALING EXHAUST GASES.
WARNING
30
Page 33

3. With both hands on the steering wheel, release pressure on
brake pedal and carefully apply pressure to throttle pedal.
Vehicle speed is controlled by the amount of pressure on the
throttle pedal. The CVT shifting is done automatically.
4.
Drive slowly at first, practicing maneuvering and using the throttle
and brakes on level surfaces .
5. Vary the throttle pedal position. Do not operate at sustained idle.
6. You may switch to 4-wheel drive at any time. It will only engage when
the rear wheels begin to lose traction.
7. Do not exceed recommended towing capacity.
8. Perform regular checks on fluid levels, and all important areas on
the vehicle as outlined on the pre-operation check list.
IMPORTANT
Braking
Practice starting and stopping (using the brakes) until you are familiar with
the controls. NOTE: When the accelerator is released completely and the
engine speed drops to near idle, the vehicle has no engine braking.
1. Release the throttle pedal completely.
2. Press on the brake pedal evenly and firmly.
Stopping The Engine
1. Release the throttle pedal completely
2. Place the transmission selector lever in neutral.
3. Apply the parking brake to help prevent the vehicle from rolling.
4. Turn the ignition key to the off position and remove the key.
LOW GEAR IS THE PRIMARY GEAR FOR OPERATING THIS VEHICLE. HIGH IS INTENDED FOR USE ON HARD PACKED SURFACES WITH LIGHT LOADS. PREMATURE BELT WEAR IS THE
RESULT OF OPERATING IN A GEAR THAT IS UNSUITABLE FOR
THE TERRAIN.
TO CHANGE GEARS, STOP THE VEHICLE AND WITH THE ENGINE IDLING, MOVE THE LEVER TO THE DESIRED GEAR. DO
NOT ATTEMPT TO SHIFT GEARS WITH THE ENGINE ABOVE IDLE
OR WHILE MOVING.
WHEN CARRYING CARGO OR TOWING A TRAILER, REMEMBER
THAT LOAD WEIGHT WILL INCREASE BRAKING DISTANCES.
FAILURE TO ALLOW FOR INCREASED BRAKING DISTANCES
MAY RESULT IN ACCIDENT AND INJURY.
WARNING
31
WHEN VEHICLE IS IN MOTION, DRIVER AND PASSANGERS
SHOULD ALWAYS KEEP ALL BODY PARTS INSIDE THE VEHICLE. FAILURE TO DO SO CAN RESULT IN INJURY OR DEATH.
WARNING
Page 34

ALWAYS APPLY THE PARKING BRAKE BEFORE LEAVING
THE VEHICLE. THE ENGINE/TRANSMISSION PROVIDES NO
BRAKING EFFORT WHEN THE ENGINE IS NOT RUNNING. IF
THE VEHICLE MOVES, IT MIGHT BE DAMAGED OR CAUSE
INJURY.
WARNING
CAUTION
EXHAUST SYSTEM COMPONENTS ARE VERY HOT DURING
AND AFTER USE OF THE VEHICLE AND WILL CAUSE
BURNS IF THEY COME IN CONTACT WITH SKIN.
Using The Cargo Box
The tailgate of the cargo box can be opened by pulling up on the handle
at the rear center of the tailgate.
The cargo box can be raised for dumping material or gaining access to
the engine area. Models with the electric power lift feature only require
pushing the rocker switch on the dash. Manual models require pulling
the release handle (located under the front left corner of the cargo box)
upward. (Refer to photograph on next page)
CAUTION
NEVER EXCEED THE LOAD CAPACITY LISTED IN THE SPECIFICATIONS CHART FOR YOUR PARTICULAR VEHICLE. AN
OVERLOADED CARGO BOX CAN CAUSE INSTABILITY DURING OPERATION OF THE VEHICLE.
WARNING
FAILURE TO ALLOW FOR INCREASED BRAKING DISTANCE WHEN HAULING CARGO OR TOWING A
TRAILER MAY RESULT IN ACCIDENT AND INJURY. ALWAYS SLOW DOWN AND ALLOW ADDITIONAL BRAKING DISTANCE WHEN TOWING OR HAULING CARGO.
CAUTION
ON MODELS WITHOUT THE ELECTRIC POWER LIFT FEATURE, THE CARGO BOX SHOULD BE EMPTIED BEFORE ATTEMPTING TO LIFT THE BOX.
32
Page 35

Load Distribution
1. Always load the cargo box placing the load as far forward as
possible.
2. Always operate the vehicle with extreme care whenever hauling
or towing loads.
3. Drive slowly with the transmission in low range.
4. Insure that the cargo box latch (on manual lift models) is securely latched before loading and operating. Unintentional box tilting
may result if weight is place in the rear of the box and the
latch is not secured.
WARNING
Manual Cargo Box
Release Handle
Electric Cargo Box
Power Lift Actuator
33
NEVER OPERATE THIS VEHICLE WITH THE CARGO BOX IN
THE RAISED POSITION. THE CARGO BOX COULD CLOSE
UNEXPECTEDLY WHILE DRIVING, SEVERELY INJURING
THE DRIVER.
Page 36

Driving Safely
Driving Procedures
1. Sit in the driver’s seat with the seat belt fastened.
2. After starting the engine and allowing it to warm up, shift the
transmission into gear.
3. Check your surroundings and determine your path of travel.
4. Release the parking brake.
5. Keeping both hands on the steering wheel, slowly depress the
throttle with your right foot and begin driving. Vehicle speed is
controlled by the amount of throttle opening and the CVT transmission shifting is automatic.
6. Drive slowly. Practice maneuvering and using the throttle and
brakes on level surfaces.
NOTE: Low is the primary gear for operating this vehicle. High gear is
intended for use on hard-packed surfaces with light loads.
Driving on Slippery Surfaces
When driving on slippery surfaces such as wet trails, loose gravel, or
ice, be alert for the possibility of skidding and sliding. Under these conditions, follow these precautions:
1. Slow down when entering slippery areas.
2. Maintain a high level of alertness, reading the trail and avoiding
quick, sharp turns, which can cause skids.
3. Correct a skid by turning the steering wheel in the direction of the skid.
4. Drive with 4-wheel drive engaged to assist in controlling the vehicle.
WARNING
FAILURE TO EXERCISE CARE WHEN OPERATING ON
SLIPPERY SURFACES CAN RESULT IN LOSS OF TIRE
TRACTION AND CAUSE LOSS OF CONTROL, ACCIDENT,
AND SERIOUS INJURY OR DEATH.
NEVER APPLY THE BRAKES DURING A SKID.
DO NOT OPERATE ON EXCESSIVELY SLIPPERY SUR-
FACES.
ALWAYS REDUCE SPEED AND USE ADDITIONAL CAU-
TION WHEN OPERATING ON SLIPPERY SURFACES.
34
Page 37

Driving Uphill
Whenever traveling uphill, follow these precautions:
1. Always travel straight uphill.
2. Avoid steep hills (15° maximum).
3. Proceed at a steady rate of speed and throttle opening.
WARNING
CLIMBING HILLS IMPROPERLY CAN CAUSE LOSS OF
CONTROL OR VEHICLE OVERTURN. ALWAYS CHECK
THE TERRAIN CAREFULLY BEFORE CLIMBING A HILL.
BRAKING AND HANDLING ARE GREATLY AFFECTED
WHEN OPERATING IN HILLY TERRAIN. IMPROPER PROCEDURE COULD CAUSE LOSS OF CONTROL OR OVERTURN AND RESULT IN SERIOUS INJURY OR DEATH.
AVOID CLIMBING STEEP HILLS (15° MAXIMUM)
USE EXTREME CAUTION WHEN OPERATING ON HILLS,
AND FOLLOW PROPER OPERATING PROCEDURES
OUTLINED IN THE OPERATOR’S MANUAL
NEVER CLIMB HILLS WITH EXCESSIVELY SLIPPERY OR
LOOSE SURFACES.
NEVER ACCELERATE SUDDENLY.
NEVER GO OVER THE CREST OF A HILL AT HIGH
SPEED. AN OBSTACLE, A SHARP DROP, OR ANOTHER
VEHICLE OR PERSON COULD BE ON THE OTHER SIDE
OF THE HILL.
15° Maximum
35
Page 38

Sidehilling
Driving Downhill
Whenever descending a hill, follow these precautions:
1. Proceed directly downhill.
2. Slow down.
3. Apply the brakes slightly to aid in slowing.
Driving Through Water
Your Bush Hog utility vehicle can operate through water up to a maximum recommended depth equal to the floorboards. Follow these procedures when operating through water:
WARNING
CROSSING DOWNHILL OR TURNING ON HILLS CAN RESULT IN LOSS OF CONTROL OR VEHICLE OVERTURN,
RESULTING IN SEVERE INJURY OR DEATH. AVOID
CROSSING THE SIDE OF A HILL WHEN POSSIBLE. WHEN
UNAVOIDABLE, EXERCISE EXTREME CAUTION. AVOID
OPERATING ON STEEP HILLS (15° MAXIMUM)
WARNING
TRAVELING DOWNHILL IMPROPERLY COULD CAUSE
LOSS OF CONTROL OR VEHICLE OVERTURN. ALWAYS
CHECK TERRAIN CAREFULLY BEFORE DESCENDING A
HILL
NEVER DESCEND A HILL AT HIGH SPEED. EXCESSIVE
SPEED MAY RESULT IN LOSS OF VEHICLE CONTROL
AND LEAD TO SERIOUS INJURY OR DEATH. ALWAYS
OPERATE SLOWLY WHEN TRAVELING DOWNHILL
AVOID DESCENDING A HILL AT AN ANGLE, WHICH
WOULD CAUSE THE VEHICLE TO LEAN SHARPLY TO
ONE SIDE. TRAVEL STRAIGHT DOWNHILL WHEN POSSIBLE.
WARNING
THE LARGE TIRES ON YOUR UTILITY VEHICLE MAY
CAUSE THE VEHICLE TO FLOAT IN DEEP OR FASTFLOWING WATER, WHICH COULD RESULT IN LOSS OF
CONTROL AND LEAD TO SERIOUS INJURY OR DEATH.
NEVER CROSS DEEP OR FAST FLOWING WATER WITH
YOUR BUSH HOG UTILITY VEHICLE.
36
Page 39

1. Always determine water depths and current before entering.
2. Choose a crossing where both banks have gradual inclines.
3. Proceed slowly, avoiding rocks and obstacles.
4. After leaving water, always dry the brakes by applying light pressure to the lever repeatedly until braking action is normal.
NOTE: After running your vehicle in water, it’s critical that you perform
the services outlined in the Maintenance section on page 47. Give special attention to engine oil, transmission oil, front and rear gearcases,
and all grease fittings.
CAUTION
IMMERSION CAN RESULT IN MAJOR DAMAGE IF THE
VEHICLE ISN’T SERVICED CORRECTLY AND
PROMPTLY. AFTER IMMERSION, ALWAYS TAKE THE
VEHICLE FOR YOUR DEALER TO SERVICE. DO NOT
START THE ENGINE!
IF IT IS NOT POSSIBLE TO TAKE THE VEHICLE TO
YOUR DEALER BEFORE STARTING THE ENGINE, PERFORM THE SERVICE OUTLINES IN PAGE 56, AND
TAKE THE VEHICLE TO YOUR DEALER AT THE FIRST
OPPORTUNITY.
37
Page 40

Driving Over Obstacles
Be alert! Look ahead and learn to read the terrain you’re traveling on.
Watch for hazards such as logs, rocks and low hanging branches.
WARNING
SEVERE INJURY OR DEATH CAN RESULT IF YOUR VEHICLE SUDDENLY COMES IN CONTACT WITH A HIDDEN OBSTACLE. NOT ALL OBSTACLES ARE
IMMEDIATELY VISIBLE. REDUCE SPEED AND TRAVEL
WITH CAUTION IN UNFAMILIAR TERRAIN
38
Page 41

Driving In Reverse
Follow these guidelines when operating in reverse:
1. Back slowly.
2. Apply the brakes lightly for stopping.
3. Avoid turning at sharp angles.
4. Always avoid backing downhill.
5. Never open the throttle suddenly while backing.
6. Always inspect left and right fields of vision before backing.
WARNING
39
FAILURE TO USE CAUTION WHEN OPERATING IN REVERSE CAN RESULT IN SERIOUS INJURY OR DEATH. BEFORE SHIFTING INTO
REVERSE, ALWAYS CHECK FOR OBSTACLES
OR PEOPLE BEHIND THE VEHICLE AND FOLLOW THE REVERSE OPERATION PROCEDURES OUTLINED IN THIS MANUAL. ALWAYS
BACK SLOWLY.
Page 42

Parking On An Incline
Avoid parking on an incline if possible. If it is unavoidable, follow these
precautions:
1. Place the transmission in low gear to help prevent rolling.
2. Set the parking brake after depressing service brake.
3. Block the rear wheels on the downhill side.
WARNING
40
A ROLLING VEHICLE CAN CAUSE PROPERTY
DAMAGE AND SERIOUS INJURY. ALWAYS
APPLY THE PARKING BRAKE AFTER STOPPING THE ENGINE. ALWAYS BLOCK THE
DOWNHILL SIDE OF THE WHEELS IF LEAVING
THE VEHICLE ON A HILL, OR PARK THE VEHICLE IN A SIDEHILL POSITION INSTEAD.
OPERATING THE VEHICLE WHILE THE PARKING BRAKE IS ENGAGED COULD CAUSE LOSS
OF CONTROL AND RESULT IN SERIOUS INJURY OR DEATH. ALWAYS DISENGAGE THE
PARKING BRAKE BEFORE OPERATING THE
VEHICLE.
Page 43

Hauling Cargo
Bush Hog utility vehicles have been designed to carry or tow specific
capacities. Always read and understand the load distribution warnings
listed on the warning decals.Never exceed the following capacities.
Model Max. Capacity Cargo Box Towing Capacity
4430 1,500 lbs. 1,000 lbs. 1,500 lbs.
WARNING
HAULING CARGO IMPROPERLY CAN ALTER VEHICLE
HANDLING AND MAY CAUSE LOSS OF CONTROL OR
BRAKE INSTABILITY, WHICH CAN RESULT IN SERIOUS
INJURY OR DEATH. ALWAYS FOLLOW THESE PRECAUTIONS WHEN HAULING CARGO:
ALWAYS LOAD THE CARGO BOX WITH THE LOAD AS
FAR FORWARD AS POSSIBLE.
ALWAYS OPERATE THE VEHICLE WITH EXTREME
CARE WHEN HAULING OR TOWING LOADS.
SLOW DOWN AND DRIVE IN LOW GEAR.
WARNING
41
DRIVING WITH PASSENGERS IN THE CARGO BOX CAN
RESULT IN SEVERE INJURY OR DEATH.
NEVER ALLOW PASSENGERS TO RIDE IN THE CARGO
BOX. PASSENGERS MUST ALWAYS RIDE IN THE CAB
WITH SEAT BELTS FASTENED SECURELY.
Page 44

Emptying The Cargo Box (Electric Lift Models)
1. Select a level site to empty the cargo box. Do not attempt to
unload the vehicle while parked on an incline.
2. Set the parking brake.
3. Dismount the vehicle.
4. Release the tailgate latch.
5. Operate the bed lift switch to raise the box.
6. Using the switch, lower the cargo box completely before moving
the vehicle.
WARNING
OPERTATING THE VEHICLE WHILE THE CARGO BOX IS
RAISED COULD RESULT IN SEVERE INJURY. THE BOX
COULD CLOSE UNEXPECTEDLY AND CAUSE INJURY TO
THE DRIVER OR PASSENGER. NEVER OPERATE THIS VEHICLE WITH THE CARGO BOX IN THE RAISED POSITION.
WARNING
Cargo Box
Release Lever
ON MANUAL LIFT MODELS:
IF THE WEIGHT DISTRIBUTION ON THE BOX IS LOCATED
TOWARD THE REAR OF THE BOX WHEN THE RELEASE
LEVER IS PULLED UPWARD, THE BOX MAY DUMP UNEXPECTEDLY AND CAUSE SERIOUS INJURY TO THE OPERATOR OR BYSTANDERS.
NEVER OPERATE THE DUMP LEVER WITHOUT ENSURING THAT THE BOX IS EMPTY.
42
Page 45

Towing Loads
Belt Life
Use low forward gear when hauling or towing heavy cargo to extend
belt life.
Parking The Bush Hog Utility Vehicle
1. Stop the vehicle on a level surface.
2. When the engine has stopped, apply the parking brake.
3. Remove the ignition switch key to prevent unauthorized use.
WARNING
TOWING IMPROPERLY CAN ALTER VEHICLE HANDLING
AND MAY CAUSE LOSS OF CONTROL OR BRAKE INSTABILITY, WHICH CAN RESULT IN SERIOUS INJURY OR
DEATH. ALWAYS FOLLOW THESE PRECAUTIONS WHEN
TOWING:
NEVER LOAD MORE THAN 150 LBS. (68.1 kg) TONGUE
WEIGHT ON THE TOWING BRACKET.
DO NOT OPERATE VEHICLE FASTER THAN 10 MPH
(16 km/h) WHEN TOWING. TOWING A TRAILER INCREASES BRAKING DISTANCE.
DO NOT TOW MORE THAN THE RECOMMENDED 1,500
LB. WEIGHT FOR THE VEHICLE.
ATTACH A TRAILER TO THE HITCH BRACKET ONLY. DO
NOT ATTACH A TRAILER TO ANY OTHER LOCATION OR
YOU MAY LOSE CONTROL OF THE VEHICLE.
NEVER TOW A TRAILER ON A GRADE STEEPER THAN 15°.
WARNING
A ROLLING VEHICLE CAN CAUSE PROPERTY DAMAGE
AND SERIOUS INJURY. ALWAYS APPLY THE PARKING
BRAKE AFTER STOPPING THE ENGINE.
43
Page 46

WARNING
4-Wheel Drive
Your Bush Hog Utility Vehicle is equipped with an exclusive 4-wheel
drive system that can be activated by a switch on the dash board.
When the switch is off, the vehicle is in two-wheel drive at all times.
When the switch is in 4-wheel drive, the front wheels will automatically
engage anytime the rear wheels begin to lose traction. When the rear
wheels regain traction, the front wheels will automatically disengage.
The 4-wheel drive switch light indicates whether the vehicle is in 4wheel drive. There is no limit to the length of time the vehicle may remain in 4-wheel drive.
The 4-wheel drive switch may be turned on or off while the vehicle is
moving. If the switch is turned off while the front hubs are driving, they
will not release until the rear wheels regain traction.
Disengaging 4-Wheel Drive
Under certain conditions, it may be possible for one or both hubs to remain engaged unnecessarily. This condition causes increased steering effort and some vehicle speed restriction.
Take the following steps to disengage the 4-wheel drive system:
1. Stop the vehicle.
2. Shift to reverse and back up a minimum of 10 feet.
CAUTION
SWITCHING TO 4-WHEEL DRIVE WHILE THE REAR
WHEELS ARE SPINNING MAY CAUSE SEVERE DRIVE
SHAFT AND CLUTCH DAMAGE. ALWAYS SWITCH TO 4WHEEL DRIVE WHILE THE REAR WHEELS HAVE TRACTION OR ARE AT REST.
44
GASOLINE IS EXTREMELY FLAMMABLE AND CAN BE
EXPLOSIVE UNDER CERTAIN CONDITIONS. WHEN
PARKING INSIDE A GARAGE OR OTHER STRUCTURE,
BE SURE THAT THE STRUCTURE IS WELL VENTILATED
AND THAT THE VEHICLE IS NOT CLOSE TO ANY
SOURCE OF FLAME OR SPARKS, INCLUDING ANY APPLIANCE WITH PILOT LIGHTS.
Page 47

3. Stop completely.
4. Shift into forward and drive.
If the hubs remain engaged after following these instructions, return
the vehicle to your dealer for service.
NOISE EMISSION CONTROL SYSTEM
TAMPERING WITH NOISE CONTROL SYSTEEM IS PROHIBITED!
U.S. Federal law prohibits the following acts or the causing thereof:
1. The removal or rendering inoperative by any person other than
for purposes of maintenance, repair, or replacement of any
device or element of design incorporated into any new vehicle for
the purpose of noise control prior to its sale or delivery to the ultimate purchaser or while it is in use or
2. The use of the vehicle after such device or element of design has
been removed or rendered inoperative by any person.
“AMONG THOSE ACTS PRESUMED TO CONSTITUTE TAMPERING ARE THE ACTS LISTED BELOW,”
1. Removal or alteration or the puncturing of the muffler or any
engine component which conducts removal of engine exhaust gases.
2. Removal or alteration or the puncturing of any part of the engine air
induction system.
3. Replacement of any vehicle parts with parts not in compliance with
federal regulations.
4. Lack of proper maintenance.
WARNING
OPERATING WITH ONLY ONE FRONT HUB ENGAGED
COULD RESULT IN LOSS OF CONTROL, ACCIDENT, AND
SEVERE INJURY OR DEATH.
WHEN HUB ENGAGEMENT SYMPTOMS ARE PRESENT,
USE THE DISENGAGING PROCEDURE BEFORE PROCEEDING.
45
Page 48

CAUTON
USFS Approved Spark Arrestor
The muffler on this vehicle was tested and approved in accordance
with the USFS Forest Service Stanedard 5100-1A.
SECTION III
MAINTENANCE AND LUBRICATION
Periodic Maintenance Schedule
Careful periodic maintenance will help keep your vehicle in the safest,
most reliable condition. Inspection, adjustment and lubrication intervals of important components are explained in the following schedule.
Maintenance intervals are based upon average operating conditions.
Vehicles subjected to severe use, such as operation in wet or dusty
areas, should be inspected and serviced more frequently. If you’re not
familiar with safe service and adjustment procedures, have a qualified dealer perform these operations.
Inspect, clean, lubricate, adjust or replace parts as necessary. When
inspection reveals the need for replacement parts, always use genuine
Bush Hog parts available from you Bush Hog dealer.
Maintenance Chart Key
ss
Perform these operations more often under severe use, such as in
dirty or wet conditions, to purge water or dirt contamination from
grease fillings and othe critical components.
H Emission Control System Service - NOTE: Some models may have
an additional California-only emissions warranty.
n Dealer service item.
46
EXHAUST SYSTEM COMPONENTS ARE VERY HOT DURING AND AFTER USE OF THE VEHICLE. HOT COMPONENTS CAN CAUSE SERIOUS BURNS AND CAN CAUSE
A FIRE.
DO NOT TOUCH HOT EXHAUST SYSTEM COMPONENTS.
USE CAUTION WHEN TRAVELING THROUGH TALL
GRASS, ESPECIALLY DRY GRASS.
Page 49

Periodic Maintenance Schedule
WARNING
Item Frequency Remarks
Brake System Pre-operation Inspect
Tires Pre-operation Inspect
Wheels Pre-operation Inspect
Frame nuts, bolts, Pre-operation Inspect
fasteners
Parking Brake Pre-operation Check lever adjustment
daily; adjust
Throttle Cable Pre-operation Inspect
Steering Pre-operation Inspect
Coolant/Level Daily Replace every two years
Headlamp Daily Inspect daily; apply dielec-
tric grease to donnector
when replaced
Taillamp Daily Inpect daily; apply dielectric
grease to socket when
replaced
s Air Filter- Main Weekly Inspect; replace if necessary
H Element
s Transmission Oil 25 hrs. Check level; change oil
annually
Battery 25 hrs. Check terminals; clean;
check fluid level
n Brake pad wear 25 hrs. Inspect periodically
s Engine breather 25 hrs. Inspect; replace annually
H filter and as needed
s General 25 hrs. Lubricate all fittings, pivots,
Lubrication cables
47
IMPROPERLY PERFORMIMNG THE PROCEDURES
MARKED WITH A
nn
COULD RESULT IN A COMPONENT
FAILURE AND LEAD TO SERIOUS INJURY OR DEATH.
HAVE AN AUTHORIZED BUSH HOG DEALER PERFORM
THESE SERVICES.
Page 50

Item Frequency Remarks
Engine Cylinder 25 hrs. Re-torque required at first
Head/Cylinder service only
Base Fasteners
s Engine Oil-Level 25 hrs. Check level daily; break-in
service at 25 hrs.
s Engine Oil - 100 hrs. Change oil at 100 hours;
H Change more often in cold weather
use
s Oil Filter 100 hrs. Replace with oil change
H
H Engine breather 100 hrs. Inspect
hose
Carburetor Float 50 hrs. Drain bowl periodically and
Bowl prior to storage
n Throttle Cable 50 hrs. Inspect; adjust, lubricate,
replace if necessary
H Choke (Enricher) 50 hrs. Inspect;adjust, replace if
Cable necessary
Shift Linkage 50 hrs. Inspect; adjust
n Drive Belt 50 hrs. Inspect; adjust, replace if
necessary
n Steering 50 hrs. Inspect; lubricate
s Front Suspension 50 hrs. Inspect; lubricate, tighten
Fasteners
s Rear Suspension 50 hrs. Inspect; tighten fsteners
Engine Mounts 300 hrs. Inspect
n Valve Clearance 300 hrs. Inspect; adjust
H Spark Plug 100 hrs. Inspect; replace if necessary
n Ignition Timing 100 hrs. Inspect and adjust as needed
H
n Front Hub Bearings 100 hrs Check at 100 hrs. and
replace as needed
48
Page 51

Item Frequency Remarks
n Fuel System 100 hrs. Check for leaks at fuel cap
H lines, fuel valve, filter, pump
and carburetor.Replace
lines every two years.
Fuel Filter 100 hrs. Replace annually
Spark Arrestor 100 hrs. Clean out
s Front Gearcase Oil 100 hrs. Check monthly; change
annually
n Clutches (drive 100 hrs. Inspect; clean
and driven)
n Brake Fluid 200 hrs. Change every two years
n Front Wheel 300 hrs. Inspect; replace if necessary
Bearings
H Idle Speed As required Adjust
Engine Side Cover As required Drain moisture after driving
in water.
n Toe Adjustment As required Periodic inspection, adjust
when parts are replaced
49
Page 52

MAINTENANCE AND LUBRICATION
Lubrication Recommendations
NOTE: Hours are based on 10 mph average. If service is due at 20
hours, the equivalent odometer reading would be 200 miles. Perform
all services at whichever reading is reached first.
Lubrication Chart
Item Lube Method Frequency
Engine Oil SAE 10W-30, Add to proper level Check level daily
API SJ for on dipstick
gereral use
Brake Fluid DOT 3 or 4 Maintain level be- As required; change
tween fill lines every 200 hrs.
Transaxle Oil SAE 80W-90 Refill to middle of Check monthly;
w/LSD additive sight window change every 100 hrs.
Front Differential Mobil 424 Refill to check plug Every 100 hrs.
Right Angle SAE 80W-90 Refill to middle of Every 100 hrs.
Drive w/LSD additive sight window
Lube Fittings: Lithium Based Grease with grease Every 25 hrs.
Top of Front Grease gun
Struts, Swing
Arm Pivots,
Pillow Block
on Driveshaft
MIXING BRANDS OR USING A NON-RECOMMENDED OIL
MAY CAUSE SERIOUS ENGINE DAMAGE
CAUTON
WARNING
VEHICLE OPERATION WITH INSUFFICIENT, DETERIORATED, OR CONTAMINATED ENGINE OIL WILL CAUSE
ACCELERATED WEAR AND MAY RESULT IN ENGINE
SEIZURE, ACCIDENT, AND INJURY. ALWAYS PERFORM
THE MAINTENANCE PROCEDURES AS OUTLINED IN THE
PERIODIC MAINTENANCE SCHEDULE.
50
Page 53

Engine Oil
Maintain the engine oil at the proper level to ensure a properly functioning engine, and change the oil and oil filter every 100 hours or
every six months, whichever comes first. Dirt and metal particles collect in the oil, and oil loses its lubricative quality if used too long.
Suggested break-in oil change is at 25 hours, or one month, whichever
comes first. Severe use operation requires more frequent service. Severe use includes continuous duty in dusty or wet conditions, and cold
weather operation. NOTE: Severe use/cold weather operation is when
all operating is at below 10°F and/or when operating between 10°F
and 30°F if most trips are slow speed and less than five miles. Always
change the oil filter when changing oil.
Oil Check
The engine oil can be checked and/or refilled by folding the bottom
seat cushion up and forward exposing the engine.
1. Position the vehicle on a level surface.
2. Start the engine and let it idle for 20 - 30 seconds.
3. Stop the engine and fold the seat forward.
4. Remove the dipstick and wipe it clean with a clean cloth.
5. Replace the dipstick completely into the engine.
6. Remove the dipstick and check to see that the oil level is
between the full and add marks. Add oil if necessary. Do not overfill.
NOTE: A rising oil level between checks in cool weather driving can indicate moisture collecting in the crankcase. If the oil level is above the full
mark, change the oil.
Oil Dipstick
Oil Filler Cap
51
Page 54

Engine Oil and Filter Change
1. Run the engine two or three minutes until warm. Stop the engine.
2. Clean the area around the drain plug at the bottom of the
crankcase.
3. Place a drain pan beneath the engine and remove the drain plug.
Allow the oil to drain completely.
4. Clean drain hole and replace the drain plug. Torque to 14 ft. lbs.
5. Remove the oil filter and clean the sealing surface area.
6. Lubricate the new filter 0-ring with clean engine oil.
7. Install the new filter and turn by hand until filter gasket contacts
the sealing surface, then turn an additional 1/2 turn.
8. Remove the dipstick and fill the engine with approximately 1-1/2
quarts of SAE 10W-30, API SJ motor oil. Replace the dipstick.
9. Start the engine and check for leaks at the drain plug and oil filter.
10. Stop the engine and check the oil level on the dipstick.
11. Dispose of used oil and filter properly.
Transaxle
The transaxle oil should be changed every 100 hours.
1. Park the vehicle on a level surface.
2. Remove the drain plug from the transaxle and let oil drain into a
drain pan. Dispose of used oil properly.
3. Clean drain hole and replace the drain plug.
4. Refill transaxle with Mobilube HD LS 80W-90 (or equivalent) to
the middle of sight window. If the transaxle does not have a sight
window, refill to top of check plug.
CAUTION
HOT OIL CAN CAUSE SERIOUS BURNS. DO NOT
ALLOW OIL TO COME INTO CONTACT WITH SKIN.
52
Page 55

Front Differential
The front differential oil should be changed every 100 hours If the vehicle is used in wet conditions, the oil should be checked more frequently. If the oil has a milky appearance, it should be changed as
soon as possible. Failure to properly maintain this area can result in
premature wear or possible failure of the front differential components.
Oil Check
1. With the vehicle on a level surface, remove the fill plug and check
the lubricant level. Oil should be filled until it overflows from the
fill plug.
2. Replace the fill plug and tighten.
Oil Change
1. Support the vehicle securely with a jack stand.
2. Remove the front tire on the driver’s side.
3. Remove the fill plug.
4. Remove the drain plug located on the bottom right-hand side and
drain the oil into a drain pan. Discard the used oil properly.
5. Clean and reinstall the drain plug.
6. Add Mobil 424 oil to 3/4” below the threads of the fill plug hole.
7. Reinstall the fill plug and tighten. Check for leaks.
Front Differential
53
Page 56

Right Angle Drive
The right angle drive oil should be changed every 100 hours.
1. With the vehicle on a level surface remove the fill plug and drain
plug and drain oil into a drain pan. Discard the used oil properly.
2. Refill the drive box with SAE 80W-90 w/LSD additive, to the middle of the sight window.
Oil Change
1. Remove the combination breather/fill plug from the top
of the case.
2. Remove the drain plug from the bottom of the case
and drain the oil into a pan. Discard the used oil properly.
3. Clean and replace the drain plug and fill the right angle
drive with Mobilube HD LS 80W-90 (or equivalent) - Refill
to the center of the sight window.
4. Replace the breather/fill plug and tighten. Check for leaks.
Right Angle Drive
54
Page 57

Constantly Variable Transmission (CVT)
Do not modify any component of the CVT system. Doing so may reduce its strength so that a failure may occur at a high speed. The CVT
system has been precision balanced. Any modification will cause the
system to be out of balance, creating vibration and additional loads on
components.
The CVT system rotates at high speeds, creating large amounts of
force on clutch components. Extensive engineering and testing has
been conducted to ensure the safety of this product. However, as the
owner, you have the following responsibilities to make sure this system
remains safe:
Always follow all recommended maintenance procedures. See your
dealer if required.
This CVT system is intended for use on the Bush Hog utility vehicle.
Do not install it on any other product.
Always make sure the CVT housing is securely in place during operation.
CVT Drying
There may be some instances when water is accidently ingested into the
CVT system Use the following instructions to dry it out before operating.
1. Shift the transmission into neutral and apply full throttle for no longer
than 10 seconds and repeat as necessary. This will expel the moisture and air dry the belt and clutches.
2. Allow the engine RPM to settle to idle speed, then shift the transmission to the lowest available range.
3. Test for belt slippage. If the belt slips, repeat the process.
4. Take the vehicle to your dealer for service as soon as possible.
WARNING
FAILURE TO COMPLY WITH THE INSTRUCTIONS IN THIS
WARNING CAN RESULT IN SEVERE INJURY OR DEATH.
55
Page 58

Vehicle Immersion
If it is impossible to take your vehicle to a dealer before starting it, follow the steps outlined below.
Honda Engines
1. Move the vehicle to dry ground, or at least to a water level below
the floor.
2. Disconnect the fuel pump wires.
3. Remove the spark plugs.
4. Loosen the carburetor drain screw by turning the screw counterclockwise to allow fuel to drain from the fuel bowl . This screw is
accessible with a long handled screwdriver from above, and
behind the engine.
5. Turn the engine over several times with the electric starter.
6. Dry the spark plugs and reinstall, or install new spark plugs.
7. Tighten the carburetor drain screw.
8. Connect the fuel pump wires.
9. Attempt to start the engine. If necessary, repeat the drying procedure.
NOTE: Water damage to electrical components may necessitate replacement of that component.
CAUTION
IF YOUR VEHICLE BECOMES IMMERSED, MAJOR ENGINE DAMAGE CAN RESULT IF THE VEHICLE IS NOT
THOROUGHLY INSPECTED. TAKE THE VEHICLE TO
YOUR DEALER BEFORE STARTING THE ENGINE.
56
Page 59

Engine Air Filter
We recommend that the air filter be cleaned every 25 hours and replaced once a year.
1. The air filter is accessible from the right side of the vehicle, below
the passenger seat. Loosen both fastening clips and remove the
housing cover. There is an outer and inner filter that may then be
pulled out for service or replacement.
2. Inspect the filter housing and clean out any debris or moisture.
3. Replace the filter elements or install new ones.
NOTE: Service the air filter more frequently if the vehicle is operated
in wet conditions or at high throttle openings for extended periods.
CVT Enclosure Air Filter
We recommend that the air filter be cleaned every 25 hours and replaced once a year
The CVT filter is accessible by folding the seat forward. The filter housing is located on the driver’s side above the gas tank.
1. Remover the two wing nuts and remove the housing cover.
2. Remover the filter element, clean the inside of the housing and
reinstall the filter or install a new one.
Engine Air Filter Housing
CVT Air Filter Housing
57
Page 60

Fuel Filter
Your Bush Hog utility vehicle is equipped with an in-line fuel filter that
should be replaced by your dealer after every 100 hours of operation.Do not attempt to clean the fuel filter.
Spark Plugs
The spark plugs should be changed every 100 hours. The spark plugs
are accessible from under the seat or under the cargo box. Always use
the spark plugs recommended by the engine manufacturer and set the
gap as specified.
Spark plug condition is indicative of engine operation. The spark plug firing end condition should be read after the engine is warmed up and the
vehicle is driven at higher speeds. Immediately check the spark plug for
correct color.
1. Normal
The normal insulator tip is gray, tan, or light brown. There will be few
combustion deposits. The electrodes are not burned or eroded. This
indicates the proper type and heat range for the engine and service.
NOTE: The tip should not be white. A white tip indicates overheating,
caused by use of an improper spark plug or incorrect carburetion adjustments.
2. Wet Fouled
The wet fouled insulator tip is black. A damp oil film covers the firing
end. There may be a carbon layer over the entire nose. Generally, the
electrodes are not worn. General causes of fouling are excessive oil,
use of non-recommended injection oil, improper use of the choke. or incorrect carburetion adjustments.
Spark Plug Removal and Replacement
1. Open the seat and/or the cargo box to access the engine compartment.
2. Remove the spark plug boot and using a socket wrench, remove
the plug.
3. Reverse the procedure for spark plug installation. Torque to 14 ft.
lbs. (19 Nm).
58
WARNING
A HOT EXHAUST SYSTEM AND ENGINE CAN CAUSE SERIOUS BURNS. WEAR PROTECTIVE GLOVES WHEN REMOVING A SPARK PLUG FOR INSPECTION.
Page 61

Spark Arrestor
Use the following procedure to periodically purge accumulated carbon from the exhaust system.
1. Loosen the set screw and remove the spark arrestor from the muffler. Tap the arrestor on a hard surface to loosen carbon deposits and
clean the inside of the tubing.
2. Place the engine in neutral and start the engine. Purge the accumulated carbon from the system by momentarily revving the engine
several times. Rap the exhaust system and repeat the procedure several times to expel additional carbon.
3. Stop the engine and allow the exhaust system to cool.
4. Reinstall the spark arrestor.
Spark Arrestor
WARNING
FAILURE TO HEED THE FOLLOWING WARNINGS WHILE
SERVICING THE SPARK ARRESTOR COULD RESULT IN
SERIOUS INJURY OR DEATH.
DO NOT PERFORM SERVICE ON THE SPARK ARRESTOR
WHILE THE SYSTEM IS HOT. EXHAUST SYSTEM TEMPERATURES CAN REACH 1000° F. ALLOW COMPONENTS
TO COOL SUFFICIENTLY BEFORE PROCEEDING.
REMOVE COMBUSTIBLE MATERIALS FROM THE AREA.
WEAR EYE PROTECTION.
DO NOT STAND BEHIND OR IN FRONT OF THE VEHICLE
WHILE PURGING.
NEVER RUN THE ENGINE IN AN ENCLOSED AREA. EX-
HAUST CONTAINS POISONOUS CARBON MONOXIDE
GAS THAT CAN CAUSE LOSS OF CONSCIOUSNESS OR
DEATH IN A VERY SHORT TIME.
NEVER GO UNDER THE VEHICLE WHILE IT IS INCLINED.
59
Page 62

Throttle System
Throttle Freeplay
If the throttle pedal has excessive play due to cable stretch or cable
misadjustment, it will cause a delay in throttle response, especially at
low engine speed. The throttle may also not open fully. If the throttle
pedal has no freeplay, the throttle may be hard to control, and idle may
be erratic.
Throttle Freeplay Inspection
1. Apply parking brake.
2. Shift the gear lever into neutral.
3. Start the engine and warm it up thoroughly.
4. Measure the distance the throttle pedal moves before the engine
begins to pick up speed. Freeplay should be from 1/16” to 1/8”.
Note: The throttle system is not intended to be adjusted by the owner.
If problems occur, take the vehicle to your dealer for adjustments.
WARNING
FAILURE TO CHECK OR MAINTAIN PROPER OPERATION OF THE THROTTLE SYSTEM CAN RESULT IN AN
ACCIDENT AND LEAD TO SERIOUS INJURY OR DEATH
IF THE THROTTLE STICKS DURING OPERATION.
NEVER START OR OPERATE THIS VEHICLE IF IT HAS A
STICKING OR IMPROPERLY OPERATING THROTTLE
PEDAL.
IMMEDIATELY CONTACT YOUR DEALER FOR SERVICE
IF THROTTLE PROBLEMS ARISE.
ALWAYS CHECK THE PEDAL FOR FREE MOVEMENT
AND RETURN BEFORE STARTING THE ENGINE AND
OCCASIONALLY DURING OPERATION.
60
Page 63

Brake Inspection
The front and rear brakes are hydraulic disc type brakes and are activated by the brake pedal.
Routine inspections are recommended to keep the brake system in
good operating condition. Inspect the level of the brake fluid before
each operation.
Change the brake fluid at the intervals outlined in the Maintenance
Schedule beginning on page 49. The brake fluid should also be
changed if it becomes contaminated, if the fluid level is below the minimum, or if the type and brand of the fluid in the reservoir are unknown.
Inspection Procedure
1. Position the vehicle on level ground.
2. Inspect the brake fluid by looking at the reservoir under the hood.
The level should be between the upper (MAX) and lower (MIN)
level lines.
3. If the fluid level is lower than the lower level line, add brake fluid
to the upper (MAX) line.
4. Apply the brake forcefully for a few seconds and check for fluid
` leakage around the fittings.
WARNING
AFTER OPENING A BOTTLE OF BRAKE FLUID, ALWAYS DISCARD ANY UNUSED PORTION. NEVER STORE OR USE A PARTIAL BOTTLE. BRAKE FLUID IS HYGROSCOPIC, MEANING IT
RAPIDLY ABSORBS MOISTURE FROM THE AIR. THE MOISTURE CAUSES THE BOILING TEMPERATURE OF THE BRAKE
FLUID TO DROP, WHICH CAN LEAD TO EARLY BRAKE FADE
AND THE POSSIBILITY OF ACCIDENT OR SEVERE INJURY.
Brake Fluid
Reservoir
61
Page 64

Brake Inspection
5. Check the brake system for fluid leaks.
6. Check the brake pedal for excessive travel or a spongy feel.
7. Check the friction pads for wear, damage and looseness.
8. Inspect the brake disc spline and pad wear surface for excessive
wear.
9. Change pads when worn to 3/64” (.1 cm), about the thickness of
a dime.
Parking Brake Adjustment
1. Engage the parking brake by pulling up the hand lever, the vehicle
should not roll while parked. If the vehicle moves, adjustment is
needed.
2. The hand lever is equipped with a rotating knob to
adjust the engagement of the parking brake. Loosen the set
screw on the side of the knob and turn the knob clockwise to
increase pressure on the brake system. Test the brake system
and adjust again, if needed. When adjustment is satisfactory,
tighten the set screw securely in the adjustment knob.
Parking Brake
62
Page 65

Steering Wheel Inspection
Check the steering wheel for freeplay and smooth operation as outlined in the Maintenance Schedule.
1. Park the vehicle on level ground.
2. Lightly turn the steering wheel left and right.
3. There should be 0.8 - 1.0 in. (20 25 mm) of freeplay.
4. If there is excessive freeplay or strange noises, or the steering
feels rough or “catchy”, have the steering system inspected by an
authorized Bush Hog dealer.
Seat Belts
Inspect all seat belts for proper operation before each use of the vehicle.
1. Push the latch plate into the buckle until it clicks. The latch plate
must slide smoothly into the buckle. A click indicates that it is
securely latched.
2. Push the red button to make sure it releases freely.
3. Check the belt for wear, cuts or damage. If any irregularities are
found, have the seat belt system checked and/or replaced by an
authorized dealer.
The seat belt angles should be adjusted to suit the individual in that particular seat before driving. Make sure the seat belt angle is adjusted to
the lowest possible lap position before riding.
1. To adjust, loosen the bolts on each end of the belts.
2. Reposition both the buckle and retractor. Tighten the bolts.
WARNING
63
FAILURE TO FOLLOW THE AGE RECOMMENDATIONS FOR THIS VEHICLE COULD RESULT IN SERIOUS INJURY OR DEATH. NO ONE
UNDER THE AGE OF 16 MAY OPERATE THIS VEHICLE. NO ONE
UNDER THE AGE OF 5 MAY RIDE AS A PASSENGER IN THIS VEHICLE.
Page 66

Tires
Tire Tread Depth
Always replace tires when tread depth is worn to 1/8” (.3 cm) or less.
Wheel Lug Nuts
Inspect the lug nuts occasionally for tightness or missing nuts. Tighten
to 35 ft. lbs.
Wheel Removal
1. Stop the engine, place the transmission in gear and engage the
parking brake.
2. Loosen the lug nuts slightly.
WARNING
OPERATING YOUR VEHICLE WITH WORN TIRES WILL INCREASE THE POSSIBILITY OF SKIDDING, LOSS OF CONTROL AND AN ACCIDENT, WHICH COULD RESULT IN
SERIOUS INJURY OR DEATH. ALWAYS REPLACE TIRES
WHEN THE TREAD DEPTH MEASURES 1/8” (.3 CM) OR
LESS.
IMPROPER TIRE INFLATION OR THE USE OF NON-STANDARD SIZE OR TYPE TIRES MAY ADVERSELY AFFECT VEHICLE HANDLING, WHICH COULD RESULT IN VEHICLE
DAMAGE OR PERSONAL INJURY. ALWAYS MAINTAIN
PROPER TIRE PRESSURE. WHEN REPLACING TIRES, ALWAYS USE THE ORIGINAL EQUIPMENT SIZE AND TYPE.
WARNING
OPERATING YOUR VEHICLE WITH IMPROPERLY INSTALLED WHEELS WILL AFFECT VEHICLE HANDLING
AND COULD CAUSE AN ACCIDENT RESULTING IN SERIOUS INJURY OR DEATH. MAKE CERTAIN WHEELS
ARE INSTALLED PROPERLY.
64
Page 67

3. Elevate the side of the vehicle by placing a suitable stand under
the frame.
4. Remove the wheel lug nuts. Remove the wheel.
Wheel Installation
1. With the transmission in gear and the parking brake engaged,
place the wheel in the correct position on the wheel hub. Be sure
the valve stem is toward the outside and the rotation arrows on
the tire point toward forward rotation.
2. Attach the lug nuts and finger tighten.
3. Carefully lower the vehicle to the ground.
4. Torque the lug nuts to 35 ft. lbs.
Lights
When servicing a halogen lamp, don’t touch the lamp with bare fingers. Oil from your skin leaves a residue, causing a hot spot that will
shorten the life of the lamp.
WARNING
POOR LIGHTING WHILE DRIVING CAN RESULT IN SEVERE INJURY OR DEATH. HEADLIGHT AND TAILLIGHT
LENSES BECOME DIRTY DURING NORMAL OPERATION.
WASH THE HEADLIGHTS FREQUENTLY TO MAINTAIN
LIGHTING QUALITY.
HOT COMPONENTS CAN CAUSE SERIOUS BURNS TO
SKIN. DO NOT SERVICE THE HEADLAMPS UNTIL
THEY’VE COOLED SUFFICIENTLY.
65
Page 68

Cleaning Your Vehicle
Keeping your vehicle clean will not only improve its appearance, but
it can also extend the life of various components. With a few precautions, your vehicle can be cleaned much like an automobile.
The best and safest way to clean your vehicle is with a garden hose
and a pail of mild soap and water. Use a professional type washing
mitten, cleaning the upper body first and the lower parts last. Rinse
with water frequently and dry with a chamois to prevent water spots.
NOTE: If warning decals are damaged, contact your Bush Hog dealer
for free replacement.
If a high pressure type car wash system is used, extreme care must
be taken to avoid water damage to the wheel bearings, transmission
seals, body panels, brakes, headlights and warning decals. Many expensive repair bills can result from using high pressure detergent systems.
NOTE: If a high pressure car wash is used, grease all zerk fittings immediately after washing. Also run the vehicle to evaporate any water
that may have entered the engine or exhaust system.
Storage
If your vehicle is to be placed in extended or off season storage, the
following steps should be taken to preserve its condition.
1. Perform all necessary repairs and thoroughly clean the vehicle.
2. Remove the spark plug and pour approximately one ounce of
motor oil into the cylinder. Operate the starter for a few seconds
and reinstall the spark plugs.
3. Remove the battery. Store it in a cool, dry place out of the sun.
4. Lubricate all suspension pivot points.
5. Block the vehicle so all tires are suspended off the ground.
6. Spray oil on all unpainted metal surfaces to prevent rusting.
Avoid getting oil on rubber parts or in the brakes.
7. Lubricate all cables.
66
Page 69

8. Tie a plastic bag over the exhaust pipe and air cleaner inlet to
prevent moisture or small animals or insects from entering.
9. Cover the vehicle with a canvas cover. Do not use plastic or
coated materials since they do not allow ventilation for the vehicle.
Removal From Storage
1. Check the battery electrolyte level and charge the battery if necessary. Install it in the vehicle.
2. Make sure the spark plug is tight.
3. Fill the tank with fuel.
4. Check all the points listed in the Pre-Ride Inspection section on
page 29.
NOTE: Tightness of the bolts, nuts, and other fasteners should be
checked by an authorized Bush Hog dealer.
5. Lubricate as outlined in the Periodic Maintenance Schedule.
Battery
Keep the battery terminals and connections free of corrosion. If cleaning is necessary, remove the corrosion with a stiff wire brush. Wash with
a solution of one tablespoon of baking soda and one cup of water. Rinse
well with tap water and dry off with clean shop towels. Coat the terminals with dielectric grease or petroleum jelly.
Be careful not to allow cleaning solution or tap water into the battery.
Antidote
External: Flush with water
Internal: Drink large quantities of water or milk. Follow with milk of mag-
nesia, beaten egg, or vegetable oil. Call physician immediately.
Eyes: Flush with water for 15 minutes and get prompt medical attention.
WARNING
BATTERY ELECTROLYTE IS POISONOUS. IT CONTAINS
SULFURIC ACID. SERIOUS BURNS CAN RESULT FROM
CONTACT WITH SKIN, EYES OR CLOTHING.
67
Page 70

Batteries produce explosive gases. Keep sparks, flame,
cigarettes, etc. away. Ventilate when charging or using in
an enclosed space. Always shield eyes when working
near batteries. KEEP OUT OF REACH OF CHILDREN.
Replenishing Battery Fluid
(Conventional Battery)
A poorly maintained battery will deteriorate rapidly. Check the battery fluid level
often. The fluid level should be kept between the upper and lower level marks.
To refill use only distilled water. Tap water contains minerals that are harmful
to a battery.
Battery Removal (Refer to photograph on next page)
1. Open the hood to access the battery.
2. Disconnect the negative (black) cable first.
3. Disconnect the positive (red) cable next.
4. Remove the nuts from the battery tie-down bracket and lift off the bracket.
5. Lift the battery out of the vehicle, being careful not to tip the battery sideways and spill electrolyte
WARNING
IMPROPERLY CONNECTING OR DISCONNECTING BATTERY CABLES CAN RESULT IN AN EXPLOSION AND
CAUSE SERIOUS INJURY OR DEATH. WHEN REMOVING
THE BATTERY, ALWAYS DISCONNECT THE NEGATIVE
(BLACK) CABLE FIRST. WHEN REINSTALLING THE BATTERY, ALWAYS CONNECT THE NEGATIVE (BLACK)
CABLE LAST.
CAUTION
IF ELECTROLYTE SPILLS, IMMEDIATELY WASH IT OFF
WITH A SOLUTION OF ONE TABLESPOON OF BAKING
SODA AND ONE CUP OF WATER TO PREVENT DAMAGE
TO THE VEHICLE.
68
Page 71

Tie-Down Bracket
Negative (Black) Cable Positive (Red) Cable
69
Battery Installation
1. Set the battery in its holder.
2. Install the battery tie-down bracket and tighten the nuts.
3. First connect the positive (red) cable.
4. Second connect the negative (black) cable.
5. Verify that cables are properly routed.
NOTE: When installing a new battery, make sure it is fully charged
prior to its use. Using a new battery that has not been fully charged
can damage the battery and result in a shorter life. It can also hinder
vehicle performance.
Battery Storage
When the vehicle is placed in storage for three months or more, the
battery should be removed, stored out of the sun in a cool, dry place
and tested monthly. Before reusing, take the battery to your dealer for
testing and recharging.
Page 72

Attaching Occupant Protection Structure to Vehicle
(Refer to illustration on following page)
Remove occupant protection structure from shipping bundle and
arrange weldments around the vehicle.
With hood fully opened, position one side weldment into position and
loosely bolt into place using ½” x 3” bolts and locknuts in front and 5/8”
x 3” bolts and locknuts in rear. Nuts should be oriented towards the
outside of the vehicle in rear. Place opposite side weldment into position and fasten loosely into place.
Loosely fasten front weldment into place using ½” x 2-½” button head
cap screws on the top and ½” x 2” button head cap screws in front.
Loosely fasten rear weldment into place using ½” x 2-½” button head
cap screws on top and 3/8” x 1” bolts and locknuts on bottom (where
indicated).
Install seatbelts to holes in rear weldment using ½” x 1” bolts and locknuts. Tightening bottom of rear weldment will help to align seat belt
holes.
Tighten all fasteners. Do not exceed torque specification on rear frame
mounts.
Place seat back against rear of cab frame with the five studs extending through the matching mounting holes. Fasten using 5/16” flat
washers and locknuts.
OPTIONAL EQUIPMENT
Consult with your Bush Hog dealer for availability of optional equipment. These items will have installation instructions supplied with the
kits.
ITEMS TO CHECK:
Check oil level in the engine (see engine manual)
Check tightness of all fasteners, including bolts, lug nuts, and
setscrews.
Check tire pressure.
70
SECTION IV
ASSEMBLY
Page 73

Seat Back
Mounting Holes
(5/16” Flatwashers
& Locknuts)
5/8” x 3” Bolts
& Locknuts
3/8” x 1” Bolts
& Locknuts
1/2” x 2”
Hex Socket
Button Head Bolts
1/2” x 2”
Hex Socket
Button Head Bolts
Cross Tube,
Front
Light Bar,
Left
Light Bar,
Right
Center Tube,
Rear
1/2” x 3”
Bolts & Locknuts
1/2” x 2-1/2”
Hex Socket
Button Head Bolts
1/2” x 2-1/2”
Hex Socket
Button Head Bolts
Seat Belt
Mounting Holes
1/2” x 1”
Bolts & Locknuts
OCCUPANT PROTECTION
STRUCTURE
71
Inner
Seat Belt
Inner
Seat Belt
Outside
Seat Belt
Outside
Seat Belt
Outside
Seat Belt
1/2” x 2-1/2”
Bolt & Locknut
1/2” x 1-1/2”
Bolt & Locknut
1/2” x 1-1/2”
Bolt & Locknut
Seat Belt Installation
Install all seat belts so that the release button will be to the outside of the occupant when fastened.
Release
Button
Release
Button
Release
Button
Page 74

Rubber Bumper Pad Adjustment
The plastic bed of the Utility Vehicle is equipped with two rubber
bumper pads located at the bottom front of the bed. These rubber
bumpers are factory adjusted to prevent rattling when the bed is in the
down position. If adjustment should be needed at a later time proceed
as follows:
Manual Lift - Screw pads down enough so that slight down pressure
on the front of the bed is needed to unlatch the lift handle.
Electric Lift - Lower bed, then screw pads down for a snug fit to prevent rattling.
Bumper Pad
72
Page 75

TROUBLESHOOTING CHECK LIST
STARTER MOTOR WON’T TURN ENGINE:
• Gear shift lever not in neutral
• Battery discharged
• Battery leads do not make good contact with the battery terminals
or ground on frame
• Fuse failure (check to find and correct the cause of the failure)
ENGINE CRANKS, BUT WON’T START:
• No fuel in tank
• Fuel filter clogged
• Water in fuel
• Choke is not used when engine is cold
• Air filter clogged or inlet blocked
• Engine flooded
• Fuel tank vent clogged
• Spark plug wire not on spark plug
• Spark plug fouled
ENGINE STOPS:
• No fuel in tank
• Water in fuel
• Fuel filter clogged
• Choke left on too long
• Air filter clogged or inlet blocked
• Fuel tank cap vent clogged
• Engine overheated
• Too much idling or low speed running (not enough air flow)
• Overloaded
• Fouled spark plug
• Engine oil low
NO POWER:
• Engine overheated
• Too much idling or low speed running (not enough air flow)
• Overloaded
• Wrong spark plug
• Engine oil low
• Compression leakage
• Valve clearance insufficient
• Fuel filter clogged
• Air filter clogged or inlet blocked
• Spark plug dirty or worn
• Choke left on
• Engine oil incorrect
• Water in fuel
73
Page 76

SAFETY DECALS
To promote safe operation, Bush Hog supplies safety decals on all
products manufactured. Because damage can occur to safety decals
either through shipment, use or reconditioning, Bush Hog will, upon
request, provide safety decals for any of our products in the field at no
charge. Contact your authorized Bush Hog dealer for more information.
No. 1
No. 1
No. 5
No. 6
No. 2 No. 3
No. 4
74
Page 77

No. 2
No. 3
No. 4
No. 5
No. 6
75
Page 78

TORQUE SPECIFICATIONS
BOLT DIAMETER
WRENCH (IN.) “B” AND SAE SAE SAE
SIZE (IN.) “A” THREAD SIZE GRADE 2 GRADE 5 GRADE 8
7/16 1/4 - 2O UNC 6 (7) 8 (11) 12 (16)
7/16 1/4 - 28 UNF 6 (8) 10 (13) 14 (18)
1/2 5/16 - 18 UNC 11 (15) 17 (23) 25 (33)
1/2 5/16 - 24 UNF 13 (17) 19 (26) 27 (37)
9/16 3/8 - 16 UNC 20 (27) 31 (42) 44 (60)
9/16 3/8 - 24 UNF 23 (31) 35 (47) 49 (66)
5/8 7/16 - 14 UNC 32 (43) 49 (66) 70 (95)
5/8 7/16 - 20 UNF 36 (49) 55 (75) 78 (106)
3/4 1/2 - 13 UNC 49 (66) 76 (103) 106 (144)
3/4 1/2 - 20 UNF 55 (75) 85 (115) 120 (163)
7/8 9/16 - 12 UNC 70 (95) 109 (148) 153 (207)
7/8 9/16 - 18 UNF 79 (107) 122 (165) 172 (233)
15/16 5/8 - 11 UNC 97 (131) 150 (203) 212 (287)
15/16 5/8 - 18 UNF 110 (149) 170 (230) 240 (325)
1-1/8 3/4 - 10 UNC 144 (195) 266 (360) 376 (509)
1-1/8 3/4 - 16 UNF 192 (260) 297 (402) 420 (569)
AMERICAN
Bolt Head Markings
Wrench
Size “A”
Bolt
Diameter “B”
SAE Grade 8
(6 Dashes)
SAE Grade 2
(No Dashes)
SAE Grade 5
(3 Dashes)
Proper toque for American fasteners used on Bush Hog equipment.
Recommended Torque in Foot Pounds (Newton Meters).*
76
Page 79

WRENCH BOLT
SIZE DIA. ASTM ASTM ASTM ASTM
(mm) “A” (mm) “B” 4.6 8.8 9.8 10.9
8 5 1.8 (2.4) 5.1 (6.9) 6.5 (8.8)
10 6 3 (4) 8.7 (12) 11.1 (15)
13 8 7.3 (10) 21.1 (29) 27 (37)
16 10 14.5 (20) 42 (57) 53 (72)
18 12 25 (34) 74 (100) 73 (99) 93 (126)
21 14 40 (54) 118 (160) 116 (157) 148 (201)
24 16 62 (84) 167 (226) 181 (245) 230 (312)
30 20 122 (165) 325 (440) 449 (608)
Proper torque for metric fasteners used on Bush Hog equipment.
Recommended torque in foot pounds (newton Meters).*
*Use 75% of the specified torque value for plated
fasteners. Use 85% of the specified torque
values for lubricated fasteners.
Numbers appearing on bolt heads
indicate ASTM class.
METRIC
Wrench
Size “A”
Bolt
Diameter “B”
TORQUE SPECIFICATIONS
Proper torque for metric fasteners used on Bush Hog equipment.
Recommended torque in foot pounds (newton Meters).*
77
Page 80

NOTES:
Page 81

NOTES:
Page 82

PP..OO.. BBooxx 11003399 ••SSeellmmaa,, AALL 3366770022--11003399
TTeelleepphhoonnee ((333344)) 887744--22770000 ••wwwwww..bbuusshhhhoogg..ccoomm
 Loading...