

Page 1
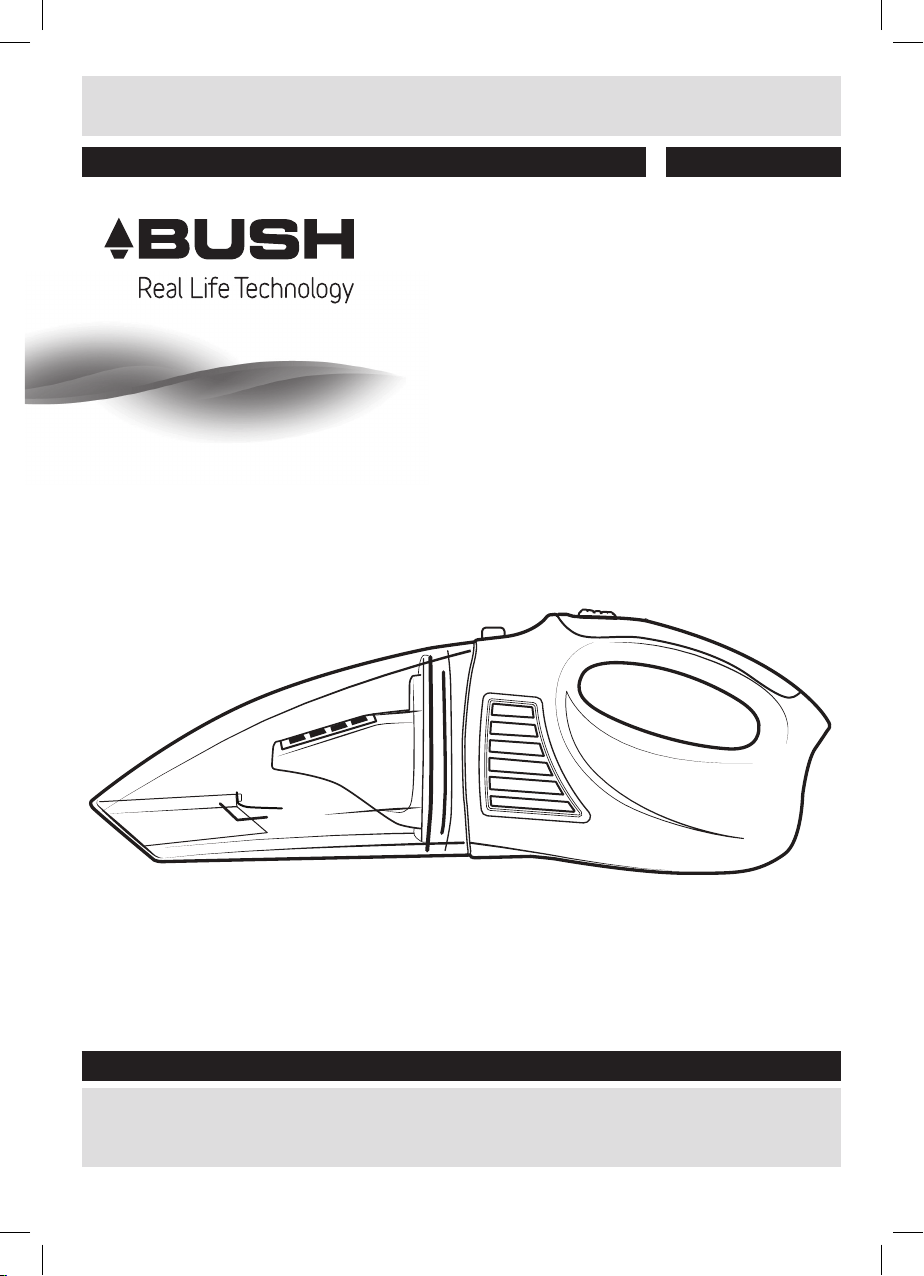
BUSH - 7.2V Rechargeable Hand-Held Vacuum Cleaner
Installation & User Instructions – Please keep for future reference
406/7874 (D)
MA X.
Important – Please read these instructions fully before installing or using
These instructions contain important information which will help you get the best from your appliance and
ensure safe and correct installation, use and maintenance.
If you need help or have damaged or missing parts, call the Customer Helpline: 0870 600 3030
Page 2
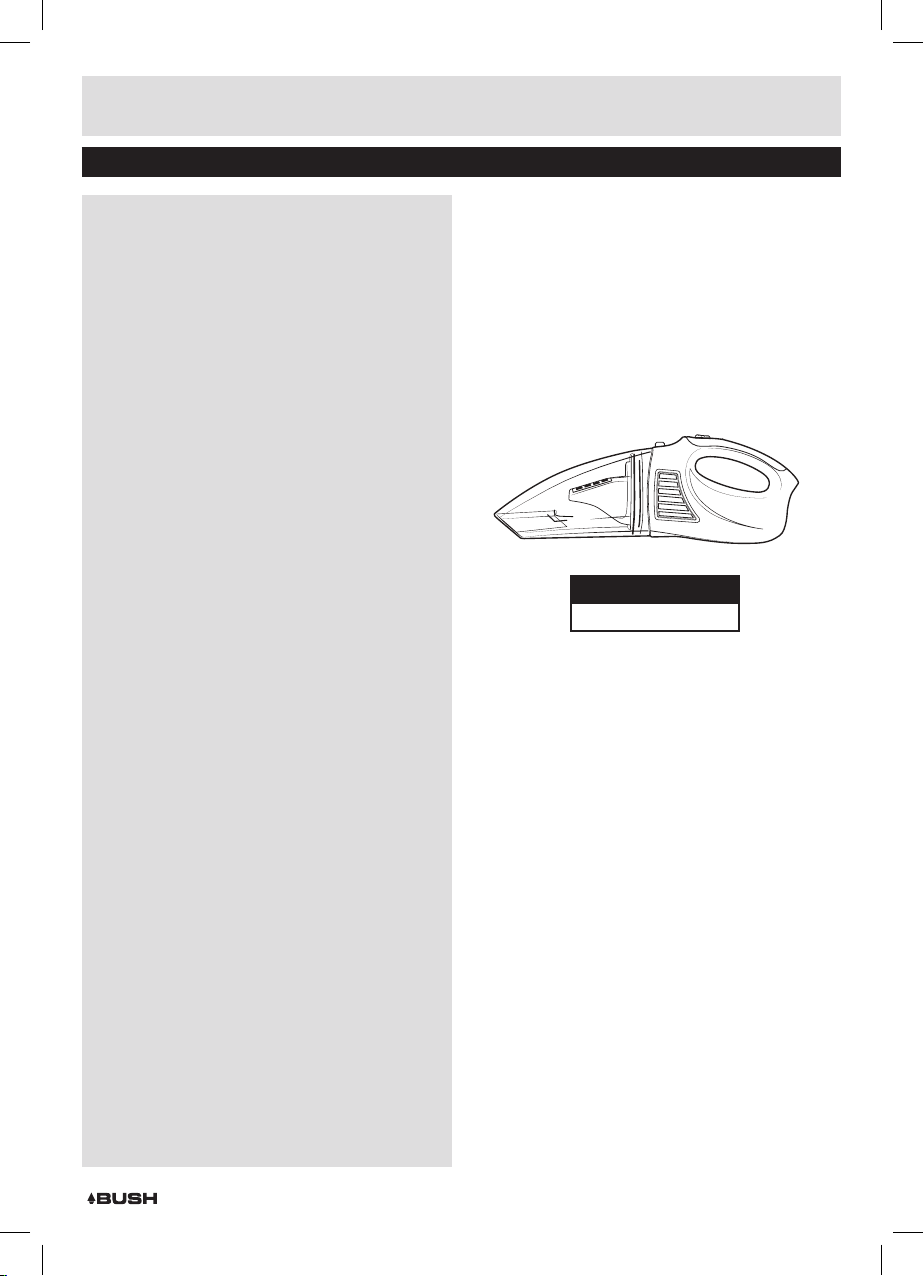
Table of contents
Safety Warnings .................................2
Safety Warnings .................................3
Accessories included .............................4
Overview of controls ..............................4
Recharging information ..........................5
Instructions before use ...........................5
Operating instructions ...........................5
Operating instructions (cont) .....................6
Cleaning & maintenance .........................6
Wall mounting instructions .......................7
Wall mounting & fixings ..........................8
Care & maintenance .............................9
Purchasing replacement filters ..................9
Troubleshooting ..................................9
Rechargeable battery disposal ...................9
Technical specifications ..........................9
MAX.
Product Codes
SLX225E
Page 1
Page 3
Safety information
Important – Please read these instructions fully before installation
Safety Warnings
IMPORTANT SAFETY INSTRUCTIONS
When using an electrical appliance,
basic safety precaution should
always be observed, including the
following.
PLEASE READ ALL INSTRUCTIONS
CAREFULLY BEFORE USING THE
PRODUCT. AND KEEP FOR FUTURE
REFERENCE.
FOR HOUSEHOLD USE ONLY!
WARNING: To reduce the risk of fire,
electrical shock or injury:
1: User must read & understand
instructions prior to usage of this
product. Use only as described in this
manual. Use manufacturer’s original
accessories only.
2: Follow all label and marking
instructions on your Vacuum
Cleaner.
3: Do not use or recharge the Vacuum
Cleaner outdoors.
4: Do not pick up anything that
is burning or smoking, such as
cigarettes, matches. This is a fire
risk
5: Do not use the Vacuum Cleaner to
pick up flammable or combustible
liquids.
6: Do not use in an area where
dangerous items are stored.
7: Do not handle or use the Vacuum or
Battery Charging Adapter with wet
hands
8: Do not use the Vacuum when it is
plugged in to a mains socket
9: Do not use the Vacuum without a
filter in place.
10: While vacuuming, do not block the
air-intake, or the exhaust vents of
the Vacuum. This could cause the
motor to overheat and malfunction.
11: Take care in keeping all body parts
(hair, fingers & clothing) away from
moving parts & openings.
12: Keep the air-intake (nozzle);
exhaust vents, crevice tool & brush
away from your face and body &
loose clothing.
13: Take care when vacuuming stairs.
14: Do not charge if the charger plug
or cable is damaged in any way.
15: Plug the charging unit directly into
a mains wall socket; do not use an
extension cable.
16: Store the Vacuum (indoors)
correctly after use to avoid
accidents.
Page 2
Page 4
Safety information
Important – Please read these instructions fully before installation
17:
This vacuum includes rechargeable NI-MH cells.
D0 not incinerate cells or expose
to high temperatures, as they may
explode.
18: Do not remove the battery pack
yourself. Take the entire Vacuum to
qualified service engineer.
19: Use only the attachments &
charging adapter supplied by the
manufacturer
24: The Vacuum Cleaner is not a toy,
keep away from small children.
25: Do not abuse the charger cable.
Never carry the charger or base by
the cable or pull to disconnect from
a socket. Instead grasp the plug
and pull to remove.
26: Keep the charger away from hot
surfaces.
27: Do not insert objects into
openings. Do not use with openings
blocked; keep free of dust, lint &
20: Do not continue to use this
Vacuum if it appears to be
hair. Anything that may reduce air
flow.
malfunctioning
21: If the Vacuum malfunctions, or
is damaged in any way it should
be taken to a qualified service
engineer for repair.
22: Do not apply lubricants to the
motor of the Vacuum Cleaner
23: Leakage of ingredients contained
within the battery pack, can cause
personal injury as well as damage
to your Vacuum. If battery leakage
occurs, avoid contact with skin. If
contact occurs, immediately wash
thoroughly with soap and water. If
liquid leaking from a battery pack
comes into contact with your eyes,
immediately flush thoroughly with
water and see a doctor.
28: Do not attempt to use the charger
with any other product nor attempt
to charge this product with another
charger. Use only the charger
supplied with this product.
29: Do not use this Vacuum while
charging.
30: This appliance can be used by
children aged from 8 years and
above and persons with reduced
physical, sensory or mental
capabilities or lack of experience
and knowledge if they have been
given supervision. Children shall not
play with the appliance. Cleaning
and user maintenance shall not
be made by children without
supervision.
Page 3
Page 5

Functions & controls
Please familiarize yourself with the parts and accessories listed below
Accessories included
• 1 X SLX225E Vacuum
• 1 X Squeegee
• 1 X Instruction manual
Overview of controls
Dust container release switch
Dust filter
Suction nozzle
• 1 X Detachable Brush
& Crevice tool
• 1 X Mains adapter
ON/OFF switch
MAX level
(liquid)
Dust container
Liquid suction
attachment
• 1 X Wall Bracket
• 1 X Spare Filter
• 2 X Screws & Plugs
Ventilation
openings
WALL MOUNTING BRACKET
Accessory
holders
LED indicator
Carry
handle
Spare filter
Re-charge
dock jack
Page 4
Brush
attachment
(fit’s on end of
crevice tool)
Crevice tool
attachment
Mains power
adapter
Re-charge
dock
Page 6

User instructions
Recharging information
• Before using for the first time charge the vacuum
cleaner for at least 14 hours. The recommended
duration for each subsequent charge is 14 hours to
maintain maximum performance from the internal
battery.
NOTE: The LED indicator will illuminate during
charging.
• To maintain peak performance - We recommend
discharging the Vacuum battery fully at least once a
month and then charging for the full 14 hours.
• Recommendation for efficient cleaning - Please
keep the usage time to no more than 10 minutes
each time.
IMPORTANT
• The air vents must not be blocked at any time.
Blocking the vents may cause overheating which will
damage the motor.
• We recommend you clean and dry the dust filter
after each use.
Instructions before use
1: Remove all items from the packaging. Check
the accessory list on page 4 to ensure you have
everything.
2: Check the DUST FILTER is securely fitted inside the
DUST CONTAINER, if not remove the container (see
page 6) and re-fit the FILTER. Ensure the filter is
pushed fully up to the stops inside the container.
Operating instructions
USAGE IN DRY CONDITIONS
1: Lift and remove the Vacuum from the charging dock.
2: Attach the BRUSH or CREVICE attachments to the
SUCTION NOZZLE to reach confined spaces or brush
the particles.
3: Switch the Vacuum ON using the ON/OFF switch.
4: Replace the cleaner on the charging dock after use.
The LED indicator will begin to flash to indicate the
Vacuum is being charged.
NOTE: Empty the DUST CONTAINER before
returning to the CHARGING DOCK to ensure the
Vacuum does not get blocked.
USAGE IN WET CONDITIONS
1: Lift and remove the Vacuum from the charging dock.
2: Attach the SQUEEGEE attachment to the SUCTION
NOZZLE.
MAX.
3: Install the wall mounting bracket (see ‘wall mounting
instructions’ page 7) and dock the Vacuum once
installed.
4: See ‘Recharging information’ section above for initial
& subsequent charging instructions.
5: When fully charged you can remove the Vacuum and
proceed to the operating instructions.
3: Switch the Vacuum ON using the ON/OFF switch.
4: You can now suck up non-flammable liquids using
the SQUEEGEE attachment.
NOTE: DO NOT allow the liquid in the dust
container to exceed the MAX marked on the side.
Page 5
Page 7

User instructions
MAX.
40 Degrees
Operating instructions (cont)
5: When sucking up liquids, ensure the Vacuum is
positioned at least 40 - 90 degrees.
NOTE: Never allow liquids to come into contact
with the motor.
MAX.
40 Degrees
5: When finished empty the DUST CONTAINER of all
liquid and dry before storage, storing wet or damp can
affect future suction and also run the risk of electrical
shock if docked on the charging bracket.
NOTE: This Vacuum is intended for NORMAL
household usage only.
Cleaning & maintenance
REMOVING THE DUST CONTAINER
Cleaning & maintenance (cont)
CLEANING THE DUST CONTAINER & FILTER
1: Remove the DUST CONTAINER (see step 1 of
removing the dust container),
2: Remove the FILTER by sliding the entire plastic
section out of the largest end of the CONTAINER.
MAX.
3: Clean the DUST FILTER section and if required the
inside of the DUST CONTAINER.
4: Re-fit the FILTER inside the CONTAINER (Ensure
the filter is pushed fully up to the stops inside the
container) and follow step 2 of ‘removing the dust
container’ to re-fit the DUST CONTAINER.
REPLACING THE FILTER
After time the filter will become clogged with particles
and will require changing. Follow the below steps to
replace the dust filter.
1: Follow steps 1-3 to remove & clean the DUST FILTER.
2: Take a small cross head screwdriver and unscrew the
2 screws in the Filter to remove the filter block.
1: Press the DUST CONTAINER RELEASE SWITCH on
the top of the handle, and slide the DUST CONTAINER
away from the motor section.
MAX.
2: To re-fit the DUST CONTAINER, slide the CONTAINER
back onto the motor section until it locates the
bottom pip first and then locate the hole in the top of
the DUST CONTAINER, it will then click into place.
Page 6
3: Insert the replacement filter block, replace the
screws and tighten again.
4: Once secure push the FILTER back inside the DUST
CONTAINER until fitted snugly.
NOTE: Replacement filters are available to
purchase. Please see details in the rear of this
manual.
Page 8

User instructions
Wall mounting instructions
See the below diagram for wall mounting the charging
dock. Further fixing instructions can be found on pg 8.
1: Insert the wall fixings supplied (or suitable fixings as
described on page 8) shown to below.
2: Dock the Vacuum as show on the diagram below.
Ensure the Charging dock is mounted with the JACK
pointing vertically upwards to ensure the Vacuum
remains seated when docked.
MAX .
Page 7
Page 9
A Guide to
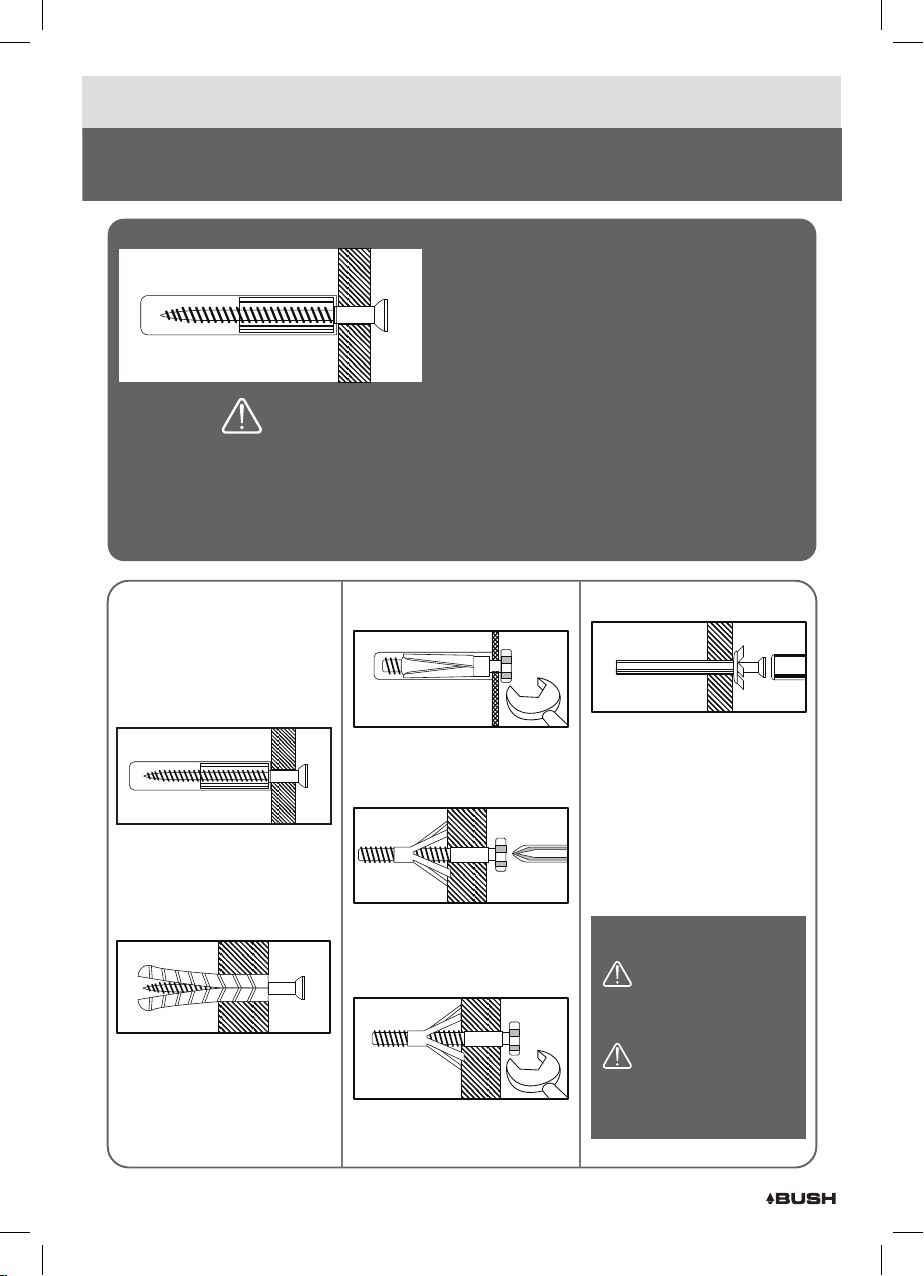
Wall Mounting & Fixings
IMPORTANT:
When drilling into walls always check that there are no
hidden wires or pipes etc. Make sure that the screws and
wall plugs being used are suitable for supporting your unit.
Consult a qualified tradesperson if you are unsure.
HINTS:
1) General Rule Always use a larger screw and wall plug if you are not sure.
2) Ensure you use the recommended drill bit to match the wall plug and hole size.
3) Ensure you drill the hole horizontally, do not force the drill or enlarge the hole.
4) Take extra care when drilling high walls, ceilings and ceramic tiles. Ensure the plug is fitted below a
ceramic tile to avoid splitting or cracking.
5) Ensure wall plugs are well fitted and are a tight fit in the drilled hole.
Types of Walls
You can use one of the following types
of wall plug if your walls are made of
brick, breeze block, concrete, stone,
wood or plaster board.
No.1 “Standard’ Wall Plug
General Wall Materials
These come in various sizes a nd are
made from plastic or sometimes wood
fibre.
No.2 “General Purpose” Wall Plug
Aerated / Breeze Block
Generally aerated blocks should not be
used to support heavy loads. Use a
specialist fitting in this case.
For light loads, a general purpose plug
can be used.
No.3 “Sheild Anchor” Wall Plug
Heavy Loads
For use with heavier loads such as TV,
Hi-FI speakers & Satellite dishes etc.
No.4 “Cavity Fixing” Wall Plug
For use with plaster board partitions or
hollow wooden doors.
No.5 “Cavity Fixing - Heavy Duty”
Wall Plug
For use when fitting or supporting
heavy loads such as shelving, wall
cabinets & coat racks.
No.6 “Hammer Fixing” Wall Plug
For use with walls stuck with plaster
board. The hammer fixing allows it to
be fixed to the wall rather than the
plaster board. Always check the fixing
is secure to the retaining wall.
CARE & MAINTENANCE
SAFETY
Always check the fitting and
location to ensure your safety in
and around the home.
FITTING
From time to time check the fitting
to ensure the wall plugs or screws
do not become loose.
Page 8
Page 10

User instructions
Care & maintenance
Important: Always unplug the appliance from the power socket during cleaning and maintenance.
Never use any sharp instruments or abrasive substances, soap, household cleaner, detergent or wax polish for
cleaning.
Clean the external surfaces with a damp soft cloth only. Never use abrasive products or solvents as they may
damage the appliance.
Purchasing replacement filters
Replacement filters are available for purchase. If you would like to purchase a filter please phone the below number
between 9am - 5pm Mon - Fri : 01327 308 729
Troubleshooting
In the unlikely event of difficulties with your appliance please follow the trouble shooting guide below.
If the problem persists, contact the retailer if the machine is still under guarantee.
Customer helpline: 0870 600 3030
Problem Reason(s) Solution(s)
No Power • Battery is drained • Charge the battery fully
Low or no suction power • Battery is drained
• Dust container is full
• Filter is clogged
Dust leaking from the unit • Dust container is full
• Dust container is not fitted to the
motor section correctly
• Charge the battery fully
• Empty the container (see page 6)
• Clean the filter (see page 6)
• Empty the container (see page 6)
• Re-fit the Dust container (see page 6)
Rechargeable battery disposal
DO NOT use ordinary batteries for replacements. These may leak and damage the Vacuum cleaner and cause
personal injury.
In order to preserve the ecology please dispose of this unit properly so that it can be recycled.
Do not dispose of to unsorted waste.
For more detailed information about recycling of this product or battery, please contact your local Civic Office, your
household waste disposal service or the shop where you purchased the product.
Technical specifications
Motor • 7.2V 45W
Battery Charger • Class II Transformer IP20
Battery Charger Rating • 230-240V @ 50Hz
Battery Charger Voltage • 9V DC 250 mA
Charging Rate • 14 Hours (Approx)
Battery Pack • Ni-MH AA 7.2 V (1,2V x6) 1400mAh
Page 9
Page 11

Guarantee
PRODUCT GUARANTEE
This product is guaranteed against manufacturing defects for a period of
Year
This product is guaranteed for twelve months from the date of original purchase.
Any defect that arises due to faulty materials or workmanship will either be replaced,
refunded or repaired free of charge where possible during this period by the dealer from
whom you purchased the unit.
The guarantee is subject to the following provisions:
The guarantee does not cover accidental damage, misuse, cabinet parts, knobs or
consumable items.
The product must be correctly installed and operated in accordance with the instructions
contained in this manual.
It must be used solely for domestic purpose.
The guarantee will be rendered invalided if the product is re-sold or has been damaged by
inexpert repair.
Specifications are subject to change without notice.
The manufacturer disclaims any liability for the incidental or consequential damages.
The guarantee is in addition to, and does not diminish your statutory or legal rights.
Guarantor: Argos Limited
489 - 499 Avebury Boulevard
Central Milton Keynes
MK9 2NW
 Loading...