

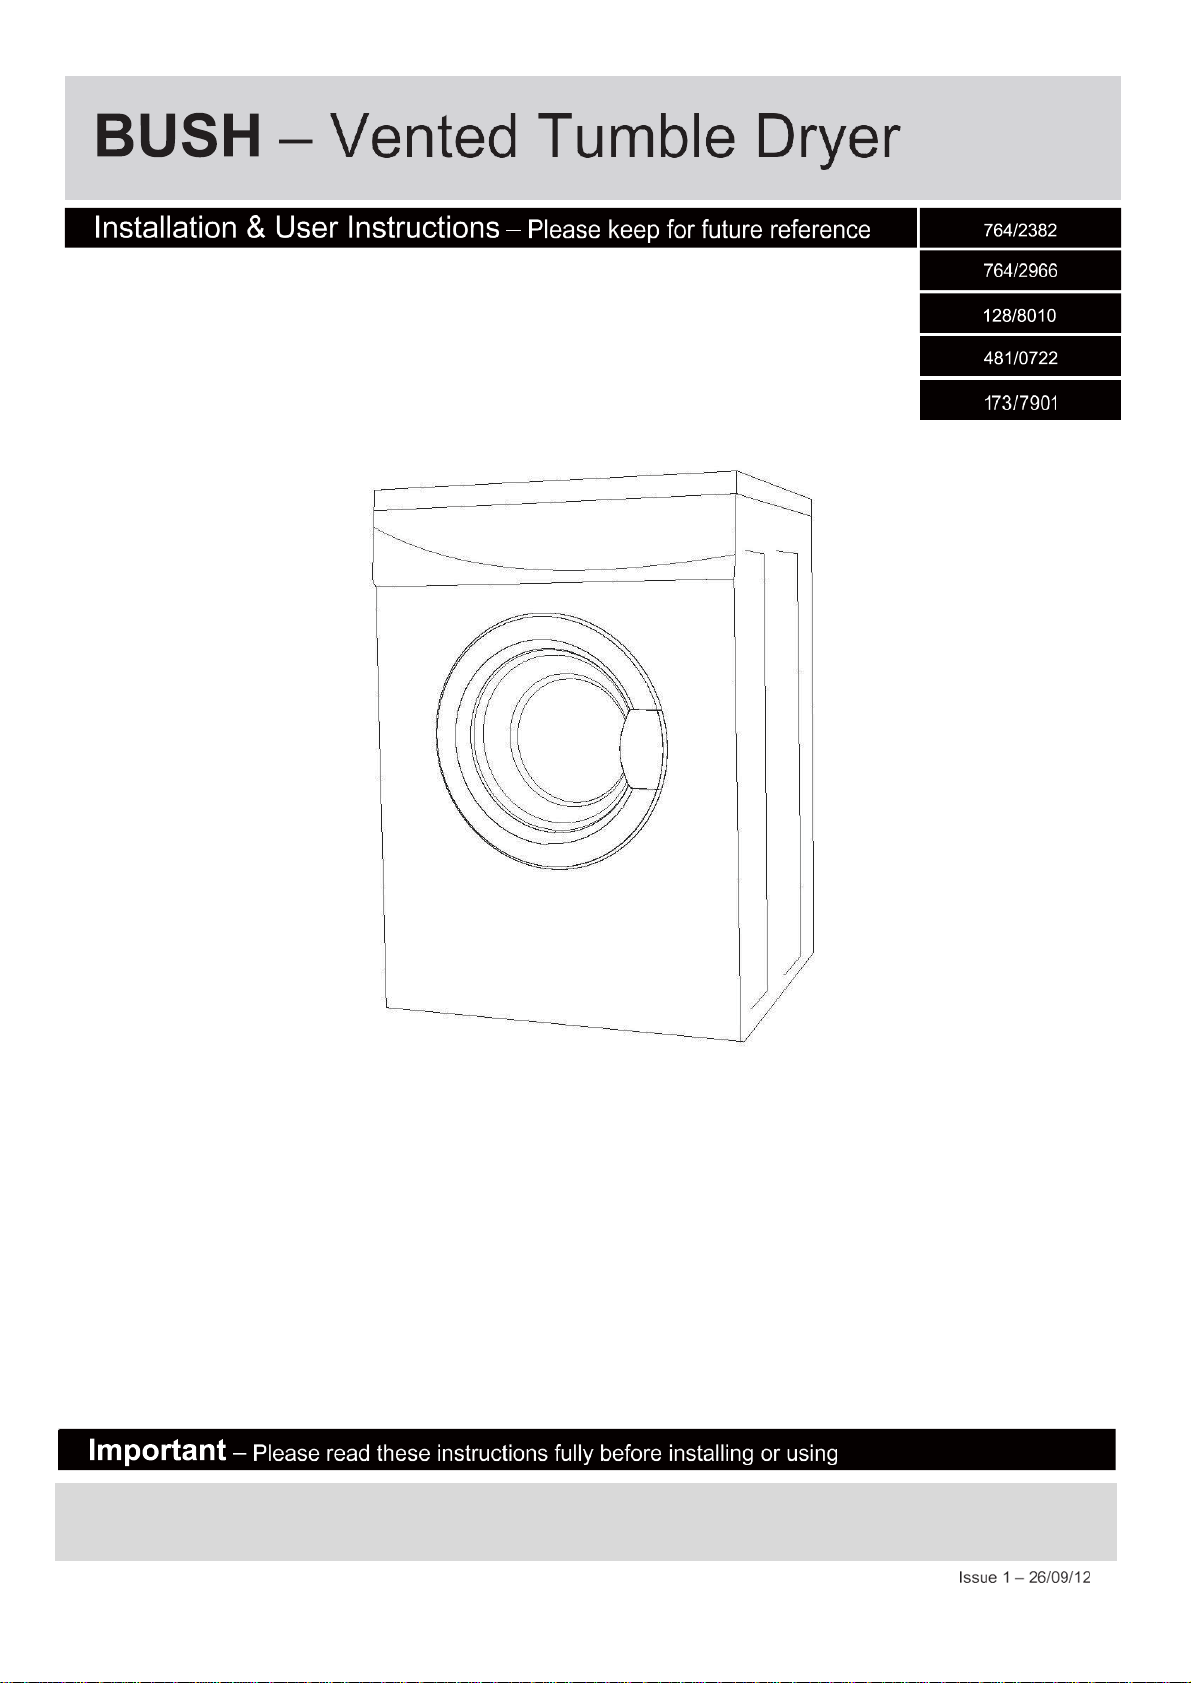
Page 1
These instructions contain important information which will help you get the best from your
appliances and ensure safe and correct installation, use and maintenance.
If you need help or have damaged or missing parts, call Customer Helpline: 0345 257 7271
Page 2
TDV6B
Page 3
Children of less than 3 years should be kept
away unless continuously supervised.
Do not attempt to repair the appliance yourself
Contact the Customer Helpline: 0345 257 7271.
Page 4
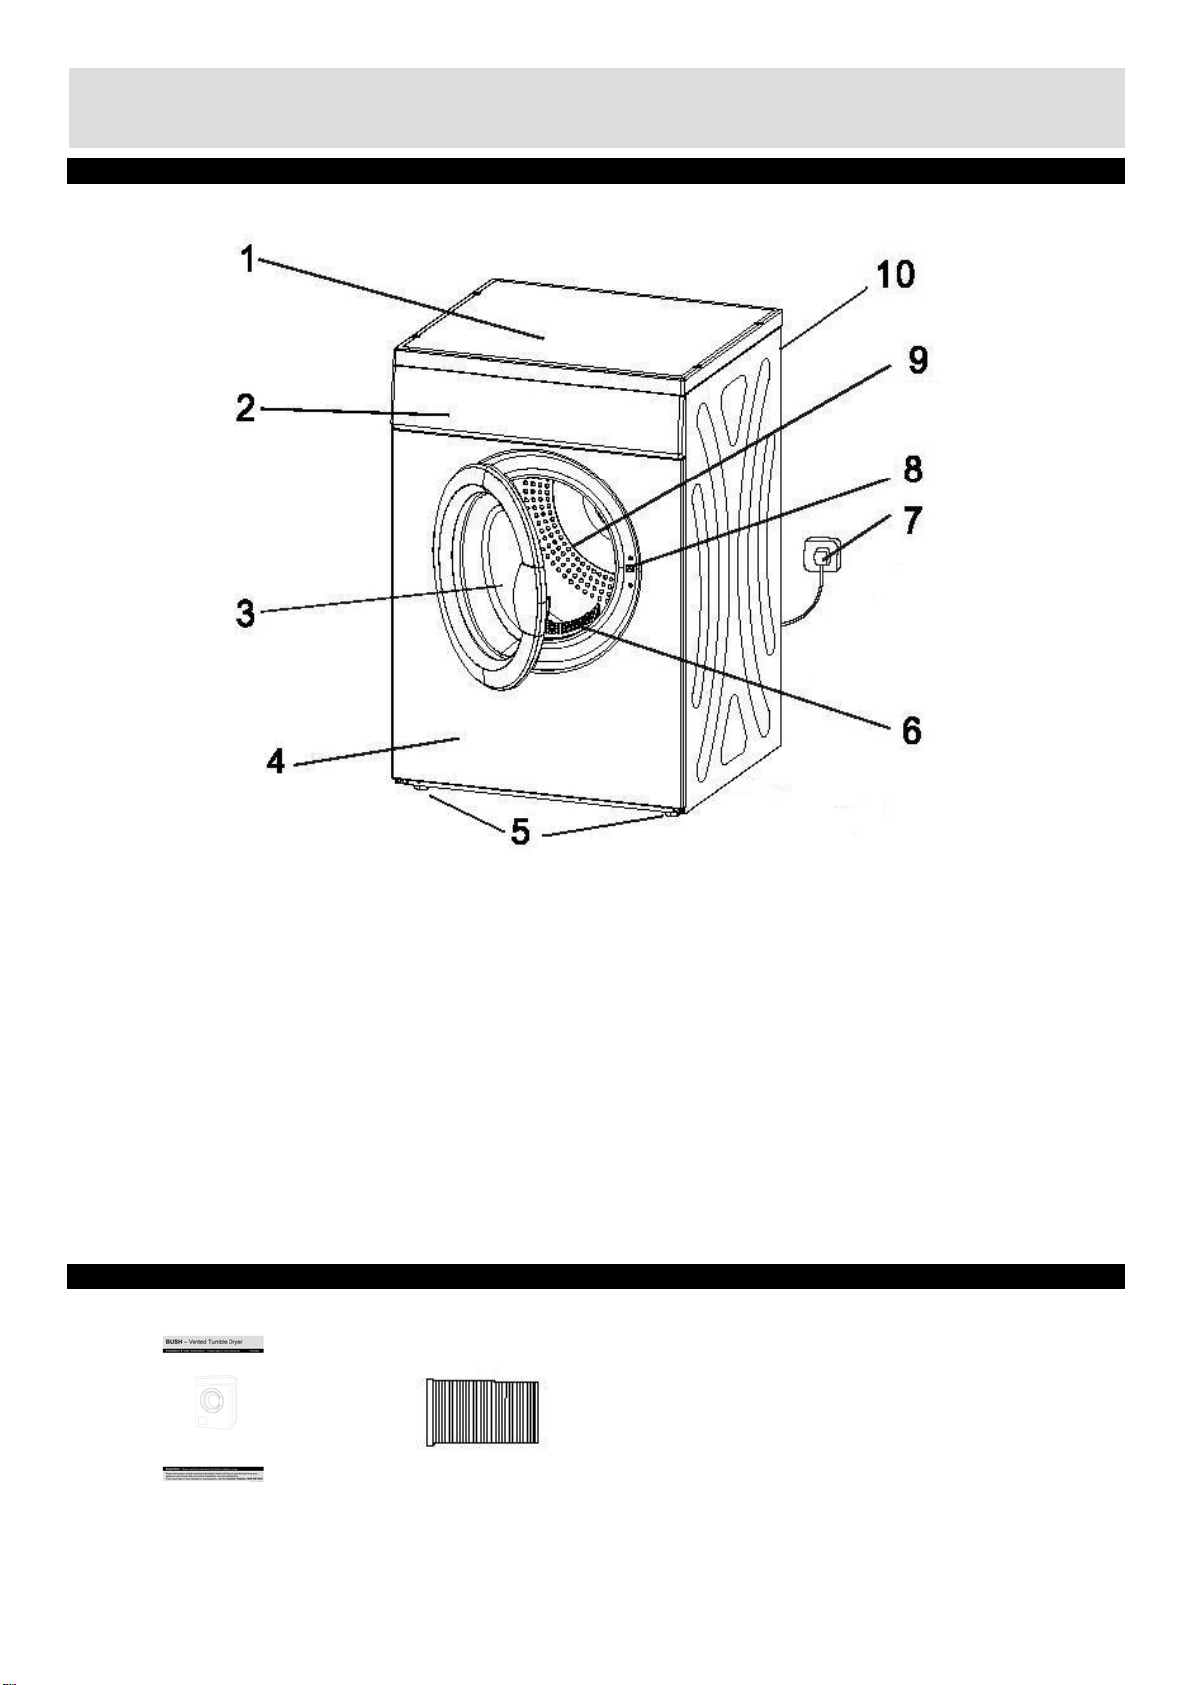
Please familiarize yourself with the parts and accessories listed below
1.
Top board
2.
Control panel
3.
Door
4.
Front case
5.
Adjustable feet
6.
Lint filter
7.
Plug
8.
Door sensor
9.
Tumble drum
10.
Overheat Safety reset switch (back)
Accessories included
Instructions x 1 Hose (2.5M) x 1
3
If you have damaged or missing parts,
call the Customer Helpline: 0345 257 7271
Parts
Page 5
Installation
Transportation
Caution: 2 people are required to
unpack and handle the appliance, it is
recommended that gloves are worn.
The appliance should be transported only in
an upright position. Do not tilt the appliance
greater than 45. The packaging as supplied
must be intact during transportation.
Do not move the appliance by pulling the door
or handle as it may damage your flooring and
wall coverings etc.
Ensure the supply cable is not caught under
the appliance during and after moving.
Carefully remove all packaging materials
including the foam base, dispose of correctly.
Installation
Ensure sufficient spacing is provided for the
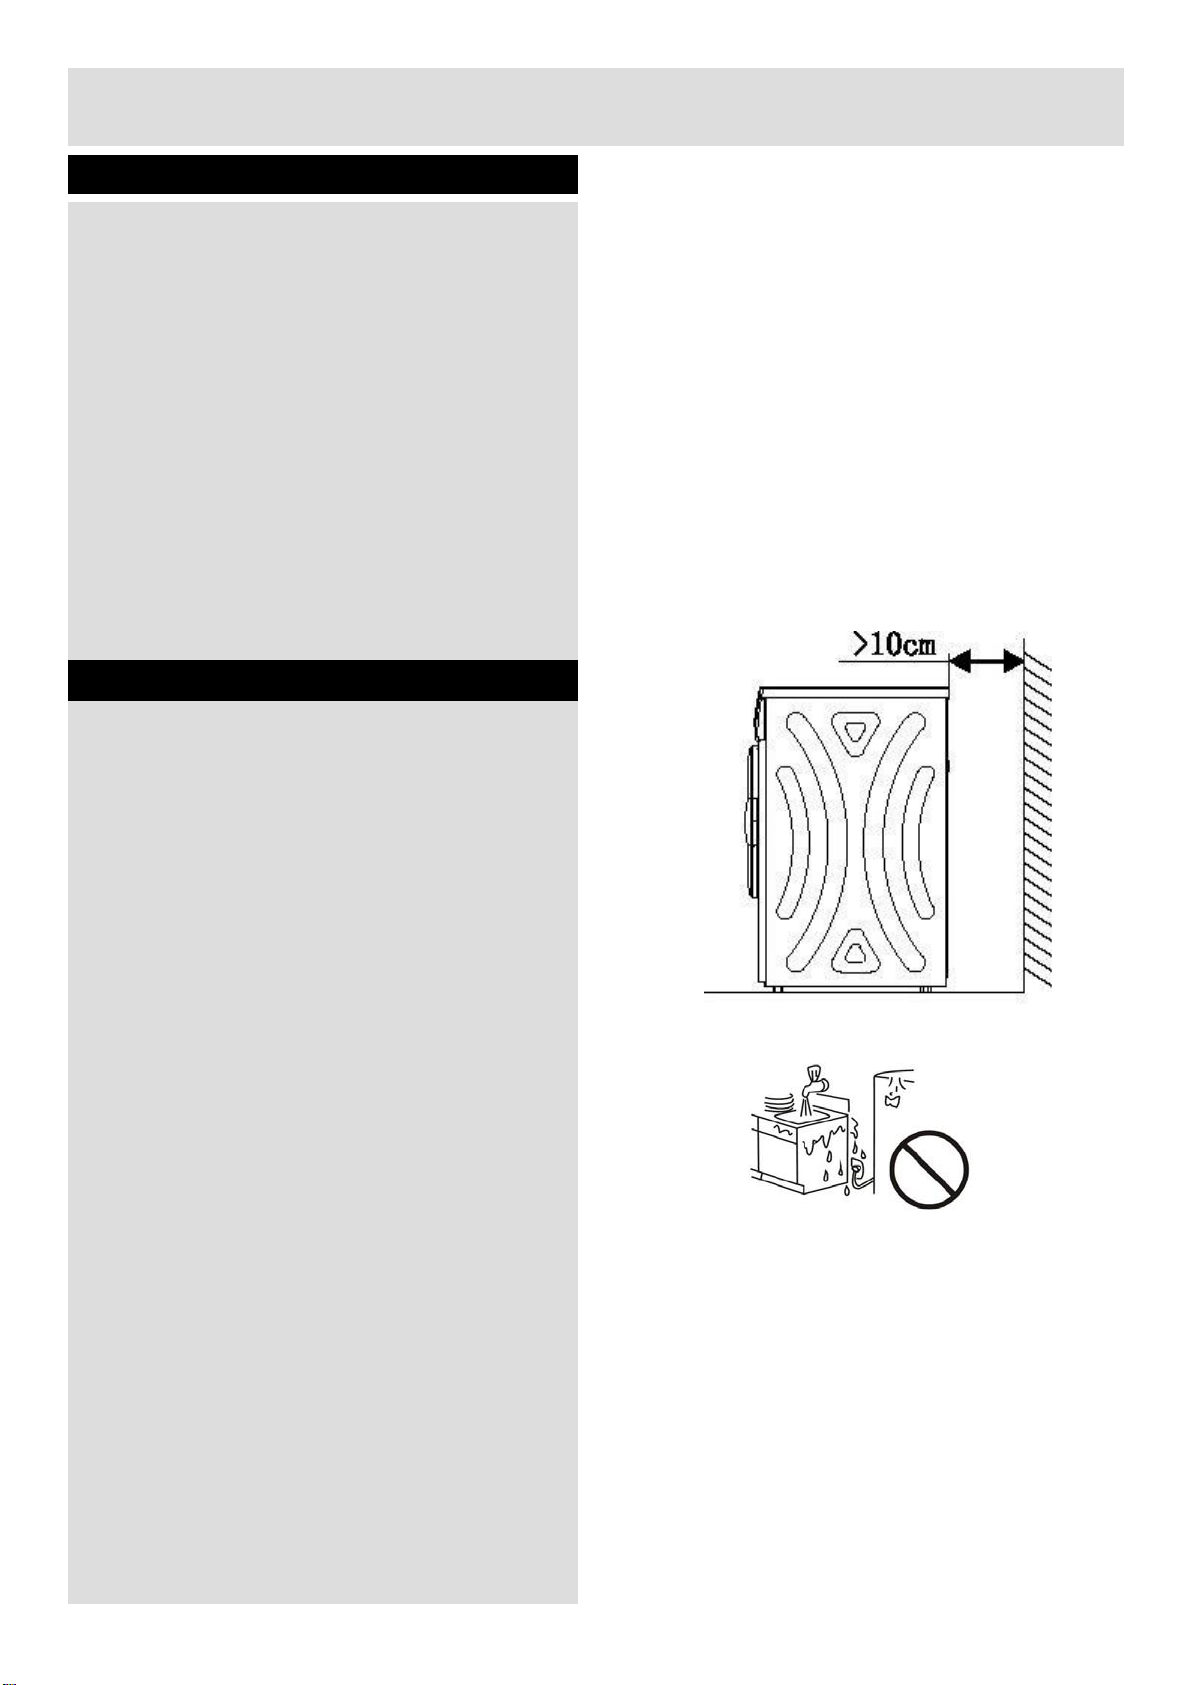
appliance to be installed. Leave space on
back (10cm) to ensure proper ventilation.
The room for putting the tumble dryer must me
kept for proper ventilation.
Make sure that your machine is not placed on
the power cord.
Do not place the appliance near a heat source
or in direct sunlight.
Do not put any heavy objects on top of the
appliance. It will damage the appliance.
Do not install the appliance in moist and wet
place.
Adjust the feet at front to level the appliance.
It should be installed on a smooth surface to
avoid excessive vibration and noise.
Never unscrew the adjustable feet from their
housings.
Refer to section “User instructions” to prepare
your appliance for use.
4
Page 6

Installation
Hose connection
Warning: 2 people may be required to
install the hose. It is recommended to wear the
gloves.
NOTE : Ventilation hose assures exhausting of
the air from the inside of the tumble dryer.
•
Carefully remove all packaging materials
including from the foam, dispose of correctly.
•
Before installation, ensure that the unit is
power off and unplug from the mains.
1.
Connect hose to the air outlet of the machine.
2.
Extended the hose to the suitable length.
3.
Route the hose to the outdoors via a window
or it can be connected to an outlet in the wall
(see the diagrams).
•
The air outlet hose must be extended directly
to the outdoors. There must be in minimum
number of elbows as not to hinder air
ventilation.
•
To prevent water accumulation in the hose,
make sure the hose is not folded on the floor.
•
In winter, the room temperature may be cold.
The water may condense inside the hose.
Period check is required to avoid hose
damaged by the water.
Warning: Do not connect the hose to the
chimney of a stove or fireplace.
5
Page 7

Installation
Electrical connection
Plug replacement (UK & Ireland only)
Should you need to replace the plug; the wires in
the power cable are coloured in the following
way:
Blue – Neutral ‘N’
Brown – Live ‘L’
Green & Yellow – Earth ‘E’
As the colours of the wires in the power cable
may not correspond with the coloured markings
identifying the terminals in your plug, and
proceed as follows:
The green & yellow wire must be connected to
the terminal in the plug that is marked with the
letter E or by the earth symbol.
The blue wire must be connected to the terminal
that is marked with the letter N.
The brown wire must be connected to the
terminal that is marked with the letter L.
If power supply cord is damaged, it must
replaced by the manufacturer or its service
agent or a similar qualified person in order to
avoid a hazard.
Any electrical work that is required to
install this appliance MUST be carried out by
a qualified electrician.
Warning: THIS APPLIANCE MUST BE
EARTHED
Before making any electrical connections,
ensure that:
Electrical safety is only guaranteed when the
earth system of your house is in accordance
with the related local regulations.
Do not damage the refrigerant circuit.
Do not bend, stretch or pull the supply cable to
avoid electric shock.
Do not use electrical appliances inside the
food storage compartments of the appliance,
unless they are of the type recommended by
the manufacturer.
Ensure the power socket is suitable for the
maximum power of the machine (fuses in the
power circuit must be 13 amp).
The supply voltage should be the same as that
indicated in the technical specifications and
the appliance rating plate.
The appliance should be earthed and in
compliance with the applicable law.
When installed, the power socket must be
within easy reach.
If the socket outlets in your home are not
suitable for the plug supplied with this unit
check with a qualified electrician for
replacement.
The use of adapters, multiple connectors or
extension cables are not recommended.
The appliance must be connected to a 220240 volt 50Hz AC supply by means of a three
pin socket, suitably earthed and protected by a
13 amp fuse.
Should the fuse need to be replaced, a 13
amp fuse approved to BS1362/A must be used.
The plug contains a removable fuse cover that
must be refitted when the fuse is replaced. If
the fuse cover is lost or damaged, the plug
must not be used until a replacement cover
has been fitted or the plug is replaced.
A damaged plug should be cut off as close to
the plug body as possible, the fuse should be
removed and the plug disposed of safely.
6
Page 8

User Instructions
Before first use
Final checks before operating the appliance
1.
Good air circulation around the appliance positioned.
2.
The feet have been adjusted for perfect levelling.
3.
Check the hose has been extended to the outdoors.
4.
Plug in the appliance.
Garment suitable for drying in tumble dryer
Before using the tumble dryer, you have to ensure the laundry is suitable to dry in the tumble dryer.
Always follow the advice on the garment labels. Dry only the laundry with the label stating they are
suitable for drying in the dryer and select the appropriate program.
Garment NOT suitable for drying in tumble dryer
Do not dry articles that have been previously cleaned in, washed in, soaked in or spotted with
petrol,/gasoline, dry-cleaning solvents or other flammable or explosive substances as they give off
vapors that could ignite or explode.
Do not dry the articles containing rubber, plastic or similar elastic materials such as padded bras,
tennis shoes, galoshes, bath mats, rugs, bibs, baby pants, raincoat plastic bags or pillows that may
melt or burn. Some rubber materials, when heated, can uner certain circumstances produce fire by
spontaneous combustion.
Do not dry clothes / articles made of foam or rubber as they may be deformed.
Clothes / articles made of or contain metal, hard plastic and similar materials, such as belt buckles,
jeans, bra wires, buttons and similar accessories will damage the machine and may cause breakdown.
Do not place such item in the tumble dryer.
Do not dry items such as woolen, silk articles and nylon stockings, delicate embroidered fabrics,
garments with metal accessories and items such as sleeping bags.
Too wet laundry or laundry with dripping water must not be put into the tumble dryer.
Preparation for the clothes to the dried
Thoroughly spin the laundry in washing machine. High spin speed can reduce the drying time and save
energy consumption.
Separate your laundry before placing them into the tumble dryer.
Sorting the laundry according to their types and thickness. Put the same type of laundry together.
7
Page 9

Page 10

Page 11

Page 12

Page 13

Care and Maintenance
General
Important: Always unplug the appliance from the power socket during cleaning and
maintenance.
Never use any sharp instruments or abrasive substances, soap, household cleaner, detergent or wax
polish for cleaning.
Use luke warm water to clean the cabinet of the appliance and wipe it dry.
Never clean the appliance with flammable fluids. It could cause a damage and fire hazard.
Clean the exterior of the appliance, inner tube and door seal with a damp cloth. Open the door for
aeration to dry the inner tube through.
Avoid water goes in the control panel. Clean with a dry cloth only.
Clean the lint filter after each use.
Clean the lint filter
Important: Always unplug the appliance from the power socket during
cleaning and maintenance.
Clean the lint filter after each use.
Pull it upward to remove the filter from the machine.
Clean the filter with the damp cloth.
Put it back to the machine after cleaning.
Moving your appliance
Moving
Refer to section “Transportation” under “Installation”
12
Page 14

Trouble Shooting
In the unlikely event of difficulties with your appliance please follow the trouble shooting guide below. If
the problem persists, contact the retailer if the machine is still under guarantee. If the machine is out of
guarantee, contact an approved service agent on 0345 257 7271.
Problem Possible cause Solution
Appliance does not
start
The mains plug is not plugged in.
Protection devices or fuses of the
electrical system at home open
Machine is overloaded.
Insert the mains plug.
Check the protection devices and
fuses.
Remove the clothes until the weight
of clothes is less than 6 kg.
Laundry has shrunk
Incorrect program is used
Clothes are not suitable for drying in
dryer.
Review the advice on garments label
to select the suitable program
setting.
Dry only the clothes which is suitable
for drying in the dryer.
Laundry not dry
enough at the end of
drying
Too many clothes put into the
machine at the same time.
Lint filter is not dirty and not yet clean
Reduce the quantity of clothes for
the drying each time. Do not
overload
Clean the lint filter after each use.
Laundry too dry
Not taken out the clothes in time while
the drying cycle is finished.
Incorrect program is used
Take out the clothes immediately
while the drying cycle is finished.
Review the advice on garments label
to select the suitable program
setting.
Noisy appliance
Not position on even surface
Appliance is touching objects around
Install on even surface and leveling
the appliance
Ensure spacing at both sides and
above the appliance
13
Page 15

TDV6B
Page 16

Guarantee
PRODUCT GUARANTEE
This product is guaranteed against manufacturing defects for a period of
Year
This product is guaranteed for twelve months from the date of original purchase.
Any defect that arises due to faulty materials or workmanship will either be replaced,
refunded or repaired free of charge where possible during this period by the dealer from
whom you purchased the unit.
The guarantee is subject to the following provisions:
The guarantee does not cover accidental damage, misuse, cabinet parts, knobs or
consumable items.
The product must be correctly installed and operated in accordance with the instructions
contained in this manual.
It must be used solely for domestic purpose.
The guarantee will be rendered invalided if the product is re-sold or has been damaged by
inexpert repair.
Specifications are subject to change without notice.
The manufacturer disclaims any liability for the incidental or consequential damages.
The guarantee is in addition to, and does not diminish your statutory or legal rights.
In the event of a problem with the product within the guarantee period call the Customer
Helpline on 0345 257 7271.
Guarantor: Argos Ltd
489 - 499 Avebury Boulevard
Central Milton Keynes
MK9 2NW
Page 17

 Loading...