

Page 1
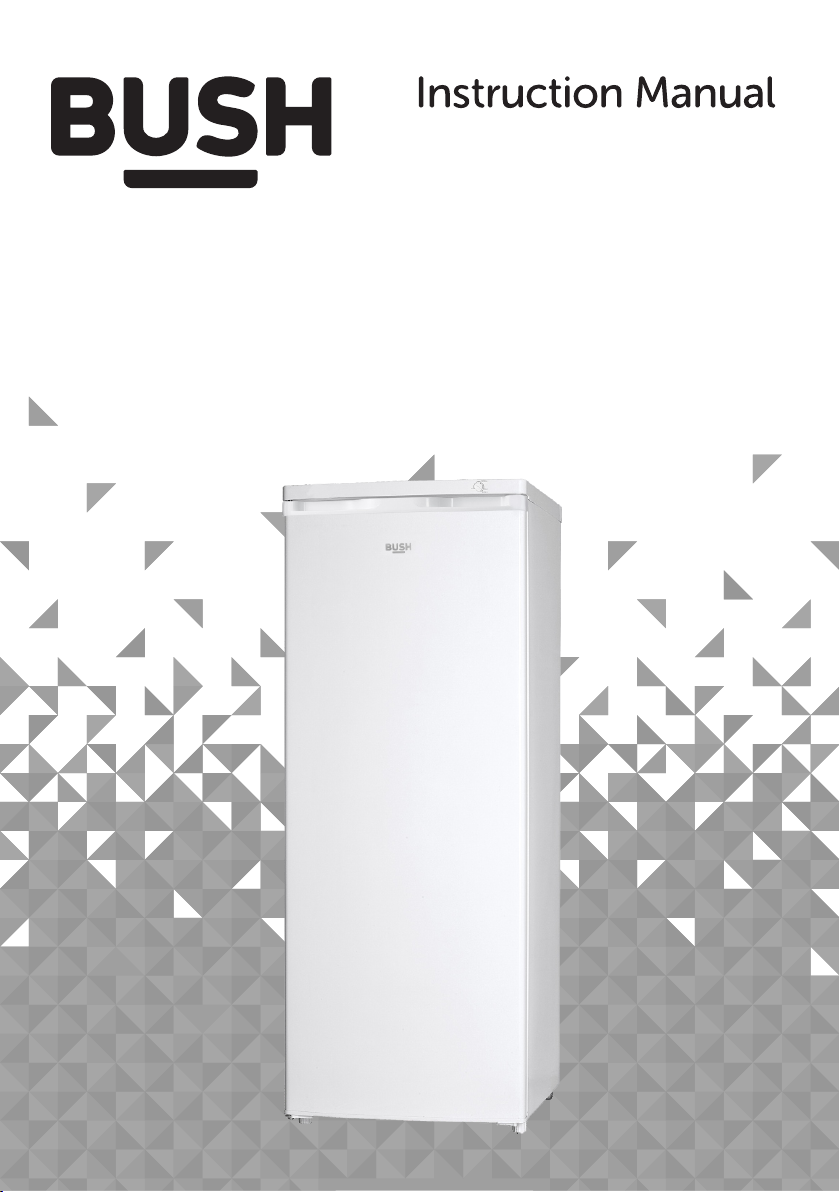
M55TFW20
Page 2

You'll soon be enjoying your new refrigerator.
It all begins here,with your instructions.Don't worry,
there's nothing too technical coming up.Just simple,
step-by-step guidance to get you up and running
quickly.Sound good?Then let's get started
Help and Guidance
We' re here to help you get the most from your refrigerator.Should you require
any guidance,a simple solution can often be found online at.
www.bush-support.com
If you assistance,call one of our experts on 0345 257 7271. still require further
Troubleshooting
2 Help and Guidanc e
Page 3

Contents
1 Safety i nformation
S afet y in formatio n 6
Getting to know 2
your refrigerator
Rea dy? Let's begin...
Par ts
14
13
Installing your3
refrigerator
Transportation 17
Insta llation 17
Do or Revers e 18
El ect rical Connection 19
4Using your
refrigerator
Before f irst u se 22
U si ng y our a ppli anc e 22
U seful i nformation 22
6Product support
Trouble Shooting 30
Help and 31assi stance
Guarantee 32
Care and Maintenance 5
Genera l 26
Po wer failure 26
Movin g y our applianc e 26
Technica l Specification s 27
0345 257 7271.
Contents 3
Page 4

Troubleshooting
Page 5

Safety information 1
Page 6
Safety information
Important-Please read these instructions fully
before installing or operating
Before use
6 Safety information
0345 257 7271.
Page 7
Safety information
Important-Please read these instructions fully
before installing or operating
Troubleshooting
Safety information 7
Page 8
Safety information
Important-Please read these instructions fully
before installing or operating
8 Safety information
0345 257 7271.
Page 9
Safety information
Important-Please read these instructions fully
before installing or operating
Troubleshooting
Safety information 9
Page 10
Safety information
Important-Please read these instructions fully
before installing or operating
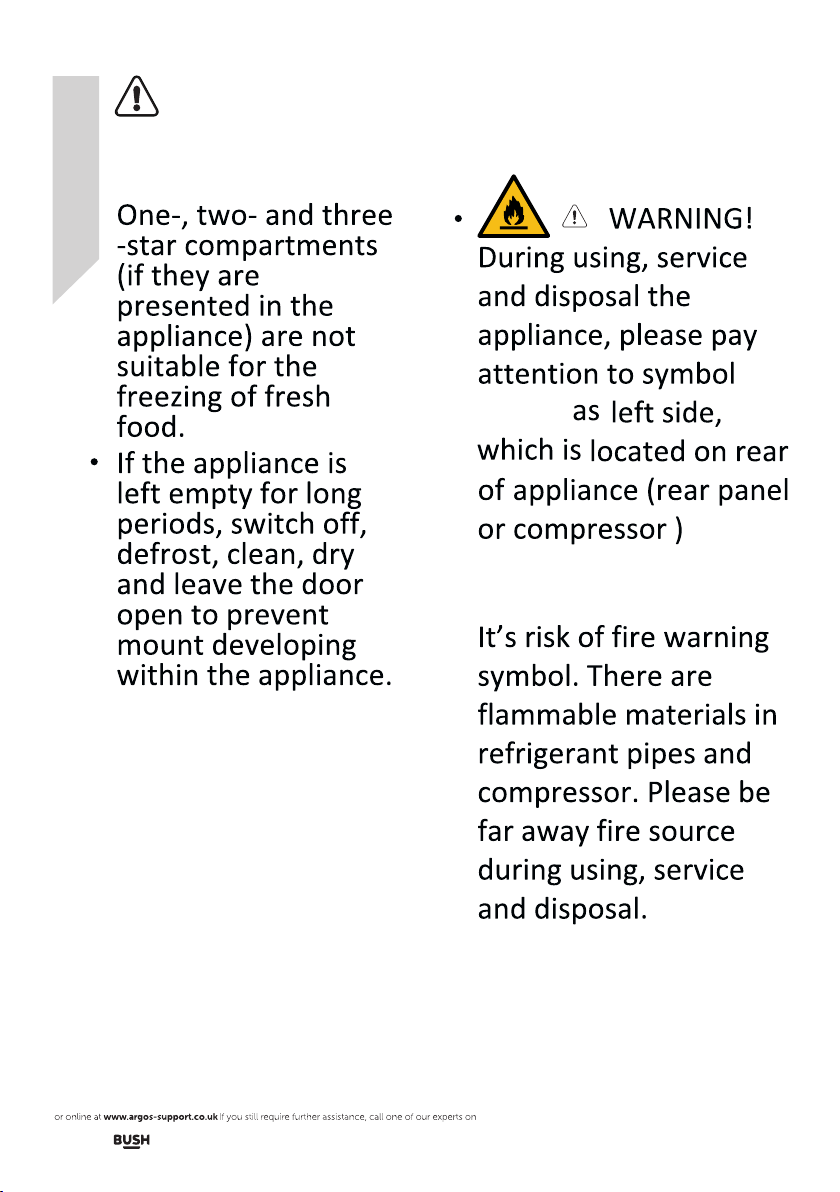
similar
and with yellow or orange
color.
10 Safety information
0345 257 7271.
Page 11

Troubleshooting
Page 12

Getting to know
your refrigerator 2
Page 13

Getting to know your refrigerator
You'll be up and running in no time
Ready?Let's begin...
Please read these instructions carefully.They contain
important information which will help you get the best
from your refrigerator and ensure safe and
correct installation and operation
If you require any further assistance,our technical
experts are happy to help.For full details,refer to
the product support section at the end of these
instructions.
0345 257 7271.
Getting to know you r refrigerator 13
Page 14

Getting to know your refrigerator
You'll be up and running in no time
Parts
1
6
2
3
1.Top cover
2.Drawers
3.C omp ressor
4.Leve lin g legs
5.Door assembl y
6.Thermostat
Accessories in clu ded
M55TFW20
5
4
Instru cti ons x 1
14 Getting to know yo ur refrigerator
Troubleshooting
Page 15

0345 257 7271.
Page 16

Installing your refrigerator 3
Page 17

Installing your refrigerator
Bringing it all together
Transportation
Caution: 2 pe opl e are required to unpack
and handle the app lia nce , it is
rec ommended that gloves a re worn.
.T he appliance should be tran spo rted only in an
uprigh t p osi tio n. Do not t ilt the appliance greate r
than 45 degrees . The packagin g as sup pli ed must
be intact during transporta tio n.
.A fter tran spo rti ng the appliance, leav e it for at
least 4 hou rs before switch ing on to allow the
coo lin g syste m to s ettle. Fai lure to comply could
res ult in damage to the applianc e.
.D o not move the appliance by pul lin g the d oor or
handle as it may damage your flo ori ng and wall
coverings etc.
.E nsure the supply ca ble i s not caught under the
applia nce during and after moving.
.C arefully remove all packag ing material s
including the foam bas e, dispose of cor rectly
Installation
.E nsure suffic ien t spacing is provid ed for the
appliance to be in stalled. Leave space on both
sides (5cm), bac k (5c m) an d abo ve the
appliance (5cm ) to en sure prop er ventilati on.
.D o not place the appliance near a heat sou rce or
in direc t sun light.
.D o not put any heav y obj ect s on top of the
appliance. It wi ll da mage the appliance.
.D o not install th e app lia nce i n a moi st and wet pl ace .
.A djust the feet at fron t to level th e app lia nce . It
should be installed on a smooth surfa ce to avoid
excessive vi bration and noise .
.Each appliance has a clim ate class (shown on the
rating plate ) whe re it indicates the temperature
ran ge of the appliance operation in place. The
appliance may not work prop erl y if it is left for a
long period at a tempera ture outside the specified
ran ge.
Climate Class
SN
N
ST
T
Amb.T.( C ) Amb.T.( F )
10~32 C
16~32 C
16~38 C
16~43 C
50~90 F
51~90 F
61~100 F
61~110 F
Troubleshooting
Instal ling your refr igerator 17
Page 18

Installing your refrigerator
Bringing it all together
Door Reverse
Warning: Rem ove the main plug before
reversing th e doo r. 2 people may be
req uired to re verse the door
1. Remove t he sc rews (6) holdi ng th e top panel (7)
to th e uni t. Remove the to p pan el.
2. Remove t he two screws (1 ) hol din g the top
hinge (5 ) (ri ght side) to the fram e. Remove t he
top h ing e (5).
3. Lift the door off the bottom hinge pin and place
it on a non-scratching s urface.
4. Remove t he two screws (8 ) hol din g the bottom
hinge (2 ). Remove the bo ttom hinge (2).
5. Remove t he left front le g (4) a nd transfer it to
the right sid e.
6. Before replacing the bottom hinge (2), re move
the hinge pin ( 9) an d reverse the direction of
the hinge (2) . Reassemble the bottom hinge (2)
on the lef t han d sid e usi ng the two screw s (8).
7. Refit th e hin ge pin (9) into the bottom hinge (2).
8. Lower the door ont o the b ottom hinge pi n (9) .
9. While holding the door in the closed positio n,
rea sse mbl e the upper hinge (5) on the left h and
side using the two s crews (1) . Do no t tig hten
the scre ws (1) until the top of t he up per d oor is
level wi th th e counter t op.
10. Refit the top panel (7) using the screws (6)
Warning: Please make sure th e uni t to
be tilte d more than45 degre e to access
the bottom hinge. It is advised to l eave the unit for
4 hours to allow the cooling to s ettle before
switch o n.
Levelling the appliance
1.Rotate feet clockwise to h eighten.
2.Rotate feet anti c loc k wis e to lower.
FIG URE 1
Doo r openi ng from le ft side
FIG URE 2
Doo r openi ng from ri ght sid e
18 Insta lling your ref rigerator
0345 257 7271.
Page 19

Installing your refrigerator
Bringing it all together
Electrical connection
Any e lec trical work that is required to
instal l this appliance MUST be c arr ied out
by a quali fie d ele ctr ician.
Warning: THIS APPLIANCE M UST B E
EAR THE D
Bef ore making any e lec trical connecti ons ,
ensure t hat:
.E lectrical safety is only guaranteed when the ea rth
system of y our h ouse is in accordan ce wi th th e
rel ated local reg ulations.
.D o not damage the refr igerant c ircuit.
.D o not bend, stre tch or pull the supply cable to
avoid electric shock.
.D o not use electrical appliance s ins ide t he food
sto rage c omp art ments of the appliance, unless
they are of the type recom men ded b y the
manufa cturer.
.E nsure the powe r soc ket is s uitable for th e
max imu m power of the machine (fuses in the
power ci rcuit must be 13 a mp) .
.T he supply voltage s hou ld be the same as that
indica ted in the techn ica l spe cifications and t he
appliance rating plate.
.T he appliance should be earthed and in
com pli anc e wit h the a pplicable law.
.W hen installe d, th e power socket must be within
easy reach.
.I f the socke t outlets in your home are n ot suitable
for t he plug supplied with this unit check with a
qualified e lec tri cia n for re pla cem ent.
.T he use of adapters, m ultiple connectors or
ext ension cables are n ot recommended.
.T he appliance must be con nec ted to a 220-240
vol t 50H z AC su pply by means of a thre e pin
socket, suitabl y ear the d and prote cted by a 13
amp fuse.
.S hould the fuse need to be re pla ced , a 13 amp
fuse approved to BS136 2 mus t be used.
.T he plug contai ns a remova ble f use cover that
must be refitt ed wh en the fuse is replaced. I f the
fuse cover is lost or damaged , the p lug m ust not
be used until a replacement cover has been fitte d
or the plug is re placed.
.A d amaged plug should be cut off a s clo se to the
plug body as possi ble , the f use s hou ld be removed
and the plug dispo sed o f safely.
Instal ling your refr igerator 19
Plug rep lac eme nt (UK & Irel and o nly )
Should you ne ed to replace the plu g; th e wires
in the power cable are col oured in the
fol lowing way:
Blue Neutral 'N'
Bro wn Li ve 'L'
Gre en & Yellow Ea rth 'E'
As the col ours of the wires in th e power cable
may n ot correspond wit h the c olo ured
markings id ent ify ing t he terminals in you r
plug, and pro cee d as follows:
The gree n & yellow wire mu st be connecte d to
the term ina l in th e plug that is marked with the
letter E or by the earth sym bol.
The blue wire m ust be connected to the
ter min al th at is marke d with the lette r N.
The brow n wire must b e con nec ted to the
ter min al th at is marke d with the lette r L.
If the power su ppl y cord is damage d, it m ust be
rep lac ed by the manufactu rer or its service
age nt or a s imilar qualified person i n order
to avoid a hazard.
Troubleshooting
Page 20

0345 257 7271.
Page 21

Using your refrigerator 4
Page 22

Using your refrigerator
Getting the most from your appliance
Before first use
2. Stori ng frozen food
Final check s before op erating t he ap pli anc e
1. Good air circulatio n around the appliance
positioned.
2. Th e feet h ave been adjusted for per fect
levell ing.
3. Clean the compartment pe r recommendatio n
in section Care an d Mai ntenance .“ ”
4.Plug in the a ppl ian ce
The comp ressor start s up an d in
operation may produce some backgro und n ois e
and it is normal, th is is n ot a defect .
Using your appliance
1. Temperature adju stm ent
.T he compartment te mpe ratu re can be set by
the thermostat betwe en "M IN" a nd
"MAX" (cold est setti ng) . We recommend
settin g the thermostat midway f irst.
.To en sure the compartm ent i s maintained a t
the desired temperat ure, it is advised to
monito r the temperat ure periodicall y by a
thermomet er and adjust the thermostat
accordingly.
.L oad the appliance afte r swi tch on for a wh ile
to al low t he temperatu re rea ch th e des ired
settin g.
.T he freezer compartment is 4 Star rated
and suitabl e for the fre ezing and storage of
pre -frozen food.
.C heck the food packaging for su gge stion
before st orage.
Useful i nformation
The following guidelines and recommendations
are s ugg ested to ob tain the best re sul ts an d
sto rage hygiene.
Fre que nt door openings can cau se th e internal .
tem perature to rise so the door should be closed
as soon as possible.
For hygiene re asons, it is always a good pract ise .
to pa ck, w rap and cover th e food before storing.
Use a polythene bag to store raw meat and pl ace .
on the lowest shelf. Avoid contact with cooked
foo d to prevent contami nation. For safety
rea son , store raw meat for two to thre e days o nly.
Cooked dishes must be stored in airtig ht covere d .
con tainers .
Foo d sho uld cool to room temperat ure..
Most vegetab les s hou ld be b lan ched and chilled .
before freezing.
Do not leave frozen fo od at room te mpe rature to .
thaw. You cou ld defrost the food by putt ing it in
the fridge to thaw slowly. Make s ure you avo id
def rosting food f rom dropp ing food juices on
to ot her food.
22 Using your refrigerator
Troubleshooting
Page 23

Using your refrigerator
Getting the most from your appliance
Energy s aving tips
Place yo ur fr idge away from direc t sun light, .
you r oven or any othe r hea t sources. Allow
20 cm clear spa ce on b oth s ide s and a bove,
and at lea st 5 cm behind.
Cover al l food stored, and arrange it so that cold .
air can ci rculate f reely.
Higher cold s etting will use more ene rgy. Do n ot .
set to maximum cold if it is not neces sar y.
Cool the hot/war m food to room temperature .
before put them into your fridge.
Fre que ntly opening and closing the door will .
cau se th e internal tem perature to rise and it
will con sum e more energy.
Close the door(s ) properly, and m ake sure th e .
seals and hinges a re airtight. Chec k the s eal s by
puttin g a she et of paper between t he do or an d
the main body of the f rid ge. If the paper moves,
you r sea ls ne ed replacing.
Def rost regu lar ly if your refri gerator is not a .
fro st-free or cyc lic d efrost mo del . Accumulate d
ice layer should not be more th an 5 mm t hic k.
The pre- set combination of drawers , baskets a nd .
shelve s have alre ady b een s et in the most
eff ici ent way for the use of this product.
Defrosting
.T he appliance require s defrost ing o nce or twice
a yea r whe n the i ce layer th ick nes s
5~10mm. Unp lug t he ap pli anc e from the mains
before defrosting.
Rem ove all frozen food from the freezer an d .
rol l it fi rmly in newspapers. Put it into a
con tainer in a cool place for temporar y storage.
Use an ice scraper (not provi ded ) or si milar tool .
to remove the ice layer. This process can be
speeded up by p lac ing a p ot
Empty th e def rosting w ater and clean the .
fre ezer.
Turn o n the f reezer and set to maxi mum .
tem perature. Re fill the froz en foo d to freezer.
This pro ces s should be completed wi thi n .
2 hours.
0345 257 7271.
Using yo ur refrigerator 23
Page 24

Troubleshooting
Page 25

Care and Maintenance 5
Page 26

Care and maintenance
Looking after your appliance
General
Important: Always un plug the appliance
fro m the p ower socket during cleaning
and maintenance.
.N ever use any sha rp instruments or a brasive
substances, soap, household cleaner,
detergent or w ax polish for cl ean ing .
.U se luke warm wate r to clean the cabinet of th e
appliance and wi pe it d ry.
.N ever clean the applian ce wi th fl amm able
fluids. It co uld cause damage and a fire hazard.
.C lean the exter ior o f the a ppl iance and door
seal with a dam p clo th an d dry i t through.
.Avoid w ater goin g into the temperature
con trol box. . Cle an wi th a dr y clo th only.
.C lean the condenser (located at the back of
the appliance) w ith a vacuum cleaner. It is
suggested to remo ve the dust ever y year.
.S helves are all removable for cleaning purpose.
Important: Care must b e take n whi le
cleaning /carrying the app lia nce n ot to
tou ch th e bottom of the co nde nse r metal wires
at th e bac k of th e app lia nce, as this could cause
injury to fin gers and hands.
Rem arks: Full appliance will stay co ld lo nger
than a partially f ill ed on e.I f ice crystals a re still
visible on th e food, it may be frozen a gain,
although flavour and arom a may be affected. If
foo d is found to b e in a po or condition, it is best
to th row it away.
Short va cation
There is n o nee d to disconnect the appl ian ce
fro m the m ain s if you will be away for two to
three weeks. Use up the perishab le food.
Long vac ation
Rem ove all the food i f you are away for th ree
wee ks or m ore. Unplug the applia nce a nd le ave
the doors ope n to provid e air c irculation t o
pre vent odour and mould.
Movin g your appliance
Moving
Refer to se ction “Tra nsp ortation”
under “Installation”
Pow er failure
In ca se th ere is a power fai lure, you s hou ld
take the following actions:
If it last s les s tha n 24 hours, keep the doors
closed. This wil l all ow th e stored food to stay
col d as lo ng as p oss ibl e. If it lasts more tha n
24 hours , it is advised to empty the freezer
com par tme nt and tempora ril y store the food
in a porta ble f reezer or using artificial ice packs .
Try to stay cold for a s lon g as po ssi ble .
26 Care an d mai ntenance
0345 257 7271.
Page 27

Care and maintenance
Looking after your appliance
Technica l Spe cif ications
Model M55TF W20
Energy efficiency class A+
Energy consumption Kwh/year 2 15
Net storage volume fresh food (litres) /
Net storage volume frozen foo d (li tres) 163
Total n et storage (litres) 163
Frozen food compartment rating 4star
Climate class N/ST
Operating noise leve l dB( A) 42
Minimum Operation Temperature 16 C
Pro duc t Dim ension 550mmx 580 mmx 1430mm
°
Disposal information
The symb ol on t he product or its packaging indicate s that this prod uct m ay not be
tre ated as household waste . Instead i t sho uld be handed over to t he ap pli cable
col lec tio n poi nt for the recycling of electrica l and e lectronic equip men t , By
ensuring this product is disposed of correc tly, yo u wil l help prevent potential
negative con seq uen ces for the envi ronment and human h eal th , wh ich could
otherwise be cau sed b y inappropriate waste h and lin g of this product . For m ore
detail ed inform ati on about recyc lin g thi s product , please co ntact your loc al
cou nci l office , your household waste disposal service or the shop wh ere the
pro duc t was purchase d .
Rem emb er : Ol d fridges must b e dis pos ed of caref ull y - old er mo del s contain C FC gases
that are harmful - if in doubt , co ntact your loc al co uncil for deta ils on how to dispose o f
an old fridge .
Care and m aintenance 27
Troubleshooting
Page 28

0345 257 7271.
Page 29

Product support 6
Page 30

Product support
Help is always at hand
Troubleshooting
If you have a pro blem with your product, t hese questions may be able to assist you?
Question- App liance does not work .
Answer
Appliance is not s witched on - Switch o n the a ppl iance.
Mains plug is not pl ugged in o r is lo ose . -Insert mains plug.
Fuse has blow n or is d efectiv e - Che ck fuse, replace if nece ssa ry.
Socket is defective - Mains ma lfu nct ion s are to be cor rected by an electr ici an.
Question - Appl iance cools too much.
Answer
Temperature is too cold - Adjust the thermostat dial to a wa rmer setting.
Question - The food is too warm.
Answer
Temperature is not properly adjusted - A dju st the thermostat to a cooler setting.
Door was o pen for an ex ten ded period - Open the door only as long as necessary.
A large quantity of warm food was placed i n the a ppl ian ce - Ad just the thermost at
to a co ole r setting. Cool war m food before placin g in th e refrigerator.
The appliance is n ear a h eat source - Pos ition the refr ige rato r away f rom a heat sourc e.
Question-He avy b uild up of frost, possibl y also on the door se al.
Answer
Door seal is not air t igh t - Carefully wa rm the leaking sections of the door seal wit h a
hair dryer( not h otter than approx 50 degree) . At the same t ime s hap e the warmed door seal
by hand such th at it s its correctl y.
Question - Water on the f loor or on storage shel ves .
Answer
Wate r drain hole is blocked - Rem ove food re sid ue or ice from the entrance of the drai n hol e.
Question - Appl iance is making u nusual noises
Answers
Appliance is not l evel - Readjus t the f ront levelling fee t.
Appliance is in co ntact with wal l or ot her o bjects. - Push appliance away a short dista nce
A part at th e bac k of th e app liance,e. g.a tube, is in conta ct with another appliance part or
wal l - Gently bend this part away carefu lly if necessary
30 Produ ct su pport
Troubleshooting
Page 31

Product support
Help is always at hand
Help and assiance
If yo u require any technical guidanc e or fi nd th at your ref rigerator is not operating as intende dЈ
a simple solu tio n can o ften be fou nd in t he Troubleshooting se cti on of t hes e instruction or online at
www.bush-s upp ort .co m
If yo u still require fur the r assistance Ј call one of our ex per ts on 0 345 2 57 72 71.To help give us give
you a fast and eff icient service please have the follo win g informatio n ready.
Model Ref.
Serial number
Date of purchase
Local ca ll rat es ap plies*
You can find these on
the rating plate- a sma ll
information panel Ј usually
a sti cker or metal plateЈon
the rear o f your appliance
This will be sh own o n
you r receipt
Line open 8am-7pm Monday to Saturday and 10am-4pm Sunday
*Calls to B may attra ct a charge and se t up fee from residential line s dep end ing ush enquiry lines
on yo ur ca ll plan/tariff. Mobile and other prov iders cos ts may vary, see www.bt. com/pricing for d etails.
For s ecu rit y and training purp ose Ј telephone ca lls t o and from custo mer serv ice centres maybe
rec orded and monitored.Call from Republic of Ire land will attract inter national call charges.
This appliance c omp lies with the fo llo win g EEC directiv es:
2014/35/EEC Low voltage d irective
2014/30/EU EMC d irective
0345 257 7271.
Pro duc t sup por t 31
Page 32

Product support
Help is always at hand
Call us now and activate your 12 month guarantee
Thank you for choosing Bush. Your new product is guaranteed against
faults and breakdowns for 12 months.Don't forget to register it with us
today so we can provide you with our best possible after-sale service
and useful upd ates.
www.bushregistration.co.uk
FREEPHONE*
0800 597 8548
Lines are ope n 8am -8pm,365 days a year.* Call may be recorded and monitored.
Your Bush Guarantee
This pro duc t is guaranteed for twelve months from th e date of original purchase. Any defect
that ari ses d ue to faulty materials or workman shi p wil l be repaired fr ee of charge (or i f
applicabl e the p roduct will be repl ace d or the purchase price refundedЈwhere possible
during this peri od by t he de aler from who yo ur pu rchased unit.
. The guarantee does not c over
accidental damageЈmisuse cab ine t
parts, knobs or co nsumable items.
. The prod uct m ust be correct ly in stalled
and operated in accordance with the
instru cti ons conta ine d in th e man ual
. It must be u sed s ole ly for domesti c
purposes. The gu arantee w ill
be re nde red invalid if the product is
To find out how we an d Dom estic & Genera l Ins urance Plc use your d ata please refe r to th e
The guarantee is subject to the following provisionsЈ
re- sol d or ha s bee n damaged by inexpe rt repair.
. Specifications are subject to cha nge
without notice .
. Bush disclaim any liability fo r los s or da mage
arising fro m the breakdown of the prod uct
. This guarantee is in add iti on to and does not
diminish yo ur statut ory o r legal rights
Important Data Protection Information
guarantee re gistrat ion m aterial or vis it ww w.bushregistrations.c o.u k
32 Produ ct su pport
Troubleshooting
Page 33

0345 257 7271.
Page 34

Troubleshooting
Page 35

0345 257 7271.
Page 36

Contact
www.bush-support.com
Helpline:0345 257 7271
CKBSH-F03
 Loading...