

Page 1
Page 2

Audio-Photo-Video Player User Manual
Please read this instruction manual carefully before operating this product, and store it well
for future reference. Product images and illustrations are for illustrative purpose only, please
always refer to the real product. This instruction manual may subject to changes for
improvement without prior notice.
Safety Warnings and Maintenance
Please read ALL safety warnings and precautions before attempting to use your player to
avoid injury.
Important Safety Information
WARNING: Failure to follow the following safety instructions could result in fire, electric shock, or other
injury or damage.
1. Avoid water, liquid and wet/damp locations. Do not use the player in rain, near
washbasins or any other wet locations. In the instance where the player gets wet,
unplug all cables, turn the player off and dry it out thoroughly before switching it back
on again.
2. Repairing the player. Never attempt to repair the player yourself, as it does not
contain any user serviceable parts. The rechargeable battery in the player should only
be replaced by an authorized service centre.
3. Listening to loud sounds for prolonged periods may permanently damage your
hearing. Before putting on the earphones turn the volume down then put the
earphones on and slowly increase the volume until you reach a comfortable listening
level. If you experience ringing in your ears or muffled speech, stop listening and have
your hearing checked. Hearing experts suggest that to protect your hearing as
follows:
• Limit the amount of time using earphones or headphones at high volumes.
• Avoid turning up the volume to block out noise from the surroundings.
• Turn the volume down if you can’t hear people speaking near you.
4. Using earphones or headphones whilst operating a vehicle of machinery is not
recommended and is illegal in some areas. Be careful and attentive, stop using your
player if you find it disruptive or distracting while operating any type of
vehicle/machinery or performing any other activity that requires your full attention.
- 1 -
Page 3

Audio-Photo-Video Player User Manual
Important Handling Information
CAUTION: Failure to follow these handling instructions could result in damage to your player
and or other equipment.
1. Never force a connector into a port. Check for obstructions on the port. If the
connector and port do not interface with reasonable ease they probably do not match.
Make sure that the connector is matching with and is positioned correctly in relation to
the port.
2. When connected to a USB port, do not remove the USB device whilst it is being
accessed. Electrical interference and electrostatic discharges may cause malfunction
and damage to the USB device and thus may result in loss of data. It is strongly
recommended to back up all important data on a PC in order to protect
against corruption, data loss or device malfunction. Please note that the
manufacturer shall not accept any liability for damage or loss of stored data.
3. The player operates best in temperatures between -5º and 40º C. Its play time may
temporarily shorten when it is operating in low-temperature conditions.
4. Store your player in a place where the temperature is always between -5º C and 40ºC.
Do not leave your player in the car as temperature in parked cars may exceed this
range.
5. To clean the player, unplug all cables, turn the player off. Then use a soft, slightly
damp, lint free cloth. Avoid getting moisture in openings. Do not use window cleaners,
household cleaners, aerosol sprays, solvent cleaners or abrasives to clean your player.
6. To minimize static electricity, avoid operating the player in an extremely dry
environment. In an environment with electrostatic discharge, this may cause
malfunction to the product and reset may be required.
- 2 -
Page 4

Audio-Photo-Video Player User Manual
Table of Contents
Safety Warnings and Maintenance................................................... 1
Important Safety Information .................................................................................1
Important Handling Information.............................................................................2
Table of Contents..................................................................................... 3
Package Content...................................................................................... 6
Getting Started......................................................................................... 6
Features .......................................................................................................................6
Product Overview.......................................................................................................7
Charging the Battery.................................................................................................7
Turning On/Off the Player ........................................................................................8
Hold Function..............................................................................................................8
Reset Feature..............................................................................................................8
Using Micro SD Card..................................................................................................9
Inserting the Micro SD Card.................................................................................................9
Removing the Micro SD Card ...............................................................................................9
Connecting to the Computer ............................................................. 10
System Support........................................................................................................10
Connecting the Player to the Computer ..............................................................10
Transferring Files......................................................................................................10
MSC Mode ..............................................................................................................................11
MTP Mode - For Windows
MTP Mode - For Windows
®
XP users: ...............................................................................12
®
Vista users:...........................................................................14
Formatting the Player..............................................................................................15
MSC Mode ..............................................................................................................................16
MTP Mode - For Windows
MTP Mode - For Windows
®
XP Users:...............................................................................17
®
Vista Users: ..........................................................................17
Disconnecting the Player from the Computer ....................................................17
MSC Mode ..............................................................................................................................17
MTP Mode...............................................................................................................................17
Basic Operation...................................................................................... 18
Calling up the Menu.................................................................................................18
How to Navigate the Menu.....................................................................................18
Music........................................................................................................... 18
Starting Playback .....................................................................................................19
Pausing Playback......................................................................................................19
- 3 -
Page 5

Audio-Photo-Video Player User Manual
Selecting Next/Previous Track...............................................................................19
Fast Forwarding/Rewinding Current Track ..........................................................19
Adjusting the Volume Level ...................................................................................19
Music Player ..............................................................................................................20
Lyrics Display............................................................................................................20
Settings......................................................................................................................20
Audio Setup ...........................................................................................................................21
Play Mode...............................................................................................................................21
Add To Favourite...................................................................................................................22
Removing a Track from My Favourite List........................................................................22
Clearing Up the My Favourite List .....................................................................................23
Video........................................................................................................... 24
Starting Playback .....................................................................................................24
Pausing Playback......................................................................................................24
Stop Playback ...........................................................................................................24
Select Next/Previous Video File ............................................................................24
Fast Forwarding/Rewinding Current Track ..........................................................24
Adjusting the Volume Level ...................................................................................25
Video Player ..............................................................................................................25
Deleting a Video File................................................................................................25
Settings......................................................................................................................25
Select Time............................................................................................................................26
LCD Expand ...........................................................................................................................26
Record........................................................................................................ 27
Start Recording ........................................................................................................27
Pause Recording .......................................................................................................27
Stop Recording .........................................................................................................27
Voice Recorder..........................................................................................................28
Selecting Record Rate.............................................................................................28
Playing a Voice Record............................................................................................28
Deleting a Record File .............................................................................................29
Time............................................................................................................ 30
Photo .......................................................................................................... 30
Settings......................................................................................................................30
Viewing Picture in Thumbnail.............................................................................................30
Viewing Pictures in Slide Show ..........................................................................................31
Selecting Slide Show Duration...........................................................................................31
Text............................................................................................................. 32
Scrolling through the Book ....................................................................................32
Deleting a Text File ..................................................................................................32
Settings......................................................................................................................33
- 4 -
Page 6

Audio-Photo-Video Player User Manual
Page Jump..............................................................................................................................33
Save Mark ..............................................................................................................................33
Load Mark .............................................................................................................................. 33
Delete Mark ...........................................................................................................................34
Set Font..................................................................................................................................34
Set Color ................................................................................................................................34
Browse Mode .........................................................................................................................35
Flip Time.................................................................................................................................35
Browse....................................................................................................... 35
Settings ..................................................................................................... 36
Light Time .................................................................................................................36
Brightness .................................................................................................................36
AutoShut Time..........................................................................................................37
Desktop Wallpaper...................................................................................................37
Time............................................................................................................................37
Default .......................................................................................................................38
USB Mode ..................................................................................................................38
System Information.................................................................................................38
Troubleshooting..................................................................................... 39
Contact Details ....................................................................................... 39
Technical Specifications...................................................................... 40
Product Guarantee................................................................................ 41
- 5 -
Page 7
Audio-Photo-Video Player User Manual
Package Content
Main Unit
Quick Start Guide
USB cable (for PC connection and
battery charging)
Earphone
(User Manual is included)
Driver Disc
Getting Started
Features
• 3” TFT color screen
• WMA/MP3/OGG music player
• Video player (.AVI, .RM, .RMVB)
• MPEG4 / WMV9 Decoding
• Photo player (.JPEG, .BMP, .GIF)
• Voice recording (.WAV) and playback
• E-book reading (.TXT)
• Lyric Synchronous Display
• Easy navigation folder & file
• Micro SD card
• WMA DRM support
• USB mass storage device and MTP
• Integrated USB connector
• Superb audio quality
- 6 -
Page 8

Product Overview
A B C D E F G
Audio-Photo-Video Player User Manual
A. Screen
B. Previous/Rewind/Up Button
C. Microphone
D. Volume Down Button
E. Power/OK Button
F. Next/Fast Forward/Down Button
G. Volume Up Button
H. Micro SD Card Slot Door
I. Hold Switch
J. Menu/Exit Button
K. Reset Opening
L. Headphone Socket
M. Strap Holder
N. USB Port Cover
H I J K L M N
Charging the Battery
The player comes with a rechargeable battery. On the
first charge before using, this will take approximately 8
hours for the battery to be fully charged. But thereafter it
would normally take 3 hours to be fully charged.
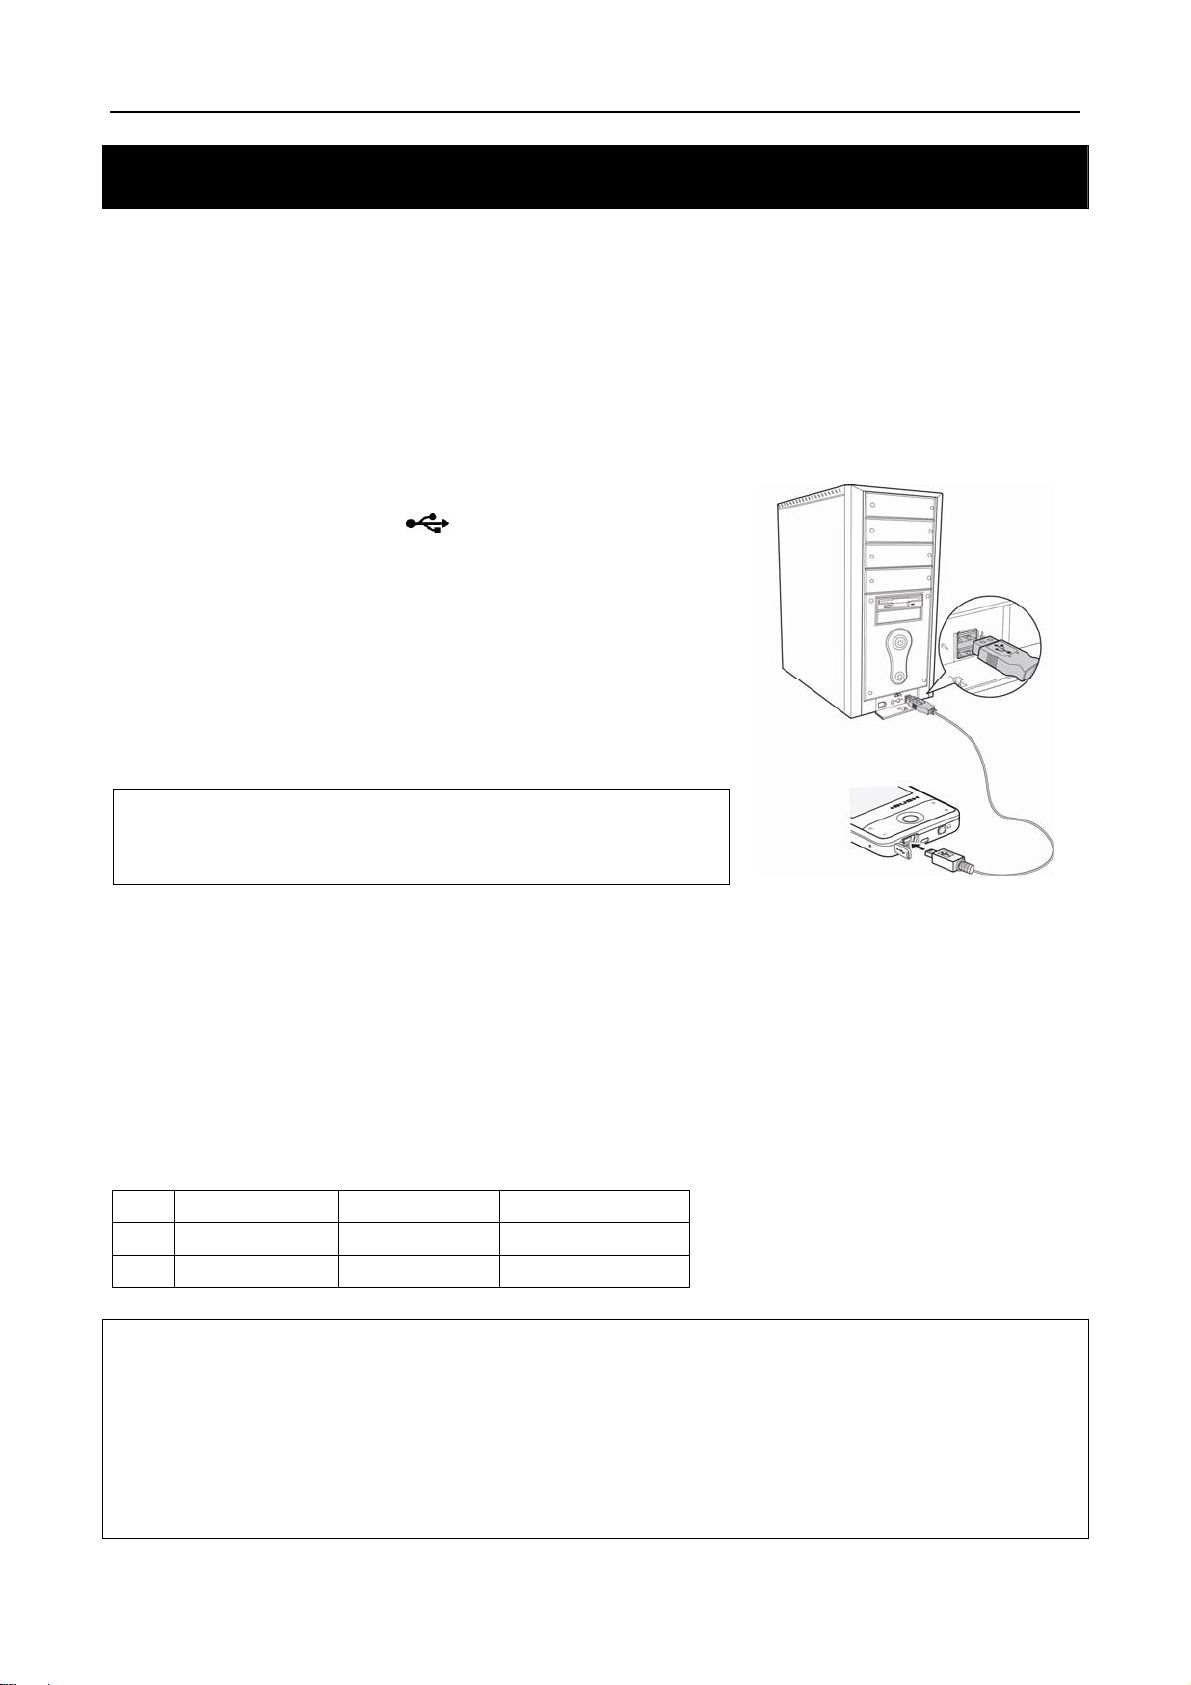
1. Turn on the computer.
2. Connect the player with the computer with a USB
cable.
A battery icon progresses, indicating charging is
undergoing. The icon stays full when charging finished.
NOTE:
Fully charge the battery every two or three months when the
player is not used for a long period of time. Otherwise, the
battery voltage may be too low to power the player on.
- 7 -
Page 9
Audio-Photo-Video Player User Manual
Turning On/Off the Player
Power On: Press and hold the Power/OK button till the
screen is activated.
The player automatically goes to the main menu screen after
boot-up.
Power Off: Press and hold the Power/OK button till the
screen is deactivated.
NOTE:
The time for the player to start-up would be longer when files
are added to/ removed from the memory. This is normal as the
start-up time is dependent on the number of files stored. The
more the files stored, the longer the start-up time will be. But
the start-up time will resume to normal in the next start-up.
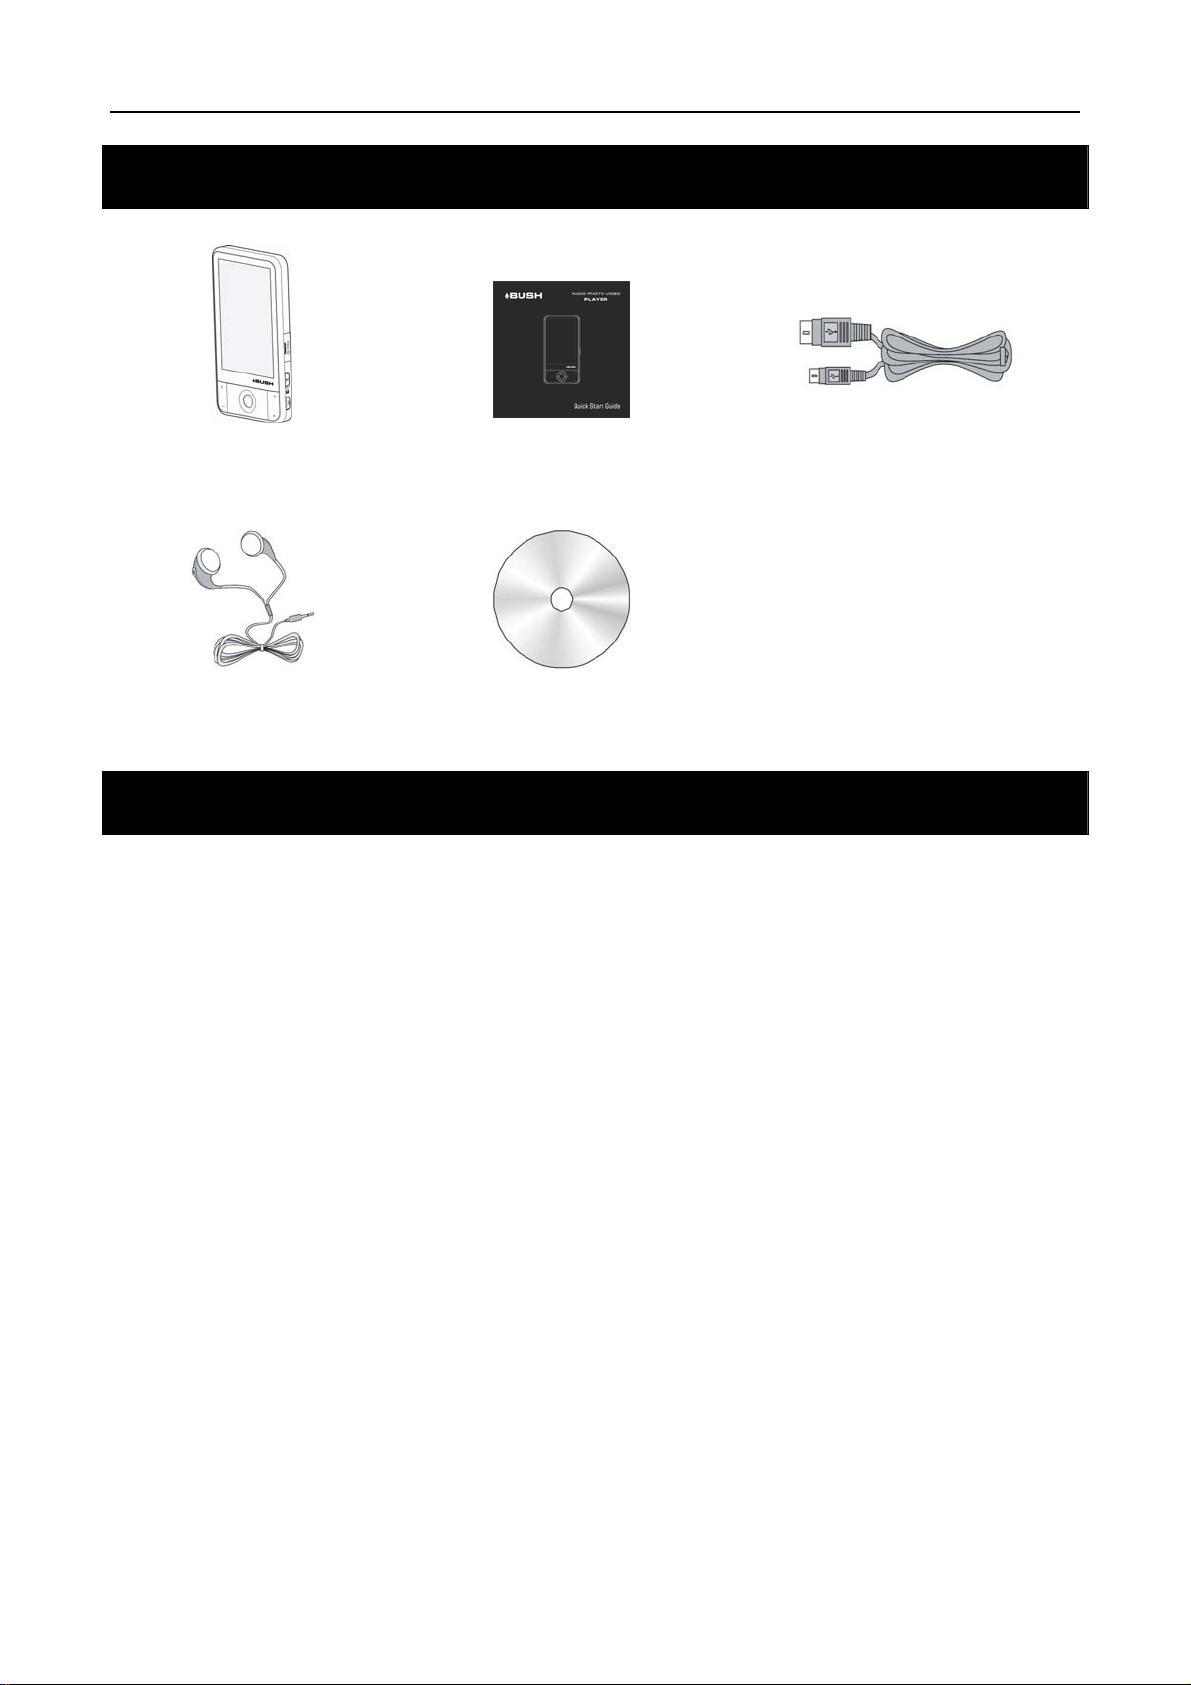
Hold Function
You may lock the functional keys to prevent accidental
operation. Slide the Hold switch down to the lock icon
and then a lock icon appears at the lower right
corner indicating the functional keys are now locked.
In the lock mode, the player performs no operation
when you press any button. To unlock the functional
keys, slide the Hold switch back in the direction of the
Micro SD card slot.
Reset Feature
The player is designed with a reset feature. If it works
abnormally, reset the player by depressing the reset
opening with a paper clip. Turn on the player again and it
will resume normal operation.
Unlock
Lock
- 8 -
Page 10
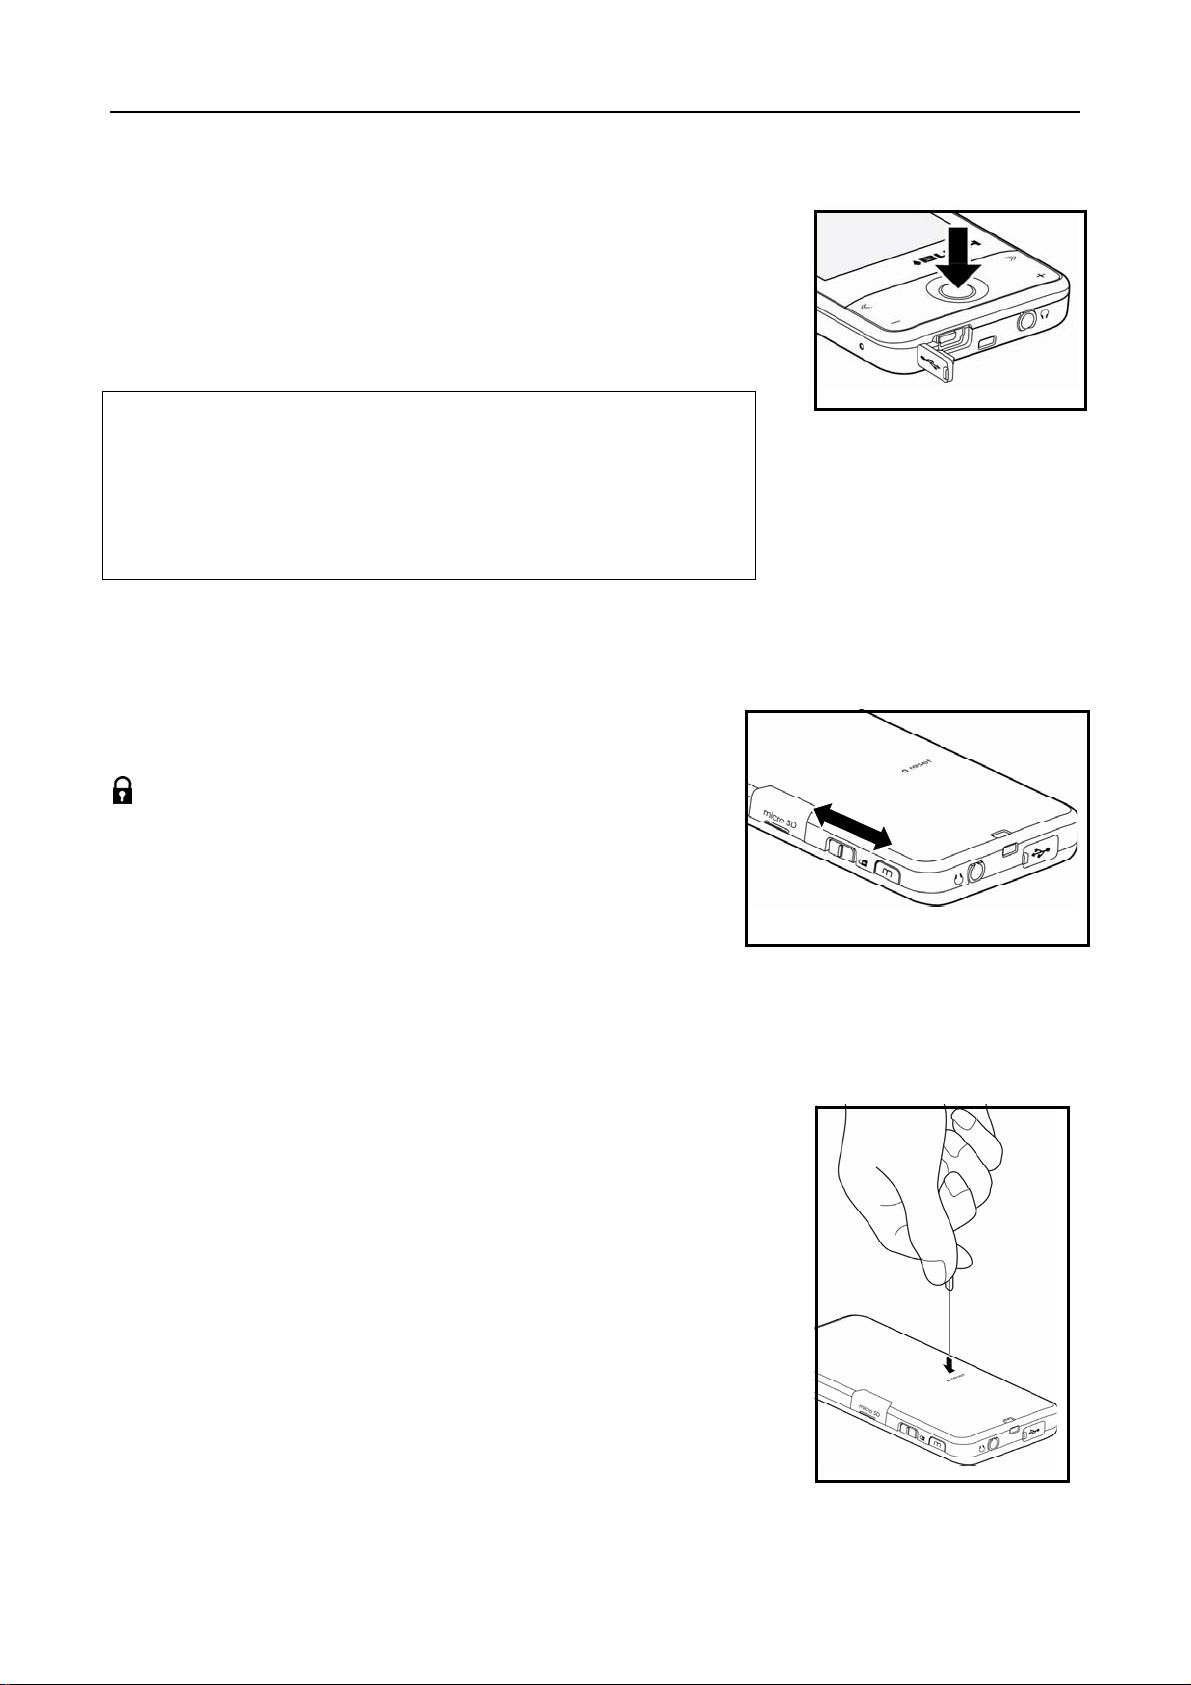
Using Micro SD Card
Inserting the Micro SD Card
1. Flip up the Micro SD card slot cover.
Audio-Photo-Video Player User Manual
2. Insert the Micro SD card in the direction
of the arrow below.
3. Flip down the cover.
NOTE:
• New folder would be created for the micro SD card when the product is connected to a PC and that this
is the memory of the micro SD card. The transfer speed is slower than normal if the files are transferring
between SD card and PC.
• To copy the files in the internal memory to the Micro SD card, set the player to the MSC USB mode and
follow the instructions of Transferring Files in the Connecting to the Computer section for data transfer.
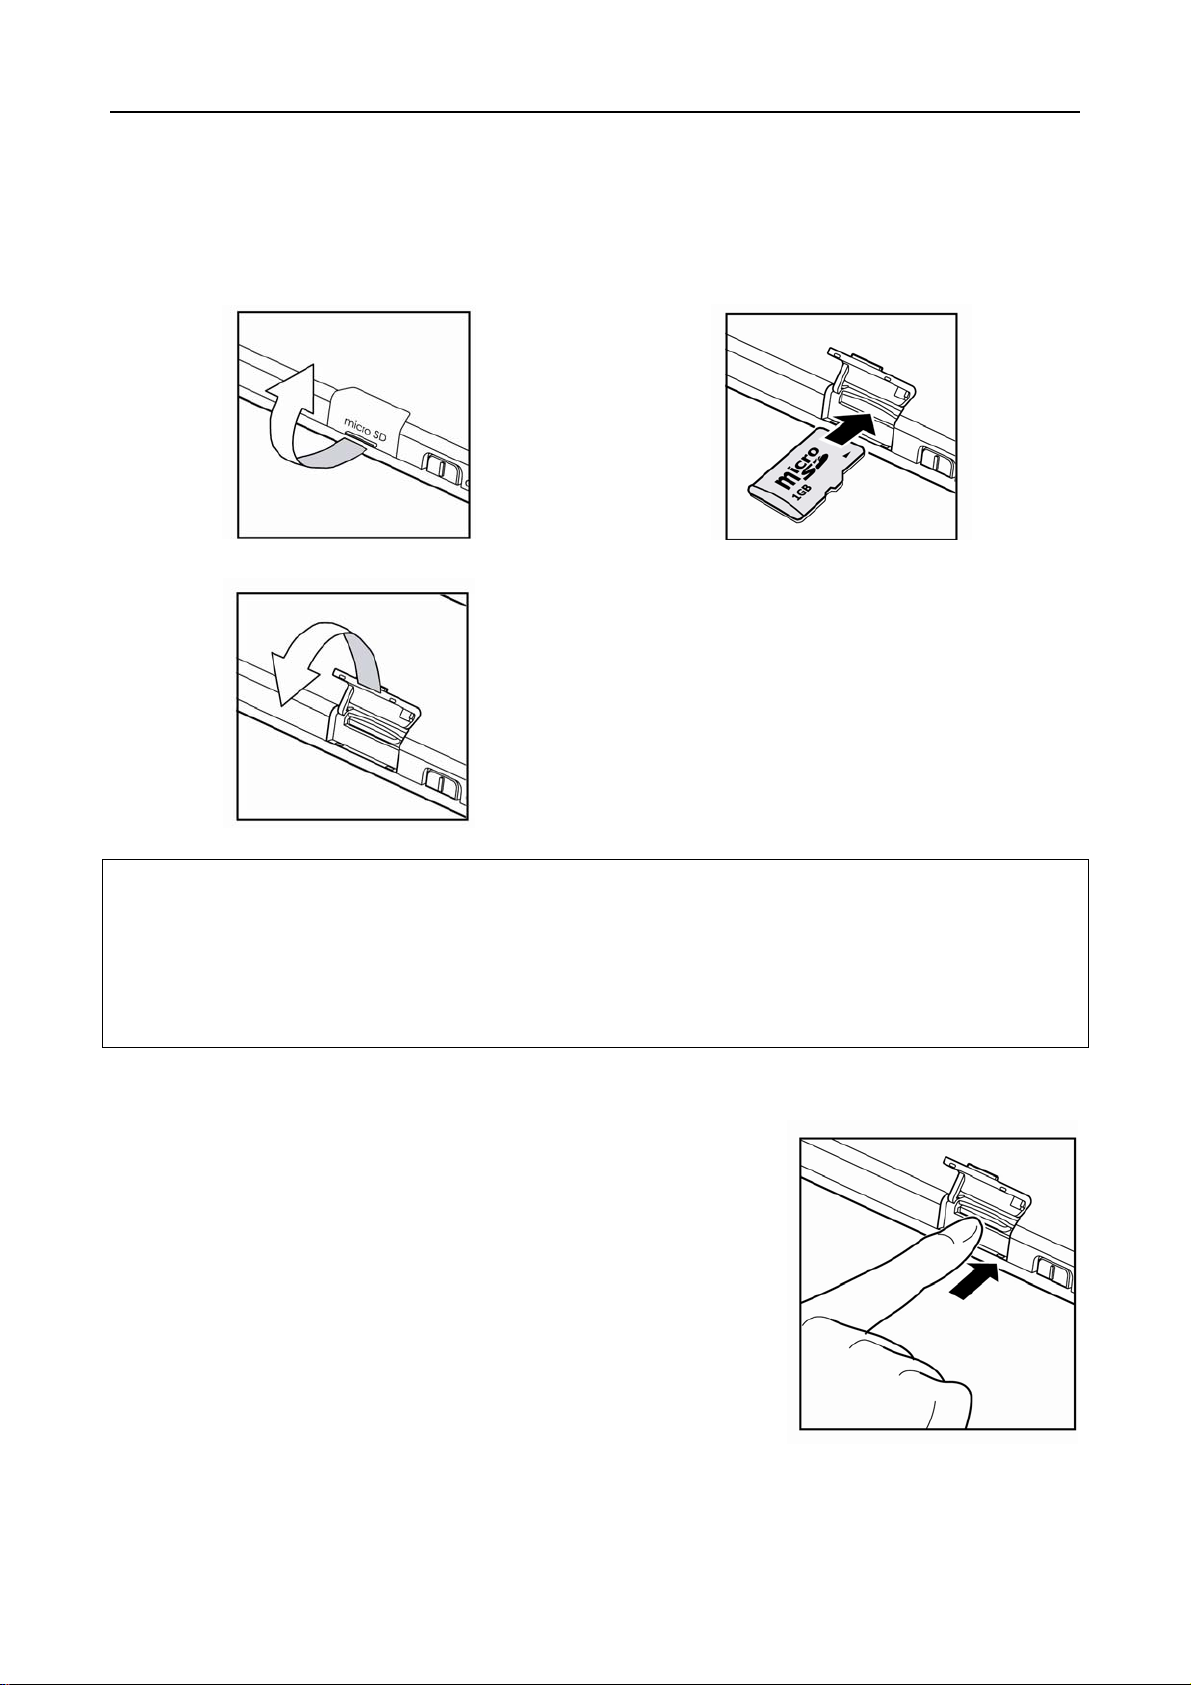
Removing the Micro SD Card
1. Flip up the card slot cover.
2. Gently push the card inward with your finger and
release it for its bouncing out of the card slot.
3. Pull out the card carefully.
4. Flip down the cover.
- 9 -
Page 11
Audio-Photo-Video Player User Manual
Connecting to the Computer
System Support
• Supports Windows
®
2000/XP/Vista.
Connecting the Player to the Computer
Connect the player with the computer with the USB cable.
The screen displays the
player is in USB mode.
Windows
®
will show Found New Hardware when the
player is first attached. The player will then recognize as a
new device under My Computer.
NOTE:
It may take several minutes for Windows
for the first time depending on the hardware configuration.
indicator, indicating the
®
to recognize the device
Transferring Files
After connecting the player to the computer, the player works in Mass Storage Class (MSC) or
Media Transfer Protocol (MTP) mode, depending on the player’s USB mode. In the Windows
XP/Vista operation systems, the player works in MSC or MTP mode. But in the Windows
2000 operation system, the player works in MSC mode only.
Refer to USB Mode in the Settings section on how to select MSC or MTP mode.
Windows® 2000 Windows® XP Windows® Vista
MSC √ √ √
MTP √ √
NOTE:
MSC stands for Mass Storage Class. It doesn't require separate drive installation when it's first connected to
PC and it can be used as an external mass storage device using 'drag and drop method’ with 'Windows
Explorer'.
MTP stands for Media Transfer Protocol. It is to facilitate communication between devices and connected
host. It also enables command and control of the connected device. For further details, you may go to:
http://msdn2.microsoft.com/en-us/library/ms867188.aspx
®
®
- 10 -
Page 12
Audio-Photo-Video Player User Manual
MSC Mode
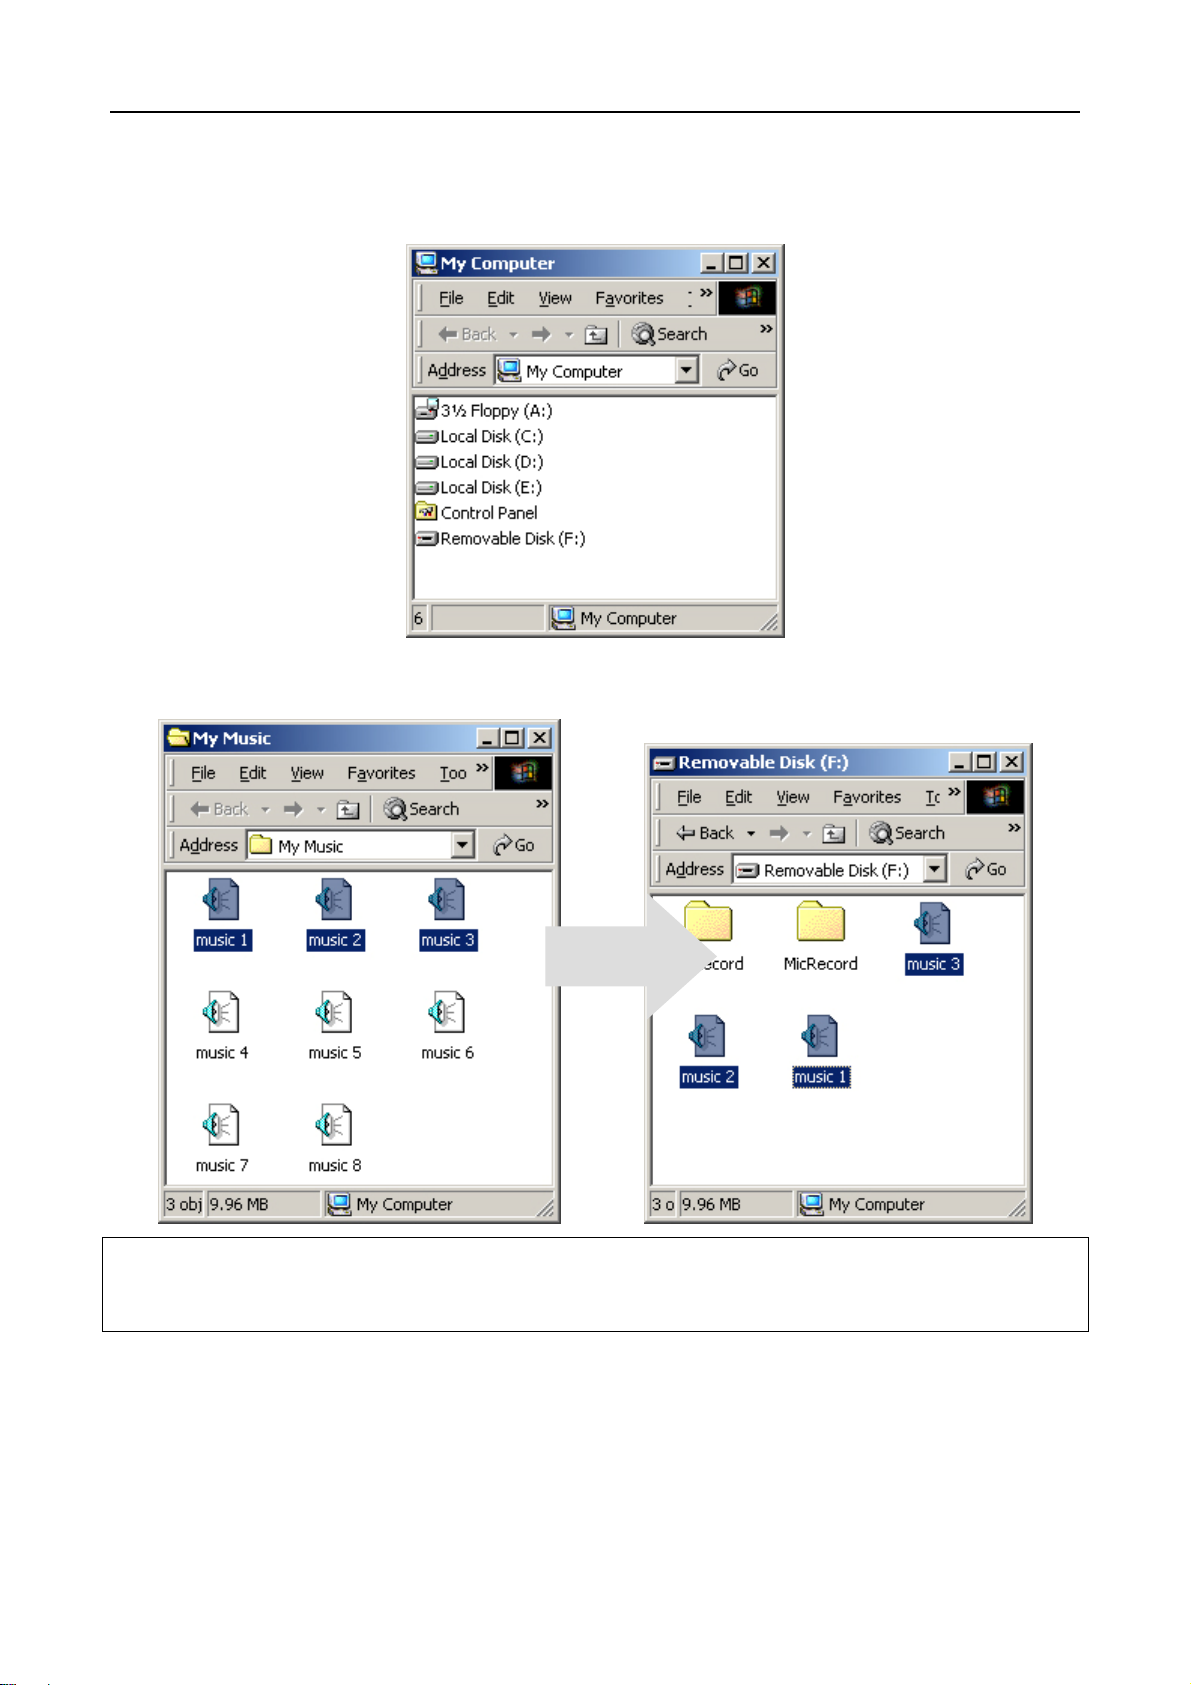
1. Double-click My Computer in Windows Explorer, the player is recognized by the
computer as a removable disk. Double-click it to explore the device.
2. Drag the files of your favourite songs to Removable Disk.
NOTE:
You are strongly recommended to organize you songs in different folders systematically so that you can
locate your songs easily in the Browse mode.
MTP Mode
The player is recognized as a MTP device for:
- Windows
- Windows
®
XP
®
Vista
- 11 -
Page 13

Audio-Photo-Video Player User Manual
MTP Mode - For Windows® XP users:
1. After connecting the player to the computer, the MTP Media Player window appears.
2a. Select Sync digital media files to this device and click OK.
3a. Select Manual and click Finish.
4a.
Click Sync and drag the file you want to transfer to the left window.
- 12 -
Page 14

Audio-Photo-Video Player User Manual
5a. Click Start Sync.
You also can copy the media files to the player by the drag-and-drop method.
2b. Select Take no action and click OK.
3b. Double-click My Computer.
4b. Double-click MTP Device.
Data folder: You can drag and drop all data files to the Data folder.
Media folder: You can only drag and drop the media files (music, videos and photos)
the player supports to the Media folder.
5b. Drag the file to the portable media drive.
NOTE:
• To play the DRM protected music, you should use Windows
store the DRM files to the player.
• If encountering any problem about DRM file transfer, Windows
following link for instruction: http://support.microsoft.com/kb/922814
®
Media Player 10 via MTP connection to
®
Media Player 10 users visit the
- 13 -
Page 15

Audio-Photo-Video Player User Manual
MTP Mode - For Windows® Vista users:
1. After connecting the player to the
computer, the AutoPlay window
appears.
2a. Select Sync digital media files to this
device and click OK.
3a. Click Sync on the menu bar.
4a. Select the file you want to synchronize to the player and drag it to the Sync List. Click
Start Sync.
- 14 -
Page 16

Audio-Photo-Video Player User Manual
You also can copy the media files to the
player by the drag-and-drop method.
2b. Select Open device to view files and
click OK.
3b. Double-click Internal Storage.
4b. Drag the files to the Internal Storage.
NOTE:
• Do not disconnect the player from the computer during data reading or writing.
• To play the DRM protected music, you should use Windows
to store the DRM files to the player.
• If you have any problem about DRM file transfer,
®
9 For Windows
Player 11:
http://www.microsoft.com/downloads/details.aspx?FamilyID=1d224714-e238-4e45-8668-516
6114010ca&DisplayLang=en
9 For Windows
files to this Player:
http://www.microsoft.com/windows/windowsmedia/knowledgecenter/howto/mp11/sync.aspx
• Windows
®
Vista users must use Windows® Media Player 11 to transfer music files to the player.
Media Player 11 users, visit the following link to restore the Windows® Media
®
Media Player11 users, visit the following link for instructions on how to sync
®
Media Player 11 via MTP connection
Formatting the Player
If you want to erase all files in the internal memory of the player, format the player on the
computer.
NOTE:
Please back up all your songs or other media files before formatting your player.
- 15 -
Page 17

Audio-Photo-Video Player User Manual
MSC Mode
1. Double-click My Computer.
2. Right-click the removable disk for
the player.
3. Select Format.
4. Click Start.
5. Click OK.
6. Click OK when formatting finishes.
NOTE:
Do not select NTFS under the File System tab. Otherwise, the player cannot work and needs to
format again.
- 16 -
Page 18

Audio-Photo-Video Player User Manual
MTP Mode - For Windows® XP Users:
1. Double-click My Computer.
2. Right click the disk named
3. Click OK.
4. Click OK when formatting finishes.
MTP Device and select Format.
MTP Mode - For Windows® Vista Users:
1. Double-click My Computer and then
double-click the device MTP Player.
2. Right-click Internal Storage and
select Format.
3. Click OK.
4. Click OK when formatting finishes.
NOTE:
The screen will display again when the file transfer or formatting is completed. Disconnect the
player from the computer only when all data reading/writing is finished.
Disconnecting the Player from the Computer
MSC Mode
1. The screen will display the indicator again when the file transfer or formatting is
completed. Disconnect the player from the computer only when all data reading/writing
is finished.
2. Double-click the Unplug or Eject
3. Select USB Mass Storage Device and click Stop.
4. Click OK.
5. Disconnect the USB cable from the computer.
MTP Mode
1. The screen will display the indicator again when the file transfer or formatting is
completed. Disconnect the player from the computer only when all data reading/writing
is finished.
2. Disconnect the USB cable directly from the computer.
icon in the system tray.
- 17 -
Page 19

Audio-Photo-Video Player User Manual
Basic Operation
Calling up the Menu
The player automatically goes to the menu screen after boot-up. Menu options include
Music>>Video>>Record>>Time>>Photo>>Text>>Browse>>Settings.
How to Navigate the Menu
Press the or button to scroll menu option right or left respectively.
Press the
Press the
Press the
Press the button to return to the upper level menu or exit.
button to enter the submenu list.
or button to scroll the submenu list up or down respectively.
button to confirm the selection.
Music
The player automatically goes to the menu screen after
boot-up.
1. Press the or button to select Music.
2. Press the
The music files can be sorted by categories, such as Current
Play (This option only appears when music is under
playback), All Music, Artist, Album, Genre, My
Favourite, Record and Dir List, so that you can choose the
songs easily.
1. Press the
Play / all Music / Artist / Album / Genre / My
Favourites / Record / Dir List).
2. Press the button to confirm the selected category.
The music list appears.
button.
or button to select an option (Current
- 18 -
Page 20

Audio-Photo-Video Player User Manual
Current Play Enter the music playback screen.
All Music Play all music files in the player.
Artist Play music files in the albums by different artists.
Album Play music files by album.
Genre Play music files by genre.
My Favourites Play the favourite music files.
Record Play the recorded files.
Dir List List all audio files including
the music and record files.
Starting Playback
Press the or button to select a file from the music list. Press the button to start playback.
Pausing Playback
Press the button to pause during playback.
Selecting Next/Previous Track
Press the button during playback to play the next track.
Press the
Press the
button within the first five seconds of the playback to play the previous track.
button after five seconds of the playback to play the current track from the beginning.
Fast Forwarding/Rewinding Current Track
Press and hold the button to fast forward the current track, and release to stop forwarding.
Press and hold the
button to fast rewind the current track, and release to stop rewinding.
Adjusting the Volume Level
Press the button to increase the volume level, or press and
hold the button to increase fast.
Press the
button to decrease the volume level, or press
and hold the button to decrease fast.
- 19 -
Page 21

Audio-Photo-Video Player User Manual
Music Player
F K
A
B
C
D E F
J
I
H
G
A. Music Mode
B. ID3 Tag (Title, Artist, Album)
C. Equalizer Mode
D. Play Mode
E. Progress Bar
F. Play/Pause
G. Battery Power Level
H. Elapsed Time/Total Time
I. Lyric display
J. Current File Number/Total File Number
K. Time
Lyrics Display
The player supports lyrics files in LRC format.
1. Make sure the lyric file has the same name as the music file.
2. Save music file and lyrics file in the same folder of the player.
3. While playing the music, the lyrics will be displayed synchronously on the bottom of the
screen.
NOTE:
The player only supports the lyric synchronous display for files that share the same name as the music file,
e.g., for a music file named Angel.mp3, the lyric file must be named Angel.lrc. The music and lyric files also
must locate at the same directory.
Settings
In the music playback screen, press the button to pop up the music setting menu.
- 20 -
Page 22

Audio-Photo-Video Player User Manual
Audio Setup
There are six preset equalizer settings for
music playback effect, Normal, X-Bass,
Rock, Classic, Pop and Jazz.
1. Audio Setup is the highlighted item of
the music setting menu.
2. Press the
3. Press the
option (Normal / X-Bass/ Rock /
Classic / Pop / Jazz)
4. Press the
selected equalizer.
button.
or button to select an
button to confirm the
Play Mode
Select the play mode for music playback. There are five modes.
Normal Playing tracks in sequential order and the music
playback stops when each track has been played once.
Repeat Playing one track repeatedly.
All Repeat Playing all tracks repeatedly.
Shuffle Playing tracks randomly.
Repeat Shuffle Playing tracks repeatedly in random order.
1. Press the
Mode.
2. Press the
3. Press the
option (Normal / Repeat / All Repeat /
Shuffle / Repeat Shuffle).
4. Press the button to confirm the
selected play mode.
or button to select Play
button.
or button to select an
- 21 -
Page 23

Audio-Photo-Video Player User Manual
Add To Favourite
You can add the currently playing track to the favourite list.
1. Press the
2. Press the
The track is added to the My favourite list.
You also can select a track from the music list and add it to the
My Favourites list.
1. Press the
2. Press the
3. Add to Favourite is the currently selected item.
4. Press the
or button to select Add To Favourite.
button to confirm.
or button to select a track from the list.
button and a submenu appears.
button to confirm.
Removing a Track from My Favourite List
1. Press the or button to select My
Favourite from the music category.
2. Press the
3. Press the
track from the My Favourites list.
4. Press the
appears.
5. Remove the currently highlighted item.
6. Press the button to confirm the
removal.
button.
or button to select a
button and a submenu
- 22 -
Page 24

Audio-Photo-Video Player User Manual
Clearing Up the My Favourite List
1. Press the or button to select My Favourite from the
music category.
2. Press the
3. Press the button and a submenu appears.
4. Press the
5. Press the
button.
or button to Clear All.
button to confirm the clear-up.
- 23 -
Page 25

Audio-Photo-Video Player User Manual
Video
The player only supports video files in .AVI, .RM, .RMVB, WMV and MPEG4 decoding file.
Starting Playback
1. In the menu, press the or button
to select Video.
2. Press the
3. Press the
video file from the file list.
4. Press the
video file.
button.
or button to select a
button to play the selected
Pausing Playback
Press the button to pause during playback.
Stop Playback
Press and hold the button to stop playback and exit to the video file list.
Select Next/Previous Video File
Press the button during playback to play the next video file and press the button to
play the previous video file.
Fast Forwarding/Rewinding Current Track
Press and hold the button to fast forward the current playback, and release to stop
forwarding. Press and hold the
stop rewinding.
button to fast rewind the current playback, and release to
- 24 -
Page 26

Audio-Photo-Video Player User Manual
Adjusting the Volume Level
Press the button to increase the volume level, or press and hold the button to increase
fast. Press the
decrease fast. The volume level indicator
button to decrease the volume level, or press and hold the button to
Video Player
A
B
C D E F
Deleting a Video File
appears at the lower left corner of the screen.
A. Video File Title
B. Progress Bar
C. Volume Level
D. Play/Pause
E. Elapsed Time/Total Time
F. Battery Power Level
1. Press the or button to select a file
from the file list.
2. Press the
appears.
3. Delete File is the currently highlighted
item.
4. Press the
5. Press the
confirm the removal or Cancel to cancel
the operation.
button and a submenu
button.
or button to select OK to
Settings
Press the button during playback and a submenu appears.
- 25 -
Page 27

Audio-Photo-Video Player User Manual
Select Time
You can watch video from the selected point.
1. Select Time is the currently highlighted item.
2. Press the
button.
3. Press the
button to adjust the field value.
4. Press the
or button to select the Hour and Minute fields. Press the or
button to watch video from the selected time point.
LCD Expand
You can expand the video screen to full screen or
watch video in its original size screen.
1. Press the
Expand.
2. Press the
3. Press the
Screen or Normal.
or button to select LCD
button.
or button to select Full
- 26 -
Page 28

Audio-Photo-Video Player User Manual
Record
The player records voice and saves it in .WAV format.
Start Recording
1. In the menu, press the or button
to select Record.
2. Press the
3. Start to Record is the currently
highlighted item.
4. Press the
button.
button to start recording.
Pause Recording
Press the button during recording to pause and press the button again to resume
recording.
Stop Recording
Press the button to stop recording. A Save Record File
window appears. Press the
Press the
button.
or button to select YES.
- 27 -
Page 29

Audio-Photo-Video Player User Manual
Voice Recorder
A
A. Time of Recording
C
B. Recording Indicator
C. Time
D. Record File Name
D
E. Battery Power Level
B
E
Selecting Record Rate
1. In the record list, press the or
button to select Rate.
2. Press the
3. Press the
recording rate (Low / Middle / High).
Low Low recording quality.
Middle Medium recording quality.
High High recording quality.
NOTE:
The higher rate you select, the better quality the
record is but the more space the file occupies.
button.
or button to select a
Playing a Voice Record
You can play the voice record from Browse.
1. In the menu, press the
2. Press the
3. Press the
4. Press the
5. Press the
6. Press the
button.
or button to select RECORD.
button.
or button to select a record file.
button to play it.
or button to select Browse.
- 28 -
Page 30

Deleting a Record File
1. Press the or button to select a file
from the record file list.
2. Press the
appears.
3. Delete File is the currently highlighted
option.
4. Press the
5. Press the
confirm deletion or Cancel to cancel
operation.
button and a submenu
button.
or button to select OK to
Audio-Photo-Video Player User Manual
- 29 -
Page 31

Audio-Photo-Video Player User Manual
Time
1. In the menu, press the
2. Press the
3. Press the button to switch between clock and calendar.
In the calendar, scroll the calendar left, right, up and down by
button to check the time.
or button to select Time.
pressing the
, , and button respectively.
Photo
1. In the menu, press the
2. Press the
3. Press the
4. Press the
Press the
button. All pictures are displayed in thumbnail size.
, , or button to select a picture file.
button to view it fit-to-screen.
or button to view the previous or next picture.
or button to select Photo.
Settings
When viewing a picture, press the button and a submenu appears.
Viewing Picture in Thumbnail
1. Thumbnail is the currently highlighted item.
2. Press the
button.
- 30 -
Page 32

Viewing Pictures in Slide Show
1. Press the or button to select Slide
Show.
2. Press the
3. Press the
4. Press the button to start viewing
pictures in slide show.
button.
or button to select On.
Selecting Slide Show Duration
1. Press the or button to select Slide
Mode.
2. Press the
3. Press the
option (1 Sec / 2 Sec / 3 Sec / 4 Sec / 5
Sec).
4. Press the button.
button.
or button to select an
Audio-Photo-Video Player User Manual
- 31 -
Page 33

Audio-Photo-Video Player User Manual
Text
To read an ebook:
1. In the menu, press the
to select Text.
2. Press the
3. Press the
file from the file list.
4. Press the
button.
or button to select a text
button to read the ebook.
Scrolling through the Book
or button
Press the button to scroll down the book and press the button to scroll up.
Deleting a Text File
1. Select a file in the text file list.
2. Press the
3. Delete File is the currently highlighted item.
4. Press the
5. Press the
and Cancel to cancel operation.
button and a submenu appears.
button.
or button to select OK to confirm deletion
- 32 -
Page 34

Audio-Photo-Video Player User Manual
Settings
Press the button during reading and a submenu appears.
Page Jump
You may pinpoint to the page you want to start reading from.
1. Page Jump is the currently highlighted item.
2. Press the
3. Press the
button.
or button to select the digit.
4. Press the
5. Press the
page.
NOTE:
The number of target page cannot exceed the total page number.
or button to adjust the numeric value.
button and the player jumps to the target
Save Mark
You can make up to eight book marks.
1. Press the
2. Press the
3. Press the
4. Press the
or button to select SaveMark.
button.
or button to select a mark number.
button.
Load Mark
1. Press the or button to select LoadMark.
2. Press the
3. Press the
4. Press the
mark.
button.
or button to select a book mark.
button to start reading from the selected
- 33 -
Page 35

Audio-Photo-Video Player User Manual
Delete Mark
1. Press the or button to select DelMark.
2. Press the
3. Press the
4. Press the
button.
or button to select a book mark.
button to confirm deletion.
Set Font
Select a smaller or larger font for reading.
1. Press the
2. Press the
3. Press the
/ Font Mid / Font Big).
4. Press the
or button to select Set Font.
button.
or button to select an option (Font Small
button.
Set Color
1. Press the or button to select Set Color.
2. Press the
3. Press the
display.
4. Press the
button.
or button to select a color for the text
button.
- 34 -
Page 36

Audio-Photo-Video Player User Manual
Browse Mode
The player can scroll up the book automatically or manually.
1. Press the or button to select Browse Mode.
2. Press the
3. Press the
Mode.
4. Press the
button.
or button to select Auto Mode or Manual
button.
Flip Time
Set up the duration for automatic scroll-up.
1. Press the
2. Press the
3. Press the
Sec / 20 Sec / 25 Sec / 30 Sec).
4. Press the
or button to select Flip Time.
button.
or button to select an option (10 Sec / 15
button.
Browse
To browse the files stored in the internal and external memories.
1. Press the
2. Press the
3. Press the
an Micro SD card is inserted).
4. Press the
5. Browse folders and files. Select one file to play it or delete it.
or button to select Browse in the menu.
button.
or button to select Flash or SDCard (SDCard disk appears when
button.
- 35 -
Page 37

Audio-Photo-Video Player User Manual
Settings
To navigate the Settings list:
1. Select Settings in the menu.
2. Press the
3. Press the
4. Press the
Light Time
button to display the Settings list.
or button to select a setting in the list.
button to enter the submenu.
Backlight time is the duration for the
backlight to be on after pressing a button or
performing an action. When the light time
passes with no further operation, the
backlight time will go off automatically.
1. Press the
LightTime.
2. Press the
3. Press the
option (5 Seconds / 15 Seconds /30
Seconds / 1 Minute / Always On).
or button to select
button.
or button to select an
Brightness
1. Press the or button to select
Brightness.
2. Press the
3. Press the
button.
or button to adjust the
brightness level.
4. Press the
Cancel.
5. Press the
or button to select OK or
button.
- 36 -
Page 38

AutoShut Time
To save the battery when the music or video
playback is paused or stopped, you can set the
automatic power-off time. When the player
keeps idle for the set time, it will shut down
automatically.
1. Press the
AutoShut Time.
2. Press the
3. Press the
option (No automatic shutdown / 1
Minute / 5 Minutes / 10 Minutes / 15
Minutes).
or button to select
button.
or button to select an
Desktop Wallpaper
Audio-Photo-Video Player User Manual
There are eight wallpapers available for the
screen’s background picture.
1. Press the
DeskTop.
2. Press the
3. Press the
desktop wallpaper.
or button to select
button.
or button to select a
Time
Set the date and time for the player.
1. Press the
Time.
2. Press the
3. Press the
the hour, minute, second, time format,
month, day, year, OK and Cancel fields.
or button to select
button.
or button to move through
4. Press the or button to change the
value of date and time.
5. Select OK and press the
confirm the adjustment.
button to
- 37 -
Page 39

Audio-Photo-Video Player User Manual
Default
1. Press the or button to select
Default.
2. Press the
3. Press the
to load factory default settings or NO to
cancel operation.
4. Press the button to confirm.
button.
or button to select YES
USB Mode
Select MSC for mass
1. Press the
Mode.
2. Press the
3. Press the
or MTP.
4. Press the
or button to select USB
button.
or button to select MSC
button.
System Information
You may check the player’s system information, including
manufacturer, firmware version, used space and free space
of the internal and external memories.
1. Press the or button to select System
Information.
2. Press the
3. Press the button to exit and return to the Settings
list.
button.
- 38 -
Page 40

Audio-Photo-Video Player User Manual
Troubleshooting
Problems/Symptoms Solutions
Cannot turn on the player.
No sound.
Sound distorts. Battery power is exhausted. Recharge the battery.
The computer does not
recognize the player.
Can not play
copy-protected
music files.
pressing any button.
Can not turn on the player
after formatting the
player.
Battery power is exhausted. Recharge the battery.
Not enough space is reserved for system files. Free some memory
space by erasing some files.
The player works abnormally and needs to be reset. Reset the player
by depressing the reset opening.
Headphones are not inserted. Insert headphones.
Volume level is too low. Increase the volume level.
Music and video files are corrupted. Download uncorrupted files.
No secure connection with the computer. Make sure the player is
securely connected.
The computer is not compatible with the player. The player only
works on Windows® 2000/XP/Vista OS.
Incorrect downloading methods. Transfer copy-protected music
files to the player by using the Windows
function of the music management software provided by the online
music store where you purchased the files. Refer to the respective
software FAQs.
Functional keys are locked. Disable the hold feature. No response when
The player works abnormally and needs to be reset. Reset the
player by depressing the reset opening with a paper clip.
Use an incorrect file system for formatting. Reformat the player
with a correct file system. See Formatting the Player in the
section of Connecting the Player to the Computer for details.
®
Media Player’s sync
Contact Details
Please write to:
Customer Services
Argos Ltd
489-499 Avebury Boulevard
Saxon Gate West
Central Milton Keynes
MK9 2NW
Telephone: 0870 600 3030
Through the process of continuous improvement, Argos Ltd. reserves the right to change or
alter specifications without prior notice. E&OE
- 39 -
Page 41

Audio-Photo-Video Player User Manual
Technical Specifications
Built-in Memory 4GB/8GB NAND flash (some memory is reserved
for firmware and system management)
Interface USB 2.0 high speed
Power Built-in 420mAh Li-Polymer battery
Max. Playtime Up to 8 hours
Max. time for charging Approx. 3 hours via PC
Display 3” TFT color screen
File Support Audio: WMA, MP3, OGG
Video: AVI, RM, RMVB, WMV and MPEG4 decoding.
Image: JPEG (Progressive JPEG is not supported),
BMP, GIF
Signal to Noise Ratio > 90 dB
Frequency Response 20 Hz ~ 20 KHz
Headphones Output < 4.4 mW (each output)
Firmware Flash based.
Supported OS Windows
Max. number of folders 1000
Max. number of files 2000
Max. layers of nested
11
folder
Earphone Impedance: 32 ohms±15%
Sensitivity: 114±3dB at 1KHz.
®
2000/XP/Vista
The mark above is in compliance with the Waste Electrical and Electronic Equipment Directive 2002/96/EC
(WEEE). The mark indicates the requirement NOT to dispose the equipment including any spent or discarded
batteries as unsorted municipal waste, but use the return and collection systems available. If the batteries
or accumulators included with this equipment display the chemical symbol Hg, Cd, or Pb, then it means that
the battery has a heavy metal content of more than 0.0005% Mercury, or more than 0.002% Cadmium or
more than, 0.004% Lead.
Important Notice for the battery disposal
Your product contains a built-in rechargeable battery covered by the European Directive 2006/66/EC. Please
inform yourself about the local rules on separate collection of batteries because the correct disposal will help
prevent negative consequences for the environmental and human health. Please do not dispose your
batteries with your normal household waste.
- 40 -
Page 42

PRODUCT GUARANTEE
- 41 -
 Loading...