


Arch Installation Instructions
Arch Installation Instructions
for models TFS/OFS 33 /39 /44 /49 /63
for models TFS/OFS 33 /39 /44 /49 /63
These instructions are for the installation of the BURNTech
Arches only. See instructions that came with your unit for
complete Fireplace Installation Instructions.
Step 1
Assemble your fi replace as per the instructions supplied with
it, up until before the last tier of wall.
Step 2
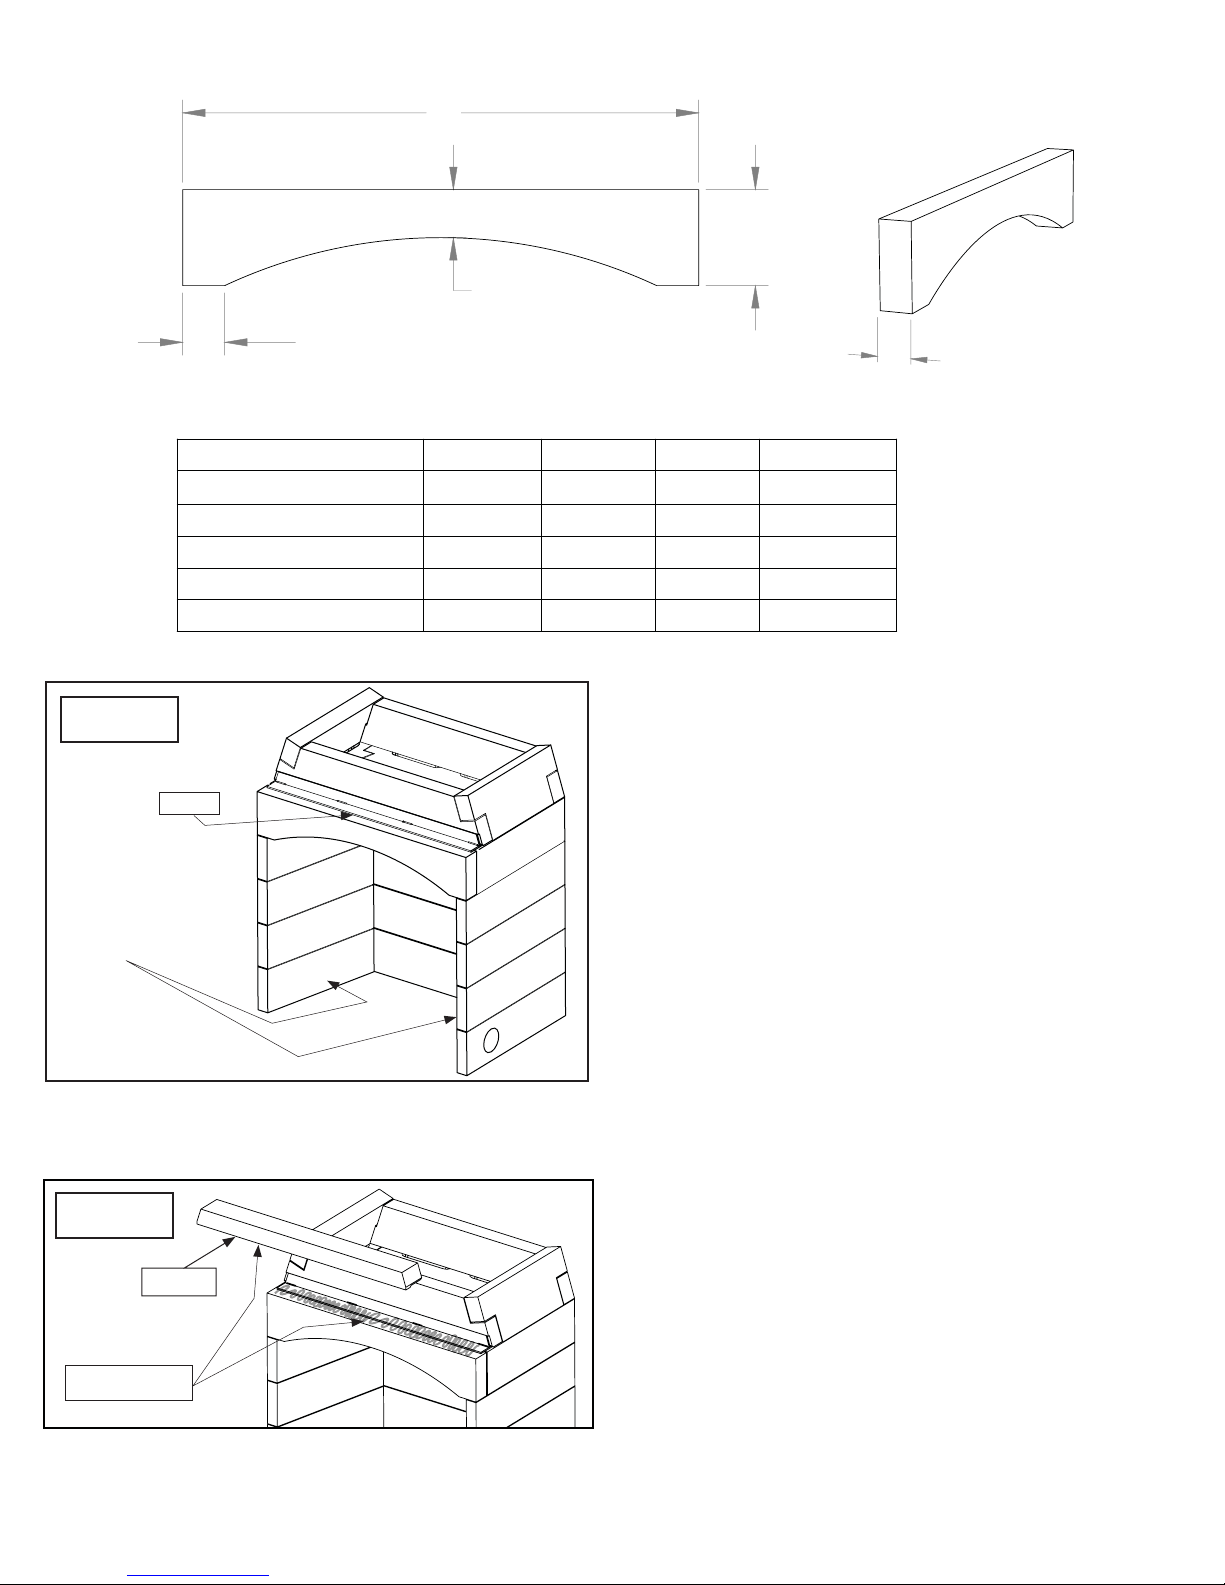
Prior to completing last row of side walls, saw cut 3-1/4”to 33/8” off the front of each of both side walls as shown in Fig.1.
FIGURE 1
CUT
CUT
3-1/4” TO
3 3/4"
3-3/8”
Step 3
Apply mortar to all mating surfaces of Arch and place into cut
opening. Level as necessary.
FIGURE 2
Arch
NOTE: Since the Arch reduces the effective opening height
by 4 inches, you may want to obtain a Height Extension Kit to
compensate for the difference (see Figure 3).
Apply mortar
REV 10 FEB 2014
A
B
C
TFS/OFS 33
TFS/OFS 39
TFS/OFS 44
TFS/OFS 49
TFS/OFS 63
FIGURE 3
T-Bar
A Height Extension Kit
may be added
D
MODEL
AB
37"
43"
48"
53"
67"
8" 4"
8" 4"
8" 4"
8" 4"
8" 4"
Customer Service:
Most parts and accessories may be purchased from your
dealer. For additional Parts and accessories please call
Burntech® Fireplace Solutions Monday thru Friday 9 AM to
4 PM (Pacifi c Standard Time) at (818) 564-4253 or Fax your
order to (818) 564-4232.
You may also visit our website at:
WWW.BURNTECH.COM
3"
CD
3-1/2"
3-1/2"
3-1/2"
3-1/2"
3-1/2"
Step 4
Make sure adequate amount of mortar is applied underneath
and behind Lintel front piece as shown in Figure 4.
FIGURE 4
Lintel
Apply mortar
Continue assembling your fi replace as per the instructions
supplied with your unit.
 Loading...