

Page 1
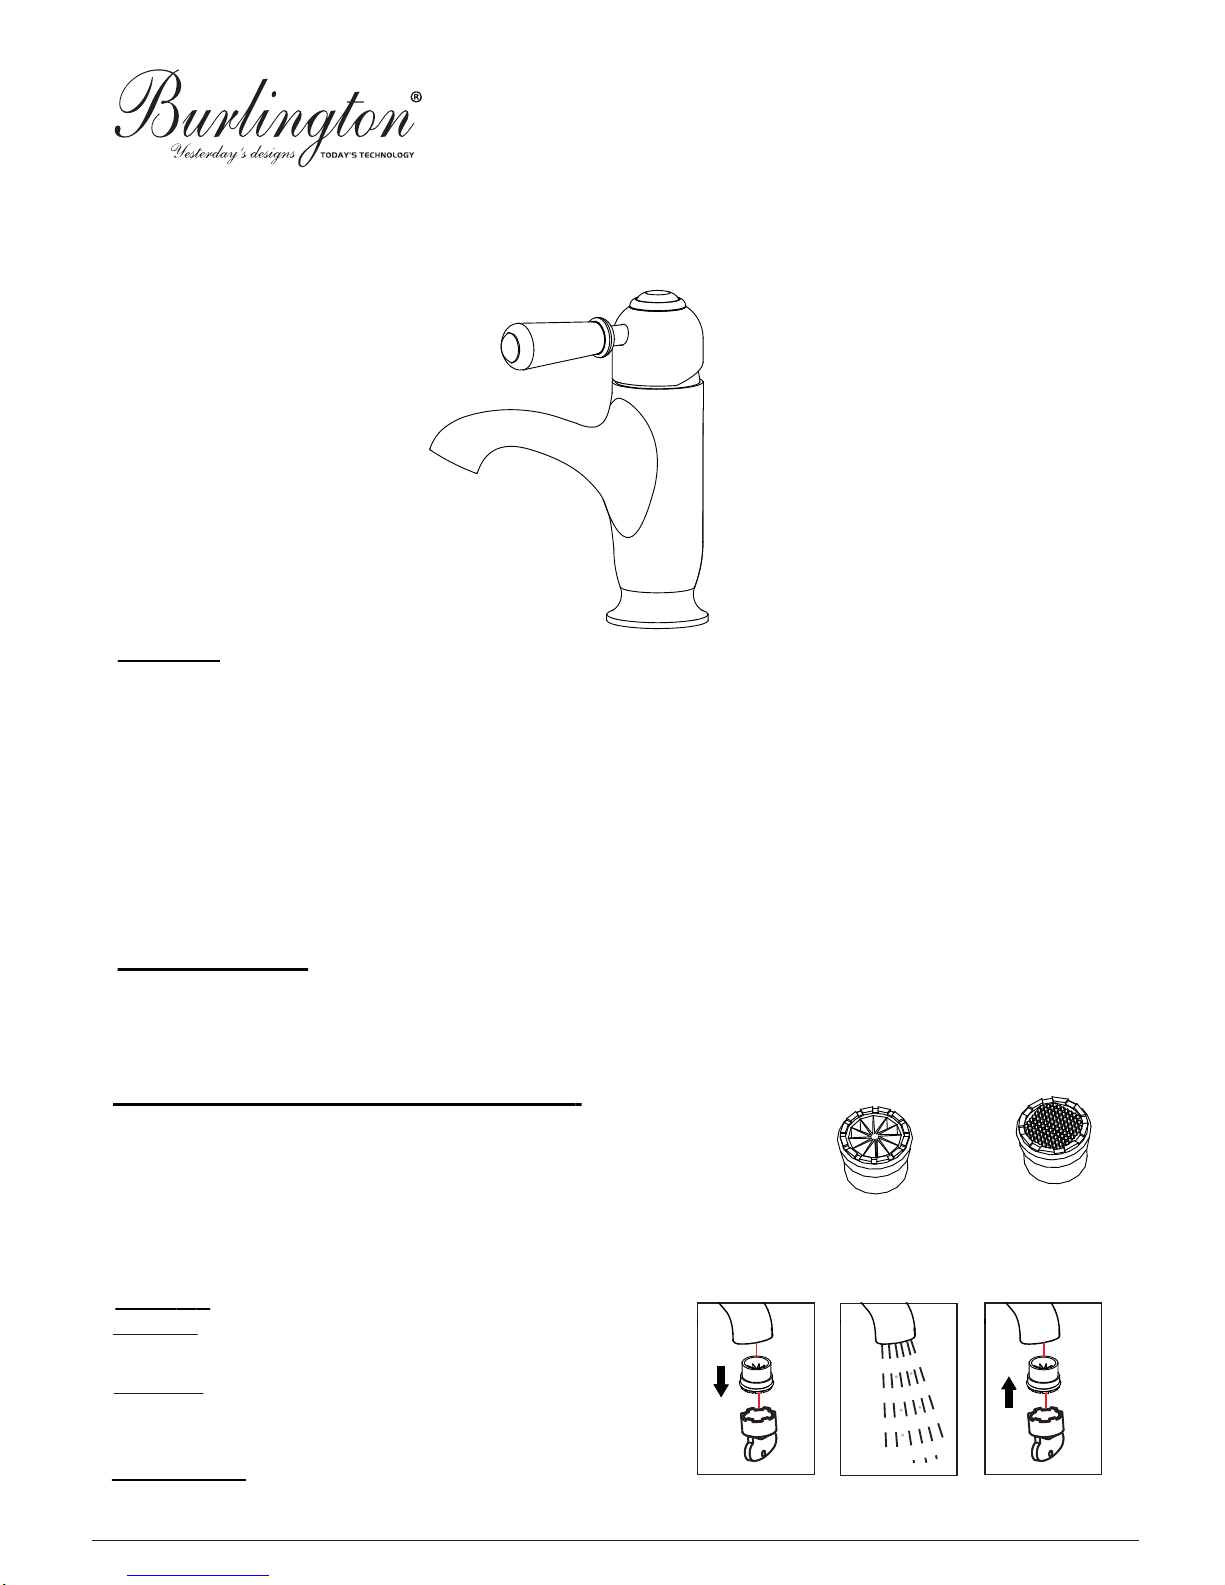
INSTALLATION INSTRUCTIONS
● We recommend that this product is installed by a qualified professional contractor. Such as a plumber who is certified by NVQ
(National Vocational Qualification) or SNVQ (Scottish National Vocational Qualification) Level 3.
● Please check this product immediately to ensure that it has not been damaged and is complete. Before installation, please make
sure this product is the correct model and you have all the parts required for installation and using.
● All the taps in Burlington Range should be supplied with hot and cold water at balanced pressure. If not, then the mixing function
will not work correctly. It is necessary to fit non-return valves on both hot and cold feeds pipe. These are not supplied.
● Please flush the water system to ensure that no metal swarf, solder, and other impurities can enter the taps.
●
Turn off water supply before commencing work, this should be done at the isolating valves of inlet feeds if fitted or main stopcock.
● Please read these instructions carefully and keep it for future reference.
Working pressure
The tap is suitable for both high and low pressure installation. To ensure that the tap works well under low water pressure, the
cold water storage tank must be at least 2 meters above the installed position. The maximum static pressure is 10 bar, and
operating water pressure is 5 bar. Where the operating water pressure above 5 bar, then a pressure reducing valve must be fitted.
FLOW STRAIGHTENER
The tap comes with a factory-fitted flow straightener for low pressure water systems.
If the water flow is high, replace the factory-fitted flow straightener with the high pressure
aerator supplied.
Use NEOPERL Key to unscrew the straightener in the Nozzle. Replace with the aerator
provided, and screw back in nozzle tightly. (If you misplace the Neoperl key you can use
the top of the aerator/straightener as a key)
AERATOR
Straightener and aerator (alternative option)
Important
D
1 - 2
Cleaning
NOZZLE
KEY
Before use: Unscrew the filter and allow the water to run freely for
5 minutes. Then screw the filter back in place.
Chelsea curved basin mono tap without pop up waste - CH21
Periodically: Using the key provided unscrew the nozzle and remove.
Rinse it with cleaning running water until any loose debris is cleared.
Then replace the nozzle and tighten with key provided.
Maintenance
We do NOT recommend you use any household cleaners to clean the product. Because these cleaners change substance or formula
too frequently. The product should be always cleaned only with soapy water and rinsed with clean water and dried with a soft cloth.
Page 2
D
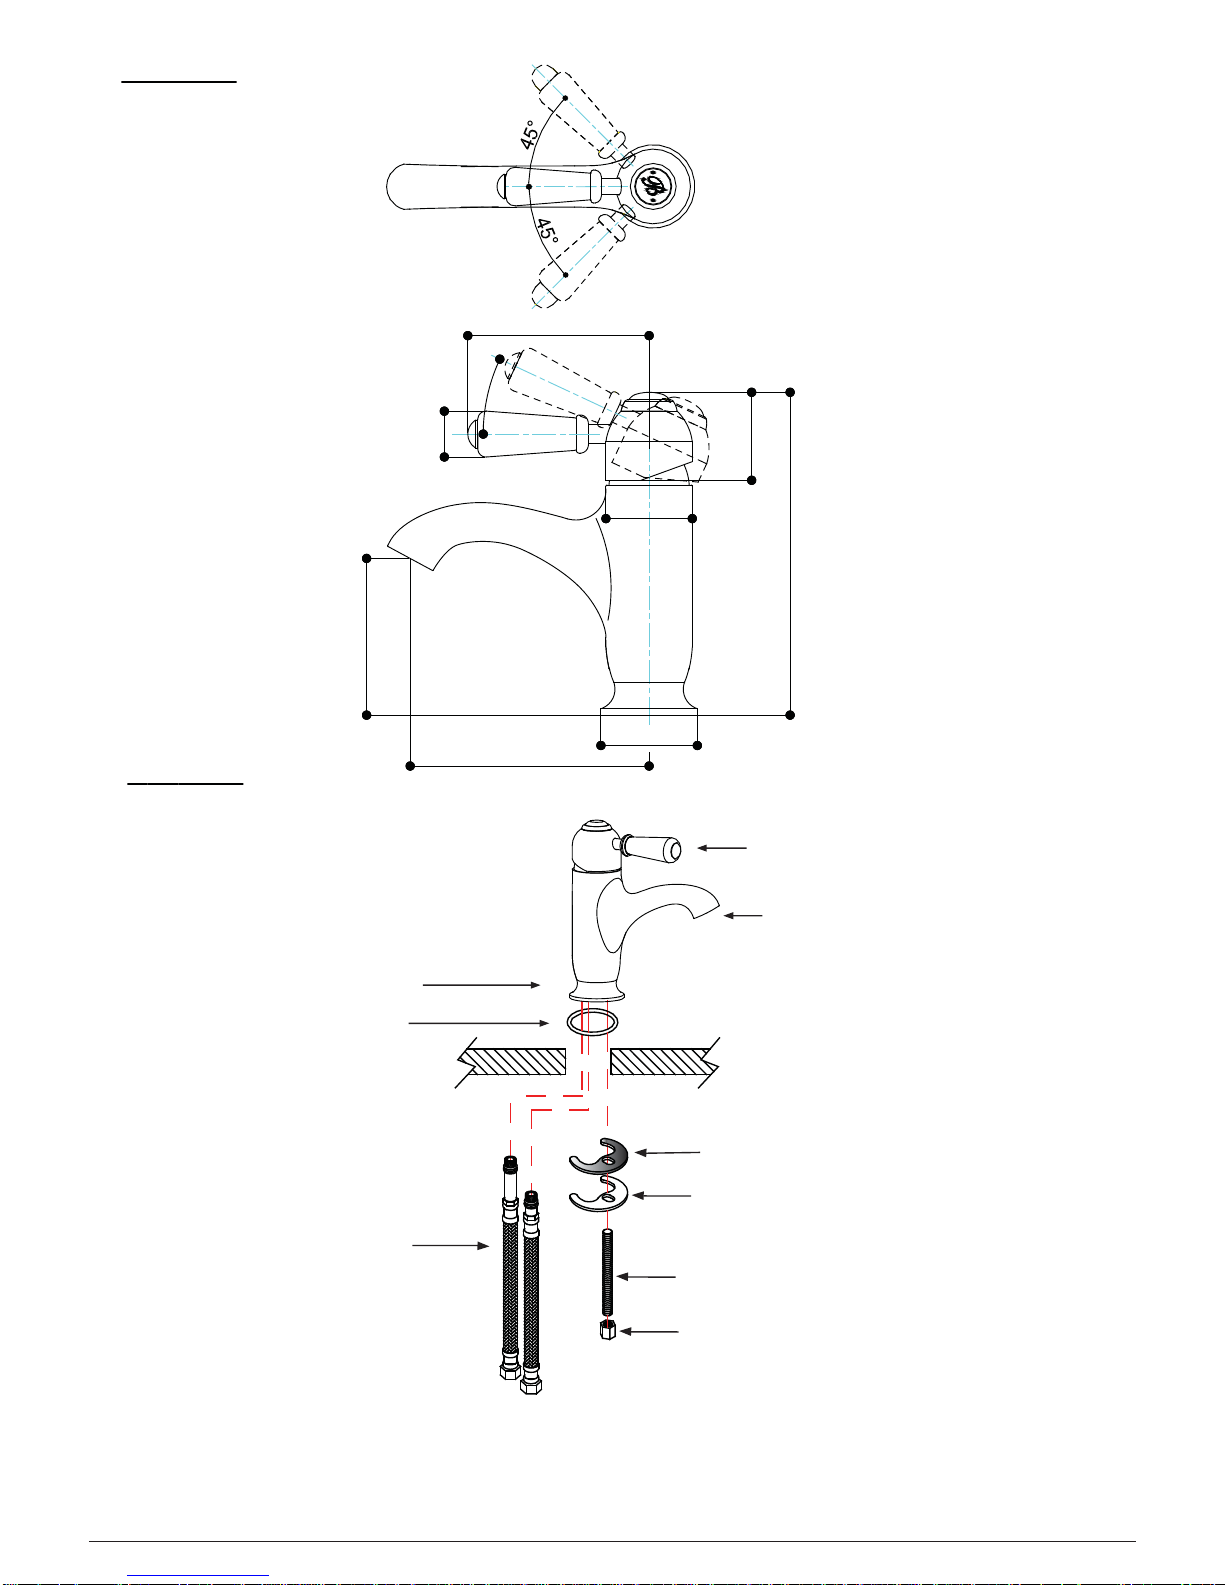
Installation
1. Fit the “O” ring into the groove on the underside of the mixer body.
2. Screw and tighten two flexible hose into the mixer body.
3. Loose the nut from stud and screw the stud into the base of mixer.
4. Pass the flexible hoses and stud through the hole in basin. Slide the black washer
and metal plate onto the stud. Then screw on the nut and tight the mixer on basin.
Dimension
2 - 2
SPOUT
“O” RING
BLACK
WASHER
METAL
PLATE
MIXER BODY
Basin
Worksurface
CONTROL
HANDLE
STUD
NUT
FLEXIBLE
HOSE
Ø48
90
Ø23
Ø43
78
43.5
25°
119
160
Page 3
INSTALLATION INSTRUCTIONS
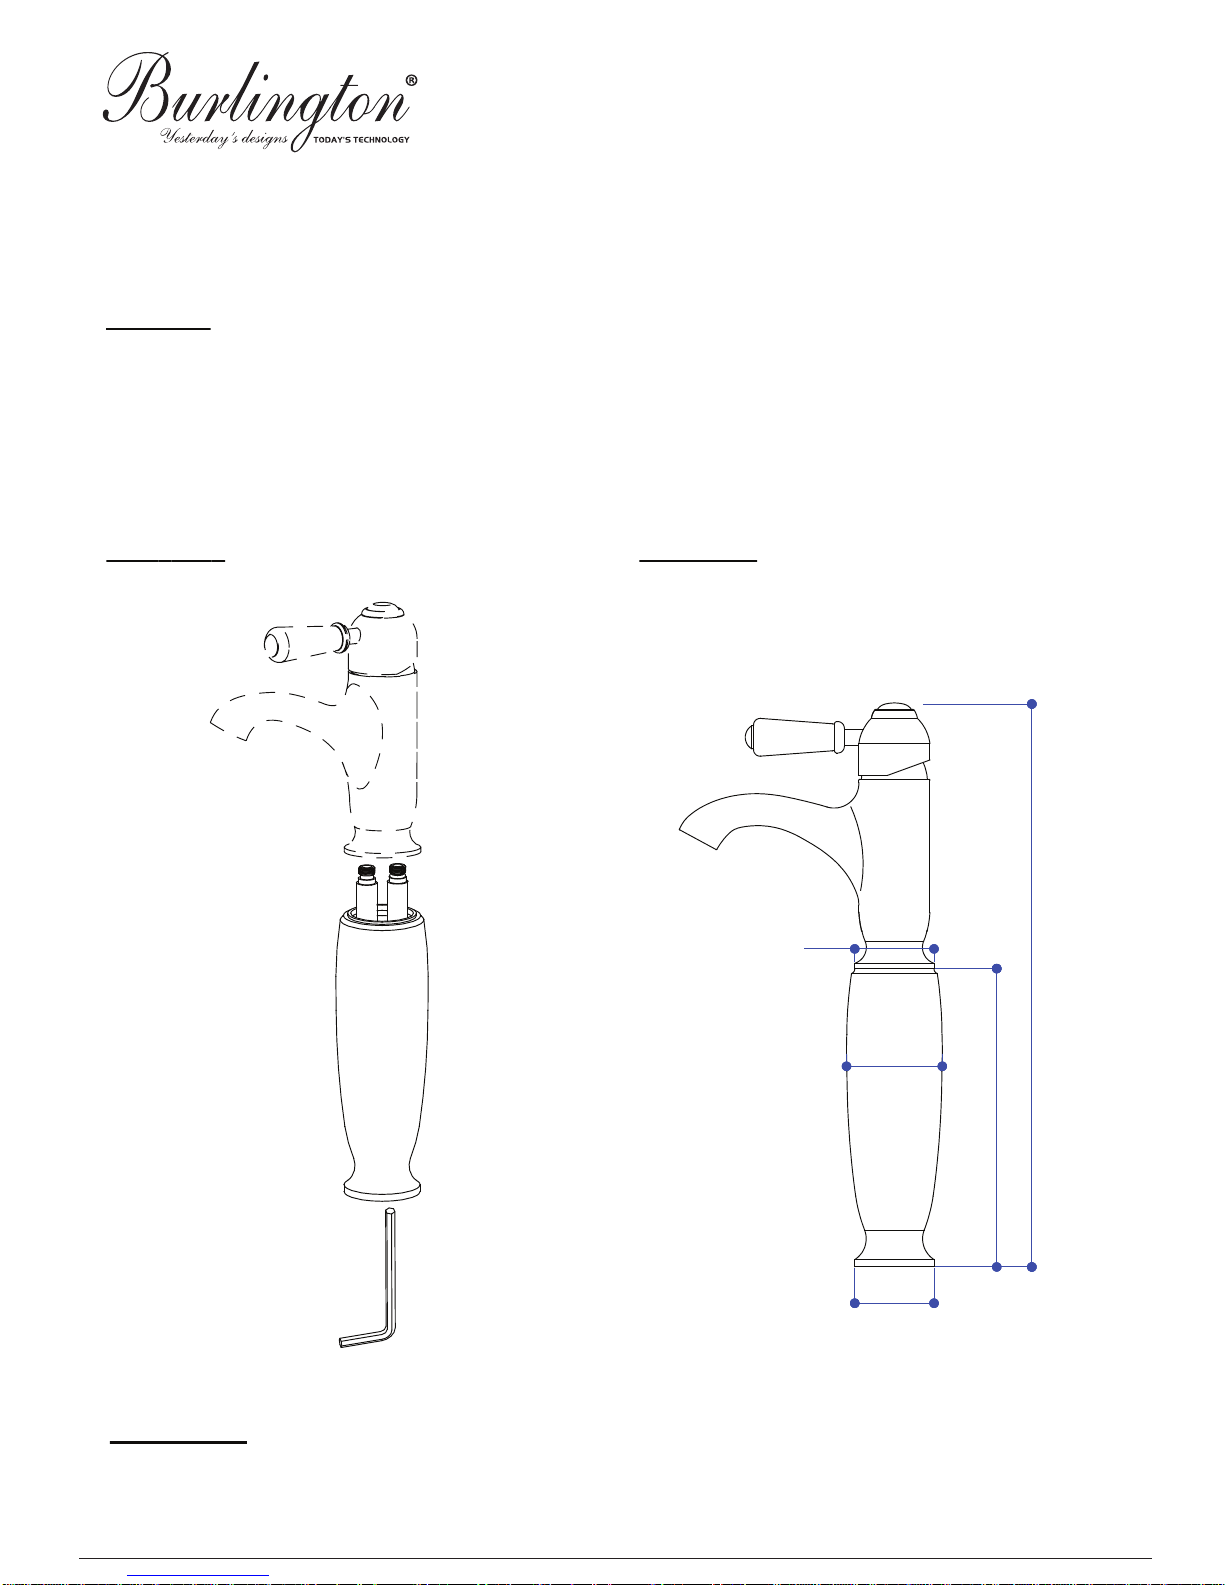
Chelsea extended height kit - CH24
● We recommend that this product is installed by a qualified professional contractor. Such as a plumber who is certified by NVQ
(National Vocational Qualification) or SNVQ (Scottish National Vocational Qualification) Level 3.
● Please check this product immediately to ensure that it has not been damaged and is complete. Before installation, please make
sure this product is the correct model and you have all the parts required for installation and using.
● Please read these instructions carefully and keep it for future reference.
Important
A
1 - 1
Maintenance
We do NOT recommend you use any household cleaners to clean the product. Because these cleaners change substance or formula
too frequently. The product should be always cleaned only with soapy water and rinsed with clean water and dried with a soft cloth.
Installation
Dimension
(Not Supplied)
Ø48
340.5
Ø48
Ø58
180.5
 Loading...