

Kurzanleitung / Quick installation guide
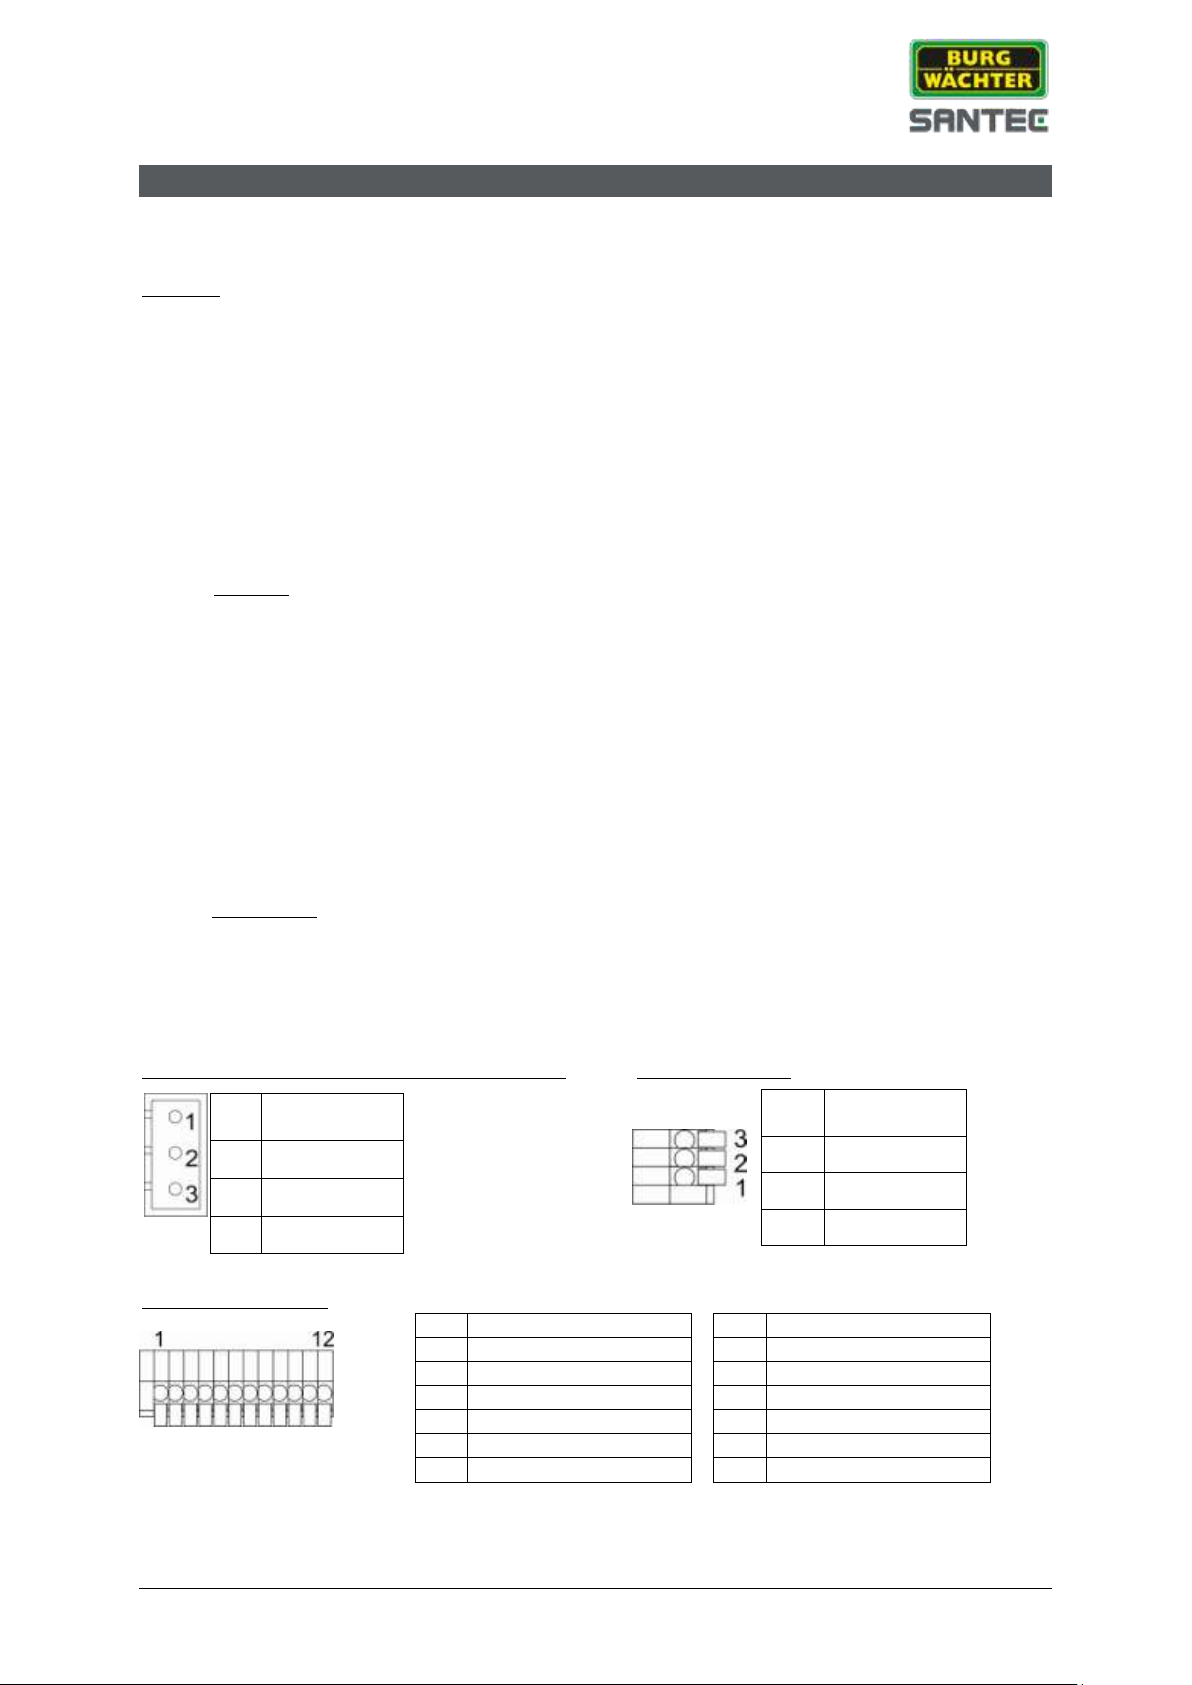
Pin Beschreibu
ng
1
AC 24_1
2
GND
3
AC 24_2
Pin
Beschreibu
ng
3
LINE_IN
2
GND
1
LINE_OUT
Pin
Beschreibung
Pin
Beschreibung
1
ALARM_OUT_NO_1
7 ALARM_OUT_COM_2
2
ALARM_OUT_NC_1
8 GND
3
ALARM_OUT_COM_1
9 ALARM_IN_4
4
GND
10
ALARM_IN_3
5
ALARM_OUT_NO_2
11
ALARM_IN_2
6
ALARM_OUT_NC_2
12
ALARM_IN_1
SNC-8322I, SNC-8322HO
KURZANLEITUNG
IP Speed-Dome SNC-8322I und SNC-8322HO
Achtung:
Wenn Sie den Speed-Dome aus dem Karton nehmen, heben Sie ihn nicht am Gehäusedeckel hoch:
Der Deckel ist nicht verschraubt und kann sich beim Herausheben des Speed-Domes lösen, so dass
die gesamte Kamera zu Boden fallen kann.
Um den Speed-Dome in Betrieb zu nehmen, gehen Sie bitte wie folgt vor:
1. Ziehen Sie den Gehäusedeckel ab und entfernen Sie die Transportsicherungen (Klebestreifen
am Objektiv, Füllstoff an der Deckelinnenseite, Linsenabdeckung).
2. Schrauben Sie die Deckenhalterung (kann auch als Bohrschablone dienen) an der
Zimmerdecke fest und führen Sie die Kabel aus der Decke durch die Halterung.
3. Verbinden Sie das LAN-Kabel mit dem Speed-Dome. Wenn Sie kein PoE verwenden, ist ein
Netzteil mit offenem Kabelende erforderlich sowie der beiliegende Stromstecker.
Hinweis: Die eingebaute Heizung bei Kamera SNC-8322HO funktioniert nur bei
Spannungsversorgung mit 24 V AC und nicht mit PoE).
4. Setzen Sie den Speed-Dome auf die Deckenhalterung auf. Drehen Sie ihn hierbei ein wenig,
bis die Fixierschraube greifen kann und Sie den Speed-Dome mit der Halterung fest
verschrauben können.
5. Setzen Sie zum Schluss den Gehäusedeckel wieder auf und schrauben Sie ihn fest.
6. Legen Sie die beiliegende CD in Ihren PC/Laptop ein und installieren Sie den
IP-Finder.
7. Der IP-Finder zeigt Ihnen eine IP-Adresse für die Kamera an.
Bei einem Doppelklick auf die IP-Adresse wird standardmäßig der Internet Explorer geöffnet.
Sollte dieses nicht funktionieren, können Sie auch manuell die vom IP-Finder angezeigte IPAdresse im Internet Explorer eingeben. Mittels des IP-Finders kann bei Bedarf der Kamera
eine andere IP-Adresse zugewiesen werden.
IP-Adresse:
Die Kamera ist mit einer standardmäßigen IP-Adresse ausgestattet:
Standard IP-Adresse: 192.168.1.168 (oder durch DHCP eingestellt, wenn verfügbar)
Benutzername: admin
Passwort: 9999
Anschluss an Spannungsversorgung (24 V AC): Audio Anschluss:
Alarm I/O Anschluss:
Weitere Informationen zur Installation und Konfigurationen der Kamera entnehmen Sie bitte der
Bedienungsanleitung. Irrtum und technische Änderungen vorbehalten.
Version 1.0sfi/0612/dt-engl/A5
Kurzanleitung / Quick installation guide
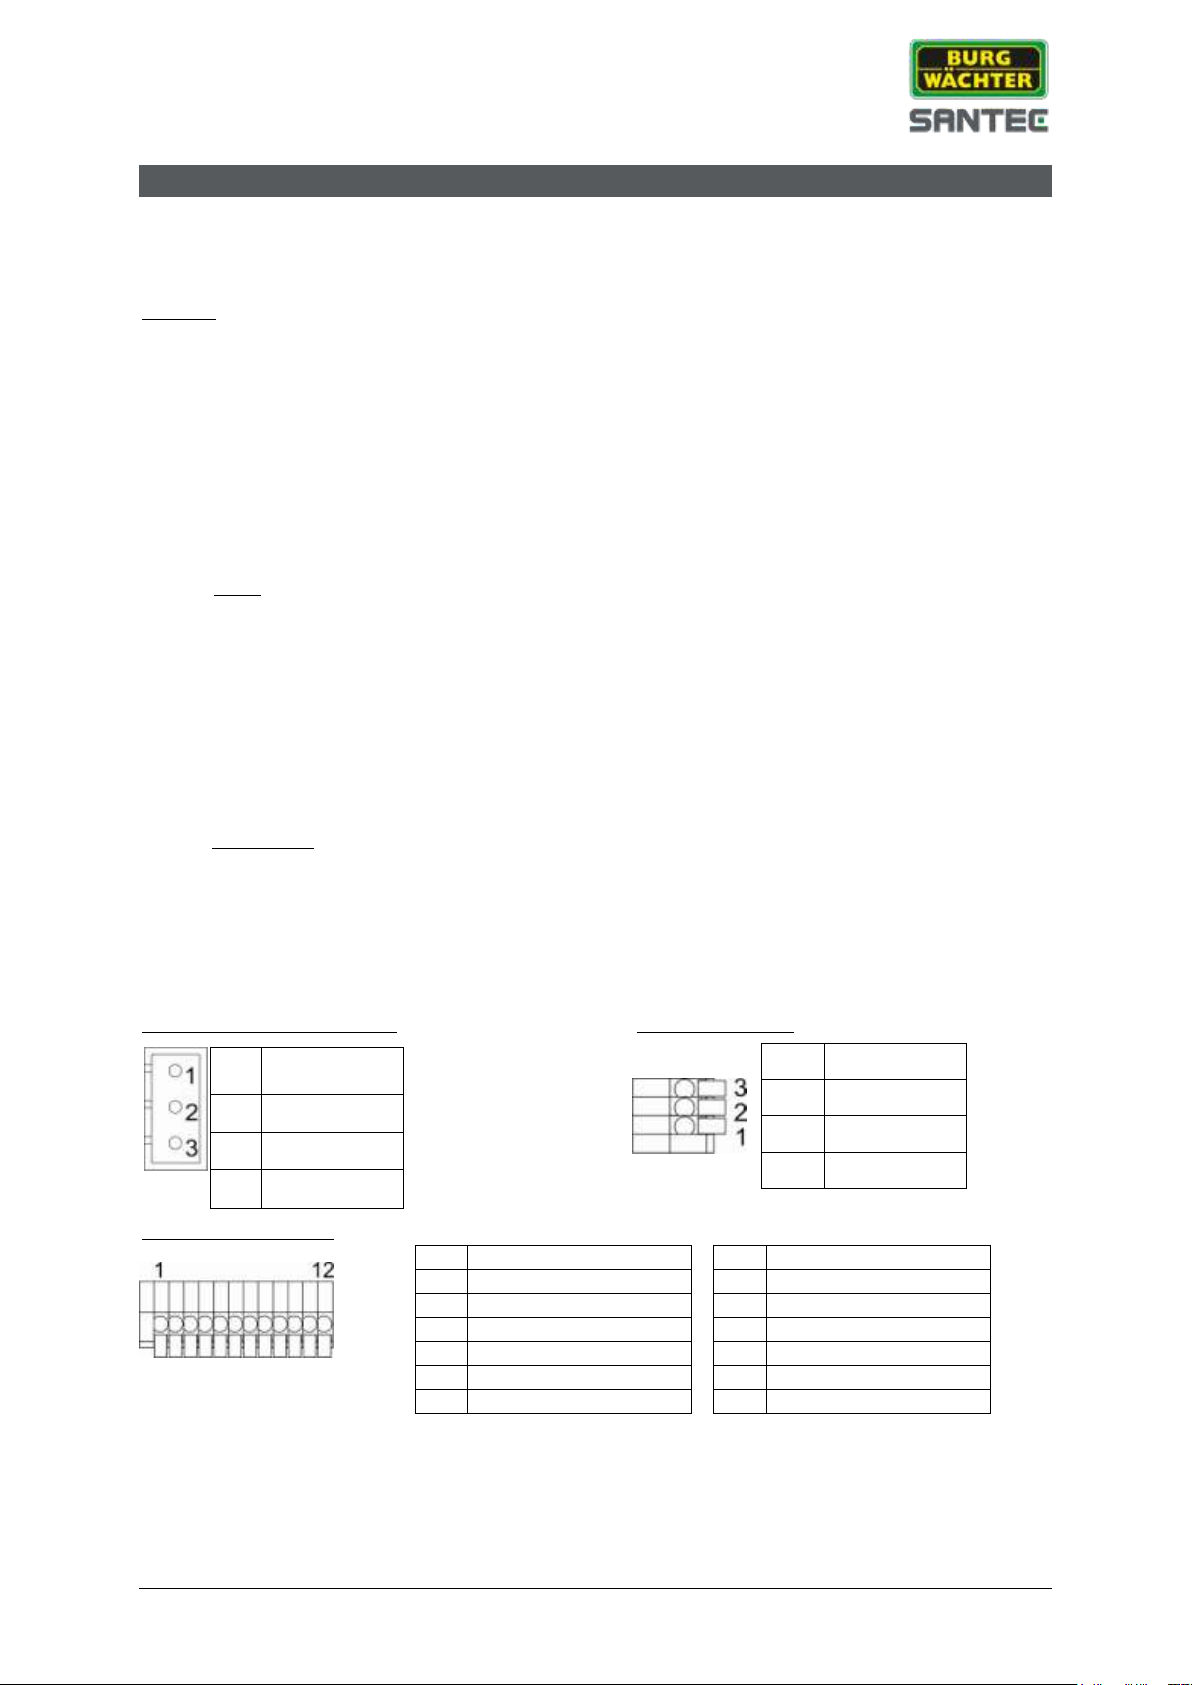
Pi
n
Description
1
AC 24_1
2
GND
3
AC 24_2
Pin
Description
3
LINE_IN
2
GND
1
LINE_OUT
Pin
Description
Pin
Description
1
ALARM_OUT_NO_1
7 ALARM_OUT_COM_2
2
ALARM_OUT_NC_1
8 GND
3
ALARM_OUT_COM_1
9 ALARM_IN_4
4
GND
10
ALARM_IN_3
5
ALARM_OUT_NO_2
11
ALARM_IN_2
6
ALARM_OUT_NC_2
12
ALARM_IN_1
SNC-8322I, SNC-8322HO
QUICK INSTALLATION GUIDE
IP speed dome SNC-8322I and SNC-8322HO
Caution:
When taking the speed dome out of the box, do not lift it by its housing top. The top is not screwed
tight and may come off when taking the dome out of the box, hence the entire dome may fall down.
To operate the speed dome, please follow these steps:
1. Take off the housing top and remove the transport securing devices ( adhesive tape on lens,
filling material on housing top’s inner side, lens cover).
2. Mount the bracket (may also serve as a drilling hole scheme) to the ceiling and lead the
cables through the bracket.
3. Connect the LAN cable to the speed dome. If you don’t use PoE, a power adapter with open
cable ends is required plus a power plug (included in the delivery)..
Note: The built-in heater of camera SNC-8322HO only operates when 24 V AC is used (and
not PoE).
4. Mount the speed dome to the ceiling bracket. Turn the dome a bit until the fixing screw is in
the right position and you can screw it tight to the bracket.
5. Put the housing top back and screw it tight.
6. Insert the CD (included in the delivery) into your PC/laptop and install the IP-finder.
7. The IP-finder displays an IP address for the camera. Double-click on the IP address and the
Internet Explorer comes up automatically. In case this doesn’t work, you may also enter the IP
address (as shown by the IP-finder) manually into the Internet Explorer. Using the IP-finder,
another IP address can be assigned to the camera, if required.
IP address:
The camera comes with a default IP address:
Default IP address: 192.168.1.168 (or by DHCP, if available)
User name: admin
Pass word: 9999
Connect to power (24 V AC): Connect to audio:
Alarm I/O connection:
Please also refer to the user manual for further installation information and on camera configurations.
Subject to technical changes. Errors excepted.
Version 1.0sfi/0612/dt-engl/A5
 Loading...