

Page 1
BUNN
BREWING
®
TU3 & TDO-4
DAILY BREWING & CLEANING INSTRUCTIONS
STEP 1
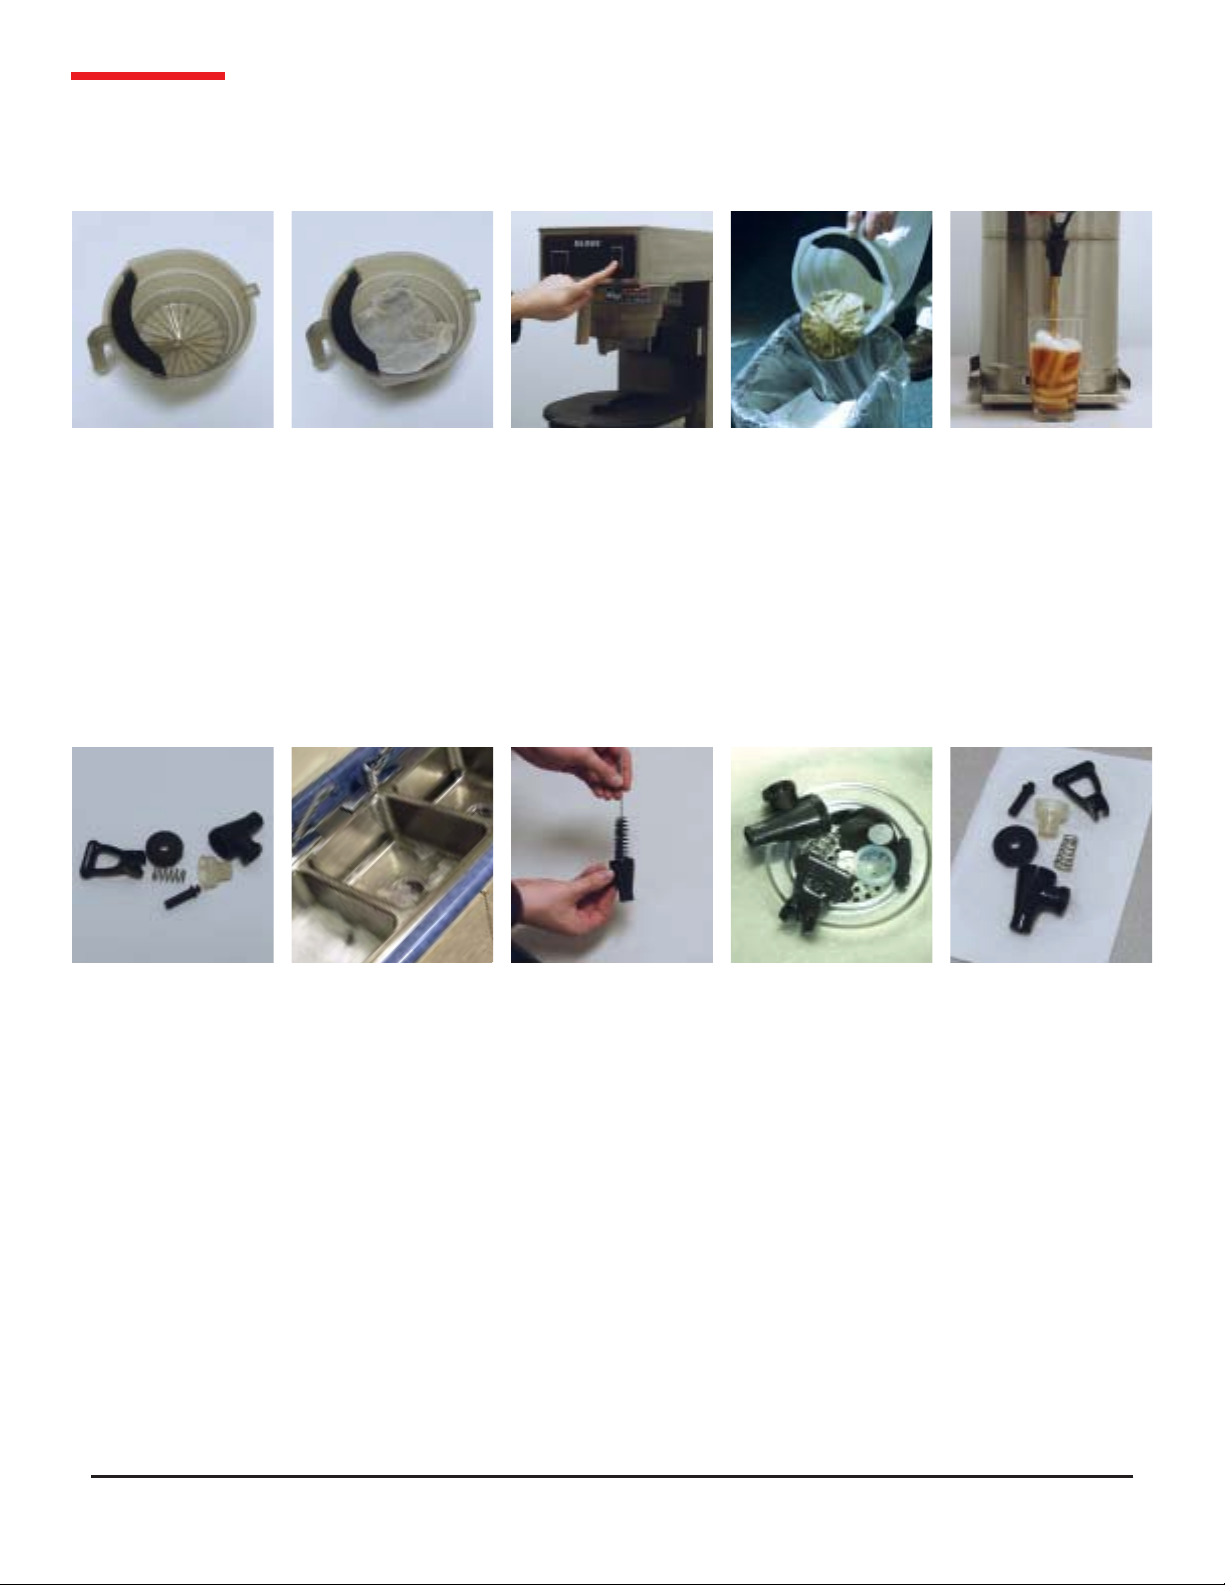
Begin each brew cycle with a
clean, empty funnel and
server.
CLEANING
STEP 1 STEP 2 STEP 3 STEP 4
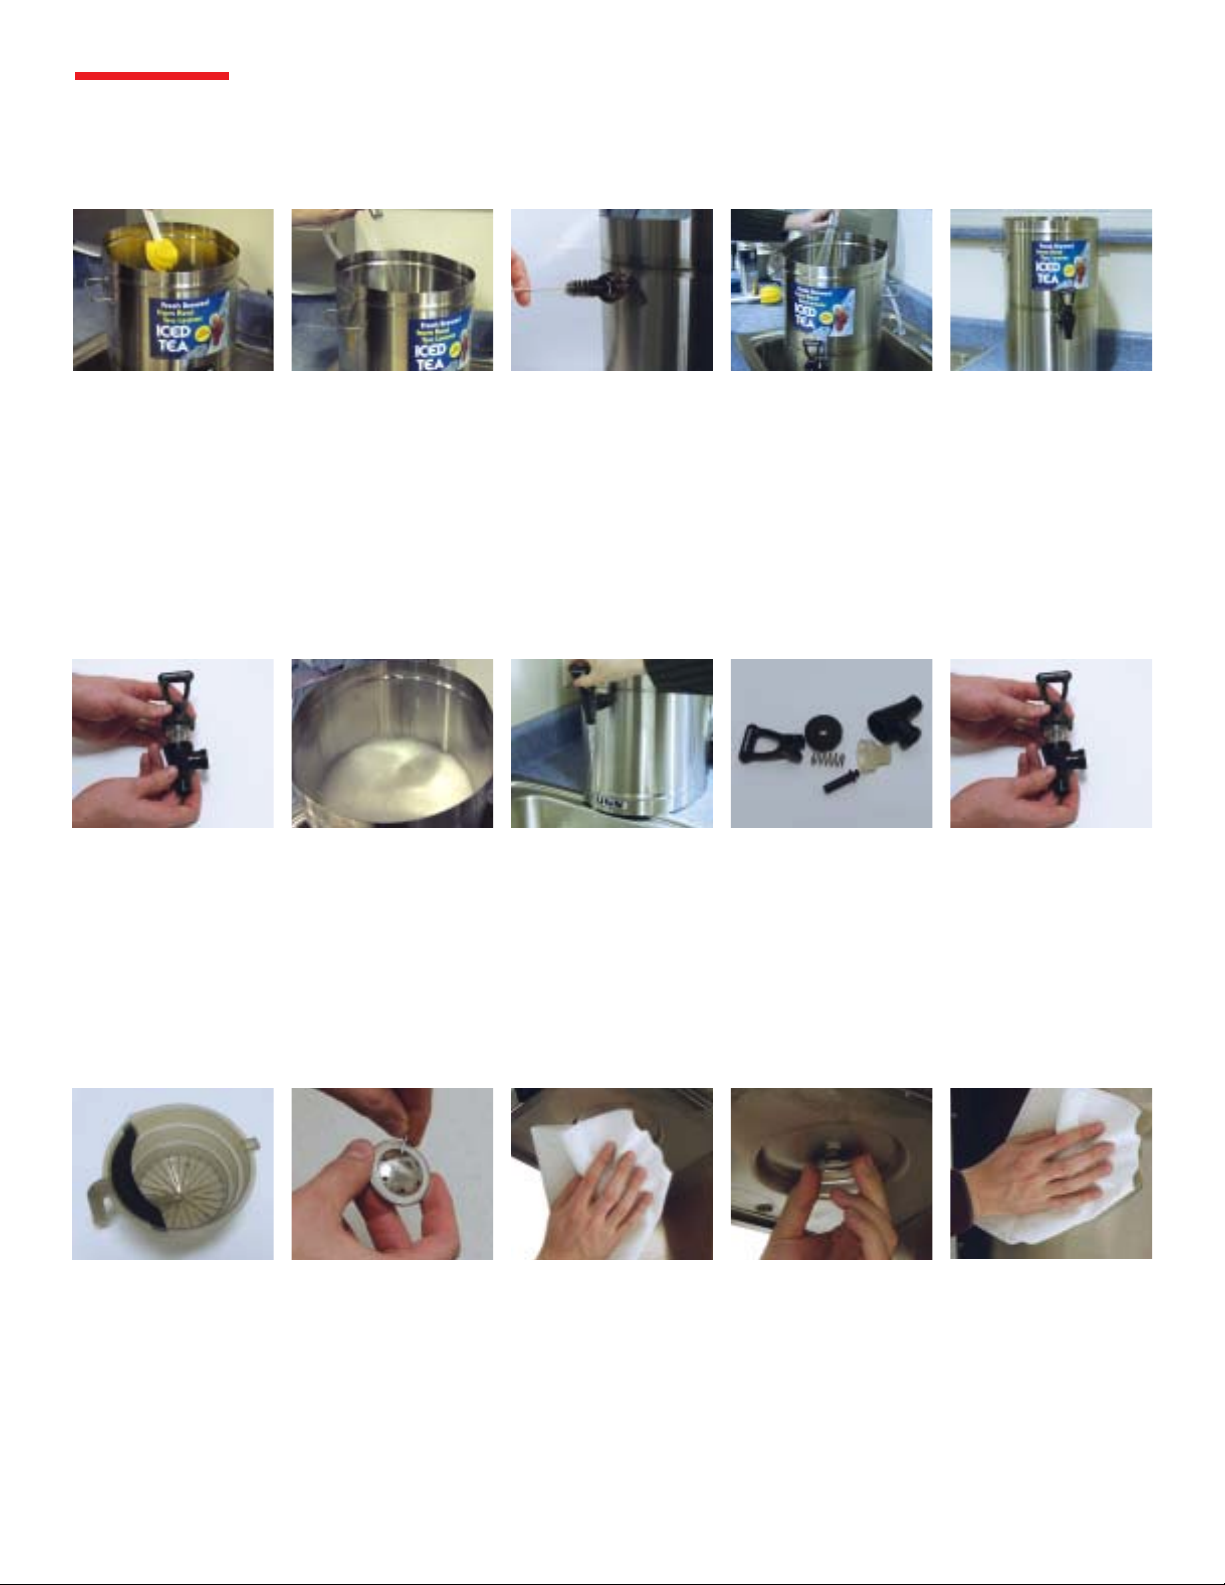
Turn the faucet in a counterclockwise direction and remove the faucet from the dispenser. Unscrew the faucet
cap from the faucet body and
disassemble all faucet parts.
STEP 2 STEP 3 STEP 4
Insert one tea pouch into the
funnel.
Transfer these parts to a three
compartment sink for cleaning. Fill the first sink with a
soap solution using a mild
detergent, the second sink
with a sanitizer solution (75°F
warm chlorine solution of at
least 50-100 ppm) and the
third sink is used for clean
rinse.
Slide the loaded brew funnel
into the funnel rails until it
stops. Place the power switch
in the ON position. Momentarily press and release the
START switch.
Use a small brush (BOM
#00674.0000) to thoroughly
scrub the faucet body.
When tea no longer drips
from the funnel tip, carefully
remove the brew funnel and
discard the used tea pouch.
Return the power switch to
OFF to prevent a false start.
Thoroughly clean and sanitize the brew funnel and funnel tip screen.
Allow the parts to soak in a
sanitizer solution for a minimum of ten minutes.
STEP 5
Fresh tea is available at the
faucet. Drain the reservoir
before starting another brew
cycle.
STEP 5
Remove the faucet parts from
the sanitizer solution and
rinse thoroughly. Allow parts
to air dry over night.
DO NOT KEEP BREWED BEVERAGES OVERNIGHT
35287.0000A 01/03 ©2003 Bunn-O-Matic Corporation
35287 012003
Page 2
®
BUNN
DAILY BREWING & CLEANING INSTRUCTIONS
CLEANING (Continued)
TU3 & TDO-4
STEP 6
Thoroughly clean the entire
inside surface of the dispenser and the faucet shank
using a small brush (BOM
#00674.0000) mild detergent
and water solution. Thoroughly rinse the dispenser
with clean water.
STEP 11
Assemble the faucet components and attach the faucet
to the dispenser turning
clockwise.
STEP 7 STEP 8 STEP 9 STEP 10
Prepare a sanitizer solution
in a clean bucket (1/4 gallon). Use a commercial sanitizer that has 50-100 ppm of
available chlorine with a concentration level of at least
3% available chlorine (KAY5 Sanitizer). Follow the mixing instructions to ensure 100
ppm of available chlorine.
STEP 12 STEP 13 STEP 14 STEP 15
Once a week, fill the dispenser
with a chlorine solution (75°F
warm chlorine solution of at
least 50-100 ppm).
Pour a small amount of sanitizer solution into the dispenser. Use a small brush
(BOM #00674.0000) to clean
all the way through the faucet shank. Repeat several
times.
Draw a small amount (2 oz.)
of presoak through the faucet making contact with the
faucet components. Allow the
dispenser to soak over night.
The next morning, perform
the daily cleaning procedures
on the faucet and dispenser.
Thoroughly rinse the dispenser with clean water.
Once a month, replace the
faucet seat cup (B.O.M.
#00600.0000). Discard the
old seat cup.
Allow the dispenser to air dry
over night
The faucet assembly (B.O.M.
#03260.0001) can be ordered for replacement.
STEP 16
Clean and sanitize the brew
funnel, funnel tip and screen
assembly.
STEP 17 STEP 18 STEP 19 STEP 20
Remove and thoroughly rinse
the sprayhead. The holes
must be open and clear of
any mineral deposits.
Wipe the sprayhead panel
clean with a damp cloth.
Insert the deliming spring
into the sprayhead tube until
about an inch is visible and
move it in and out five or six
times. Insert the spring into
the air vent hole in the
sprayhead panel and move it
in and out five or six times.
Reinstall the sprayhead.
Wipe down the entire outside surface of the brewer
with a clean damp cloth.
35287 012003
 Loading...