

Page 1

USE AND CARE OF YOUR
My Café®
Tea & Coffee Pod Brewer
Model MCA
AUTOMATIC POUR IN
The Bunn logo is a registered trademark of Bunn-O-Matic Corporation.
My Café is a registered trademark of Bunn-O-Matic Corporation.
Model MCP
RECORD MODEL & SERIAL NUMBER
In order to receive accurate and timely warranty assistance, it is important to
record the Model and Serial Number information located on the bottom of the
brewer. A space is provided below for this information.
MODEL:
SERIAL NUMBER:
41980.0000C 06/11 ©2009 BUNN-O-MATIC CORPORATION
Record these numbers from the
bottom of the brewer, before
filling the brewer with water.
Page 2
TABLE OF CONTENTS
WARNINGS ............................................................................................................ 2
USER NOTICES ...................................................................................................... 3
INTRODUCTION ..................................................................................................... 3
IMPORTANT HANDLING INFORMATION ................................................................ 3
SPECIFICATIONS ...................................................................................................4
IMPORTANT SAFEGUARDS ................................................................................... 5
GENERAL INFORMATION .......................................................................................6
FEATURES AND CONTROLS ..................................................................................8
DEFINITIONS ......................................................................................................... 9
WATER INLET SET-UP ......................................................................................... 10
PLUMBING REQUIREMENTS ............................................................................... 10
INITIAL BREWER SET-UP .................................................................................... 11
BREWING DELICIOUS COFFEE OR TEA ............................................................... 13
ROUTINE CLEANING ............................................................................................ 14
PERIODIC CLEANING/DESCALING ...................................................................... 14
CLEANING THE SPRAYHEAD/SEAL .....................................................................15
ASSEMBLING THE SPRAYHEAD/SEAL ............................................................... 15
INSPECTING THE SPRAYHEAD/SEAL .................................................................. 16
CLEANING THE POD HOLDER ............................................................................. 16
CYCLING THE BREWER ....................................................................................... 16
STORING THE BREWER ....................................................................................... 16
TROUBLESHOOTING ......................................................................................17-19
LIMITED WARRANTY ..........................................................................................20
USER SERVICEABLE PARTS ................................................................................ 22
This symbol alerts you
to the risk of fire or
electrical shock in the
accompanying message.
Repair Should Be Done By Authorized Service Personnel!
WARNING
RISK OF FIRE OR ELECTRICAL SHOCK
Hazardous Voltage!
Can Cause Fire Or Electrical Shock!
Do Not Disassemble The Brewer!
There Are No User Serviceable Parts Inside!
Keep this booklet for future reference.
2
This symbol alerts
you to important
operating and service
instructions.
Page 3
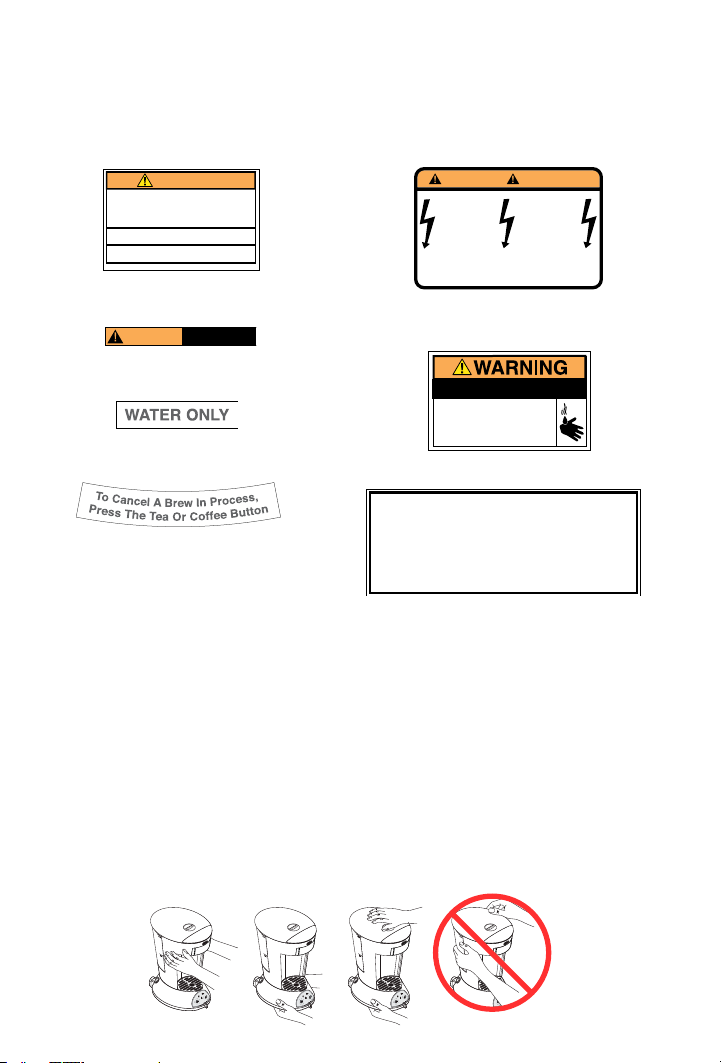
USER NOTICES
HOT LIQUIDS
Carefully read and follow all notices on the equipment and in this manual. They
were written for your protection. All notices on the equipment should be kept in
good condition. Replace any unreadable or damaged labels by visiting our web site
at www.bunn.com.
WARNING
• DO NOT OVERLOAD CIRCUIT.
• ALWAYS ELECTRICALLY GROUND THE CHASSIS.
• DO NOT DEFORM PLUG OR CORD.
• FOLLOW NATIONAL AND LOCAL ELECTRICAL CODES.
• KEEP COMBUSTIBLES AWAY.
FAILURE TO COMPLY RISKS EQUIPMENT
DAMAGE, FIRE OR SHOCK HAZARD.
READ THE ENTIRE OPERATING MANUAL
BEFORE USING THIS PRODUCT
00986.0002F 10/07 ©1994 Bunn-O-Matic Corporation
# 00986.0002
WARNING
Risk of fire or
electrical shock.
Do not open.
No user serviceable
parts inside.
Do not immerse.
Household and
commercial type.
Repair should be done
by authorized Service
Personnel only.
AVERTISSEMENT
Risque d'incendie ou
d'électrocution.
Ne pas ouvrir.
Aucune pièce réparable
par l'utilisateur à
l'intérieur.
Ne pas immerger.
Type ménager et
commercial.
Les réparations doivent être
confiées aux personnes
qualifiées.
# 37267.0000
WARNING:
# 37280.0000
HOT LIQUIDS
Make certain the pod drawer is
securely locked into the brewer.
Failure to do so can result in a
# 37281.0000
burn hazard.
# 41936.0000
As directed in the International Plumbing Code of the
International Code Council and the Food Code
Manual of the Food and Drug Administration (FDA),
# 37282.0000
this equipment must be installed with adequate
backflow prevention to comply with federal, state
and local codes. For models installed outside the
U.S.A., you must comply with the applicable Plumbing /Sanitation Code for your area.
# 00656.0001
INTRODUCTION
The BUNN® My Café® Automatic and Pourover Tea & Coffee Pod Brewer is
designed to personalize your brewing experience by allowing a single cup brew of
perfectly balanced coffee or tea.
BUNN® brewers are recognized in homes, offices and restaurants throughout
the world as the very finest.
IMPORTANT HANDLING INFORMATION
To avoid dropping and damaging the brewer or reservoir, do not attempt to pick
the brewer up by the reservoir or lid. Always grasp the brewer by the sides, bottom,
or top and bottom of the brewer.
P3027
3
Page 4

SPECIFICATIONS
Electrical (MCA/MCP)- This brewer has an attached, 3-prong grounded cord set
and requires 2-wire service with ground, rated 120 volts ac, 12 amps, single phase,
60 Hz. Components include a 1450-watt tank heater.
NOTE: Do not operate brewer on the same outlet as other electrical appliances.
Electrical (MCAA/MCPA)- This brewer has an attached, grounded cord set and
requires 2-wire service with ground, rated 220-240 volts ac, 6 amps, single phase,
50/60 Hz. Components include a 1450-watt (max.) tank heater.
NOTE: Do not operate brewer on the same outlet as other electrical appliances.
CE REQUIREMENTS
• This appliance must be installed in locations where it can be overseen by trained
personnel.
• For proper operation, this appliance must be installed where the temperature is
between 5°C to 35°C.
• Appliance shall not be tilted more than 10° for safe operation.
• An electrician must provide electrical service as specied in conformance with all
local and national codes.
• This appliance must not be cleaned by water jet.
• This appliance is not intended for use by persons (including children) with reduced
physical, sensory or mental capabilities, or lack of experience and knowledge, unless they have been given instructions concerning use of this appliance by a person
responsible for its safety.
• Children should be supervised to ensure they do not play with the appliance.
• If the power cord is ever damaged, it must be replaced by the manufacturer or
authorized service personnel with a special cord available from the manufacturer or
its authorized service personnel in order to avoid a hazard.
• Machine must not be immersed for cleaning.
Dimensions:
MCA/MCAA/MCPA - 13 9⁄16 in. (34.4 cm) High; 7 13⁄16 in. (19.8 cm) Wide;11
1
⁄16 in. (28 cm) Deep.
MCP - 12 7⁄16 in. (31.6 cm) High; 7 3⁄4 in. (19.7 cm) Wide;10 5⁄8 in. (27 cm) Deep.
Brew Capacity:
MCA/MCAA and MCP/MCPA - Approx. 4 to 12 oz. (118 to 355 ml) serving in one
ounce increments. Reservoir holds 46 oz. (1.7 L) of water.
Weight : Each includes pod brewer, pod holder, lid, reservoir, drip tray and drip tray grate.
MCA/MCAA/MCPA- 8 11⁄16 pounds (3.9 kg)
MCP- 7 1⁄2 pounds (3.4 kg)
4
Page 5
IMPORTANT SAFEGUARDS
Follow these basic safety precautions when using electrical appliances
to reduce the risk of fire, electric shock, and/or personal injury:
• Read all instructions.
• Do not touch hot surfaces. Use
handles or knobs.
• To protect against electric shock, do
not place cord, plug, or brewer in
water or liquid.
• Close supervision is necessary
when the brewer is used by or near
children.
• Unplug from outlet when not in use
for extended periods of time and
before cleaning. Allow to cool before
putting on or taking off parts, and
before cleaning.
• Do not operate the brewer with a
damaged cord or plug, or after the
brewer malfunctions or has been
damaged in any manner. Return the
brewer to an Authorized Service
Facility for examination, adjustment,
or repair.
• The use of an accessory not evaluated
for use with this brewer may cause
injuries and is not authorized.
• For indoor use only.
• Do not let the power cord hang over
edge of table or counter, or touch hot
surfaces.
• Do not place the brewer on or near
a hot gas or electric burner, or in a
heated oven.
• Do not use brewer for other than its
• Do not insert or remove pod holder
while brewing. Press the coffee or tea
button to stop or cancel a brew cycle.
• A canceled brew cycle is not held in
memory. The next brew cycle will
dispense full volume based on the
volume setting.
• To avoid container overow, empty
mug before each brew cycle.
• Never place hands directly under the
pod holder. Hot water and steam can
be present.
• Do not place brewer in a sink or near
other water source. Remove reservoir
and fill separately or use the slide lid.
• When the brewer is idle, the lid
should be in the closed position.
• Always use a mug or bowl that is
larger than the brew volume selected.
• Keep hands away if container
overows. Wait until brew nishes,
let liquid cool, then lower volume
setting or use a larger mug.
• Never brew without the pod holder
insert in place. Excessive pressure
on the pod could result in coffee or
tea escaping from the holder and into
the container. Hot liquid splash and
burns could occur.
• Use cold water only.
• Do not place torn pods or use ground
coffee in pod holder.
intended use.
SAVE THESE INSTRUCTIONS
• A short power-supply cord is used to reduce the risks resulting from becoming
entangled in or tripping over a longer cord.
• If an extension cord is used, the marked electrical rating of the extension cord
should be at least as great as the electrical rating of the brewer, and the cord
should be arranged so that it will not hang over the edge of the table or counter
where it can be pulled on by children or tripped over.
• The extension cord must be of the 3-pronged, 3-socketed, grounding type,
3-wire cord. (Including grounding conductor).
• If the power cord is ever damaged, it must be replaced by the manufacturer
or authorized service personnel with a special cord available form the
manufacturer or its authorized service personnel in order to avoid a hazard.
Improper electrical installation will damage electronic components. Damage
caused by incorrect electrical connections is not covered by warranty.
5
Page 6

GENERAL INFORMATION
Improper installation could result in permanent damage and void the
limited warranty. Read & follow instructions on pages 10-11.
• Use CAUTION when dispensing hot water from the brewer. The water
from your BUNN® Pod brewer is approximately 200°F (93°C). This is
approximately 50°F (10°C) hotter than the hot water from your faucet and
must be handled with care.
• This brewer is designed to remain plugged in at all times (except during initial
installation, cleaning, or when brewer will not be used for an extended period of
time).
• A power switch is provided on the lower left side to completely shut off all
electrical components when your plans take you away from the brewer for three
or more days. Safety features, designed into the BUNN® Pod brewer, make the
daily use of this switch unnecessary.
• Whenever the brewer has been shut off or unplugged for an extended period of
time, rinse the reservoir and refill with fresh cold water before using. It is also
recommended that the brewer be cycled. (See page 15)
• Your BUNN® Pod brewer has a specially designed tank to keep the water inside
at the proper temperature. This constant supply of hot water assures the correct
method of brewing in less than one minute.
• When inserting a pod into the pod holder, it is important to seat the pod all the
way into the holder cavity. Leaks could occur if the pod is too large, or does not
seat completely into the holder cavity. Ensure that all of the paper edge and any
tabs of the pod are inserted into the holder cavity.
• Prior to brewing, make certain pod holder is securely locked into the brewer.
Failure to do so can result in a burn hazard.
• While brewing, the incoming water in the tank is also being heated to the proper
temperature and held until needed.
• The brewer is equipped with a 120 volt, 3-prong grounded cord set. The plug is
provided with a round grounding pin. (International brewers are equipped with
a 230 volt, grounded cord set. The plug is provided with a grounding circuit
in compliance with local requirements) This is a safety feature and allows the
plug to fit into a properly grounded outlet. If the plug does not fit into the outlet,
contact an electrician to update your outlet. Attempting to bypass the safety
aspect of this plug will void the warranty.
• The sprayhead may become loose over time. Unplug the machine and allow it
to cool down before tightening or removing the sprayhead. Use extreme caution
not to burn yourself. Tighten or remove the sprayhead with your fingertips.
CONTINUED
6
Page 7

GENERAL INFORMATION (Cont.)
• CAUTION: Never apply force to remove the pod holder. If the holder does not
slide out easily, wait 10 minutes and try again. Burns resulting from hot water
splash could occur if the holder is forcibly removed from the brewer.
• Use CAUTION to avoid burns during consumption of any freshly brewed
beverage. Servings are extremely hot.
7
Page 8

FEATURES & CONTROLS
A Slide Lid
B Pod Holder
K Release Button
C Sprayhead Seal
D Sprayhead
E Pod Holder Insert
F Pod Holder
G Drip Tray Grate
H Drip Tray
I Volume Control
K Lever
J Control Panel
K Brew Lights
K (Blue)
L Water Inlet (MCA)
M Power Switch
N Water Reservoir
O Primer Bulb
N
M
L
K
J
O
A
B
C
D
E
F
G
H
I
WARNING: Hot liquids present. Use caution when brewing and
removing the Pod Holder.
NOTE: Brewer requires a minimum 15 amp circuit.
REFILL WATER
INDICATOR
COFFEE BREW
BUTTON
CONTROL PANEL
HEATING INDICATOR
POD HOLDER
INDICATOR
TEA BREW
BUTTON
VOLUME CONTRO L
INDICATORS
8
Page 9

DEFINITIONS
• SLEEP MODE - If the brewer has been idle for 6 hours, it will reduce power to
conserve energy. After 26 hours, the brewer will shut down completely. When
either of these two sleep modes occur, the Pod Holder Release Button will no
longer be glowing red. To wake the brewer up, press either the Coffee or Tea
Brew button, or eject the pod holder. The light and heater will come back on.
• BREW CANCEL - If it is necessary to cancel a brew cycle, this can be done by
pressing either the Coffee or Tea button again. Although some water may drip
out, the pump will immediately stop forcing water through the pod holder.
Always wait for hot liquid to stop before removing the pod holder.
CAUTION: When a brew cycle is canceled, it will not finish dispensing it’s previous
brew volume when the button is pressed again. The memory is reset and the
brewer will dispense a full volume as indicated by the Volume Control Lever. This
could cause a container to overflow if it is not emptied prior to pressing the button
a second time.
• MIN & MAX MARKINGS - The side of the water reservoir bears the markings
“MIN” and “MAX”. These markings indicate the minimum and maximum
amount of water that can be placed in the reservoir. If the minimum amount of
water is not in the reservoir, the brewer will not operate. These markings are
referenced throughout this booklet.
• PULSE BREW™ - Using the Tea Button will cause the brewer to perform a
pulse brew operation. A Pulse Brew cycles the water on and off to effectively
steep the tea to extract the proper avor. The “On-Off-On” water ow is normal.
Always wait for the blue (brew) lights to go out, and the red BUNN light to come
back on before carefully removing the mug or pod holder. Pressing either brew
button during this operation will stop the brew cycle. (See the “Brew Cancel”
feature above for more information.)
9
Page 10

WATER INLET SET-UP (MCA/MCAA ONLY)
The My Café
®
Automatic Pod Brewer is designed for businesses and office
applications, where a pressurized water system can be utilized to feed the brewer
with a constant water supply. If the machine will not be used with plumbing, follow
MCP/MCPA set up instructions.
IMPORTANT NOTE: If the brewer is to be used as a pour-over, the cap must be
installed on the water inlet fitting, located in the rear of the brewer. (See FIG. 3)
Otherwise, prepare the existing water line as defined in “Plumbing Requirements”
and then follow the instructions provided below.
PLUMBING REQUIREMENTS
If used as an automatic, this brewer must be connected to a cold water system
with operating pressure between 20 and 90 psi (138 and 620 kPa) from a 1/2” or
larger supply line. A shut-off valve should be installed in the line before the brewer.
Install a regulator in the line when pressure is greater than 90 psi (620 kPa) to
reduce it to 50 psi (345 kPa). The water inlet tting on the strainer is 1/4” are.
Verify that Strainer and Orifice are installed.(Fig. 3)
NOTE: Bunn-O-Matic recommends 1/4” copper tubing for installations of less than
25 feet and 3/8” for more than 25 feet from the 1/2” water supply line. A tight
coil of copper tubing in the water line will facilitate moving the brewer to clean the
countertop. Bunn-O-Matic does not recommend the use of a saddle valve to install
the brewer. The size and shape of the hole made in the supply line by this type of
device may restrict water flow.
As directed in the International Plumbing Code of the International Code Council
and the Food Code Manual of the Food and Drug Administration (FDA), this
equipment must be installed with adequate backflow prevention to comply
with federal, state and local codes. For models installed outside the U.S.A.,
you must comply with the applicable Plumbing /Sanitation Code for your area.
P3525
Strainer/
Flow control
Provided tube
FIG. 3 Strainer and Orifice Location 120V
STRAINER
ORIFICE
120V230V
10
Page 11

INITIAL BREWER SET-UP (MCP/MCPA)
Remove Slide Lid (A) and Water Reservoir (N)
1
Thoroughly rinse the Water Reservoir then
2
ll to the MAX line.
NOTE: Filling the Water Reservoir is not
required for Automatic units with water line
installed.
Reinstall the Water Reservoir.
3
Plug in the brewer and turn on the
4
Power Switch (M).
NOTE: The “Rell Water Indicator” will
slowly ash until initial setup is complete.
Press the Pod Holder Release Button
5
(B) and pull the Pod Holder (F) out.
Rinse thoroughly and reinstall.
CAUTION: Always verify the Pod Holder is
locked into place before brewing.
CAUTION: Do not attempt to remove the Pod
Holder while brewing.
Place a cup that will hold a minimum of
6
14 oz. onto the Drip Tray Grate (G).
CONTINUED
11
Page 12

INITIAL BREWER SET-UP (MCP/MCPA)
Fill the Primer Bulb (O) with water by
7
squeezing the bulb while in the Water
Reservoir.*
*NOTE: Filling the Water Reservoir by
pressing the “Coffee Brew Button” once
will be required for Automatic units prior to
completing Step 7.
NOTE: Squeezing the bulb with the whole
hand rather than just the nger tips will
give better results.
Place the tip of the “Primer Bulb” over
8
the Water Reservoir Exit.
Press the “Coffee Brew Button” while
9
applying a small amount of downward
pressure on the “Primer Bulb” then
squeeze to dispense the water from
the bulb. Raise the “Primer Bulb” from
the Water Reservoir Exit to allow the
internal water pump to pull water from
the Water Reservoir.
NOTE: Repeat Step 7 & 8 until the unit is
primed, i.e. water is dispensing from the
Pod Holder into the cup.
If the “Rell Water Indicator” is no
10
longer ashing the initial setup is complete. Wait for the “Heating Indicator” to
go out before brewing a fresh cup.
12
Page 13

BREWING DELICIOUS COFFEE OR TEA
2. Adjust the volume
CAUTION: Hot water and hot pod will be
1. Check water level.
WARNING:
* Never place hands directly under pod holder outlet. Hot water can be present.
* Never remove the holder with force. If stuck, wait 10 minutes and try again.
* Never brew without the pod holder insert in place.
Must be above MIN
line.
control lever to the
desired volume.
NOTE: Minimum volume is approx.
4 oz. (118 ml) Maximum is approx.
12 oz. (355 ml) Settings are in 1 oz.
(30 ml) increments. Volumes are
approximate and may vary with type
and size of pod.
3. Place a mug, several
ounces larger than
the volume selected,
on the drip tray grate
below the pod holder.
4. Press and hold the
pod holder release
button while sliding
the pod holder out.
5. Press a pod into the
pod holder. NOTE:
For best results,
center pod in holder
and gently press the
pod completely into
holder cavity.
6. Insert the loaded
pod holder into the
brewer and press all
the way in to lock
holder.
7. Press and release
the Coffee or Tea
button. To cancel
a brew, press and
P2959
release the Coffee
or Tea button.
8. When brewing has
stopped, press and
hold the pod holder
release button
while sliding the
pod holder out.
present.
P2961
NOTE: The red BUNN light will come back
on indicating the brew cycle has finished.
9. Dispose of the used
pod. Do Not Touch
P2908
Hot Pod!
Enjoy!
(Caution: Beverage is very hot.)
P2909
13
P2903
P2958
P2908
P2911
Page 14

ROUTINE CLEANING
Before beginning any cleaning procedure, unplug the
brewer to avoid the accidental start of a brew cycle.
Clean the pod holder, drip tray and drip tray grate after
each use, using a damp cloth and mild detergent and rinse.
With the pod holder and drip tray removed, use a damp cloth
with mild detergent to wipe the area below the pod holder
and into the drip tray area. Occasionally, wipe the outside of
the brewer with a damp cloth. (The reservoir, slide lid, pod
holder, drip tray and drip tray grate are dishwasher safe.)
PERIODIC CLEANING/DESCALING
P2963
(Recommended At Least Once a Month.)
Periodically, you should clean and descale the brewer to clear any mineral
deposits that may have accumulated due to impurities in the water source. If these
deposits are not removed, they can impair the operation of the brewer and reduce
the product life.
There are several products available specifically for descaling. We recommend
using URNEX® Activated Descaler or JavaClean2 Cleaner and Descaler, available
on our web site: www.bunn.com. (White vinegar can be used to descale if a
descaling product is not available.)
Follow the directions as printed on the manufacturer’s package.
1) Fill the reservoir with descaling product as described by the manufacturer’s
directions, or 32 oz. (946 ml) of white vinegar. Do not
add powder mix directly to the reservoir. Descaling
product must be mixed into a solution before it is
added to the reservoir.
2) Place an empty pod holder into the brewer. Be sure
the holder is locked into place, and set the VOLUME
CONTROL SLIDE LEVER to the maximum position.
3) Place an empty container or bowl on the drip tray grate
P3028
that will hold at least 14 oz. (414 ml) of liquid, and
press the COFFEE BREW BUTTON to start a brew cycle.
4) Once the brew cycle has finished, empty the container
and set it back onto the drip tray grate. Press the
COFFEE BREW BUTTON again to start a second brew
cycle.
5) Once the brew cycle has finished, empty the container
and the remaining solution, or vinegar from the
P2958
reservoir. Remove the pod holder; clean the reservoir
and pod holder thoroughly using a mild detergent, then
rinse.
NOTE: There is now descaling solution in the internal tank.
Follow the manufacturer’s directions if the solution must be
left in the tank for any period of time. For vinegar, allow the
solution to sit for at least two, but no more than four hours.
6) Fill the reservoir to the “MAX” line with fresh clean cold
P2908
water and place the pod holder back into the brewer.
CONTINUED
14
Page 15

7) Place the empty container back onto the drip tray grate and press the COFFEE
BREW BUTTON to begin a brew cycle.
8) When the cycle has finished, empty the container. Repeat step 7 at least two
more times to remove the solution from the tank.
9) Clean the pod holder with a mild detergent and rinse thoroughly.
10) Proceed to the “Cleaning The Sprayhead/Seal” section.
CLEANING THE SPRAYHEAD/SEAL
1) Press the Power Switch into the off “O” position.
2) Unplug the brewer and allow it to cool down.
(Minimum of 1 hour.)
3) After the unit has been allowed to cool, remove the
pod holder and set aside.
4) Using your fingers, rotate the sprayhead/seal
assembly until the sprayhead and seal are removed.
NOTE: If the sprayhead and seal are separated, they must
be reassembled as they were when removed from the
brewer. Improper reassembly could result in personal
P3015
injury from scalding water.
5) Clean the sprayhead and seal with a mild detergent and rinse thoroughly.
6) Using your fingers, rotate the sprayhead/seal assembly counter-clockwise
until it is finger tight.
7) Replace the pod holder.
8) Plug in the brewer and press the Power Switch to restore power to the
brewer.
ASSEMBLING THE SPRAYHEAD/SEAL
If the sprayhead and seal are separated during removal
or cleaning, they must be reassembled properly.
Top
1) Identify the top of the seal. The top of the seal that seats
against the roof of the sprayhead cavity has a ridge that
can be felt by running your fingers across the surface of
the seal. The bottom is smooth.
P2953
2) Identify the top of the sprayhead. The top of the
sprayhead has a star pattern and a threaded hole where
the sprayhead attaches to the brewer.
3) While carefully stretching the seal, guide the sprayhead
into the channel of the seal. Make sure it is completely
in the channel.
Top
P2953
When properly assembled, the sprayhead will slide easily
into the channel of the seal and will not cause any buckles in
the surface of the seal. If the sprayhead seems to be difficult
to seat, and you must stretch the seal more than a slight tug,
the assembly is not together correctly.
P2953
15
Page 16

INSPECTING THE SPRAYHEAD SEAL
When disassembling your brewer for cleaning, inspect the sprayhead seal for
cracks, tears and holes. Although the seal should last for an extended period of
time, damage can occur through handling.
CAUTION: The seal confines the hot liquid to the pod holder. Replace the seal if it
becomes damaged. Parts are available at www.bunn.com.
CLEANING THE POD HOLDER
To prevent residue build up, it is a good idea to periodically disassemble
the pod holder/screen assembly and clean it with a mild
detergent.
1) Press and hold the POD RELEASE BUTTON while
sliding the pod holder out.
2) Flip the POD HOLDER upside down and place the
holder cavity over the palm of your hand.
3) Using a small object, press the tab of the POD HOLDER
P2942
INSERT through the hole in the bottom of the pod holder to remove.
4) Clean the screen and holder using a mild detergent and rinse. (Dishwasher
Safe)
5) Press the insert back through the hole in the bottom of the POD HOLDER.
WARNING: Brewing without the insert can result in hot liquid splash and burns.
CYCLING THE BREWER
If the brewer has not been used for an extended period of time, it is a good
idea to cycle your brewer before brewing a serving of coffee or tea.
1) Remove the reservoir and pod holder from the brewer, clean with a mild
detergent and rinse.
2) Refill the reservoir to the maximum line.
3) Insert an empty pod holder into the brewer. (Make sure it locks in place)
4) Set the volume control lever to the maximum setting.
5) Place a container on the drip tray grate that will hold at least 14 oz. (414 ml)
6) Press the coffee brew button.
7) When the brew cycle has ended and water drip out has stopped, carefully
remove the pod holder and remove any excess water. You are now ready to
brew.
CAUTION: Water is hot!
STORING THE BREWER
Unplug the brewer and wait for it to cool. If your Pod brewer has been used,
it must be stored above 32°F (0°C) to prevent damage to the internal water tank.
Empty and dry the water reservoir before storing.
NOTE: Water will remain in the internal tank. If stored for an extended period of
time, refer to “Cycling The Brewer” section before using.
16
Page 17

TROUBLESHOOTING
SITUATION EXPLANATION
The REFILL WATER INDICATOR
has come on.
The POD HOLDER INDICATOR
has come on.
The water shuts off and comes
back on again when brewing.
Pour-Over only:
The WATER RESERVOIR has run low on water.
Slide the lid open and pour additional water
into the reservoir, or remove the reservoir
and fill it at a sink, or other water source.
CAUTION: Do not place the brewer in a sink
or other water source. Do not fill past the
Maximum fill line.
Automatic only:
The WATER RESERVOIR has recently been
removed from the brewer and replaced empty.
Press the Coffee or Tea brew button to
activate filling of the water reservoir.
CAUTION: To avoid accidental burns, always
have a cup on the drip tray grate when
pressing either brew button. Do not place
hands under the pod holder outlet.
The POD HOLDER is missing.
Place the pod holder into the machine and
press it firmly into place.
The POD HOLDER is not locked in place.
Carefully remove and re-insert the pod
holder into the machine making certain
it is locked into place. The POD HOLDER
INDICATOR on the control panel will go
out.
The TEA BREW BUTTON has been pressed to
start the brew cycle.
Do NOT press the TEA BREW or COFFEE
BREW button during the brew cycle. This
will stop the brew cycle. The brewer is
using a Pulse Brew™ technology to steep tea
properly. The water will shut off and turn on
17
(Continued)
Page 18

TROUBLESHOOTING (Cont.)
SITUATION
(Continued)
The water shuts off and comes
back on again when brewing.
The Pod Holder will not come
out of the brewer.
Water is appearing on the
counter around the base of the
brewer.
EXPLANATION
again. This is normal and will take about 45
seconds to complete. Wait for the blue lights
to go out.
NOTE: Although the pulse brew process can
be used for coffee or tea, it is designed to
brew tea. Because the process of brewing
tea is different than coffee, the brewer works
differently when the TEA BREW BUTTON is
used. An “On-Off-On” cycle is used to steep the
tea and provide the maximum flavor extraction.
This is normal.
The pod in the POD HOLDER may have swelled
to a point where the holder does not slide out
easily.
Wait at least 10 minutes and then try
carefully removing the pod holder again.
CAUTION: Hot liquid may be present.
The WATER RESERVOIR has been removed
to be filled with water and was not seated
properly when it was replaced.
Remove the lid from the top of the brewer.
With firm, but not forceful pressure, press
down on both sides of the reservoir to
ensure that the seal in the bottom of the
reservoir seats properly. Replace the lid and
watch for additional water around the base
of the brewer. If a problem persists, contact
Customer Service. (Refer to page 18 for
customer assistance.)
Water leaks out around the
sprayhead.
Replace a damaged seal or tighten a loose
sprayhead.
Refer to “Assembling The Sprayhead/Seal”
& “Inspecting The Sprayhead/Seal” sections
for detailed information on how to resolve
sprayhead leaks.
CAUTION: Wait for hot liquid to cool.
18
Page 19

TROUBLESHOOTING (Cont.)
SITUATION EXPLANATION
The BUNN® (POD HOLDER
RELEASE BUTTON) indicator is
not on all of the time.
The HEATING INDICATOR
comes on when the COFFEE or
TEA button is pressed.
The HEATING INDICATOR
comes on during a brew cycle.
When the BUNN
®
button (Also known as the
POD HOLDER RELEASE BUTTON) is lit, this
indicates that the power to the machine is on.
No action is required. The BUNN® Pod
brewer is ready to brew.
When the brewer enters a sleep mode the POD
HOLDER BUTTON will not be glowing.
Pressing any button or the POD HOLDER
RELEASE BUTTON will wake up the brewer.
NOTE: If the brewer does not operate, refer to
the first situation listed in the beginning of this
troubleshooting section, on page 14.
The HEATING INDICATOR will glow when the
tank is bringing water up to brew temperature.
Wait for the HEATING INDICATOR to go out.
When the Indicator has gone out, a brew
cycle can be started.
The water entering the internal tank is being
heated for the next brew cycle.
No action is required. As the heated water is
being emptied to brew a serving, new water
enters the internal tank. The brewer senses
this new water and activates the tank heater
to heat the water for the next brew cycle.
The indicator coming on during a brew cycle
is normal.
19
Page 20

LIMITED WARRANTY
Bunn-O-Matic Corp. (“Bunn”) warrants the Pod brewing equipment manufactured by it will be
commercially free of defects in material and workmanship existing at the time of manufacture
and appearing within 1 year of the date of purchase. The warranty covers both parts and labor
for the 1 year period. This warranty does not apply to any equipment, component or part
that was not manufactured by Bunn or that, in Bunn’s judgment, has been affected by misuse,
neglect, alteration, improper installation or operation, improper maintenance or repair, non
periodic cleaning and descaling, equipment failures related to poor water quality, damage or
casualty. In addition, the warranty does not apply to replacement of items subject to normal
use: These items include but are not limited to; user replaceable parts such as seals and gaskets. This warranty is conditioned on the Buyer contacting Bunn for instructions on obtaining
warranty service.
Contact may be made by:
1) Calling toll free 800-870-0894
2) World Wide Web www.bunn.com
3) In writing to us at Bunn-O-Matic Corp., Attn. Warranty Administrator, P.O. Box 3227,
Springfield, IL 62708-3227
Upon receipt of the request for warranty service, Bunn at its sole option may choose to replace
the unit, request that the unit be taken to a local Bunn Service center for repairs or request the
unit be mailed pre paid to a Bunn repair center for repairs.
Prior authorization from Bunn is required for any warranty service and Bunn may request proof
of purchase.
THE FOREGOING WARRANTY IS EXCLUSIVE AND IS IN LIEU OF ANY OTHER WARRANTY,
WRITTEN OR ORAL, EXPRESS OR IMPLIED, INCLUDING, BUT NOT LIMITED TO, ANY IMPLIED
WARRANTY OF EITHER MERCHANTABILITY OR FITNESS FOR A PARTICULAR PURPOSE. The
agents, dealers or employees of Bunn are not authorized to make modifications to this warranty
or to make additional warranties that are binding on Bunn. Accordingly, statements by such
individuals, whether oral or written, do not constitute warranties and should not be relied upon.
If Bunn determines in its sole discretion that the equipment does not conform to warranty,
Bunn, at its exclusive option while the equipment is under warranty, shall either 1) provide at no
charge replacement parts and/or labor (during the applicable parts and labor warranty periods
specified above) to repair the defective components, provided that this repair is done by a Bunn
Authorized Service Representative; or 2) shall replace the equipment or refund the purchase
price for the equipment.
THE BUYER’S REMEDY AGAINST BUNN FOR THE BREACH OF ANY OBLIGATION ARISING OUT
OF THE SALE OF THIS EQUIPMENT, WHETHER DERIVED FROM WARRANTY OR OTHERWISE, SHALL BE LIMITED, AT BUNN’S SOLE OPTION AS SPECIFIED HEREIN, TO REPAIR OR
REPLACEMENT.
In no event shall Bunn be liable for any other damage or loss, including, but not limited to, lost
profits, lost sales, loss of use of equipment, claims of Buyer’s customers, cost of capital, cost of
down time, cost of substitute equipment, facilities or services, or any other special, incidental or
consequential damages.
20
Page 21

NOTES:
21
Page 22

USER SERVICEABLE PARTS
17
8
9
2
3
1
4
18
12
13
Strainer Assy
230V Models
5
11
16
10
21
15
14
Strainer Assembly
Early 120V Models
4
6
19
20
7
22
Page 23

USER SERVICEABLE PARTS
1 37419.1000 1 Reservoir Assy, Float/Valve
2 36264.0000 1 Reservoir, 46 Oz
3 39446.0000 1 Guide/Float Assy
4 36378.0001 2 Valve, Check DW 10
5 36379.0000 1 Valve, Check DW 11
6 37521.0000 1 Kit, Sprayhead/Seal Assembly
7 37520.0000 1 Drip Tray & Grate Assy (MCP)
37520.0001 1 Drip Tray & Grate Assy MCA)
8 37495.1000 1 Lid Assy, Pour-In (Includes Decals)
9 36717.1002 1 Pod Holder Assembly BLK
36717.1003 1 Pod Holder Assembly BLU
10 34466.0000 5 Foot, Rubber .5” OD x .25”
11 39182.0000 1 Orifice, Inlet Tube 120V
12 39216.0000 1 Screen Filter 120V
13 38414.0000 1 Strainer/Flow Control Assy 230V
14 00310.0000 1 Tube Assembly, 230V
15 22300.0222 1 Strainer/Flow Control Assy (Early Models)
16 36891.0000 1 Decal, Control Panel (MCA)
36534.0000 1 Decal, Control Panel (MCP)
17 37092.0001 1 Decal, Removable 5-Step
18 41936.0000 1 Decal, WARNING: HOT LIQUIDS
19 37282.0000 1 Decal, TO CANCEL BREW....
20 37092.0001 1 Decal, MY CAFÉ
21 44941.1000 1 Bulb, Priming
23
 Loading...