

Page 1
iVina
Quick Installation Guide
Duplex Color Document Scanner
Page 2

2
Copyright
All rights reserved. No part of this publication may be reproduced,
transmitted, transcribed, stored in a retrieval system, or translated into any
language or computer language, in any form or by any means, electronic,
mechanical, magnetic, optical, chemical, manual, or otherwise, without the
prior written permission of iVina Inc.
In regards to material scanned by this product may be protected by
governmental laws and other regulations, such as copyright laws, the
customer is solely responsible for complying with all such laws and
regulations.
Software Installation
Make sure no other programs or applications are running when
installing the scanner software.
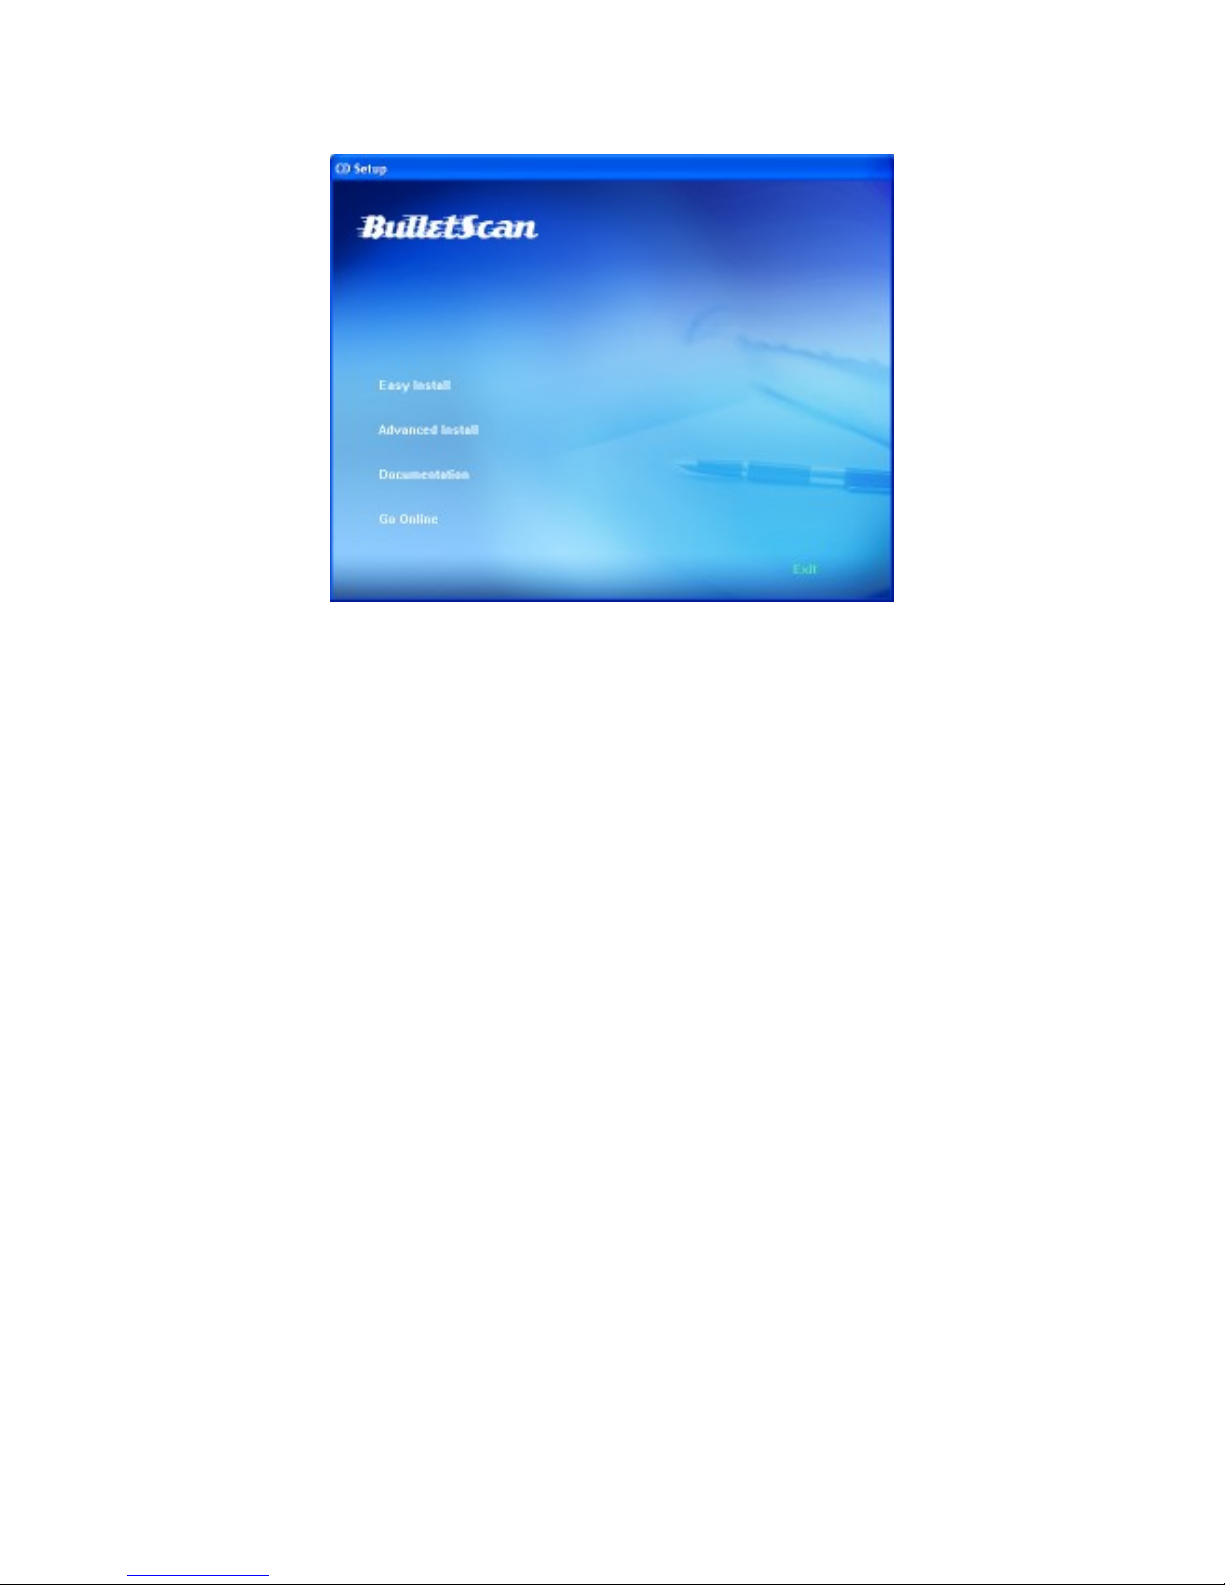
Insert the scanner software CD into your computer's CD drive.
The software installation menu should launch, asking you which
type of installation to perform.
Page 3
3
Select "Easy Install" from the menu to have all of the standard
software installed automatically for you.
If you're using Windows Vista with User Access Control enabled,
you may see a window pop up. Click the "Allow" option.
When your computer finishes installing the software and driver,
you can then connect and power on your scanner (see next
page).
If the installation menu doesn't open automatically, you'll need to
open "My Computer" (on Windows XP) or "Computer" (on
Windows Vista/7). From there double-click the "ScannerDrivers"
icon and the menu should open.
If you do not have a drive that can read CD-ROM discs, the driver
for your scanner is available at www.bulletscan.com
The additional software provided with your scanner is only
licensed for distribution via CD, and is only licensed for the
computer that the BulletScan scanner is attached to.
iVina BulletScan S300 Quick Install Guide
Rev. 5 Aug 2010
Page 4
4
Unpacking the Scanner:
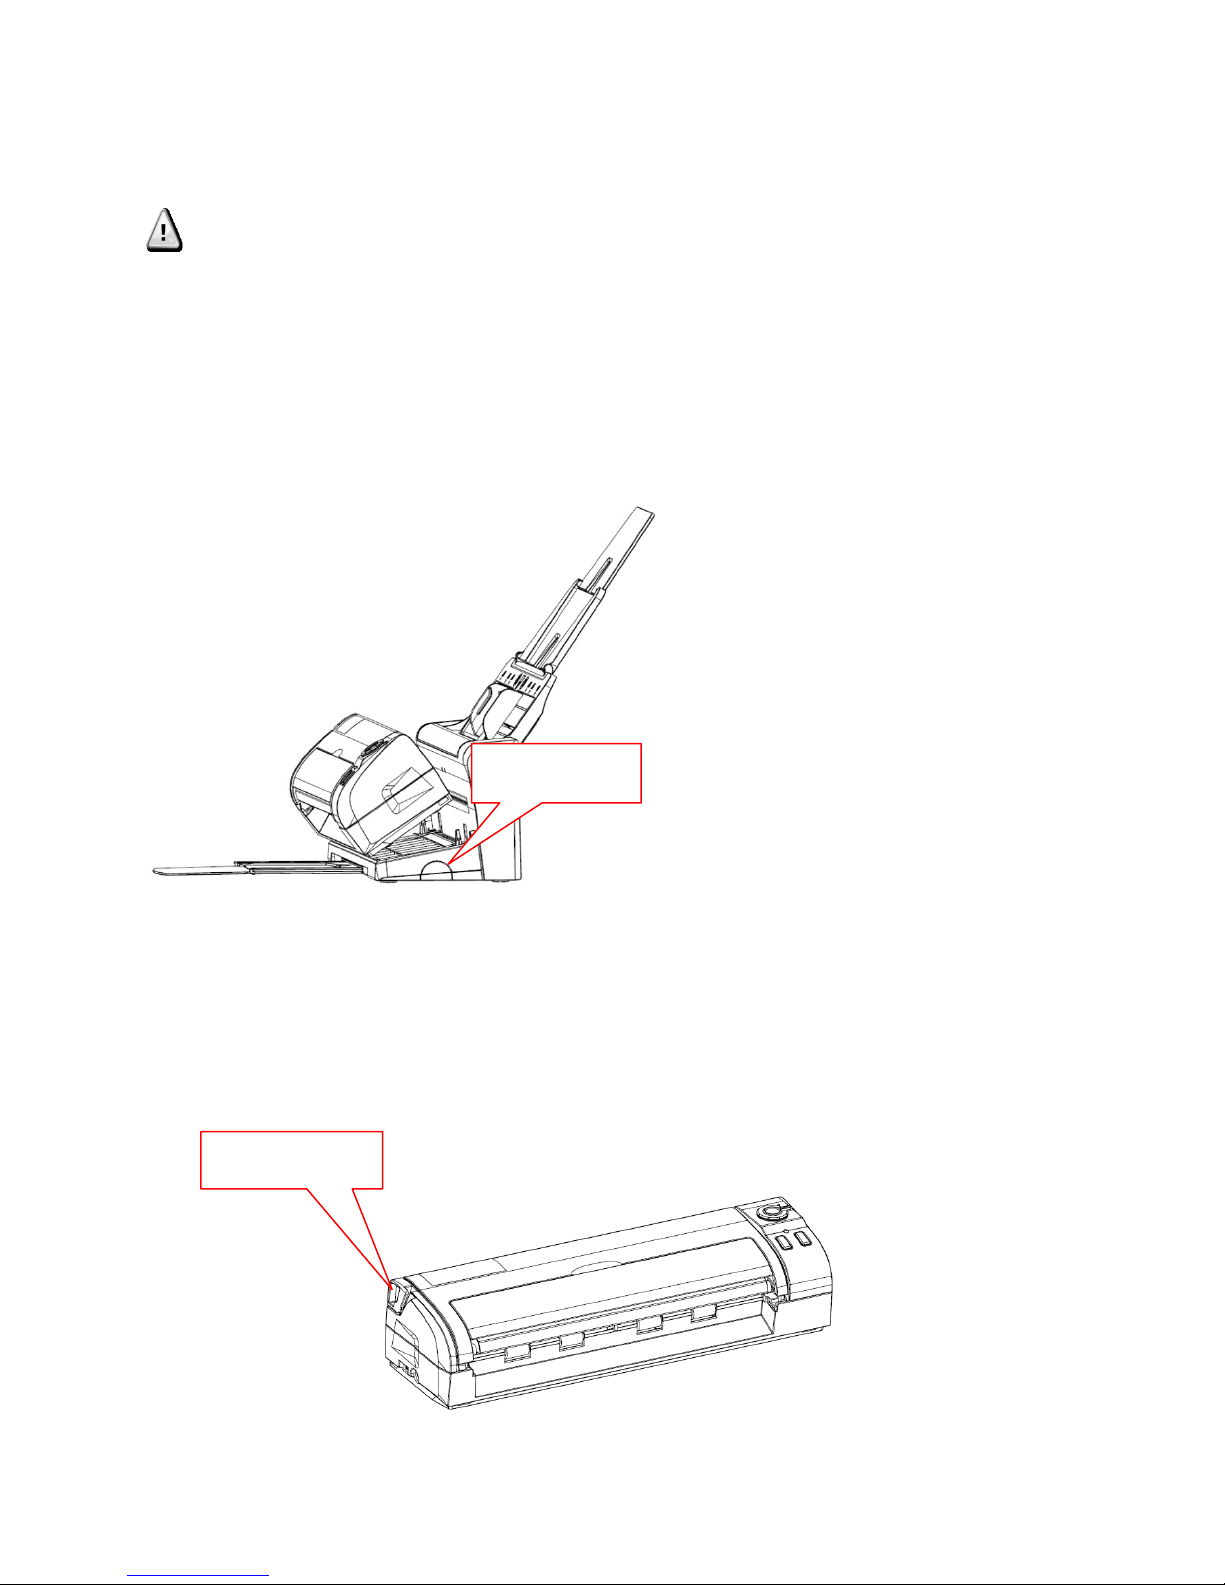
Release Button
Release Catch
Attention! - Your scanner is secured for shipping with Blue or
Bright Orange Packing Tape. Only remove the Colored Tape, the
foam and bubble wrap it secures, and loose cushioning foam.
Removing the clear plastic guide strips or the white reference
background will void your warranty. See the BulletScan website
under "setup" for details or questions.
After you have removed the
external tape, press the
release button on the
right-hand side to undock
the scanner. Lift the Scan
Module up and forward to
undock it. Remove the
protective foam from
between the Scan Module
and the Dock.
Then, on the left hand side of the Scan Module pull the release
catch. The Scan Module should open up and you can remove the
foam from the middle.
Page 5
5
Docking Steps:
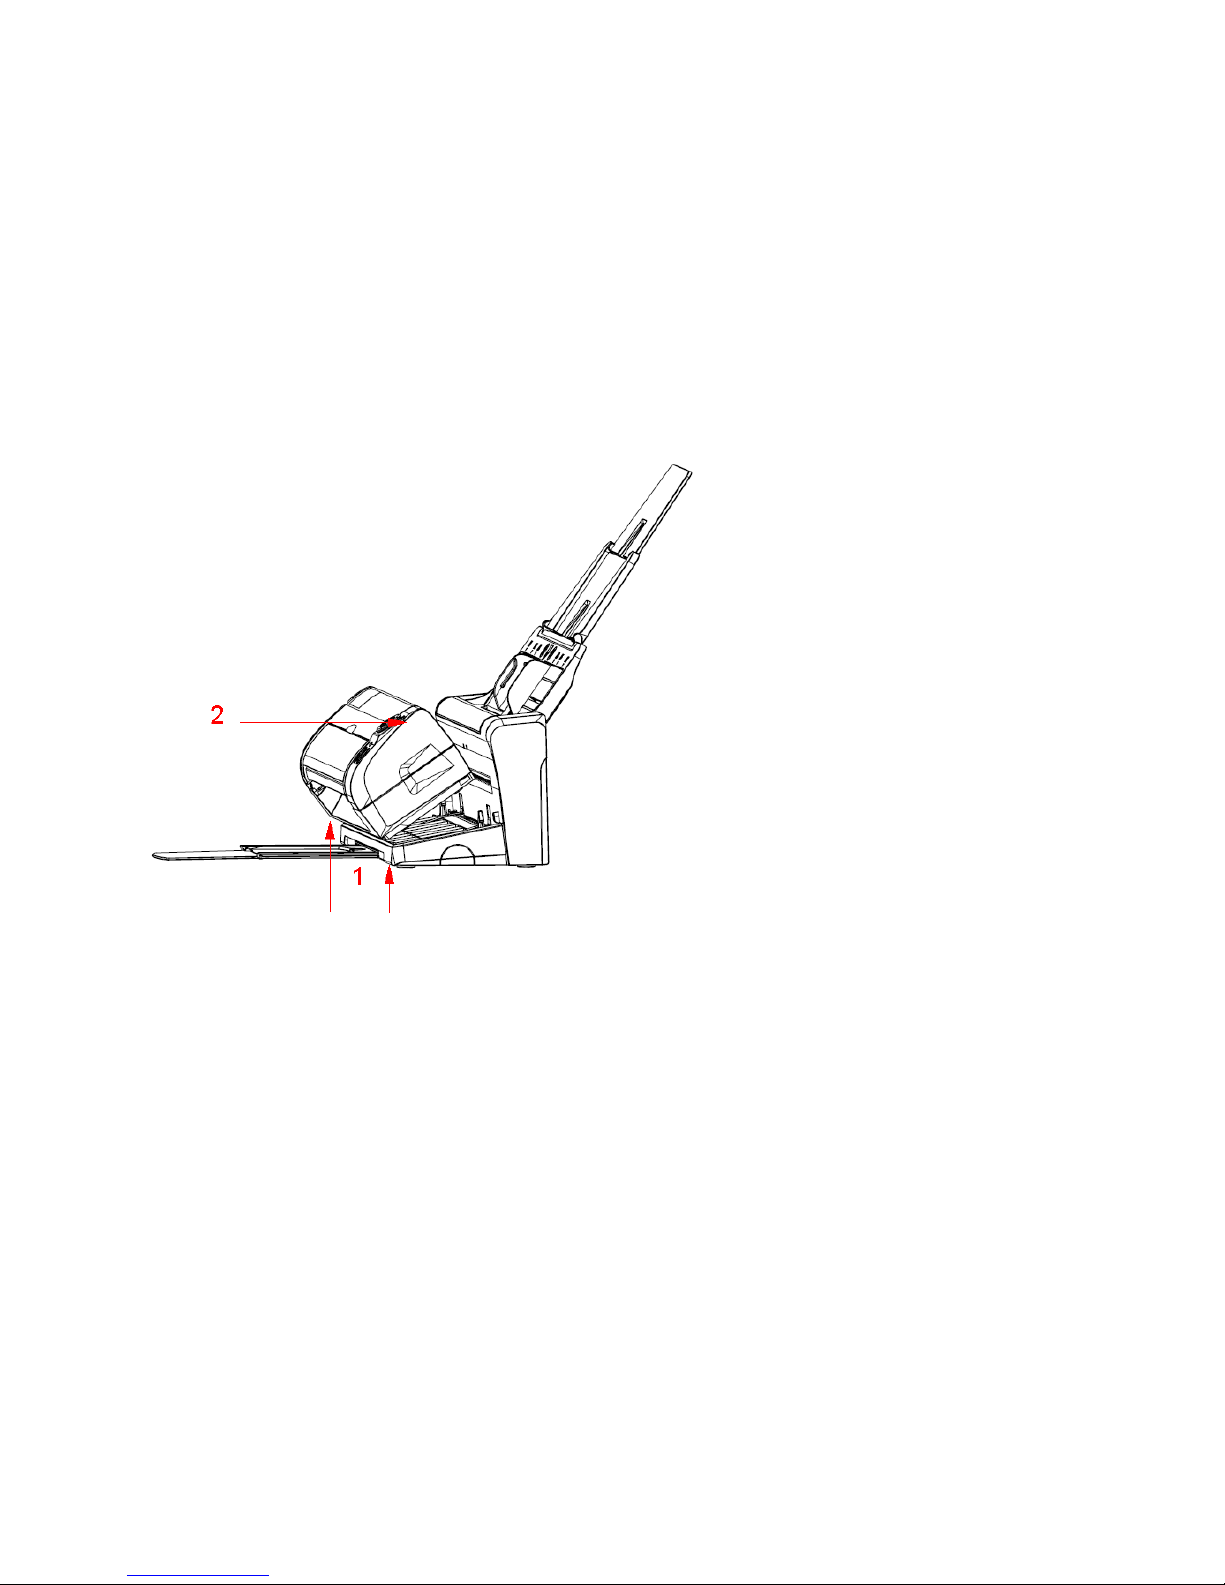
To dock the S300 scan module, line up the front edge of the scan
module with the front edge of the docks (1). Tilt the scan module
gently back and everything should snap into place (2).
iVina BulletScan S300 Quick Install Guide
Rev. 5 Aug 2010
Page 6
6
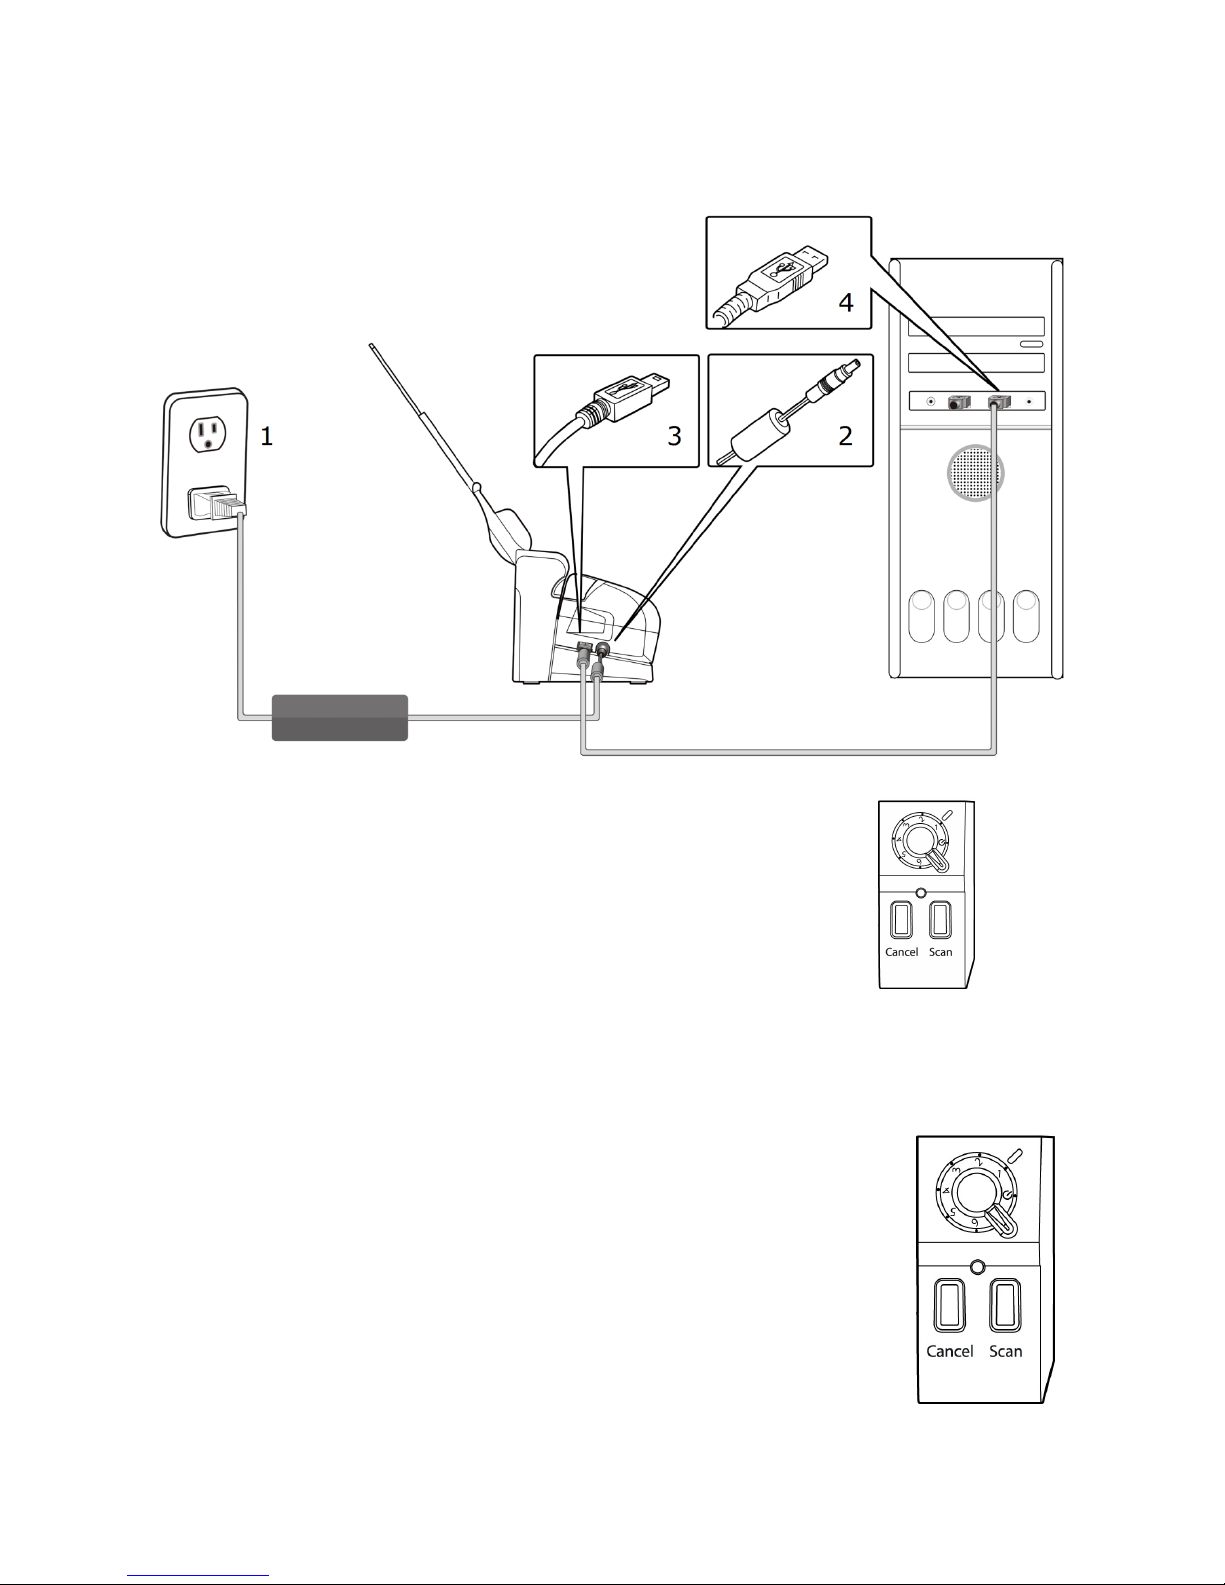
Connecting the scanner to your computer
Power on your scanner by turning the dial to 1
Windows will detect and finish installing the driver for your
scanner. The first time you scan, the scanner will automatically
perform calibration and color optimization.
This may take around a minute depending on your system.
Scanning from the ADF:
With the Scan Module docked, insert a stack of
documents top down into the
Pick the desired profile number on the dial
Press the Scan Button
Page 7
7
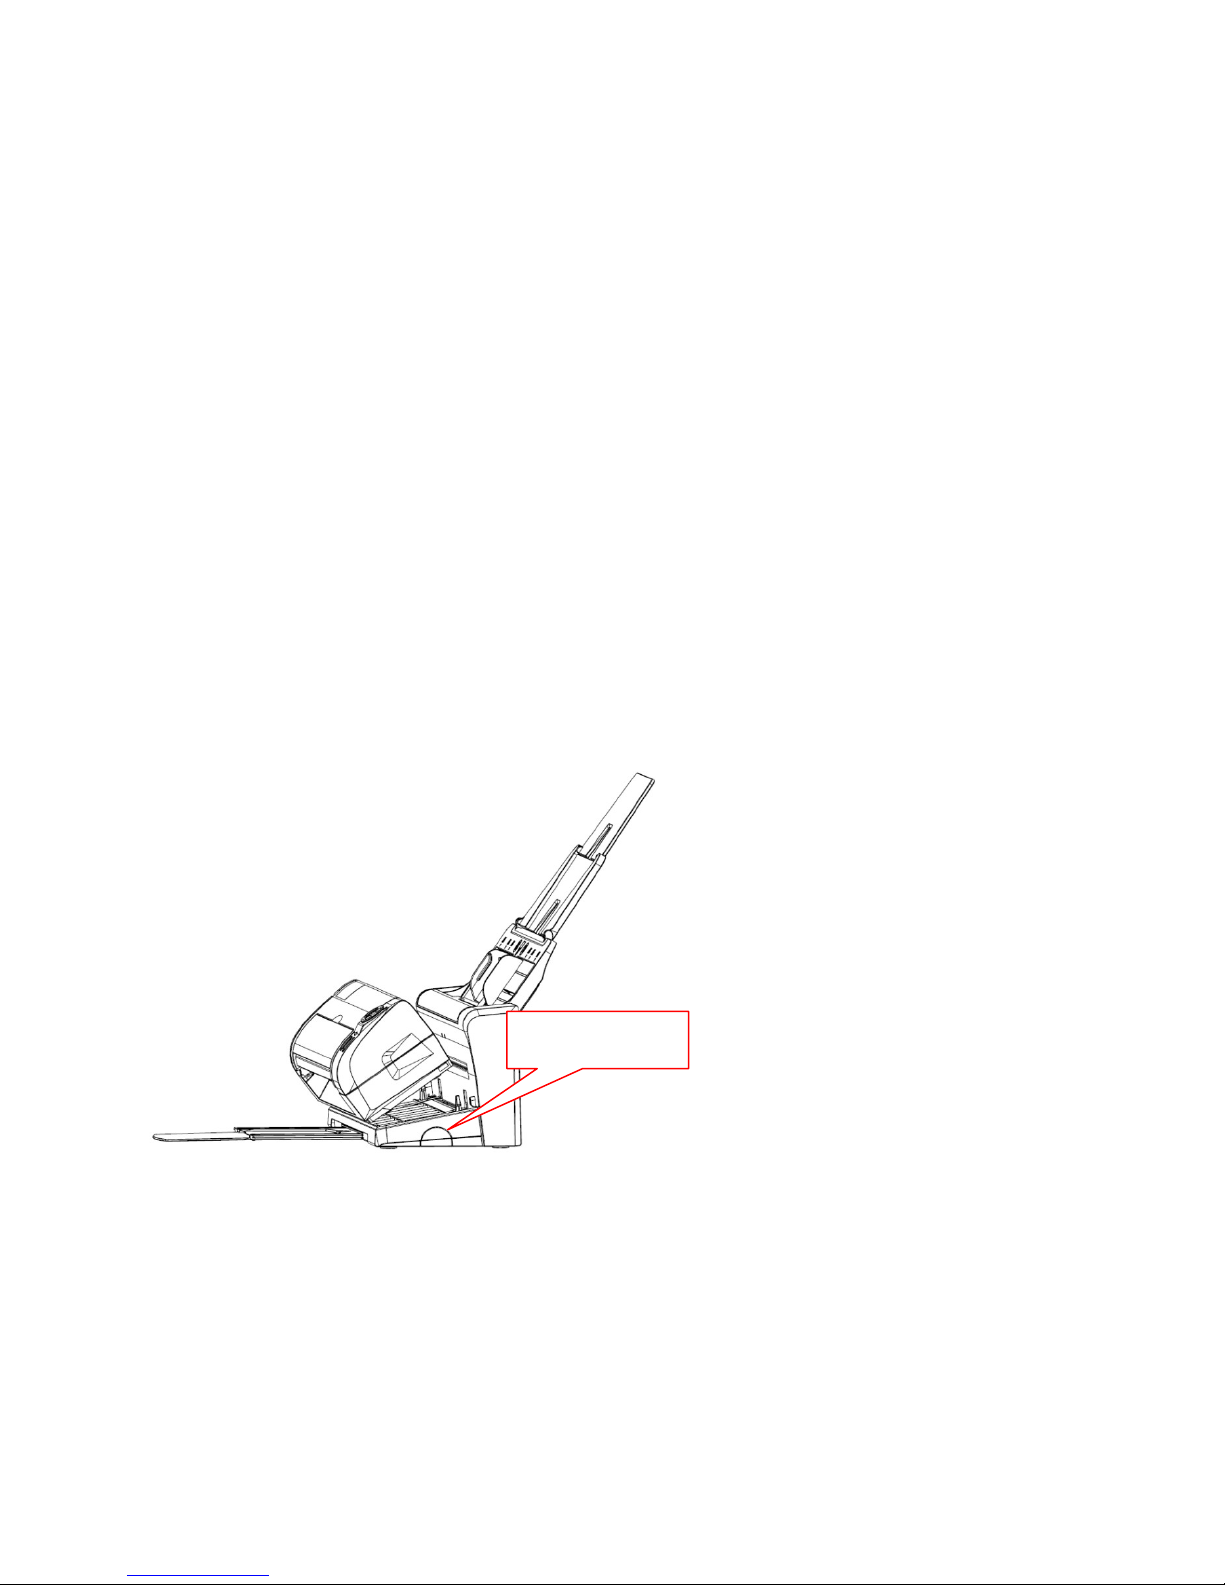
Scanning from the Front Input Tray:
Release Button
Flip the front input tray open
Place your document in the center of the front input tray
Gently insert the document
When the scanner detects the document it will automatically
grab the document and pull it into a ready position
Pick the desired profile number on the dial
Press the Scan Button.
The front input tray may be used to scan while docked or
undocked.
Undocking your scanner:
Your scanner can be undocked to become portable.
Press the release button on
the right-hand side to
undock the scanner. Lift the
Scan Module up and forward
to undock it.
iVina BulletScan S300 Quick Install Guide
Rev. 5 Aug 2010
Page 8

8
Warranty
The information contained in this document is subject to change without notice.
iVina makes no warranty of any kind with regard to this material, including, but not limited to, the implied
warranties of fitness for a particular purpose.
iVina shall not be liable for errors contained herein or for incidental or consequential damages in connection with
the furnishing, performance, or use of this material.
Trademarks
Microsoft is a registered trademark of Microsoft Corporation.
Windows and Vista are trademarks of Microsoft Corporation.
ENERGY STAR is a U.S. registered mark.
Other brands and product names herein are trademarks or registered trademarks of their respective
holders.
 Loading...