

Page 1
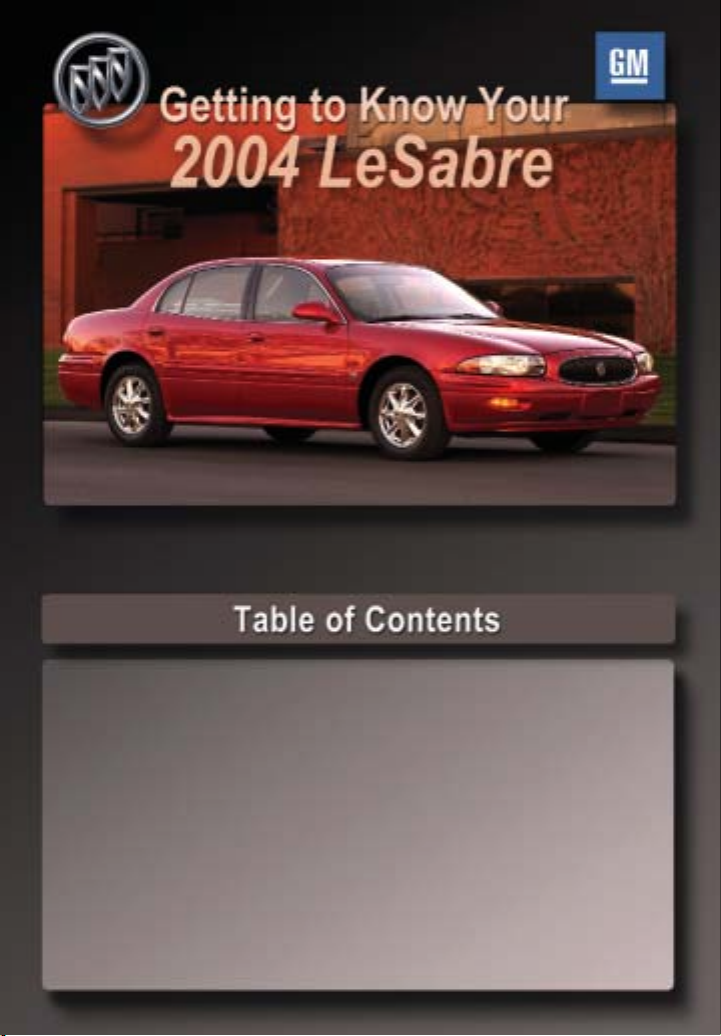
Congratulations on your purchase of a Buick LeSabre. Please read this information and your
Owner Manual to ensure an outstanding ownership experience. Note that your vehicle may not
include all the features described in this booklet. Place this booklet in your Owner Manual
portfolio for easy reference.
Instrument Panel . . . . . . . . . . . . . . . . . . . . . . . . .2
Instrument Panel Cluster . . . . . . . . . . . . . . . . . .3
Audio Systems . . . . . . . . . . . . . . . . . . . . . . . . . .4
Climate Controls . . . . . . . . . . . . . . . . . . . . . . . . .6
Power Seat Controls . . . . . . . . . . . . . . . . . . . . . .7
Heated Seats . . . . . . . . . . . . . . . . . . . . . . . . . . . .7
Door Locks and Child Security . . . . . . . . . . . . .8
Mirrors . . . . . . . . . . . . . . . . . . . . . . . . . . . . . . . . .8
Window Controls . . . . . . . . . . . . . . . . . . . . . . . .9
Sunroof . . . . . . . . . . . . . . . . . . . . . . . . . . . . . . . .9
Lamp Controls . . . . . . . . . . . . . . . . . . . . . . . . .10
Turn Signal/Multifunction Lever . . . . . . . . . . . .10
Cruise Control . . . . . . . . . . . . . . . . . . . . . . . . . .11
Headlamps — High Beam . . . . . . . . . . . . . . . . .11
Trunk and Fuel Door Releases . . . . . . . . . . . . .12
Convenience Features . . . . . . . . . . . . . . . . . . .13
OnStar®Communication System . . . . . . . . . . .14
Head-Up Display (HUD) . . . . . . . . . . . . . . . . . . .14
Universal Transmitter . . . . . . . . . . . . . . . . . . . .15
Driver Memory Seat and Mirrors . . . . . . . . . . .16
Driver Information Center (DIC) . . . . . . . . . . . .16
DIC Programming . . . . . . . . . . . . . . . . . . . . . . .17
Roadside Assistance Program . . . . . . . . . . . . .20
My GMLink . . . . . . . . . . . . . . . . . . . . . . . . . . . .20
Page 2
2
Getting to Know Your 2004 LeSabre
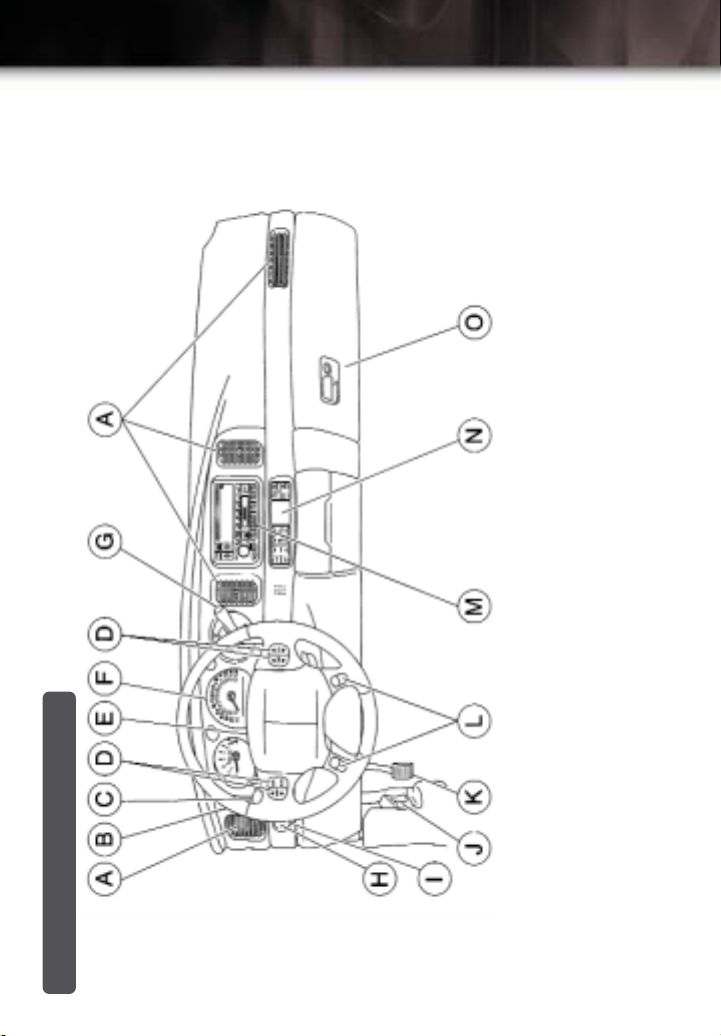
J. Hood Release
K. Parking Brake
L. Cruise Controls
M.Audio System
N. Climate Controls
O. Glove Box
Instrument Panel
(if equipped)
E. Hazard Warning Flashers
F. Instrument Panel Cluster
G. Traction Control Button
Buttons (if equipped)
A. Air Outlets
B. Driver Information Center (DIC)
C. Turn Signal/Multifunction Lever
(if equipped)
H. Exterior Lamp Buttons
D. Steering Wheel Controls
See Section 3 of your Owner Manual.
I. Head-Up Display (HUD) Controls
(if equipped)
Page 3
3
11
10
9
8
7
6
5
4
3
2
12
13
14
15
16
17
18
19
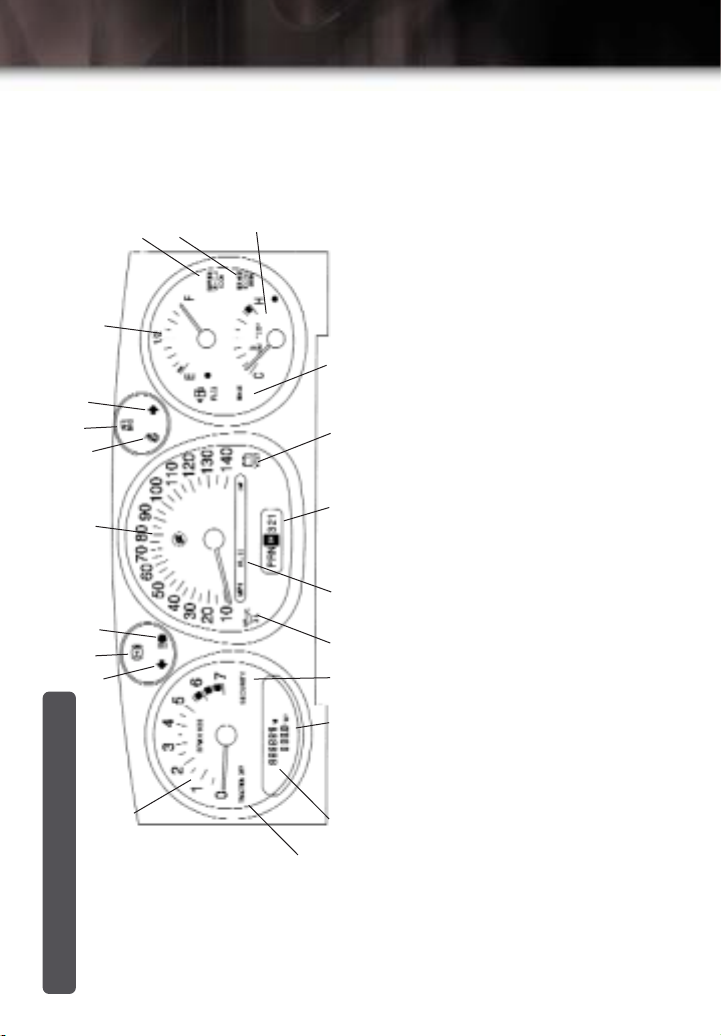
Warning Light
20.Trip Odometer
21. Traction Control System Off
IMPORTANT: The instrument panel
cluster is designed to let you know
about many important aspects of your
Gauge
9. Fuel Gauge
10.Service Vehicle Soon Light
11. Service Engine Soon Light
12.Engine Coolant Temperature
13.Brake System Warning Light
14.Battery Warning Light
vehicle’s operation. It is important to
read your Owner Manual and become
familiar with the information being
relayed to you by the lights, gauges
and indicators, and what action can
be taken to ensure safety and to
prevent damage.
See Section 3 of your Owner Manual.
15.PRND321 lndicator
16.Cruise Control lndicator Light
17.Oil Pressure Light
18.Security Light
19.Trip Odometer
1
Instrument Panel Cluster
21
20
Your vehicle’s instrument panel is
equipped with this cluster or one very
similar to it. The instrument panel
Light
cluster includes these key features:
1. Tachometer
2. Turn Signal lndicator Light
3. Antilock Brake System Warning
4. High Beam lndicator Light
5. Speedometer
6. Safety Belt Reminder Light
7. Air Bag Readiness Light
8. Turn Signal lndicator Light
Page 4
4
Getting to Know Your 2004 LeSabre
Audio Systems
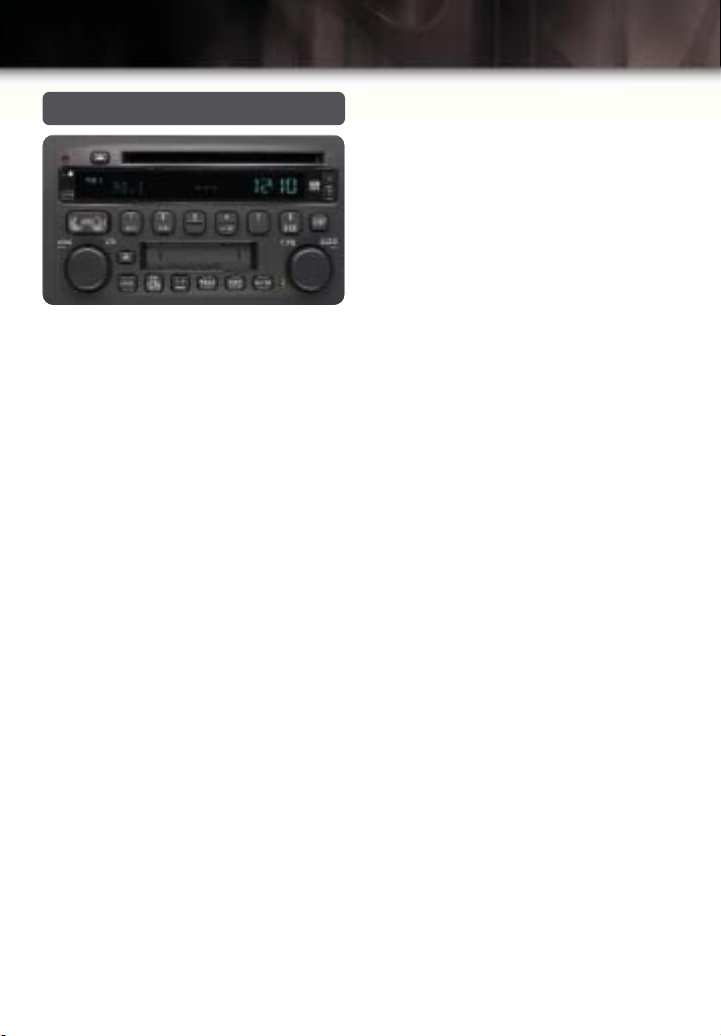
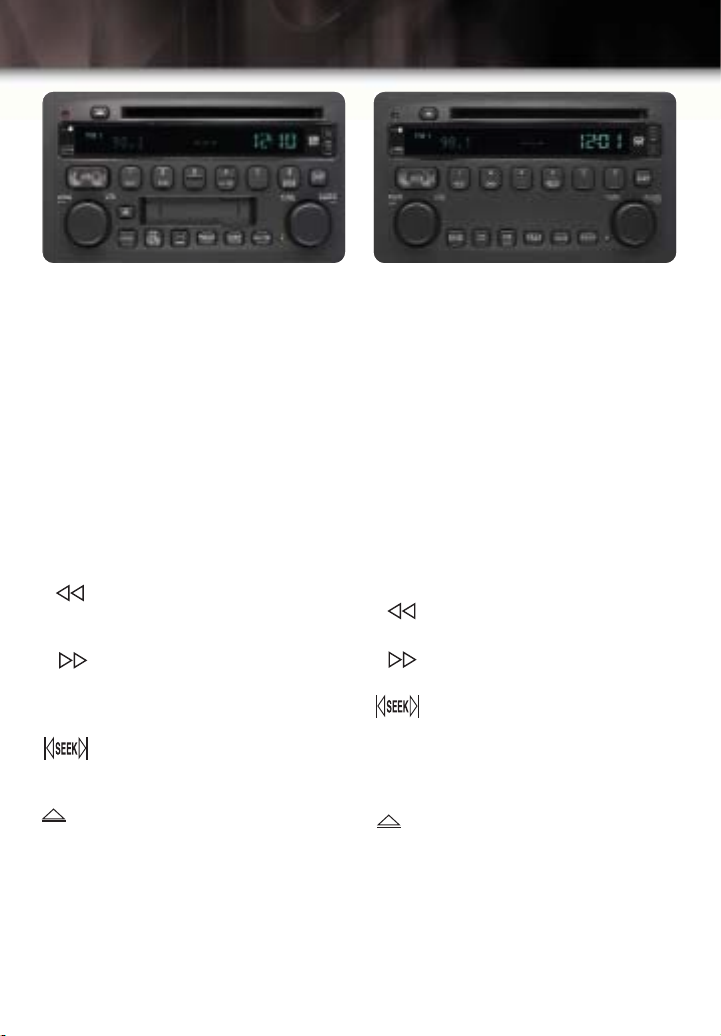
AM-FM Stereo with Cassette Tape
Player, and CD Player with Automatic
Tone Control (if equipped)
Radio Controls
PWR: Press this knob to turn the radio
on or off. Turn the knob to the left to
decrease volume. Turn it to the right to
increase volume.
BAND: Press this button to select AM,
FM1 or FM2, or XM radio.
TUNE: Turn this knob to choose radio
stations.
SEEK: Press the left or right arrow to go
to the next higher or lower station. Press
a SEEK arrow for 2 seconds. SCAN will
appear in the display. Use SCAN to listen to stations for a few seconds.
Press and hold one of the SEEK arrows
for more than 4 seconds to listen to
each of your preset stations for a few
seconds. Press an arrow again to stop
scanning.
EQ: Press this button to bass and
treble equalization settings for different
program types.
AUDIO: Push and release this button
until BASS, MID or TREBLE appears on
the display. Then turn the Audio knob to
increase or decrease.
Also, use this button to adjust the balance and fade between the speakers.
Radio Data System (RDS) Features
TRAF: Press this button to receive traf-
fic announcements. TRAF will appear on
the display and when a traffic announcement comes on, you will hear it.
INFO: If the current station has a
message, press this button to view the
message.
P-TYP: Press this button to find the
desired program type. Then, find a category by turning the AUDIO knob. Press
either SEEK arrow to select a category
and take you to the category’s first
station.
ALERT: Alert warns of local or national
emergencies. You will hear the
announcement, even if the volume is
muted or a cassette tape or compact
disc is playing. You will not be able to
turn off alert announcements.
Numbered Buttons
The six numbered buttons let you set up
to six AM and 12 FM stations (six FM1
stations and six FM2 stations).
Turn the radio on. Select the band.
Tune in the desired station.
Press and hold one of the six numbered
buttons until you hear one beep, then
release the button. The station is now
preset.
Page 5
5
AM-FM Stereo with Cassette Tape
Player, and CD Player with Automatic
Tone Control (optional)
Cassette Tape Player Controls
With the radio on, insert the tape into
the tape slot. The tape will begin to play.
BAND: Press this button to listen to the
radio when a cassette or CD is playing.
CD TAPE: Press this button to play a
cassette tape or a CD when listening to
the radio.
6 SIDE: Pressing this button changes
the side of the tape.
1 : Press this button to reverse the
tape rapidly. Press it again to return to
playing speed.
2 : Press this button to quickly
advance to another part of the tape.
Press the button again to resume playing the tape.
: Press this button to search for
the next or previous selection on the
tape.
: Pressing this button removes the
tape.
Setting the Clock
H: Press and hold this button until the
correct hour appears.
M: Press and hold this button until the
correct minute appears.
AM-FM Stereo with CD
CD Player Controls
With the radio on, insert the CD partway
into the slot with the label side up. The
player will pull the CD in and begin to
play.
DISP: Press this button to see which
track is playing. Press it again within 5
seconds to see how long the track has
been playing. To change the display
(track or elapsed time), press DISP to
select the display you want and hold the
button until the display flashes.
4RDM: Press this button to hear tracks
in random order. Press it again to stop.
1 : Press and hold this button to
quickly reverse within a track.
2 : Press and hold this button to
quickly advance within a track.
: Press the right arrow to go to
the next track. Press the left arrow to go
to the start of the current track.
BAND: Press this button to change to
the radio while a CD is playing.
: Press this button to remove the
disc.
CD: Press this button to play a CD while
listening to the radio.
See Section 3 of your Owner Manual.
Page 6
6
Getting to Know Your 2004 LeSabre
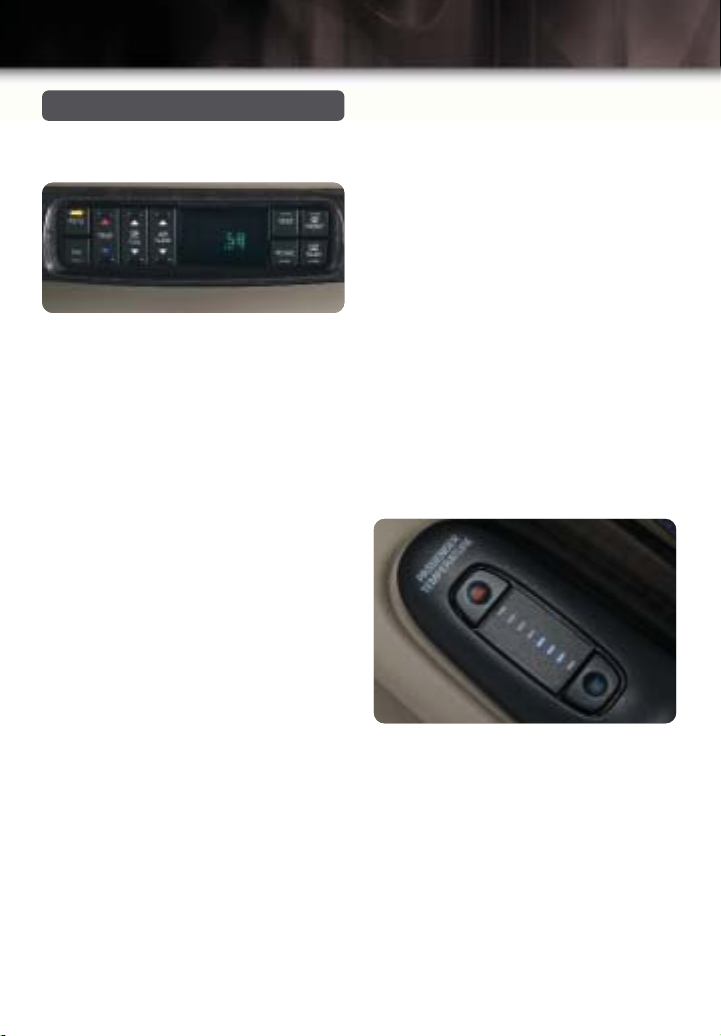
Climate Controls
Dual Automatic ComforTemp Climate
Control
AUTO: Press this button to make the
system automatically adjust to changes
in temperature inside the vehicle.
TEMP: Press this button’s up or down
arrow to increase or decrease the interior temperature.
FAN: Press this button’s up or down
arrow to increase or decrease blower
fan speed.
AIR FLOW: Press this button’s up or
down arrow to select airflow direction to
the FLOOR, MID-FLOOR, MID and
WINDSHIELD-FLOOR.
Display
The display indicates the outside temperature, your interior temperature setting selection, current airflow direction
settings and fan speed.
VENT: Press this button to allow outside
air to flow through the vehicle. Press the
button again to turn the vent off.
FRONT: Press this button to defrost the
windshield.
REAR: Press this button to defog the
rear window. At speeds above 30 mph
(48 km/h), the defogger will stay on until
you press the button again. At speeds
below 30 mph (48 km/h), the defogger
will turn off automatically.
RECIRC: Press this button to limit the
amount of outside air entering the
vehicle.
OFF: Press this button once to turn off
the passenger comfort control system.
Press the button twice to turn off the
main system.
Personal Choice Comfort Controls
(optional)
This feature allows two different
drivers to recall their own climate control
settings.
The settings that are recalled are the
last choices of the driver prior to exiting
the vehicle, and are recalled by pressing
the key fob/transmitter unlock button or
by pressing one of the memory buttons
on the driver’s door panel.
Passenger Climate Control
The controls for this feature are located
on the passenger’s door armrest. Press
the red arrow to raise the inside
temperature on the passenger side.
Press the blue arrow to decrease the
interior air temperature on the
passenger side. You can adjust the
temperature up to 5˚F cooler or warmer
than the driver’s setting.
See Section 3 of your Owner Manual.
Page 7
7
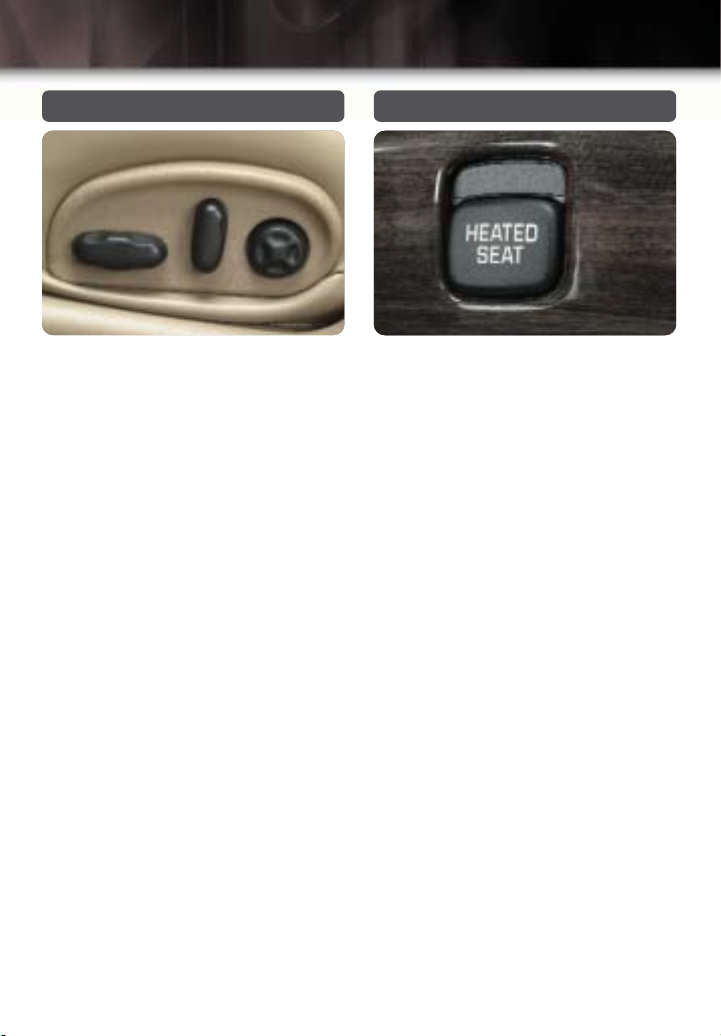
Power Seat Controls
Adjust Seat Height and Cushion
Position
Push the horizontal control forward or
rearward to move the entire seat forward
or rearward. Move the entire horizontal
control up or down to move the entire
seat up or down. Move the front of the
horizontal control up or down to adjust
the front portion of the seat cushion up
or down. Move the rear of the horizontal
control up or down to adjust the rear
portion of the seat cushion up or down.
Reclining Front Seatbacks (optional)
Move the vertical control forward or rearward to move the seatback forward or
rearward.
4-Way Power Lumbar Control
(optional)
Press the power lumbar control forward
or rearward to increase or decrease
support. Press the control up or down to
move the lumbar support up or down.
See Section 1 of your Owner Manual.
Heated Seats (optional)
The HEATED SEAT buttons are located
on the driver’s and front passenger’s
door panels. Press the button to turn the
heated seat to the HIGH setting. The
button will illuminate. Press again to
select the LO setting.
Pressing the button again turns the
heated seat off.
See Section 1 of your Owner Manual.
Page 8
8
Getting to Know Your 2004 LeSabre
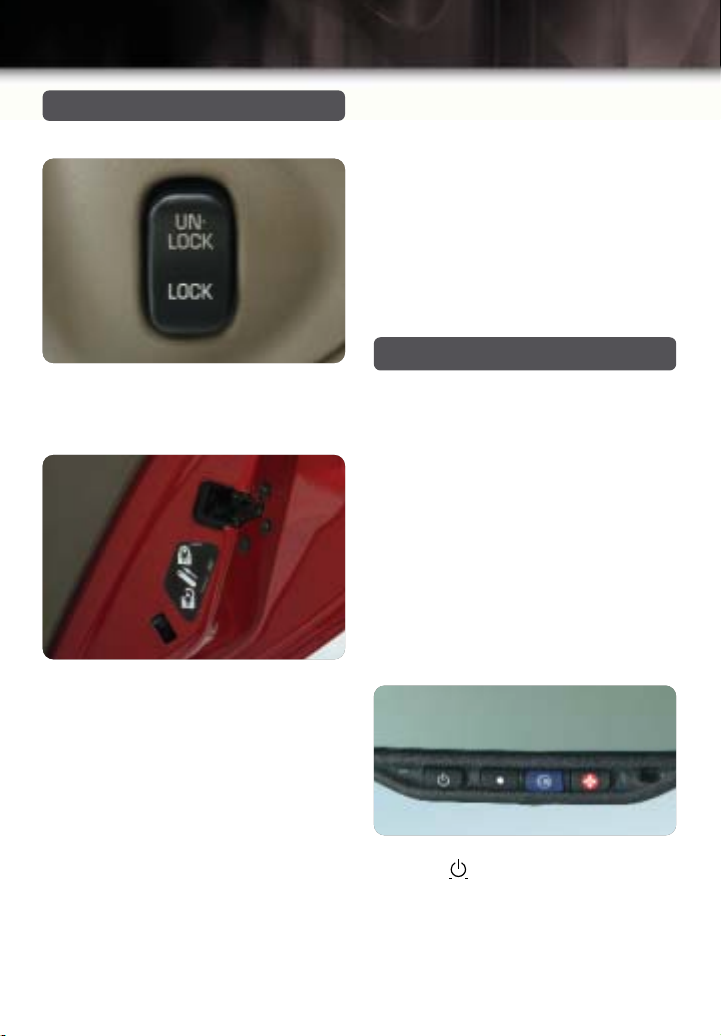
Door Locks and Child Security
Power Door Locks
Press UNLOCK or LOCK on the door
switch to unlock or lock all the doors.
Rear Door Child Security Locks
To prevent opening a rear door from
the inside:
• Open one of the rear doors. Move the
lever on the side of the door all the
way up to the lock symbol.
• Close the door.
• Repeat for the other door.
To open a rear door when the child
security lock is on:
Unlock the door from the inside and
open the door from the outside.
To cancel the security feature:
• Open the door from the outside and
move the lever all the way down.
• Repeat for the other door.
Child Restraints
Your vehicle has top strap anchors
installed behind the rear seatback to
secure child safety seats.
See Section 2 of your Owner Manual.
Mirrors
Outside Rearview
Your vehicle’s power mirror controls are
located on the driver’s door armrest. To
operate the left or right mirror, press L or
R on the selector switch located below
the control pad. If the switch is placed in
the center position, no mirror movement
will occur.
To adjust the mirror position, press the
arrows located on the control pad.
Inside Rearview
Electrochromic Day/Night Rearview
Mirror with Compass (optional)
Press the button to turn the automatic
dimming feature and compass on/off.
A green light will illuminate when the
dimming feature is on.
See Section 2 of your Owner Manual.
Page 9
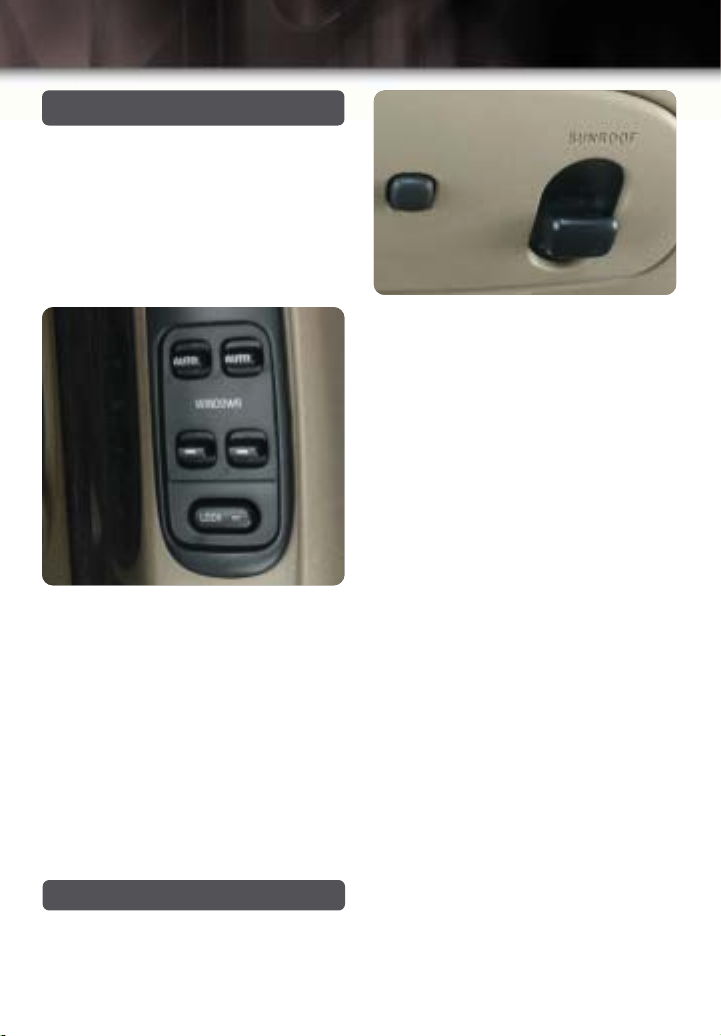
Window Controls
The power window controls are located
on the driver’s door armrest.
Express-Down Window
AUTO: Press this switch rearward and
release to express open the window.
Press the switch again to stop a window
in express.
Window Lockout
LOCK: Press this switch to disable the
passenger window switches. The switch
will illuminate to indicate the lock is
active.
Press the switch again to enable the
passenger window switches.
Window Lockout is a programmable feature. Refer to the DIC Programming section in this guide for further information.
See Section 2 of your Owner Manual.
9
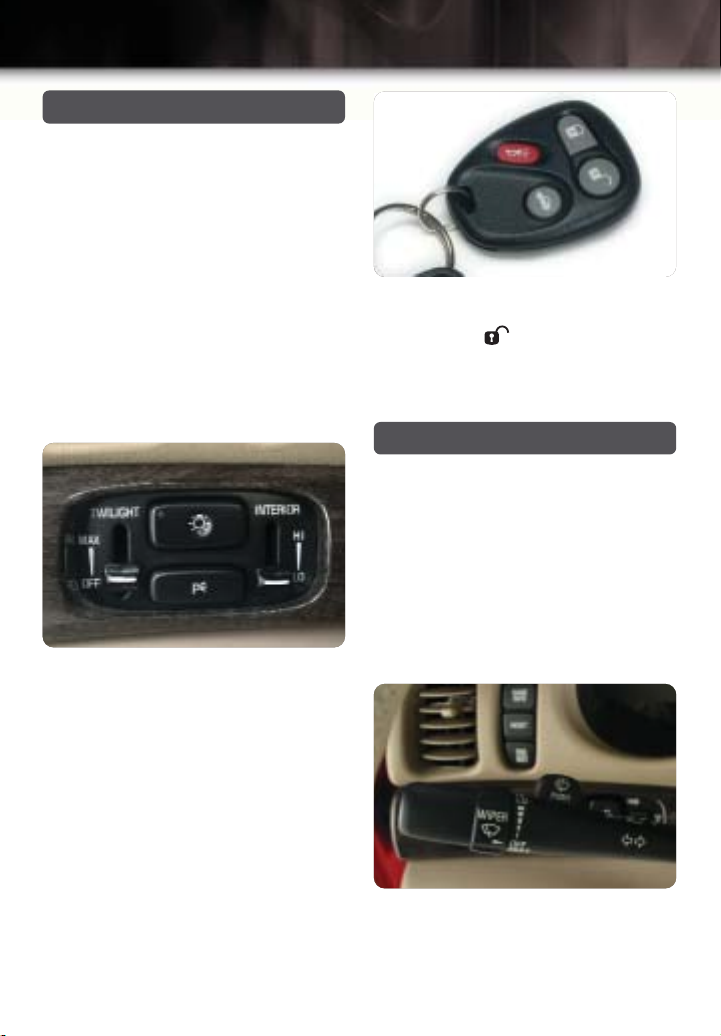
The sunroof switch is located on the
headliner, between the sun visors.
Press and hold the switch rearward and
release to express open the glass panel
and sunshade. The sunroof will open
automatically to the full-open position.
Press the switch again at the desired
point to stop the panel in a partially open
position.
Press and hold the switch forward to
close the glass panel. The sunshade
must be manually closed.
Vent
The vent position raises the rear portion
of the sunroof. Once it is closed, the
sunroof can be opened to a vent position. (The sunshade must be opened
and closed manually for vent operation.)
Push the sunroof switch upward to vent.
Pull the sunroof switch downward to
close.
See Section 2 of your Owner Manual.
Sunroof (optional)
The ignition must be in the ON position
or the Retained Accessory Power (RAP)
must be active to operate the sunroof.
Page 10
10
Getting to Know Your 2004 LeSabre
Lamp Controls
Interior Lamps
See Section 3 of your Owner Manual for
interior lamp operating instructions.
Daytime Running Lamps
The Daytime Running Lamps will come
on when the ignition is ON, the headlamp switch is OFF, and the transaxle is
not in PARK (P).
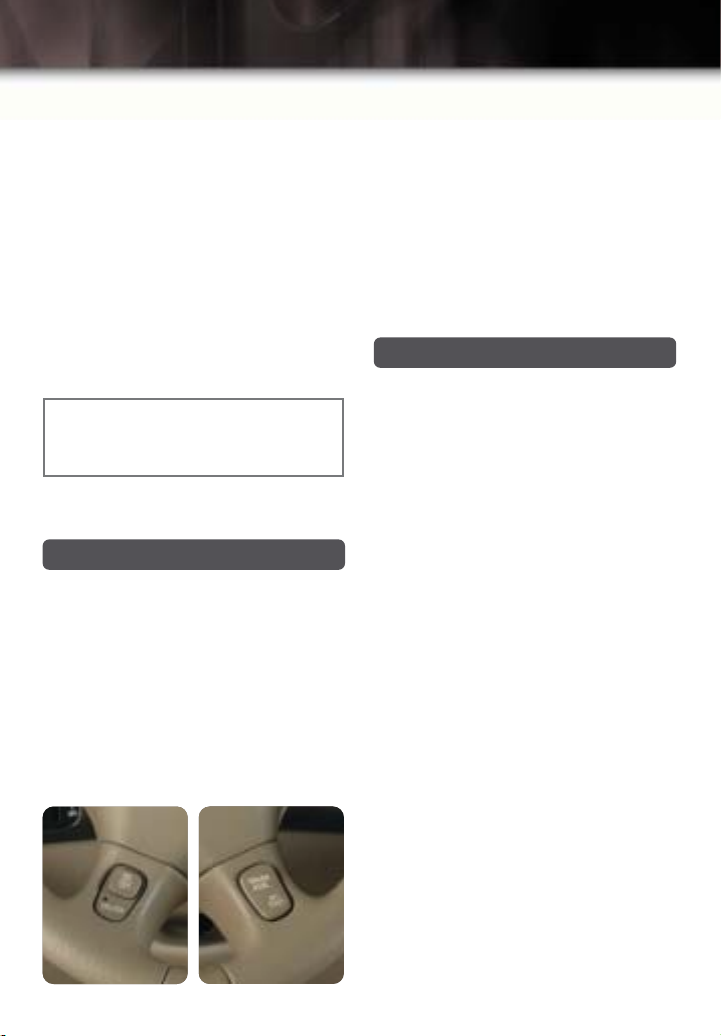
Twilight Sentinel
This feature automatically switches the
headlamps on and off by sensing how
dark it is outside. You should not have to
manually turn the headlamps on or off.
The Twilight Sentinel control lever is
located to the left of the steering
column. To operate it, slide the lever
from OFF to MAX to adjust the
headlamps ON time from a few seconds
to 3 minutes, after the ignition has been
turned OFF.
Perimeter Lighting
Notice: Driver #1 and Driver #2 key
fob settings are unique. Refer to DIC
Programming.
The headlamps, parking and backup
lamps will illuminate when you press the
unlock symbol on the keyfob
transmitter.
See Section 3 of your Owner Manual.
Turn Signal/Multifunction Lever
Windshield Wiper Controls
MIST
Turn the WIPER band toward you and
release it for a single wipe cycle. For
more cycles, hold the band on MIST
longer.
WASH
Push the washer PUSH tab to spray
washer solvent on the windshield.
Moisture-Sensing Delay Windshield
Wipers (optional)
The moisture-sensing wiper system
monitors the moisture on the windshield
Page 11
11
and adjusts the wipers accordingly. The
wipers will wipe once to indicate that this
feature is on.
Activate the Moisture-Sensing System
Turn the WIPER band to one of the five
sensitivity levels within the DELAY area.
The wipers will make one wipe to indicate it is on. The DELAY position closest to OFF/MIST is the lowest sensitivity
setting and allows more rain to accumulate before the wipers actuate. Rotating
the WIPER band away from you will
increase the sensitivity and frequency of
wipes.
Notice: Turn the wiper band to OFF
to avoid wiper damage when going
through an automatic car wash.
See Section 3 of your Owner Manual.
Cruise Control
Set Cruise Control
The cruise control buttons are located
on the steering wheel. Press the
ON/OFF button to turn cruise control on.
Accelerate to the speed you want
to set.
Press the SET/COAST button. The
cruise control light on the instrument
cluster will illuminate. Remove your foot
from the accelerator pedal.
Resume Set Speed
Applying the brakes will turn the cruise
control off.
Press the RESUME/ACCEL button. The
vehicle’s preset speed will resume.
OFF
Press ON/OFF or step on the brake
pedal.
See Section 3 of your Owner Manual.
Headlamps — High Beam
High/Low Beam Changer
Pull the turn signal lever toward you until
it clicks to change from low beam to
high beam.
Flash-To-Pass
Pull and hold the turn signal lever toward
you briefly to flash the headlamps.
See Section 3 of your Owner Manual.
Page 12
12
Getting to Know Your 2004 LeSabre
Trunk & Fuel Door Releases
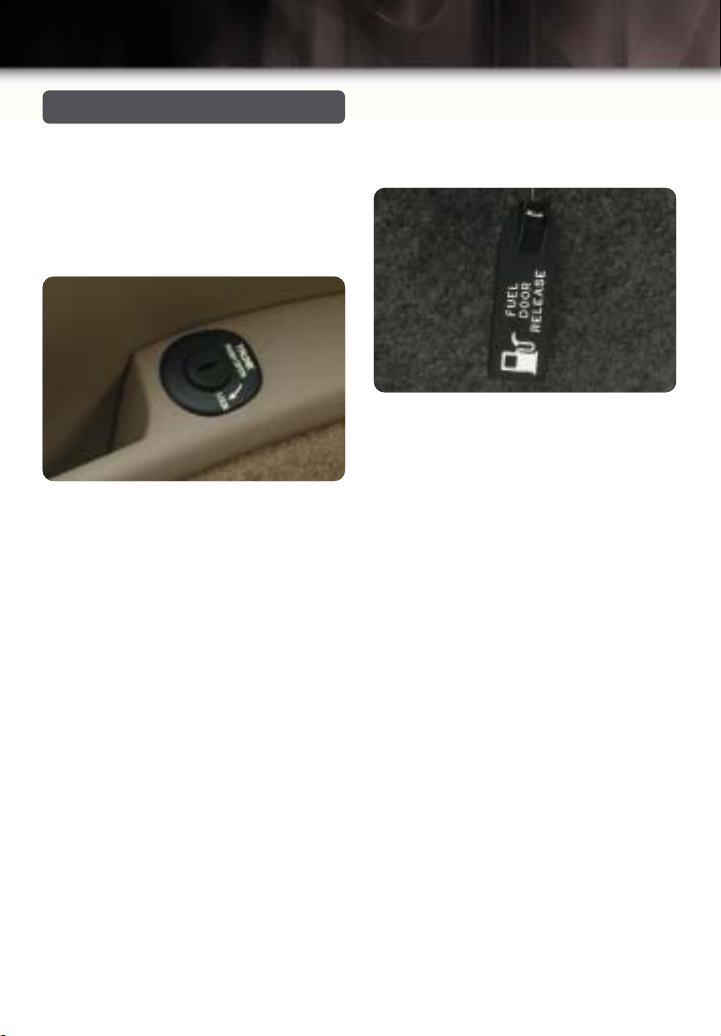
The remote TRUNK RELEASE button is
located on the driver’s door.
Remote Trunk Release
Vehicle must be in PARK (P) or NEUTRAL (N) and the trunk release lockout
unlocked.
Press the TRUNK RELEASE button to
open the trunk lid.
Remote Trunk Release Lockout
This feature allows you to secure items
in the trunk by disabling the TRUNK
RELEASE button.
Insert the ignition key into the TRUNK
RELEASE button. Turn the key onequarter of a turn to the right. Remove
the key.
Manual Fuel Door Release
An alternate fuel door release is located
in the top of the trunk compartment on
the driver’s side.
Pull the FUEL DOOR RELEASE tab to
release the fuel door.
Valet Key
The valet key is used for the ignition and
side doors only. It does not open the
trunk or glove box. Use this key when
valet parking your vehicle. Use the ignition key to open all doors, the trunk, and
glove box. Do not use a valet key to
duplicate an ignition key.
See Sections 2 and 5 of your Owner Manual.
Page 13
13
Convenience Features
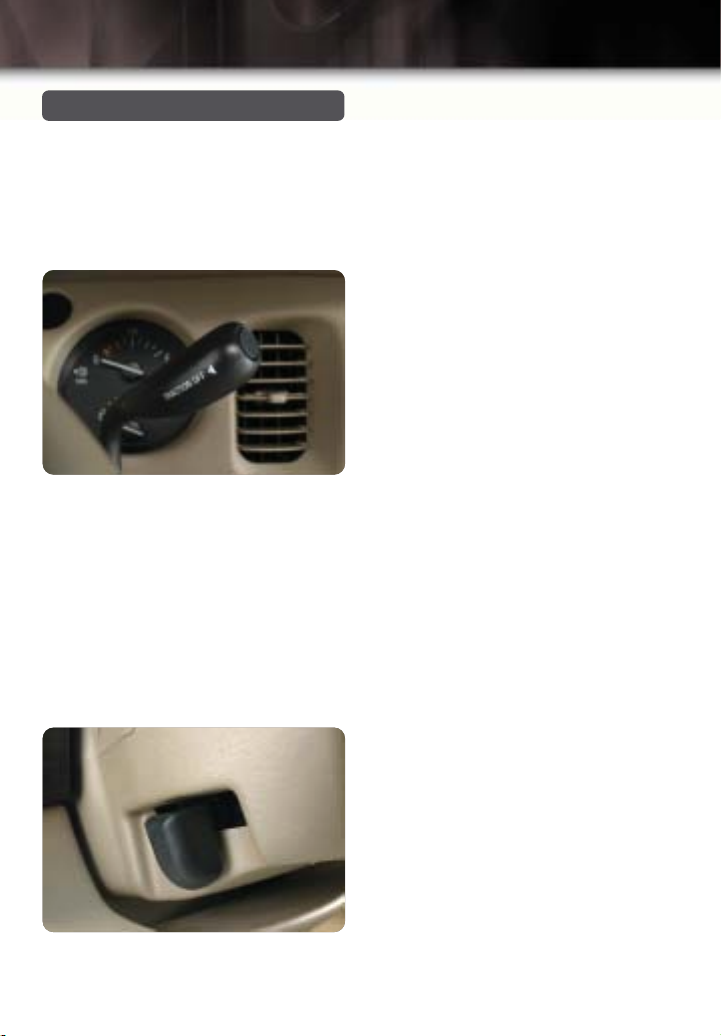
Traction Control System (optional)
The Traction Control System automatically comes on whenever you start the
vehicle. You may wish to turn the system
off if your vehicle gets stuck in sand,
mud, ice or snow.
Press the TRACTION OFF button to turn
the system off.
Tilt Wheel
The tilt wheel lever is located on the left
side of the steering column.
To operate:
Hold the steering wheel and pull the
lever toward you. Adjust the steering
wheel to a comfortable position, then
release the lever.
Passenger Compartment Air Filter
(optional)
This feature filters outside and recirculated air, removing pollen and dust particles. The filter has an access panel
located beneath the instrument panel,
near the accelerator pedal. This filter
should be replaced during routine
schedule maintenance.
See Sections 3 and 4 of your Owner Manual.
Page 14
14
Getting to Know Your 2004 LeSabre
OnStar®Communication System
(optional)
OnStar®brings an added dimension of
safety, security, peace of mind, and personal convenience to your LeSabre driving experience.
With OnStar, you’ll have peace of mind
knowing your driving experience is completely enhanced with such features as:
• Emergency services dispatch
• Automatic notification of air bag
deployment
• Roadside assistance with location
• Stolen vehicle tracking with automatic
theft notification
• Routing and location assistance
• Remote diagnostics
• Remote door unlock
• Convenience services — location of
hotels, restaurants and other points
of interest. The OnStar database has
250 categories and more than 4 million listings.
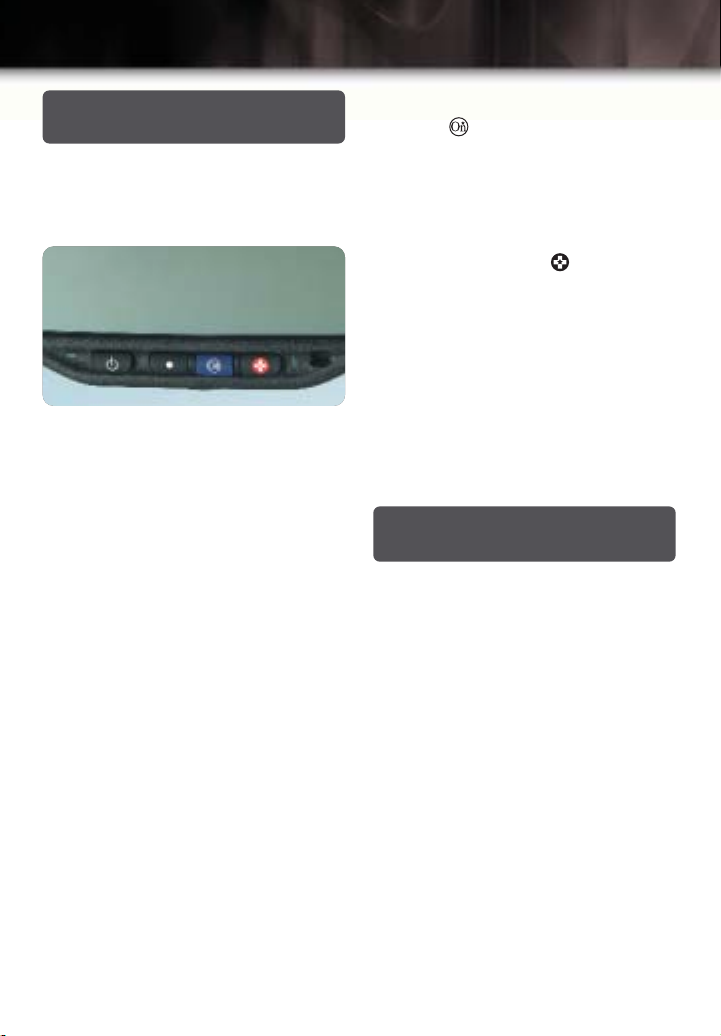
Call Answer or END Button
Press the solid white button at the end
of a call. You’ll hear the words, “OnStar
Request Ended.” Also, press this button
to answer a call from the OnStar Center,
or to cancel a call if one of the other buttons is accidentally pressed.
OnStar Services Button
Press the button to connect to an
OnStar Advisor. You’ll hear a chime,
followed by the words “Connecting to
OnStar.” The Advisor will be able to help
you with any subscriber services.
Emergency Button
In an emergency, press to connect to
an OnStar Advisor. The Advisor will
contact the nearest emergency services
provider who can dispatch ambulance,
police, fire or other emergency services.
Telltale Light
A solid green light indicates the OnStar
system is on. If the light blinks, an
incoming or outgoing call is in progress.
See Section 2 of your Owner Manual.
Head-Up Display (HUD)
(optional)
EyeCue®Head-Up Windshield Display
The HUD displays the following as a
reflection in the windshield:
• Speedometer Reading
•Turn Signal Indicators
• High-Beam Indicator
• Check Gauges Message
The HUD controls are located on the
instrument panel to the left of the
steering wheel column.
To operate:
Start the engine; slide the dimmer lever
all the way up. Slide the dimmer control
upward or downward to increase or
decrease the image brightness.
Page 15
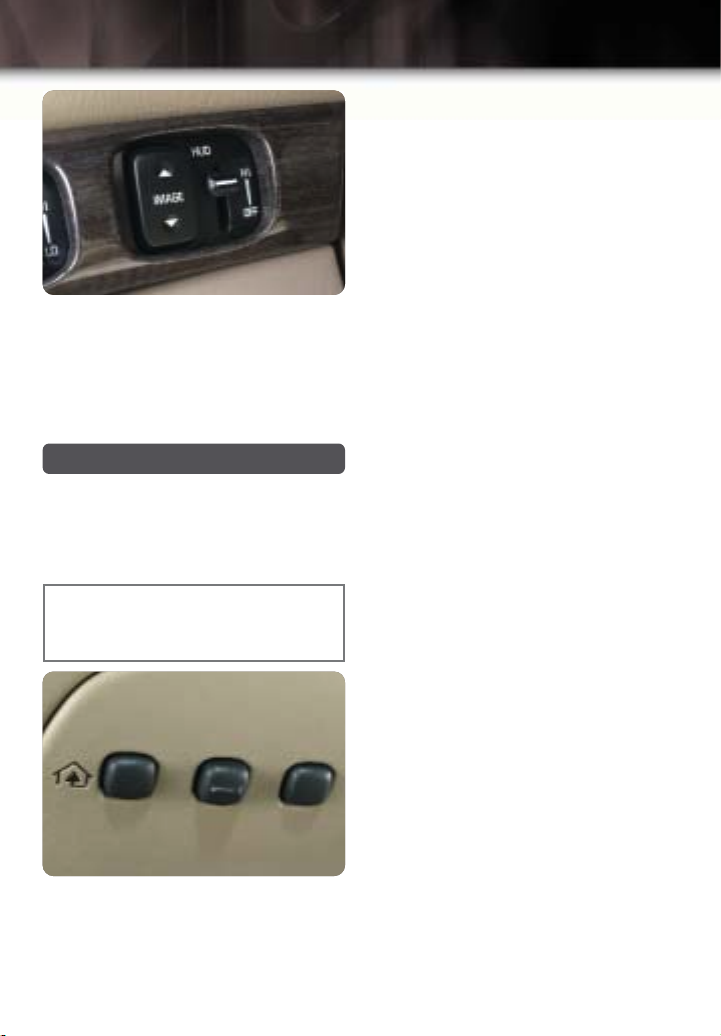
Press the image height adjuster control
up or down arrow to raise or lower the
HUD image on the windshield to suit
your personal preference.
See Section 3 of your Owner Manual.
Universal Transmitter (optional)
Programmable Universal Transmitter
You can program up to three transmitters. The vehicle’s engine should be
turned off during programming.
Note: Make sure people and objects
are clear of the garage door you are
programming.
Hold your hand-held transmitter against
the bottom surface of the Universal
Transmitter (UT) so you can see the
indicator light.
Choose one of the three buttons to
program. Press and hold the transmitter
button and the UT button until the
indicator light flashes rapidly (this could
take up to 90 seconds). Release both
buttons.
Operate Universal Transmitter
Press and hold the appropriate button.
The light will illuminate while the signal
is being transmitted.
®
PASS-Key
III
The PASS-Key®III is a passive theftdeterrent system that provides your
vehicle with a higher level of security by
offering 3 trillion electronic security
codes.
A single key opens all locks and operates the ignition. A transponder is located in the key. With the key in the ignition, the transponder is activated and
emits an encoded signal. This signal
allows the engine to start.
15
To erase any previous settings:
Press and hold the two outside buttons
simultaneously until the indicator light
flashes rapidly. Release the buttons.
Page 16
16
Getting to Know Your 2004 LeSabre
New Key
If a new ignition key is required, it
should be purchased at a Buick dealership. The key is matched to your vehicle’s module. The module will then learn
the new transponder key code.
See Section 2 of your Owner Manual.
Driver Memory Seat & Mirrors
(optional)
With the vehicle in PARK (P), adjust the
driver’s seat, including the lumbar position (optional) and both outside mirrors
to a comfortable position. This feature
also recalls the radio and climate control
settings. However, it does not include
the power head restraint settings.
To recall the memory seat and mirrors
using the key fob/transmitter, program
the DIC Seat Recall feature to ON.
See Section 2 of your Owner Manual.
Driver Information Center (DIC)
(optional)
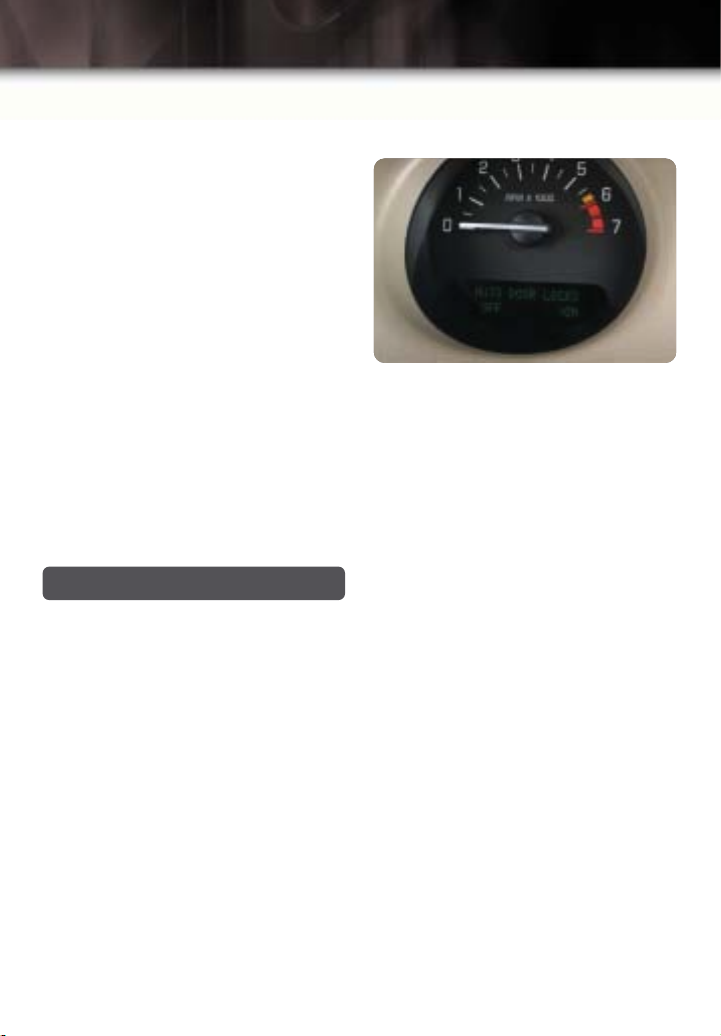
The DIC displays information about how
your vehicle is functioning and shows
warnings and messages if a system
problem is detected.
StabiliTrak®Message
When the “STABILITY SYS ACTIVE”
message appears, a computercontrolled system is automatically
activated. Some brake pedal noise or
vibration is normal. (StabiliTrak is an
optional feature.)
DIC Button Descriptions
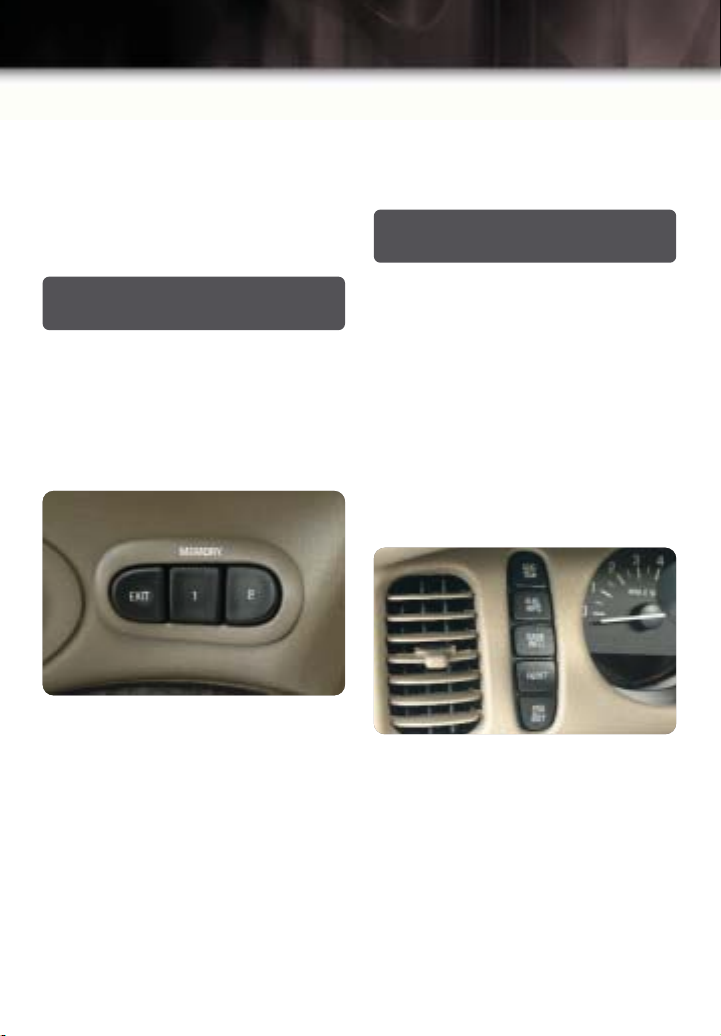
• Press and hold the appropriate
Driver/MEMORY button (located on
the driver’s door panel), to correspond with the DIC Driver number,
until you hear two beeps.
• Follow the previous step with the
other key fob/transmitter to set up for
a second driver, and select the other
Driver/MEMORY button.
• Press and release the EXIT button.
With the transaxle in PARK (P), the
seat will move all the way back or to
your personalized exit position.
• Press the ODO/TRIP button to display the vehicle’s total mileage, and
Trip 1 or Trip 2 miles. Press the
ODO/TRIP button for the appropriate
trip number, then press the RESET
button to reset the trip odometer.
• Press the FUEL INFO button to display fuel economy, fuel average, fuel
instantaneous, fuel range and fuel
used. Press the ODO/TRIP button for
the appropriate trip number, then
press the RESET button while the
Page 17
17
average fuel economy is displayed in
the DIC to learn what the average
fuel economy is from a new starting
point.
• Press the GAGE INFO button to display oil pressure, coolant temperature, battery state, oil life index and
tire pressure information.
• Press the RESET button, along with
other buttons, to reset system
functions.
After an oil change:
• Press and hold the RESET button
while the oil life index is displayed in
the DIC. After 5 seconds, the oil life
will change to 100%.
• Press the ENG/MET button to change
the display to either English or metric
units.
See Section 3 of your Owner Manual.
DIC Programming
DIC Personal Choice Programming
The DIC can be used to program the following features for two drivers:
• Outside Curb View Assist Mirror
• Automatic Door Locks
• Delayed Locking
• Security Feedback
• Perimeter Lighting
• Memory Seats
• Window Lockout
• Driver ID
• Language Selection
The DIC recognizes the drivers as
Driver #1 and Driver #2 (Memory 1 and
Memory 2).
Each key fob/transmitter is unique and
marked with either a #1 or #2 on the
back.
To program and recall your personal
choice features:
Turn the ignition ON and place vehicle in
PARK (P).
1. To inform the DIC which driver you
are, press the appropriate memory
seat control button, or press the
unlock symbol on your key fob/
transmitter.
2. Press and hold ENG/MET for 5 seconds. “Welcome to Buick Options
Feature” will appear on the DIC display. The next display will be your
driver number. Press ENG/MET to
select the feature you want to program.
Follow the display information for each
feature. Press RESET to save the selection and advance to the next button.
When finished programming, “Options
Feature Selection Done” will appear on
the DIC display.
To exit without programming each
personal choice feature:
Press another DIC button or turn the
ignition to OFF. Your selections will be
retained.
Page 18

18
Getting to Know Your 2004 LeSabre
Outside Curb View Assist Mirror
To tip the passenger mirror down when
the vehicle is in REVERSE (R):
Tilt Mirrors (OFF/ON).
• Press ENG/MET to select OFF or
ON. Press RESET to record your
choice and advance to the next
feature.
Automatic Door Locks
To make the doors lock or unlock when
the vehicle is in PARK (P):
• AUTO DOOR LOCKS (OFF/ON)
Press ENG/MET to select OFF or
ON.
If you select OFF, there will be no
door locking feature.
If you select ON for AUTO DOOR
LOCKS, the doors will lock when you
shift out of PARK (P).
Press RESET to record your choice.
• UNLOCK IN PARK (OFF/ON) Press
ENG/MET to select OFF or ON.
If you select OFF for UNLOCK,
there will be no automatic door
unlock feature.
If you select ON for UNLOCK and
ALL for DOOR TO UNLOCK, all the
doors will unlock when you shift into
PARK (P).
Press RESET to record your choice.
• DOOR TO UNLOCK (ALL/DRIVER)
Press ENG/MET to select ALL or
DRIVER. Press RESET to record
your choice.
Delayed Locking
To delay the locking of the doors by 5
seconds after the power door lock
switch is pressed:
• DELAYED LOCKING (OFF/ON)
Press ENG/MET to select OFF or ON.
If you select OFF for DELAYED
LOCKING, there will be no delayed
locking feature.
If you select ON for DELAYED LOCKING, the doors will lock 5 seconds
after pressing the door lock switch.
Press RESET to record your choice.
Security Feedback
To sound the horn and/or flash the exterior lamps when you press LOCK or
UNLOCK on the key fob/transmitter:
• KEYLESS FEEDBACK (OFF/ON)
Press ENG/MET to make your
selection.
If you select OFF for KEYLESS
FEEDBACK, there will be no
feedback.
If you select ON for KEYLESS
FEEDBACK, you will also need to
select LIGHTS or LIGHTS + HORN.
Press RESET to record your choice.
• LIGHTS FEEDBACK (OFF/ON)
Press ENG/MET to select LIGHTS or
L+ HORN.
If you select ON, the lights will flash
twice.
If you select L + HORN, the lights will
flash and the horn will chirp once.
Press RESET to record your choice.
• HORN FEEDBACK (OFF/ON) Press
ENG/MET to make your selection.
If you select OFF for HORN FEEDBACK, there will be no feedback.
If you select ON for HORN FEEDBACK, the horn will chirp once.
Press RESET to record your choice.
Page 19
19
Note: If you desire perimeter lighting,
you must select LIGHTS for UNLOCK
FEEDBACK.
Perimeter Lighting
To turn the headlamps, parking lamps
and backup lamps on when you press
on the key fob/transmitter:
1. PERIMETER LIGHTS (OFF/ON)
Press ENG/MET to select OFF or
ON.
If you select OFF for PERIMETER
LIGHTS, there will be no perimeter
lighting.
If you select ON for PERIMETER
LIGHTS, the lights will illuminate.
Press RESET to record your choice.
Memory Seats Recall
To recall the position of your seat and
mirrors when you press unlock on the
key fob/transmitter:
1. SEAT RECALL (OFF/ON) Press
ENG/MET to select OFF or ON.
If you select OFF for SEAT RECALL,
there will be no seat recall feature.
If you select ON for SEAT RECALL,
the seat and mirrors will move to their
preset memory positions when the
vehicle is unlocked using the key
fob/transmitter.
Press RESET to record your choice.
2. RECALL POSITION MEMORY
(EXIT) Press ENG/MET to select
MEMORY or EXIT.
If you select MEMORY for RECALL
POSITION, the seat and mirrors will
move to their preset memory
positions.
If you select EXIT for RECALL POSITION, the seat and mirrors will move
to their preset exit positions.
Press RESET to record your choice.
Window Lockout
To select the number of passenger windows you want to prevent from being
opened:
1. WINDOW LOCK (R+ PASS/REAR)
Press ENG/MET to select R+ PASS
or REAR.
If you select R+ PASS for WINDOW
LOCK, all three passenger windows
will lock out.
If you select REAR, the two rear windows will lock out.
Press RESET to record your choice.
See your Owner Manual for Driver ID and
Language Selection programming.
Note: This feature is activated by pressing the WINDOW LOCK switch on the
driver’s door.
Page 20

20
Getting to Know Your 2004 LeSabre
Roadside Assistance Program
1-800-252-1112
TTY Users: 1-888-889-2438
Buick Motor Division is proud to offer
premium Buick Roadside Assistance to
customers for vehicles covered under
the 3-year/36,000-mile (60,000 km) new
car warranty (whichever occurs first).
Buick’s Roadside Assistance toll-free
number is staffed by a team of technically trained advisors, who are available
24 hours a day, 365 days a year.
We will provide the following services for
3 years/36,000 miles (60,000 km), at no
expense to you:
• Fuel delivery
• Lockout service
•Tow to nearest dealership for
warranty service
• Flat tire change
• Jump starts
For prompt and efficient service when
calling, please provide the following
information to the advisor:
•Vehicle location
•Telephone number of location
•Vehicle model, year and color
•Vehicle mileage
•Vehicle Identification Number (VIN)
•Vehicle license plate number
For problems that cannot be resolved
over the phone, our advisors have
access to a nationwide network of
dealer-recommended service providers.
My GMLink
The Buick Owner Center at My GMLink
is a complimentary service for Buick
Owners, a one-stop resource to
enhance your Buick ownership experience. Exclusive member benefits
include online service reminders, vehicle
maintenance tips, online owner manual,
special privileges and more. Sign up
today at www.mygmlink.com.
Certain restrictions, precautions and safety procedures apply to your vehicle. Please read your Owner
Manual for complete instructions. All information contained herein is based on information available at
the time of printing and is subject to change without notice. Copyright 2003 by GM Corp.
All rights reserved.
04LESQRG
 Loading...