

Page 1
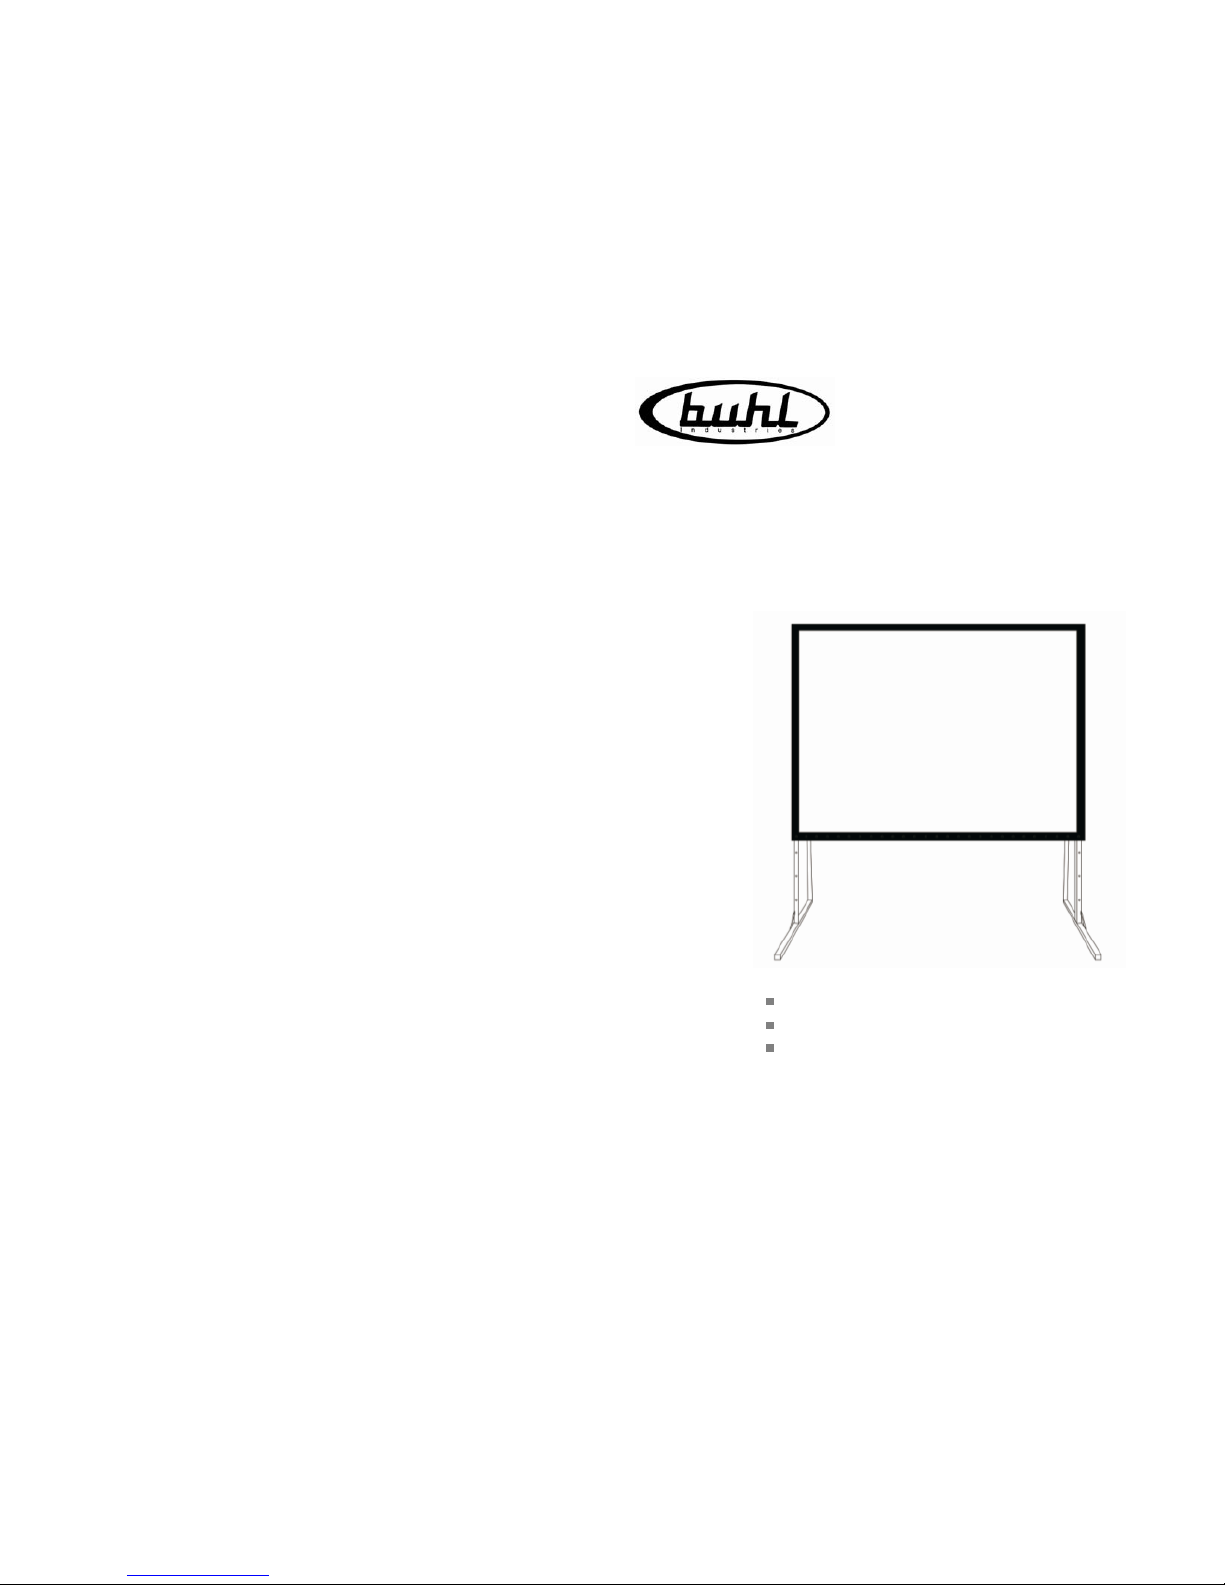
Good clear picture quality
Exquisite design
Easy to use
Thank you for choosing Buhl Screens. Please read through these instructions before use.
Need help? Support is available at www.hamiltonbuhl.com
User Manual
Easy Fold Portable Screen
Page 2
When setting up the projection screen, care must be taken to distinguish between the front
and back of the screen fabric. Front or rear projection screen could be identified by the
card which hangs on the corner of the fabric screen or in the screen fabric bag.
Dust dirt and scratches on the projection area will affect the picture quality, take note of
the points below to prevent this.
1. Do not touch the projection area with hands.
2. Do not write or draw on the projection area.
3. Do not use fingers or sharp objects to point on the projection area, this will damage the screen
fabric.
4. Use a soft damp cloth or soft brush to clean the pr oj e c ti o n ar ea.
5. Do not use chemical cleaning agent s or alco hol t o clean t he pr oje ction ar ea. U se clean water only.
After using the screen, disassemble the screen and sto re it in the aluminum storage box provided.
The screen should only be operated by adults to avoid accidental damage and injury.
Design:
The aluminum frame is designed to be light weight and easily operated.
This makes it easy to carry. assemble and disassemble.
Screen fabric:
The screen fabric is attached to the rectangular frame and held in place by several snap buttons
Which ensure an evenly stretched and per fe c tl y flat surface.
The front projection fabric has a vi ewing angle of 55ºand a gain of 1.0,The rear projection fabric has
a viewing angle of 40º and a gain of 1.6.
Both types of fabric are durable and can be folded many times without any damage and the
distortion rate of frame is less than 1%.
Assembly:
The screen can be assembled in few minutes depends on the size and without the use of tools.
The screen should be stored in an impact resistant aluminum storage box when it is not in use.
Ideal for:
Business meetings, churches, schools,
Family centers and industrial training rooms.
Correct use of the projection screen will ensure better results.
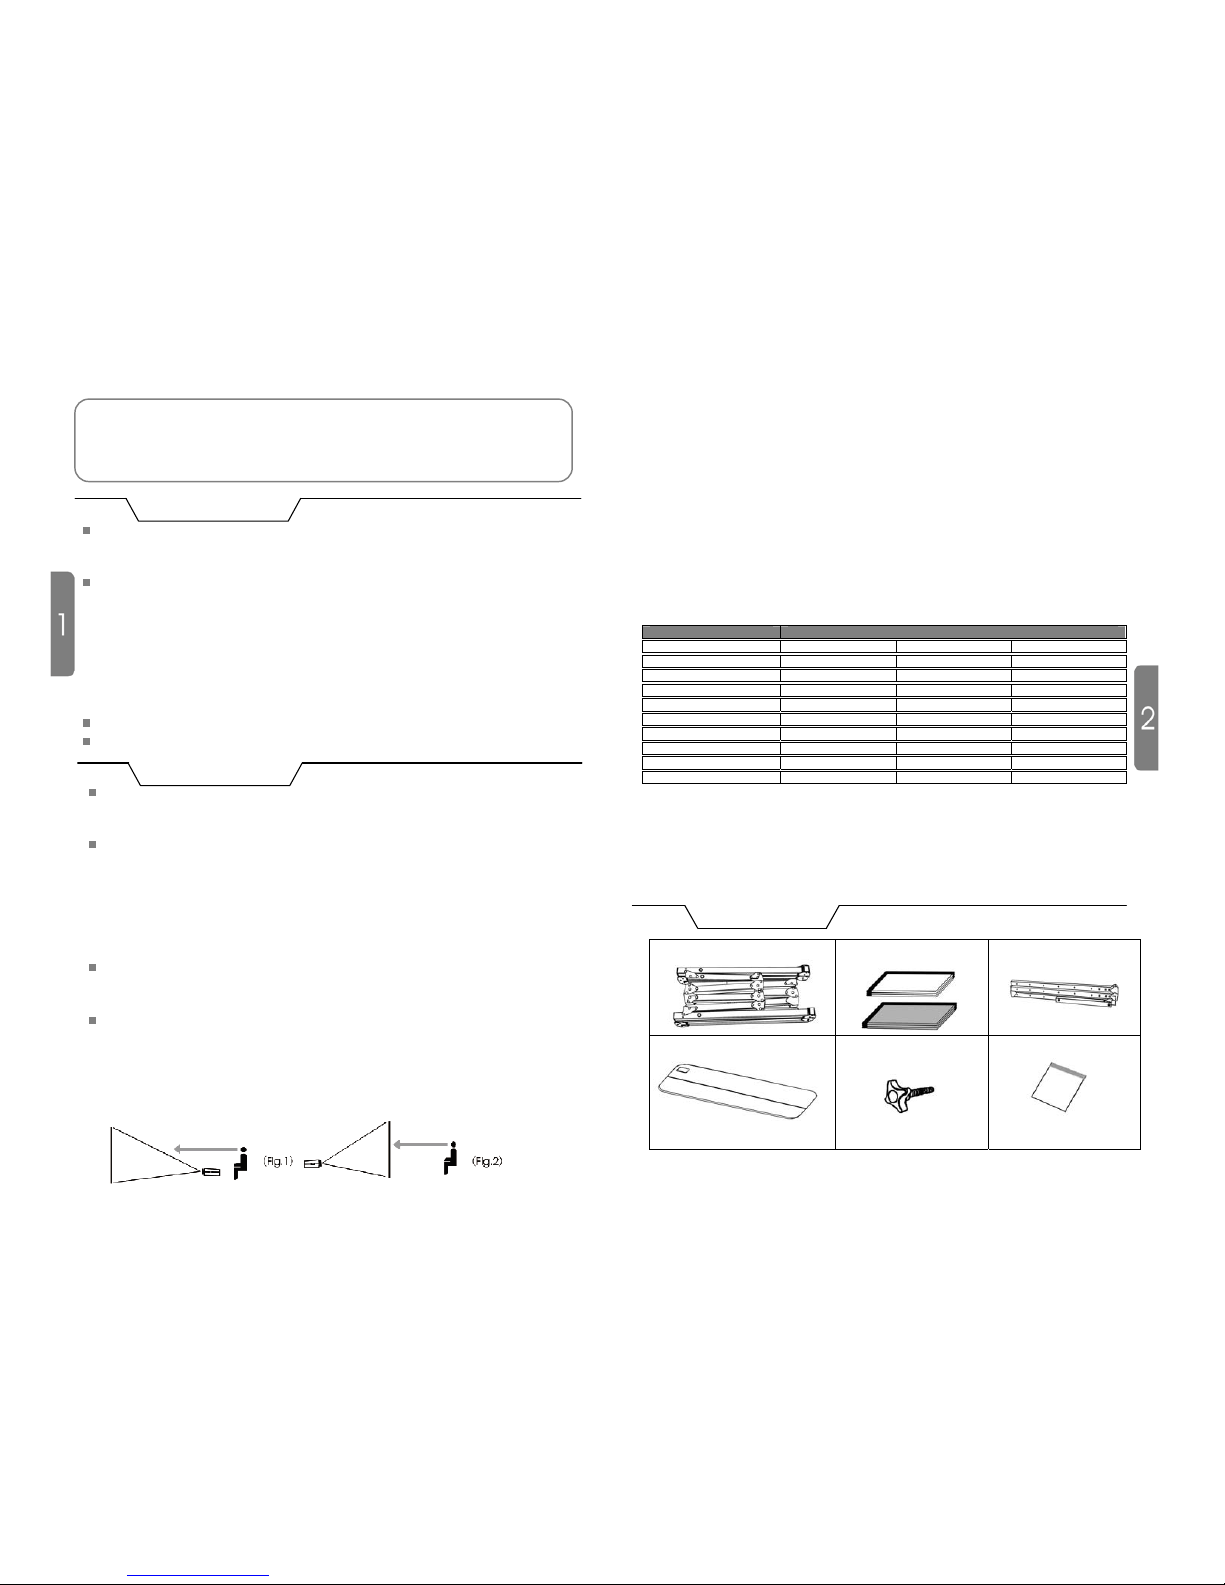
For front projection assemble and view the screen as indicated in fig.1
For rear projection assemble and view the screen as indicated in fig.2
Content and accessories list: When unpacking the screen, check that all the parts from the appropriate
list are there.
Use the parts as instructed by the user manual.
Parts List – 150”, 180”, 200” Sizes
Specified screen size(inches) 150、180、200
Part Part numbe
r
Quantity
Folding frame 1 1 Pcs
Screen fabric 2 1 Pcs
Folding legs 3 2 Pcs
Screen fabric bag 4 1 Pcs
Hand screws M8X50 5 8/10 Pcs
User manual 6 1 Pcs
QC Pass 7 1 Pcs
Fabric bag carton box 8 1 Pcs
Aluminum storage box 9 1 Pcs
Note: The part lists above are subje c t to ch an ge w i th out prior notice.
1.Folding frame
2.Front/rear projection
Screen fabric
3. left and right folding legs
4.Screen fabric bag
5.Hand screw M8X80
M8x50
6.User manual
Thank you for choosing our screen.Please read through the user man ual before
using the screen.Correct usage and maintenan ce could insure a longer life f or the
p
roduct.
Product Description
User instructions
Parts diagr am
Page 3
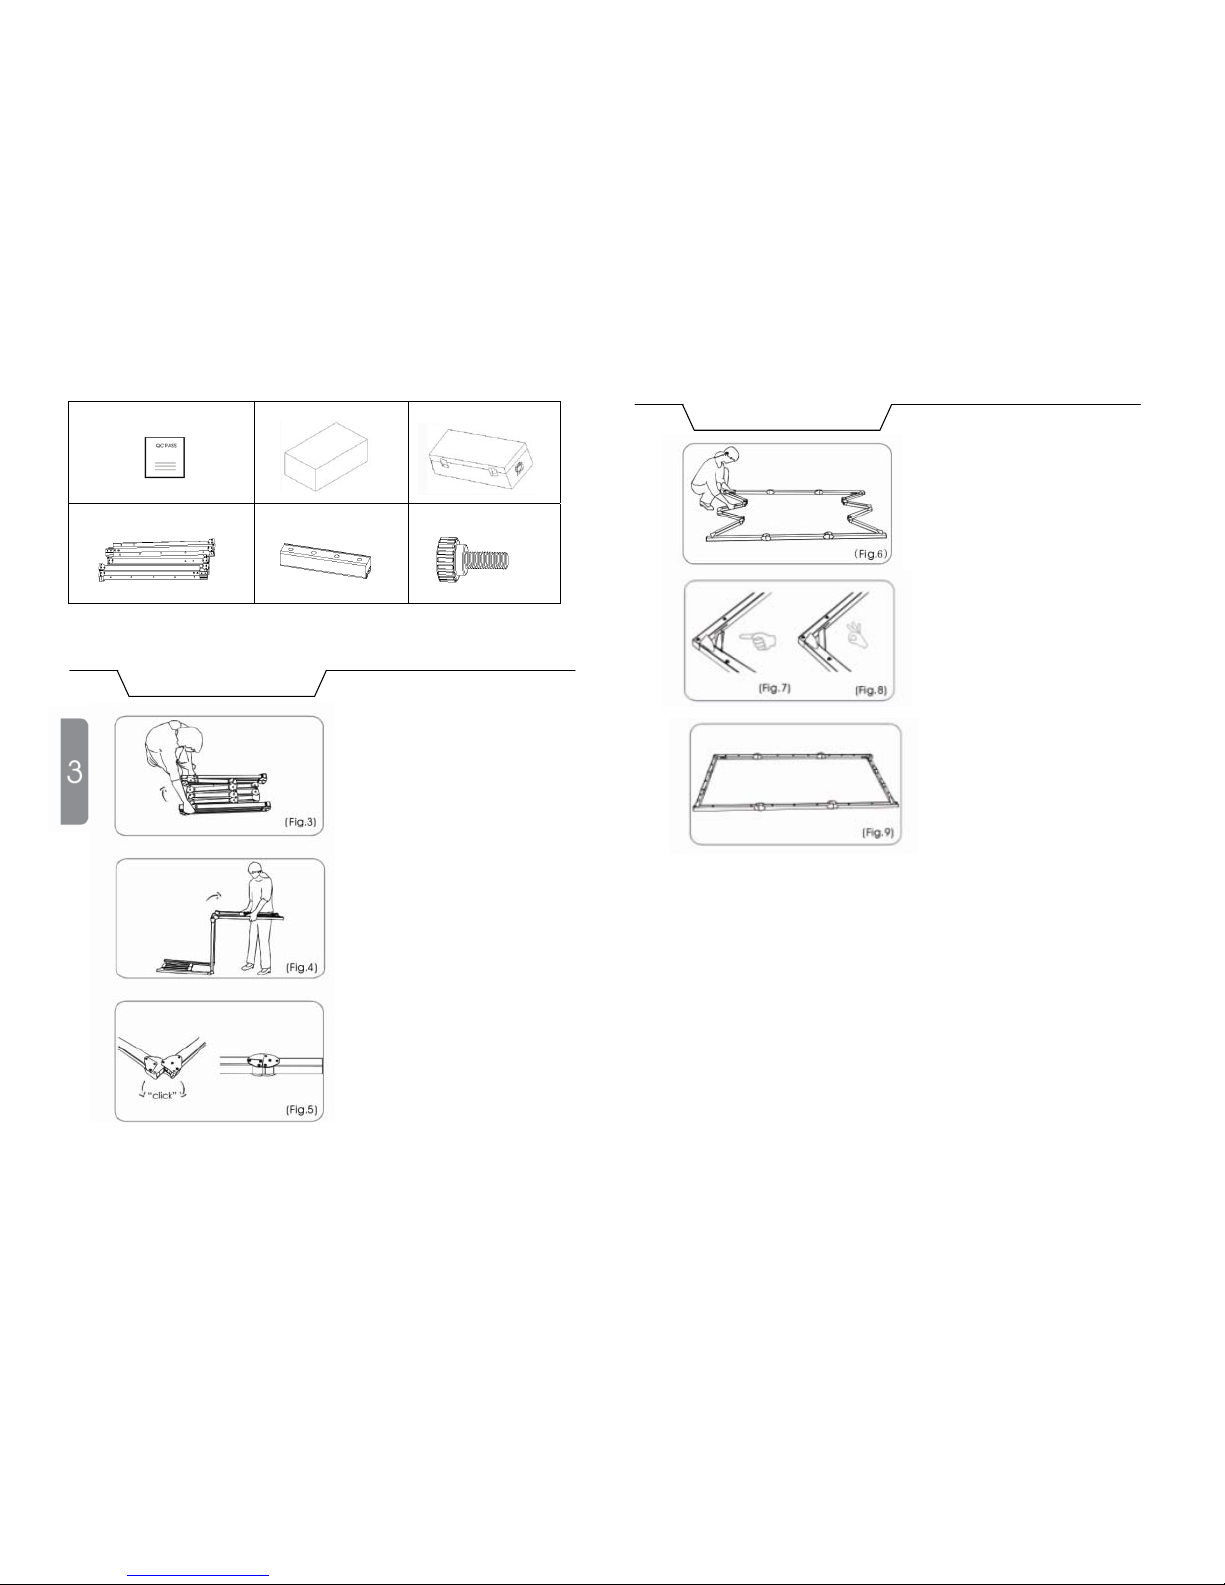
7.QC PASS 8.Fabric bag carton box 9. Aluminum storage box
10. Folding frame 11. Conn ecting pole 12.Hand screw M8X16
Note: the part diagrams above are subject to chang e without prior notice.
1.Take the frame out of the box and
place it on a flat surface. Unfold the
longer sections first.(Fig.3+4)
Assembly instructions
Assembly instructions
3.Make sure all 4 corners of the frame
are at 90º and the hinged support bar
is straight and not bent.(Fig.7-9)
2.Unfold the frame until the latch on
the hinge ”clicks” into place. Repeat the
procedure for the shorter sections.
(Fig.5+6)
Page 4
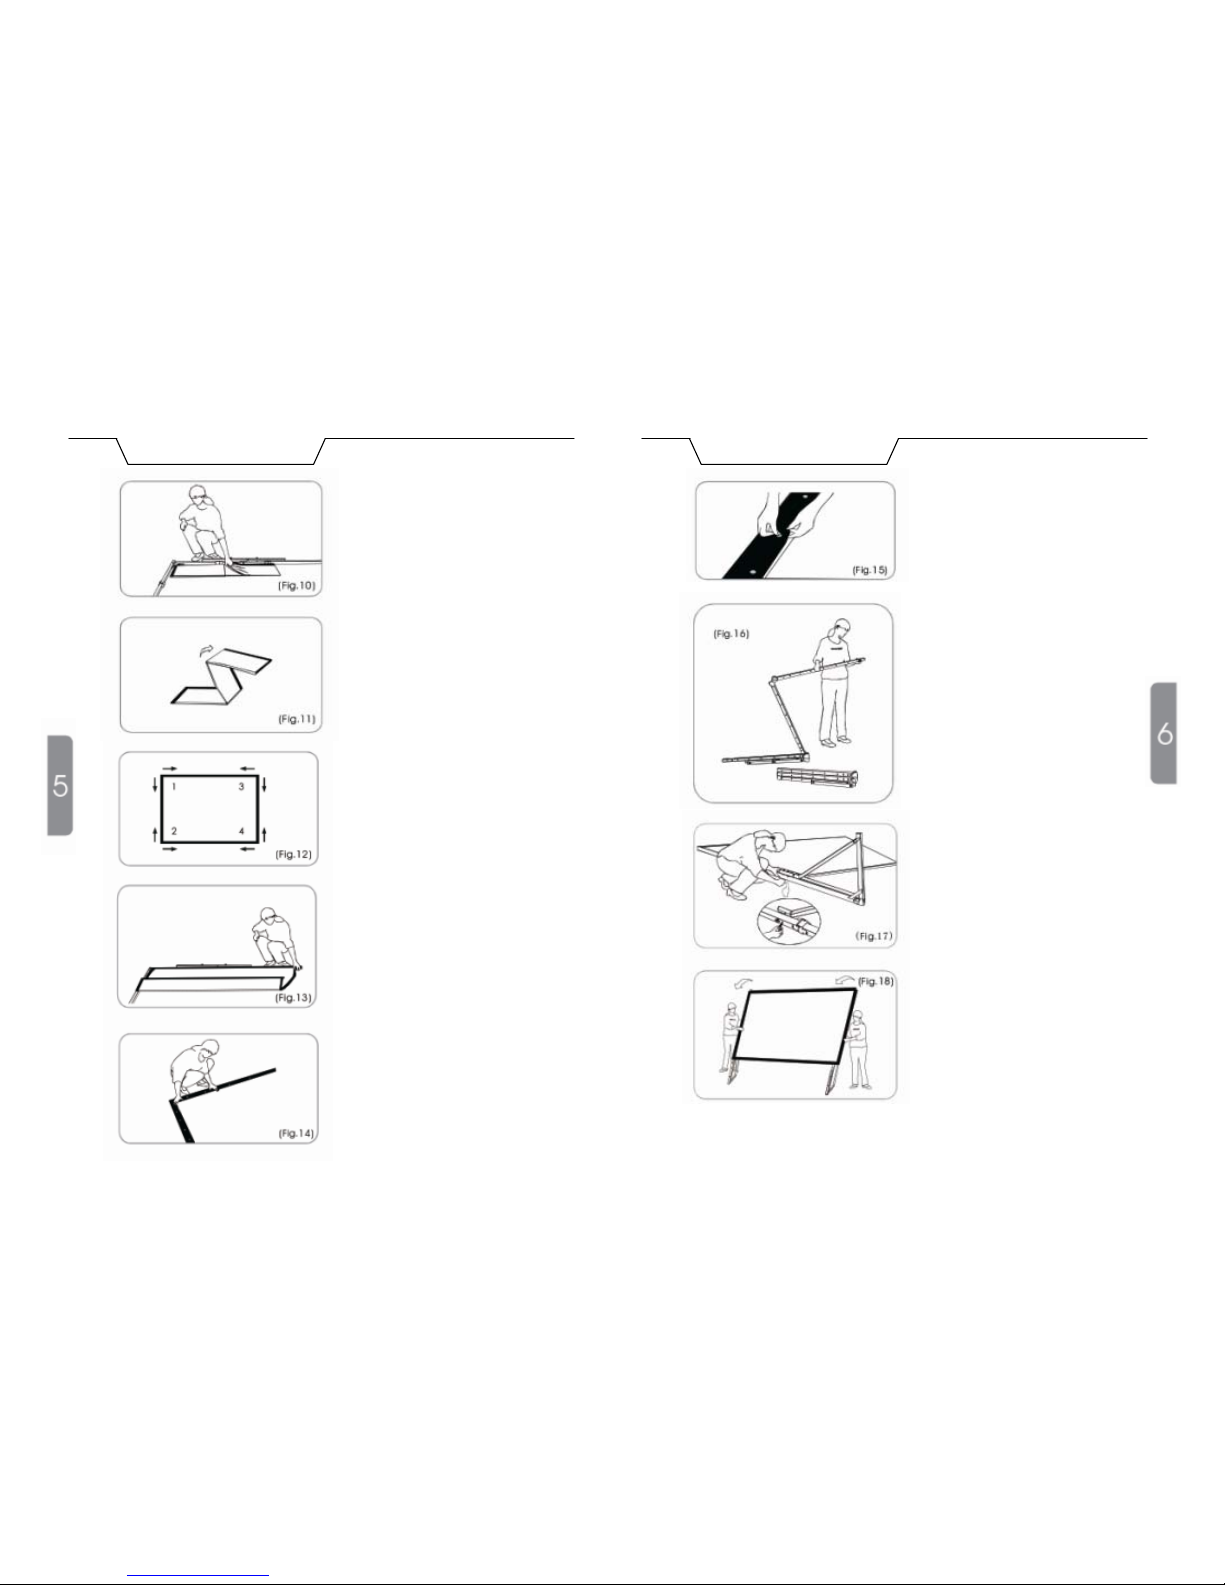
4.Take the screen fabric out of the
screen fabric bag and put it inside the
frame next to the corner.
Unfold as shown in the diagram.
(Fig.10+11)
Assembly instructions
5. Secure the screen fabric to the frame by
snapping the buttons start from the corner
①, ② then ③, ④
(Shown in Fig.12-15)
Make sure all the buttons must be sna
pp
ed.
Assembly instructions
6. Take the folding legs out of the box and
Unfold as shown in (Fig.16), and make sure
the hinges click into place.
7. Once the legs are locked in place,
Lay the frame on the floor and position
the legs over both sides of the frame.
Use the hand screws to attach the frame
to the legs just little before tighten two
sides of them firmly. (Fig.17+18)
Page 5
Note: If the screen is faulty or is damaged in any way. Do not try to repair the projection
screen yourself. Contact customer service to arrange it to be repaired.
The projection screen parts and specifications ar e su bject to change without prior
notice.
Warnin
Misuse of the screen may cause
damage to the screen, or injury
to persons.
Assembly instructions
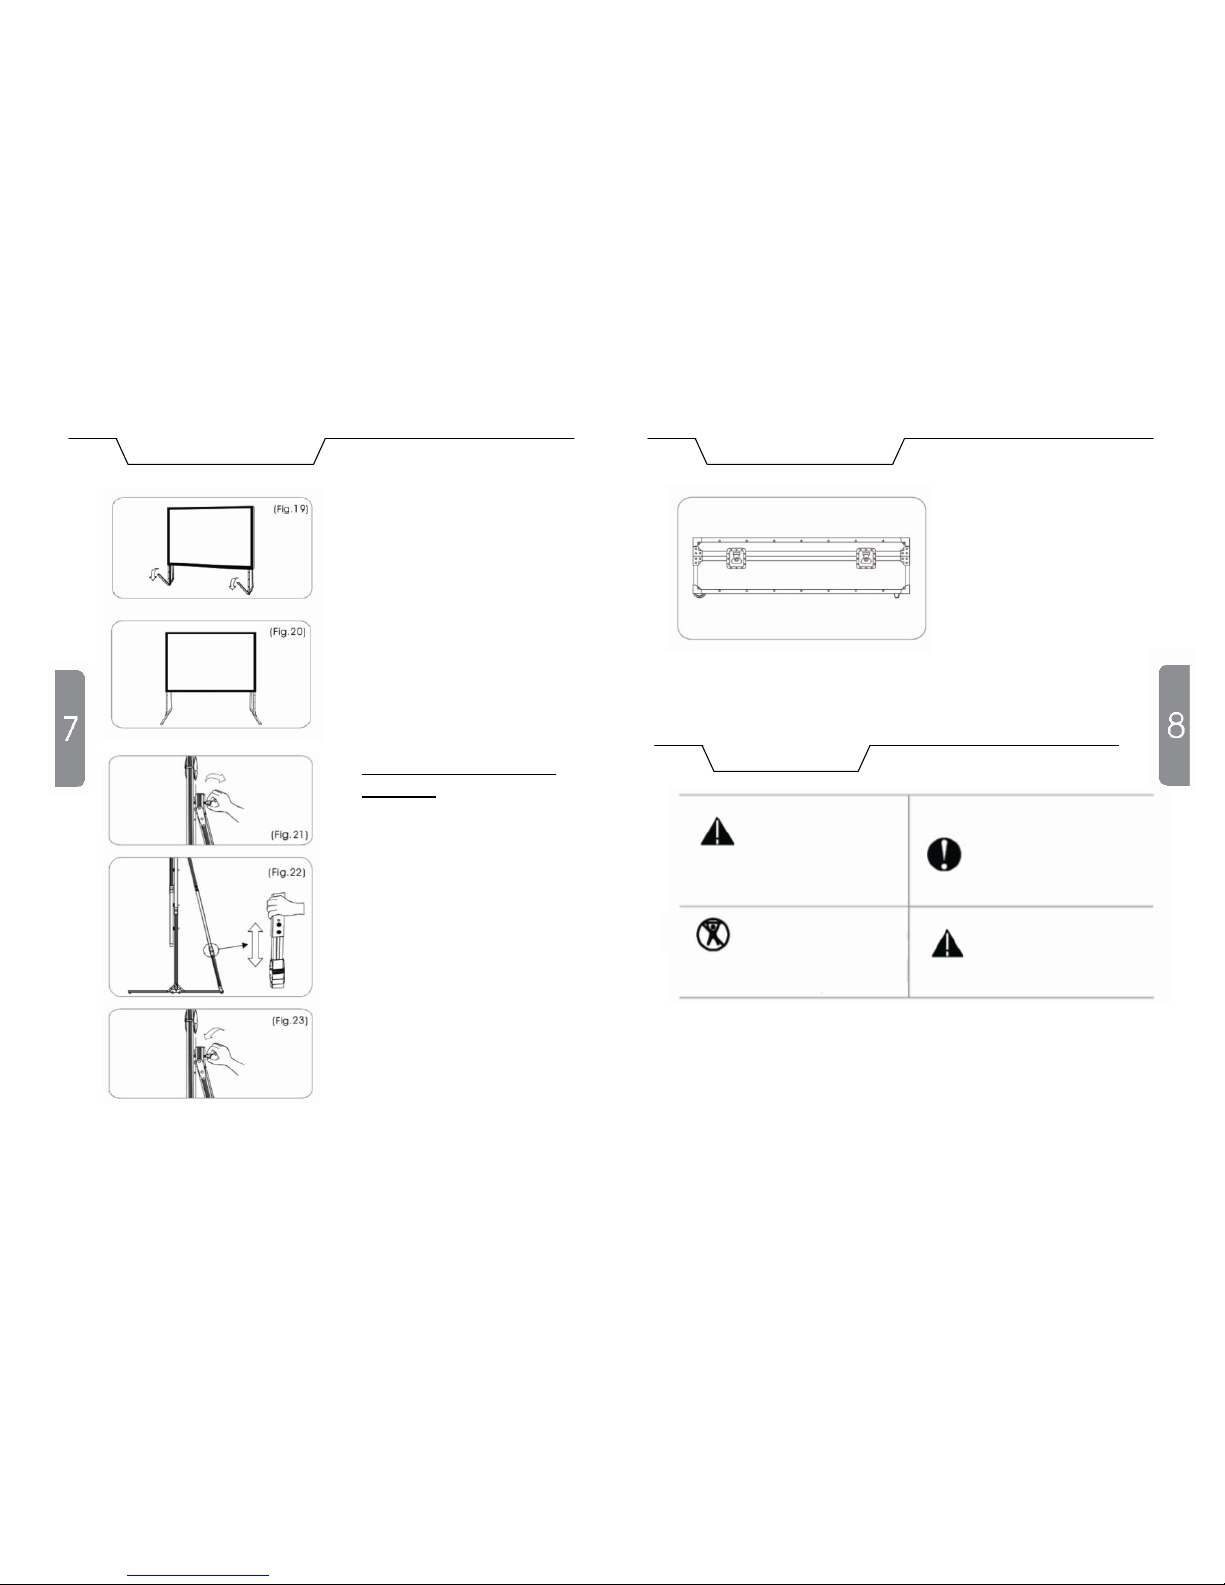
8. When the frame is in the vertical
position, fold the front facing feet of the
legs out. (Fig19+20)
Assembly is now completed and the
projection screen will be stable on a flat
surface.
Additional information for screen
size over 150”
Use the hand screws to secure the
support leg to the frame in an
appropriate position. The support leg
can be adjusted to an appropriate
length. (Fig.21-23)
Assembly instructions
9. After using the screen, disassemble
and store it in the aluminum storage box
provided. To disassemble the screen,
implement the assemble procedure in
reverse order.
Safety Notice
The projection screen must be set up on a
stable surface where t here is suf ficient
space. Failure to do so may cause the
screen to fall over causing damage to the
screen and injury to persons.
Do not hang things from the
screen or climb on it. Doing so
may cause the screen to fall off
and damage the screen and
cause injury .
After using the projec tion screen
Disassemble the screen and store it in
the aluminum storage box provided.
This will protect it from dust, dirt and
accidental damange.
Warnin
Do not climb
on the screen
Notice
Page 6
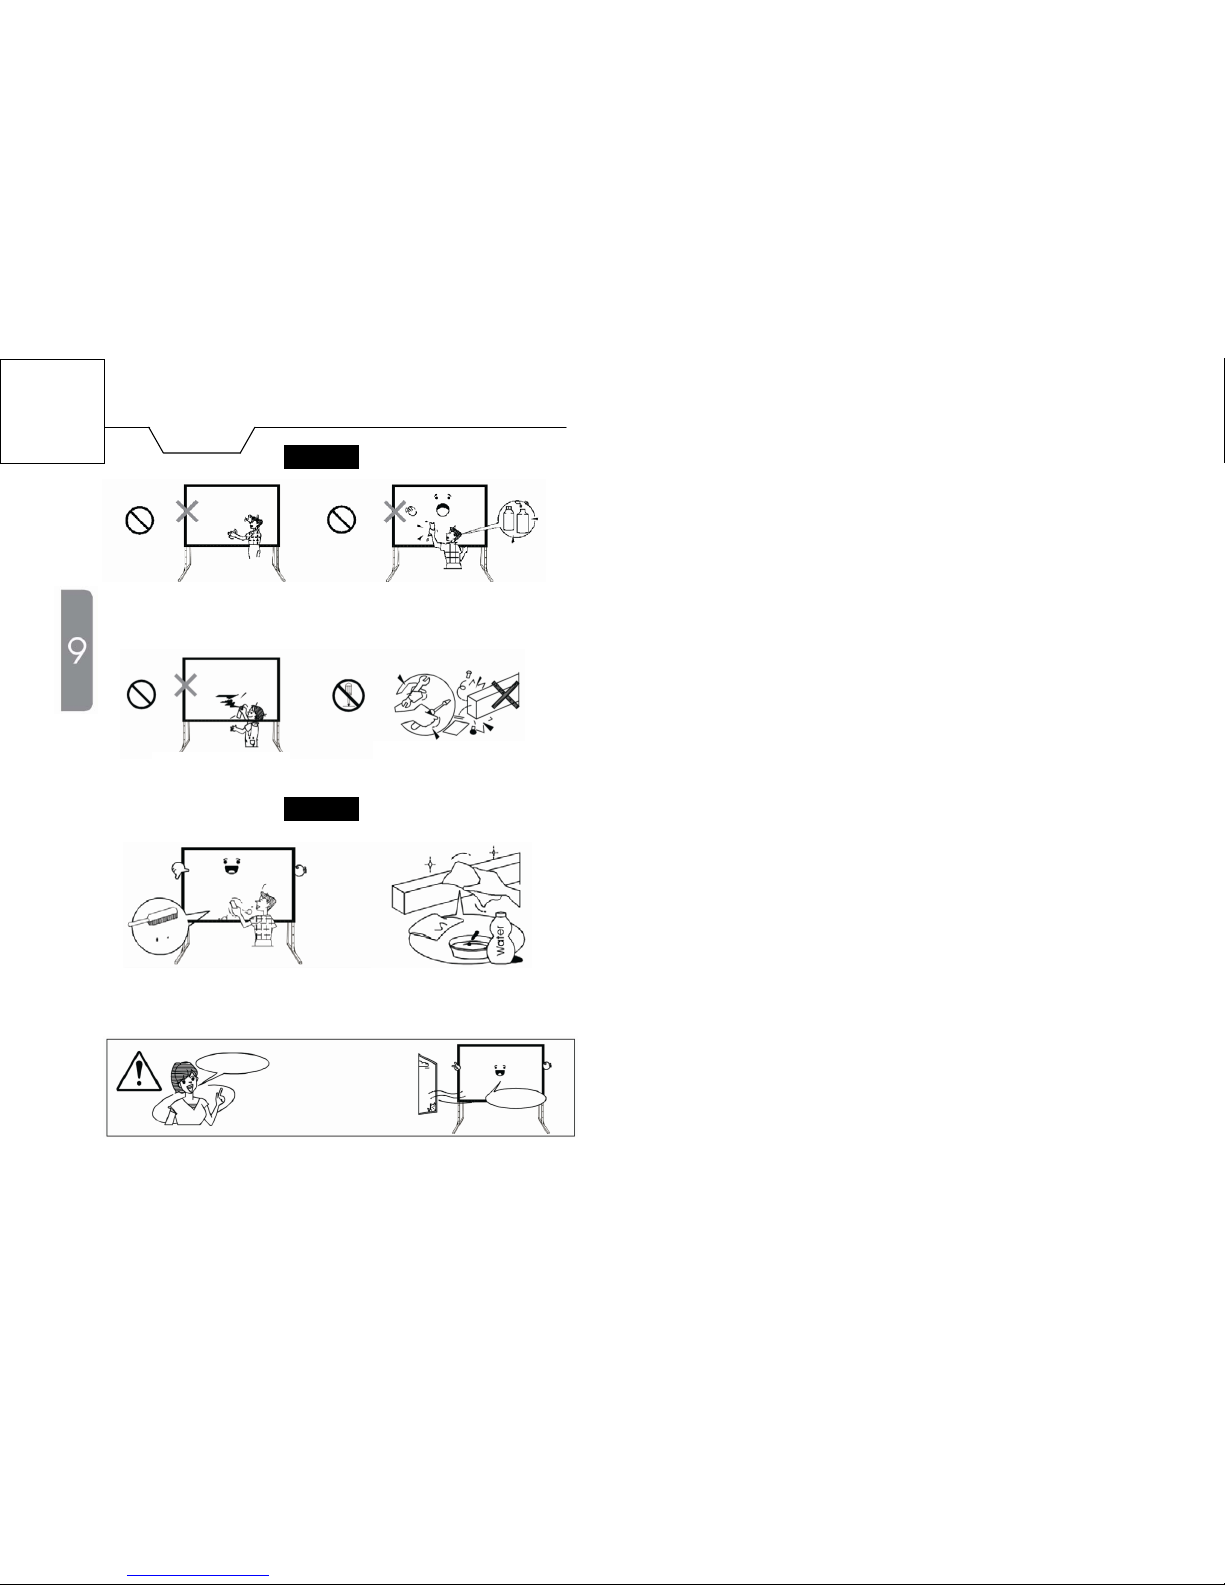
Notice
Do Not
Do not touch the projection
area with hands
Do not use chemical cleaning
agents or alcohol to clean the
projection area
Do not write or draw on
the projection area.
Do not disassemble
the screen when it is in use.
Use a soft damp cloth or soft brush
to clean the projection area.
Use clean water and a soft damp
cloth to clean the screen.
After using the screen, disassemble
the screen and store it in the aluminum
storage box provided.
Correct
2.Unfold the
frame until the
latch on
the hinge ”clicks”
 Loading...