

Page 1
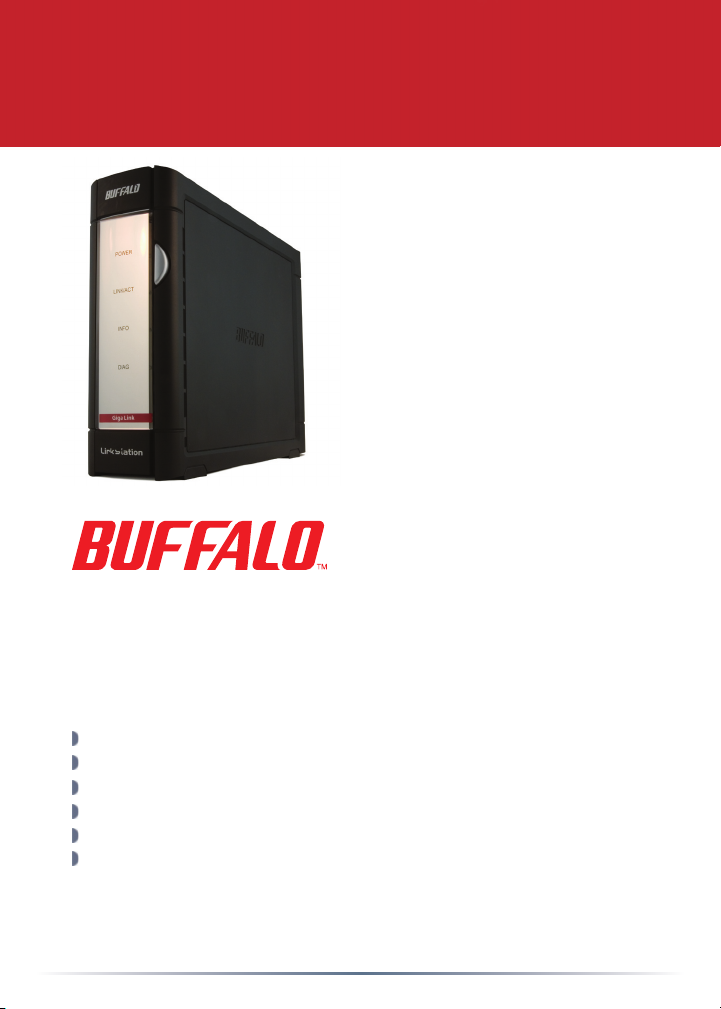
Package Contents:
Quick Setup Guide
LinkStation Pro
Main Unit (LinkStation)
Ethernet Cable
Power Cable
LinkNavigator Installation CD
Quick Setup Guide (this manual)
Warranty Card
www.buffalotech.com
v1.1
Page 2
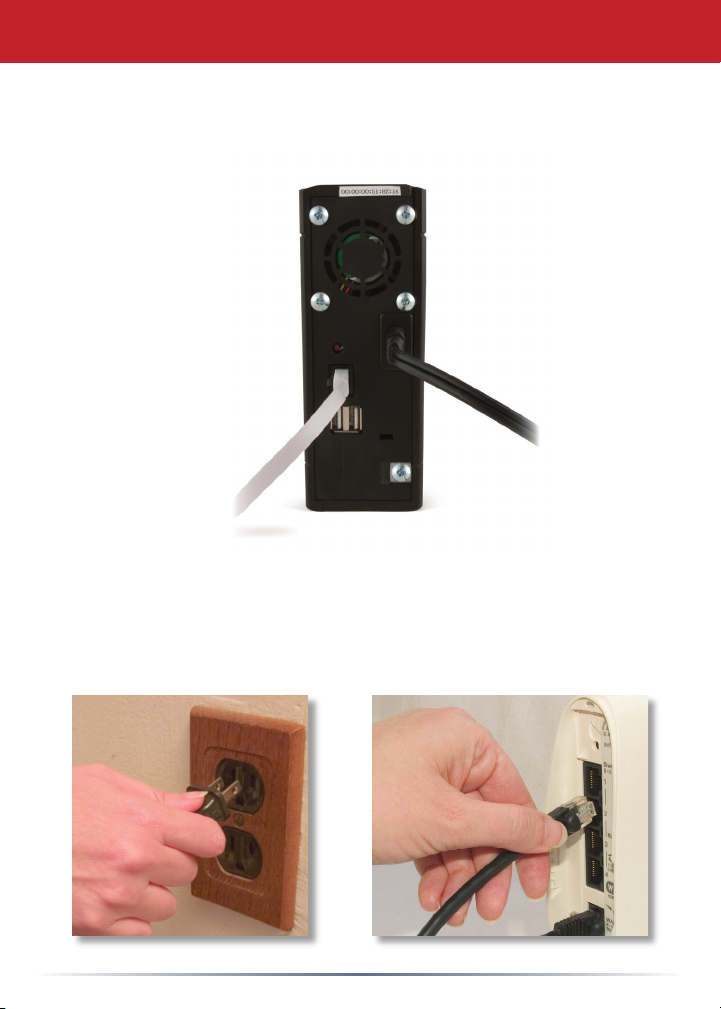
Step 1: Connect your Cables
Plug LinkStation’s power cord and Ethernet cable into the back of
the LinkStation.
Connect the power plug to a surge protector or power outlet. Plug
the other end of the Ethernet cable into a hub, switch, or router
on your local network.
2
Page 3
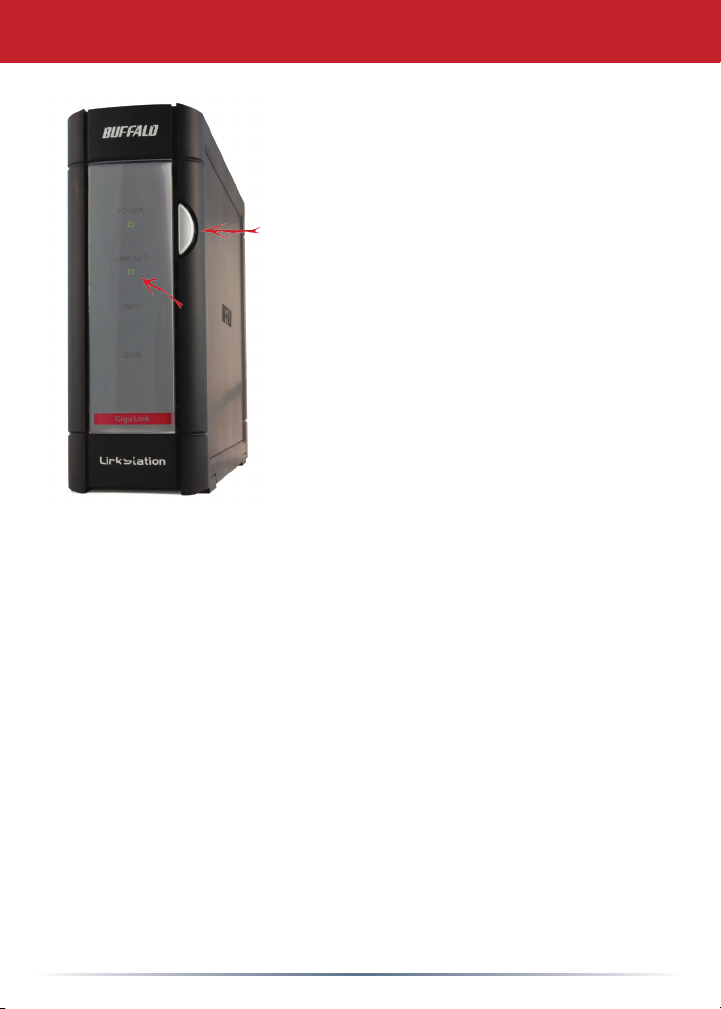
Step 2: Check your Connection
Press the power button on the front panel
to turn your LinkStation on.
Check the LINK/ACT LED on the front
of the LinkStation. If it’s lit, then your
LinkStation is connected properly. Please
to continue setup.
turn to
If the LINK/ACT LED on the front of
LinkStation is
not properly connected to your network.
Make sure that:
• both LinkStation and the hub, switch, or PC are powered on,
• the Ethernet cable is securely fastened to both devices, and
• the Ethernet cable is not damaged. To verify, try using another
Ethernet cable.
page 4
lit, your LinkStation is
not
If problems persist, contact our technical support.
3
Page 4

Step 3: Installing Software
Insert the LinkNavigator
CD into a PC’s CD-ROM
drive. If Setup doesn’t
launch automatically, you
can launch it manually by
clicking Start, then Run....
When the Run dialog
opens, type d:\setup.exe
(where “d” is the drive letter
of your CD-ROM). Press
OK to continue.
Press the Start
Installation button to
begin.
Click on Connect this PC
to LinkStation (the green,
lower button).
Click Next to step through
the installation.
4
Page 5

Continue pressing Next to
step through the installation.
When installation is
complete, you may close the
installation window.
Two new icons will be on your desktop: Shortcut
for LinkStation and Buffalo NAS Navigator.
5
Page 6

Using your LinkStation
The LinkStation shortcut will take
directly to the folders on your
LinkStation.
Share is the main folder that you can
put les and folders in. Info contains
a copy of your user manual.
The Buffalo NAS Navigator
icon opens the LinkStation’s
client utility. This lets you
easily view system information
for your LinkStation(s). If
you click Setup and choose
Conguration Settings, it
will take you to the settings
conguration GUI, where you
may change your LinkStation’s
settings. Until you change it,
the GUI’s username is “admin” and the password is “password”.
Consult your user manual for more information on the Buffalo
NAS Navigator and the Settings Conguration GUI.
Another way to access folders
and data on your LinkStation is
through the mapped driveletter
‘L’. When the installation
program ran, it added your
LinkStation’s main “share” folder
to your “My Computer” folder as
drive ‘L’. Use this virtual hard
drive like any other hard drive on your computer. You may add
additional shares and mapped drive letters to your LinkStation
and PC; consult your user manual for more information.
Congratulations! Your LinkStation is ready to use. Please see
the LinkStation User Manual on your LinkStation cd for more
help and conguration options.
6
Page 7

Technical Specications
LAN Standards: IEEE 802.3u, IEEE 802.3ab, IEEE 802.3
Transmission: 1000BASE-T: 8B1Q4, PAM5; 100BASE-TX: 4B5B
MLT-3, MLT-3; 10BASE-T Manchester Coding
Access Media: CSMA/CD
Media Interface: RJ-45
USB Standard: USB 2.0
Hi-Speed (HS)
Full-Speed (FS)
Low-Speed (LS)
USB Connector: USB A Connector (2)
Data Transmission Speed: Max: 480 Mbps (HS Mode)
Max: 12 Mbps (FS Mode)
Electric Current: 120V A/C
Power Consumption: ~21W
Dimensions: 2.4“ x 6.3“ x 8.5“ (60 x 160 x 216 mm.)
Weight: ~3.5 lbs
Operating Temperature: 41-95˚F;20-80%non-condensing
Technical Support
Buffalo Technology offers free technical support. See the back page of
this quick start guide for contact information. Please also visit the web
site at http://www.buffalotech.com.
FCC Warning
This device complies with part 15 of the FCC Rules. Operation is
subject to the following two conditions: (1) This device may not cause
harmful interference, and (2) this device must accept any interference
received, including interference that may cause undesired operation.
7
Page 8

http://www.buffalotech.com
USA/Canada Technical Support is available 24 hours a day, 7 days a week
Toll-Free: 866-752-6210
email: info@buffalotech.com
Europe Technical Support is available between 9am-6pm (Monday-Thursday) (GMT)
and 9am-4:30pm on Fridays.
email: helpdesk@buffalo-technology.ie
©2005-2006, Buffalo Technology (USA), Inc.
 Loading...