

Page 1
Quick Setup Guide
MiniStation Portable
USB 2.0 Hard Drive
HD-PHSxxU2-UC Series
Package Contents:
• Main Unit (MiniStation Portable Hard Drive) 1
• 5v USB Power Adapter 1
• 12” USB Cable 1
• 36” USB Cable 1
• Quick Setup Guide 1
• Software CD 1
If any items are missing or damaged, please contact the reseller or
retailer from which the product was purchased.
www.buffalotech.com
V 1.7
Page 2

Getting Started with Windows
Windows Installation
Connect one of the included USB cables to the USB port on the back of
MiniStation.
Plug USB cable here
Plug the other end of the USB cable into the USB port on the
computer or device you are adding the MiniStation to.
Windows 2000, XP, and ME
MiniStation will install automatically.
2
Page 3
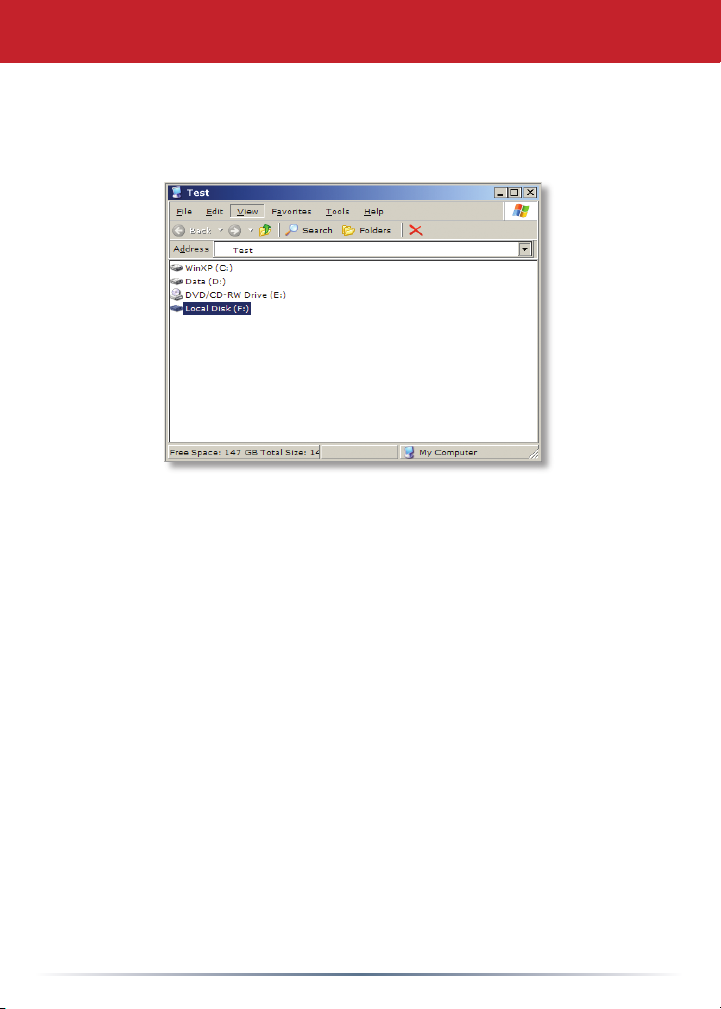
Open My Computer and the new drive will be present. By default it will
use the rst available drive letter and will be named “Local Disk”. The
MiniStation comes pre-formatted so you may begin using it immediately.
The software CD in your MiniStation package includes programs for
Windows computers, including backup software and the SecureLockWare
drive encryption program. See the appropriate manual on the CD for
more information on the programs.
3
Page 4
Getting Started with Macintosh
Macintosh Installation
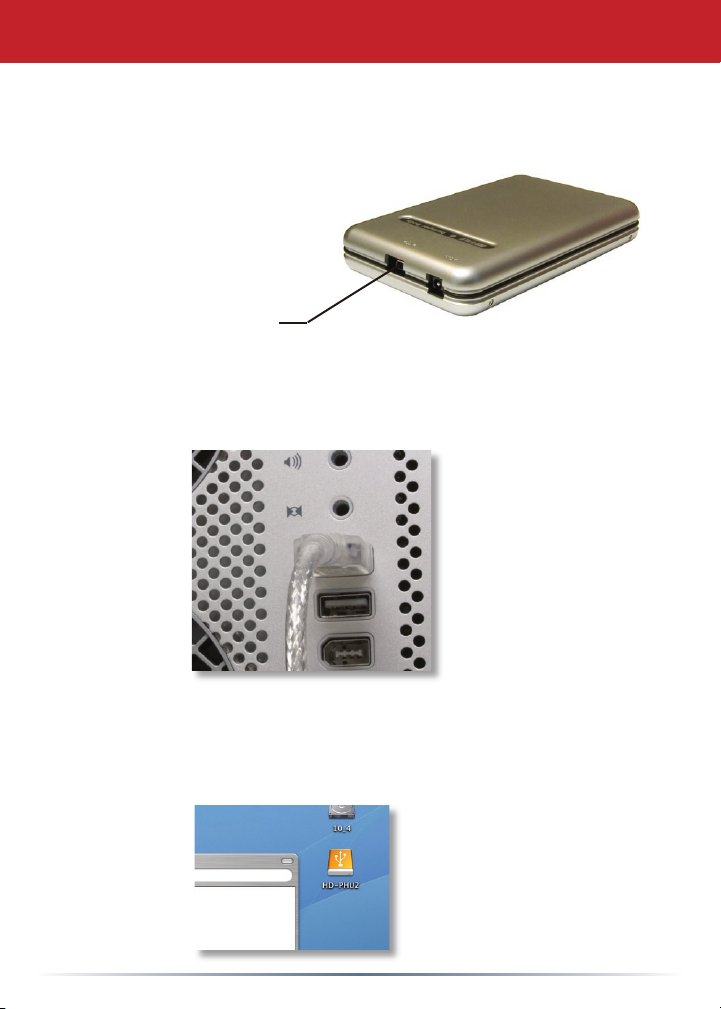
Connect the included USB cable into the MiniStation’s USB port.
Plug USB cable here
Connect the other end of the USB cable to the USB port on the computer
or device you are adding the MiniStation to.
OS X
An icon will appear on the desktop. Double click on it to access the
MiniStation hard drive.
4
Page 5

Macintosh OS X Setup
The MiniStation comes pre-formatted with Windows FAT32. Your
Macintosh will recognize this format so you may begin using it
immediately. This format will allow for use on both Macintosh and
Windows computers.
You may choose to format the
drive with a Macintosh format.
This is recommended if you do
not plan to use the unit with
any equipment other than
Macintosh computers. To
format in Mac OS X, Navigate
to your Utilities folder and
select the application Disk
Utility.
Select The Buffalo Hard Drive
and click the Erase button.
Follow the wizard to complete
the format process. Click
Erase when done.
NOTE: Formatting the drive
will erase all data on the drive.
5
Page 6

Macintosh OS 9 Setup
Mac OS 9
In Mac OS 9, the MiniStation will automatically mount on the desktop.
The MiniStation comes pre-formatted with Windows FAT32. Your
Macintosh will recognize this format so you may begin using it
immediately. This format will allow for use on both Macintosh and
Windows computers.
Mac OS 9 will not allow you to reformat the drive to a Macintosh format.
You must use Mac OS X or a third party disk utility to reformat the drive,
if reformatting is necessary.
6
Page 7

Macintosh Backup
Backup software for Windows PCs is available on your software disk,
included with your MiniStation. See your software CD for documentation
on installing and using that product. Many other commercial backup
solutions from third parties also work perfectly with the MiniStation.
Apple offers a Backup Utility to OS X users who have purchased a .Mac
account. This is not a Buffalo product, but if you have .Mac, the following
directions may be helpful:
Connect the MiniStation hard drive
to your Mac and make sure it is
mounted on the desktop.
From your Applications folder, open
the application Backup.
By default, the user idisk is selected
as the backup destination. To change
this to the MiniStation, click the Set
button and then the Create button.
7
Page 8

Select the Buffalo portable hard drive and
name the backup le. Click Create.
Select the les you would like to have
backed up by placing a check mark in the
corresponding box. You may add additional
les and folders by clicking the “+” button
on the bottom left and select which les
and folders you would like to backup. Once
done click the Backup Now button.
Your les will now be backed up.
You can also create a backup schedule by
clicking the calendar icon on the bottom
left (circled). Select whether you want daily
or weekly backups, time of day, and day of
week.
8
Page 9

Power Boosters
USB Power Adapter Cable
A USB to 5 volt power adapter is included with the MiniStation. If your
MiniStation isn’t getting sufcient power from the USB port it’s plugged
into, you can plug this cable into an additional USB port for extra power.
Mobile Assist Cable
If your USB ports cannot supply enough
consistent 5v power for best performance
from your MiniStation, try the optional
accessory Mobile Assist Cable, available from
Buffalo Technology (www.buffalotech.com). It
smooths and strengthens voltage, letting the
MiniStation operate normally even if power
quality from the USB port is marginal.
Note: After connecting the Mobile Assist
Cable, the Power Booster takes approximately
10-20 seconds to fully charge. Once it is
charged it will turn on the MiniStation.
Connecting the MiniStation: Please connect
the Mobile Assist Cable to the MiniStation
before plugging it into your computer or
USB hub.
Disconnecting the MiniStation: When
you wish to disconnect and remove the
MiniStation, unplug the Mobile Assist
Cable from the computer’s USB port
before unplugging it from the MiniStation.
9
Page 10

Technical Specifications
MiniStation
USB Standards:
Capacity:
Seek Time:
Transmission Speed:
Power Consumption:
Power Supply:
Dimensions:
Weight:
Operating
Environment:
USB Specication Rev. 2.0
40, 60, 80, 100GB
Max. 13 milliseconds
Max. 480 Mbps
Max. 2.5W
DC5V±5%
5.0“ (W) x 3.26“ (H) x .83“ (D)
0.42 lb.
5 - 35 degree C
20-80% humidity (non-condensing)
Technical Support
Buffalo Technology offers free technical support (24/7 Phone Support in
North America, Email Support in Europe). Please see the back page of
this quick start guide for contact information. Please also visit the web
site at http://www.buffalotech.com.
FCC Warning
This device complies with part 15 of the FCC Rules. Operation is subject
to the following two conditions: (1) This device may not cause harmful
interference, and (2) this device must accept any interference received,
including interference that may cause undesired operation.
10
Page 11

http://www.buffalotech.com
USA/Canada Technical Support is available 24 hours a day, 7 days a week
Toll-Free: 866-752-6210
email: info@buffalotech.com
Europe Technical Support is available between 9am-6pm (Monday-Thursday) (GMT)
and 9am-4:30pm on Fridays.
email: helpdesk@buffalo-technology.ie
©2005, Buffalo Technology (USA), Inc.
 Loading...