

Page 1
User Manual
CloudStation
CS-X, CS-WX, and CS-WV
www.buffalotech.com
v2.8
™
Page 2

2
Introduction
Thank you for purchasing the Buffalo CloudStation. This simple device gives you the
exibility of cloud-based storage without the worries that come with storing your important
data on someone else’s servers. Using Pogoplug software, CloudStation lets you serve up
les, photos, and multimedia over the Web to any of your devices, wherever you may be.
Turn to page 4 to set up your CloudStation.
Because we’re constantly updating our products, the images and text in this manual may
vary slightly from the images and text displayed by your CloudStation. As time passes,
future user interfaces, updated software, and later versions of this manual may be available
for download from www.buffalotech.com. For more information on CloudStation, see
buffalocloudstation.com.
Page 3

3
Table of Contents
Introduction
Setup 4
Diagrams and Layout (CS-WX & CS-WV) 7
Power Mode Switch 10
Diagrams and Layout (CS-X) 11
Using your CloudStation
Login 13
Uploading 14
Downloading 15
Pogoplug Applications 16
Sharing 17
Search 19
Slideshows 20
Creating New Folders 21
Renaming Files and Folders 22
Renaming Devices 23
Active Copy 24
Settings and Conguration
General Settings 25
Social Settings 26
Media Settings 28
Security Settings 29
Upload Settings 30
Adding a Printer 31
Device Settings 34
Local Settings 35
Adding a Second Drive 38
Time Machine 40
BitTorrent Client 41
Direct Copy 43
Troubleshooting
Status LED Flash Codes 45
Appendix
Specications (CS-WX & CS-WV) 47
Specications (CS-X) 48
Contact Information (USA) 49
Contact Information (Europe) 50
GPL Information 51
Page 4
4
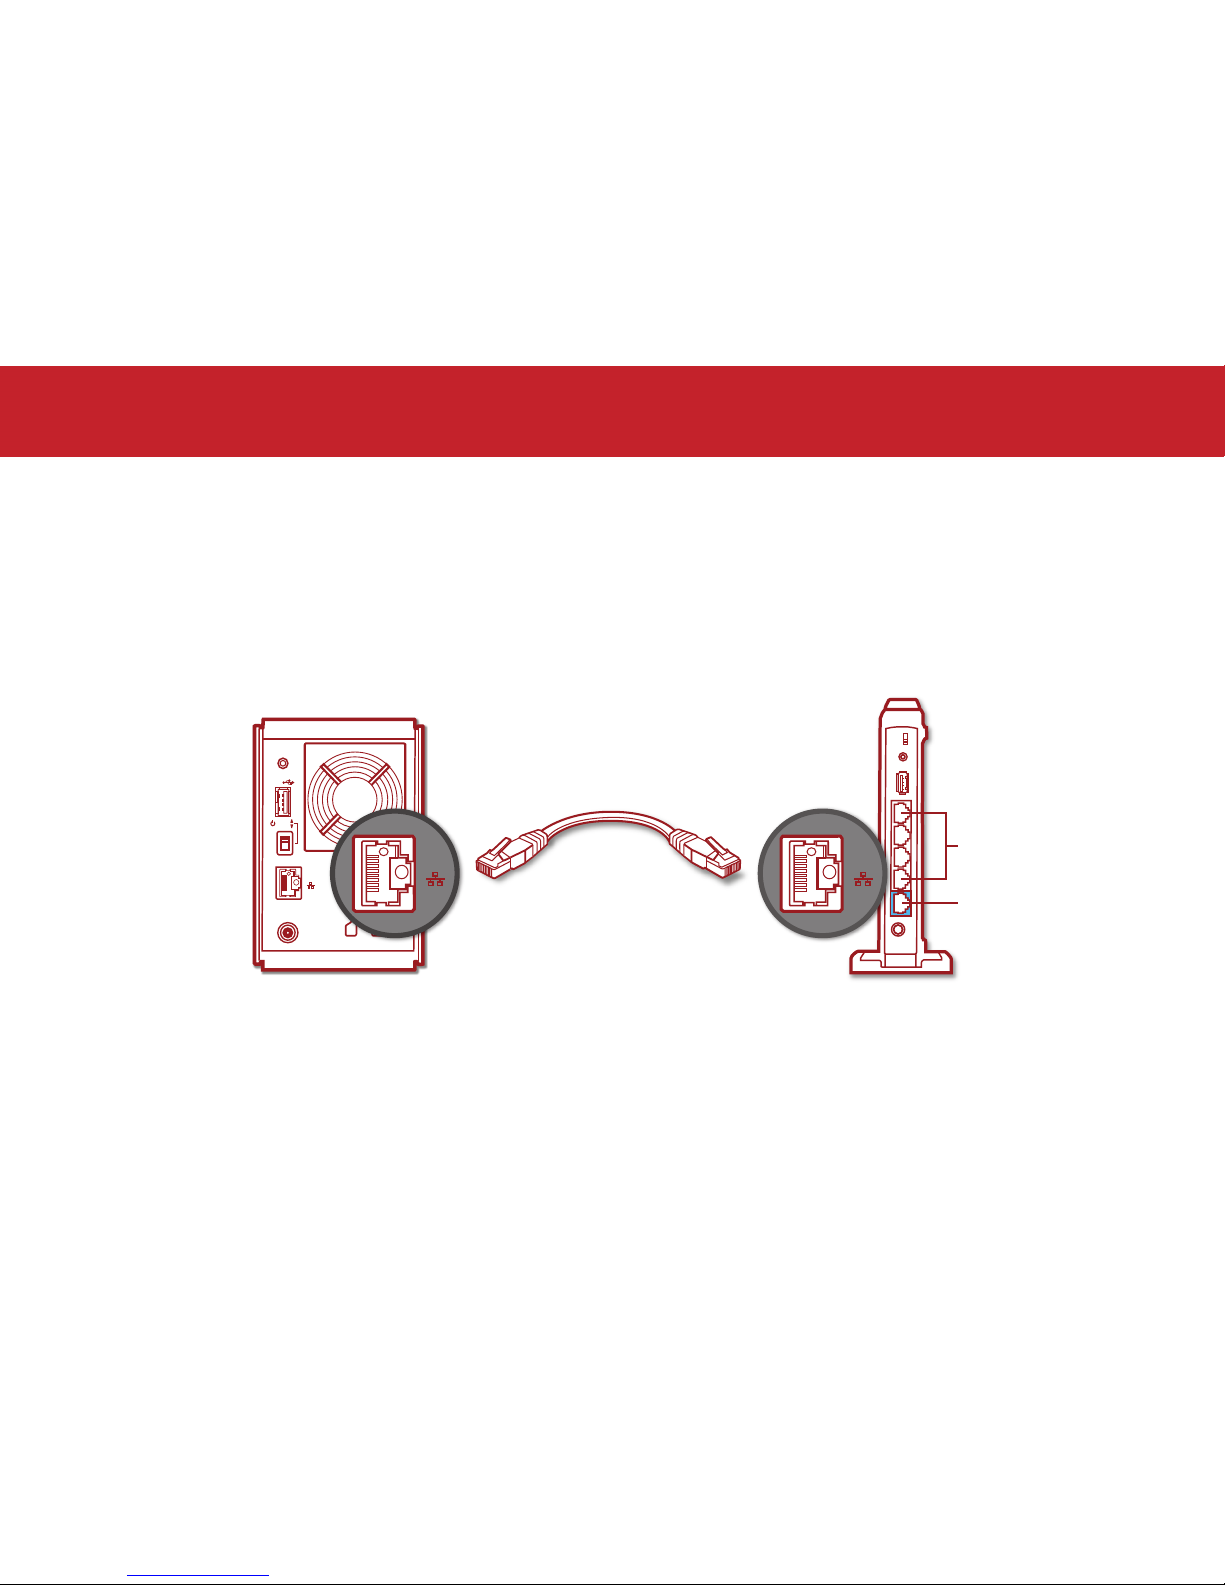
Open a browser window on your computer and go to https://cloudstation.pogoplug.com/. Click
Set Up Your CloudStation.
Plug one end of the included Ethernet cable into the Ethernet port on your CloudStation and the
other end into any available LAN port on your router.
In the browser window, click Next.
Setup
USB
FUNCTION
AUTO
ON
OFF
DC-IN
LAN
LAN
WAN
LA N
LA N
Page 5

5
Now, plug your CloudStation into a surge protector, wall socket, or power strip.
Move the power mode switch on the back of the unit to the on (middle) position. The blue power
LED will begin to blink.
Wait for the CloudStation to boot. This will take about 5 minutes. When the power LED on the
front panel stops blinking and glows steadily, the unit has nished booting. The info/error LED
should not be blinking. If it is, turn to the next page to troubleshoot.
In the browser window, click Next. Follow the instructions on the screen to nish installing your
CloudStation.
USB
FUNCTION
AUTO
ON
OFF
DC-IN
LAN
Page 6

6
If you’ve connected your CloudStation to a power source and to a router, but the info/error LED
is ashing amber or your CloudStation suddenly turned off by itself, here are some things you
can check:
Is the power mode switch on the back of the CloudStation (CS-WX and CS-WV models only) in
the On position? If it’s in the Auto (top) position, the CloudStation may suddenly shut down
after a few minutes. Move it to the On (bottom) position until you’ve installed NAS Navigator
software on your computers.
Is the amber info/error LED on the front of your CloudStation (CS-WX and CS-WV models only)
ashing? Check the following:
Is the Ethernet cable connected to your CloudStation and to your router?
Is your router turned on?
Is your router congured to automatically assign IP addresses (DHCP)?
Do you have a rewall installed that blocks UDP, or is UDP disabled on your router?
If you have veried all of the above and the info/error LED on the front of your CloudStation is
still ashing, please move the power mode switch to the Off position, wait until the power LED
turns off, and then move it back to the On position. It will take about ve minutes to boot.
If you continue to have problems, please contact tech support. Tech support contact
information is available on pages 49 and 50.
Troubleshooting
Page 7
7
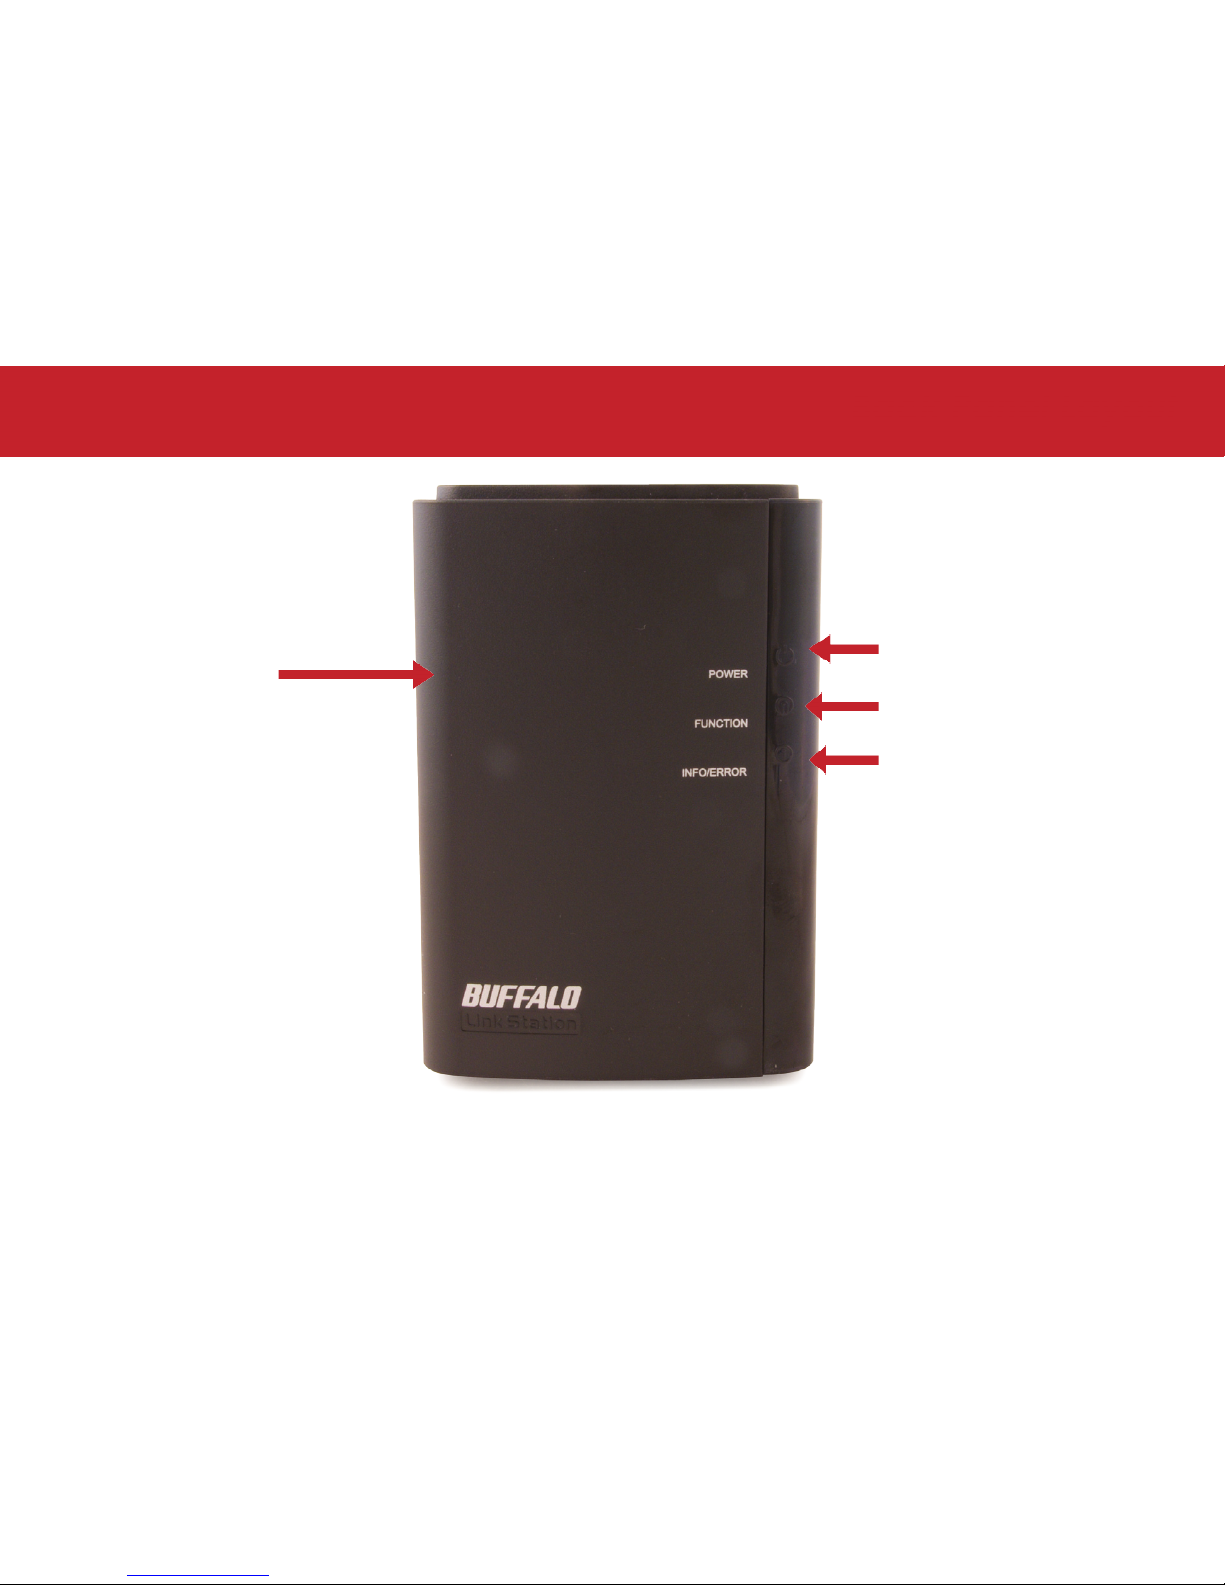
Back Panel Layout
Front (CS-WX and CS-WV)
Power LED
Function LED
Info/Error LED
Front Cover
(pull the left
side straight
toward you to
remove)
Page 8
8
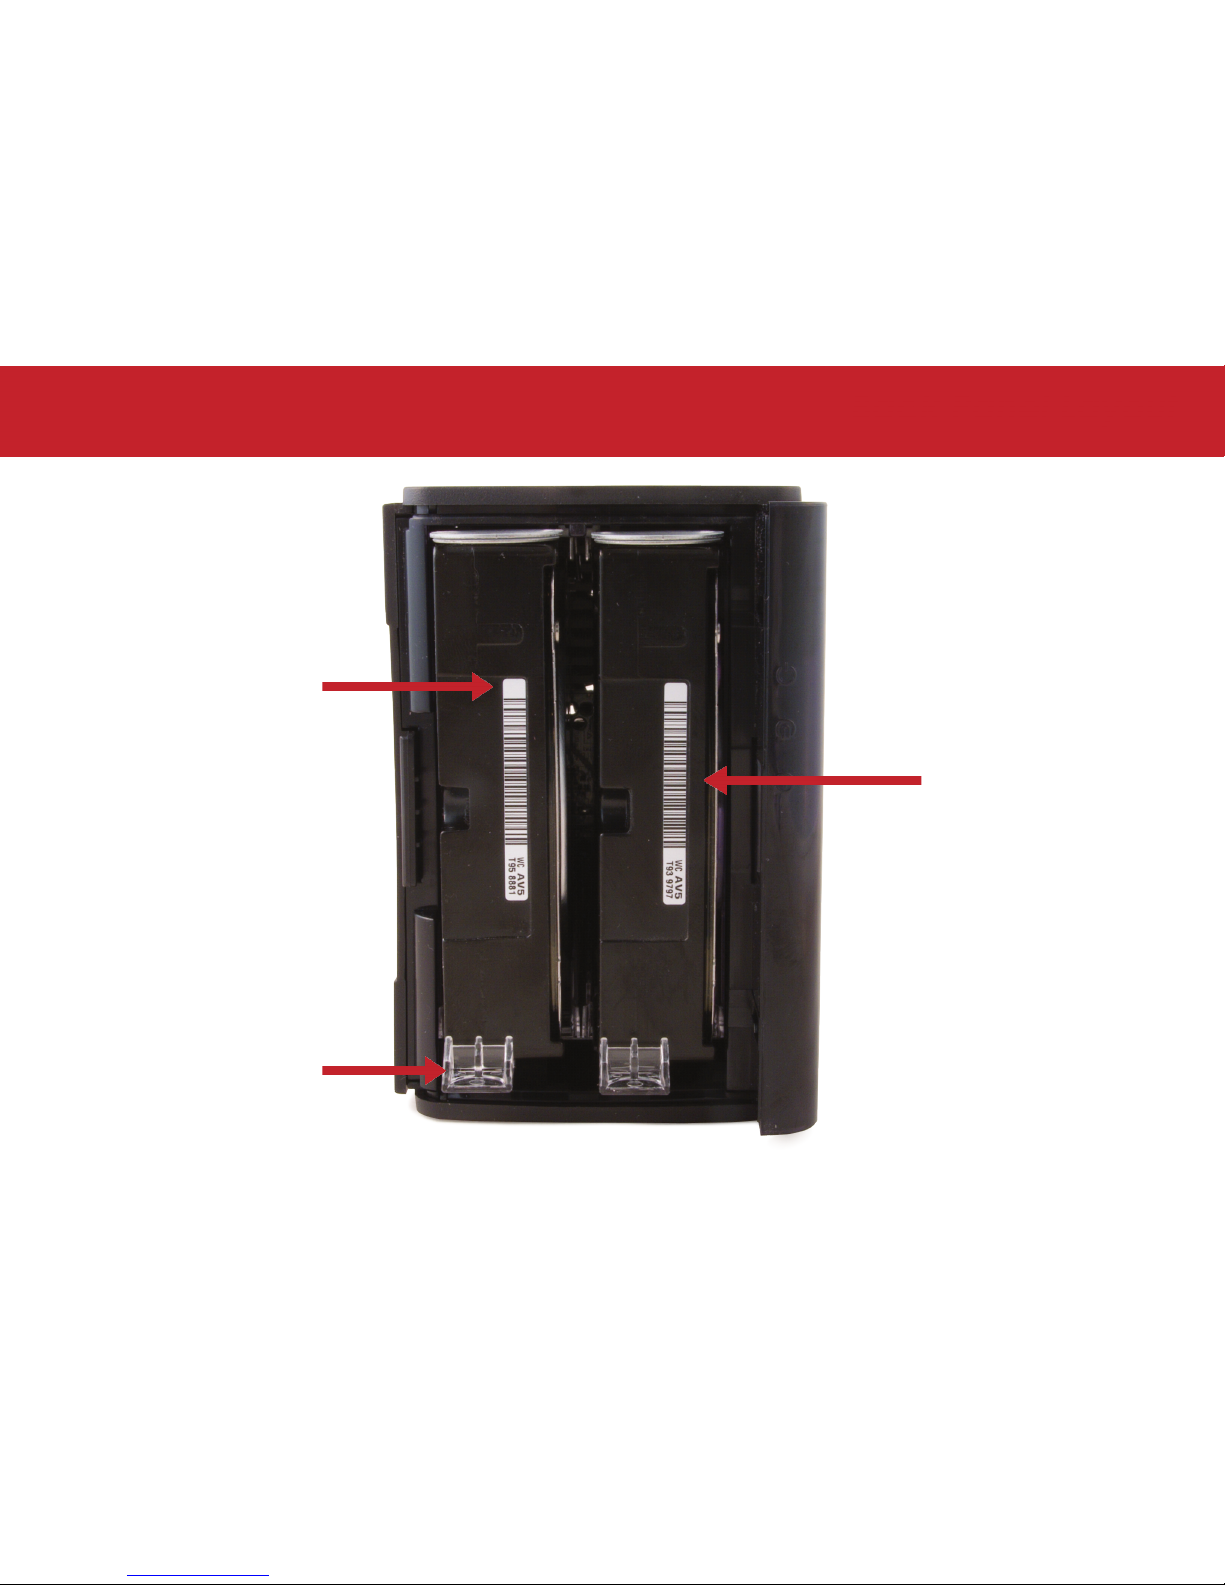
Back Panel Layout
Front Panel Removed (CS-WX and CS-WV)
Second hard
drive
Main hard drive
Press tab to
release drive
Page 9
9
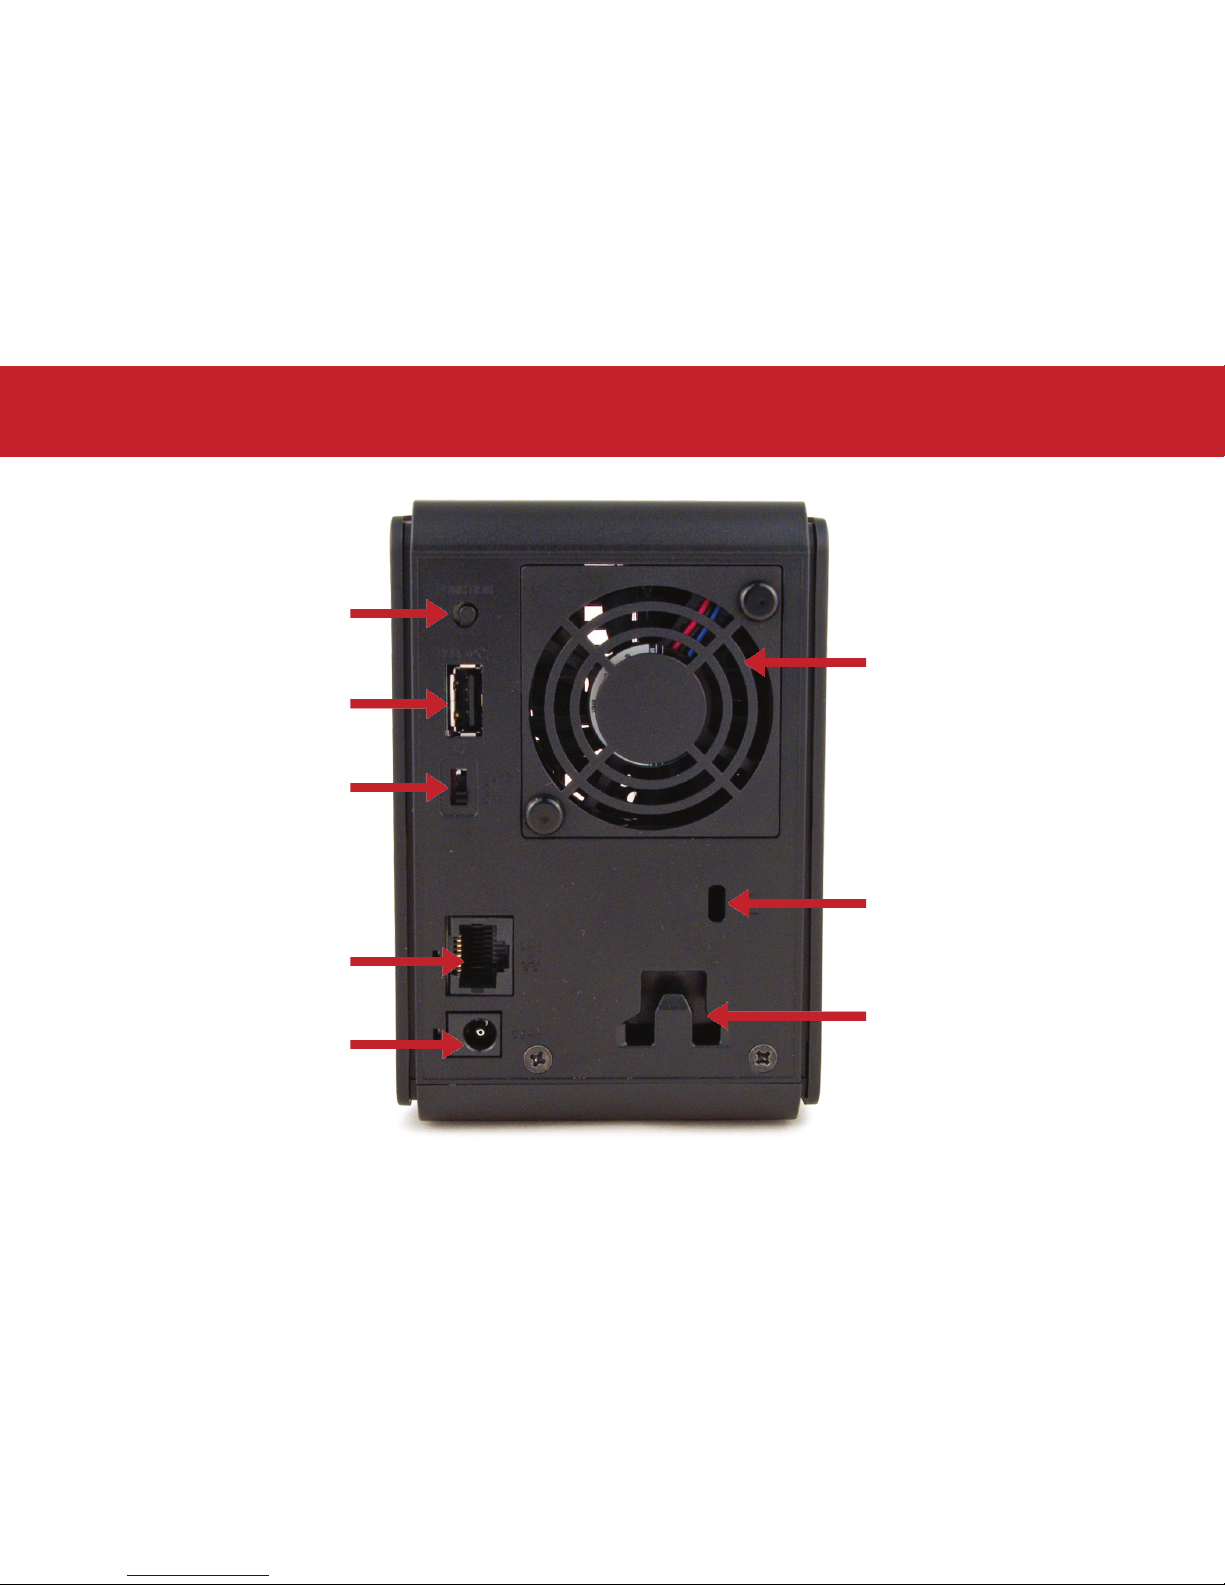
Front Panel Layout
Rear (CS-WX and CS-WV)
Function Button
USB
Fan
Auto Power
Power On
Power Off
Ethernet
(to router)
Power
Socket for
Kensington-style lock
Power cord
stress relief
Page 10
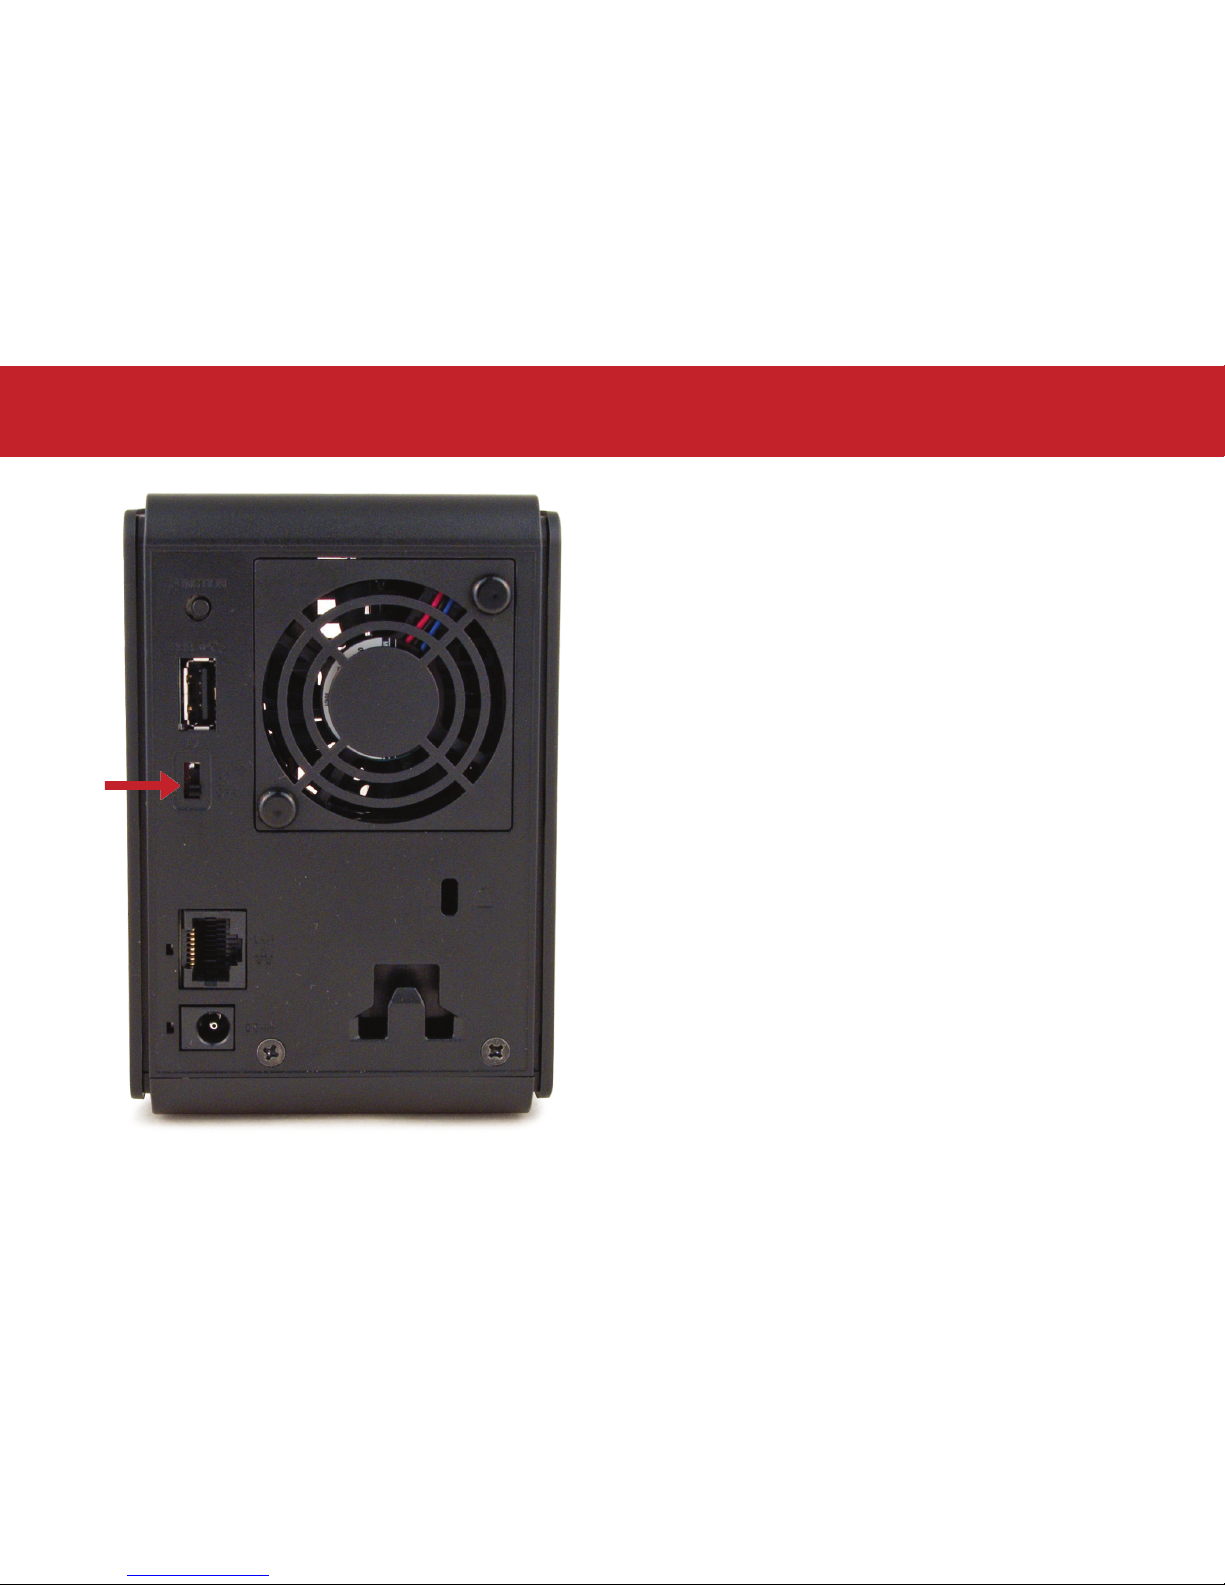
10
The “Power Mode” switch on the back of the
unit has three positions: Auto, On, and Off.
The Auto position automatically powers the
unit on or off with your PC. If your PC is turned
on the CloudStation will power up; if the PC is
turned off the CloudStation will power down.
You must have installed the NAS Navigator
software (available from www.buffalotech.com)
on your PC for this feature to work. Otherwise,
if you move the switch to Auto, your unit will
power down by itself and you will have to
manually turn it back on.
Move the switch to the On (middle) position to
have the CloudStation turn on and stay on.
To turn off the CloudStation, move the switch
to the Off position. It will take several minutes
to fully shut down. Do not unplug the unit
until shutdown is complete and the power LED
is no longer lit.
Power Mode Switch (CS-WX and CS-WV)
Power
Mode
Page 11
11
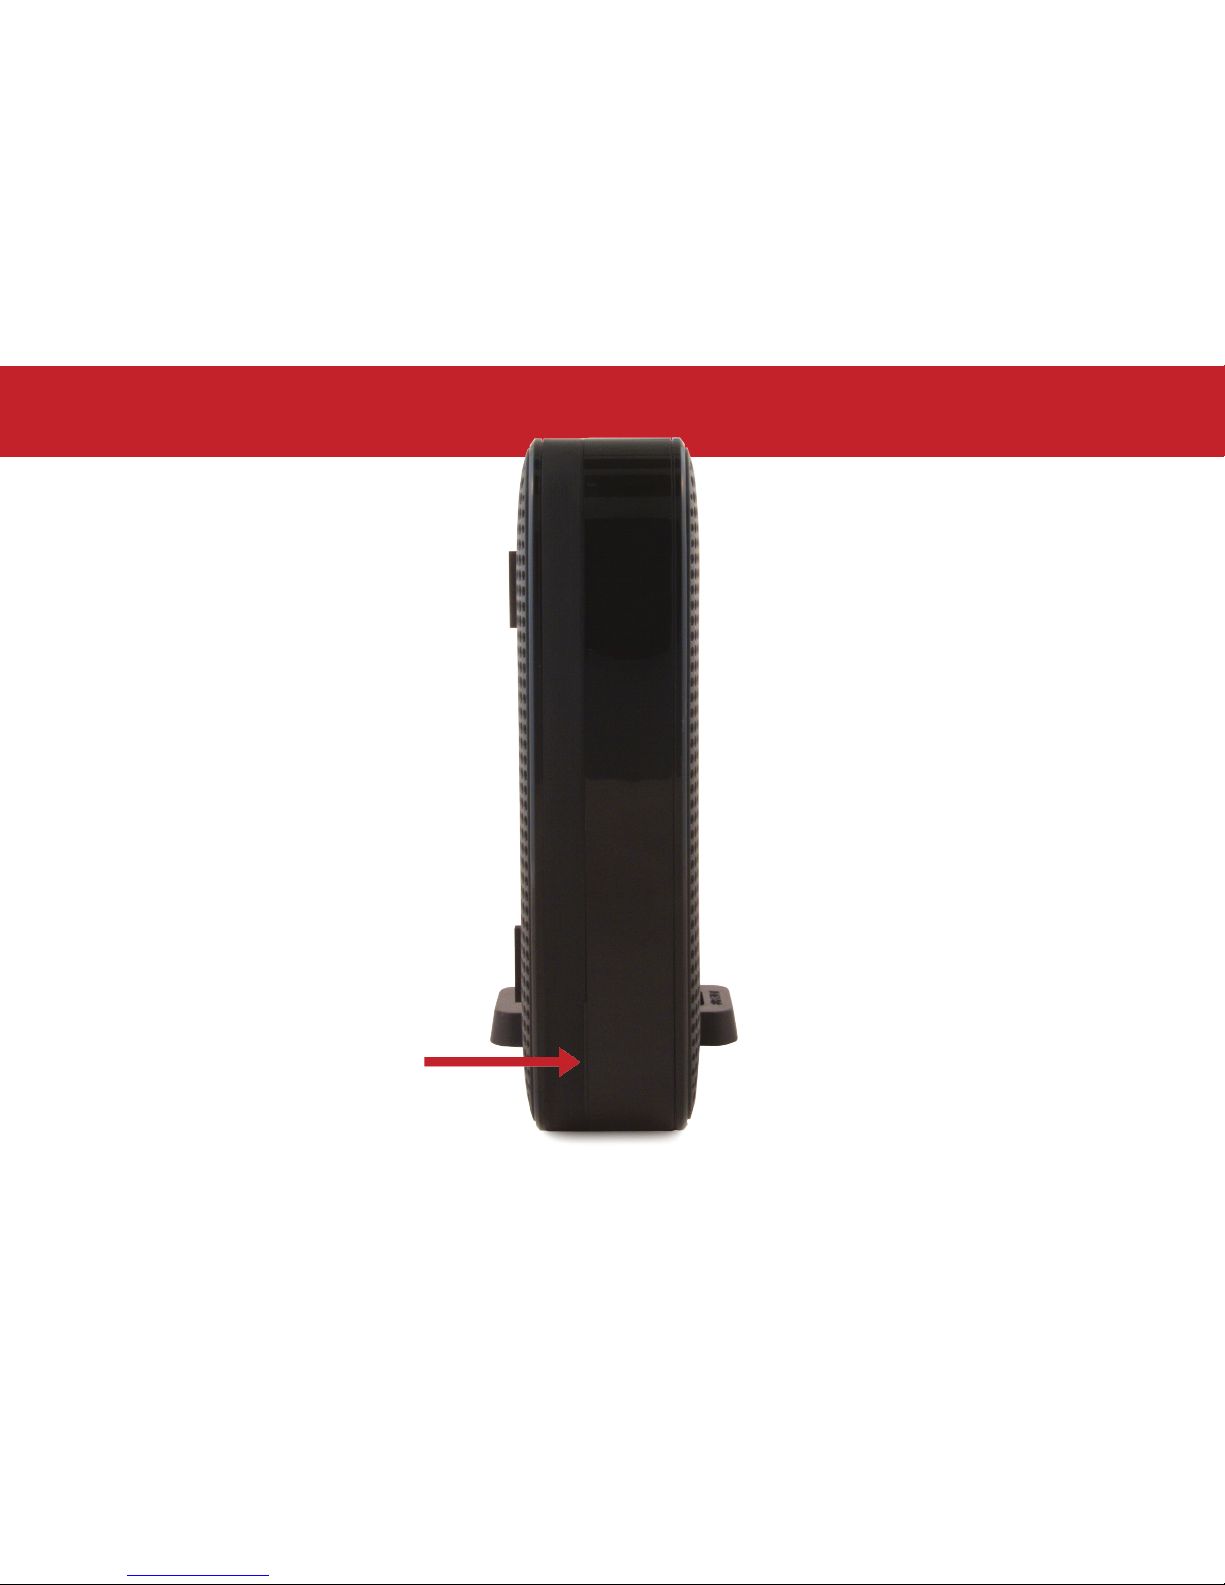
Back Panel Layout
Front (CS-X)
Power LED
Page 12
12
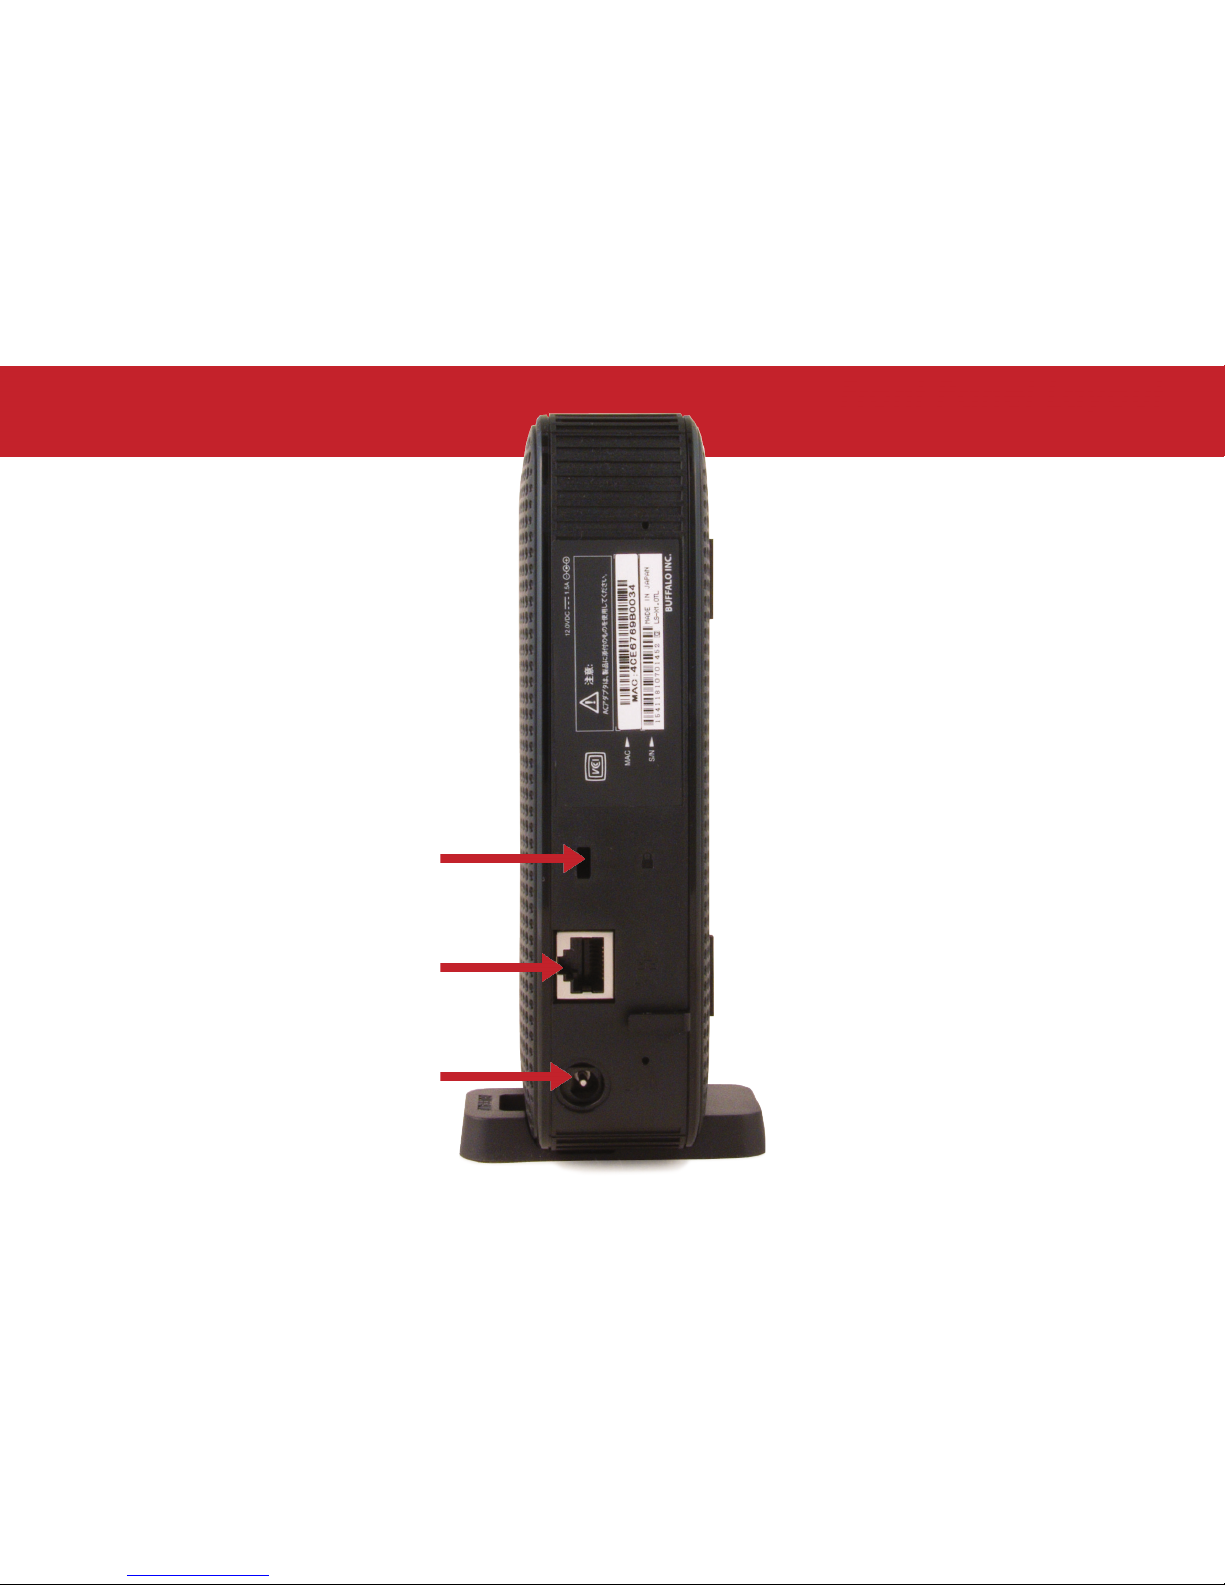
Front Panel Layout
Rear (CS-X)
Ethernet
(to router)
Power
Socket for
Kensington-style lock
Page 13
13
Using Your CloudStation
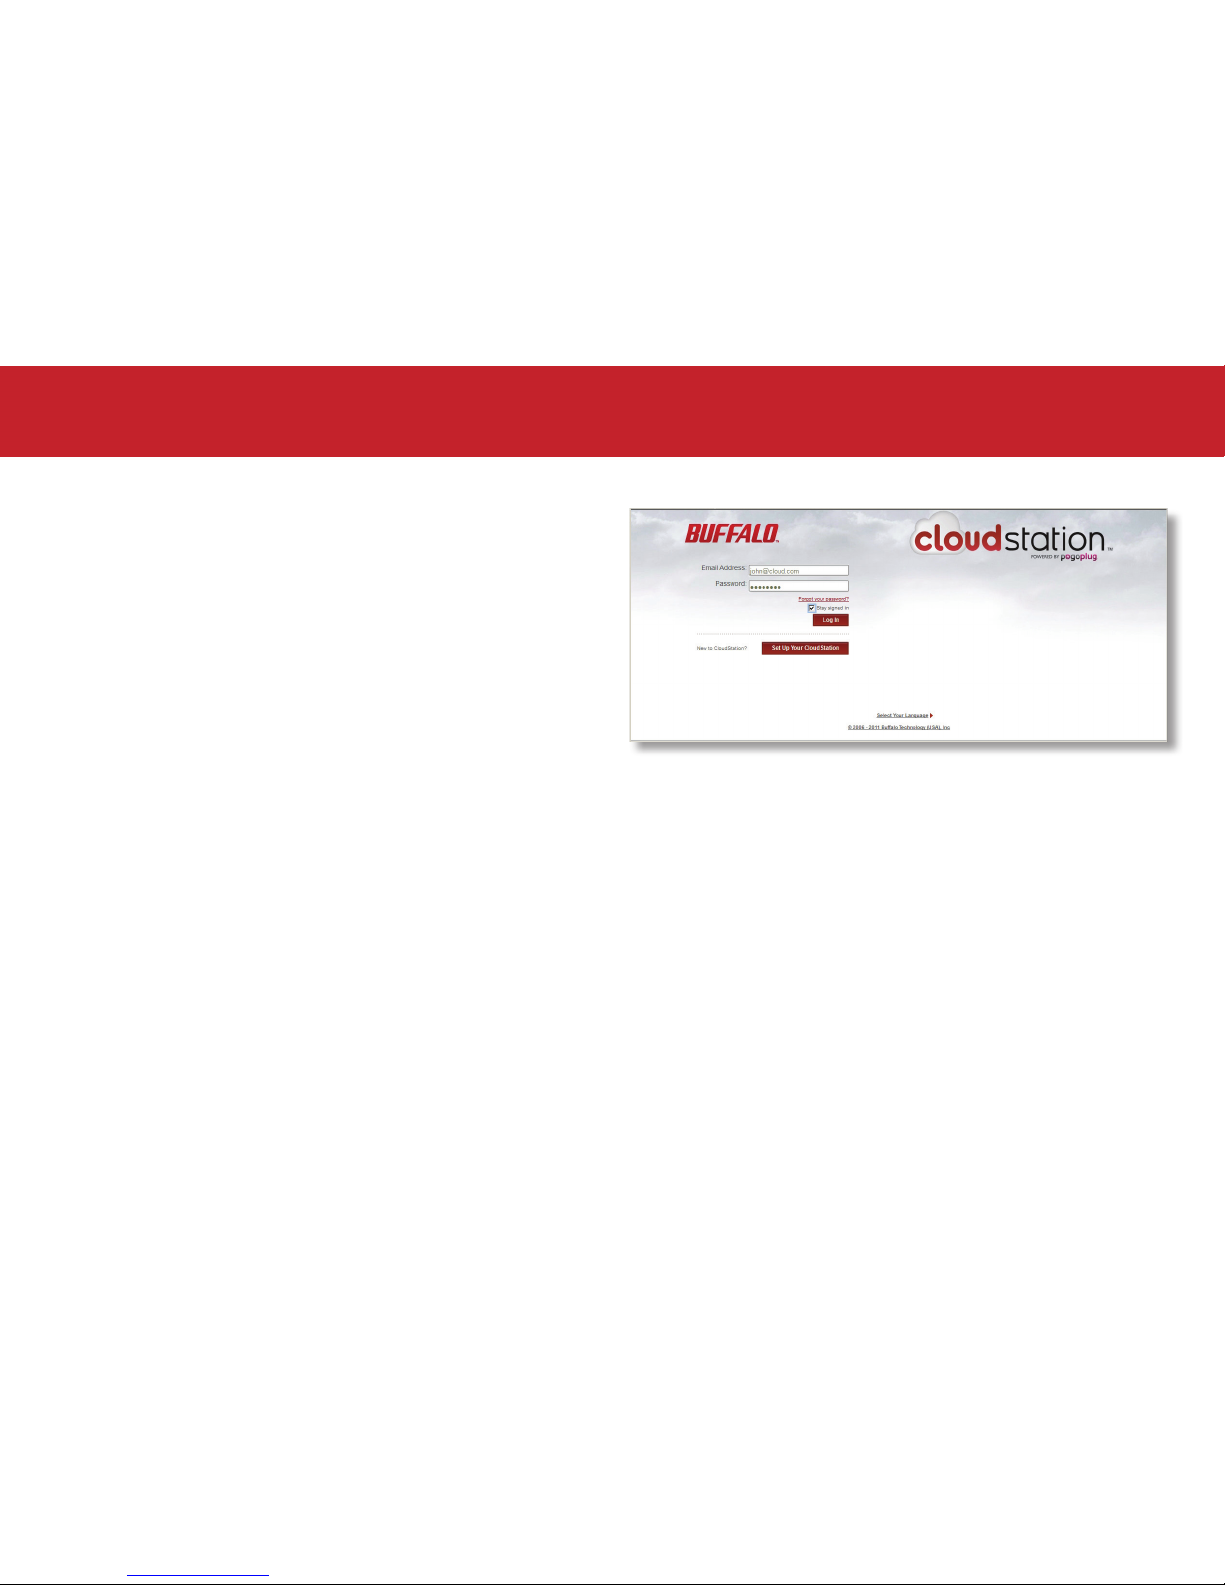
Login
To access your CloudStation, open a browser
and go to https://cloudstation.pogoplug.com.
Enter the email address and password that you
registered during setup.
Page 14
14
Using Your CloudStation
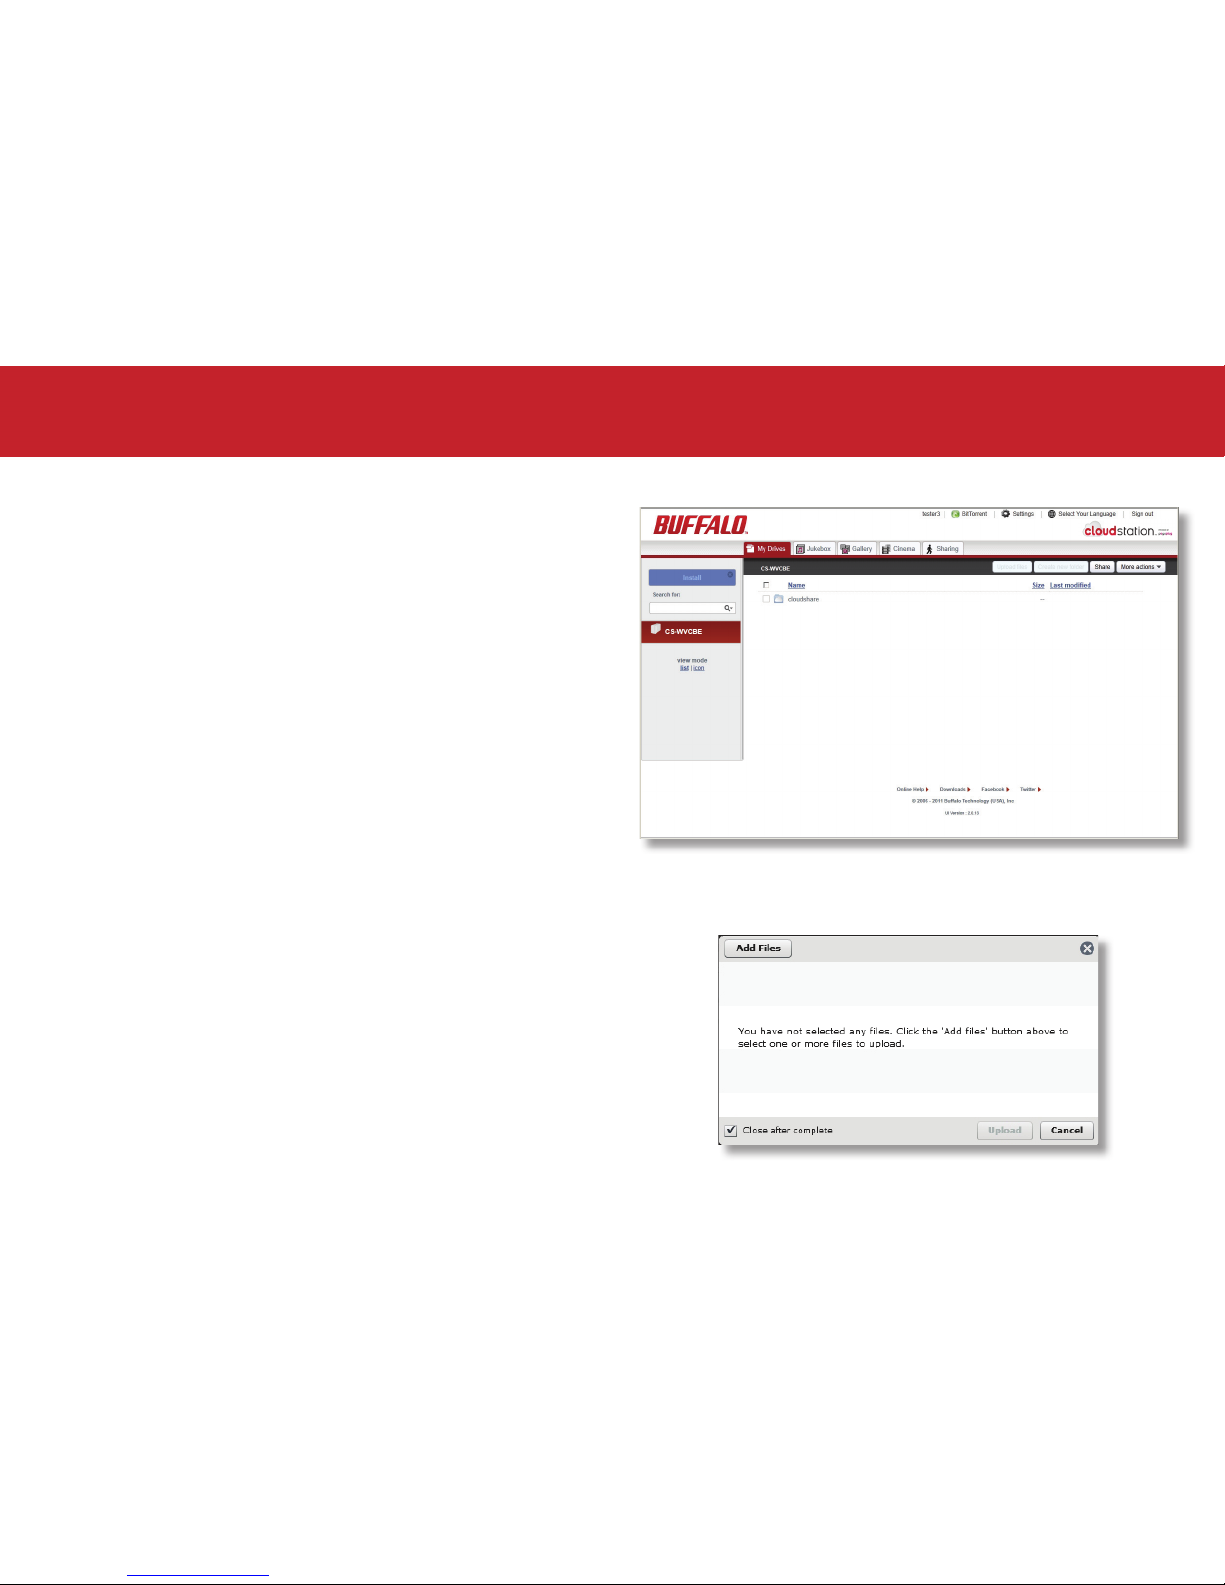
Uploading
Locate the drive and folder you would like to
upload to. If this is your rst time using the
CloudStation, click on the cloudshare folder.
Click Upload Files on the grey toolbar at the top
of the screen.
When the upload les dialogue appears, select
Add File(s) and choose the le(s) you would like
to upload.
Click Upload.
Page 15
15
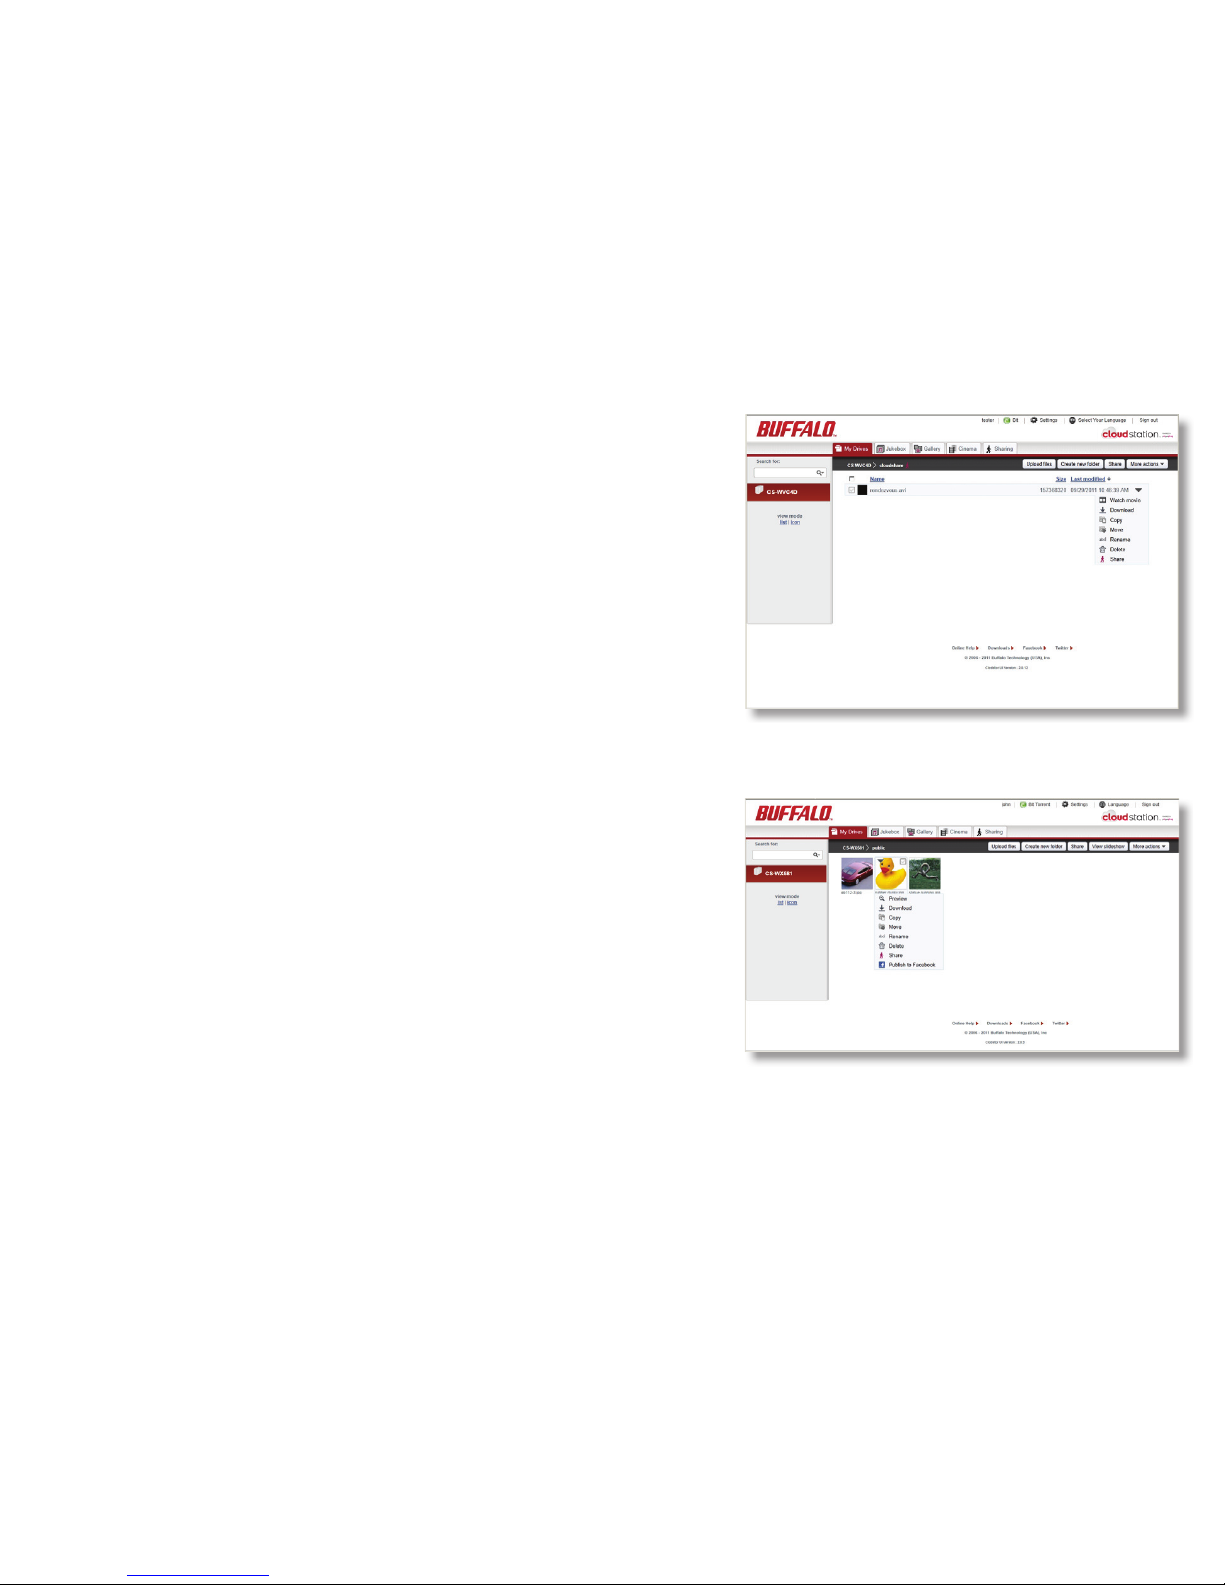
Locate the folder or le you would like to download and
point to it with your mouse pointer.
Hover over the le to see the down arrow. Click the down
arrow and choose Download.
The le will be saved to the download location specied
in your browser preferences. If you are downloading
an entire folder, it will be compressed to a zip le
automatically before download.
Downloading
Page 16
16
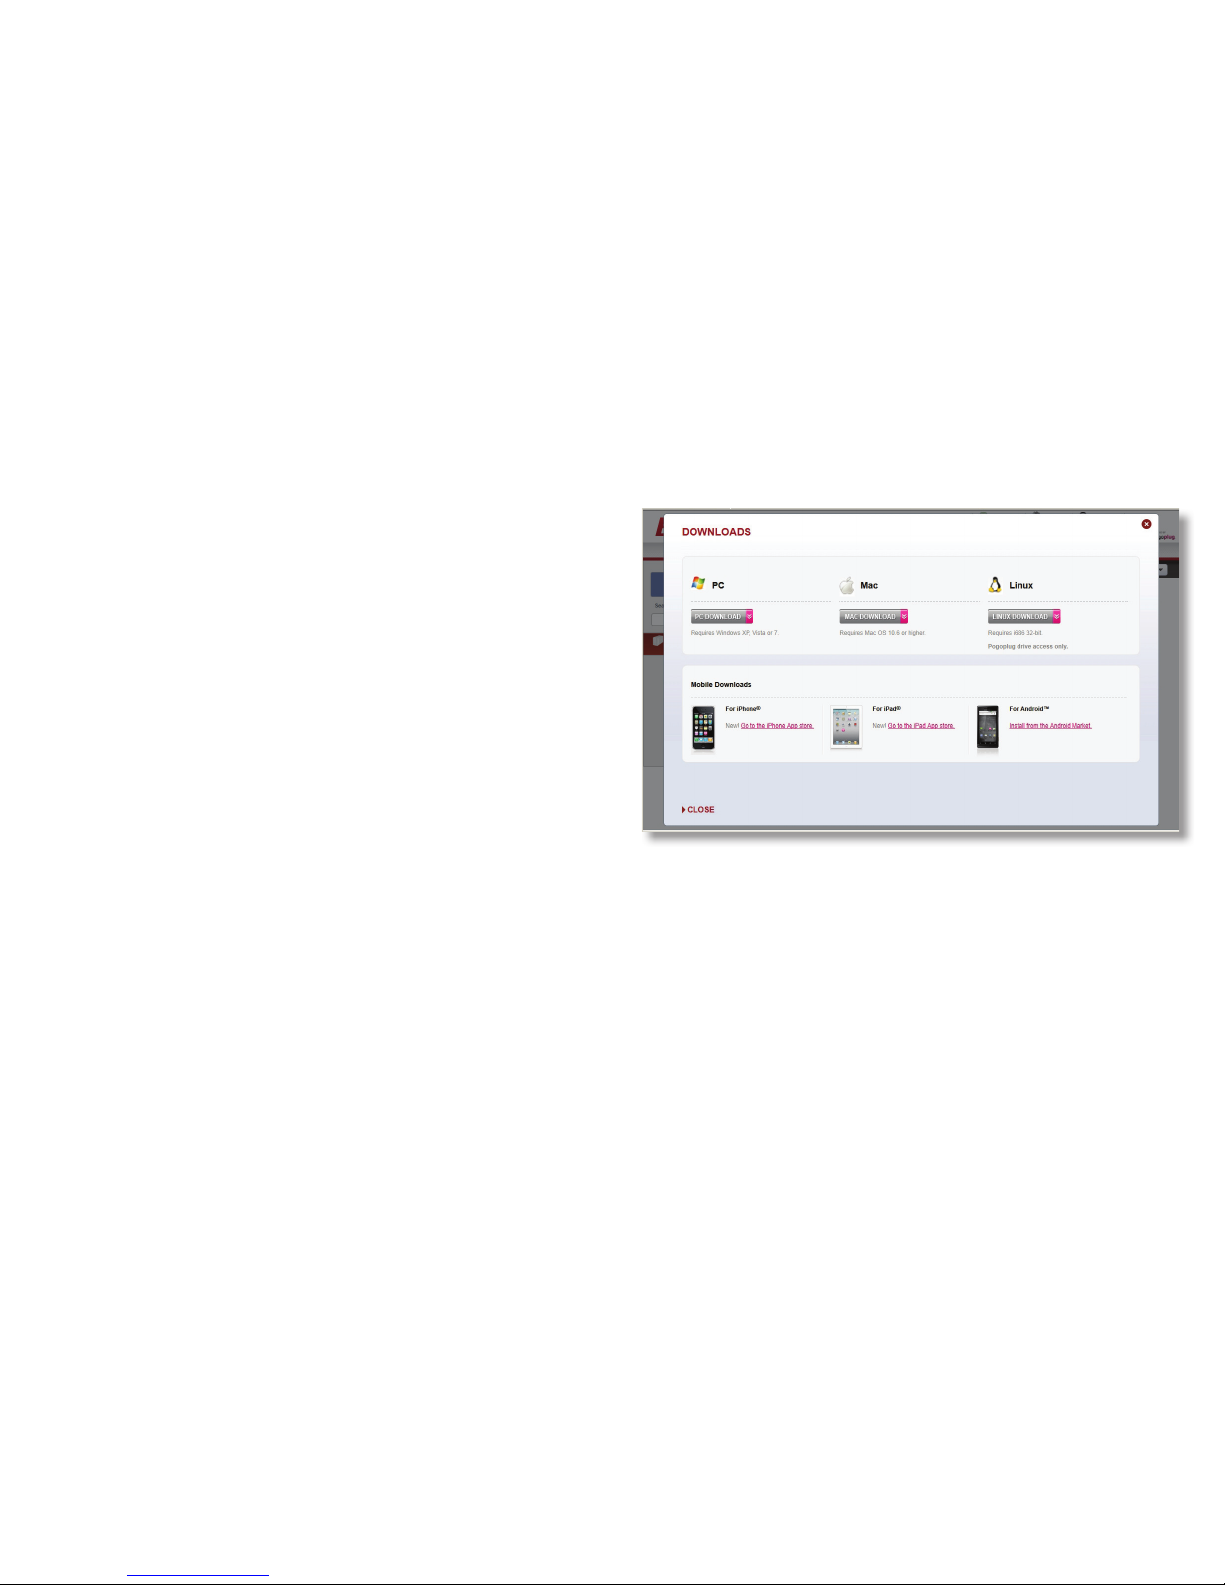
Pogoplug Drive software allows your CloudStation
to appear to your computer as a directly attached
drive. You can see and access all drives and
folders shared with you via the Files Shared with
me folder. This works whether you are on the
local network or outside of it.
Pogoplug Mobile software for iPhone, iPad, and
Android devices give you the ability to access les
on your CloudStation from anywhere, anytime on
your mobile device.
To download the Pogoplug applications visit
Pogoplug Applications
www.buffaloCloudStation.com/support/downloads or click on the blue Install Pogoplug on your
computer button at the top left of the home page.
Note: Because the software is client based and the CloudStation drives are not physically
attached to your computer, there are some limitations to what you can do with them. For
example, CloudStation drive maintenance through the software is not supported.
Page 17

17
Sharing on your CloudStation is quick and easy. You can share with one
or multiple people.
To share a folder or le:
1. Click on the down-arrow for the folder or le and choose Share.
2. Enter the email address of the person you would like to share the
folder with in the textbox located under “To”. You may share with
multiple people by adding multiple email addresses separated by either
a comma or semicolon. Email addresses you enter are saved into the
address book for easy access.
3. You have the option to send a message to the user you are sharing
with in the “Message” text box.
4. If you’re logged in to Facebook, you post to your friend’s wall by
adding a check next to their name.
5. Click Finish.
6. A link will be emailed to the users you have shared with.
Note: Links to shared folders expire 2 weeks after they’re sent. If the
Sharing
Page 18

18
user it is being shared with has not created an account and password they will no longer be able
to access the share. If the owner of the share removes them from the share list and adds them
again, a new link will be generated and sent with a 2 week expiration.
To stop sharing a drive, folder, or le:
1. In List mode, click on the arrow to the right of the
drive, folder, or le. In Icon mode, hover your cursor
over the icon and click on the down arrow.
2. Choose Stop sharing this.
Page 19

19
You can use the global search categories Jukebox, Gallery,
and Cinema to sort out music, photos, and movies,
respectively. Click on a category and the interface will
display les in that category.
In each category, view options appear in the left-side menu.
The Jukebox category lets you view your music by artist,
albums, or genre. The Gallery category lets you view by date
or create custom slideshows. The Cinema category lets you
organise your videos by date.
To search for a le, enter its name in the Search for box and
click the icon to the right of the box.
Search
Page 20

20
You can create slideshows that include your favorite photos, videos, and
music.
To create a slideshow follow these steps:
1. Select the Galleries tab, then select Custom Slideshows. Click Create.
2. Enter a name for the new slideshow in the popup window.
3. Put a check next to the folders and les that you want in the
slideshow.
4. Select the le of folder of the music that you want to play during your
slideshow (optional).
5. Click Start slideshow.
Slideshows
Page 21

21
In the navigation bar at the left of the screen, select
the device where you would like to create the new
folder.
Then, under Name, select the folder where the new
folder will go.
Click Create New Folder.
Give your new folder a name.
Creating New Folders
Page 22

22
Focus your mouse pointer on the name of the folder or le
you would like to rename and click on the “abc” icon to
the right of it. You can then change the name of the le or
folder.
Or, click the down arrow at the far right and choose
Rename. You can then change the name of the le or
folder.
Renaming Files and Folders
Page 23

23
Click the Settings tab at the top of the window.
You will see a list of your PogoPlug enabled devices. Next
to each device there is a rename link. Click the link to
enter a new name. The new name may include up to 15
alphanumeric characters, hyphens, and underscores.
Renaming Devices and Top Folders
Page 24

24
Active Copy automatically backs up a folder to a different folder.
Source and target folders may be on your CloudStation, or on
a different CloudStation or other Pogoplug device. If you have
installed Pogoplug drive software on your computer, you can also
use it with Active Copy.
To congure Active Copy, click on Settings, then Backup. Click on
Set up Active Copy on a New Folder.
Choose the source folder, then the target folder. Click Finish when
done.
Depending on how many les are in the source folder and the
speed of the network between the two devices, it may take some
time for Active Copy to complete.
Active Copy
Page 25

25
From the settings window you can update your email addresses and
manage the CloudStation device(s) associated with your account.
You may associate multiple email addresses with your account. Each
email address has full access to all drives and shares associated with
the account.
To add additional email addresses to your account, simply click the
add link next to “Your email addresses”.
General Settings
Settings and Conguration
Page 26

26
To allow posting to Twitter, Facebook, or MySpace from
your CloudStation, log in to the appropriate service in
Social Settings. To log in to a service, click sign in and
step through the wizard. Note: you may have to disable
your pop-up blocker to log in.
Once you’re logged in, you can share folders and les
on your social networks. Click Return to Library, select
a folder or le, click the down arrow, and click Share.
Social Settings
Page 27

27
Enter the email addresses of anyone you want to send
the message to directly. Enter text for your message. If
you want to post the message to a social network, click
on More sharing options, or click Finish to send the
message now.
If you’re sharing the message to a social network, put a
check in the box next to each social network that you
want to publish to and click Finish.
Page 28

28
You can use CloudStation to stream movies, photos, and
music to your XBox 360® and PS3® game consoles and
to the game consoles of people you share with. You can
also play back media les from the CloudStation with a
computer browser if Flash is installed. The Media Settings
screen also allows you to customize the options for how
the CloudStation handles videos. There are 3 options:
optimize videos for playback (convert into web friendly H.264
encoding), create media meta-data (fetch music album art,
iPhoto dates, etc.), and generate thumbnails (which allows
for previewing). All of these options can be turned on or off.
Click Apply Below Changes to conrm your choice.
You can preview a video by hovering the mouse pointer over
the thumbnail for a video. You can turn off this feature on
the Media Settings page by unchecking Preview videos when
hovering over video thumbnails. HTLM5 is supported for
compatible Web browsers. Select the HTLM5 video or audio
checkbox to enable this feature.
Media Settings
Page 29

29
Changing your Password
Click “Change Password” to change the
password associated with your account.
Full Security
Check the box next to Use full security sessions
to enable SSL (HTTPS) throughout your entire
CloudStation session. Enabling this option may
slow down access to your CloudStation. Note
that even if this option is disabled, you will
always automatically sign in with full security,
keeping your password and account access
safe.
Security Settings
Require sign-in to view email shares
Check the box next to Require sign-in to view email shares to require the people you share with to
enter a password before viewing the contents of the share. If they have not previously assigned a
password with CloudStation, they will be prompted to add one. This feature can also be enabled
after you select the le or folder you would like to share by clicking Share This, then More sharing
options. Check Require sign-in to view this share.
Page 30

30
You may congure your CloudStation to
automatically upload les that are emailed as
attachments to upload@mypogoplug.com.
Check the box next to Upload my email
attachments to.
Choose a folder to store uploaded attachments,
then click OK.
Upload Settings
Page 31

31
The CloudStation supports most Epson and HP
printers manufactured since 2005. USB printers
should be attached directly to the USB port on the
back of the CloudStation (CS-WX and CS-WV models
only). Network printers may be anywhere on the
same network (subnet) as the CloudStation.
You can print documents that are stored on your
CloudStation to a supported printer. To enable this
feature, go to Print Settings and check Enable printer
discovery.
Select your CloudStation from the drop-down menu
and click OK. You can then print documents stored
on the CloudStation by clicking on the printer icon on
the document’s icon.
Enabling Print my email attachments to allows you
to print les by sending or forwarding an email from
your registered email address with the les you want
printed attached to print@mypogoplug.com.
Select the destination printer from the drop-down list
and click OK.
Adding a Printer
Page 32

32
You can also allow others to print by giving printing
rights to their email addresses. To share the printer
with someone else, go to the Sharing tab, click on
printers I share, select Share, chose the printer then
the people you want to share the printer with.
Enter an email address in the To eld. Enter a
message (optional) in the Message eld if desired.
Click Finish. The person you’ve invited can now print
documents by sending them as attachments to print@
mypogoplug.com.
Page 33

33
To edit the share, or to stop sharing the printer, go
to the Sharing tab, click the black down-arrow to
the right of the printer, and select Edit share or Stop
sharing this.
Page 34

34
Click Manage to open local settings or
BitTorrent to open BitTorrent settings.
Device Settings
Page 35

35
The local settings may be accessed remotely via
the Device Settings page or locally as follows:
Use NAS Navigator2 to nd the CloudStation
on the network. By default, it will be named
CS-WXabc, CS-WVabc, or CS-Xabc where “abc”
is the last three digits of the MAC address of
the CloudStation. Right-click and choose open
web admin. Log in to the CloudStation. The
default password is “password”.
BitTorrent - To use BitTorrent, enable it
and choose a download folder. By default,
the BitTorrent username is “admin” and the
password is blank (no password).
Local Settings
Backup - (Time Machine) To use Time Machine, you’ll create a folder for backups on the
CloudStation. This folder is not visible from Windows. Time Machine targets can be added and
removed from the UI. See page 40 for instructions on conguring Time Machine.
Direct Copy - You may choose the folder where les are copied to here.
Local Users - You may enable or disable local network access to shares on the CloudStation here.
Please note that these restrictions are not enforced when accessing the device via the Cloud UI or
Pogoplug desktop and mobile apps.
Page 36

36
Folders - This lets you add or remove folders on your CloudStation. The user can control what to
expose on the cloud (accessible via cloud UI and the Pogoplug desktop and mobile apps) and what
to make visible only when you are in the same subnet as the CloudStation (samba and afp).
Device Name - You may change the name of your CloudStation here. The name may include up
to 15 alphanumeric characters, a hyphen or an underscore
Password - This is the login password for the local UI. It’s not related to the Cloud account. To
change the login password for your CloudStation, enter a new password here (twice) and click
Save. The default password is “password”.
Date/Time - You may set the date and time on the CloudStation manually or automatically. If
setting manually, enter a time zone, date, and time. Click Use Local Time to use the time from
your computer. Click [Save] when done.
Network - You may congure the IP address settings on the CloudStation manually or
automatically. Automatically (via DHCP) is recommended for most users. If Manually is selected,
enter the appropriate network settings and click Save. This setting can only be changed when you
are connected to the CloudStation locally as described above.
Storage - You may recongure the hard drive settings for the CloudStation here.
Notications - Enable Email Notication to have your CloudStation automatically send you
an email if errors occur. Click Add to enter the email addresses that notication will be sent
to. Choose which events (Hard Drive Status, Fan Failure, and/or Disk Error) will trigger a
notication. Click Send Test Message to send a sample email to registered addresses, or Save to
save your changes and exit. Note: if your notication emails don’t seem to arrive, check your junk
folder!
Page 37

37
Sleep Schedule - Enable to congure the CloudStation to shut down during preset periods.
Maintenance - Clicking Restore restores your CloudStation to its factory default settings.
Normally, this doesn’t affect data stored on the drive. However, you may choose to check Erase
data before clicking Restore, which will erase all data on the drive. Note that this will not
unregister the device. If you choose to erase data, it may take several hours to complete.
Clicking Rebuild Media Library will recreate thumbnails and re-transcode your videos and movies.
Active copy jobs to or from folders on the CloudStation will need to be restarted. This operation
cannot be stopped or reversed.
Note: Restore and Rebuild Media Library can only be used when you are connected to the
CloudStation locally.
Updates - If enabled, the CloudStation will be automatically updated with the latest rmware.
This is enabled by default. If an update results in unexpected behavior, clear your browser’s
cache.
Status - This gives you current system settings for your CloudStation and information about the
network.
Language - Select your language from the drop-down list on the top right side of the screen. Note:
This only changes the language for the local UI of the device. To change the language for the
Cloud UI, click Return to library and then click the language tab at the top right.
Restart CloudStation - Power cycles the device. The button is located on the right side of the top
bar.
Page 38

38
In some markets, CS-WX and CS-WV CloudStation
devices may come with only a single drive. You may
add a second drive to these units for extra storage or
data security. For RAID 1 mirroring, the second drive
should be the same as or larger capacity than the
original drive.
To add a second drive, turn the CloudStation off and
remove the front panel. Insert the new drive into the
open bay (for RAID, the new drive should be the same
or larger capacity than the existing drive). Power the
CloudStation on and go to the local user interface
at http://x.x.x.x/, where x.x.x.x is the IP address of
Adding a Second Drive
your CloudStation. The new drive will be listed in Storage. Click on Change Disk Settings. Select
either Keep them independent of each other or Group them (Disk Mirroring).
If independent, the new drive is formatted and the original drive is unchanged. The info/error
LED ashes amber until the format is complete.
For RAID 1, the new drive is formatted into a mirror of the original drive. Data from the original
drive will be stored on both drives simultaneously. The info/error LED ashes amber until the
process is complete. CloudStation devices that come with two drives will have them in RAID 1 by
factory default.
Note: Reversing the drives will cause strange things to happen! Don’t get them mixed up.
Page 39

39
To replace a failed drive, go to the local user interface at http://x.x.x.x, where x.x.x.x is the IP
address of your CloudStation. See which drive failed. Turn off the CloudStation and replace the
bad drive. Turn the CloudStation back on and let it boot up. In the local user interface, click on
After replacing the drive, click here. The array will be rebuilt.
To remove a drive that has not failed, put the drives into Independent mode. In the local user
interface, select that drive to remove and click on remove disk. Power down the CloudStation and
physically remove the drive.
In Independent Mode, the disks are independent. They may contain different data. The full
capacity of both drives is usable. There is no redundancy. If a drive fails, all data on that drive is
lost.
In RAID 1, disk mirroring provides fault tolerance but also decreases overall capacity. An array of
drives is created and the system saves the data to both hard drives in the array simultaneously. If
a drive fails, the healthy drive continues to work and your data is accessible without interruption.
Once the faulty drive is replaced and the array is rebuilt, the array is restored to its original
condition.
When changing from Independent mode to RAID 1, you have three options:
Keep the data from disk 1 (left drive in chassis)
Keep the data from disk 2 (right drive in chassis)
Don’t keep any data
When changing from RAID 1 to Independent Mode, all data is lost.
Page 40

40
To use the CloudStation as a location for backups from a Mac
running Time Machine, begin by navigating to Device Settings/
Backup in the local user interface and clicking Enable, then
Apply.
On your Mac, open Time Machine. Click on Choose Backup
Disk.
Choose your CloudStation from the list and click Use for
Backup. In 120 seconds, Time Machine will begin running a
backup.
Time Machine
Page 41

41
The built-in BitTorrent client on CloudStation
will download your les for you. To enable it,
select Enable. Click Apply.
Then, click Open Download Manager.
Enter your BitTorrent username and password.
This is not the same as your CloudStation
username and password. The default
BitTorrent username is “admin” and the default
password is blank (no password).
BitTorrent Client
Page 42

42
To add a torrent, click on the rst download icon (the
purple one) at the top left. The Add Torrent dialog will
open. Click Browse, navigate to the torrent le, and open
it. Click OK.
Alternately, click the second (blue) icon, and enter the
URL of the torrent in the Torrent URL eld. Click OK.
The le(s) will automatically download in the background.
Page 43

43
You can copy digital media les directly to CS-WX
and CS-WV CloudStation devices from a USB storage
device, such as a digital camera, USB ash drive, or
external hard disk.
Connect your USB device to the USB port on the back
of the CloudStation. The function LED on the front of
the unit will glow blue for 60 seconds.
Direct Copy
While the function LED is still glowing blue, press the function button and release it. The
function LED will begin to blink as all media les on the USB device are copied to the folder
on the CloudStation selected in Device Settings/Direct Copy. When the copying is nished, the
function LED will stop blinking.
When the copy is nished, hold down the function button until the function LED glows a steady
blue. This dismounts all attached USB devices, and it’s now safe to unplug your device.
Notes: The CS-X CloudStation doesn’t support Direct Copy.
If the function LED does not glow blue when the device is connected, then the device is not
compatible with Direct Copy.
If no folder is selected in Device Settings/Direct Copy, then no les are copied and the function
LED will continue blinking. If this happens, hold down the function button until the drive is
dismounted.
Function
button
Page 44

44
The following types of les are copied by Direct Copy:
Pictures
*.jpg *.jpeg *.gif *.png *.tif *.tiff *.yuv *.bmp *.raw
Movie
*.avi *.divx *.asf *.mpg *.mpe *.m1v *.vob *.mts *.m2ts *.m2t *.mpeg *.mpeg2 *.vdr *.spts *.tp *.ts
*.3gp *.mov *.m4v *.wmv *.dvr-ms *.xvid *.mp4 *.m4v
Music
*.mp3 *.mpa *.wma *.aac *.apl *.ac3 *.lpcm *.pcm *.wav *.m3u *.m4a *.m4b *.aif *.aiff *.ac *.ogg
*.mp2 *.mp1
Page 45

45
LED Error Codes:
If an operation error occurs, the info/error LED will ash red. It will alternate between ashing
for 1 second (tens digit) and 1/2 second (ones digit). Combine the number of longer ashes with
the number of shorter ashes to produce a two digit error code:
E00 - (no ashes) MPU failure
E01 - DRAM data line problem
E02 - DRAM address line problem
E03 - RTC chip error
E04 - failed to extract kernel
E06 - corrupted rmware
E07 - a hard disk was not found
E10 - UPS error
E11 - fan error
E15 - hard drive I/O error
E16 - no hard disks detected
E17 - internal controller error
Troubleshooting
Troubleshooting
Page 46

46
E20 - circuit board error
E21 - internal controller error
E22 - mount error
E23 - hard disk is malfunctioning
LED Information Codes:
The info/error LED will ash amber to give information codes. Like the error codes, these
alternate between ashing for 1 second (tens digit) and 1/2 second (ones digit). Combine the
number of longer ashes with the number of shorter ashes to produce a two digit information
code:
I19 - erasing disk
I23 - initializing system
I25 - updating rmware
I26 - initializing Web conguration
I27 - checking USB disk
I28 - formatting USB disk
I53 - cannot communicate with cloud service
Page 47

47
Hard Drive: 3.5” SATA
Ethernet:
10/100/1000 Mbps RJ-45
USB Interface: USB 2.0/1.1 (CS-WX and CS-WV only)
Replacement Fan: OP-FAN/LS
Replacement Power Supply: OP-AC12L
Power Supply: 100-240 V 50/60 Hz
Client OS Support: Windows
® 7 (32-bit/64-bit), Windows
Vista® (32-bit/64-bit), Windows XP,
Windows Server® 2003/2008, Windows
Server® 2003/2008 R2, Mac OS® X 10.4
or later
Power Consumption: ~17 W average; ~48 W max
Dimensions: 5.0” x 3.4” x 8.1” (127 x 86 x 206 mm)
Weight: ~3.3 pounds (1.5 kg)
Operating Environment: 41°-95° F, 5°-35° C; 20-80% non-
condensing
Mac and Mac OS are trademarks of Apple Inc., registered in the U.S. and other countries. Windows is a registered trademark of Microsoft Corporation in the United States and other countries.
Specications (CS-WX and CS-WV)
Page 48

48
Specications (CS-X)
Hard Drive: 3.5” SATA
Ethernet:
10/100/1000 Mbps RJ-45
Replacement Power Supply: OP-AC12L
Power Supply: 100-240 V 50/60 Hz
Client OS Support: Windows
® 7 (32-bit/64-bit), Windows
Vista® (32-bit/64-bit), Windows XP,
Windows Server® 2003/2008, Windows
Server® 2003/2008 R2, Mac OS® X 10.4
or later
Power Consumption: ~18 W average
Dimensions: 3.0” x 5.9” x 7.1” (75 x 150 x 180 mm)
Weight: ~1.9 pounds (0.88 kg)
Operating Environment: 41°-95° F, 5°-35° C; 20-80% non-
condensing
Page 49

49
Buffalo Technology USA Inc.
11100 Metric Blvd., Suite 750
Austin, TX 78758
GENERAL INQUIRIES
Monday through Friday
8:30am-5:30pm CST
Direct: 512-794-8533 | Toll-free: 800-456-9799
Fax: 512-794-8520 | Email: sales@buffalotech.com
TECHNICAL SUPPORT
North American Technical Support by phone is available 24 hours a day, 7 days a week. (USA
and Canada).
Toll-free: (866) 752-6210 | Email: info@buffalotech.com
Contact Information (North America)
Page 50

50
Buffalo Technology UK Ltd.
2 Bracknell Beeches, Old Bracknell Lane
Bracknell, Berkshire, RG12 7BW
United Kingdom
GENERAL INQUIRIES
Email: sales@buffalo-technology.com
TECHNICAL SUPPORT
Buffalo Technology provides technical support in English, German, French, Italian and
Spanish. For opening hours and relevant telephone numbers, please go to:
www.buffalo-technology.com/contact
Contact Information (Europe)
Page 51

51
Source code for Buffalo products is available at http://opensource.buffalo.jp
GPL Information (North America)
GPL Information
 Loading...