

Page 1
Buffalo Pellet Stoves
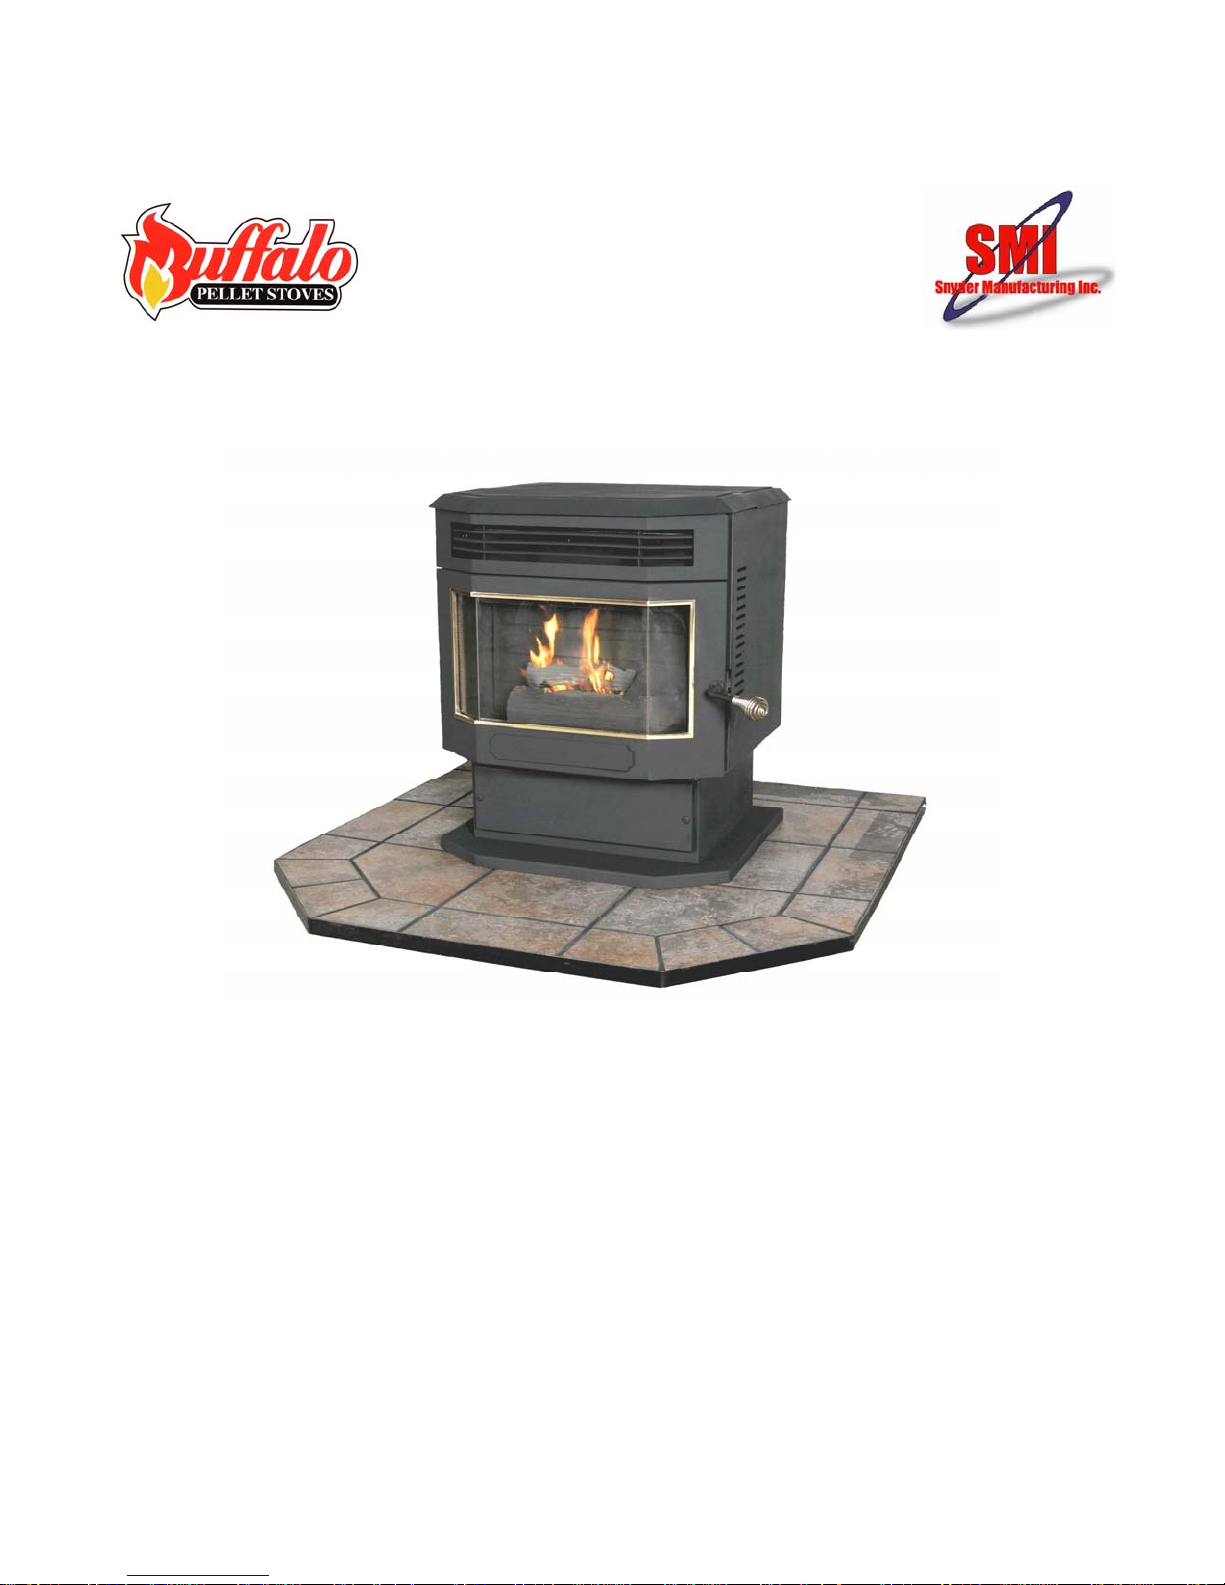
Model B100
Wood Pellet Stove
Owner’s Installation and
Operation Manual
• Read this manual in its entirety before installation or use of this pellet-heating appliance.
• Failure to follow these instructions may result in property damage, bodily injury or death.
• Contact local building inspector and/or fire officials to identify restrictions, obtain necessary permits,
installation requirements and/or inspection requirements in your area.
• Contact your local dealer with questions or with requests for warranty service.
• Save this manual for future reference.
Snyder Manufacturing
255 Rochester Street
Salamanca, NY 14779
Page 2

Page 3

Dear Buffalo Pellet Stove Owner:
Congratulations, on the purchase of your Buffalo Pellet Stove! You have selected the most
efficient residential wood pellet heating technology to provide heat in your home.
We would like to take this opportunity to share a few “tips” about installing your stove and heating
with wood pellets.
1. A quality installation is a must for the safety of your family and for efficient, satisfactory
operation of your stove. We strongly suggest that you have your stove installed by a
National Fireplace Association certified Pellet Stove Specialist.
2. Know the quality and characteristics of the pellets that you burn. Pellets can vary greatly
from manufacturer to manufacturer, from load to load from the same manufacturer and
occasionally from bag to bag within the same load.
3. Develop and diligently follow a timely cleaning schedule to ensure your stove operates as
efficiently as possible.
4. Approximately 90% of operational issues with pellet stoves are directly related to improper
installation, poor quality of pellets being burned and/or lack of timely/routine cleaning.
With minimum daily care your Buffalo Pellet Stove will provide years of clean, efficient, comfortable
and environmentally sound heat to your home.
Thank you for selecting a Buffalo Pellet Stove.
Sincerely,
Snyder Manufacturing Inc
Page 1 of 37
Page 4

Page 2 of 37
Page 5

Table Of Contents
Warnings/Safety Precautions 4
Specifications 5
Heating Specifications 5
Dimensions 5
Electrical Specifications 6
Fuel 6
Packaging 6
Optional Accessories 6
Installation Notices 7
Building Permit 7
Safety Testing and Listing 7
Installation Cautions and Warnings 7
Installation Check List 8
Floor Protection 9
Clearances to Combustible 9
Materials
Exhaust System Guidelines 9
Exhaust System Sizing 10
Combustion Air 12
Fresh Air Intake Damper 12
Exhaust System Termination 12
Horizontal Through Wall 13
Installation
Vertical Installation 14
Venting Through an Existing 14
Chimney
Mobile Home Installation 15
Smoke Detectors 15
Introduction to Heating With 15
Wood Pellets
Stove Operation 16
Exhaust Blower at Power-Up 16
Thermal Sensing Cable 16
Page 3 of 37
Automatic Fire Ignition 16
Control Panel 17
Error Codes 18
Hopper 18
Priming the Auger 18
Start-Up Process (Su) 19
Automatic Temperature Control 20
Mode/User Control Mode
Automatic Temperature Control 21
Mode (Ac)
User Control Mode/Manual 21
Control (Uc)
Set-Up Mode – Feed Rate 21
Adjustment
Overheat Safety Switch 22
FA1 Error 23
Shut Down (Sd) 23
Manual Lighting Procedure 23
Stove Maintenance 24
Clean Heat Exchanger Tubes 25
Inspect Burn Pot for Clinkers 26
Clean Door Glass 26
Clean Burn Pot, Box and Grate 27
Clean Door Airwash 29
Ash Trap Door Cleanout 30
Empty Ash Pan 31
Check Fresh Air Intake 31
Inspect/Clean Exhaust Vent 31
System
Oil Circulation Blower 32
Oil Exhaust Blower 33
Troubleshooting 34
Warranty 36
Page 6

Warnings/Safety Precautions
o
Turn off the stove if you smell smoke or can
see smoke coming from the heating
appliance.
o Turning the stove power switch to “Off” will not
turn off power to all electronics within the
stove - if the stove has been burning and is
hot, the exhaust blower will continue to
operate until the stove cools.
o Never unplug the stove to turn it off;
unplugging the stove to shut it down may
permit the stove to seep smoke in your home.
o Unless directed by Buffalo Pellet Stove/
Snyder Manufacturing personnel, never
attempt to repair or replace any parts on the
stove. All repair work done on the appliance
should be completed by a trained pellet stove
technician.
o The burn chamber door, front glass and the
heat exchanger door all become extremely hot
during stove operation, do not touch, severe
burns may result.
o Keep clothing, furniture, and all other
combustibles away from the front of the stove
during operation.
o Closely supervise children when in close
proximity to the stove. Keep children away
from the heating appliance.
o Do not store or use gasoline, lighter fluid,
kerosene or any other flammable vapors or
liquids near the heating appliance during
operation.
o The burn chamber door and ash pan must be
securely closed and latched during stove
operation to ensure proper function of the
heating appliance.
o During operation, if the flame becomes dark
orange, lazy or sooty or if the burn pot begins
to over fill with pellets, immediately turn the
power switch to “Off” and allow the stove to go
through a “Power Off” shut down procedure.
Once the stove burns through the remaining
pellets in the burn pot, completely turns off
(exhaust blower will run for a minimum of 30
mins) and cools, thoroughly clean the stove
following the maintenance procedures
identified in this manual.
o Keep all areas around the stove free of
obstructions to permit free airflow to the
appliance during operation.
o All exhaust piping transferring exhaust gasses
from the appliance to the exterior of your
Page 4 of 37
home must be completely sealed and air tight.
All pellet vent joints must be sealed with RTV
500F silicone sealant.
o All pellet-burning heating appliances require
routine maintenance/cleaning in order to
operate properly. Failure to follow the
maintenance/cleaning schedule identified in
this manual will reduce the efficiency of the
heating appliance, will cause the appliance to
not function properly, may cause premature
failure of components and in extreme cases
may void the warranty on the appliance.
o Allow the appliance to cool entirely before
doing any routine maintenance/cleaning on
the stove.
o This pellet stove is designed, tested and
approved to only burn wood pellets at this
time. Burning any other type of medium will
void the warranty and Warnock Hersey safety
listing.
o This pellet-burning appliance will not operate
during a power outage. If power within your
home is intermittent, turn the power switch on
the stove to the “Off” position and leave the
stove powered down until uninterrupted power
to the appliance is restored (power down
threatening condition has passed).
o Pellet stove must be connected to a standard
115V, 60Hz., grounded electrical outlet.
Power to the heating appliance must not be
provided through a ground fault interrupt (GFI)
circuit.
o Exhaust piping must be checked once every
ton-and-a-half of pellets burned to inspect for
and to clean any accumulation of soot and/or
creosote that has accumulated within the
exhaust system. Failure to follow this exhaust
system inspection/cleaning schedule may
result in adverse and potentially dangerous
stove operation conditions.
o Never put your hands or fingers near the
auger (located on the inside bottom sloped
surface of the hopper). A high torque motor
drives the auger which is capable of inflicting
harm to fingers placed in close proximity to
the auger. The auger is driven by software,
based on the set temperature of the stove and
the detected room temperature the auger can
turn on and off at any time
Page 7

Specifications
Heating Specifications
BTU output range: 6,500 to 42,000 BTU
Circulation blower size: 265 CFM
Efficiency: 87%
Flue size: 3”
Air intake size: 2”
Approximate maximum heating capacity: 1200 to 1800+ sq. ft.
Burn Rate: 0.8 to 5.0 lbs./hour
Maximum burn time at lowest setting (manual control): 62 hours (50/0.8)
Maximum burn time (automatic temperature control): 72 hours plus*
*
Dependent upon thermal load of the installation
Hopper Capacity, Standard: 50 lbs.
Hopper Capacity, Extended: 90 lbs.
Dimensions
Width (A): 26”
Depth (G): 29”
Height, standard hopper (B): 30”
Height, extended hopper: 37”
Exhaust location
Side to center of exhaust (D): 3 7/8”
Bottom to center of exhaust (E): 17 1/8”
Fresh air intake location
Side to center of fresh air intake (C): 8 3/8”
Bottom to center of fresh air intake (F): 13 3/8”
Figure 1: Rear view Figure 2: Top Down View
Page 5 of 37
Page 8

Electrical Specifications
Voltage: 120 VAC
Power (current) during start-up: 438 watts (3.65A)
Power (current) during operation: 370 watts (3.08A)
Fuel
This heating appliance was designed to burn wood pellets that comply with the standards set by
the Pellet Fuels Institute
• Minimum density of 40 pounds/cubic foot
• Maximum length of 1.5”
• Pellet diameter between 1/4” and 5/16”
• Fines that will pass through 1/8” screen not to exceed 0.5% by weight
• Salt content no more that 300 parts per million
• Ash content no more than 3% by weight (standard grade pellets)
• Moisture content less than 8% by weight
If the fuel being burned does not comply with these minimum standards, the appliance may not
operate as designed and may be cause to negate the warranty.
Packaging
Included with your assembled Buffalo Pellet Stove Model B100 are the following items
Owner’s Installation and Operations Manual
Power cord
Thermal sensing cable (standard length – 10’)
Artificial log
Optional Accessories
Thermal sensing cable (length 25’)
Thermal sensing cable (length 50’)
Extended hopper
Fresh air intake damper
Page 6 of 37
Page 9

INSTALLATION NOTICES
Safe Installation Notice
Your BUFFALO Pellet Stove must be properly installed to meet the safety listing of the stove.
Failure to strictly follow these installation instructions could result in the possibility of a house fire,
property damage, bodily harm or even death.
Building Permit
Local building codes must be followed and required building permits obtained from local building
officials prior to installation of your Buffalo Pellet Stove.
Safety Testing And Listing
Your Buffalo Pellet Stove has been tested and is listed by Warnock Hersey Laboratories, an
accredited independent testing laboratory, in accordance with the requirements in UL1482 and
ASTM standards for solid fuel heaters, hearth stoves, fireplaces and inserts. The safety label is
located on the right side of the pellet hopper cover. This safety label contains installation
specifications that must be followed during installation of your Buffalo Pellet Stove.
Installation Cautions & Warnings
The installation sketches shown in this manual are only examples of many acceptable installation
designs. Other designs that meet local code, stated installation requirements identified in this
manual, the stove’s label and PL vent manufacturer’s requirements may be deemed acceptable.
NOTE: All stove owners, operators and installers must read and become thoroughly acquainted with the information in
this manual before installing and/or operating this heating appliance.
1. All stoves must be placed on non-combustible material (following the guidelines provided
within this manual).
2. Caution should be taken to avoid damaging any electrical wires, water pipes, heating ducts,
etc. that may be in the vicinity of the holes that must be put through walls to provide the
required exhaust venting and fresh air supply for your pellet stove.
3. Your Buffalo Pellet Stove operates with a slightly positive venting system. For the safety of
people, animals and plants in the vicinity of your stove, the exhaust system must be
correctly installed and must be airtight!
4. All installations must meet all local building codes, PL vent manufacturer’s requirements an
all requirements in this manual.
5. Any alteration made to your Buffalo Pellet Stove by any party other than an authorized
Buffalo Pellet Stove dealer or an employee of Snyder Manufacturing (Buffalo Pellet Stove)
will void the warranty on your stove.
Page 7 of 37
Page 10

INSTALLATION CHECK LIST
Unless you are knowledgeable and experienced in stove installation, we strongly recommend
that an Authorized Buffalo Pellet Stove Dealer, Buffalo Pellet Stove Factory Service
Representative or an experienced pellet stove installer/technician, install your Buffalo Pellet Stove.
Complete this checklist prior to turning on your Buffalo Pellet Stove for the first time.
Thoroughly read this entire owner’s manual. SAVE THIS MANUAL FOR
FUTURE REFERENCE!
Request that your Buffalo Pellet Stove dealer review operation of the stove and all
cleaning/maintenance procedures necessary to ensure optimum performance.
Obtain all necessary permits from local municipalities for stove installation and has
had the installation inspected by a local building inspector.
Proper location of the appliance within the home; the layout of your home and the
selected installation location of your pellet burning appliance will determine its
effectiveness as a heat source within your home. This pellet-burning appliance will
put heated air into the room or area of your home within which the stove is installed.
The heated air generated by the appliance depends on air circulation to distribute
heat to other areas of your home.
It is strongly suggested that sufficient space be provided (a minimum of 24”) on each
side of the appliance to enable the unit to be serviced. If this space is unavailable
upon installation, a provision must be made to enable sliding the stove out for service.
Use only PL type venting for pellet vent exhaust system. Use stainless steel
liner for venting through any existing chimney. Under NO circumstances can
plastic piping be utilized in any part of the stove’s exhaust system.
Plug stove into a 3-pronged, 120VAC, 60 Hz, grounded outlet. Stove cannot be
plugged into a GFI (Ground Fault Interrupt) outlet. It is recommended that a surge
protector be utilized to protect the control circuitry in the stove from erratic power
surges.
* Note: It is extremely important that the AC power provided to this stove
be properly wired (hot and neutral correctly wired, not reversed). Test
the outlet providing power to the stove by using an electrical outlet
tester. This Buffalo Pellet Stove will not function properly if AC power
provided to the appliance is reversed.
If outside air is going to be provided to the stove, use of metal pipe (rigid or
flexible) is required.
After installation is complete, recheck the installation to confirm that all installation
requirements identified in this manual have been met. If required, schedule a
post-installation inspection with your local building inspector.
Complete Buffalo Pellet Stove Limited Warranty registration card (included in this
manual) and mail it to:
Snyder Manufacturing
255 Rochester Street
Salamanca, NY 14779
Page 8 of 37
Page 11

Floor Protection
This appliance requires noncombustible floor
protection. If the stove is being placed on top
of a combustible floor surface (i.e. wood or
carpeted floor surface), use of a noncombustible floor protector must be utilized,
extending the full width and depth of the
heater extending:
• A minimum of 6” in front of the
appliance
• A minimum of 6” to each side of the
appliance
• A minimum of 2” behind the tee used
at the exhaust exit at the rear of the
appliance (if one is utilized)
• A minimum of 0” from the back of the
stove if a tee is not being utilized at the
exhaust exit at the rear of the stove
Note: It is important your Buffalo Pellet Stove
to be level when installed. Leveling should
occur below the floor protection pad. Make
any necessary adjustments to the levelness
of the floor protection pad during installation
of the pad to ensure a level stove installation.
Minimum Clearances To Combustible
Materials
Minimum clearances to nearby combustible
materials must be maintained to avoid any
potential fire hazard. The following stove
clearances to combustibles must be
maintained at all times:
• A minimum of 1” from the back
• A minimum of 2” from the sides
• A minimum of 1” from the corners
• A minimum of 16” from the top
• A minimum of 18” from the front
• A minimum of 36” to drapes, doors,
drawers or anything that can open or
swing
• A minimum of 3” from PL vent
(including cleanout tees and elbows)
to combustibles
Although not required for safety reasons, it is
strongly suggested that sufficient space be
provided (a minimum of 24”) on each side of the
appliance and at the back of the appliance to
enable servicing the unit if necessary. If this space
is unavailable upon installation, a provision must
be made to enable sliding the appliance out for
service.
General Exhaust System Guidelines
There are many available options for installing
a pellet stove within a home
• Horizontal through wall
• Vertical inside home then through wall
• Horizontal through wall, vertical 5 to 8
feet outside home, 90 degree elbow to
horizontal, then cap
• Vertical inside home through attic and
roof
• Through wall, vertical up outside of
home, through eve and roof
• Through existing masonry chimney
• Through existing wood stove chimney
pipe
Pellet vent pipe will be required to carry
exhaust gasses from the stove to outside the
home. The manufacturer of pellet vent pipe
you select will have detailed installation
instructions for each available type of
installation that can be used to install your
pellet stove. The installation instructions from
the pellet vent pipe manufacturer you select
will identify the specific components required
for each available installation option and will
include detailed directions as to how to route
and connect the vent pipe together to ensure
that the exhaust system is air tight.
Below we have included some additional
guidelines to follow in addition to those that
are available from the pellet vent pipe
manufacturer you use to construct your pellet
stove exhaust system.
1. Pellet vent pipe must maintain a
minimum clearance of 3” to any
combustibles.
Page 9 of 37
Page 12

2. Do not install a damper in the exhaust
venting system of this unit.
3. Use of a UL approved wall thimble is
required when passing pipe vent
through any combustible wall.
4. Use only UL listed, 3 or 4 inch PL vent
pipe on all stove installations. A UL
safety listed 3 to 4 inch adapter must
be used when 4-inch vent pipe is
required.
5. Horizontal exhaust system runs of over
15 feet are not recommended.
6. Exhaust systems must maintain a
minimum of ¼” vertical rise for every
12” of horizontal travel.
7. Use of more than 3 tees and/or elbows
in any installation is not suggested.
Exhaust systems with more than 3 tees
and/or elbows may not draft properly.
8. All areas of the exhaust system must
be installed such that all vertical and
horizontal runs can be periodically
inspected and cleaned (plan proper
placement of cleanout tees).
9. A clean out tee must be used at the
bottom of all vertical runs enabling the
collection and removal of fly ash. In
some installations, 4 way tees may be
necessary to enable cleaning access
to both horizontal and vertical exhaust
piping runs.
10. All PL vent pipe manufacturer’s
installation and clearance requirements
must be followed.
11. Exhaust system joints may or may not
be required to be attached using sheet
metal screws, please reference the
pellet vent manufacturer’s instructions.
If sheet metal screws are required to
attach pellet vent pipe components,
proper length screws must be used to
ensure that the inner liner of the pellet
vent pipe is NOT penetrated.
12. All exhaust system joints located inside
the home must be completely sealed
with high temperature RTV silicone to
guarantee a gas tight seal. Proper
sealing of all exhaust system joints is
required to prevent any leakage of
exhaust fumes into the home.
Page 10 of 37
13. It is strongly recommended that the
exhaust vent system NOT exit and be
terminated on the prevailing wind side
of the home.
14. Exhaust pipe surfaces can get
extremely hot and can cause burns if
touched, care should be taken to
ensure that vent piping is not easily
accessible to people or pets. Shields
or guards, maintaining proper PL vent
clearance may be required for some
installations.
15. Stove may not be placed in, or vented
through a gas fireplace.
Exhaust System Sizing
The exhaust pipe exiting at the rear of your
Buffalo Pellet Stove will accept standard 3”
PL vent pipe. Your Buffalo Pellet Stove is
certified for both 3 and 4 inch exhaust
venting. The numbers of tees, elbows,
horizontal and vertical runs of vent pipe all
add resistance to the flow of air through the
exhaust system. Excessive resistance to the
exhaust air passing through the venting
system can lead to combustion problems in
the stove. A calculation called “total factored
length” is used to determine whether 3 or 4inch vent pipe is required. By calculating the
total factored length of your planned exhaust
system, it can be determined if your venting
system will have too much resistance for
standard 3-inch vent pipe to be used.
Adjusting the size of the exhaust system vent
pipe to compensate for these variables will
help improve exhaust gas flow and overall
performance of your stove. The use of 4-inch
vent pipe will reduce this resistance. For
installations requiring a 4-inch PL vent pipe, a
3 to 4-inch PL adapter must be placed on
your stove’s exhaust pipe.
Apply the multipliers listed in the table below
to the different components of the exhaust
system, then add up all of the exhaust system
factored components to calculate the total
factored length of the planned exhaust
system. Use this calculated value to
determine the appropriate exhaust system
pipe size (3 or 4”).
Page 13

Total factored length multipliers:
System component
Total length of piping, in feet (horizontal &
vertical straight)
Multiplying
Factor
x1
Horizontal run length, in feet x3
90 degree elbows or tees x5
45 degree elbow x3
Each 1000 feet of altitude above sea level x1.5
Figure 3
If the total factored length is under 30, use a 3 or 4-inch exhaust system
If the total factored length is 30 or greater, use a 4-inch exhaust system
Example 1: An exhaust system going straight out the wall with 2 feet horizontal PL vent, into a
TEE with a clean out cap, then running vertical for 5 feet, then into a 90 degree elbow and
terminating with a 45 degree elbow, installed at sea level.
Example 2: The same system as in example 1 installed at an elevation of 6,000 feet. To estimate
the size of the exhaust system use the following factors:
VARIABLES Example 1 Example 2
Total length of exhaust system, in feet
3 feet for each foot of horizontal run.
5 feet for each 90 degree elbow or tee
3 feet for each 45 degree elbow
1.5 feet for each 1,000 feet of altitude
Total Factored Length
Required size of exhaust system
7 7
(3 x 2) = 6 (3 x 2) = 6
(5 x 2) = 10 (5 x 2) = 10
(3 x 1) = 3 (3 x 1) = 3
(1.5 x 0) = 0 (1.5 x 6) = 9
26 35
3 or 4” 4”
Figure 4
NOTE: 4 inch PL vent may be used in any installation. Always increase up to a 4” exhaust
system if in question as to the size pellet vent pipe to use.
Page 11 of 37
Page 14

Combustion Air
Air supplied to your stove and utilized for
combustions can come from two sources,
room air or outside air.
• All mobile home installations require that
outside air be provided to the pelletburning appliance.
• Outside air is also recommended for all
other installations, especially if
appliance is being installed into a wellinsulated airtight home.
• Only metal pipe, rigid or flexible, is to be
used for all outside air applications (PVC
or other combustible materials must
NOT be used).
• A wind shield, rain cap or 90 degree
down turned elbow must be used at the
end of the air intake pipe to restrict
excessive wind from blowing into the
stove and to prevent water from entering
the air intake.
• Use of ¼” rodent screen must also be
used at the end of the air intake pipe to
restrict entrance and possible blockage
of the air intake.
• Outside air must not be drawn from any
enclosed space (garage, enclosed
porch, unventilated crawl space, etc.)
• The combustion air inlet pipe on your
Buffalo Pellet Stove is 2” OD, the metal
pipe connected to the air inlet pipe on
your stove must be at least 2” ID (must
be fit over the pipe on the stove, not
inside).
• Outside air pipe termination must not
end above or within 1’ below the
exhaust system termination point
outside the home.
Fresh Air Intake Damper (Optional)
The rate at which fresh air is supplied to the
burn pot for combustion is regulated by the
exhaust blower speed. The exhaust blower
pulls fresh air through the fresh air intake and
draws it to the fire. In most typical
installations there is no need to restrict the air
being drawn in through the air intake tube. If
your installation has an extended vertical rise
Page 12 of 37
of vent pipe in the exhaust system, it may be
possible that the natural draft due to the
exhaust system will draw air to the fire at
a
higher rate than is desired. If your installatio
has more than 10 feet of vertical rise in the
exhaust system, contact your Buffalo Pellet
Stove dealer to purchase a fresh air intake
damper that can be installed on the end of
your fresh air intake to compensate for the
vertical rise in the exhaust system.
xhaust System Termination
E
1. If it is necessary to terminate the
exhaust system on the prevailing
wind
side of the home (which is strongly
NOT suggested) a minimum of 5 fee
t
of vertical rise should be included in
the exhaust system.
2. exhaust system in
Do not terminate the
any enclosed or semi-enclosed areas
such as a carport, garage, attic, crawl
space or any other area within which
exhaust gasses can accumulate and/o
concentrate.
3. m must be terminated
Exhaust syste
using and approved cap (to prevent
water from entering the exhaust
system) or using a 45-degree elb
ow
pointed in a downward direction.
4. here
Termination must not be located w
snow, leaves, grass or any other
material could block it.
5. ST NOT
The exhaust system MU
TERMINATE LESS THAN:
• 1 foot from the wall throu
gh which
the exhaust system exits
•
1 foot above ground level
• 2 feet above the roof line w
hen
extending through a roof
• of any
4 feet below or to the side
door, window or static air inlet that
opens
• elow or to the side of any
1 foot b
door or window that does not open
•
1 foot above any door, window or
static air inlet that opens
• uilding
3 feet from any adjacent b
owned by the pellet-burning
appliance owner
n
r
Page 15

Horizonta
• 2 feet below any overhang or eave
7 feet above grade when loca
• ted
adjacent to any pu
blic walkway
(Note: Vent may not terminate in
any covered walkway or
breezeway)
•
3 feet above any grass, plants or
other combustible ground
• any porch, deck or
3 feet below
materials
balcony
•
3 feet above any forced air inlet
located within 10 feet
• m any oil tank vent or gas
3 feet fro
meter
• ent property
10 feet from any adjac
line and/or buildings not owned by
the pel
let-burning appliance owner
l Through-Wall Installation
1. Taking into account all clearances that
must be maintained as identified
above, select the location for your
stove.
2.
Plan the exhaust system
3. nd
Determine and acquire the brand a
proper
used (use only one brand
size pellet vent pipe (PL) to be
of pellet vent
pipe for the entire installation, do not
mix and match different pellet vent pipe
brands).
4.
Following the pellet vent
manufacturer’s specifications, mark
and cut a
accommodate the wall thi
outside air pipe if outside air is going
hole(s) through the wall to
mble (and
to
be provided). Take care to avoid
cutting wall studs, power lines, water
lines, etc. when cutting the hole for the
wall thimble.
5.
Install the wall thimble according to the
pellet vent manufacturer’s instructions.
6. n-combustible floor pad,
Position the no
upon which the stove is going to be
placed, on the floor where the
appliance is going to be located.
7. et
Insert the proper size and length pell
vent pipe through the wall thimb
le.
8. Place the stove on the floor pad, close
to its final position, leaving space to
connect the pellet vent pipe to the rear
of the stove.
9.
Place a bead of high temp RTV
silicone around
the outside exhaust
pipe exiting your stove.
10. he
Connect pellet vent pipe adapter to t
exhaust pipe exiting the s
tove using a
minimum of 2 sheet metal screws to
attach the pipe adapter to the
appliance flue outlet (exhaust pipe) on
the stove.
11.
If 4-inch pellet vent is required, use a 3
to 4-inch pe
llet vent adapter directly
behind the pellet vent pipe adapter
attached in the step above.
12. e
Connect the length of pellet vent pip
(which is passing through th
e thimble)
onto the pellet vent pipe adapter or 3
to 4-inch pellet vent adapter (if being
utilized).
13.
Place your stove in its final position on
the pad.
14. At a minimum, on the outside of the
building a
45-degree PL type elbow onto the en
ttach a downward directed
d
of the horizontal PL vent (45-degree
elbow location a minimum of 1 foot
from the outside surface of the
building)
15. m
A more preferred exhaust syste
routing ou
tside the home, is to bring
the vent pipe out the side of the
building into a cleanout tee, then trav
5 to 8 feet vertically to a 90-degre
el
e
elbow (pointing away from the wall of
the structure), 12-inch horizontal pip
e,
terminating with a down turned 45
degree elbow or horizontal cap. This
type of pipe routing outside the hom
e
will put a slight positive draft on the
exhaust system which will aid in
evacuating smoke from the applianc
e
in the event of a power failure.
16.
Once the entire exhaust system is
installed, using high temp RTV
silicone, seal the joint where the pe
vent pipe passes through the ins
llet
ide
and outside of the wall thimble.
Page 13 of 37
Page 16

17. e
Install fresh air to air intake pipe on th
rear of the appliance (if required
or
desired).
a. If outside air is used, route and
install
the wall of the building (taking no
the outside air pipe through
te
NOT to locate it above or within 1
foot below the exhaust system
termination point).
b.
Seal the outside air pipe to your
stove’s fresh air inta
ke with RTV
silicone
c.
The outside air pipe connecting to
your stov
e’s air intake must fit over
(not inside) the air intake on the
stove.
d.
A wind shield, rain cap or 90
degree
used at the end of the air inta
down turned elbow must be
ke
pipe to restrict excessive wind from
blowing into the stove and to
prevent water from entering the air
intake.
e.
Use of ¼” rodent screen must also
be used
at the end of the air intake
pipe to restrict entrance to and
possible blockage of the air intake.
Vertical In
stallation
Your Buffalo Pellet Sto
sing a variety of vertical designs. Follow the
u
ve may be installed
same basic steps in locating your stove,
attaching the exhaust system and outside air
to the stove as described above in the
Through Wall Direct Installation section.
Follow the PL vent pipe manufacturer’s
instructions for installing through a ceiling
,
eve or roof.
Common ver
tical installation designs are:
1. Vertical, through room ceiling, through
second floor room or attic, through
roof.
2.
Vertical, up inside wall of room to an
existing
Class A or masonry chimney.
A chimney adapter must be used to
make the connection from 3” (75mm)
or 4” (100mm) pellet vent pipe (listed
to
UL 641 or ULC S609) to existing UL
Page 14 of 37
chimney system. Verify with the pipe
manufacturer that the selected pipe
brands will interconnect. NOTE: The
connection into a masonry chimney
must be airtight.
3.
Horizontal out room wall, vertical a
minimum of 5 fee
t into a 90-degree
elbow, terminating with a down turne
45-degree elbow or a horizontal cap
4.
Horizontal out room wall, vertical
through eve and roof, terminating with
a vertical or rain cap.
enting Through An Existing Chimney
V
• The following points are suggestions fo
venting your pellet-burning appliance
through an existing chimney. More
importantly, you should follow the vent
pipe manufacturer’s instructions inclu
with the vent piping purchased to build t
exhaust system for this pellet-burning
appliance.
1. Have ch
imney inspected by a qualified
installer to determine its structural
integrity.
2. ust
Existing chimneys and fireplaces m
be thorou
ghly cleaned prior to being
used in a pellet stove installation.
3.
Use of PL vent pipe must be used on
the portion of the venting system
between the stove and fireplace
shroud if one is used.
4. single
Use of 3 or 4-inch stainless steel
wall L-Vent pipe must b
e used to carry
exhaust gasses from the backside of
the fireplace shroud up the existing
masonry chimney.
5.
Use of an L-vent clean out tee at the
bottom of the vertica
l run is required to
enable ash collection and cleanout.
6.
Vent pipe exiting at the top of the
chimney should extend a minimum o
6” above the top of the chimney.
7.
Use of a vertical cap to terminate the
exhaust system is required.
8. Vent pipe must be sealed at the top
exit of the chimney utilizing a
non-
combustible cover plate and silicone
d
.
r
ded
he
f
Page 17

(use of a storm collar is also
suggested).
Never vent more than one appliance
9.
(stove, furnace, etc.) into the
same
chimney.
Mobile
Home Installation
our BUFFALO PELLET stove has been
Y
tested and listed for mobile h
addition to all previously identified
In
ome installation.
installation requirements, mobile home
installations must meet the following
requirements and must be in accorda
the Manufactured Home and Safety Sta
nce with
ndard
(HUD), CRF 3280.
1. Stove must be connected to an outside
source of com
bustion air utilizing metal
pipe (rigid or flexible) and connecting it
directly to the fresh air intake located
on the back of the stove. A rodent
guard (¼” wire mesh) must be
attached to the outside end of the fres
air intake.
2. the
Stove must be bolted directly to
floor of the mobile home. Connection
points for b
are located below the ash pan of you
olting the stove to the floor
r
pellet-burning appliance.
3.
The structural integrity of the floor,
walls and ceiling must be confirmed
and maintained.
4. The appliance must be permanently
electrically grounded to the chassis o
the mobile home,
using a minimum of
f
8 AWG copper wire.
5.
The appliance must NOT be located in
a sleeping area.
Sm
oke Detectors
ue to multiple potential sources of fire within
D
any home, we stron
moke detectors. The most appropriate
s
gly recommend installing
location of a smoke detector in proximity to
the stove is in a hallway adjacent to the room
that contains the heating appliance (this w
ill
reduce the possibility of false activation from
the heat produced by the stove). If local code
requires a smoke detector be installed within
the same room, you must follow the
requirements of your local code. Check with
your local building department for
requirements in your area.
INTRODUCTION TO HEATING W
ITH
WOOD PELLETS
Heating with wood pellets presents man
challenges, but the
nvironmental benefits far outweigh the
e
cost savings and the
challenges. Pellet fuel is “Green House G
Neutral”, meaning that the carbon produc
emitted from burning were absorbed by t
y
as
ts
he
trees used for the pellets when growing.
Unlike fossil fuels, that release green house
gases to the environment, pellet fuels come
from renewable resources.
Pellet fuels are produced using national
Pellet Fuel
has
the
h
standards established by the
stitute. The standards guarantee that the
In
fuel produced at a particular plant overall
the characteristics that were agreed to by
Institute. These include a maximum pellet
length of 1.25”, minimum fines (or sawdust),
ash, salt, and mineral contents. Does this
mean that every bag coming from that plant
adheres to the standard? No, it does not.
Quality of fuel varies from manufacturer to
manufacture, can vary from load to load from
the same manufacturer, it can even vary fro
m
bag to bag within the same load.
Pellets are made from sawdust, and although
inspection techniques are very sop
e occasional bad log gets through. The
th
histicated,
wood may have a high bark content, have
mud mixed in or simply be old rotting timber.
These variations in pellet fuels lead to mos
t of
the irregularities in burn characteristics,
efficiency and stove failure. Although the
Buffalo Pellet Stove was designed to work
with all types of wood pellet fuel efficientl
there may need to be adjustments made to
y,
the stove to make it operate properly.
Page 15 of 37
Page 18

STOVE OPERATION
Your Buffalo Pellet Stove is designed to burn
wood pellets. It’s operation and maintenance
requirements are unique to that of any other
heat-generating appliance (wood, coal, corn,
electric, propane or oil).
How Your Buffalo Pellet Stove Works
Fuel (wood pellets) is stored in the hopper of
your stove. An auger, located on the
underside of the hopper transports the pellets
to the top of the drop tube, which guides the
pellets into the burn pot. The burn pot,
located directly behind the artificial log, is
where the pellets are burned. The heat from
the fire heats a series of ten heat exchanger
tubes located directly above the burn pot.
Room air is passed through the heat
exchanger tubes by way of the circulation
blower. The air passing through the heat
exchanger tubes is heated, then blown out
the front of the stove into the room effectively
transferring the heat generated by the burning
pellets to the air in the room.
Exhaust Blower At Power Up
Upon initial power up, the control software will
turn the exhaust blower on for 30 minutes.
This is done as a safety precaution in case
there is a loss of power to the stove. If there
is a loss of power to the stove and then power
is restored, the most important function of the
stove (at power up) is to evacuate all exhaust
gasses that have accumulated within the burn
chamber (during the power outage) to outside
your home.
At any time during the initial 30 minutes that
the exhaust blower is running at power up,
the software can take control and initiate a
start-up sequence if it is detected that there is
a demand for heat.
Thermal Sensing Cable
Your Buffalo Pellet Stove automatically
senses the current room temperature via a
thermal sensing cable that exits the back of
Page 16 of 37
the stove. The stove software and the
thermal sensing cable combine to become an
integral thermostat for the stove. When the
stove is in Automatic Temperature Control
Mode, the feed rate, exhaust and circulation
blower speeds are all adjusted based on the
temperature sensed by the thermal sensing
element on the end of the cable. The end of
the thermal sensing cable should be located
within the home at a stable temperature
location (away from any door or window that
may be opened or closed occasionally or any
heat duct or register that may cause the
temperature at the cable end to fluctuate
significantly). If the thermal sensing element
at the end of the cable is subjected to
frequent fluctuations in temperature, this will
cause the stove to start-up and shut down
frequently. Frequent start-ups and shut
downs may cause undesired fluctuation of
room temperature, will result in overall higher
than necessary pellet consumption and may
lead to premature igniter element failure.
The standard length thermal sensing cable
included with each Buffalo Pellet Stove is 10
feet. Longer length cables are available from
your Buffalo Pellet Stove dealer.
Automatic Fire Ignition
Your Buffalo Pellet Stove is equipped with an
igniter, located behind the burn pot, which is
used to initiate a fire in the stove when heat is
called for by the control electronics. During
the start-up process the igniter is activated,
provides the required heat to initiate a fire,
then is turned off.
Page 19

Control Panel
To access the control panel, slide the front
cover forward approximately 4.25” to its fully
extended position. The control panel is
located on the left side of the hopper just
behind the open front cover (Figure 5).
Figure 5
The main power switch for the stove is
located at the top right corner of the control
panel. This switch controls the main power to
the stove. Please note that if power to the
stove is turned off while there is still a fire in
the burn chamber or when the stove is still
hot, the exhaust blower will continue to run
until all exhaust fumes have been evacuated
from the burn chamber and the burn chamber
has been cooled to below 110 degrees F.
This will eliminate getting unwanted exhaust
fumes in the home if power is turned off while
there is still a fire in the stove. NOTE: If the
power cord is disconnected from the wall (or if
there is an unexpected power outage) while
there is still a fire in the burn chamber, unless
there is significant positive draft on the stove
via the exhaust system, it is possible that
smoke will leak from the stove into the home.
• Power switch – Controls power to the
stove’s electrical components and
control board. When in the “ON”
position the stove will display
information to the operator through the
3 segment Temp Display Window
located just above the Low and Set
buttons on the Control panel. Any
time an error code is displayed in the
Temp Display Window, after all pellets
have burned out and the stove has
cooled, the power switch must be
toggled to the “OFF” position for a
minimum of 1 minute to reset the
stove.
Note: If the Power Switch is
toggled to the “OFF” position
when the stove is still hot or
when there is still a fire in the
burn chamber, the exhaust
blower will continue to run until
the fire in the stove is out and
the stove has cooled.
• Temp Display Window – Displays
information that will identify the current
operational status of the stove, the
current room temperature, current set
point temperature if in Automatic
Temperature Control Mode, current
User Control Mode (manual setting)
when in User Control Mode, error
codes, etc.
• High Button – Adjusts selected
variable up.
• Low Button – Adjusts selected variable
down.
• Set Button – Used in conjunction with
the High Button and Low Button to
adjust the set point temperature of the
stove, adjust the User Control Mode of
the stove, to get into and out of Set-Up
Mode when adjusting the base feed
rate of the stove and to adjust the feed
rate table being used to operate the
stove (when in Set-Up Mode).
Page 17 of 37
Page 20

Error Codes
Error
Code
FA1 No fire in burn chamber
Meaning Potential Cause of Error Code Corrective Action
Stove out of pellets
Ignition of pellets during start-up
failed
Thermal sensing cable not
Control board not receiving signal
4
from thermal sensing cable
plugged in.
Thermal sensing cable
damaged
Figure 6
Hopper
The hopper of your stove is where pellets are
stored before being transferred to the burn
pot and burned to create heat. The hopper is
located at the top of the stove and can be
accessed by pulling the top front cover of
your stove forward (it is attached to rollers)
and lifting the back top cover of your stove
up. Load pellets into the hopper by dumping
them directly into the hopper opening. The
maximum volume of pellets can be loaded
into the hopper by pushing the pellets into
each corner of the hopper and leveling them
out with the top.
• Note: Never rest a bag of pellets or put
any significant downward pressure on the
front cover of the hopper cover when it is
when it is in the open (forward) position.
Putting downward pressure on the front
cover when it is the open position may
damage the sliders that allow the cover to
slide forward.
Located at the bottom of the hopper is the
auger, which carries the pellets to the drop
tube. The drop tube guides the pellets into
the burn pot. The auger located at the bottom
of the hopper rotates within a tube that
restricts the volume of pellets that can be
dropped into the fire. Keep your hands away
from the auger at all times. If at any time it is
necessary to remove jammed pellets from the
auger/auger tube area, first turn off the stove
and disconnect the power cord from the
power source.
Page 18 of 37
Fill hopper with pellets
then prime auger
Clean burn pot, grate,
burn box, burn chamber
Plug in thermal sensing
cable
Replace thermal sensing
cable
As a safety precaution the rear hopper cover
is equipped with a switch, which senses the
condition (open or closed) of the rear hopper
cover. When the rear hopper cover is in the
open position, power to the gear motor that
drives the auger is cut off to stop the auger
from turning to ensure that the turning auger
will not pinch fingers. When the rear hopper
cover is returned to the closed position, power
to the gear motor will be restored and pellets
being transported to the burn pot will resume.
If there is a fire in the burn pot when the rear
hopper cover is opened, leaving the rear
hopper cover open (suspending the feed of
pellets to the fire) for too long will allow the
fire to go out. If the fire goes out while the
rear hopper cover is open, leave the rear
hopper cover open until all burning pellets in
the burn pot have completely burned up.
After the fire and all remaining smoldering
pellets have extinguished, turn the power
switch to the off position (the exhaust fan may
continue to run), leave the stove turned off for
a minimum of 5 minutes, then turn the power
to the stove back on and resume operation of
the stove as desired.
Priming the Auger
Before firing your Buffalo Pellet Stove for the
first time or any time the hopper has been
burned completely empty of pellets, it is
necessary to refill the hopper and auger with
pellets before firing the stove. If the auger is
not loaded with pellets when a start-up
sequence is started, the stove will not have
Page 21

enough fuel (pellets) in the burn pot to initiate
a fire.
To prime the auger with pellets follow the
steps listed below (read through entire list of
steps below before beginning the auger
priming process).
1. Load the hopper with pellets.
2. With the stove turned off, open the
burn chamber door and remove the
artificial log (Remove log from front of
burn box by grasping log on the sides
and lifting straight up).
3. Close the burn chamber door, turn the
stove on and raise the set point
temperature at least 3 degrees above
the current room temperature to initiate
a start-up sequence.
4. Wait 2 and ½ minutes. Turn power to
the stove off, wait 30 seconds, turn
power to the stove back on, this will
initiate a second start up sequence
and again begin turning the auger.
5. Looking through the burn chamber
door window, watch for pellets to drop
into the burn pot.
6. When you see the first pellets drop into
the burn pot, turn the power switch to
the off position to terminate the start-up
sequence.
7. Leave the stove powered off while you
open the burn chamber door and place
the artificial log back into the log
retention slots at the front of the burn
box.
8. Close the burn chamber door.
9. Stove is now ready for operation.
• Note: If the stove has recently been
burning and the hopper and auger have
been burned empty of pellets, the stove
must be given time to completely cool
before priming the auger.
Start-Up Process
When the stove electronics detects that heat
is required to warm the home, an
uninterruptible start-up sequence is initiated.
Depending on whether the stove is hot or cold
(a recent fire has been in the stove or not),
the stove goes through one of two different
sets of sequences of turning on the
combustion blower to a set speed, feeding
pellets to the burn pot, heating of the igniter
and activation of the circulation blower.
The control software chooses between two
different start-up sequences depending on
whether your stove is cold (has not been
running) or hot (recently shut down and has
been called upon to provide heat). The
software determines if the stove has recently
been burning by checking a temperaturesensing switch located on the exhaust
system.
If the stove is cold, the software will put the
stove through a “cold start” sequence. Stove
operation cannot be interrupted during this
start-up process. It will be evident that the
stove is going through a start-up routine
because the display will alternately show the
current room temperature, then will display Su
(Start-up). This “cold start” sequence takes
15 minutes and 30 seconds. Once the stove
has completed the start-up sequence, it will
transfer control of the stove operation to
either Automatic Temperature Control Mode
or User Control Mode (manual control)
depending upon the mode the stove was in
prior to the initiation of the start-up sequence.
If power to the stove has just been turned on
and a start-up sequence has been initiated, at
the end of the start-up, control of the stove
transfers to Automatic Temperature Control
Mode (this is the default mode).
If the stove is hot (has recently been burning)
and is again called upon to provide heat, the
software will put the stove through a “hot
start” sequence. Again, stove operation
cannot be interrupted during this start-up
process. It will be evident that the stove is
going through a start-up routine because the
display will alternately show the current room
temperature, then will display Su (Start-up).
Page 19 of 37
Page 22

The “hot start” sequence takes 13 minutes
and 30 seconds. Once the stove has
completed the start-up sequence, it will
transfer control of the stove to either
Automatic Temperature Control Mode or User
Control Mode (manual control) depending
upon the mode the stove was in prior to the
initiation of the start-up sequence.
Automatic Temperature Control Mode /
User Control Mode
Your Buffalo Pellet stove hast two different
modes of operation, Automatic Temperature
Control Mode and User Control Mode
(manual control). The software enables the
stove to operate in either Automatic
Temperature Control Mode or User Control
Mode – Manual Control (both individually
described below).
In Automatic Temperature Control Mode, the
software will regulate all operational functions
of the stove (feed rate, combustion blower
speed and circulation blower speed) based
on the difference between your desired room
temperature (set point temperature) and what
the stove senses (through the temperature
sensing cable) your current room temperature
to be. In User Control Mode you will select a
continuous burn rate for you stove (0 or
between 3 and 7). The stove will burn pellets
at the selected feed rate regardless of the
current room temperature.
At initial power up the stove will default to
Automatic Temperature Control Mode. In
Automatic Temperature Control Mode (Ac)
the display will cycle between the letters Ac to
confirm that the stove is in Automatic
Temperature Control Mode and the current
room temperature.
If you wish to transfer from Automatic
Temperature Control Mode to User Control
mode, depress and hold the Low button, then
depress and hold the High button. After both
the Low and High buttons have been
depressed together for 2 seconds the stove
will transfer into User Control Mode (Uc). In
User Control Mode (Uc) the display will cycle
between the letters Uc to confirm that the
stove is in User Control Mode, the current
User Control Mode setting (0, 3-7) and the
current room temperature.
Transfer From Automatic Temp Control
Mode to User Control Mode (Manual
Control)
• Depress and hold Low button
• Depress and hold High button (in
combination with Low button)
• After both Low and High buttons
depressed for 2 seconds – transfer
to User Control
* Note – Upon transfer from
Automatic Temperature Control to
User Control, the default User
Control Mode setting is 3, if the
stove is not burning when transfer
from Automatic Temperature
Control to User Control occurs, a
start-up sequence will be initiated.
Transfer From User Control Mode (Manual
Control) to Automatic Temp Control Mode
• Depress and hold Low button
• Depress and hold High button (in
combination with Low button)
• After both Low and High buttons
depressed for 2 seconds – transfer
to Automatic Temperature Control
Mode
* Note – Upon transfer from User Control
Mode to Automatic Temperature Control
Mode, the set point temperature on the
stove will default to the current room
temperature. Adjustments to the set
point temperature can be made using
the instructions below once transfer into
Automatic Temperature Control Mode is
complete.
Page 20 of 37
Page 23

Automatic Temperature Control Mode (Ac)
Automatic Temperature Control Mode (Ac) is
the self-regulating, operational mode of the
stove. In this mode, the software adjusts the
feed rate, as well as the exhaust/combustion
and circulation blower speeds according to
the heat required to bring your home up to the
desired set point temperature (as selected on
your stove).
Set Point Temperature Adjustment
(Automatic Temp Control Mode)
• Depress and hold Set button
• Depress High or Low button (in
combination with Set button) to
adjust set point temperature*
(depressing and holding the High or
Low button in combination with the
Set button will adjust the set point
temperature at a rapid rate)
* Once set point temperature has
been set 2.1 degrees or more
below the current room
temperature, the stove will
initiate its controlled shut down
procedure.
In Automatic Temperature Control Mode (Ac)
the display will cycle between the letters Ac to
confirm that the stove is in Automatic
Temperature Control Mode and the current
room temperature.
User Control Mode / Manual Control (Uc)
User Control Mode (Uc) allows you to select a
continuous heat setting on your stove
between 3 and 7 (levels 1 and 2 are to be
used for diagnostic testing purposes only at
this time). The stove will feed pellets and run
the exhaust/combustion and circulation
blowers at preset speeds regardless of room
temperature. User Control Mode 0 will shut
the stove down. If the stove is shut down in
User Control Mode, changing the User
Control Mode setting from 0, to any number
between 3 and 7 will initiate a start-up
sequence. The lowest burn rate setting is
number 3, the highest burn rate setting is
number 7. To change the User Control Mode
setting (while in User Control Mode) follow the
instructions below.
User Control Mode Adjustment
• Depress and hold Set button
• Depress High or Low button (in
combination with Set button) to
adjust the User Control Mode of the
stove (any number between 3 and
7)
• Selecting User Control Mode 0 will
shut down the stove
In User Control Mode (Uc) the display will
cycle between the letters Uc, to confirm that
the stove is in User Control Mode, the current
User Control Mode setting (0, 3-7) and the
current room temperature.
Set-up Mode - Feed Rate Adjustment
While in Automatic Temperature Control
Mode (Ac) it is possible to transfer into a setup mode, which enables the base feed rate of
the stove to be adjusted. If the stove is
operating in User Control Mode and the base
feed rate requires adjustment, the stove must
first be transferred into Automatic
Temperature Control Mode, then transferred
into Set-Up Mode. The base feed rate
adjustment made within set-up mode will
apply to all feed rate speeds of the stove. It is
necessary to be able to adjust the base feed
rate for each stove due to many factors,
including varying quality of fuel being burned,
the size of the area being heated within the
customer’s home, the type of installation, as
well as other factors. Set-up Mode allows the
base feed rate for each stove to be fine tuned
to offset the affect of these various factors.
Page 21 of 37
Page 24

To get into set-up mode follow the instructions
below
Enter Set-up Mode (from Automatic
Temperature Control Mode)
• Depress and hold High button
• Depress and hold Set button (in
combination with High button)
• Depress and hold Low button (in
combination with High and Set
buttons)
• After High, Set and Low buttons
depressed together for 2 seconds
– transfer to Set-up Mode
While in Set-up Mode, the stove will continue
to operate in Automatic Temperature Control
Mode.
When you transfer into set-up mode, the
current base feed rate setting (a number
between 1 and 15) of the stove will be
displayed, as a number, on the display. In
Set-up Mode, the base feed rate of the stove
can be adjusted up or down by selecting a
higher or lower base feed rate setting
number. Selecting a higher number will
increase the feed rate, selecting a lower
number will decrease the feed rate.
While in set-up mode, change the base feed
rate setting by following the instructions below
Base Feed Rate Setting Adjustment
• Depress and hold Set button
• Depress High or Low button (in
combination with Set button) to
adjust the base feed rate setting
(number between 1 and 15)
Once a new base feed rate setting has been
selected, follow the instruction below to
transfer out of Set-up Mode
Exit Set-up Mode
• Depress and hold High button
• Depress and hold Low button (in
combination with High button)
• After High and Low buttons have
been depressed together for 2
seconds – transfer out of Set-up
Mode
Upon transfer out of Set-up Mode, the new
base feed rate settings take effect. To further
adjust the base feed rate of the stove,
transfer back into Set-up Mode and go back
through the procedure outlined above.
Note: If the base feed rate is adjusted too
low, the fire may go out when the stove is
burning at the lowest feed rate speeds. If this
occurs, re-enter set-up mode and select the
next higher base feed rate setting.
If the base feed rate is adjusted too high, the
fire may have trouble keeping up with the rate
at which pellets are being dropped into the
burn pot (overfeed condition). If this occurs,
re-enter set-up mode and select the next
lower base feed rate setting.
Overheat Safety Switch
Your Buffalo Pellet Stove is equipped with an
overheat safety switch, which monitors the
internal temperature of the stove while it is
burning. If the internal temperature of the
stove exceeds what is considered safe, fuel
feed to the burn pot will temporarily be
suspended while the stove is given the
opportunity to cool to a safe temperature.
When the stove has cooled to an acceptable
level, pellet feed to the burn pot will resume.
If the time required for the stove to cool is
long enough for the fire to go out (before feed
to the burn pot is resumed), unburned pellets
may accumulate in the burn pot (the stove will
then display an FA1 error (identified below)
and go through a controlled shut down
procedure). If this occurs, the feed rate
setting at which the stove is being burned
must be reduced. The stove must be turned
off, given sufficient time to cool and then the
burn pot and burn chamber should be
thoroughly cleaned. Once the burn pot and
burn chamber are again ready for operation,
turn the stove on and immediately bring the
Page 22 of 37
Page 25

set point temperature down so that the stove
does not immediately go into a start-up
sequence. After the set point temperature
has been reduced to below the current room
temperature, transfer into set-up mode
(following the procedure identified above) and
reduce the feed rate setting from it’s current
setting. Transfer out of set-up mode and
resume normal stove operation.
FA1 Error
When an FA1 error has been detected, as a
safety precaution, the exhaust blower will run
for a minimum of 30 minutes. If at the end of
30 minutes, the software determines that the
exhaust blower is still removing hot air from
the burn chamber, the exhaust blower will
continue to run until all hot air has been
evacuated from the burn chamber.
Shut Down (Sd)
Once the stove has brought the current room
temperature 2.1 degrees above the current
set point temperature (in Automatic
Temperature Control Mode) or User Control
Mode 0 has been selected (in User Control
Mode) the stove will go through a controlled
Shut Down (Sd) procedure. When the stove
goes into Shut Down, the display will cycle
between the letters Sd, to confirm that the
stove is currently shutting down and the
current room temperature.
As a safety precaution. the exhaust blower
will run for a minimum of 30 minutes as part
of the Shut Down procedure. If at the end of
30 minutes, the software determines that the
exhaust blower is still removing hot air from
the burn chamber, the exhaust blower will
continue to run until all hot air has been
evacuated from the burn chamber. Also as
part of the standard shut down procedure, the
circulation blower will run (at it’s pre-shut
down speed) for a minimum of 30 minutes.
This is done to assure that all available heat
is transferred from the burn chamber to the
room during the shut down procedure. Once
the stove has cooled during shut down, it may
seem that the stove is blowing cool air into
the room, however, the circulation blower
draws room air to pass through the heat
exchanger tubes, the air passing through the
stove and being blown into the room is no
cooler than the current room air temperature.
The temperature of the air exiting from the
heat exchanger tubes may seem cooler than
the current room air temperature but it is
simply because the air is moving at a faster
velocity than the static room air (same
concept as how a fan keeps you cool in the
summer).
In Shut Down Mode (Sd) the display will cycle
between the letters Sd to confirm that the
stove is in the process of shutting down and
the current room temperature.
Manual Lighting Procedure (Without
Igniter)
• The steps identified below to manually light
your Buffalo Pellet Stove must be done in a
timely manner once the process is initiated.
Before starting this manual lighting procedure,
read through and fully familiarize yourself with
the entire sequence of steps which must be
followed to manually light the appliance.
Before manually lighting the stove, thoroughly
clean the burn chamber taking care to remove
any ash that has accumulated in the burn pot,
on the burn grate and in the burn box.
Place approximately a quarter cup of pellets
into the burn pot. Squeeze a tablespoon of
pellet starter gel on top of the pellets. Place
another half cup of pellets on top of the
pellets and starter gel in the burn pot.
Squeeze another tablespoon of pellet starter
gel on top of the second batch of pellets.
Place the artificial log into the log retention
slots. Push the burn chamber door closed
but do not latch it.
Turn power to the stove on. Immediately
lower the stove set point temperature (by
depressing the set button and low button at
the same time) to at least 3 degrees below
Page 23 of 37
Page 26

the current room temperature (this will ensure
that the stove will not go into a start-up
sequence). The exhaust motor will turn on.
Once the exhaust motor has turned on, open
the burn chamber door. Light the pellets by
reaching through the log with long wooden
match, handheld igniter or by some other
means taking care to keep your hands
sufficiently away from the flame which will
quickly spread across the surface of the
pellets.
Push closed, but do not latch, the burn
chamber door to provide the flame the
appropriate amount of air to establish a sound
fire in the burn pot. If the flame drops down
to a point that it looks like it is going to go out,
the burn chamber door has been closed too
far, open the burn chamber door slightly so
the fire continues to burn. Keeping the door
pushed closed, but not latched, watch the fire
until the pellets are clearly burning (3 to 4
minutes). Once the flame is established and
it is obvious that the pellets (not just the
starter gel) are burning, fully close the burn
chamber door by locking the door latch. If it
appears that the fire is in jeopardy of going
out, it is too soon to latch the burn chamber
door, unlatch the door and continue to
monitor the fire until it again appears that the
fire is well established and again try latching
the burn chamber door closed.
Continue to watch the pellets until 90% of the
pellets are fully engulfed in flames or have
become burning embers, glowing orange
(approximately 7 to 9 minutes from the time
the pellets were initially lit). Once 90% of the
pellets are completely burning or have turned
into glowing embers, bring the stove set point
temperature up to at least 4 degrees above
the current room temperature. This will
initiate a start up sequence. The stove will
indicate that it is going through a start-up
sequence by alternately showing the current
room temperature, then Su (Start-up) on the
display. From this point, the manual start-up
sequence will take between 11 and 16
minutes to complete.
Note: If the stove has been started manually
due to a faulty failed igniter, the stove must
be operated in User Control (manual) mode
until repairs are completed.
STOVE MAINTENANCE
By far the most important factor in obtaining
cost-effective, efficient, reliable heat from
your pellet-burning appliance is performing
regularly scheduled routine maintenance on
your stove. The cleaner you keep the
appliance, the better it will perform. Burning
wood pellets is an inexpensive way to
provide supplemental heat to your home,
however, burning any wood product requires
regular maintenance of the heating
appliance. The trade-off of having an
inexpensive, renewable energy heat source
in your home, is taking what amounts to a
few hours a month to maintain the integrity of
the heat source by performing specific
cleaning tasks.
Daily and/or Bi-weekly Stove Maintenance
• Shut down stove and let it cool a
minimum of 60 minutes.
• Once stove has cooled for 60 minutes,
toggle the on/off toggle switch to the
off position.
• Unplug the power cord from the back
of the stove.
Page 24 of 37
Page 27

Clean Heat Exchanger Tubes (daily, if
possible or at a minimum bi-weekly - every
6 to 9 bags of pellets)
• Open Heat Exchanger door above
Burn Chamber door to expose the
heat exchanger tubes and heat
exchanger scraper rod (leave Burn
Chamber door closed, Figure 8).
Figure 7
Figure 8
• Cautiously confirm that heat
exchanger scraper rod is cool
(Figure 9).
Figure 9
• Grasp heat exchanger scraper rod and
move rod up and down to clean
deposits from the outside of the heat
exchanger tubes. Use of both hands
will enable full even strokes to clean
deposits from the entire length of the
heat exchanger tubes (full stroke
length approximately 5.25”).
Figure 10
• If the scraper becomes stuck while
cleaning the heat exchanger tubes,
gently wiggle the rod left and right
while putting moderate upward or
downward pressure on the rod (use of
channel locks on the rod may be
required if the scraper becomes
securely lodged). If daily cleaning of
the heat exchanger tubes is not done,
eventually the heat exchanger tubes
will become encrusted with deposits,
not enabling the tubes to be cleaned at
all. Deposits accumulated on the heat
exchanger tubes will result in less
efficient transfer of heat from the burn
chamber to the home.
NOTE: If the heat exchanger tubes
are not cleaned on a regular basis by
following the above-identified
procedure, eventually deposits will
build-up to the point that the scraper
rod and attached scraper will not
move. All heat exchanger scrapers
and scraper rods are checked at the
factory before shipment to confirm
functionality. Repair of an immovable
heat exchanger scraper rod is cost
prohibitive. This repair is not covered
under warranty.
Page 25 of 37
Page 28

Inspect burn pot for clinkers/air
obstructions (Bi-weekly or every 6 to 9
bags of pellets)
• Vacuum or brush off any accumulation
of ash from the artificial log.
• Confirm that log is cool.
• Remove log from front of burn box by
grasping log on the sides and lifting
straight up.
• Look inside burn pot (Figure 11) to
check for any accumulation of ash or
clinkers. A clinker is a hard ash
formation that can be created when the
ash present in the burn pot begins to
melt.
Figure 11
• Use of a mirror and flashlight will allow
for close inspection inside the burn pot
area.
• Confirm that the burn pot area is cool
(room temperature).
• Using a screwdriver (or spoon) to
reach inside the burn pot, gently
dislodge and remove any clinkers that
may have formed inside the burn pot.
• There are air intake holes on the
bottom front side and back side of the
burn pot, these holes must be clear of
obstructions for an efficient burn.
Clear away any build up of carbon
and/or ash by scraping the bottom front
inside of the burn pot with a trowel,
paint scraper or spoon.
• Once any clinkers have been removed
from the burn pot and the front inside
burn pot air intake holes are clear, re-
inspect the burn pot for ash
accumulation. Remove any ash that
has accumulated with a Cheetah Ash
Vacuum or any alternate vacuum with
sufficient filtering to avoid putting ash
inside your home. If you do not have a
vacuum with sufficient filtering using a
narrow, firm bristle, nylon brush, brush
any ash that has accumulated in the
burn pot through the burn grate holes
to beneath the burn grate.
• Check the burn grate (located at the
bottom of the burn pot, viewed with
mirror and flashlight as demonstrated
above) for any blocked holes.
• If any holes in the burn grate have ash
or carbon build-up restricting airflow,
scrape the burn grate clean of ash
and/or carbon deposits with a
screwdriver, narrow trowel, narrow
paint scraper or spoon using care to
not touch the cartridge heater/igniter.
After clearing any obstructed burn
grate holes, vacuum the burn pot area
again (or brush the burn grate with a
narrow, firm bristle, nylon brush).
Clean Door Glass (As Needed)
• Clean glass by wiping with a clean dry
soft cloth.
• If glass is soiled such that it cannot be
cleaned with a dry cloth, use of gas
appliance glass cleaner is suggested.
• Close burn chamber and heat
exchanger door.
Once the identified daily maintenance
procedures have been completed, reinstall
the power cord into the back of the stove, turn
the power switch to the on position and
resume normal stove operation.
Page 26 of 37
Page 29

Weekly Stove Maintenance
In addition to the Bi-Weekly Stove
Maintenance procedures, perform the
following procedures once a week (or every
10 to 15 bags of pellets).
• Shut down stove and let it cool a
minimum of 60 minutes.
• Once stove has cooled for 60 minutes,
toggle the on/off toggle switch to the
off position.
• Unplug the power cord from the back
of the stove (as identified in the Daily
Stove Maintenance procedure above)
Clean Burn Pot, Burn Grate, Burn Box,
Burn Chamber (Weekly or every 10 to 15
bags of pellets)
• Open Burn chamber door.
• Using a small brush, brush any
accumulation of ash inside the burn
chamber (Figure 12) into the ash
pan/drawer. If preferred, vacuum any
accumulation of ash from the burn
chamber using a Cheetah Ash Vacuum
or alternate vacuum with sufficient
filtering to avoid putting ash inside your
home.
Figure 12
• Vacuum or brush off any accumulation
of ash from the artificial log.
• Confirm that log is cool.
• Remove log from front of burn box by
grasping log on the sides and lifting
straight up.
• Confirm that burn pot area is cool.
• Vacuum the burn pot area thoroughly.
• Remove the wing nut at the front of the
burn pot (use of pliers may be
necessary).
Figure 13
• Lift the front of the burn pot up, remove
the burn pot from the burn box.
• Once the burn pot is removed from the
burn box, thoroughly clean it using a
firm bristle wire or nylon brush taking
care to ensure that all burn pot holes
are clear of obstruction.
• Locate the burn grate jog switch
(Figure 14) found on the right side of
the stove, just below the right side
panel (switch is located on the bottom
lip of the stove frame, pointing
downward).
Figure 14
• Depress the switch to move the grate
and grate rod (power cord must be
plugged in but the stove power should
be turned off).
Page 27 of 37
Page 30

• When the grate jog switch is
depressed, the circulation blower will
turn on and you will see the grate rod
(which extends through the front of the
burn box) slowly moving.
• The grate rod will move forward and
back while the grate jog switch remains
depressed.
• Looking inside the burn box, keep the
switch depressed until the grate and
grate rod are both in their forward most
position.
• When the grate is in its forward most
position, release the grate jog switch to
stop the movement of the grate.
• Reach inside the burn box and remove
the grate by lifting it straight up.
• Thoroughly clean the grate using a firm
bristle wire or nylon brush taking care
to ensure that all grate holes are clear
of obstruction.
• Thoroughly vacuum the inside of the
burn box (Figure 15).
Figure 15
• Vacuum all ash from the two air
combustion channels that extend
directly back from the burn box (Figure
16).
Figure 16
• Vacuum any ash that may have
accumulated inside the front edge of
the igniter tube.
• Put the burn grate back into the burn
box by placing the grate on the stay
clean grate rod, straddling it over the
stay clean grate rod spacer.
• Put the burn pot back into the burn box
by placing the top rear upper edge of
the burn pot under the small tabs
located near the top rear edge of the
burn box.
• Once the back of the burn pot is
located under the burn box retention
tabs, rotate the front of the burn pot
downward to seat it in the burn box.
• While pushing the front of the burn pot
downward and pushing the back
angled surface of the burn pot toward
the rear of the stove reinstall the wing
nut to secure the burn pot in place.
• Inspect the burn pot installation to
ensure that there is not a gap between
the back top edge of the burn pot and
the burn box (Figure 17). The rear
upper edge of the burn pot should be
snug against the back of the burn box.
If it appears that there is a gap, loosen
the wing nut and attempt reinstallation
of the burn pot. A gap between the
back of the burn pot and burn box will
have a slight adverse effect on the
efficiency of the stove.
Page 28 of 37
Page 31

Figure 17
• Install Log
o Place front lower edge of log in the
log retention slots at the front of the
burn box.
o Drop log into burn box slots until
they bottom out.
• Close burn chamber door.
• Resume normal stove operation.
Clean Door Glass Airwash - Top and
Bottom (weekly or every 10 to 15 bags)
• Open the door to the burn chamber.
• Using a narrow, firm bristle, nylon
brush, clean along the glass along
both the top and bottom metal
guarding (the entire length of all three
pieces of glass, Figures 18 and 19).
Figure 18
Figure 19
• Vacuum along the same length of
glass, both top and bottom to remove
any ash or other deposits that have
been brushed loose along the length of
glass (Figures 20 and 21).
Figure 20
Figure 21
Page 29 of 37
Page 32

• The gap along the top and bottom of
the glass is called the airwash. Air
enters the burn chamber along this
length of glass, washes along the inner
surface of the glass and helps keep
the glass clean during stove operation.
Not cleaning the airwash on a weekly
basis may cause your glass to become
prematurely soiled.
Once the identified weekly maintenance
procedures have been completed, reinstall
the power cord into the back of the stove, turn
the power switch to the on position and
resume normal stove operation.
Semi-Weekly Stove Maintenance
In addition to the Bi-weekly and Weekly Stove
Maintenance procedures, perform the
following procedure once every other week
(or every 20 to 30 bags of pellets).
Ash trap door cleanout (Weekly or every
10 to 15 bags)
• There are ash trap compartments
located behind the burn chamber,
which trap and prevent excess ash
from exiting the stove.
• There are two ash trap clean out doors
located on the right and left side of the
stove (Figure 22), below the fire brick
which enable you to clean
accumulated ash from the ash trap
compartments located behind the burn
chamber.
Figure 22
Figure 23
• Using a 5/16” nutdriver or socket
extension remove the ash trap
cleanout doors (Figure 23).
• With a trowel pull the ash that has
accumulated behind that ash trap
doors forward to drop into the ash pan
or vacuum any ash that has
accumulated behind the ash trap doors
with a Cheetah Ash Vacuum or any
alternate vacuum with sufficient
filtering to avoid putting ash inside your
home.
• After all ash has been removed from
behind the ash trap cleanout doors,
reinstall the cleanout doors using a
5/16” nutdriver or socket extension.
Ash trap door cleanout may not be
required every week or 10 to 15 bags
depending on various factors. We
suggest cleaning out behind the ash trap
doors weekly until you can get a feel for
the required cleaning frequency. Ash
trap doors should be cleaned before the
cavities behind the ash trap doors
become full. The picture on the right
above shows the ash trap doors 2/3 to
3/4 full, which is an appropriate time to
clean them out.
--------------------
Page 30 of 37
Page 33

Monthly Stove Maintenance
In addition to the Bi-weekly, Weekly and
Semi-Weekly Stove Maintenance procedures,
perform the following procedure once a
month (or every 40 to 50 bags of pellets).
• Shut down stove and let it cool a
minimum of 60 minutes.
• Once stove has cooled for 60 minutes,
toggle the on/off toggle switch to the
off position.
• Unplug the power cord from the back
of the stove (as identified in the Daily
Stove Maintenance procedure above)
Empty ash pan/drawer (Monthly or every
40 to 50 bags)
• Using a 7/32” Allen head wrench
remove the two Allen heat bolts that
hold the ash pan/drawer in place
(Figure 24).
Figure 24
• After the Allen head bolts have been
removed, pull the ash pan straight
back from the stove to remove it.
• Dispose of the ashes from the ash
pan/drawer in a fireproof container.
• Vacuum the inside of the ash
pan/drawer area (the space that the
ash pan was just removed from).
• Before reinstalling the ash pan, check
the gasket on the inside of the ash
pan/drawer to confirm that it is securely
in place.
• To reinstall the ash pan simply slide
the pan back into the stove pedestal
and reinstall the 7/32” Allen head bolts.
• Snug the ash pan in place taking care
to not over tighten the bolts and deform
the sides of the ash pan cover, this
Page 31 of 37
may result in an improper seal of the
ash pan which in turn can lead to less
than optimum burn conditions.
Fresh Air Intake (Monthly or every 40 to 50
bags)
• Inspect air intake to be sure that it is
free of any obstructions.
Semi-Annual Maintenance Procedure
In addition to the Bi-weekly, Weekly and
Monthly Stove Maintenance procedures,
perform the following procedure twice a
heating season (or once every 50 to 75bags
of pellets).
Inspect and Clean Exhaust Vent System
(Every 50 to 75 bags, 1 to 1½ tons of
pellets)
• Twice a season (or every 50 to 75
bags, 1 to 1½ tons) it is necessary to
inspect and clean all exhaust vent
piping.
• To loosen and dislodge any ash that
has accumulated in the vent pipe, tap
lightly along all vertical lengths of pipe.
• Open and remove the bottom of all
“T”s in your exhaust vent system to
remove any accumulated ash.
• Entering the exhaust pipe from the
bottom of all “T”s in your exhaust
system, vacuum as much ash out of all
exhaust pipe as can be reached with a
vacuum.
• Reinstall the bottom of any “T”s that
have been removed, using aluminum
tape to seal all “T” end caps.
• Go to the exit end of the exhaust
system (where it vents outside the
home) and remove the end cap.
• Vacuum as much ash out of the
exhaust pipe as can be reached with a
vacuum.
• Reinstall the end cap on the pipe.
Improper or neglected cleaning of
exhaust system can lead to less than
optimum performance, premature
component failure and can be
EXTREMELY DANGEROUS.
Page 34

Annual Stove Maintenance
Before firing the stove for the first time each
heating season, perform all of the above
maintenance/cleaning procedures; in addition,
perform the following two simple maintenance
procedures.
NOTE: It is extremely important to thoroughly
inspect and clean the exhaust system prior to
the beginning of the each heating season.
This must be done to both clean any
accumulated ash and/or soot that may have
accumulated, but also to confirm that it is free
of any obstructions, such as bird or rodent
nests which will have a significant detrimental
effect on the performance of the appliance.
• Shut down stove and let it cool a
minimum of 60 minutes.
• Once stove has cooled for 60 minutes,
toggle the on/off toggle switch to the
off position.
• Unplug the power cord from the back
of the stove (as identified in the Daily
Stove Maintenance procedure above)
Oil Circulation Blower
• Remove Right Side Panel
o Loosen the two screws (if your side
panel is slotted) or remove the two
screws (if your side panel has
holes) at the back of the right side
panel of the stove (right as you are
looking at the stove from the front)
that hold the right side panel in
place.
o Open the burn chamber door and
heat exchanger door.
o Pull the back of the right side panel
away from the stove 1” to 2”.
o Push forward on the side panel
(toward the front of the stove) to
free it from the stove; you may
need to “bump” the side panel
forward with the palm of your hand
to free it.
• Locate the oil port on the circulation
blower (Figure 25)
Page 32 of 37
Figure 25
• Place two drops of oil into the oil port
on the circulation blower
• Reinstall Right Side Panel
o Open the burn chamber and heat
exchanger doors.
o Holding the rear of the side panel
1” to 2” away from the side of the
stove, position the front of the
panel around the door latch.
o Keeping the rear of the side pane 1
to 2” away from the side panel of
the stove, slide the panel forward
until the inner front surface of the
side panel bottoms out against the
outer surface of the stove.
o Holding the front of the panel flush
against the side of the stove, slide
the panel toward the rear of the
stove. The front of the panel has
two slots, which will catch behind
Phillips head screws mounted on
the side of the stove (one near the
top, one near the bottom) to hold
the front of the panel in place.
o After the front of the panel is
secured behind the two Phillips
head screws, push the back lip of
the panel around the back of the
stove.
o Reattach the back of the side panel
to the stove using two screws
mounted through either holes or
slots on the back of the side panel.
Page 35

Oil Exhaust Blower
• Remove Left Side Panel
o Loosen the two screws (if your side
panel is slotted) or remove the two
screws (if your side panel has
holes) at the back of the left side
panel of the stove (left as you are
looking at the stove from the front)
that hold the left side panel in
place.
o Open the burn chamber door and
heat exchanger door about half
way (45 degrees).
o Pull the back of the left side panel
away from the stove 1” to 2”.
o Push forward on the side panel
(toward the front of the stove) to
free it from the stove; you may
need to “bump” the side panel
forward with the palm of your hand
to free it.
• Locate the oil port on exhaust blower
(figure 26).
Figure 26
• Put two drops of oil into oil port on the
exhaust blower.
• Reinstall left side panel.
o Open the burn chamber and heat
exchanger doors to approximately
45 degrees.
o Holding the side panel with two
hands, align the front of the side
panel so it fits around the hinges of
both doors.
o Moving the front of the panel as far
forward as possible (front of panel
just behind the end of the burn
chamber and heat exchanger
doors) push the front of the panel
flush against the side of the stove.
o Holding the front of the panel flush
against the side of the stove, slide
the panel toward the rear of the
stove. The front of the panel has
two slots, which will catch behind
Phillips head screws mounted on
the side of the stove (one near the
top, one near the bottom) to hold
the front of the panel in place.
o After the front of the panel is
secured behind the two Phillips
head screws, push the back lip of
the panel around the back of the
stove.
o Reattach the back of the side panel
to the stove using two screws
mounted through either holes or
slots on the back of the side panel.
• After the stove has been fully
reassembled, reattach the power cord
• Toggle the power switch to the “On”
position to turn the power on and
immediately hold the set button and
low buttons down to lower the set
temperature of the stove. Lower the
set temperature to the lowest available
setting, 50F.
• The exhaust blower will turn on and
run for 30 minutes. This 30 minutes of
run time will give the oil applied to the
exhaust motor sufficient time to
thoroughly lubricate the exhaust motor.
• After 30 minutes the exhaust blower
will turn off.
Resume normal stove operation.
Page 33 of 37
Page 36

Troubleshooting
Problem Possible Cause Required Action
Power on, stove not
firing
Stove goes into startup (Su) but not firing
(eventual FA1 error)
Stove starts, runs,
then at some point
FA1 faults (no
unburned pellets
remain in the burn pot)
Stove starts, runs,
then at some point
FA1 faults (unburned
pellets found in burn
pot)
Set point temperature is less than 2.1
degrees above current room temperature
Hopper empty of pellets Fill hopper with pellets
Auger was not primed at time of start-up Clean burn pot, prime auger, restart stove
Burn pot dirty Clean burn pot
No fuel feed See No Fuel Feed below
Failed exhaust blower snap switch
Hopper empty of pellets Fill hopper with pellets
Feed rate set too low
No fuel feed See "No fuel feed" below
Overheat condition, feed rate set too high
No power to the stove
Hopper empty of pellets Fill hopper with pellets
Rear hopper lid open Close rear hopper lid
Burn chamber door not completely latched Close burn chamber door
Ash pan not securely installed Securely install ash pan
Increase set point temperature or transfer into
and operate stove in User Control Mode
Inspect, test and replace exhaust blower snap
switch
Increase base feed rate of stove using "Set-up
Mode"
Reduce base feed rate of stove using "Set-up
Mode"
Confirm that stove is plugged into a grounded
120V AC electrical outlet and the outlet is
supplying power to the appliance
No fuel feed
Exhaust blower and
circulation blower will
not turn off
Exhaust blower runs
with no fire in the
stove
Vacuum line broken, loose or obstructed Inspect, reattach, clear or replace vacuum line
Exhaust vent system plugged or obstructed Inspect and clean exhaust vent system
Exhaust blower requires lubrication
Auger jammed
Auger motor failure Test auger motor, replace if failed
Vacuum switch failure Test vacuum switch, replace if failed
Exhaust blower failure Test exhaust blower, replace if failed
Stove cooling down after shut down (both
may remain on for 30 mins or longer)
Power to stove recently turned on, exhaust
blower will run for 30 mins at power-up
Stove has FA1 faulted (no fire in the stove),
exhaust blower will run for 30 mins
Stove has recently shut down, exhaust
blower will run for 30 mins
Lubricate exhaust blower as identified in this
manual
Inspect auger and clear jam (power cord
disconnected)
None, normal operation
None, normal operation
See "Stove not firing" section above
None, normal operation
Page 34 of 37
Page 37

Troubleshooting (contd.)
Problem Possible Cause Required Action
Lazy or dark orange
flame, pellets piling up
in the burn pot
Short flame at high
feed rates
Flame goes out at
lower feed rates
Smell of smoke in
home
Circulation blower
continuously runs on
high
Burn pot, burn grate, burn pot dirty restricting
air to the fire
Ash traps filled with ash Clean ash traps
Feed rate too high
Poor quality fuel (moist, dirty, high in fines) Acquire and use better quality fuel
Exhaust vent system plugged or obstructed Inspect and clean exhaust vent system
Feed rate set too low
Natural draft on venting system may require
that an optional air damper be installed and
utilized
Poor quality fuel Acquire and use better quality fuel
Feed rate set too low
Power to the stove has been lost Restore power to the stove
Joints in vent pipe not properly sealed
Airflow through the exhaust vent system has
been blocked or severely restricted
Unit has gone into an overheat condition
Clean burn pot, burn grate, burn box
Reduce base feed rate of stove using "Set-up
Mode"
Increase base feed rate of stove using "Set-up
Mode"
Contact dealer to obtain Buffalo Pellet Stove
external air damper
Increase base feed rate of stove using "Set-up
Mode"
Inspect venting system for leaks and seal with
high temperature RTV silicone sealant
Inspect and clean exhaust vent system
Allow stove to cool, then decrease base feed
rate using "Set-up Mode"
Page 35 of 37
Page 38

Buffalo Pellet Stoves Limited Warranty
Buffalo Pellet Stoves/Snyder Manufacturing honors a 5-year limited warranty on all steel fabricated parts and a 1-year
warranty on all electrical components. This warranty is non-transferable and will be honored to the original purchaser
effective from the date of purchase (dated sales receipt confirming purchase from an authorized Buffalo Pellet Stove
dealer required).
The following items are not covered under this warranty – burn pot, igniter, heat exchanger tube scraper (and attached
rod), glass, paint, all gaskets and seals, plating on door trim.
This warranty is null and void if your Buffalo Pellet Stove has not been installed, operated, cleaned and maintained in
strict accordance with all guidelines identified within this owner’s manual. This warranty does not cover damage,
component failure or reduced performance due to misuse, mishandling, neglect, accident, alteration or willful abuse.
The limited warranty registration card must be completely filled out, signed and returned to Snyder Manufacturing
within 30 days of purchase in order for this warranty to be valid.
All claims under this limited warranty must be made through the dealer from which the stove was purchased. Check
with dealer in advance for any costs to you when arranging a warranty call. Mileage or service charges are not
covered by this warranty. Service charges vary from dealer to dealer. If upon inspection the dealer indicates that a
limited warranty claim is justified and all conditions of this limited warranty have been met, the manufacturer’s
responsibilities and liabilities shall be to repair or replace, at the manufacturer’s option, the defective part(s). All costs
associated with removal, shipment to and from the dealer or manufacturer, any losses incurred during shipment and
reinstallation, and any other losses incurred due to the appliance being removed and reinstalled, shall be covered by
the appliance owner.
Conditions and Exclusions
o There is no warranty, written or implied, on the performance of this Buffalo Pellet Stove. The manufacturer has no
control over the installation, day-to-day operation, cleaning, maintenance or quality of fuel burned in this stove. All
above identified factors are key to the performance of the appliance and are not under the control of the
manufacturer.
o This warranty does not cover operational-related problems and damage caused by various issues such as but not
limited to
1. Overfiring (caused by excessive feed rate).
2. Damage caused by burning any heating medium other than wood pellets.
3. Environmental conditions that restrict free flow of exhaust gasses from exiting the exhaust system (issues
such as, but not limited to, downdraft or back draft, negative air pressure within the home caused by other
mechanical systems within the home such as furnaces, clothes dryers, etc., improper ventilation, nearby
trees or structures that can inhibit the free exit of exhaust gasses).
o In order for this warranty to be valid, the appliance must be installed by a qualified installer (trained pellet stove
technician).
o This warranty is null and void if:
1. Appliance has been operated in an environment contaminated by Chlorine, fluorine or other damaging
chemicals.
2. Appliance has been subjected to submersion in water or prolonged exposure to dampness or high humidity
conditions.
o This warranty does not cover damage, component failure or reduced performance due to misuse, mishandling,
neglect, accident, improper installation, alteration or willful abuse.
o Buffalo Pellet Stoves and Snyder Manufacturing is free of liability for any damages caused by this heating
appliance. Incidental of consequential damages are not covered by this warranty.
o This warranty is null and void if the appliance’s serial number has been removed or if it is found that the serial
number has been changed with that of another identical appliance.
o This warranty is not valid for appliances used for commercial use.
o This warranty is not valid if the appliance has not been purchased from an authorized Buffalo Pellet Stove dealer.
o There is no warranty on damage caused by corrosion.
Page 36 of 37
Page 39

Buffalo Pellet Stoves Limited Warranty (contd.)
Neither the manufacturer, nor the suppliers to the purchaser, accepts responsibility, legal or otherwise for the
incidental or consequential damage to property or persons resulting from the use of this product. Any warranty implied
by law, including but not limited to implied warranties of merchantability or fitness, shall be limited to one (1) year from
the date of original purchase. Whether a claim is made against the manufacturer based on the breach of this warranty
or any other type of warranty expressed or implied by law, manufacturer shall in no event be liable for any special,
indirect, consequential or other damages of any nature whatsoever in excess of the original purchase price of this
product. All warranties by manufacturer are set forth herein and no claim shall be made against manufacturer on any
oral warranty or representation.
Some states do not allow exclusion of limited, incidental or consequential damages or limitations of implied warranties,
so the limitations or exclusions set forth in this limited warranty may not apply. This limited warranty gives you specific
legal rights and you may have other rights, which vary from state to state.
Page 37 of 37
Page 40

Page 41

Date of Purchase
____/____/20____
Last Name:
_________________________
First Name:
________________
Middle Initial:________
Address:
__________________________ __________________
City:
_________________________
State: ____________ Zip Code: ___________
Home Phone:
_____-_____-________
Email Address:
___________________
Model:
B-100
B-200
Serial Number:
___________________
Dealer Name: _________________________ Installer:
____________________
Snyder Manufacturing, Inc
255 Rochester Street
Salamanca, NY 14779
716-945-0354
“Buffalo Pellet Stove”
Warranty Registration Information Card
Please fill out this card and return to Snyder Manufacturing, Inc in order to continue to receive
warranty coverage and any notices about your Buffalo Pellet Stove.
Page 42

Snyder Manufacturing, Inc
255 Rochester Street
Salamanca, NY 14779
Snyder Manufacturing, Inc
C/O Warranty Registration
255 Rochester Street
Unit #1
Salamanca, NY 14779
 Loading...