

Page 1
WCR-GN Firmware Version: WCR-GN Ver.1.04 (R4.20/B1.13) / WCR-HP-GN Ver.1.00 (R0.06/B1.13)
Router Setting (For: PCCW, HGC PPPoE User)
Last Updated 28/04/2011 Hornington KB: http://kb.hornington.com
WCR-GN/WCR-HP-GN PPPoE Setting Page 1
Windows user can follow the Preparation for Buffalo Router
Setup Guideline first.
http://support.hornington.com/kb/question.php?ID=624
Hardware Setup of WCR-GN Router (PPPoE):
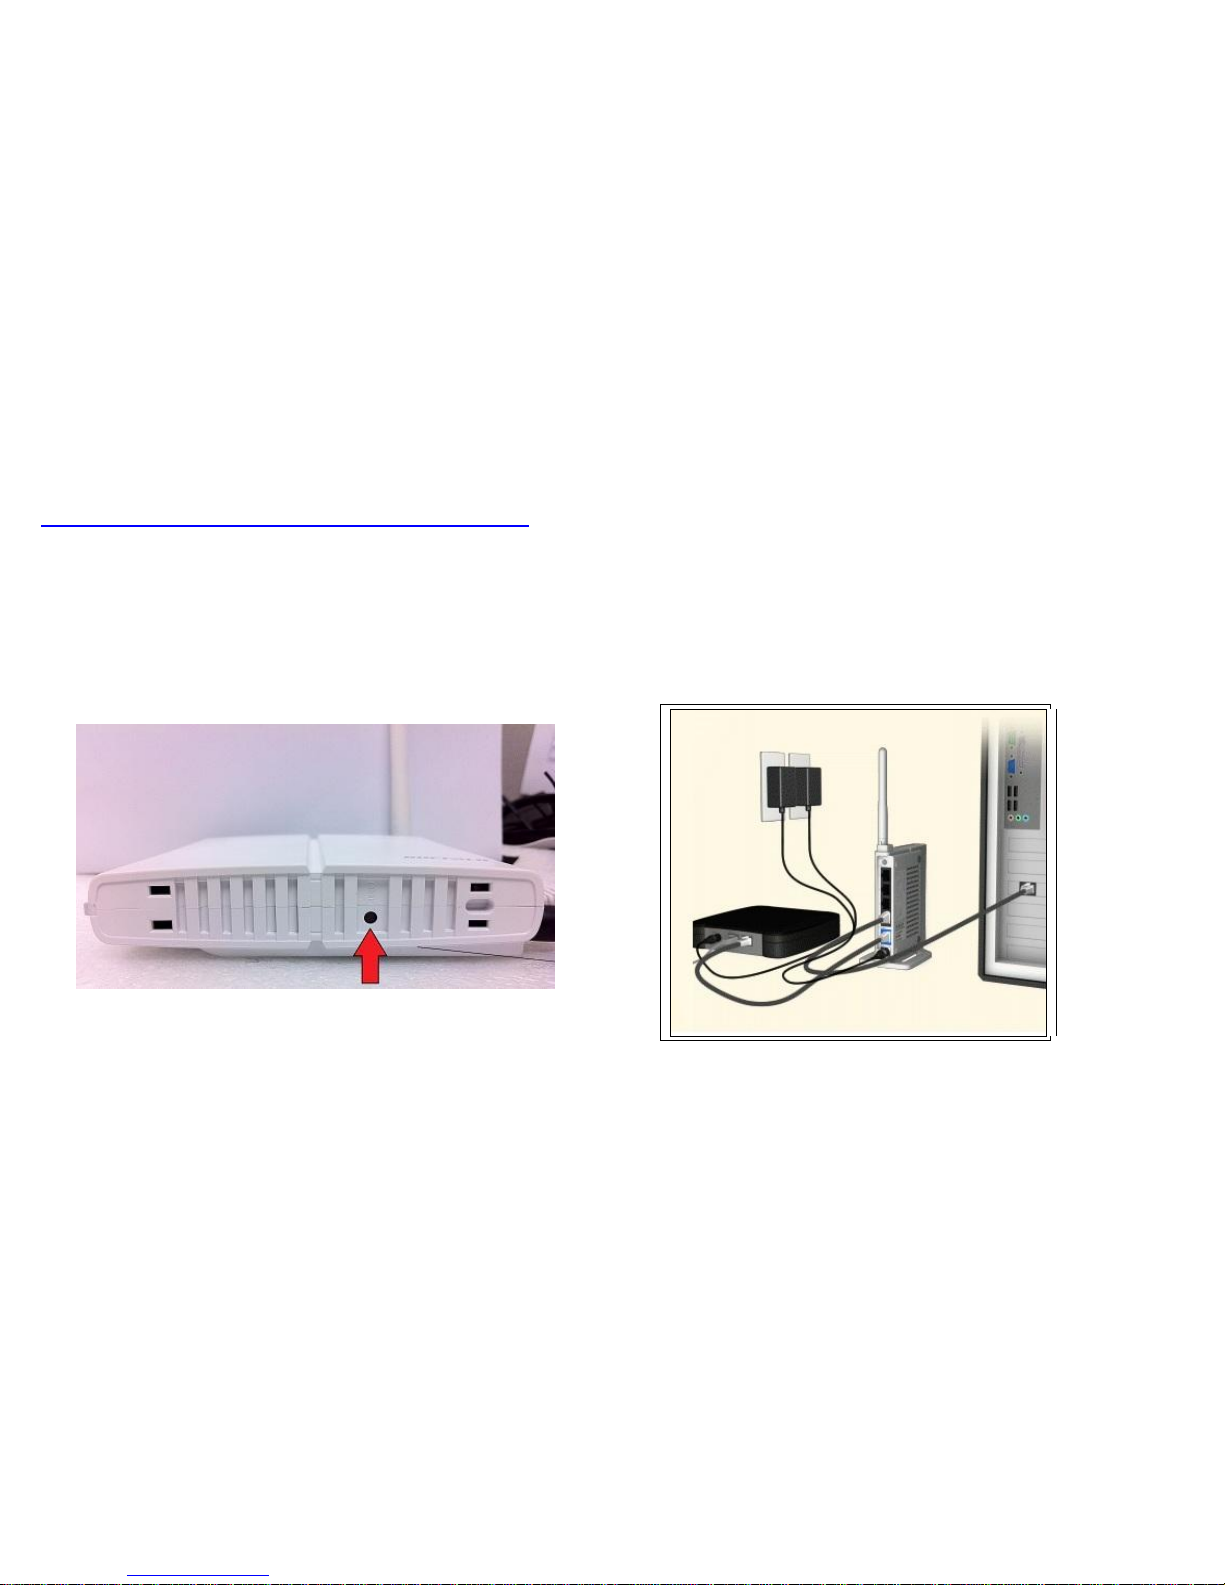
1. Power on Buffalo Router, and wait about 1 minute until the “Diag”
indicator off.
2. To reset the router, please insert “RESET” hole by a paper clip for about
10 seconds, and wait for 1 minute. The “Power”, “Wireless” and
“Router” indicators will be ON, and other indicator will be OFF.
3. Please connect your broadband service with a network cable
(Or from DSL modem) to the “Internet” port on the ROUTER.
Then use another network cable to connect “LAN1” port on the
ROUTER to the Ethernet adapter on your PC.
Page 2
WCR-GN Firmware Version: WCR-GN Ver.1.04 (R4.20/B1.13) / WCR-HP-GN Ver.1.00 (R0.06/B1.13)
Router Setting (For: PCCW, HGC PPPoE User)
Last Updated 28/04/2011 Hornington KB: http://kb.hornington.com
WCR-GN/WCR-HP-GN PPPoE Setting Page 2
Buffalo Router WCR-GN Internet Connection Setup:
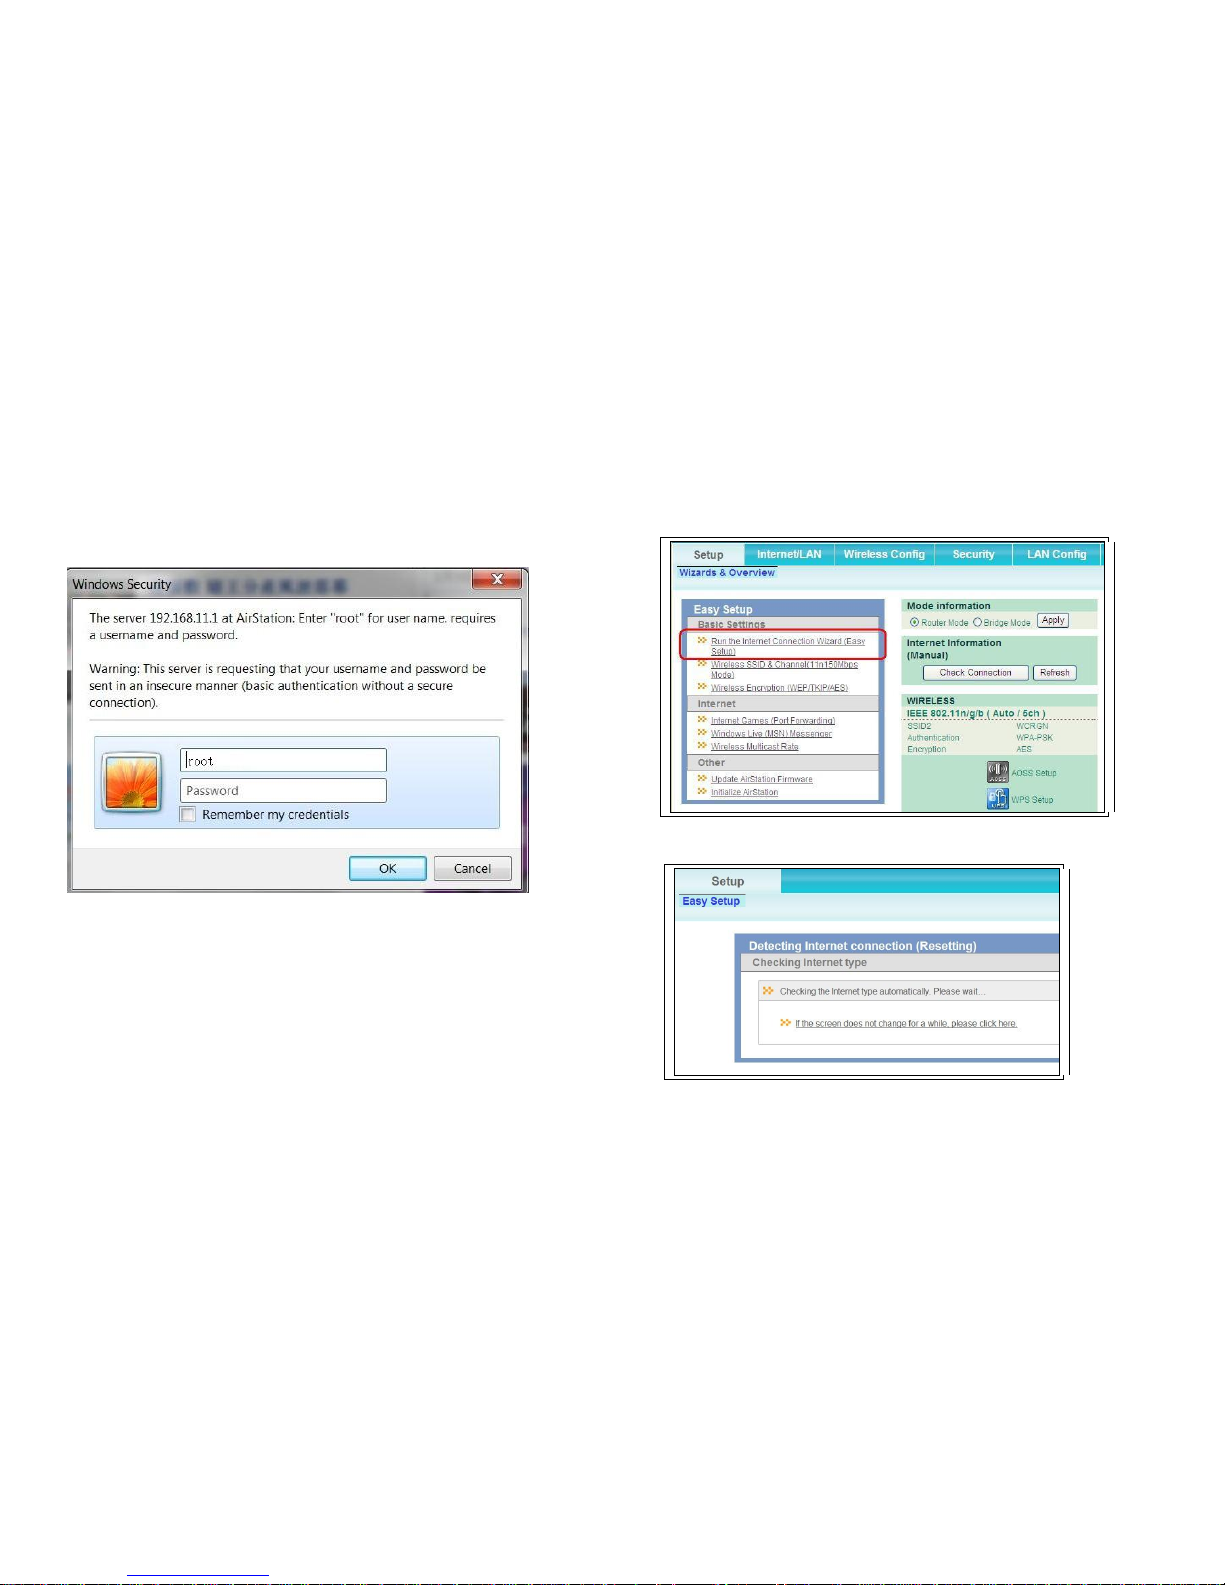
4. Launch Web Browser, enter http://192.168.11.1 in address bar and then
press Enter. Then type username as “root”, password leaves as blank
5. Press “Run the Internet Connection Wizard (Easy Setup)”
6. Router is now detecting Internet Connection.
Page 3

WCR-GN Firmware Version: WCR-GN Ver.1.04 (R4.20/B1.13) / WCR-HP-GN Ver.1.00 (R0.06/B1.13)
Router Setting (For: PCCW, HGC PPPoE User)
Last Updated 28/04/2011 Hornington KB: http://kb.hornington.com
WCR-GN/WCR-HP-GN PPPoE Setting Page 3
7. After a few moments, the following page will be displayed
and asking for “Username/Password”. Please input the login username
(e.g. xxxx@netvigator.com or xxxx@hgcbroadband.com)
and password (twice) of your broadband service now.
Then click “Next”.
8. Wait for about 1 minute.
If “Check the Internet connection” process is successful,
the following page will be displayed.
Click “Back” to finish setup.
9. If the login information is incorrect, the following page will be displayed.
Please confirm login information. Click “Back” button to return previous
page, re-enter login username/password (twice), and then click “Next” to
check internet connection again.
Page 4

WCR-GN Firmware Version: WCR-GN Ver.1.04 (R4.20/B1.13) / WCR-HP-GN Ver.1.00 (R0.06/B1.13)
Router Setting (For: PCCW, HGC PPPoE User)
Last Updated 28/04/2011 Hornington KB: http://kb.hornington.com
WCR-GN/WCR-HP-GN PPPoE Setting Page 4
10. Choose “Internet/LAN”
- On “Internet” Page Choose “Use PPPoE Client” behind the
“Method of Acquiring IP Address” field.
- Click “Apply” Button to save setting
11. Click “Wireless Config”
- Under page “WPS”, please UNCHECK “Enable” option behind
“WPS”
- Click “Apply” to save setting
-
Page 5

WCR-GN Firmware Version: WCR-GN Ver.1.04 (R4.20/B1.13) / WCR-HP-GN Ver.1.00 (R0.06/B1.13)
Router Setting (For: PCCW, HGC PPPoE User)
Last Updated 28/04/2011 Hornington KB: http://kb.hornington.com
WCR-GN/WCR-HP-GN PPPoE Setting Page 5
12. Click “Basic (11n/g/b)” Page,
- Behind “Wireless Channel”, Please do not use “Auto Channel”,
Choose 1, 6, 11, or another channel
- Please uncheck the “Use” at “SSID2”.
- Then click “Apply” button twice to save the settings.
13. Wait about 1 minute
You can check the Router’s default wireless network ID (SSID) at the side of
the router’s label.
For related topics about WCR-GN, please refer to Hornington
Knowledge Base: http://support.hornington.com/kb/category.php?catID=143
 Loading...