

Buderus Logano G334 X, Logano G334 X-73, Logano G334 X-92, Logano G334 X-116, Logano G334 X-132 Instructions Manual

6304 2381 – 09/2005 US/CA For heating engineers
Please read carefully before conversion
Propane Conversion Kit
Instructions
Logano G334 X gas-fired boiler
This conversion kit and the accompanying instructions are for conversion of
G334 X gas-fired boilers from natural gas to propane.
Required Input Rates
G334 X-73
301 MBtu/hr
G334 X-92
378 MBtu/hr
G334 X-116
476 MBtu/hr
G334 X-132
541 MBtu/hr
WARNING!
This conversion kit is intended for use by a
qualified service company only as
specified by the manufacturer’s
instructions and the current applicable
rules and regulations of the local
authorities and the regulations of
NFPA54, CAN/CGA B149.1 and 2,
Installation Code, must also be observed.
If these instructions are not followed
exactly, a fire, explosion or release of
carbon monoxide may occur with serious
property damage or loss of life and serious
injury. The heating contractor is liable for
correct conversion of the heating system
with this conversion kit.
CAUTION!
Before converting the heating system to a
different type of gas the gas line must first
be shut off and then the power to the
heating system must be disconnected.
Note: Please keep these instructions for future reference.

Contents
2
Instructions for conversion kit for Logano G334 X gas-fired boiler • Issue 09/2005
We reserve the right to make any changes due to technical modifications.
1Safety. . . . . . . . . . . . . . . . . . . . . . . . . . . . . . . . . . . . . . . . . . . . . . . . . . . . . 3
1.1 Correct use . . . . . . . . . . . . . . . . . . . . . . . . . . . . . . . . . . . . . . . . . . . . . . . 3
1.2 Notes structure. . . . . . . . . . . . . . . . . . . . . . . . . . . . . . . . . . . . . . . . . . . . . 3
1.3 Please observe these notes. . . . . . . . . . . . . . . . . . . . . . . . . . . . . . . . . . . . . 3
2 Scope of delivery . . . . . . . . . . . . . . . . . . . . . . . . . . . . . . . . . . . . . . . . . . . . 3
3 Conversion to propane . . . . . . . . . . . . . . . . . . . . . . . . . . . . . . . . . . . . . . . 4
4 Start-up instructions . . . . . . . . . . . . . . . . . . . . . . . . . . . . . . . . . . . . . . . . . 9
4.1 Making boiler ready for operation . . . . . . . . . . . . . . . . . . . . . . . . . . . . . . . . 10
4.2 Then carry out start-up procedures. . . . . . . . . . . . . . . . . . . . . . . . . . . . . . . . 11
Safety 1
3
We reserve the right to make any changes due to technical modifications.
Instructions for conversion kit for Logano G334 X gas-fired boiler • Issue 09/2005
1 Safety
Observe these instructions for your safety.
1.1 Correct use
The conversion set is supplied for conversion of the
G334X gas-fired heater from natural gas to propane.
1.2 Notes structure
Additional symbols for identification of dangers and user
instructions.
1.3 Please observe these notes
2 Scope of delivery
1. Honeywell gas solenoid valve conversion kit
# 393 691, comprising:
– black safety screw
– pressure adjustment screw
– red spring
– yellow label for gas valve
2. 2 BBR 12 ignition gas orifices
3. main gas orifices and seals
4. unit label (to be filled out and attached to the unit)
5. Technical documents
WARNING!
RISK TO LIFE
Identifies possible dangers emanating
from a product, which might lead to serious
injury or death if appropriate care is not
taken.
WARNING!
RISK TO LIFE
from electric shock.
USER NOTE
Tip for the optimum utilization and setting
of the control(s) plus other useful
information.
WARNING!
RISK TO LIFE
from explosion of flammable gases.
z Never work on gas lines unless you are
licensed for this type of work.
WARNING!
RISK TO LIFE
from electric shock.
z Disconnect the power supply to the
heating system before conducting any
work on it, e.g. switch off the heating
emergency switch outside the boiler
room.
z It is not sufficient just to switch off the
control.
4
Instructions for conversion kit for Logano G334 X gas-fired boiler • Issue 09/2005
We reserve the right to make any changes due to technical modifications.
Conversion to propane3
3 Conversion to propane
Read the instructions before conversion for your safety.
The following instructions must be followed for
conversion of the boiler to propane:
1. If the boiler has been operating, close the gas valve.
Otherwise continue with step 3.
2. Disconnect heating system from the power supply
and set the thermostat to the lowest setting.
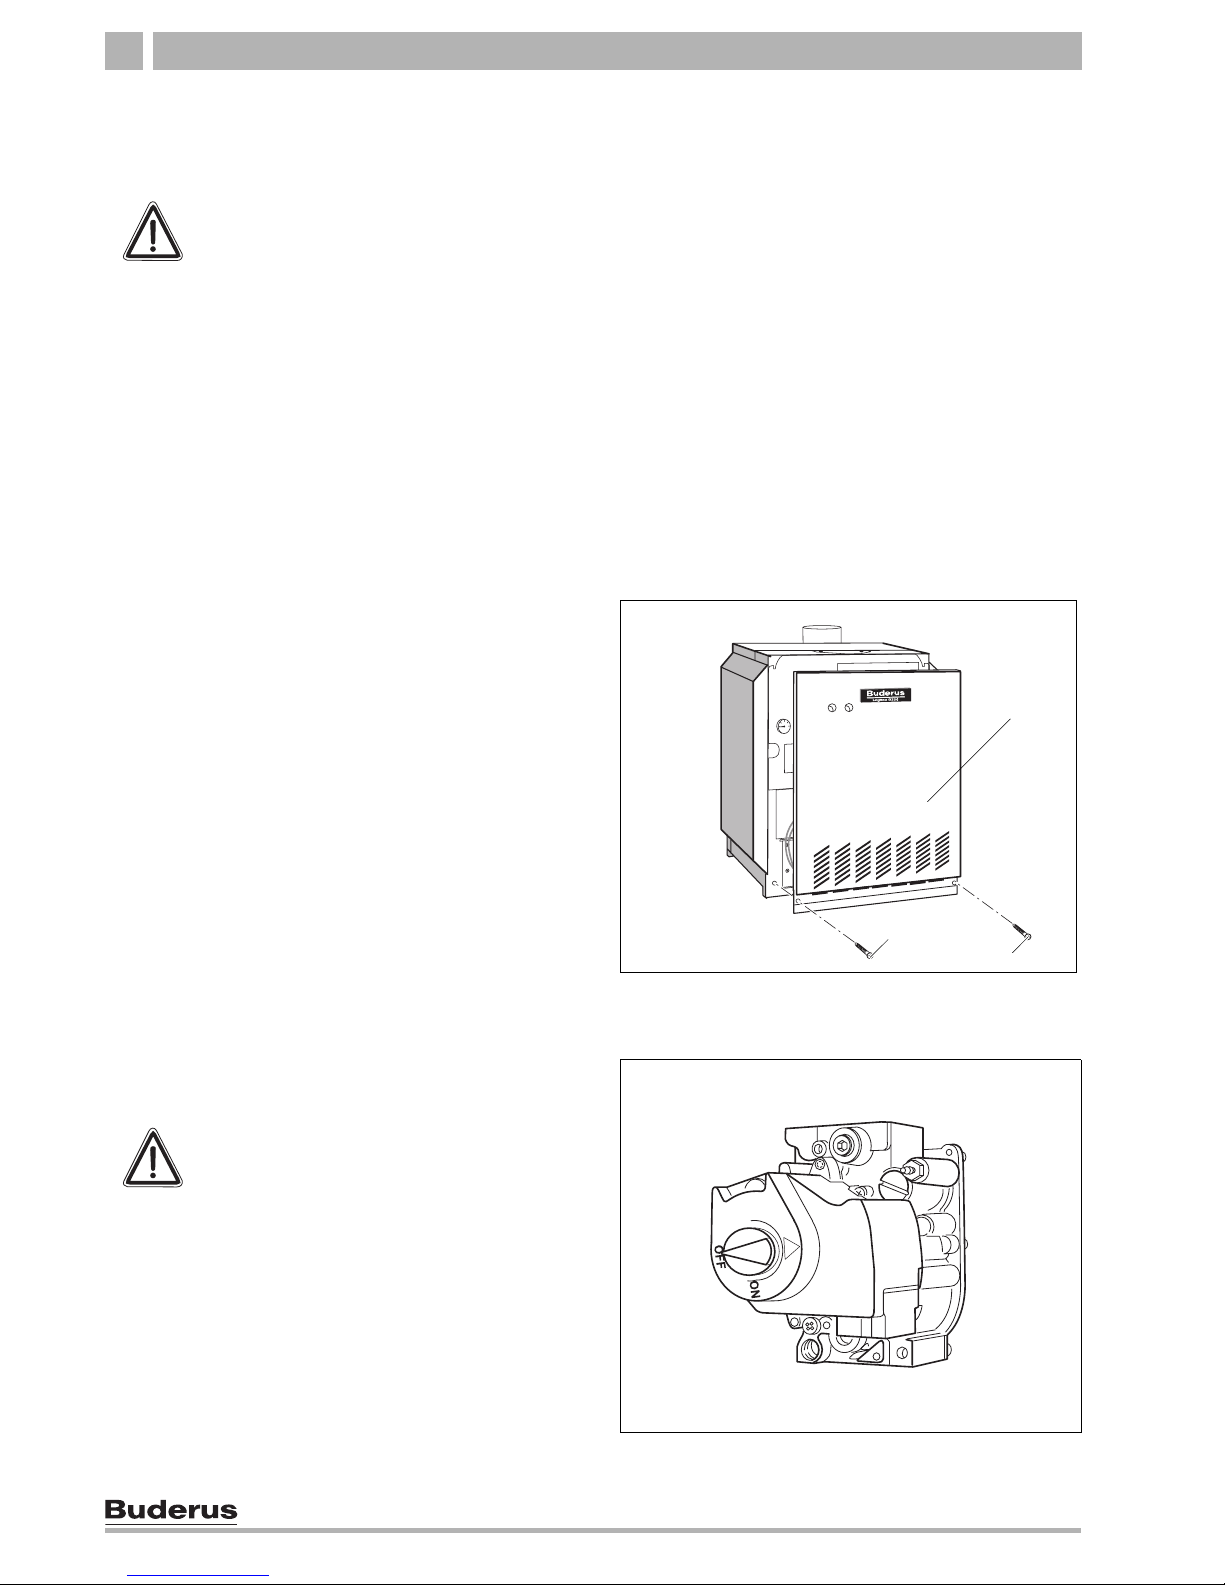
3. Remove safety screws from the left and right side
panels, then lift the front panel of the boiler and pull
it forward.
4. Turn gas valve ON/OFF button clockwise to OFF
position. Do not use force.
WARNING!
RISK TO LIFE
due to not observing the attached
conversion instructions.
z If you wish to convert the boiler for
operation with propane, the conversion
from natural gas to propane must be
carried out first as specified by the
attached conversion instructions.
Fig. 1 Removing front panel of boiler
1 Screws
2 Boiler front panel
1
2
1
Fig. 2 Gas valve
WARNING!
RISK TO LIFE
from explosion of flammable gases.
z Wait five (5) minutes until all gas
residues have dissipated. Check
whether there is any smell of gas,
including at floor level. If there is a gas
odor: STOP! Follow instructions in
section “B” of the safety instructions on
Page 9. If there is no sign of a gas odor,
continue with the next step.
Conversion to propane 3
5
We reserve the right to make any changes due to technical modifications.
Instructions for conversion kit for Logano G334 X gas-fired boiler • Issue 09/2005
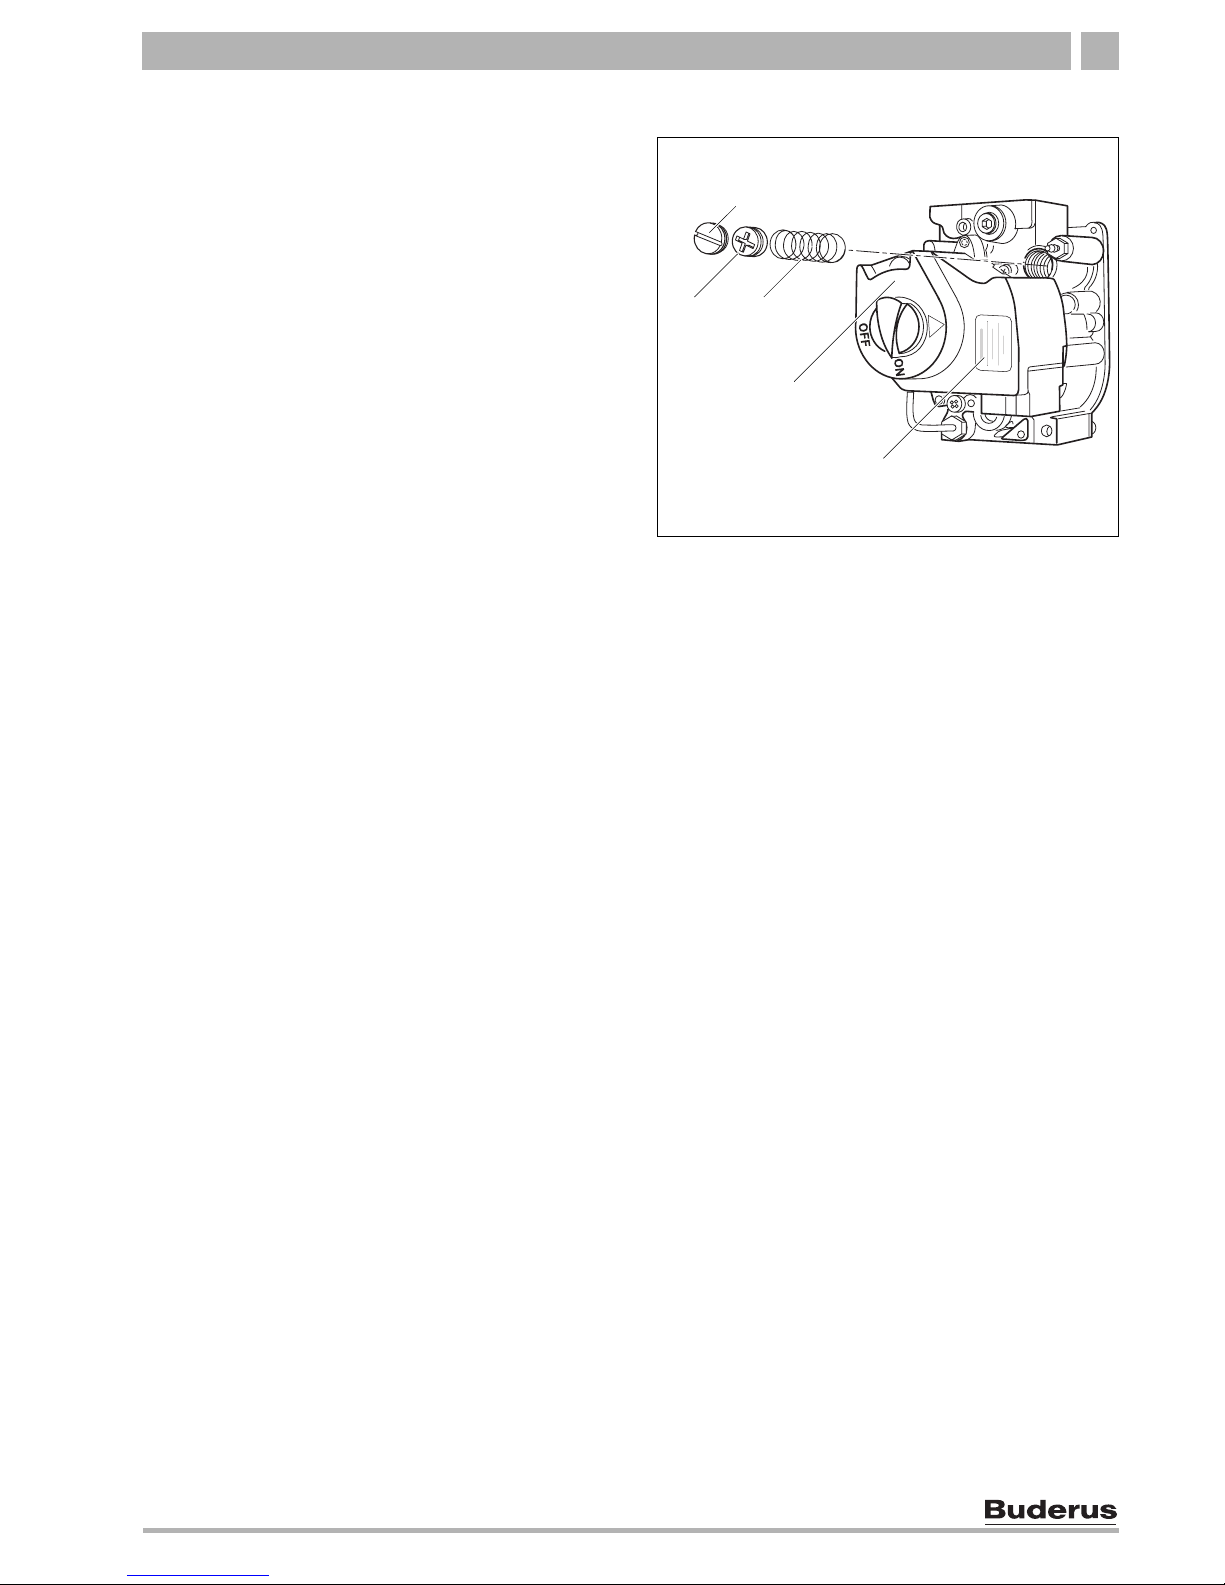
Replace main gas orifices
5. Remove the safety screw for the orifice pressure
adjustment on the gas valve.
6. Remove manifold pressure adjustment screw.
7. Remove stainless steel spiral spring.
8. Install the red spring from the Honeywell LP
conversion kit in the gas valve.
9. Screw in the new gas adjustment screw from the
Honeywell LP conversion kit until it is flush with the
top of the gas valve.
Then turn the manifold pressure adjustment screw
six (6) full revolutions of 360° clockwise. This
corresponds to a pressure preset of approx. 10.0
W.C. This setting must be checked with a pressure
gauge on completion of the conversion.
10. Install new black safety screw from the Honeywell
LP conversion kit.
11. Clean the gas valve housing and attach to yellow
label from the Honeywell LP conversion kit to a
visible spot on the gas valve.
Fig. 3 Gas valve
1 Safety screw
2 Manifold pressure adjustment screw
3 Stainless steel spiral spring
4 Gas valve
5 Yellow label
1
2
3
4
5
 Loading...