

Page 1
Getting Started
Ohm Installation Guide
Contents:
Safety Warning and Recommendations .............................................. 02
Installation Checklist .............................................................................. 03
Installing the Buddy Ohm ...................................................................... 04
Installing Current Transformers ........................................................... 05
Installing the Ohm Link .......................................................................... 06
Installing Ohm Sense .............................................................................. 07
Installing Ohm Pulse ............................................................................... 08
Troubleshooting .......................................................................................10
Provisioning Ohm Pulse
BUDDY PL ATFORM
Only trained and certied electricians are
allowed to install, replace, or service. Working
with electrical systems such as panels with
energ y supply can lead to major injuries.
20190 313
Page 2

Ohm Installation Guide | Safety Warning and Recommendations
Safety Warning and
Recommendations
Hazards and Cautions:
āā
Working with electrical systems such as panels with energ y
supply can lead to major injuries. Only trained and certied
electricians are allowed to install, replace, or service.
āā
Take care when connecting devices and
sensors to supply/power panels.
āā
Locate the emergency power-o switch in the room
in which you are working. If an elec trical accident
occurs, you can quickly turn o the power.
āā
Look carefully for and remove possible hazards
in your work area, such as moist oors,
ungrounded power extension cables, frayed
power cords, and missing safet y grounds.
āā
When working with high energy power supply make sure
you have the proper personnel protective equipment (PPE).
āā
Perform hazard assessments as required, and determine
the PPE needed to protect workers. Additional PPE, such as
fall protection equipment, respirators, chemical-resistant
or cut-resistant gloves, and chaps, may be required,
depending on the results of the hazard assessment.
āā
Depending on the job task to be performed, wear PPE
appropriate for the task. This generally includes, but is not
limited to, safety glasses, face shields, hard hats, safety
shoes, insulating (rubber) gloves with leather protectors,
insulating sleeves, and ame-resistant (FR) clothing.
āā
Do not work alone if hazardous conditions exist.
General Safety
Recommendations:
āā
Keep the chassis area clear and dustfree during and after installation.
āā
Keep tools and chassis components away from walk areas.
āā
Do not wear loose clothing that could get caught in the
chassis. Fasten your tie or scar f and roll up your sleeves.
āā
Wear safety glasses when working under conditions
that might be hazardous to your eyes.
āā
Do not per form any action that creates a hazard
to people or makes the equipment unsafe.
Need Help? www.buddy.com/support
2
Page 3
Ohm Installation Guide | Installation Checklist
Installation Checklist
Please ensure all materials, components, and
accessories are ready prior to an installation.
This checklist will help you plan your install.
Completed Site Survey (Project Scope)
Prior to installation, a Site Survey should be completed
by the Service Provider. The sur vey will inform you
what hardware goes where at the installation site.
If you do not have a completed Site Survey or have
questions contact [email protected] please have
Customer and Building names ready when calling.
Service Provider has been informed
of the installation schedule
Service Provider should be informed of the installation
schedule at least 48 hours in advance so they can ensure
an installation support representative will be available.
Ohms, antennas, Mini UPS 5V power
adapters, and mounting plates
If there is no metal surface to mount the Ohm unit, nd a
suitable location with access to a nearby outlet and install
the metal mounting plate. If any C T clips will be attached to
the Ohm, it will also need to be near the electrical panel.
Ohm Links, antennas,
and power adapters
Each Ohm Link should have a 9V AC-AC and 5V DC
adapters for reading voltage. 5V is necessary and 9V
is optional for real power (high accuracy). If the Link
will run on batteries in a single-phase installation,
have (3) A A lithium Ion batteries per Link.
Ohm Senses
You will need: Mounting tape or Velcro tape and
AA batteries. (2 batteries per Ohm Sense unit).
Installation tools
You may need a drill, drill bits, mounting screws, wire
cutters, zip ties, cable straps, screw drivers, spare
breakers, etc., to properly install Buddy Ohm.
Electrical outlet parts
If a new outlet needs to be installed, be sure
to have all the necessar y components like a
junction box, outlet, faceplate, and wires.
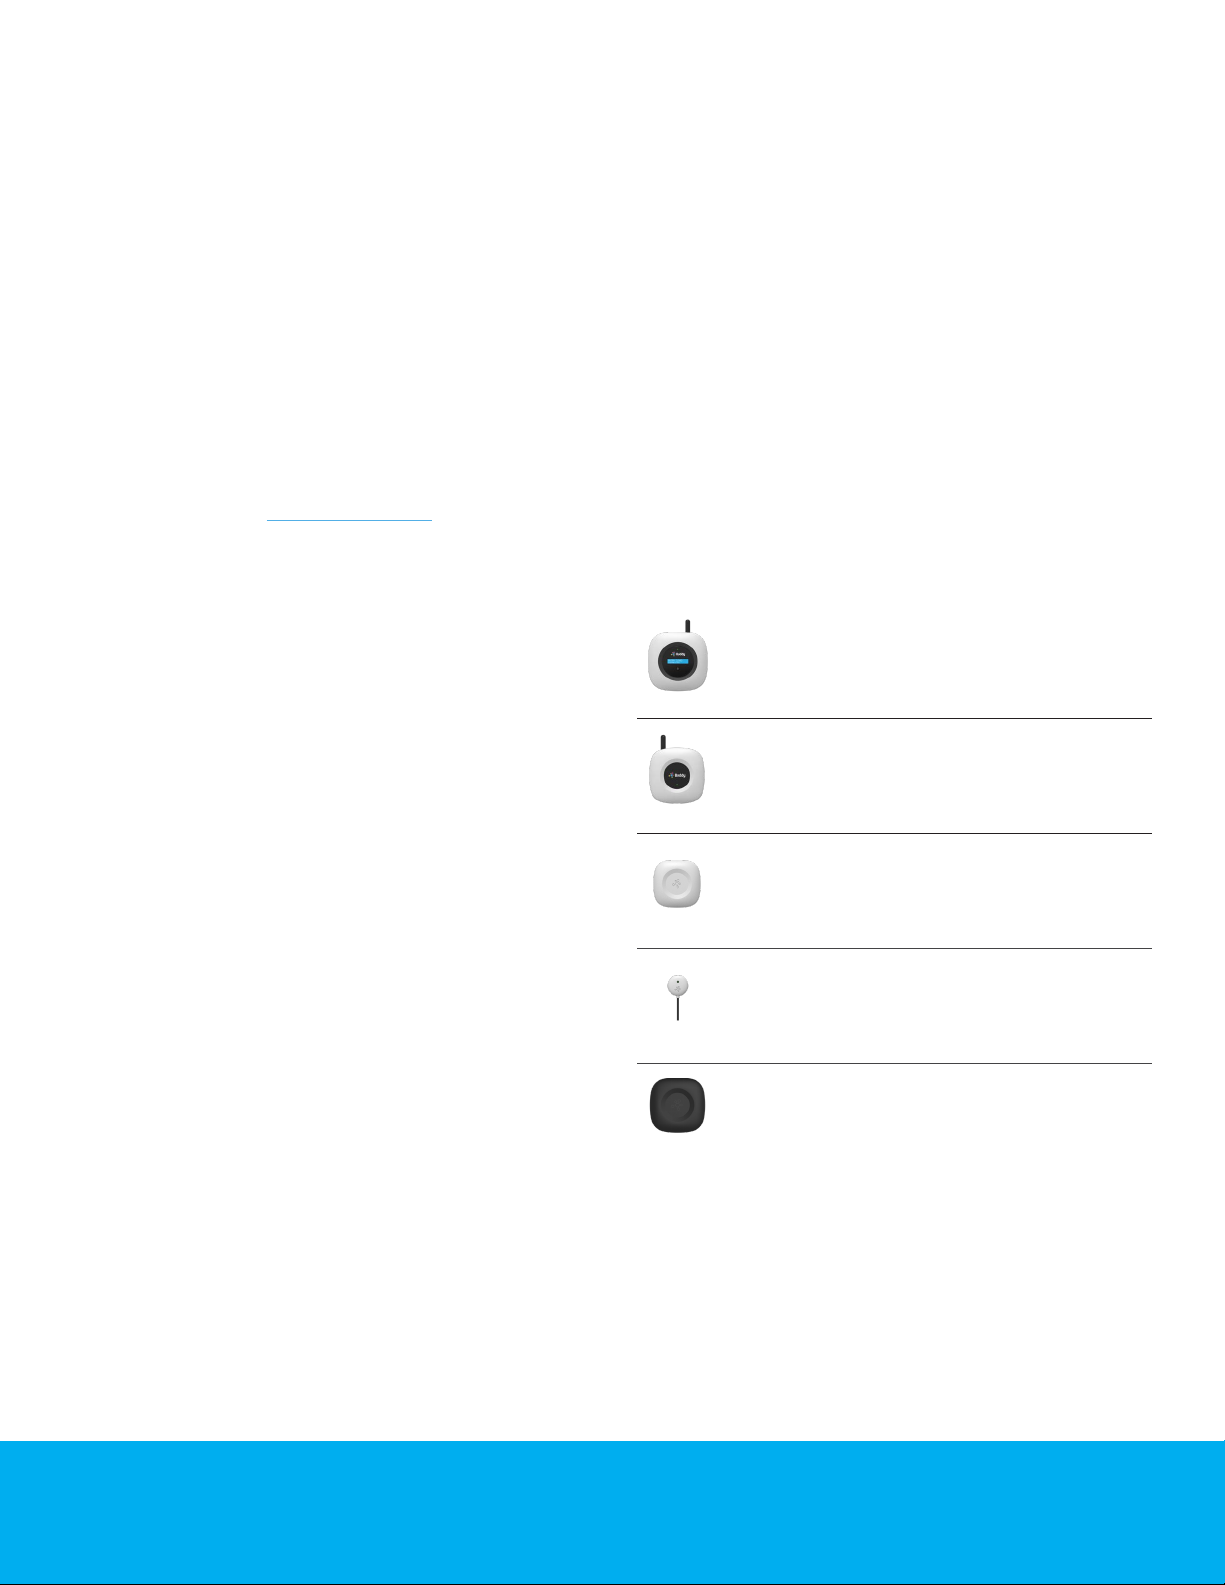
The Hardware
Buddy Ohm - The main base unit which other
devices communicate with. Buddy Ohm connects
via cellular network to Buddy Cloud.
Ohm Link - This device monitors electricity
and communicates back to Buddy Ohm over
radio frequency (433 Mhz). Ohm Links have
more input ports than Buddy Ohm units.
Ohm Sense - This sensor wirelessly measures
temperature and humidity and communicates with
Buddy Ohm over radio frequency (433 Mhz).
Ohm Pulse - Pulse sensor used for monitoring water,
gas and steam. This device communicates with
Buddy Ohm and Ohm Link units via RJ45 cable, but
can also be wired to an Ohm Sense unit as well.
Ohm View - This device displays a
public-facing dashboard onto a TV or
monitor using HDMI connection.
Need Help? www.buddy.com/support
3
Page 4
Ohm Installation Guide | Installing Buddy Ohm
Installing the Buddy Ohm
Buddy Ohm is the main base unit which other
devices communicate with. Buddy Ohm connects
via cellular network to Buddy Cloud.
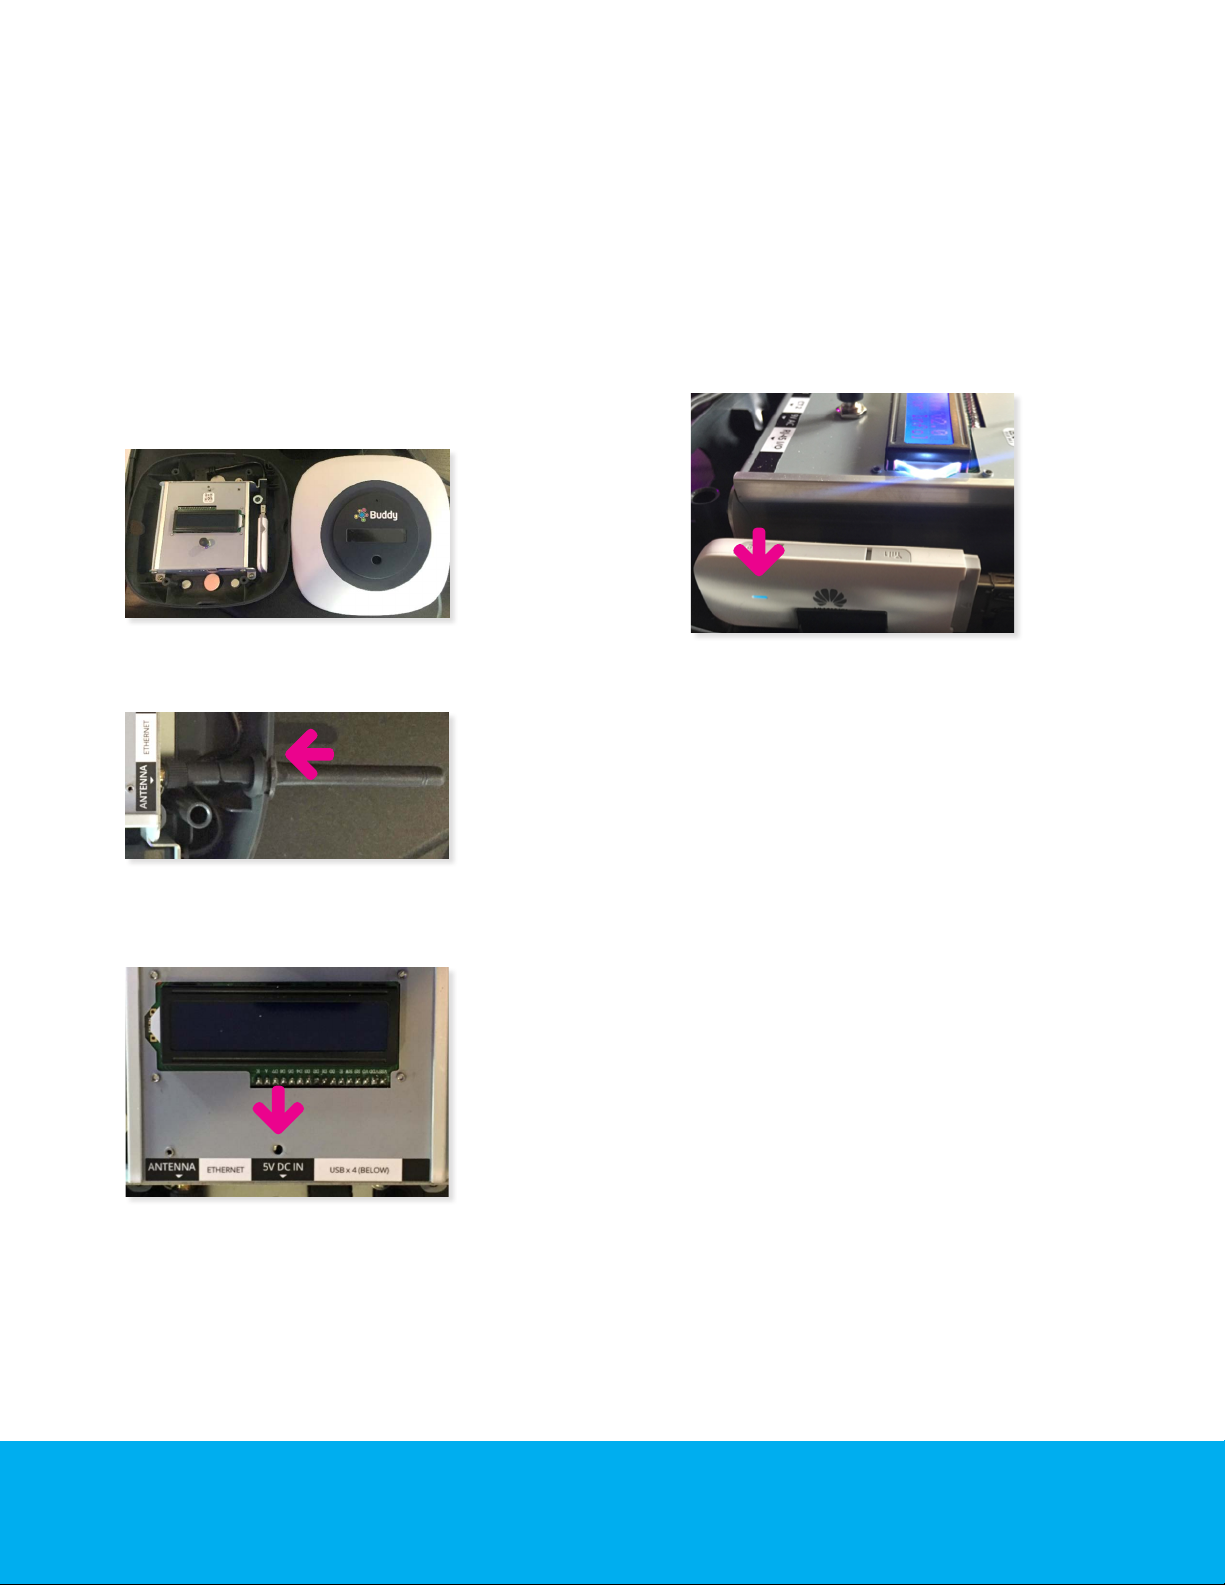
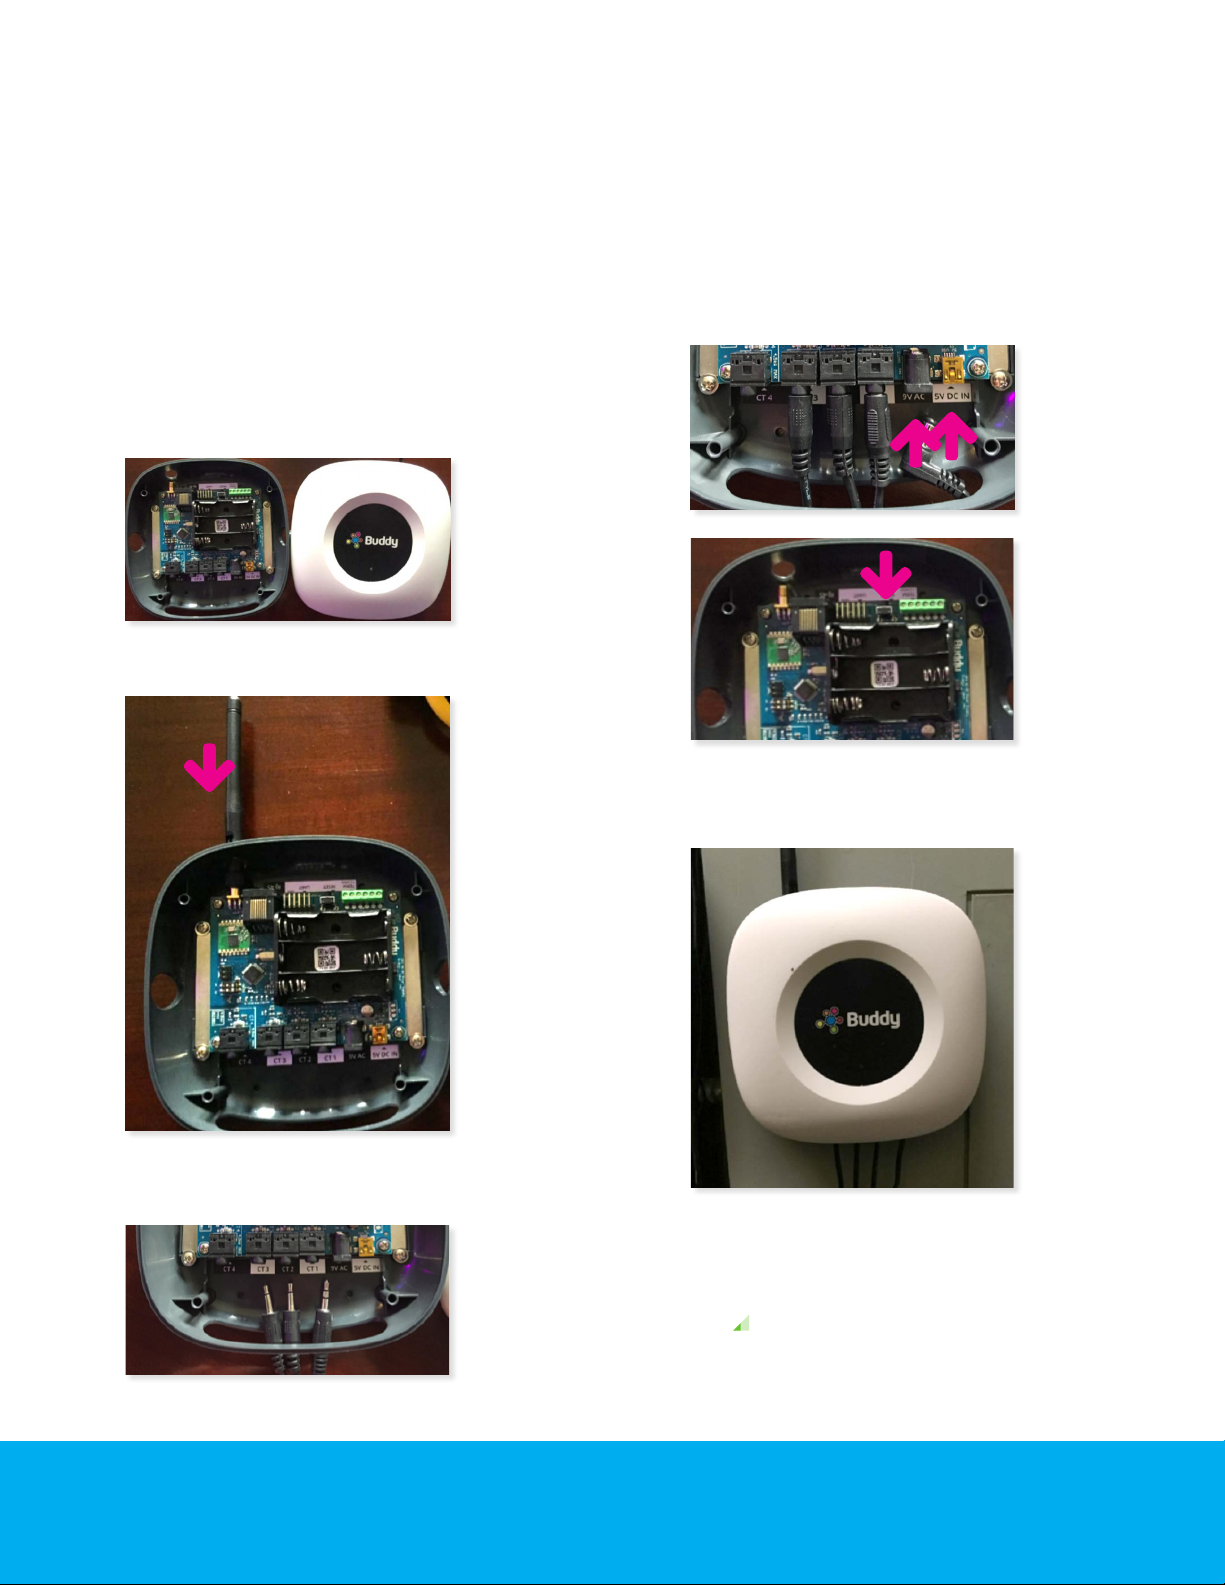
Inside the Ohm box is the Ohm device and an antenna.
Open the top cover of the Buddy Ohm device
and Install the antenna to the Ohm.
After you plug in your power supply, the cellular dongle
will ash green or blue for less than a minute. After
a minute, the light should change to solid green.
Note: If the light doesn’t become solid blue, that means
there is no cellular connection and the Ohm is unable
to connect to the Internet. See troubleshooting options
below for alternative connections to the internet.
Power on the Buddy Ohm using the power supply.
Note: Use the 5 volts power supply.
4
Need Help? www.buddy.com/support
Page 5
Ohm Installation Guide | Installing Ohm Link
Installing Current
Transformers (CTs)
Note: This step includes working with the electrical panel
rack. If required, contact a qualied electrical expert.
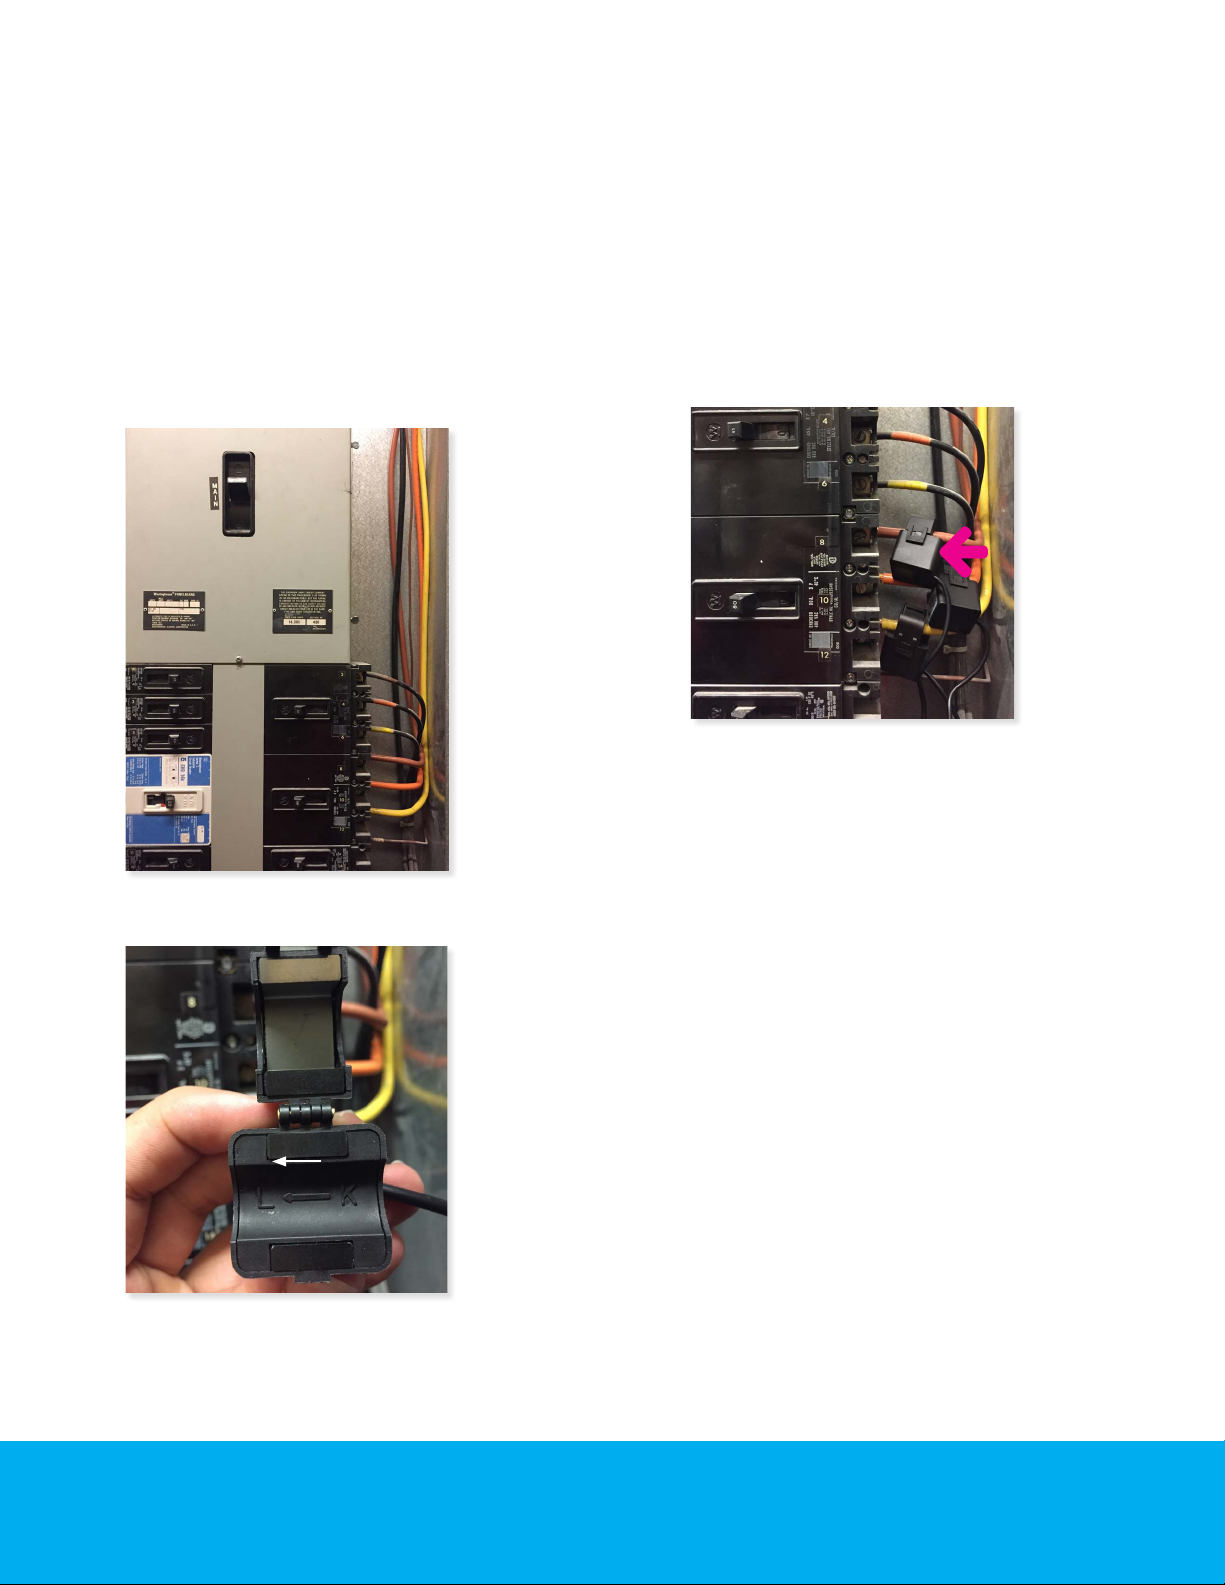
Locate the electrical panel.
Important: Ensure CTs are installed observing correct
polarity ( facing the proper direction). You will receive
a negative reading in your Ohm Portal if CTs have
been installed in the wrong direction. When installing
a current transformer (CT ), the arrow printed on
its plastic case has to point to the load you want
to monitor, away from the breaker or source.
Open the panel cover using the necessar y tools, if needed.
polarity
Use the required amperage CT clips and install to
the desired circuit(s) that you want to measure.
5
Need Help? www.buddy.com/support
Page 6
Ohm Installation Guide | Installing Ohm Link
Installing Ohm Link
The Ohm Link device monitors electricity and
communicates back to Buddy Ohm over radio
frequency (433 Mhz). Ohm Links have more
input ports than Buddy Ohm units.
Inside the Link box is the Ohm Link device and an antenna.
Open the top cover of the Link.
Install the antenna to the Link.
Power on the Link using both power
supplies, 5V DC and 9V AC.
Important: After the power supplies are plug ged in press
the Reset button, see images below. This will make sure
the device is being seen properly in the Ohm Portal.
Reset
Look for a green light to ash on.
Insert the aux cord to the desired CT
host ( C T1, CT 2, CT 3, CT 4).
Place the Link cover back to its original position.
Mounting Information
Using the magnetic back cover on Link,
mount the Link on a metal surface.
Note: If you are seeing a low signal strength icon next to
your device, try repositioning it closer to the Buddy Ohm.
Need Help? www.buddy.com/support
6
Page 7
Ohm Installation Guide | Installing Ohm Sense
Installing Ohm Sense
The Ohm Sense wirelessly measures temperature
and humidity and communicates with Buddy
Ohm over radio frequenc y (433 Mhz).
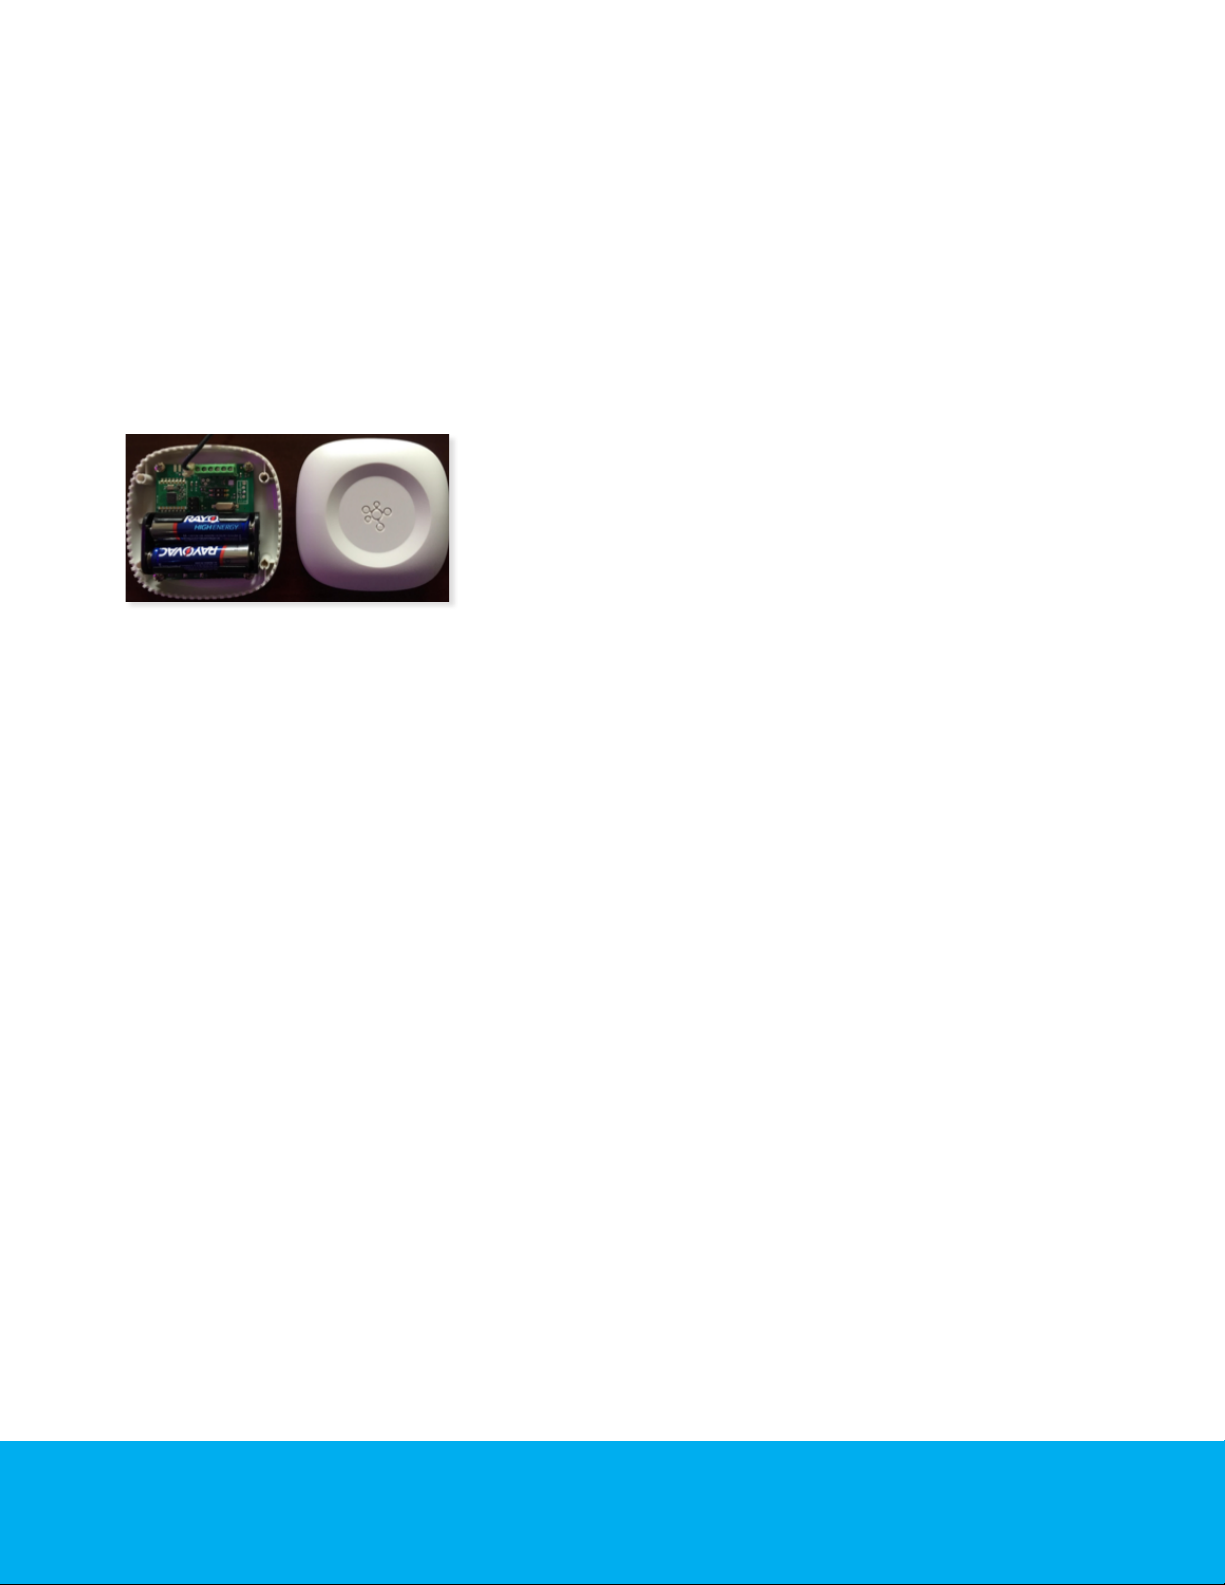
Open the top cover of the Sense.
Install the double (A A) batteries.
Look for a green light to turn on.
Place the top cover back to its original position.
The black antenna may sit outside of the
case to improve range, if needed.
Mounting Information
Use mounting tape on the back of the Sense and
mount the Sense in the desired location.
Need Help? www.buddy.com/support
7
Page 8
Ohm Installation Guide | Installing Ohm Pulse
About Ohm Pulse
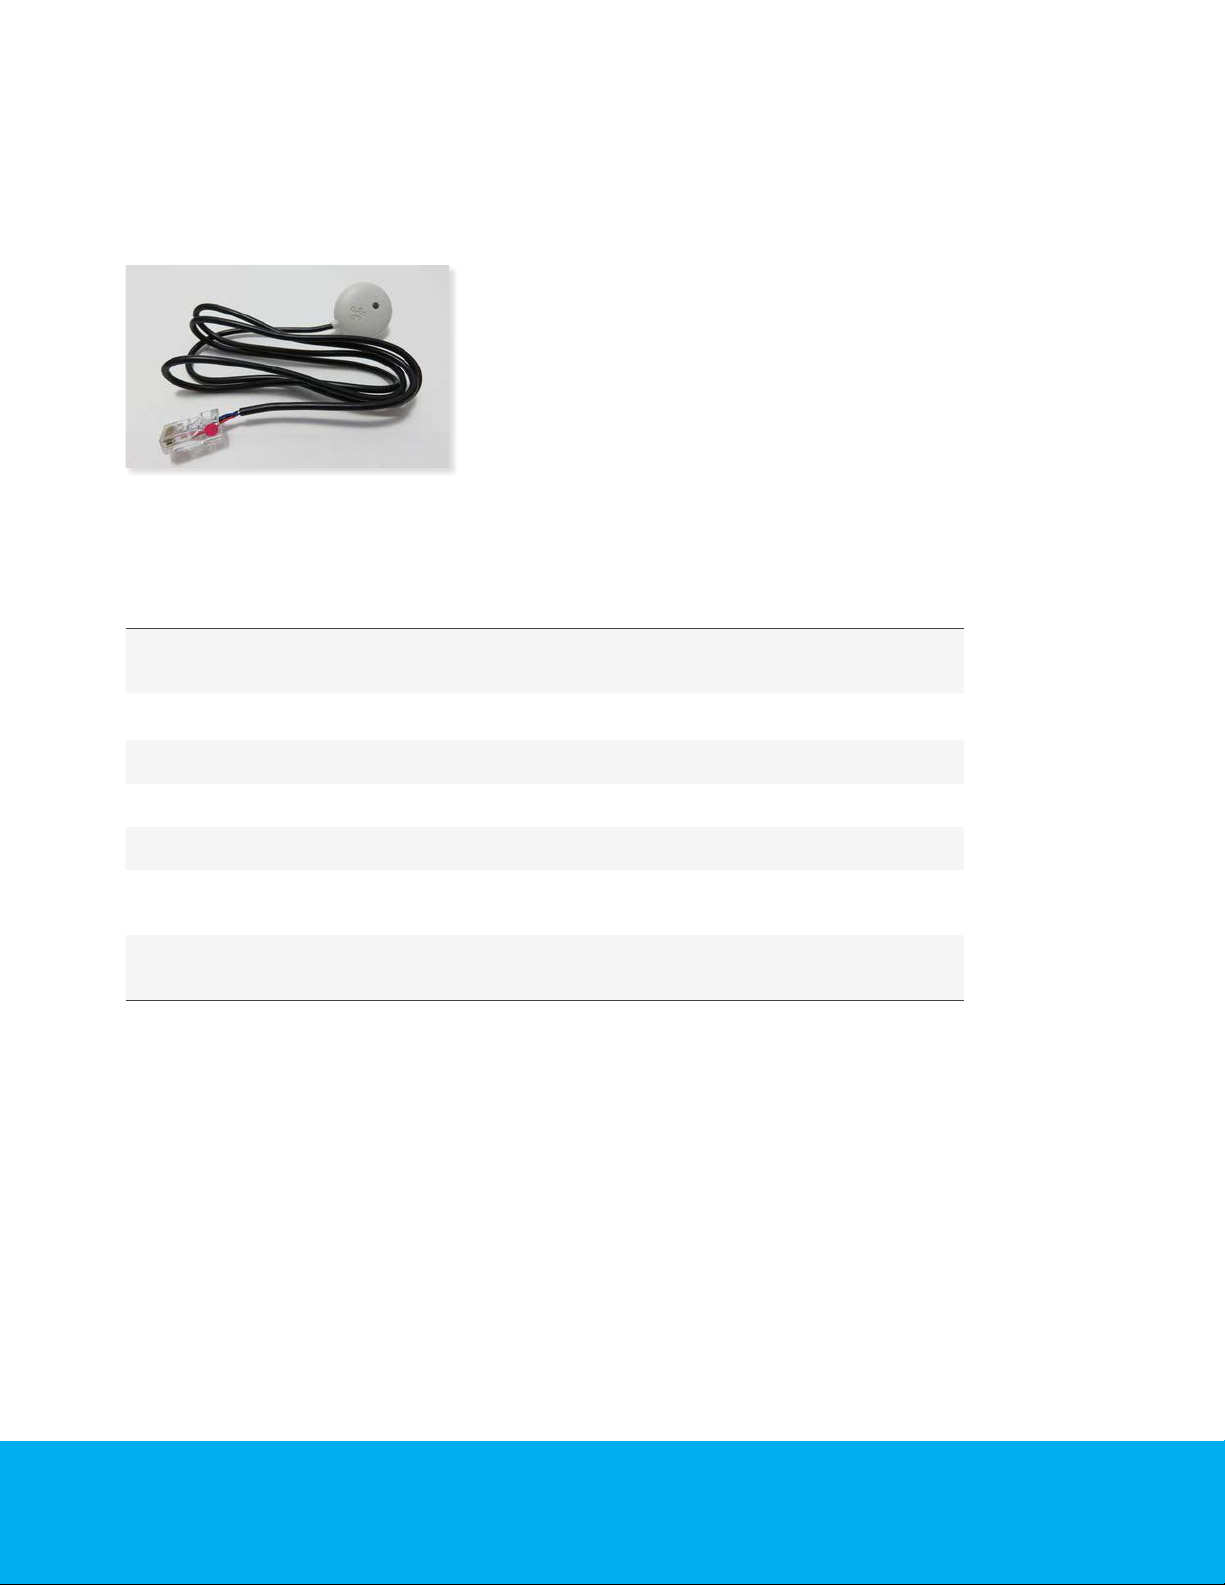
The optical Ohm Pulse sensor is used to detect light pulses from digital meters
and works with Buddy Ohm, Ohm Link and Ohm Sense units.
Parameter Notes
Operational Temperature Range -10 deg C to +60 deg C The PVC cable limits the
sensors operational range
Pulse Light Level
Ambient Light Levels Refer Installation Note 2
Cable Length 1 meter
Termination RJ45 for Link/Ohm
Active Power
Consumption (LED on)
Standby Power
Consumption (LED o)
See Installation notes on next page.
1.2mA @ 3.3V
2.1mA @ 5V
0.25uA @3.3V
35uA @ 5V
Refer Installation Note
Refer Installation Note
Need Help? www.buddy.com/support
8
Page 9
Ohm Installation Guide | Installing Ohm Pulse
Installation Notes
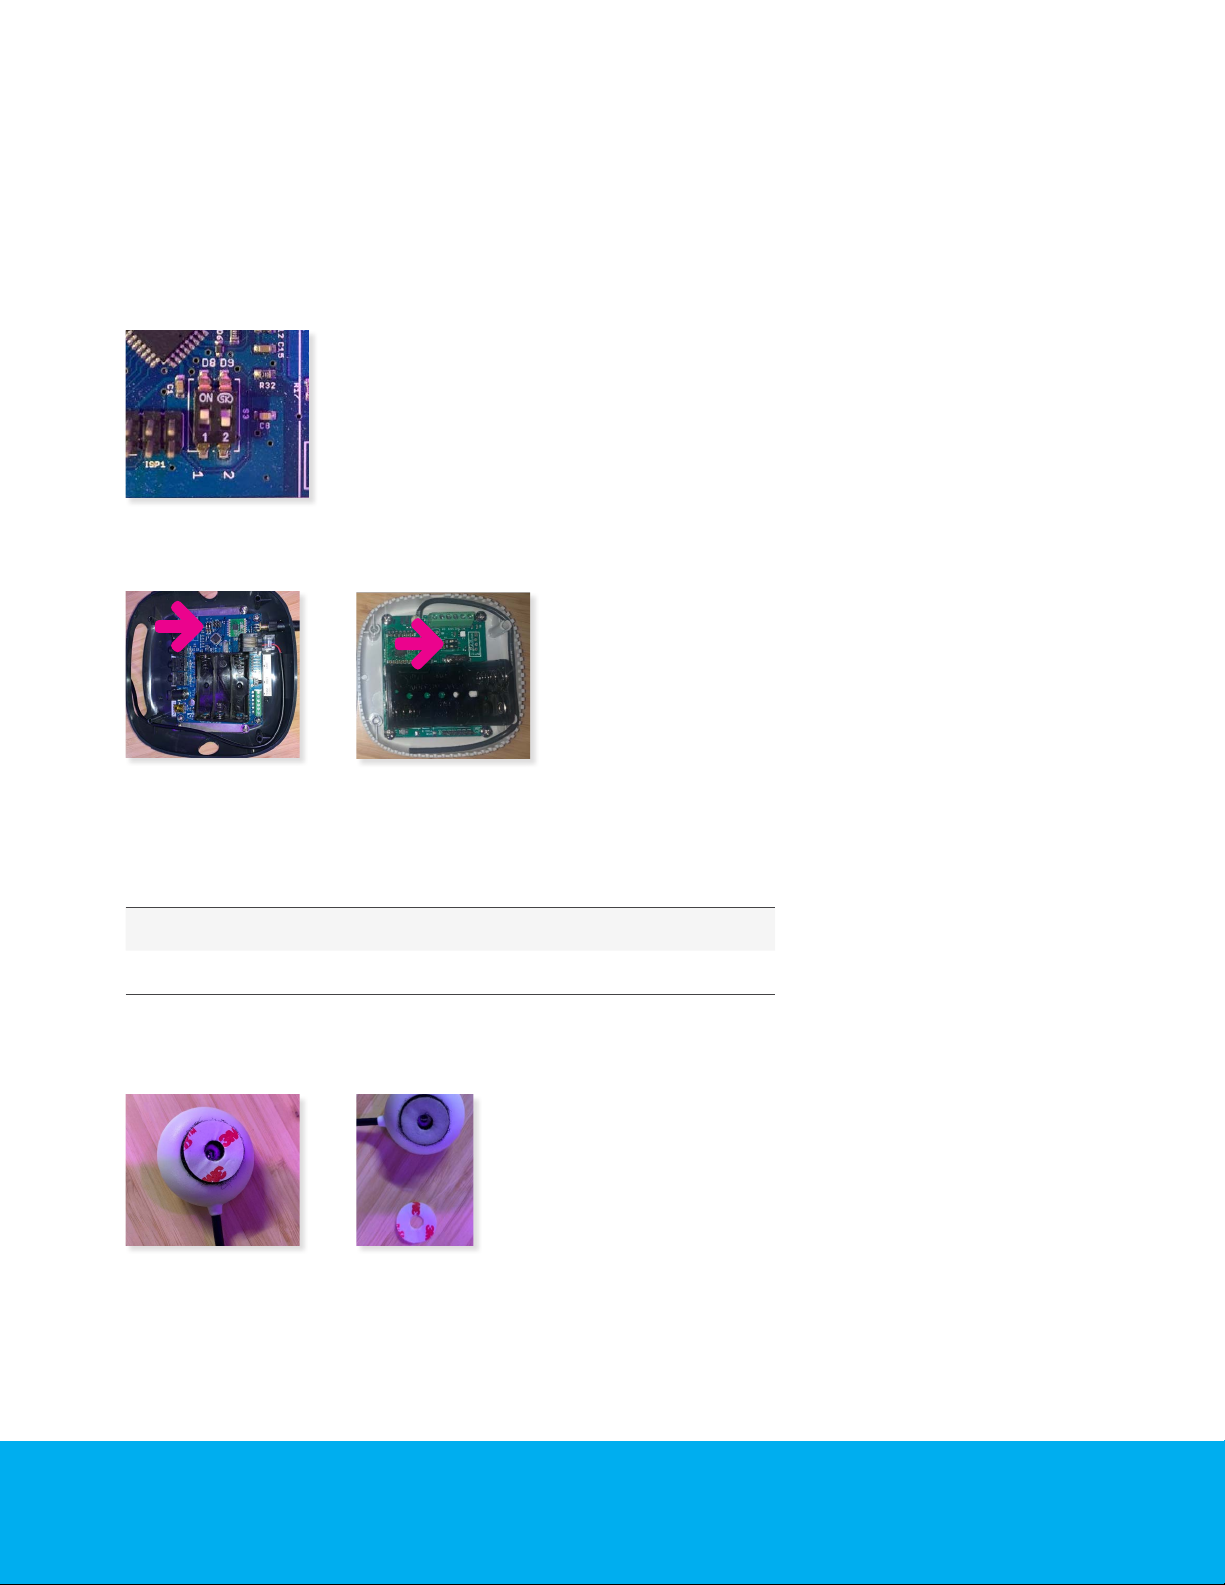
DIP switch 1 MUST be ON (Ohm Link and Ohm Sense).
The switch is located inside the Ohm Sense and Ohm Link.
Open the top cover of the Ohm Link and Ohm Sense
and locate the switch as show below
Ohm Link Ohm Sense
Please note, using the optical pulse sensor will reduce
the bat ter y life of Ohm Sense and Ohm Link.
Product Estimated Battery Life
Ohm Sense 3-6 months
Ohm Link 2-3 months
To ensure proper installation, please support the wiring of the
Pulse Sense with either cable ties or cable support clips.
Make sure the optical sensor is positioned directly over the ashing LED of
the meter you are monitoring. Poor alignment can aect the results.
If high accurate power readings are required, this sensor
should be connected to Buddy Link on AC power or on Buddy
Ohm. This does not aect normal energy reporting.
Need Help? www.buddy.com/support
9
Page 10

Ohm Installation Guide | Installing Buddy Ohm
Troubleshooting
I am seeing (-)negative energy readings on
my Feed Cards in the Ohm Portal:
āā
This means a CT clip was installed improperly, ensure
CTs have polarit y (facing the proper direction).
I am not seeing any data on my energy
Feed Cards in the Ohm Portal:
āā
Try resetting the Buddy Ohm.
āā
It is best to plug C Ts into the device
before powering it on. .
Sense is reporting, but the Sense’s Feed Card
in the Ohm Portal often turns red:
āā
Remove the Sense’s cover and take the antenna
(the black wire) out of the case, on a straight
vertical line. Please make sure the Buddy Ohm
is installed in a vertical position, in the highest
location possible, and free from features that
could interfere with RF communication.
āā
If the problem persists, consider relocating
the Sense closer to the Buddy Ohm
All Feed Cards in the Ohm Portal are red:
āā
Make sure the Ohm’s antenna is rmly installed
and check the Buddy Ohm’s connectivit y through
“Connected Devices” in the Ohm Portal
āā
If you don not have access to the Ohm Portal you can
cycle the Buddy Ohm’s menu by pressing the front
button, and check for connectivity info like external IP
āā
If Ohm is oine, power cycle it
Contact Support
Online:
Email:
www.buddy.com/support
Additional Documentation
Sense stopped reporting. Portal widget solid red:
āā
Remove the plastic cover from the Sense and Make
sure the green LED light next to the terminal block
blinks every 10 seconds If not, replace the batteries
After provisioning a Ohm Link, the associated Feed
Card(s) in the Ohm Portal remain(s) yellow:
āā
Make sure all provisioned inputs are rmly plugged
in (both CTs 3.5mm jacks and power adapters cables)
āā
Make sure the antenna is rmly installed
āā
Power cycle the Ohm Link (remove all power sources,
or press the small push-button installed on the PCB)
Ohm Installation Guide
Ohm Portal User Manual
Ohm Product Specications
Find additional documents and guides
online, visit www.buddy.com/support.
10
Need Help? www.buddy.com/support
Need Help? www.buddy.com/support
Page 11

Adelaide
Level 2, 333 King William Street
Adelaide SA 5000, AUS
+61 8 8121 8004
Seattle
217 Pine Street, Level 700
Seattle, WA 98101, USA
+1 (206) 745-9077
Buddy.com
 Loading...