

Page 1
Speckles Change Table
BBTABLCHGSA
Quick Start Guide
Safety Precautions
Please read all instructions carefully and keep a copy of these instructions for future reference.
• Follow all instructions.
• Do not leave children on the table unattended. Your child must ALWAYS be within arms
reach.
• The weight of the child should not exceed 14kgs.
• Keep product away from fire and direct heat sources.
• Regularly check the screw fittings for tightness and security.
• Always apply studs while changing mat is hanging.
• Stop using bath and change table if any parts appear to be broken or missing.
• Screws should never be loose, as a child can squeeze parts of their body or clothing into
gaps and get caught.
• Do not move the bath or change table while the baby is on it.
• Do not use the bath and change table for any purposes other than those it is designed
for.
• Assemble the unit once. It is not designed to be taken apart and re-assembled.
• When lockable castor wheels are fitted, they must always be locked when the bath or
table are in use.
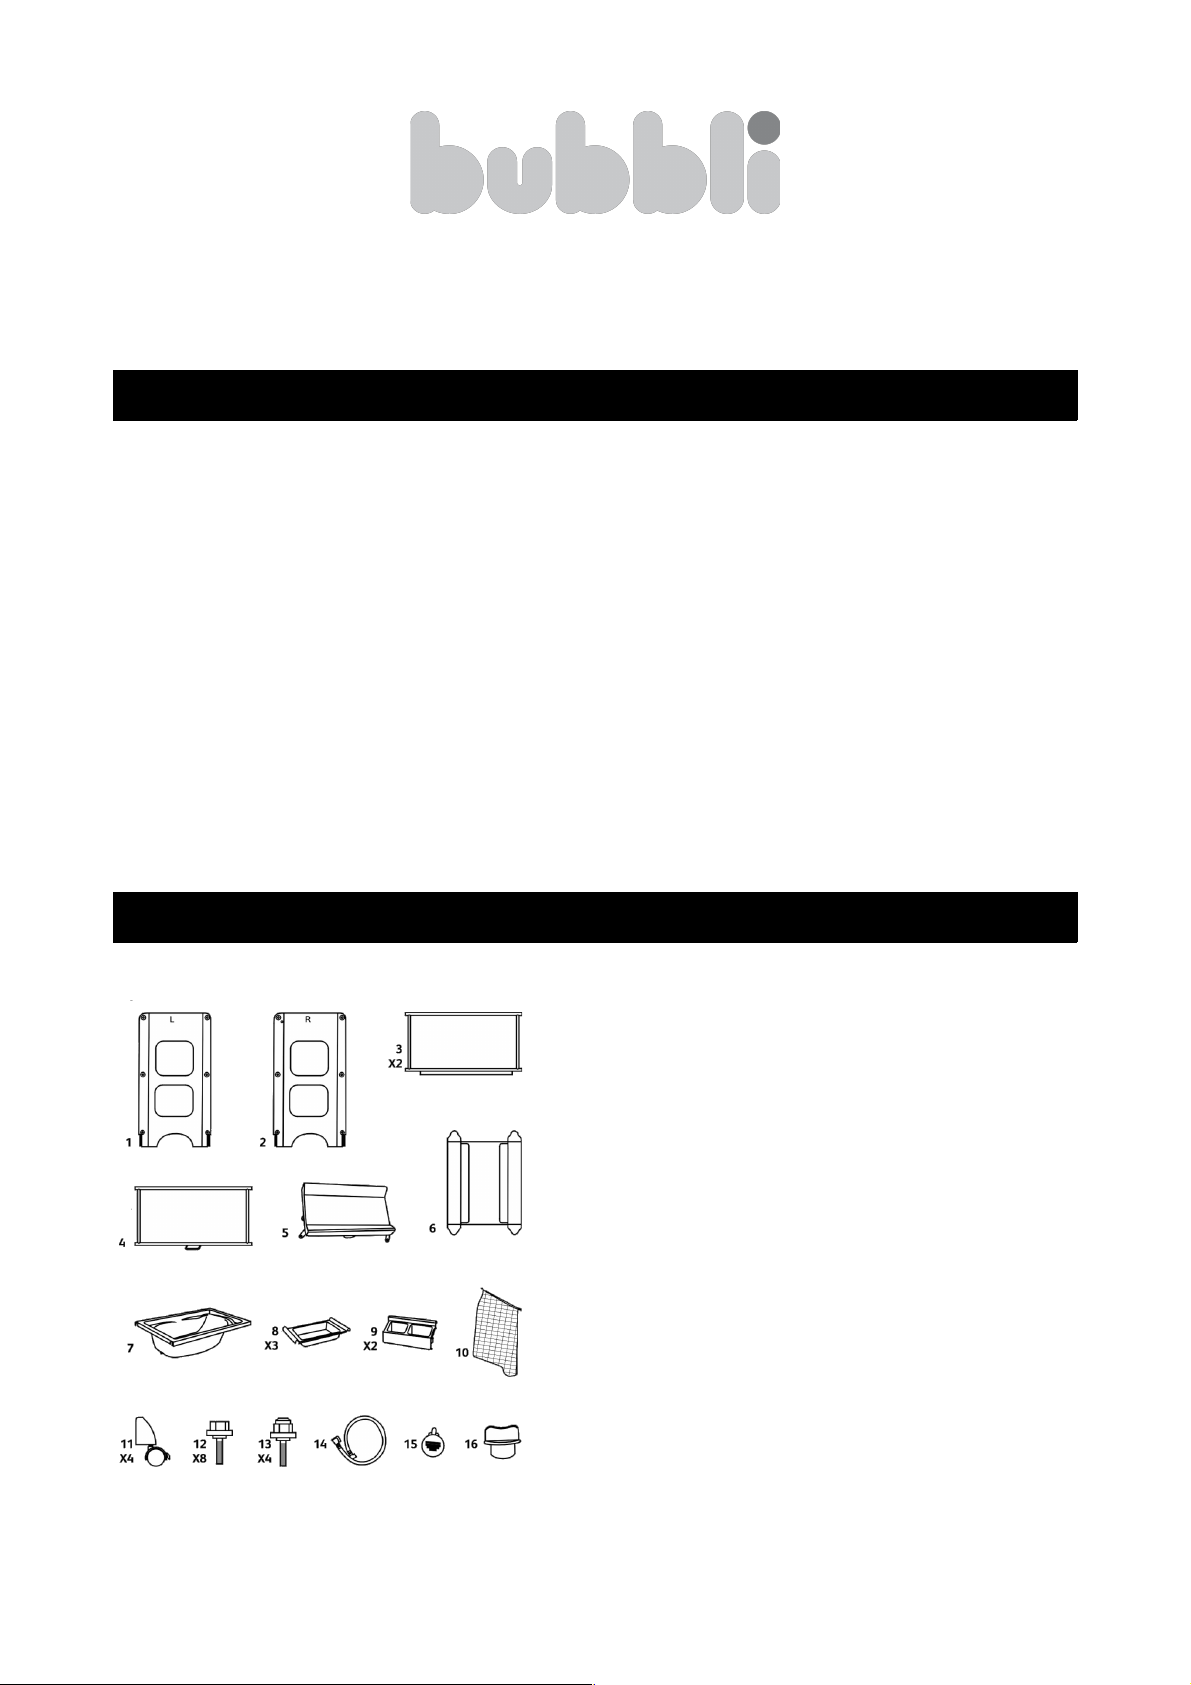
Parts List
1. Left Panel 2. Right Panel
3. Side Frames 4. Top Frame
5. Padded Top 6. Base Shelf
7. Bath Tub 8. Pan Trays
9. Utility Holders 10. Mesh Bag
11. Wheels 12. Bolts
13. Bolts with press stud 14. Drainage Pipe
15. Plug 16. Tool
17. Stud (not shown)
Page 2
Assembly/Operation Instructions
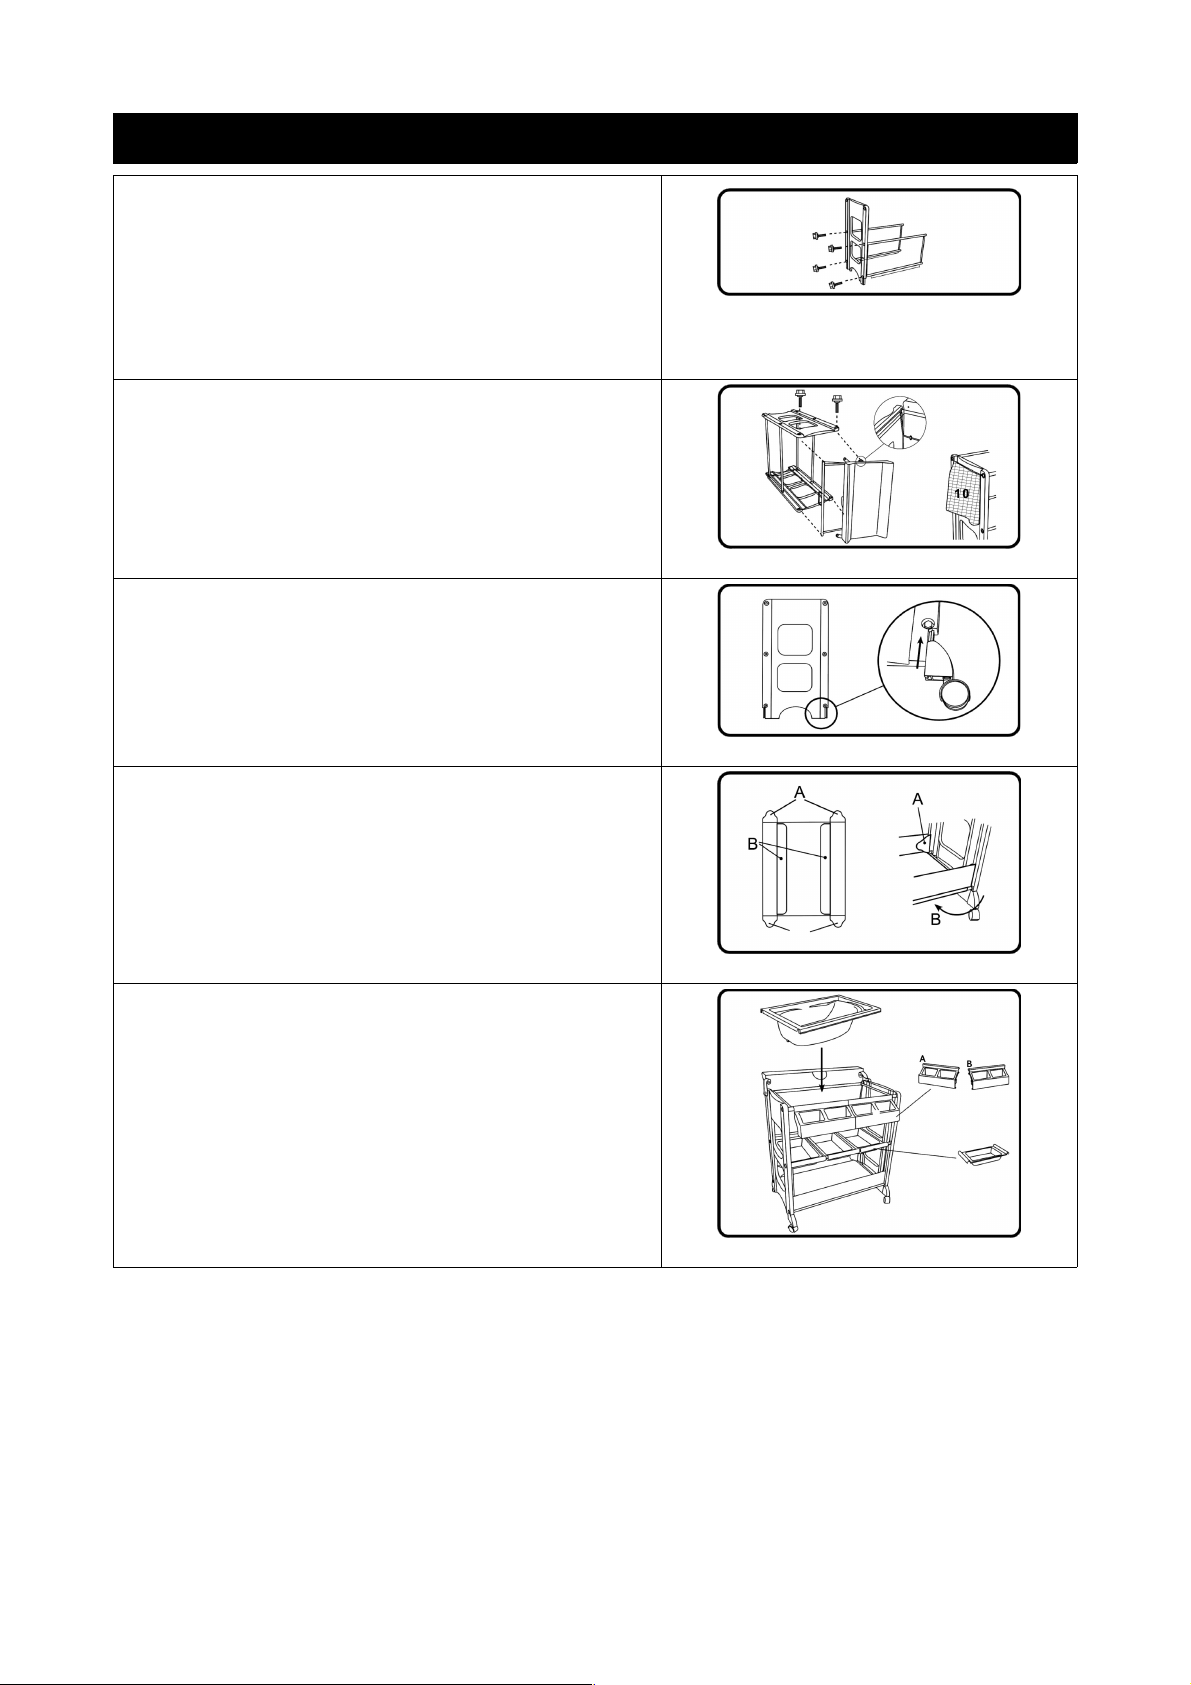
Unpack the bath and change table carefully, checking the
contents against the parts list to ensure all parts are
present.
Attach the two side frames (3) to the left side panel (1) by
inserting bolts (12) for 8 bottom holes on both sides. Insert
(13) for the 4 top end holes in the side panel, then tighten
into the threaded ends of the side frames using the
supplied tool (16).
Attach the right hand panel (2) in the same fashion.
Turn the bath and change table on its side as shown, then
attach the padded top (5) inserting two bolts into the
tubing of the padded top before fully tightening the bolts.
Slip the elastic loops of the mesh bag (10) over the bolt
heads, then tighten. Carefully turn the bath and change
table over and secure the opposite side with two more
bolts.
Attach the wheels (11) of the bath and change table, push
the wheels firmly into position along the slots provided.
Ensure the wheels are locked when using the bath and
change table.
Attach the base shelf (6) by placing the shelf in position,
then securing with flaps (A) wrapped around the uprights
of the two side frames (3), and with the flaps (B) wrapped
around and under the bottom of the frames.
Attach the utility holders (9) by hooking them over the
front of the support frame for the padded top (5).
Attach the pan trays (8) by hooking each tray over the tops
of the two side frames (3) as shown.
The bath (7) can then be places in the top of the bath and
change table.
The bath comes complete with a handy drainage hose (14), which can be attached to the outlet on the
underside of the bath. Before placing water in the bath, ensure the plug (15) is firmly locked into the plug
hole inside the bath.
When using the bath, extreme care should be taken to ensure the water is of a suitably safe temperature
before placing your child in. Do not use the bath separate from the frame.
Always apply studs (17) while the changing mat is hanging.
Maintenance
• The bath and change table can be cleaned with a household spray polish.
• The surface of the shelves should be wiped using a damp cloth.
• NEVER clean with abrasive, ammonia based, bleach based or spirit type cleaners.
 Loading...