

Page 1
Lit. Code: INST-CL-RM-111313
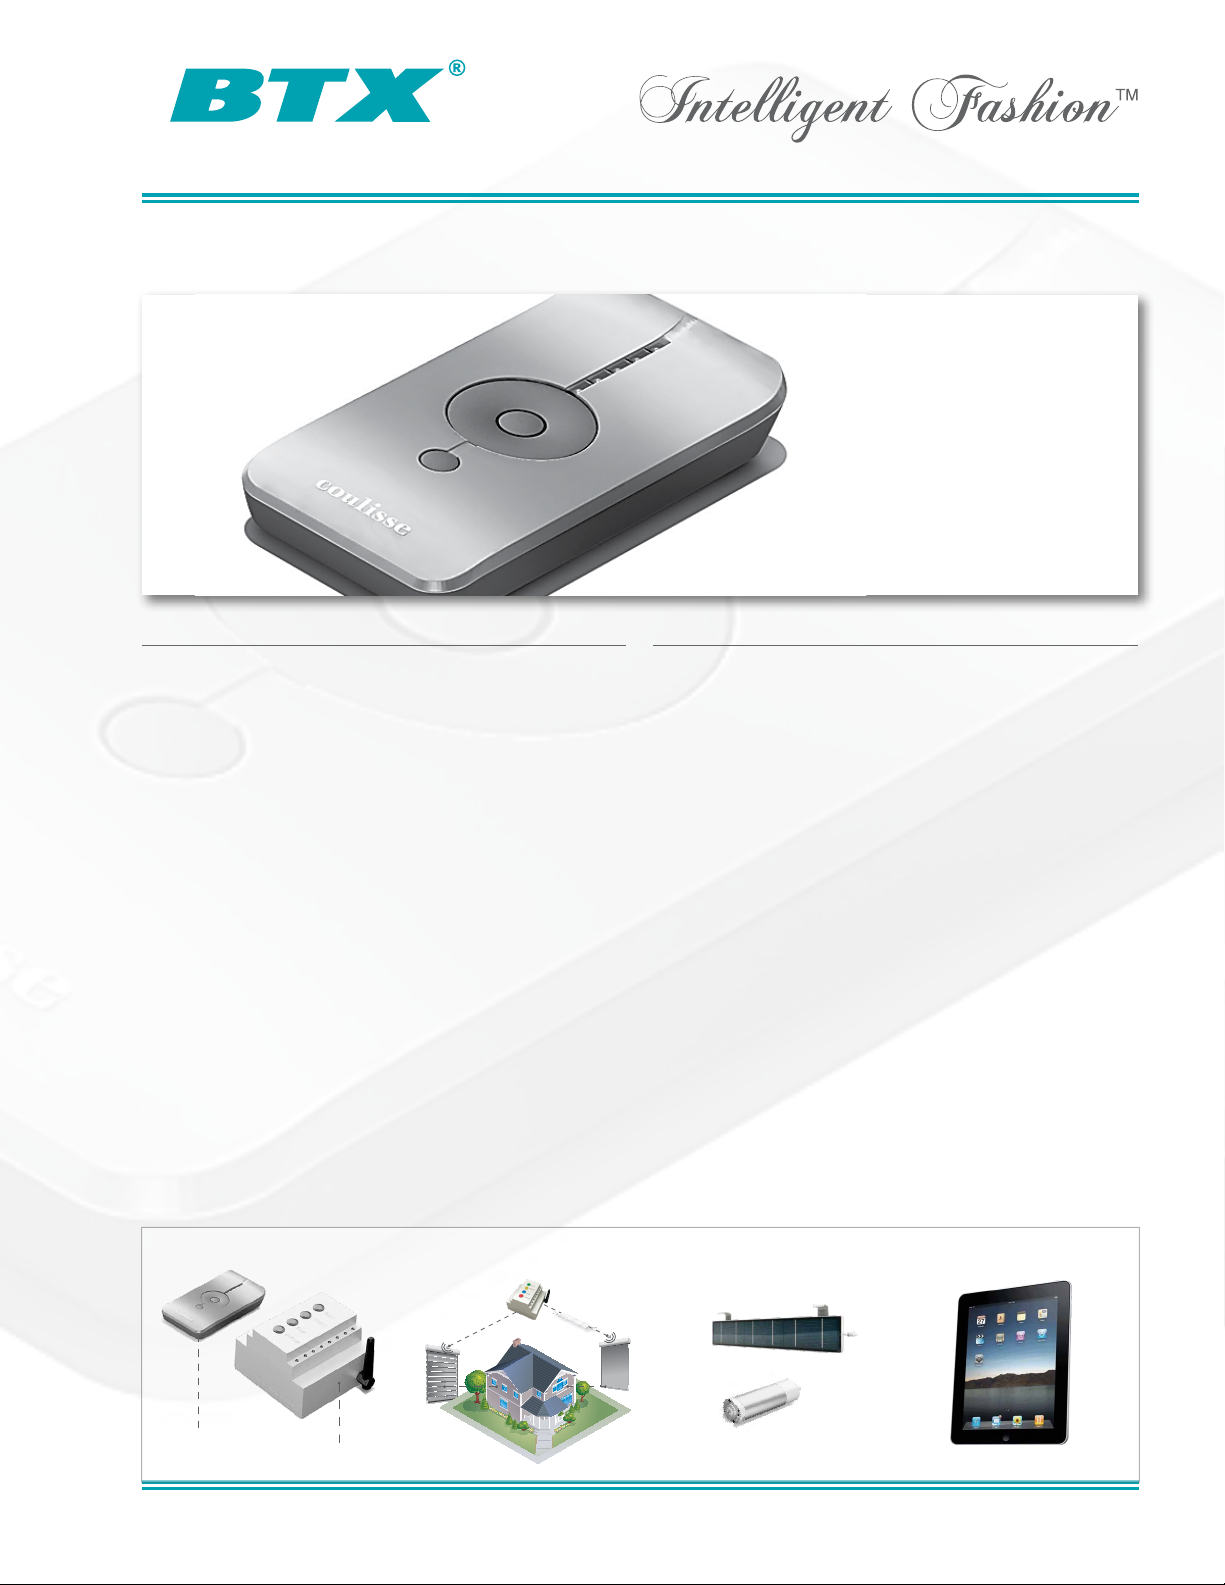
2.4 GHz Handsender
Product Overview Key Features
With the addi tio n of a n ew ra nge of
motor s, new c ont rol s ystems a nd featu res
have bee n add ed for b oth conv eni ence
and f lex ibili ty. This ne w lin e i ncorp ora tes
the a dva nced 2.4 GHz bid irect ional co ntrol
with mes h net wor k cap abi lity. Th is pl atf orm
will be found in all product lines an d will
compl eme nt th e m odern se lec tion of
fabri cs and h ardware. A pr ima ry di ffe rence
betwe en this han dsend er and 4 33 MHz
contr ols is t he opera ting met hod. For
trave rsi ng sy ste ms, o per ation is by t he
“Left ” a nd “R igh t” bu tto ns. L ift ing s yst ems
are o perated using th e “Up” a nd “Down ”
butto ns.
• Advan ced 2.4 GHz tech nol ogy
• Nativ e m esh n etw ork f or signa l relay
• All s yst ems w ork on o ne unive rsa l
contr ol platf orm
• Motor iza tion sol ution s f or
• Dra pery Sys tems
• Rol ler S had es
• Gem ini S had es
• Pan el Trac ks
• Sol ar Po wer ed Sh ade s
• andm ore
• Bidir ectional communi cation f or signa l
trans mis sion and feed bac k
• Perip her als f or a wid e r ange of contr ol
optio ns
• Super Lin k cap abl e, al low ing
commu nic ation wi th 43 3 M Hz pr oducts
Programming Guide
Technology
Network Connectors Third Party Integration
Network Connectors Solar Energy OperationWireless Home Networks
5-c hannel Hand send er
Wireless R S232
www.btxinc.com Dallas, Texas - USA
Page 2
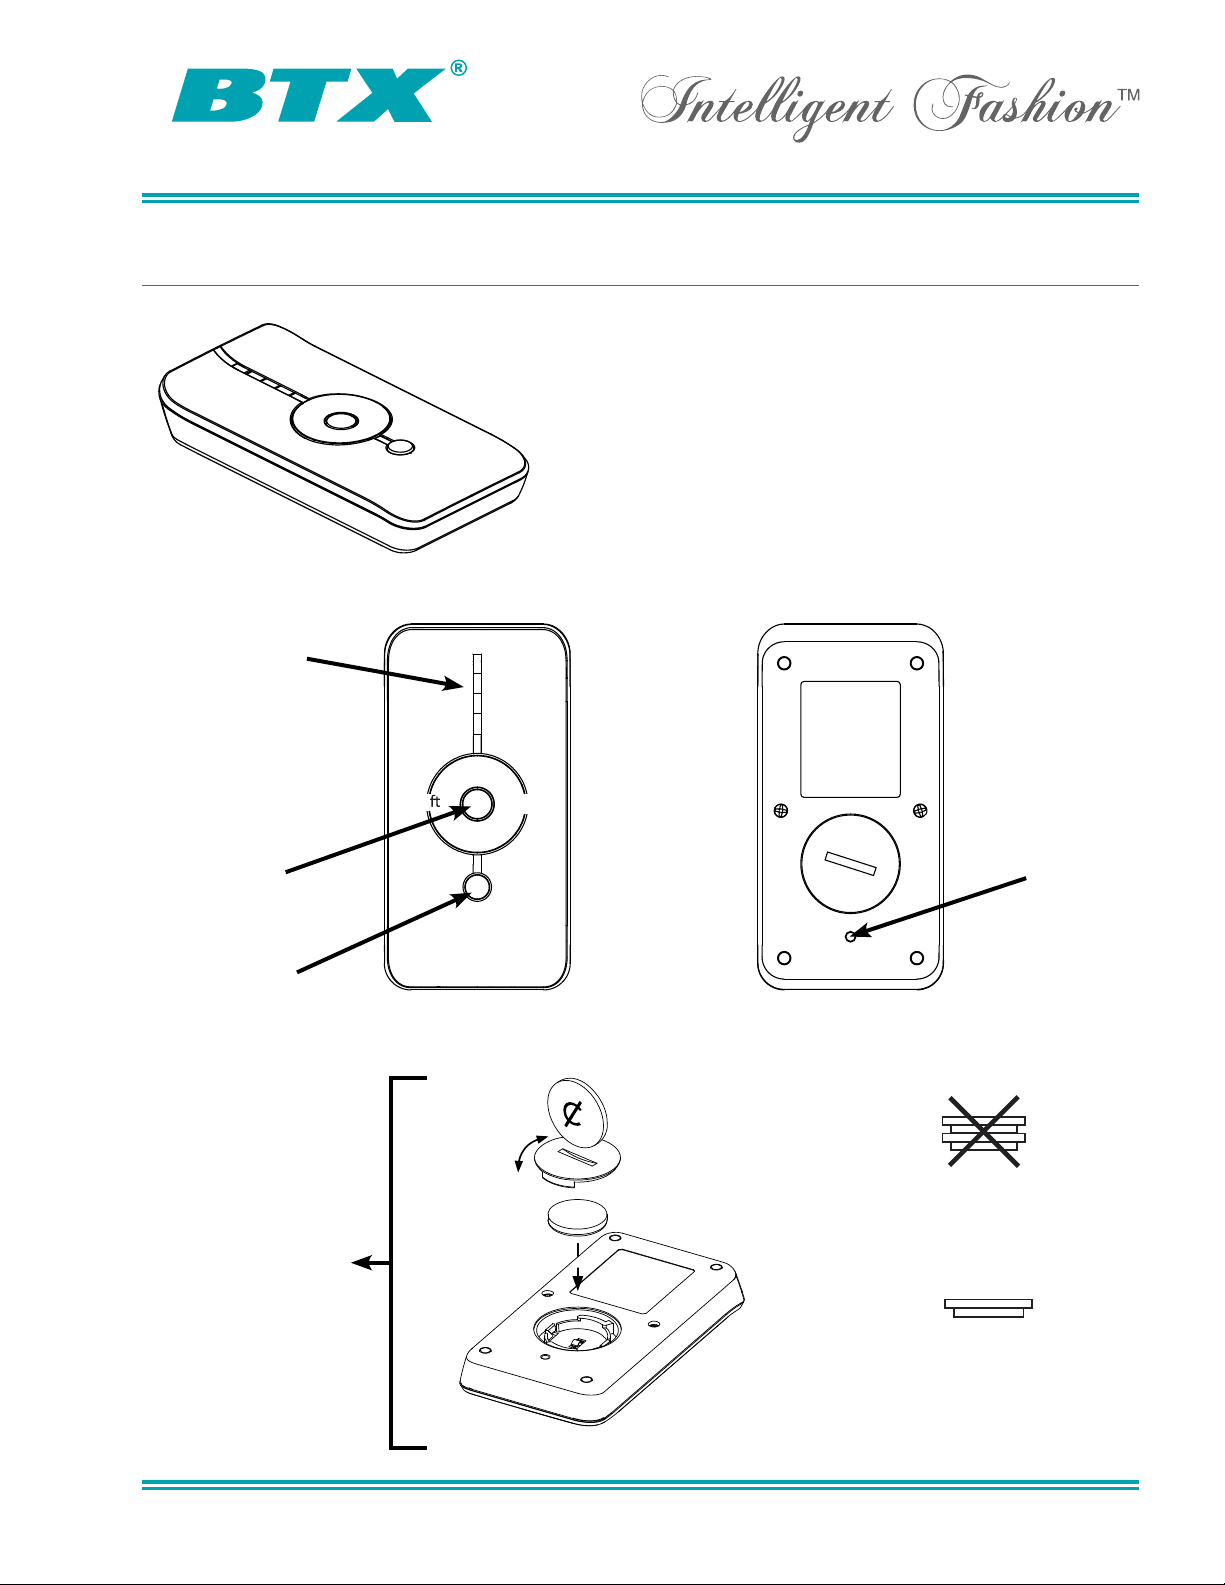
Chann el Indic ato r
(LED’ s ( 1 to 5)
Le
GeneralInformation
Part #: 490.8 001 Silv er or 49 0.8 002 W hit e
Descr ipt ion: 1 to 5-c hannel r emote, W hite
Batte ry: CR20 32 1.5V
Chann els : 5 ( 1-c hanne l v ersio n a vaila ble )
Max S yst ems p er Chann el: Infi nite
Max R ang e (in sid e bui ldi ng): 65’
Frequ enc y: 2. 4 G Hz
Weigh t: 1.97 ounces
Up
Right
Down
Cente r B utton
(stop - favor ite )
Chann el Selec t
Butto n
Chang ing the Bat tery
Progr am Butto n
+
-
2X CR2016 1,5V
+
+
-
CR2032 1,5V
www.btxinc.com Dallas, Texas - USA
Page 3
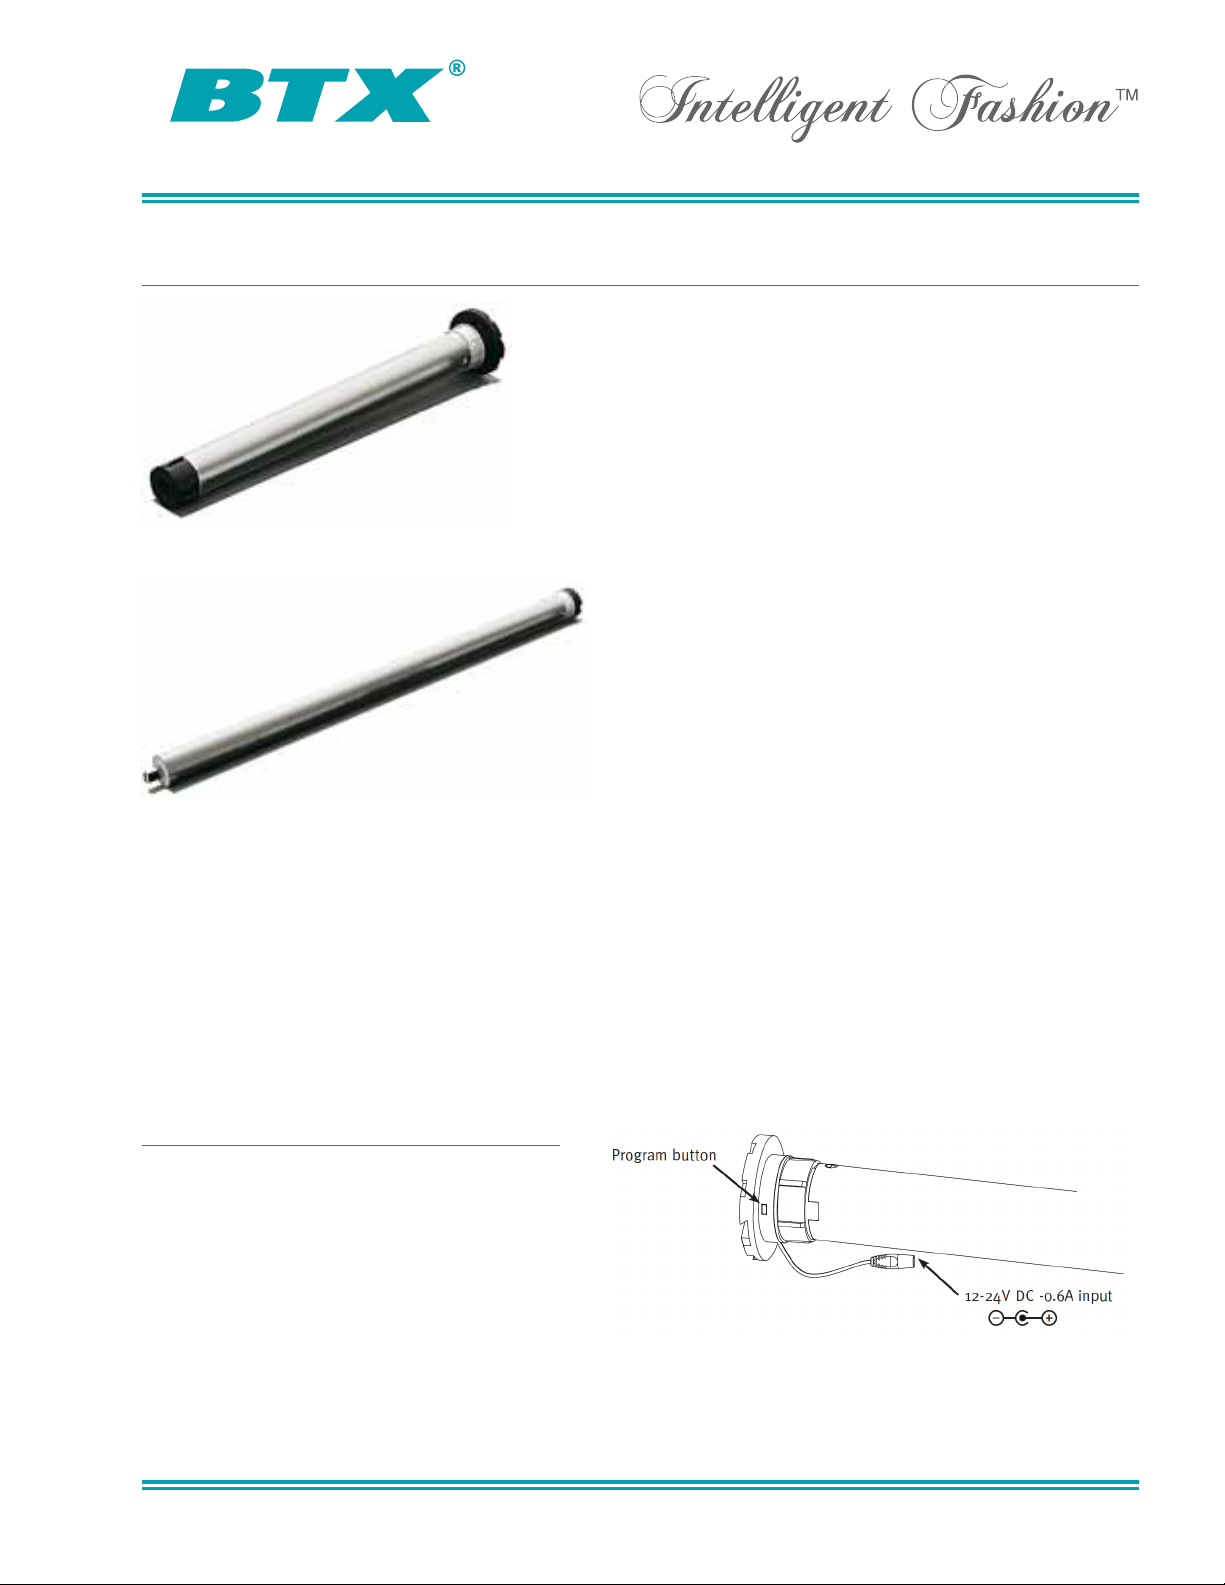
2.4GHzTubularMotorProgramming(RollerShade&Gemini)
Part #: 101.8 001
Descr ipt ion: Motor, 2 4V DC, 2 5mm, 0.8 Nm
Power Ra ting: 24V DC - 0.6A ( 15V Batt ery)
Recom men ded S upp ly: A BC- 11-W or ABC-1 3-W
Torqu e: 0.8Nm
Speed : 2 8 rpm
Opera tin g Tem per ature : 41 - 1 40° F
Max C han nels to Pair: 32 Chan nels
Physi cal Weig ht: 5.29 ounces (0.3 lbs )
Part #: 102.2 000
Descr ipt ion: Motor, 1 20V AC, 40mm, 5N m
Power Ra ting: 120V AC
Torqu e: 5Nm
Speed : 3 0 rpm
Max O per ating Ti me: 4 min.
Opera tin g Tem per ature : 41 - 1 40° F
Max C han nels to Pair: 32 Chan nels
Physi cal Weig ht: 60 o unces (3 .75 lbs)
In or der to p rog ram t he motor , t he sy ste m mus t f irst be conne cte d to a p ower sou rce.
Note: 2.4 GHz motors are init ally pro gramm ed via a pr ogram min g but ton loca ted at t he
head of the m oto r. Alt ernati vely, yo u may en ter prog rammi ng mode via the SingleS elect
featu re, howe ver, this o nly work s if the intende d motor is alrea dy learned to the r emote
or th e m otor has not bee n lea rne d t o any re mote (fa ctory de fault ).
Note: It is p ossible to progr am multi ple moto rs simul taneousl y by pla cing all intende d
motor s i n pro gram mod e, then learni ng th e h andse nde r and ch annel .
Learn ing a Ha nds ender /Ch annel
1. Pres s t he “P rogram” button o n the
motor an d the sy stem wil l beg in to
step bac k and fo rth.
2. Sele ct the d esi red c han nel o n t he
hands end er an d p ress the “Pro gram”
butto n o n the ba ck of th e rem ote.
You ne ed a pen or p ape r cli p.
3. Cont inu e to oth er pr ogr am fu nct ions or exit program mode by pressing the
“Prog ram” but ton on t he motor. Once ex ited, th e motor will sto p steppi ng.
www.btxinc.com Dallas, Texas - USA
Page 4

2.4GHzTubularMotorProgramming(RollerShade&Gemini)
Setti ng Limit s
1. If n ot alrea dy in pr ogram mo de, pres s the “P rogra m” butto n o n the mo tor a nd the
syste m w ill b egi n to ste p bac k a nd fo rth .
2. Sele ct the a ppr opria te chann el on th e h andse nde r.
3. To set the upp er li mit , hol d t he “U p” butto n o n the ha ndsen der unti l y ou’ve reached
the d esi red l ocation. Once re ached, p ress and hold th e “St op” and “Do wn”
butto ns simul tan eousl y f or ap proximat ely 3 se conds. T he syste m will s top step ping
for a mo ment to confi rm the limit i s set, t hen will continu e steppi ng. Cont inue
progr amming o r exit p rogram m ode by p ressi ng the “Program ” button on the motor.
4. To set the low er li mit , hol d t he “D own ” but ton on t he hands end er un til you’ ve
reach ed the d esired l ocation. Once re ached , p ress and hold the “St op” and “Up”
butto ns simul tan eousl y f or ap proximat ely 3 se conds. T he syste m will s top step ping
for a mo ment to confi rm the limit i s set, t hen will continu e steppi ng. Cont inue
progr amming o r exit p rogram m ode by p ressi ng the “Program ” button on the motor.
Rever se Motor Di recti on
1. If n ot alrea dy in pr ogram mo de, pres s the “P rogra m” butto n o n the mo tor a nd the
syste m w ill b egi n to ste p bac k a nd fo rth .
2. Sele ct the a ppr opria te chann el on th e h andse nde r.
3. Pres s a nd ho ld the “ Up” and “Do wn” b utt ons o n t he re mote sim ultaneou sly for
appro ximately 3 secon ds. The system w ill stop steppin g for a moment t o confir m the
chang e i s set , t hen w ill cont inu e ste ppi ng. C ont inue programm ing or e xit prog ram
mode by press ing the “Progra m” butto n on the motor.
Toggl e M oment ary /Main tai n Opt ion
1. If n ot alrea dy in pr ogram mo de, pres s the “P rogra m” butto n o n the mo tor a nd the
syste m w ill b egi n to ste p bac k a nd fo rth .
2. Pres s and ho ld the “ Program” butt on on th e m otor for appr oximatel y 3-5 se conds. T he
syste m w ill g ive a qu ick jog the n con tin ue st epp ing. Con tinue program ming or exit
progr am mode by press ing the “Pro gra m” bu tto n on the moto r.
To Er ase Hand sen der f rom Moto r
1. If n ot alrea dy in pr ogram mo de, pres s the “P rogra m” butto n o n the mo tor a nd the
syste m w ill b egi n to ste p bac k a nd fo rth .
2. Sele ct the a ppr opria te chann el on th e h andse nde r.
3. Pres s t he “P rogram” button o n the ba ck of th e handse nder. The system will sto p
stepp ing for a m oment to conf irm th e handse nder is erased, then wil l contin ue
stepp ing . Con tin ue pr ogrammin g or exi t progra m mode b y pre ssi ng th e “Prog ram”
butto n o n the mo tor.
www.btxinc.com Dallas, Texas - USA
Page 5

2.4GHzTubularMotorProgramming(RollerShade&Gemini)
To Er ase All Pro gramm ing
1. If n ot alrea dy in pr ogram mo de, pres s the “P rogra m” butto n o n the mo tor a nd the
syste m w ill b egi n to ste p bac k a nd fo rth .
2. Pres s a nd ho ld the “ Program” button on the m otor for approxi mately 1 5 second s. The
syste m w ill g ive a lo ng jog i n o ne di rection and stop . The mo tor will automat ically e xit
progr am mode.
www.btxinc.com Dallas, Texas - USA
Page 6
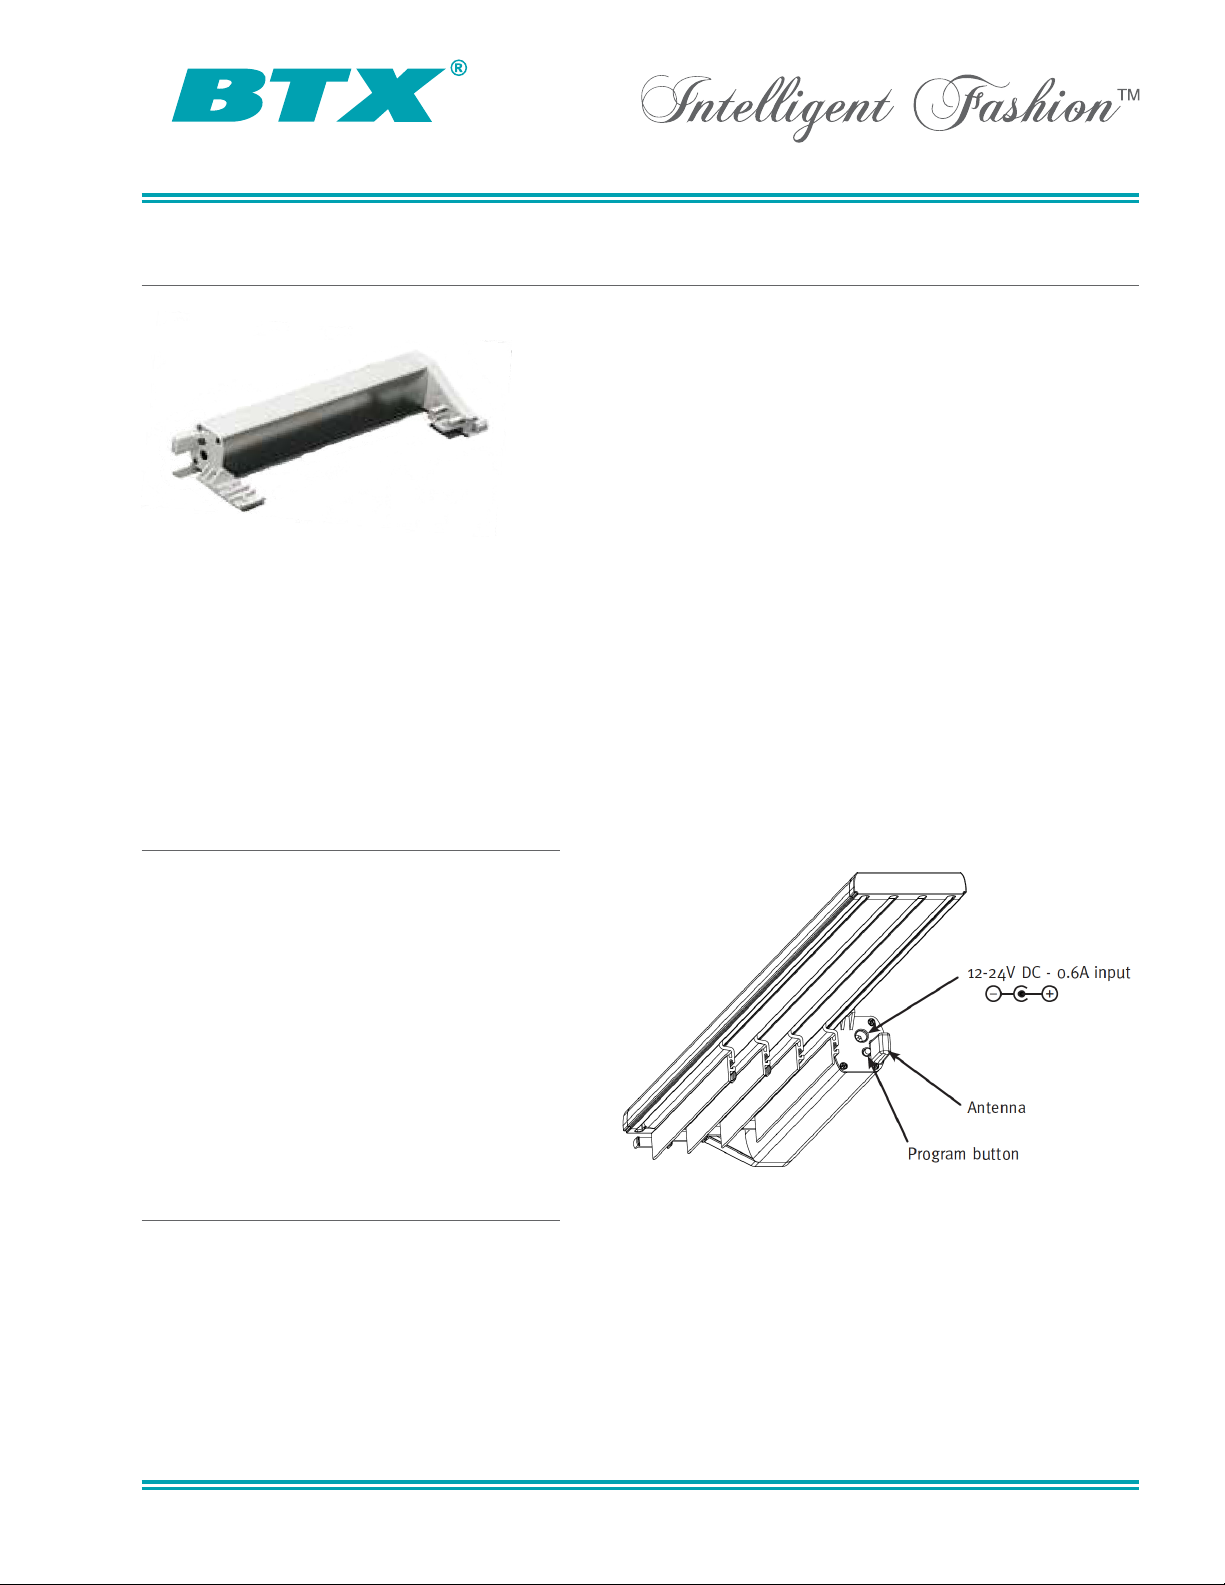
2.4GHzTraversingMotorProgramming(Drapery&Panel)
Part #: 101.8 010
Descr ipt ion: Motor, 2 4V DC, P anel
Power Ra ting: 24V DC - 0.6A ( 15V Batt ery)
Recom men ded S upp ly: A BC- 11-W or ABC-1 3-W
Max P ull ing F orc e: 6. 6 lbs
Chain Sp eed: 2.5 in/s ec
Opera tin g Tem per ature : 41 - 1 40° F
Max C han nels to Pair: 32 Chan nels
Physi cal Weig ht: 8.2 ounces ( 0.5 lbs)
In or der to p rog ram t he motor , t he sy ste m mus t f irst be conne cte d to a p ower sou rce.
Note: 2.4 GHz motors are init ally pro gramm ed via a pr ogram min g but ton loca ted at
the h ead of t he motor. Al ter natively , you ma y enter progr amm ing m ode via the Sing le
Selec t f eatur e, howev er, this on ly works if the intended motor i s alread y learned t o the
hands end er or th e mot or has n ot been lea rne d to any hand sen der ( fac tory def ault) .
Note: It is p ossible to progr am multi ple moto rs simul taneousl y by pla cing all intende d
motor s i n pro gram mod e, then learni ng th e h andse nde r and ch annel .
Calib rat ing t he Syste m
The P ane l and Verti cal s yst ems d o
not r equire l imit set tings du e to an
auto- cal ibrat ion func tio n. Ca lib ratin g
the s yst em is th e fir st thing yo u nee d
to do be fore proceedi ng with other
progr amming f unctions .
1. To cal ibrat e, press the “Pr ogram”
butto n o n the mo tor. T he syste m w ill
run e nd to en d a nd th en stop. Th e
limit s s hould no w be set .
Learn ing a Ch ann el
1. Pres s t he “P rogram” button o n the mo tor and the syst em will begin to step ba ck and
forth .
2. Sele ct the d esi red c han nel o n t he ha nds ender an d pre ss the “ Program” button on
the b ack of t he remot e. You likely need a p en or pa per clip .
3. Cont inu e to oth er pr ogram fu nctions or ex it progr am mode by pr ess ing t he “Prog ram”
butto n o n the mo tor. O nce exit ed, the mot or wi ll stop ste pping .
www.btxinc.com Dallas, Texas - USA
Page 7

2.4GHzTraversingMotorProgramming(Drapery&Panel)
Rever se Motor Di recti on
1. If n ot alrea dy in pr ogram mo de, pres s the “P rogra m” butto n o n the mo tor a nd the
syste m w ill b egi n to ste p bac k a nd fo rth .
2. Sele ct the a ppr opria te chann el on th e h andse nde r.
3. Pres s a nd ho ld the “ Lef t” an d “ Right ” b utton s o n the remote simultan eously f or
appro ximately 3 secon ds. The system w ill stop steppin g for a moment t o confir m the
chang e i s set , t hen w ill cont inu e ste ppi ng. C ont inue programm ing or e xit prog ram
mode by press ing the “Progra m” butto n on the motor.
Toggl e M oment ary /Main tai n Opt ion
1. If n ot alrea dy in pr ogram mo de, pres s the “P rogra m” butto n o n the mo tor a nd the
syste m w ill b egi n to ste p bac k a nd fo rth .
2. Pres s and ho ld the “ Program” butt on on th e m otor for appr oximatel y 3-5 se conds. T he
syste m w ill g ive a qu ick jog the n con tin ue st epp ing. Con tinue program ming or exit
progr am mode by press ing the “Pro gra m” bu tto n on the moto r.
To Er ase Hand sen der f rom Moto r
1. If n ot alrea dy in pr ogram mo de, pres s the “P rogra m” butto n o n the mo tor a nd the
syste m w ill b egi n to ste p bac k a nd fo rth .
2. Sele ct the a ppr opria te chann el on th e h andse nde r.
3. Pres s t he “P rogram” button o n the ba ck of th e handse nder. The system will sto p
stepp ing for a m oment to conf irm th e handse nder is erased, then wil l contin ue
stepp ing . Con tin ue pr ogrammin g or exi t progra m mode b y pre ssi ng th e “Prog ram”
butto n o n the mo tor.
To Er ase All Pro gramm ing
1. If n ot alrea dy in pr ogram mo de, pres s the “P rogra m” butto n o n the mo tor a nd the
syste m w ill b egi n to ste p bac k a nd fo rth .
2. Pres s a nd ho ld the “ Program” button on the m otor for approxi mately 1 5 second s. The
syste m w ill g ive a lo ng jog i n o ne di rection and stop . The mo tor will automat ically e xit
progr am mode.
www.btxinc.com Dallas, Texas - USA
Page 8

HowtoEnter“SingleSelect”ProgramMode
Singl eS elect mo de ca n b e use d t o ide nti fy an d p rogra m motors without using t he
progr am butto n locate d on the motor h ead. Thi s mode w ill cycl e throug h motors that ar e
curre ntly lea rne d t o you r h andse nde r, or ar e still in facto ry defau lt mode. Single Select
WILL NOT plac e m otors le arn ed to ot her h and sende rs in pr ogr am mo de.
1. To ent er Si ngleSel ect mode , hold t he “Stop ” button on the front of the han dsender
while pressin g the “P rogram” button o n the ba ck of th e handse nder. You will need a
pen o r p aper cli p.
2. The han dsend er will now ente r s earch mode an d look f or any m otors wi thin the
liste nin g ran ge and p lac e the fi rst-r ecognize d motor into pro gram mod e. While in
searc h mode, the LEDs on the handsend er will cascade up and d own. If the loca ted
motor is not the one you desi re, pres s the “R ight” or “Left” button o n the re mote to
cycle to anot her moto r.
3. Once yo ur de sir ed mo tor is l oca ted, per f orm an y pro gramming functio ns you r equire.
4. You c an ex it Singl eS elect mo de at an y tim e b y qui ckl y pre ssi ng th e “ Right ” b utton
twice .
ProgrammingGroups
Multi ple moto rs of di ffe rent types ca n be pro grammed together in a gr oup ( or multi ple
group s). For best per f ormanc e, BTX r ecommend s gro upi ng sy ste ms by op erati ng direc tio n
(lift ing syst ems toge the r and tr avers ing syst ems toge the r). T his is d ue to th e f act t hat
opera tio n of the se sy ste ms va rie s fro m “Up” a nd “Down ” to “Le ft” and “Right”.
Setti ng a Gro up
1. Sele ct the d esi red g roup cha nnel on handsend er.
2. Pres s t he “P rogram” button o n each o f the mo tors you want to group t ogether. All
syste ms shoul d s tart ste pping .
3. Pres s t he “P rogram” button o n the ba ck of th e handse nder. All systems should stop
stepp ing for a m oment to conf irm th e channe l is lea rne d, then con tinue st eppin g.
4. Pres s t he “P rogram” button o n each m otor to exit pro gram mod e.
www.btxinc.com Dallas, Texas - USA
Page 9
Lit. Code: INST-CL-RM-111313
433 MHz/2.4 GHz SuperLink
Product Overview Key Features
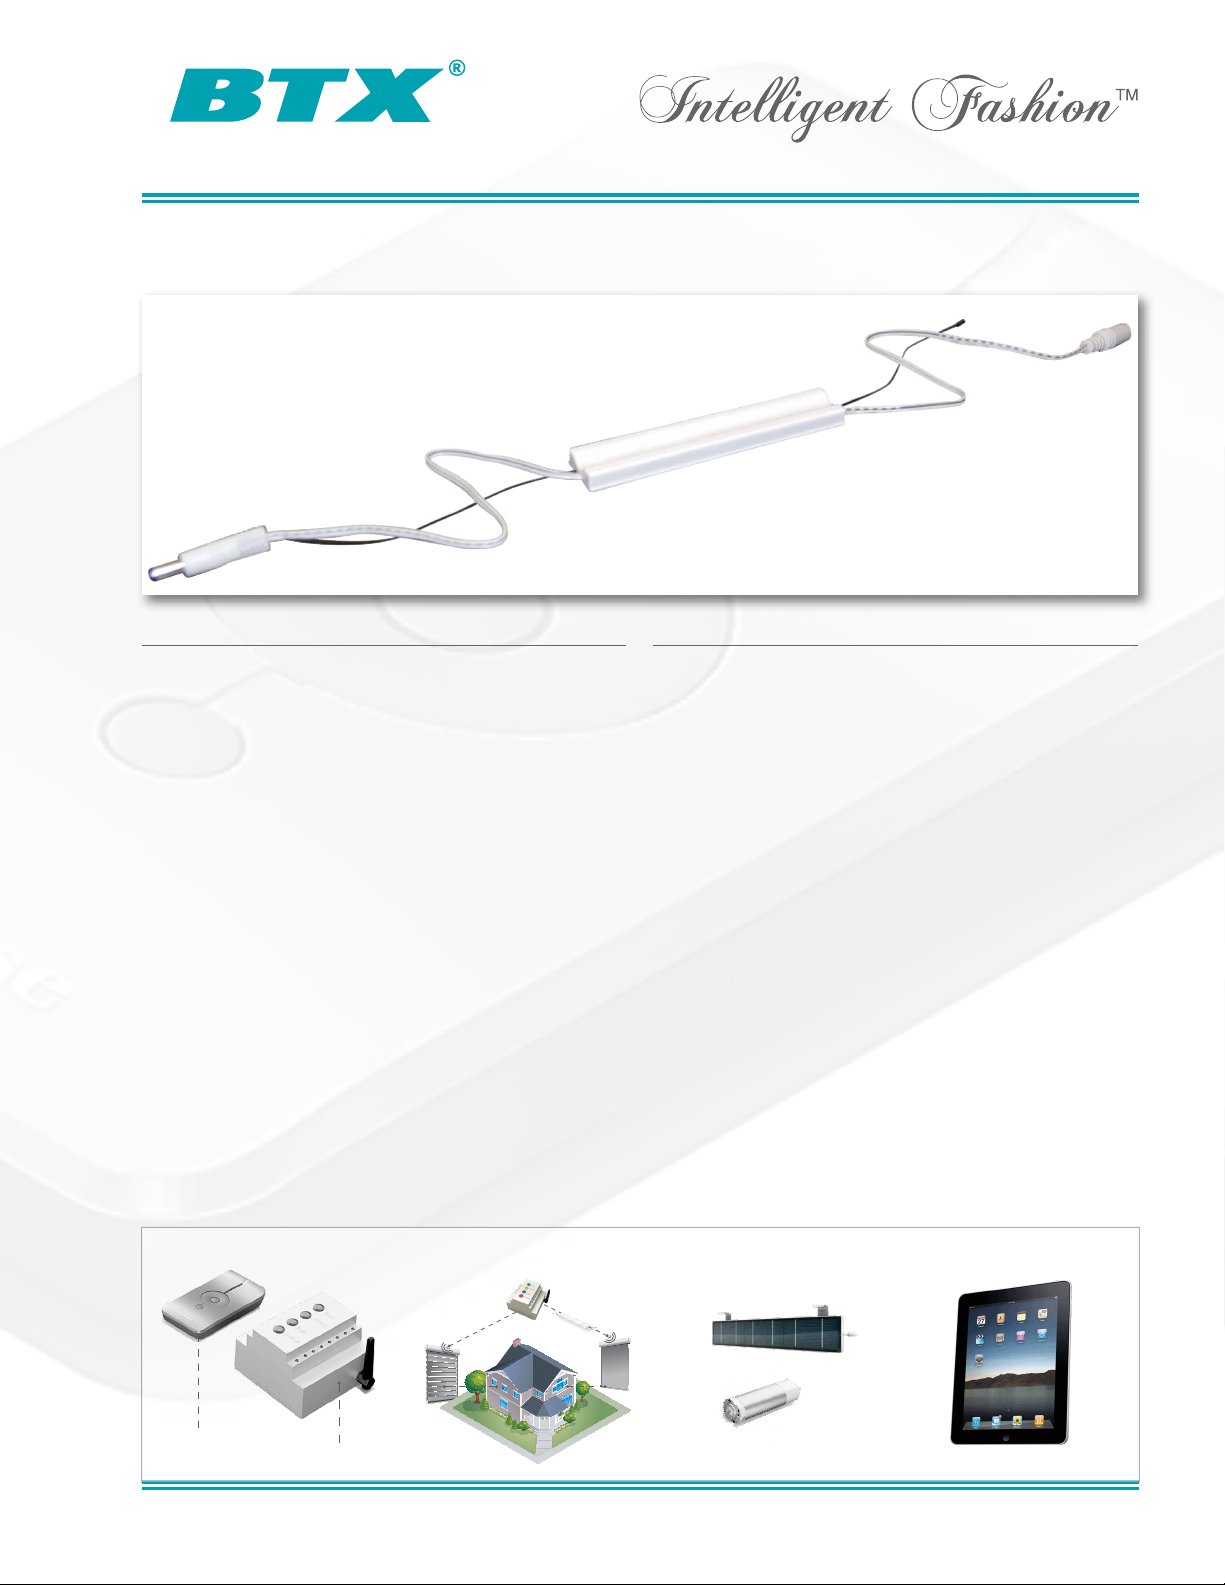
The S uperLink is a de vice tha t transl ates
radio si gnals fo r 433 MH z and 2. 4 GHz
opera tin g pla tfo rms . One sm all devi ce
can s erv e a r oom full of syst ems and has
a max imu m ran ge of up to 100 fee t. Wi th
its c omp act d esi gn, t he Super Link can be
place d i n a h idd en lo cat ion i n t he ar ea.
The S uperLink is key in bring ing BTX’ s wide
range of syst ems toge the r und er one
compl ete cont rol solu tion.
• Advan ced 433 MHz /2.4 GHz tran sla tion
techn olo gy
• Nativ e m esh n etw ork f or signa l relay
• Bring s a ll sy ste ms un der one uni versa l
contr ol platf orm
• Motor iza tion sol ution s f or
• Dra pery Sys tems
• Rol ler S had es
• Gem ini S had es
• Pan el Trac ks
• Sol ar Po wer ed Sh ade s
• andm ore
• Bidir ectional communi cation f or signa l
trans mis sion and feed bac k
Programming Guide
Technology
Network Connectors Third Party Integration
Network Connectors Solar Energy OperationWireless Home Networks
5-c hannel Hand send er
Wireless R S232
www.btxinc.com Dallas, Texas - USA
Page 10
433MHz/2.4GHzSuperLinkProgramming
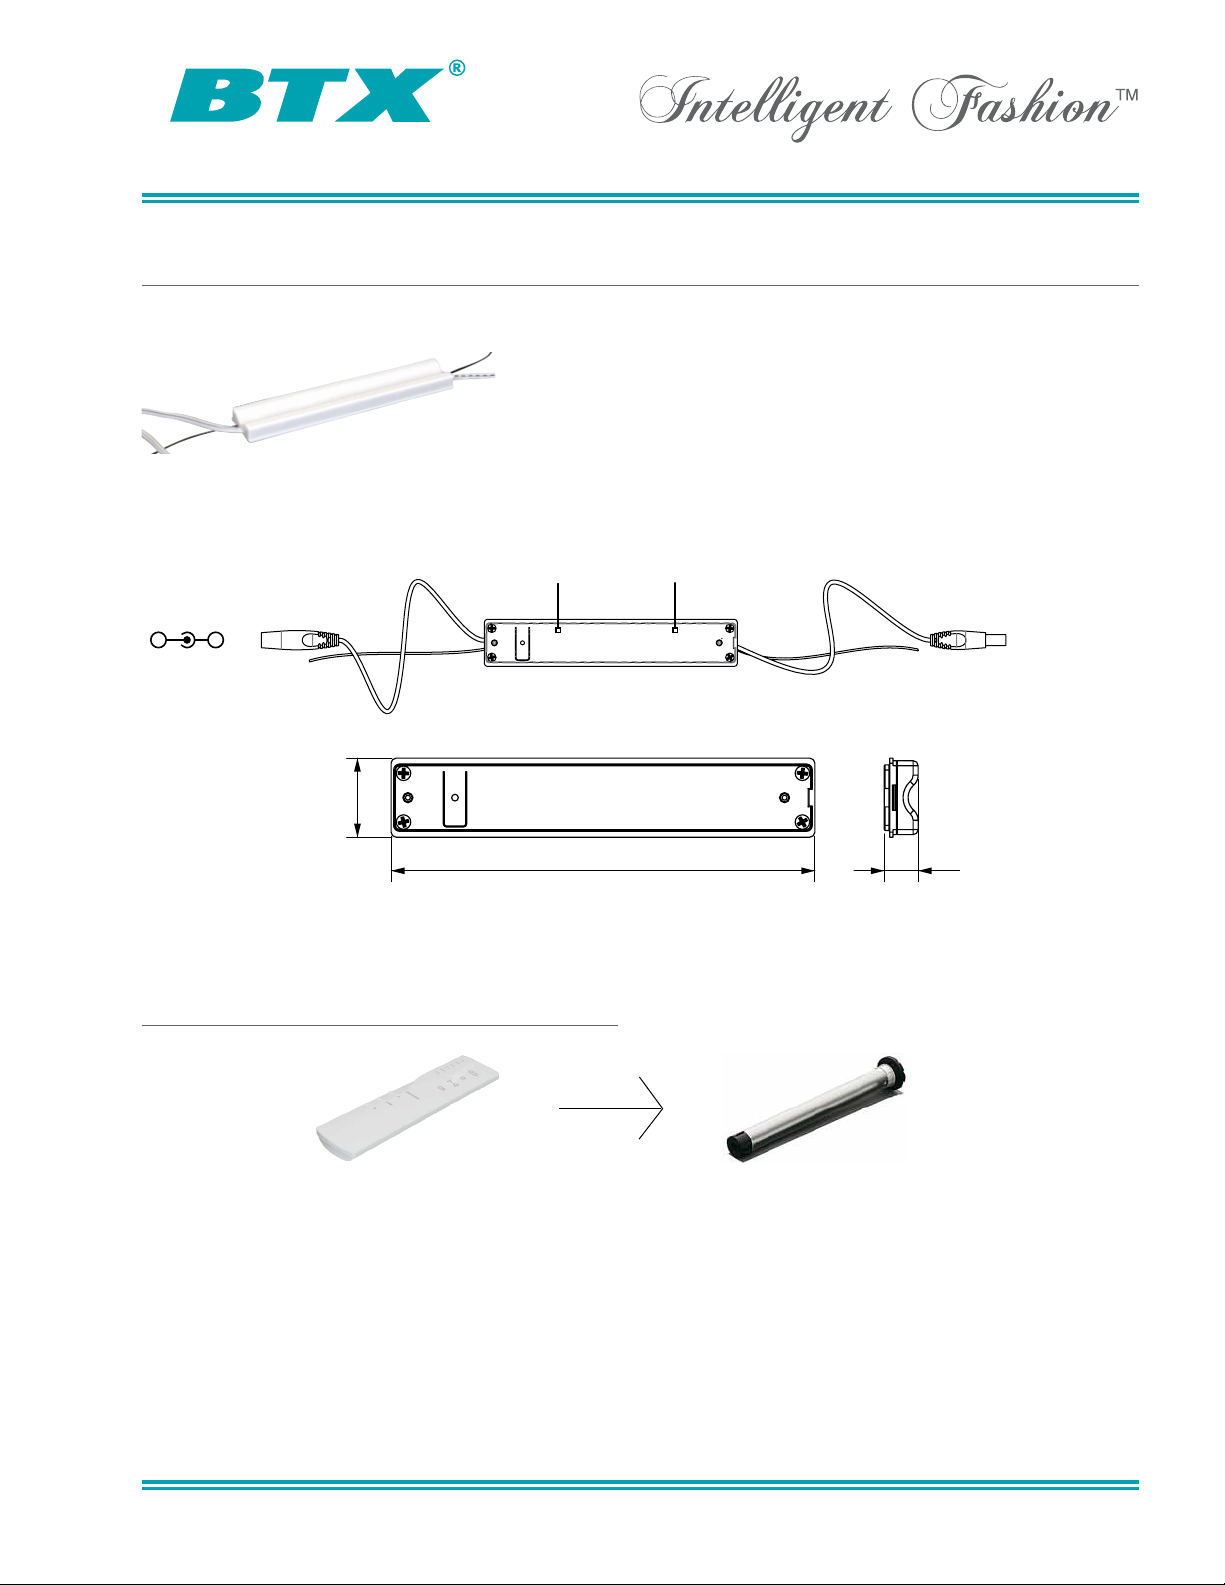
Part #: 424.8 002
Descr ipt ion: SuperLin kNexus, 433 MHz /2.4 GHz
Power Ra ting: 12 - 24 V DC, 0. 3A
Recom men ded S upp ly: A BC- 11-W or ABC-1 3-W
Max C han nels to Pair (2. 4 Ghz to 433 MHz ): 32 Channel s
Max C han nels to Pair (43 3 MHz to 2.4 GHz ): Un limited Up
and D own , 32 Max for Lef t and Ri ght C onv ersio n
2.4Ghz LED
Green = receive
Red = send
Powersupply 12-24V DC 12-24V DC Output to motor (optional)
-
+
2.4Ghz Antenna 433Mhz Antenna
1”
433Mhz LED
Green = receive
Red = send
3/8”5”
Pairi ng 433 M Hz Contr ol with 2.4 GHz Mot or
433 M Hz
2.4 G Hz
1. Conn ect the Sup erLin k t o a 1 2-2 4V DC po wer s upp ly (m ust be a wa ll tr ans for mer ).
2. Prog ram the 2.4 GHz mot or wi th a 2.4 GH z han dse nder usi ng th e a pprop riate
progr amming i nstructi ons for the syst ems in q uestion.
3. To program the moto r to a 4 33 MHz c ontrol, put the motor in to progr am mo de.
4. Sele ct the d esi red c han nel o n t he 43 3 M Hz co ntrol us ing the channel select b utton.
5. Pres s a nd ho ld the “ Ope n” an d “ Close ” b utton s s imult ane ously . T he sy ste m sho uld
cease st eppin g m oment ari ly fo r c onfir mation .
6. Pres s t he “P rogram” button o n each m otor to exit pro gram mod e.
www.btxinc.com Dallas, Texas - USA
Page 11
433MHz/2.4GHzSuperLinkProgramming
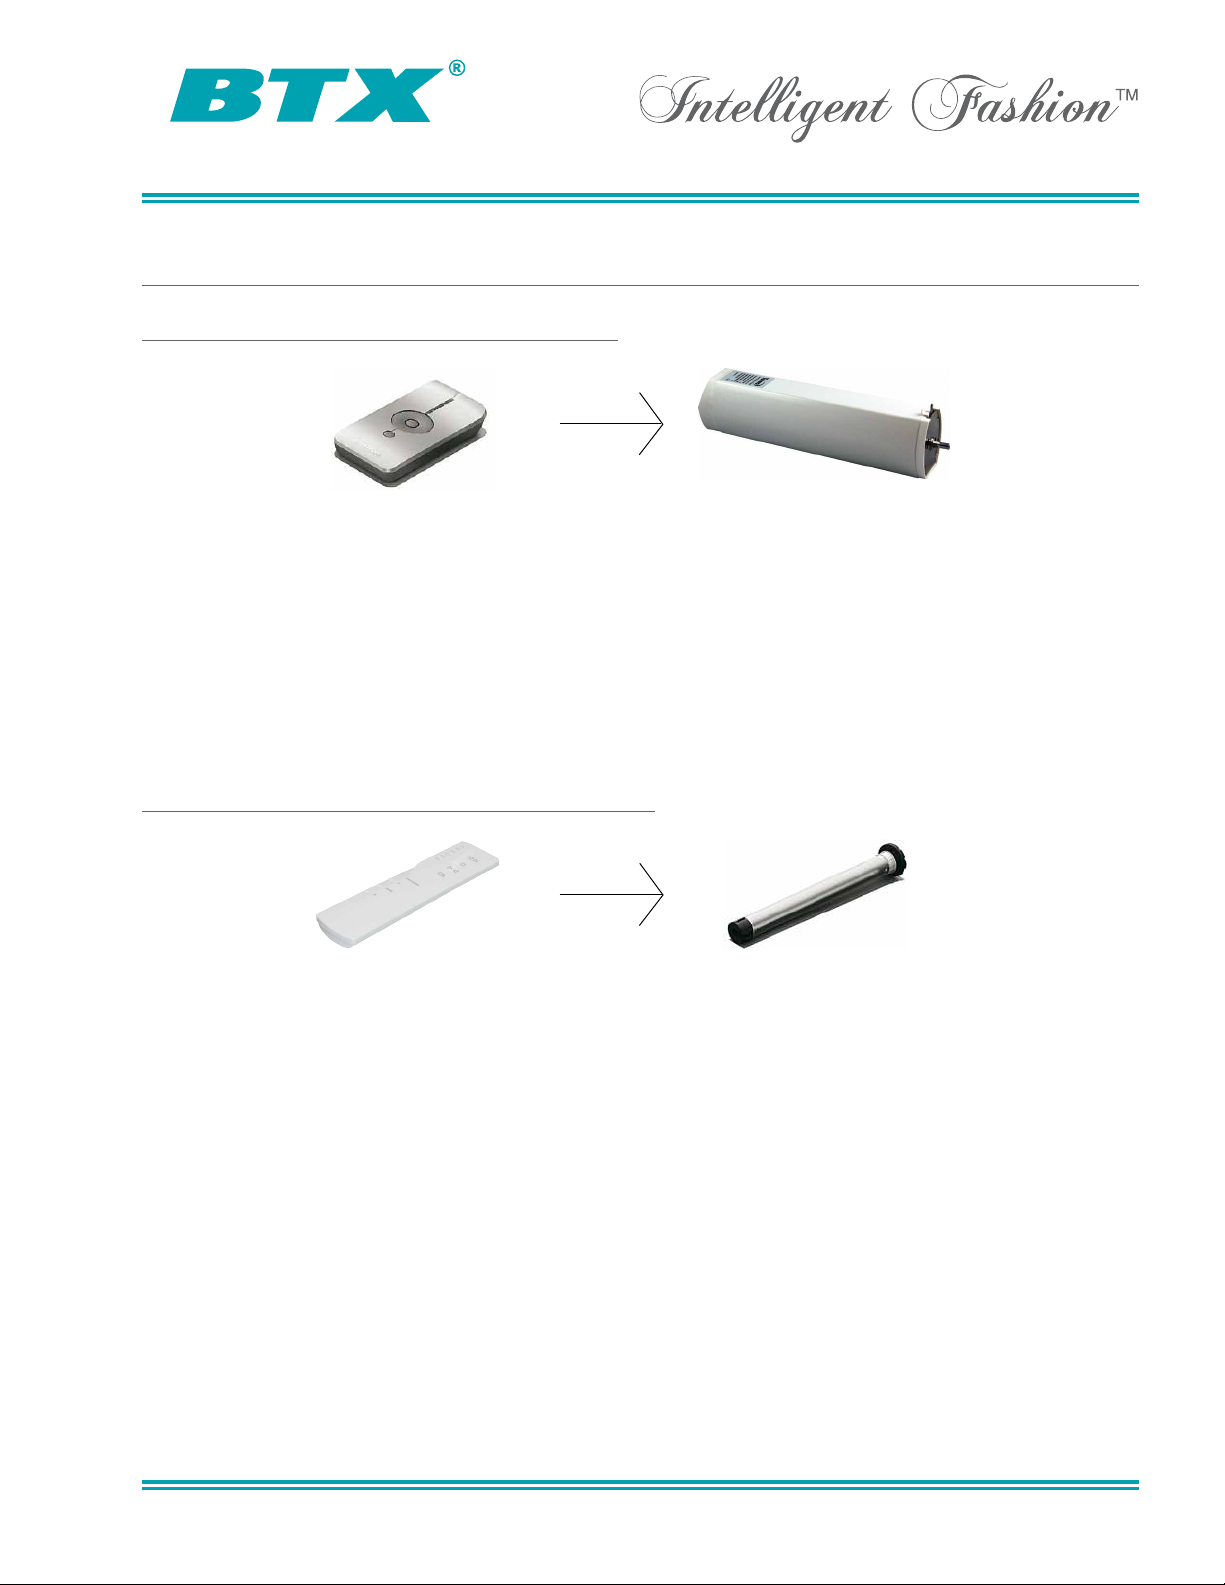
Pairi ng 2.4 G Hz Contr ol with 433 MHz Mot or
2.4 G Hz
1. Conn ect the Sup erLin k t o a 1 2-2 4V DC po wer s upp ly (m ust be a wa ll tr ans for mer ).
2. Prog ram the 433 MHz mot or wi th a 433 MH z han dse nder usi ng th e a pprop riate
progr amming i nstructi ons for the syst ems in q uestion.
3. To program the moto r to a 2 .4 GHz c ontrol, put the motor in to progr am mo de.
4. Sele ct the d esi red c han nel o n t he 2. 4 G Hz co ntrol us ing the channel select b utton.
5. Pres s t he “P rogram” button o n the ba ck of th e remote . You likely n eed a pe n or
paper cl ip. T he motor sh ould jog for con fir mation.
Opera tin g 2.4 GH z mot or with 433 MHz Con trol
433 M Hz
The m oto rs wi ll opera te nor mally us ing the “Open”, “Close”, and “St op” butt ons on t he
remot e. Addit ionally, the interm ediate s ettings can b e contro lled usi ng th e “A”, “ Center”,
and “ B” butto ns.
2.4 G Hz
433 M Hz
The s ing ular exc eptio n f or st and ard c ontro l i s wit h t he 2. 4 G Hz ve rti cal b lin d mot or. To
opera te the v ert ical sys tem c omp letel y, it is ne cessa ry to pa ir the m oto r to two chan nel s.
One c han nel i s u sed t o t ilt t he vanes , t he se con d cha nne l is use d for tr avers ing the
vanes . T he st and ard c onfigura tion whe n using this con trol set ting is to ha ve titli ng by
defau lt. For tra versi ng, the Sup erLin k w ill c onv ert t he “Up” and “Dow n” (“Ope n” and
“Clos e”) butt ons to t he “Left ” a nd “R igh t” fu nct ions as used by the 2 .4 GHz c ont rols.
www.btxinc.com Dallas, Texas - USA
 Loading...