

Page 1
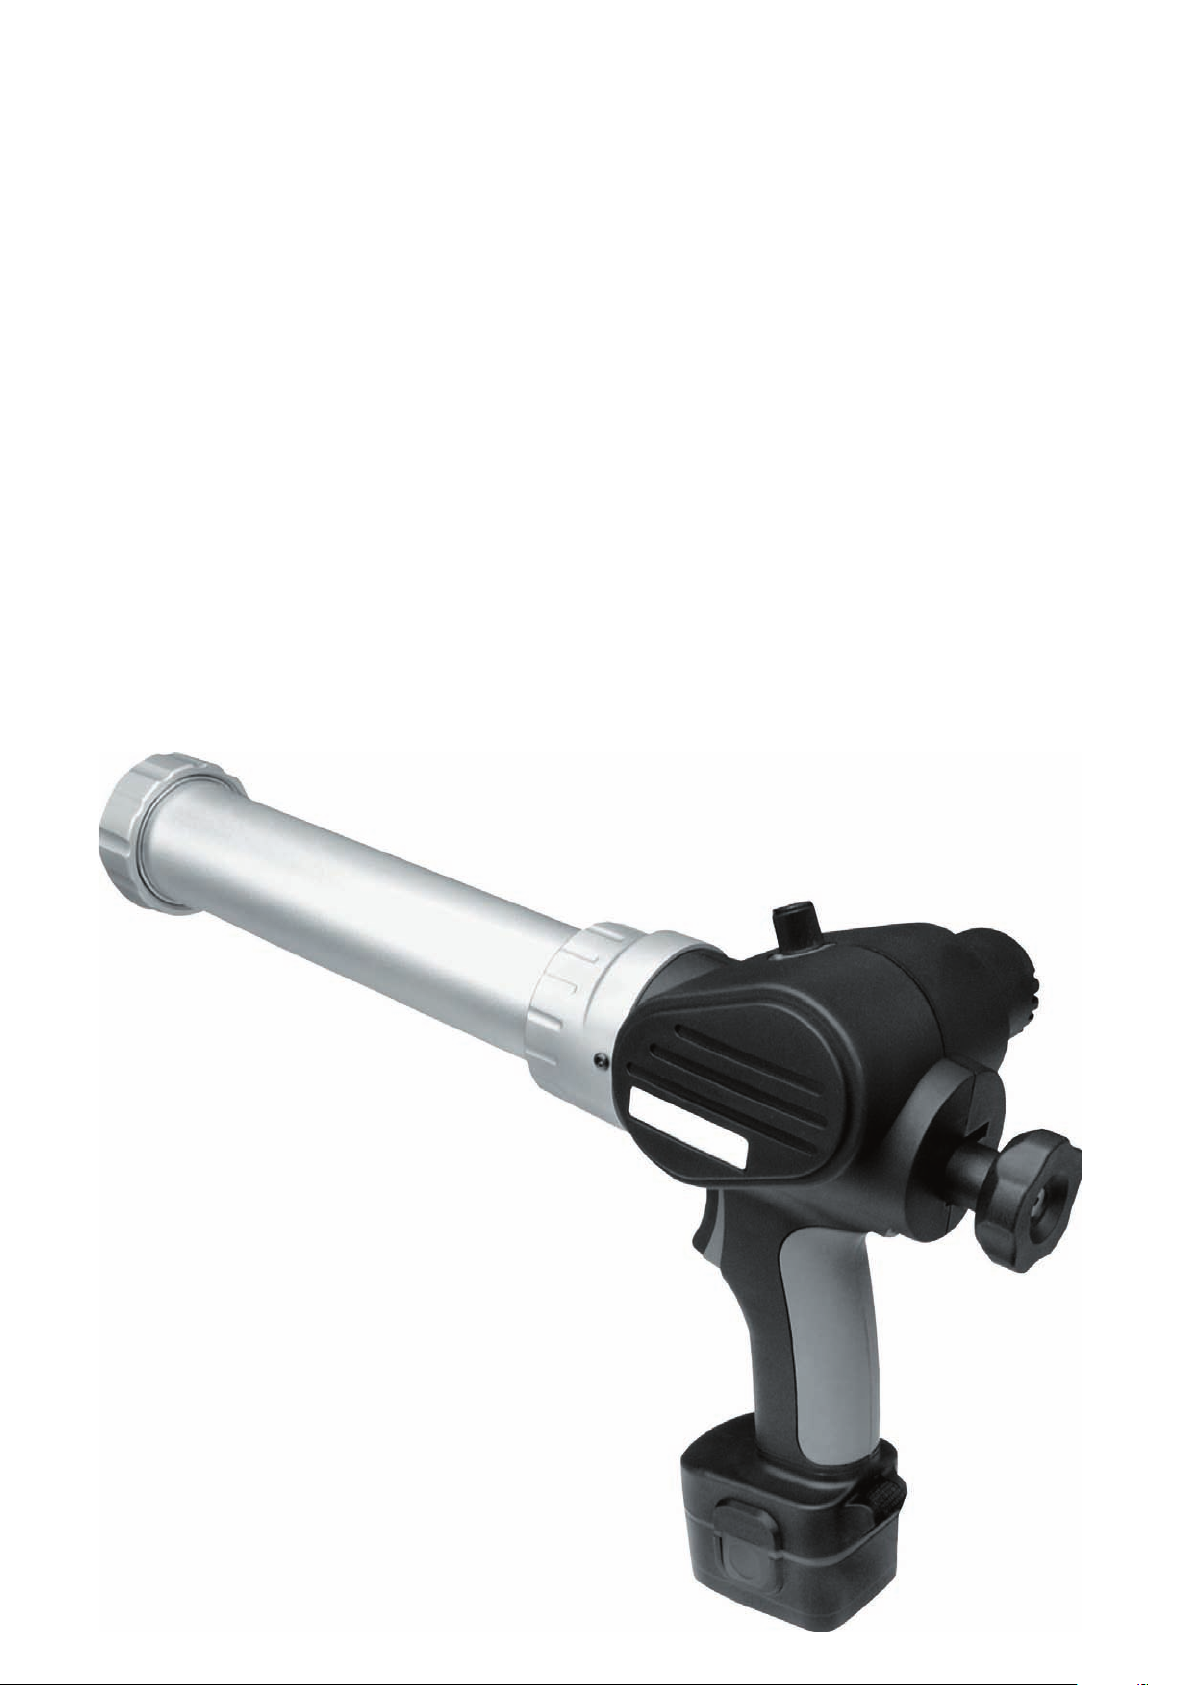
SEALer
pro gun
7.2 Volt CORDLESS SEALING GUN
Operating Instructions
2014-04
Page 2

1.
10.
11.
12.
13.
to
warming
GENERAL OPERATIONAL PRECAUTIONS
Consider working environment. Do not use the tool in damp or wet
locations and keep work area well lit. Do not use tool in the
presence of flammable liquids or gases.
2.
Guard against electric shock. Avoid body contact with earthed or
grounded surfaces.
3.
Tool should only be used by authorised personnel and should be kept
away from children.
4.
The 7.2v battery charger is not intended for use by young children.
Young children should be supervised so they do not play with this device.
When not in use, tool should be stored in a clean, dry location.
5.
Do not labour the tool. It will perform better and safer at the speed
for which it was intended.
6.
Do not abuse battery charger power cord. Never pull cord
disconnect plug from power socket. Keep cord away from heat, oil
and sharp edges.
7.
Before using tool, check for any damage. Check for alignment or
obstruction of moving parts, and any other condition that may affect
its operation.
8.
Any damaged or defective parts should be properly repaired or
replaced by an authorised service center unless otherwise indicated
in this instruction manual. Do not use tool if defective in any way.
9.
To ensure the continued operational integrity of the power tool, do not
dismantle tool casing.
Do not touch movable parts or accessories unless the power source
has been disconnected.
Dripping may occur with small nozzle openings or when
using exceptionally soft sealants or adhesives.
Do not insert a cartridge or sausage if it is wet, or if the
sealant/adhesive has hardened.
Some high modular urethanes may require heating or
before extruding. Before extrusion, it is recommended to knead
sausages thoroughly.
Page 3

OVERLOAD PRECAUTIONS
1.
Regular stalling or overloading of the motor and gearing may cause
serious damage.
2.
Urethanes/sealants can cause overload if a batch is out of date or
faulty or if sealant is cured in nozzle.
3.
If the tool is operated continuously for long periods of time, the motor
may become hot. Allow the tool to cool from time to time.
OPERATING HINTS & TIPS FOR
RE-CHARGING BATTERIES
For best performance, batteries should be fully drained/flat before
1.
recharging, otherwise, operational time may be reduced.
2.
During Charging:
RED LIGHT means battery is FAST CHARGING (APPROX. 1 HOUR),
GREEN LIGHT means battery is fully charged and is on TRICKLE CHARGE.
The Amp Hour capacity of the charger is 2.4A
IMPORTANT SAFETY INSTRUCTIONS FOR
BATTERY & BATTERY CHARGER
1.
The CG72-30 charger is only to be used for charging the 7.2 volt
CG72-29 type battery packs. Other batteries are not to be charged
using this charger.
2.
Before using battery charger, read all instructions and cautionary
markings on batteries and charger.
3.
Do not expose charger to moisture.
4.
To reduce the risk of damage to electric plug and cord, pull by plug
rather than cord when disconnecting charger.
5.
Use of any attachment not recommended or sold by the battery
charger manufacturer may result in risk of fire, electric shock or
injury to persons.
6.
Ensure cord is located so that it will not be stepped on, tripped on,
tripped over, or otherwise subjected to possible damage.
7.
Do not operate charger with damaged cord or plug. Replace them
immediately.
Page 4

ADDITIONAL SAFETY RULES FOR CHARGER
u
.
.
& BATTERY CARTRIDGE
8.
Do not operate charger if it has received a sharp blow, been dropped,
or otherwise damaged in any way. Ta ke it to a qualified service
centre.
9.
To reduce risk of electric shock, unplug charger from outlet before
attempting any maintenance or cleaning. Turning off controls will
not reduce this risk.
10.
11.
12.
13.
14.
15.
16.
Do not disassemble battery or battery charger. Ta ke it to a qualified
service center if repair is required, as incorrect re-assembling may
lt in a risk of electric shock or fire
res
Only charge battery with charger supplied by the manufacturer.
Do not allow the charger vents to become covered or clogged.
Always cover the battery terminals with the battery cover when the
battery is not used.
Do not short the battery:
Do not touch the terminals with any conductive material.
Avoid storing cartridge in a container with other metal objects such
as nails, coins, etc.
o not expose battery to water or rain. A battery short can cause
large current flow, overheating, possible burns or a tool breakdown
o not store the tool or battery in locations where the temperature
17.
18.
19.
o not incinerate the battery even if it is severely damaged or
completely worn out. The battery may explode in a fire.
Be careful not to drop, shake or strike battery.
Do not charge inside a box or container of any kind. The battery
must be placed in a well ventilated area during charging.
Page 5
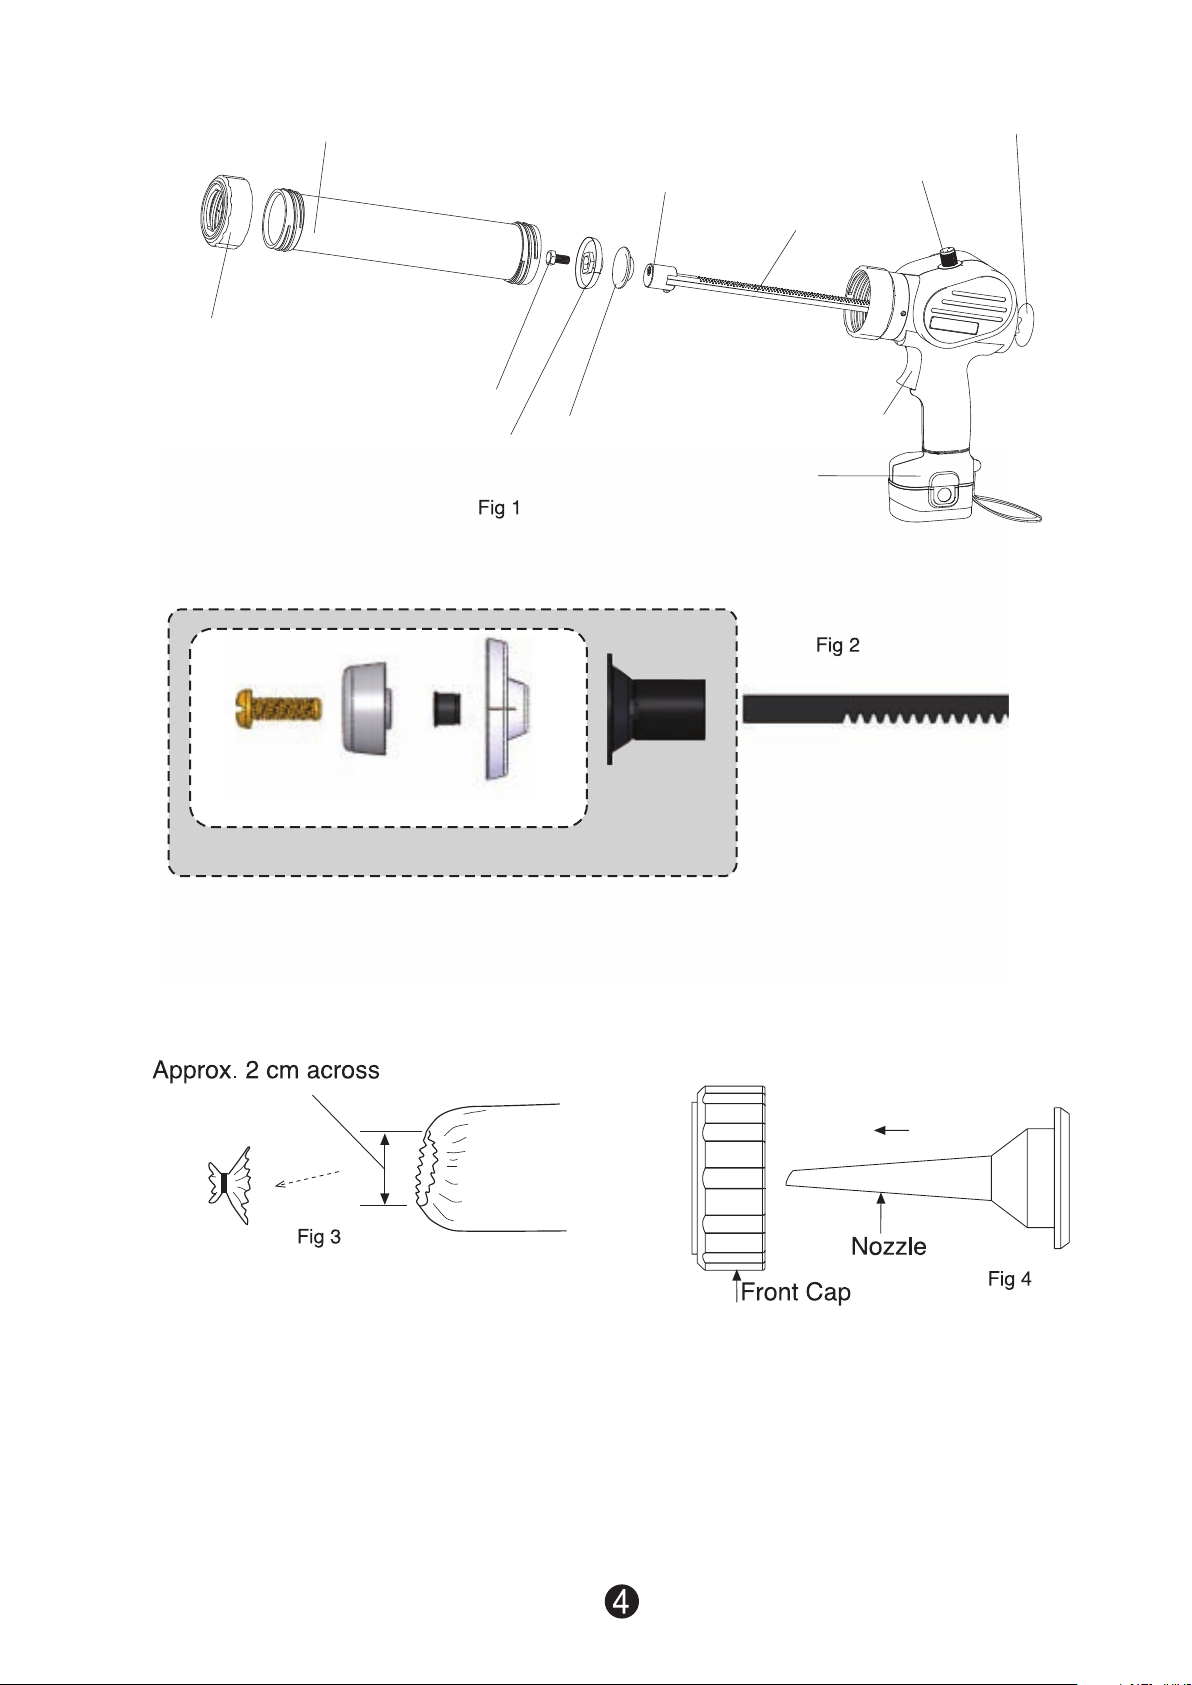
VIEWING THE MAJOR COMPONENTS
Barrel
Plunger Mount
Front Cap
Plunger Screw
Plastic Plunger Disc
Steel Plunger Disc
For Sausage Bag Application
Rear Knob
Speed Control Dial
Rack
Trigger
Battery
Plastic Plunger Assembly (PS7204K)
Plunger Assembly Kit (PS72KIT)
Cut a hole in one end of the
1.
sausage bag as shown in the
gure below.
Rack
(CG7213-6)
Remove the front cap. Fit the
2.
nozzle inside the front cap and
cut o the tip at a point suitable
for the job.
Insert the sausage bag into the barrel.
3.
Screw the front cap on tight. It is not necessary to pull back the rack
by hand. Make sure the sausage bag is inserted properly and sits upright
on the Plastic Plunger Disc.
Push the Rear Knob forward so that the Plastic Plunger Disc is rm on the
4.
rear of the sausage.
Page 6
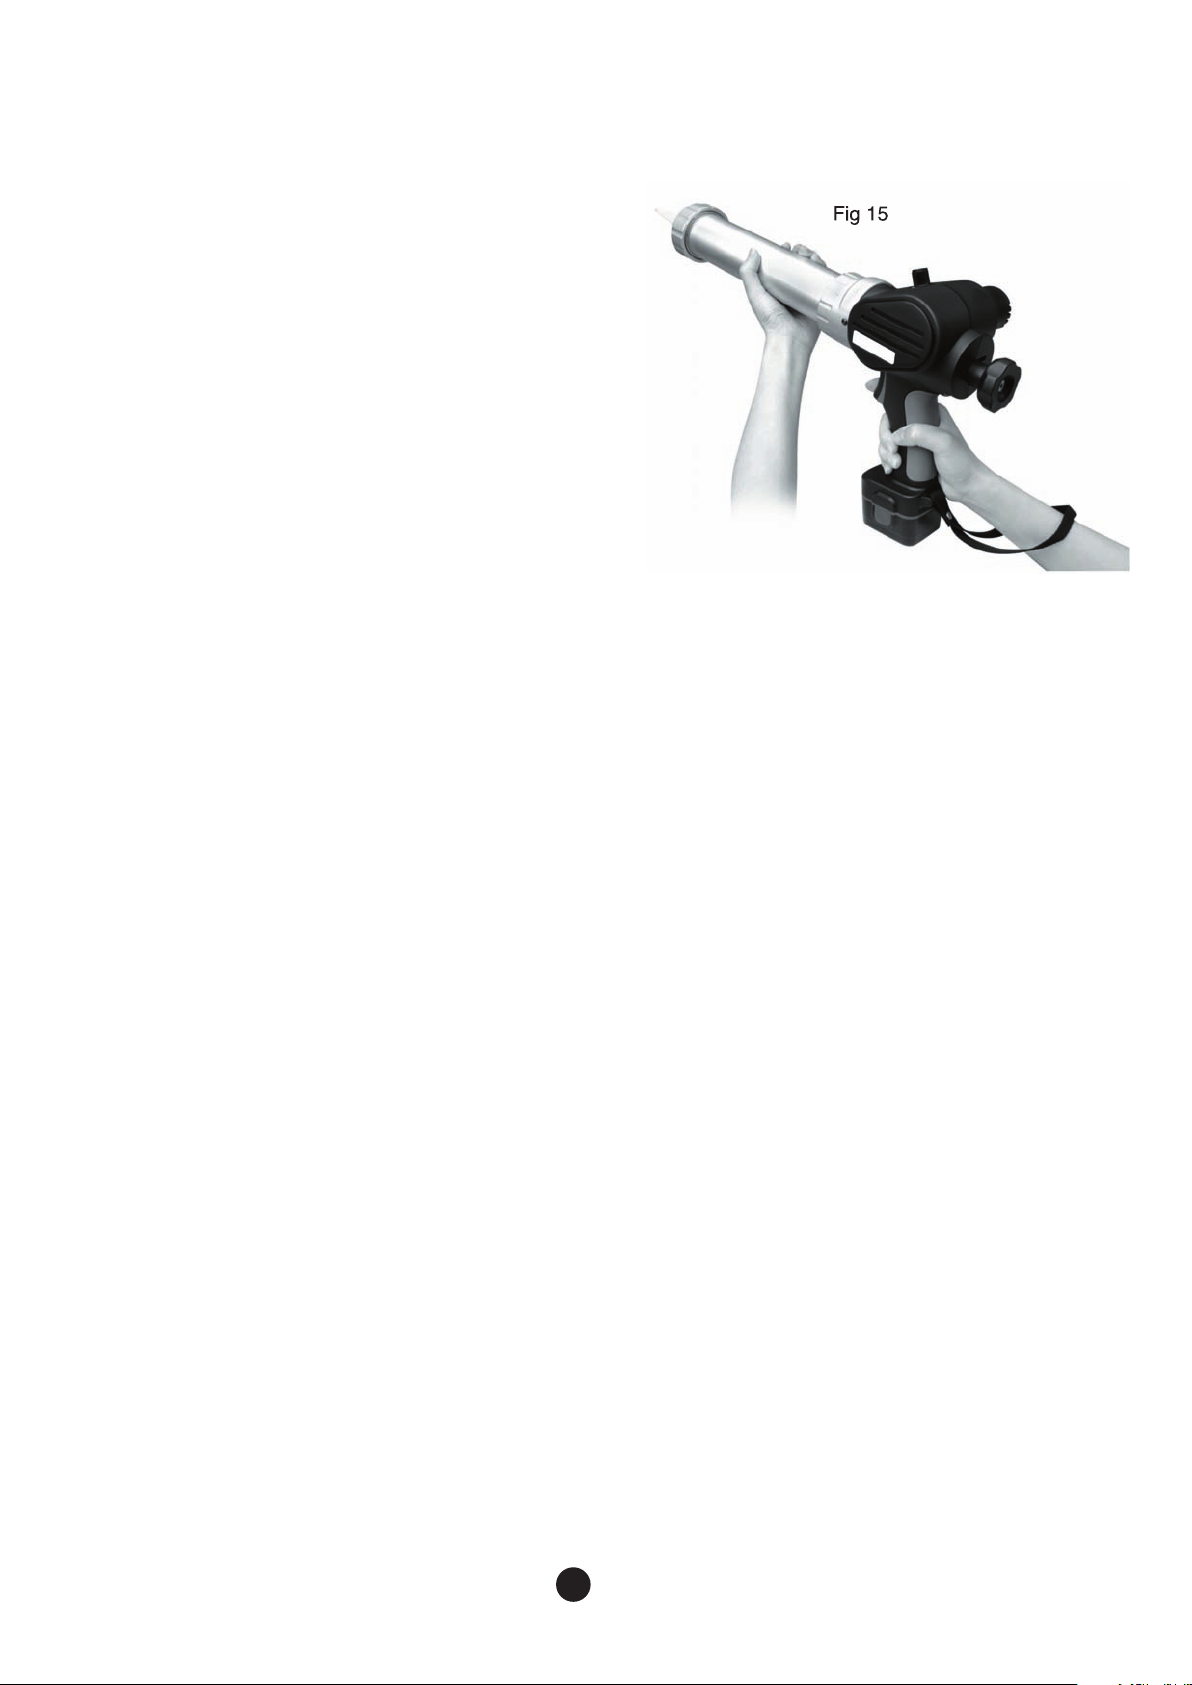
HOW TO USE THE SEALING GUN
Pass one hand through the wrist strap and grasp the handle while holding
1.
the barrel with the other.
Place the nozzle tip at desired starting point
2.
and depress trigger. The rack will move
forward, dispensing sealant/adhesive.
The rack will retract slightly when trigger is
3.
partially released in order to prevent dripping,
so allow a few seconds for the rack to move
forward when resuming tool usage.
Set tool dispensing speed according to task.
4.
The speed control dial is located at top of tool
housing.
MAINTENANCE
1.
Inspect and clean the tool regularly.
2.
Disconnect battery before any maintenance.
3.
If sealant/adhesive adheres to the rack, clean rack before it hardens.
4.
Do not wipe plastic parts with solvents or liquids such as gasoline, thinner, benzene,
carbon tetrachloride, alcohol, ammonia or oil as they may damage or crack plastic parts.
Clean plastic parts with a soft cloth and soapy water.
5.
Ensure that plastic plunger and inside of barrel are clean and smooth.
6.
Ensure that outside of sausage is also free of foreign matter, which may cause friction
when sliding along the inside of aluminium barrel.
7.
At all times, avoid dirt and foreign matter entering the caulking gun mechanism, which
may cause the mechanism to jam or stop.
8.
Ensure that the teeth on the rack are free of burrs.
9.
Do not disassemble the tool. Should any repairs become necessary,
contact the supplier or consult an authorised service center.
USING AIR PRESSURE TO CLEAN MECHANISM
Remove rear knob (14) from rack and pull the rack out of the caulking gun. This will
1.
allow some vision from the front and also access to the mechanism or clutch gear.
Using an air blow gun, direct air pressure through the rack opening at and around
2.
the drive mechanism. At the same time, engage and release the trigger and motor
several times.
Check for burrs and other obstructions on the rack teeth before re-tting the rack.
3.
Ensure that the rear knob is tted to the rack with the lug facing toward the bottom
4.
of the rack. The lug contacts and operates a micro safety switch which stops the
rack at maximum travel.
Do not apply lubrication to the mechanism.
5.
5
Page 7
28
11
02
17
16
28
31
19
18
27
13
08
10
10
09
01
22
29
30
21
36
14
15
22
25
20
22
12
10
11
24
23
26
11
23
PS72KIT
6
07
PS7204K
AP1430 models
after September 2013.
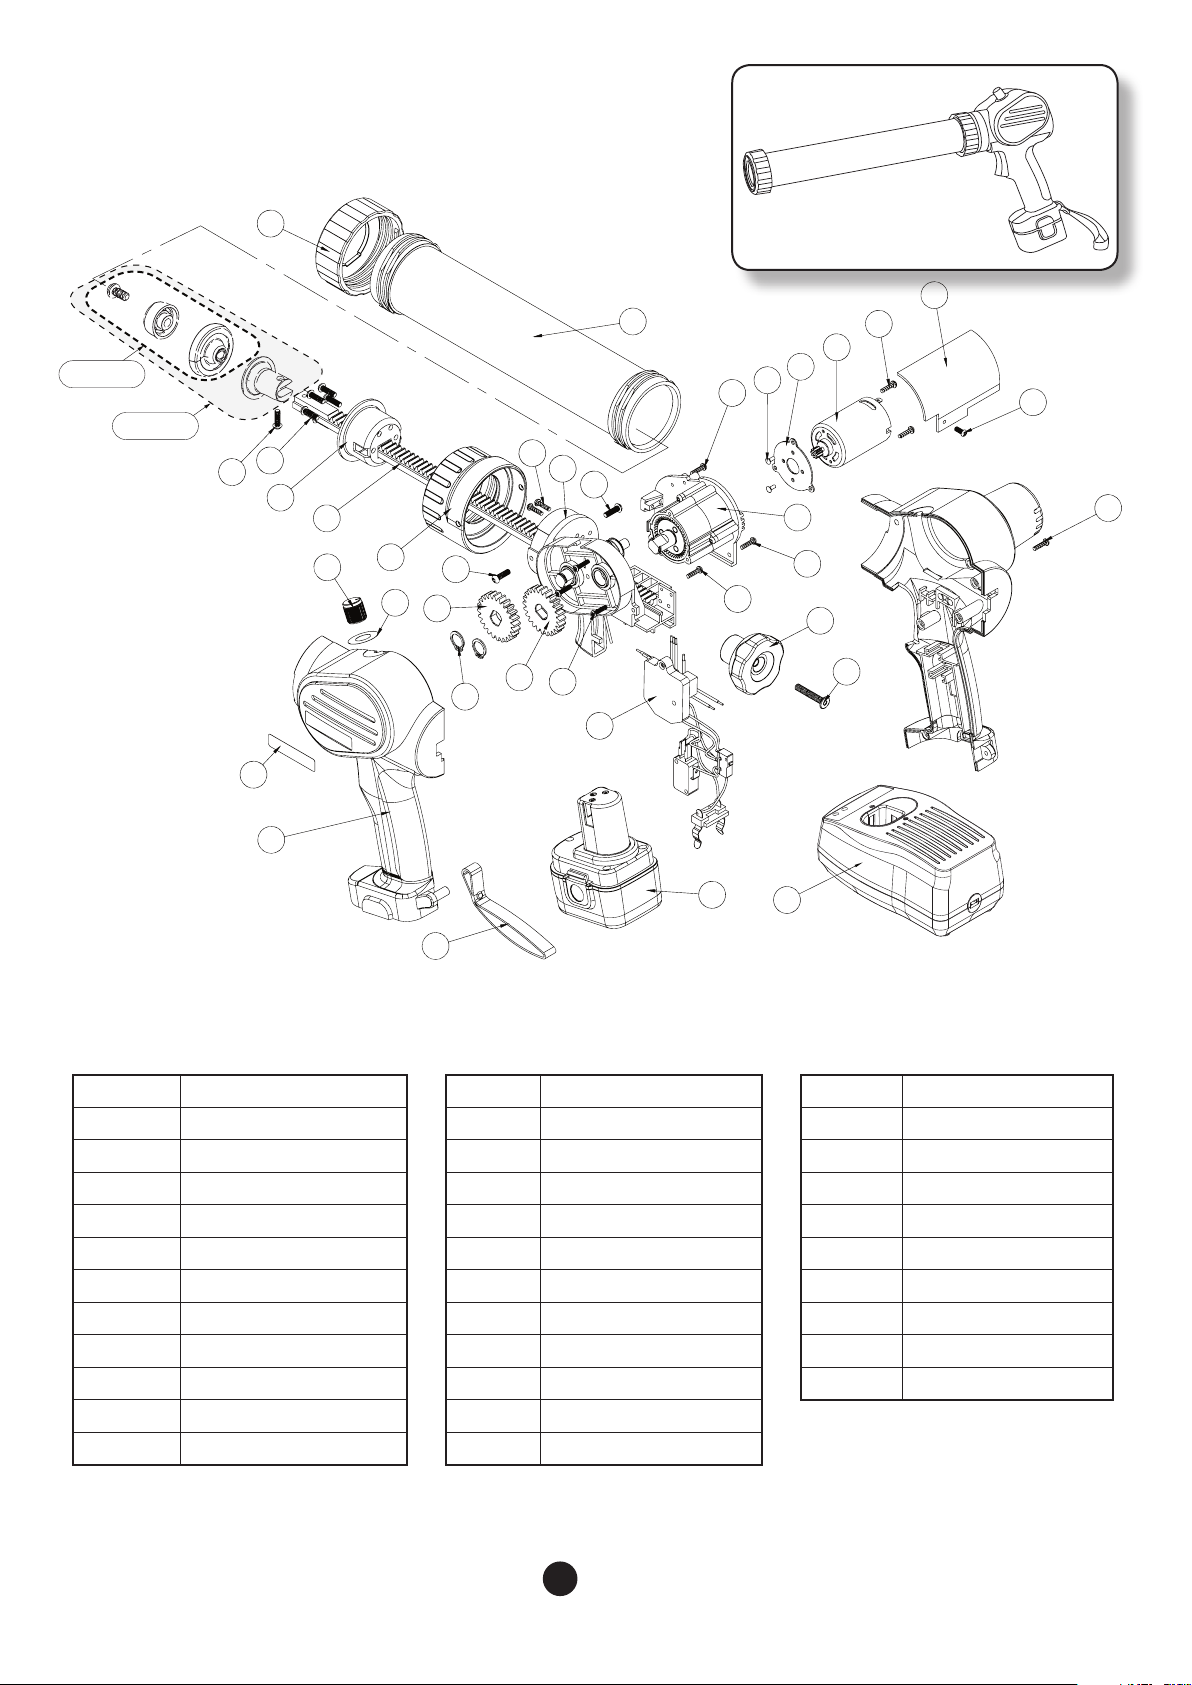
BTB Spares part numbers are listed in the tables below.
Part captions above correspond the bold numbers in the tables below.
No. Description No. Description No. Description
CG7201 Aluminium End Cap CG7214 Rear Knob CG7225 Motor Assembly 7.2v
CG7202-6 Barrel (600ml Gun) CG7215 Rear Knob Screw CG7226 Heat Sink
PS7204K Plastic Plunger Assy CG7216 Speed Control Dial CG7227 C Ring
PS72KIT Plunger Assembly Kit CG7217 Speed Control Label CG7228 Gear M1X36T
CG7207 Plunger Mount Screw CG7218 Main Housing Label CG7229 7.2v Battery-Pack
CG7208 Connecting Ring CG7219 Main Housing (L&R) CG7230 Batt Charger 240v
CG7209 Connector Cap CG7220 Gear Box Assembly CG7231 Wrist Strap
CG7210 Screw CG7221 Speed Control PCB CG7250 Plastic Carry Case
CG7211 Screw CG7222 Screw CG72MS Micro Switch
CG7212 Rack Guide Assembly CG7223 Screw
CG7213-6 Rack (600ml Gun) CG7224 Motor Ring
Page 8
BTB Auto Glass & Body Shop Tools
1b Wood St, Bendigo VIC 3550
Tel: 03 5443 1755
Fax: 03 5441 5263
Email: [email protected]
Web: www.btbtools.com
2014-04
 Loading...