

Page 1
Quickstart guide
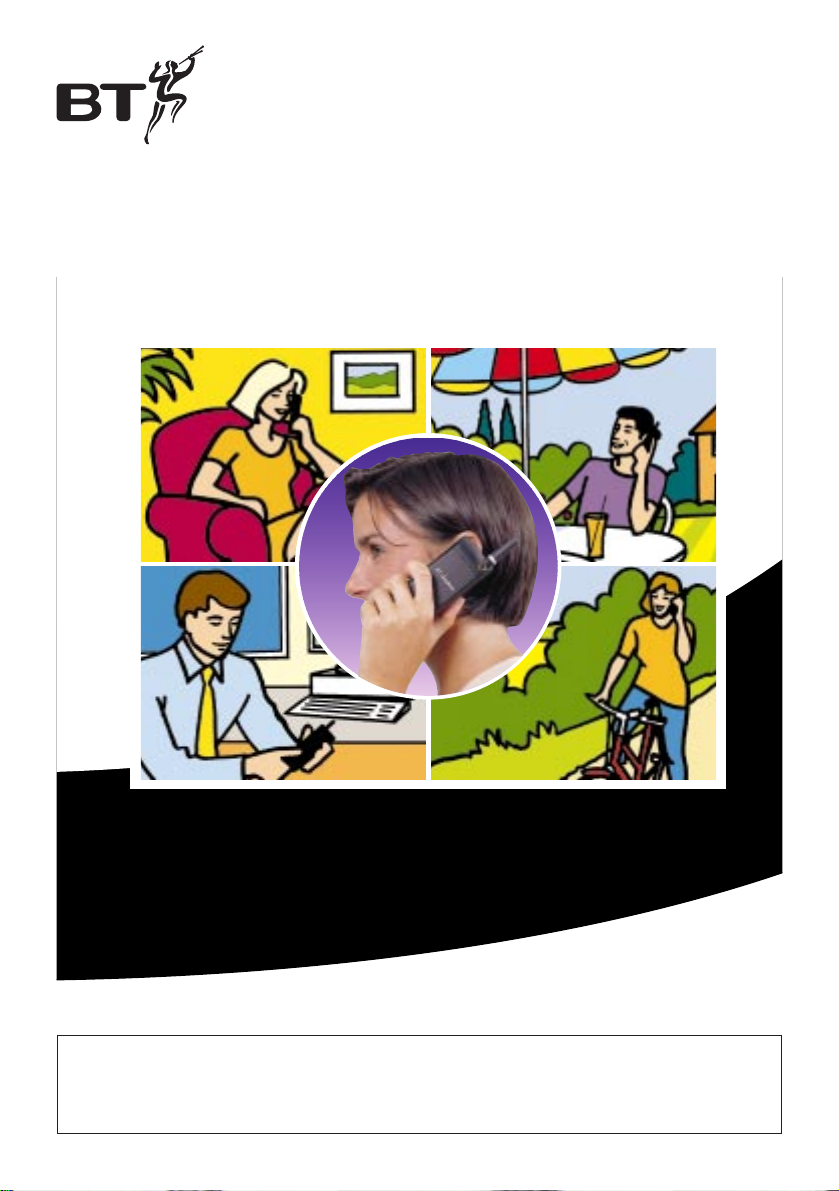
All you need to Set-up and go!
BT Onephone
all your communications needs in one
This equipment is not designed for making emergency telephone
calls when the powerfails. Alternative arrangements should be made
for access to emergency services.
Page 2

1
At a glance
BT Onephone Handset
YES
NO
CLR
ERICSSON
GHI
7
PQRS
4
1
2
3
5
6
89
0
+
#
✱
ABC
DEF
KL
MNO
TUV WXYZ
TH688
Aerial
Volume keys
Used during a call to
increase or decrease the
volume of the earpiece or
handsfree loudspeaker.
Left Arrow and
Right Arrow
Used to access the
Menu system.
YES
Used to make and answer
calls, and select menu
functions.
Clear
Erases digits from the
display. Activates the mute
functions during calls.
Star
Used to enter the
character
✱
or a P (pause).
Microphone
Earpiece
Display
NO
Used to turn the phone
ON or OFF. Used to end a
call or reject an incoming
call.
Keypad
Used to enter the digits
0-9 and letters A-Z.
Hash
Used to enter the character
#
or to terminate input of
PIN and security code.
0 Button
If held down, the 0 key
enters the international
character “✚”.
Alternative Key Functions
The keys have alternative functions when
using the menu (details on Page 13).
Indicator Light
Beeper
Page 3

Please open this page for a further ‘at a glance’
guide to your BT Onephone, home handset and
base station.
Your BT Onephone numbers
Please use this space to record your BT Onephone numbers.
Flexinumber Helpdesk 0800 070000
Flexinumber Management System 0800 9177070
Your Flexinumber 07071
■■■■■■
Your Flexinumber PIN
■■■■
Page 4

...........
...........
.................
.................
.................
.................
.............
.......
........
........
.........
.........
.........
........
.. ............
2
Home Handset (Diverse 2010)
Display
Displays the status of your handset.
Carrying clip
Memory speed dial
Enables quick dialling of numbers stored
in the memory.
Last number redial
Lets you redial the last five external
numbers you called.
Intercom
Enables internal communication and
call transfer between handsets.
Phone
For making and answering calls.
Power
Lets you switch the handset on/off and
select the operating mode.
Recall
For use with switchboards and
BT Select Services.
Keypad
End call
Used to end a call.
Store
Lets you store numbers and names in
the memory and access other phone
functions.
INT
1
2
ABC
3
DEF
4
GHI
5
JKL6MNO
7
PQRS
8
TUV9WXYZ
#
✱
0
RCL
PWR
STO
MEM
LNR
Power cord Telephone
line cord
Pager
For paging
all handsets
working
from the
base station.
In-use light
Indicates an outside
call is being made.
Charging light
On when handset battery is
charging (may occasionally be
off during standard charging
time, as charge level is adjusted).
Home base station
Diverse 2010
Page 5

3
At a glance 1
Making life simpler 4
Getting started 5
Registering your BT Onephone
with your base station 10
Using your BT Onephone
Handset 13
Using your Home Handset 17
What is a BT Flexinumber? 22
Helpline number 23
Hints and tips boxes
In this user guide, we’ve included helpful tips and important
information in grey boxes.
In this guide
Contents
Page 6

4
BT Onephone
Making life simpler
In today’s busy world we expect to
be in contact wherever we are.
Technological advances have made
this possible, but sometimes at the
expense of simplicity. Increasingly
we have a baf fling array of products
and services from which to choose,
and for those trying to contact you,
finding your location can be time
consuming and frustrating.
At BT we believe that keeping in
contact should be easy and
uncomplicated. BT Onephone places
the emphasis on fewer products and
a seamless ser vice.
Developed in association with
Ericsson, BT Onephone is a world
first. It’s the only cordless phone
you can use from your home
telephone line and the cellular
network. And because it’s digital
you can be sure of call quality and
clarity, all within one phone.
Some of the benefits that the BT
Onephone will bring you are:
Flexibility – you can use the same
phone at home or away.
Enhanced features – when using
BT Onephone in the home you can
Introduction
use all the extra benefits a mobile
phone brings such as directory of
names, tailored ring tones and
increased security.
Simplifying life – Your BT
Onephone can go wher ever you go.
Upstairs, downstairs, out in the
garden – your BT Onephone is
per fectly at home anywhere and it
lets you stay in touch. You can even
take it on holiday. All of this with
just one handset. That’s why life’s
so much simpler with BT Onephone.
BT Flexinumber
BT Onephone can be used with a
single number ser vice – such as BT
Flexinumber – which means no need
for multiple handsets, complicated
call-diver ts or a string of numbers.
You decide when and wher e you
take your calls wherever you
happen to be (for more information
please see page 22).
If you are experiencing
problems either setting up
or using your BT Onephone,
please phone our Helpline
on 0345 860 860.
Page 7

5
Setting up your home
handset and base
station(Diverse 2010)
1. Connect the telephone line
cord to the base station
Ensure that this is fitted corr ectly
into the right socket on the
underside of your base station.
2. Plug the other end of the
telephone line cord into your
BT socket
If you do not have a BT socket, call
Freefone 0800 800 150 and ask
for a BT engineer to come and fit
the correct socket. This is a
chargeable service.
3. Connect the power cable
Plug the power cable into the power
socket on the underside of your
base station.
...........
.......
........
........
Welcome to BT Onephone, a product
designed to make life easier for you,
your friends, family and business
colleagues.
Please read the following
instructions car efully before use
and retain this guide for future
reference.
For more detailed information of all
available features you will need to
refer to the individual product and
service guides as detailed in the
Help section on page 23.
You will have noticed that included
with your BT Onephone is a
digitally enhanced (DECT) cordless
handset and its base station (or
cradle). This is known as a Diverse
2010, which combines the
advantages of cordless technology
with the per for mance of a high
quality telephone.
In order for your BT Onephone to
operate from your home telephone
line when you are at home, you
must first set up the Diverse 2010
which we will refer to as your home
handset and base station.
Setting up
Getting started
...........
...........
.................
.................
.................
.......
........
........
Page 8

6. Charge the handset batteries
for at least 16 hours
Place the handset on the base
station. The handset can be charged
face up or down. When the handset
is first placed in the base station the
green
CHARGING light comes on.
The handset is given an initial fast
charge, it will then continue to
charge at a reduced (standard) rate.
During this standard charge time,
the batter y indication light may
switch on and of f as the base station
adjusts the charge level required.
When the handset batter y has been
charged for 16 hours, the home
handset is ready to use. The battery
indication symbol on the
handset shows how charged your
handset battery is. When the battery
is fully charged it will show .
Warning. Use only approved nickelcadmium (NiCad) rechargeable
batteries. Never use other batteries or
conventional alkaline batteries. Using
such batteries could lead to a short
circuit or destroy the battery casing.
Recommended batteries should have a
power rating of 600m Ah 1.2V. Batteries
are available by ringing 0345 908070.
6
4. Plug the 3 pin adaptor into a
mains power socket and
switch on
As this product is rechargeable, it is
normal that a certain amount of heat
will be produced in its day-to-day
operation. Whilst this is entirely
safe we would advise against
placing this product on antique,
veneered or wooden sur faces as
damage may occur.
5. Install the rechargeable
batteries in the handset
The handset uses the two AA size
nickel cadmium (NiCad) batteries
supplied. Hold the handset with the
keypad facing down and slide open
the batter y compartment.
Inser t the batteries as indicated on
the label inside the batter y
compar tment and slide the battery
compar tment cover shut.
If the symbol f lashes continuously,
it means the home handset is either
out of range, it is not registered with
the base station or the line cord may be
disconnected. To register, refer to the
main user guide for the Diverse 2010.
Setting up
Do not tr y to use any power
supply other than the one
provided (C39280-Z4-C67).
Page 9

Unfold the holder
Slide the mini SIM card into the
holder. Make cer tain that the
angled corner is top right.
Fold down the card holder
Lock the card holder by sliding it
down and clicking it shut.
7
Setting up your BT
Onephone
Your BT Onephone works as a dual
mode phone. It can function as a
home line phone with all the
advantages of call clarity and reduced
call charges and as a mobile with
the benefits of being able to operate
outside of the home environment.
If you have previously owned a
mobile the setting up procedure is
ver y similar.
1. Insert the SIM card
When subscribing to a mobile
network, you obtain a SIM card with
a personal security code and a PIN
code from your network operator.
The SIM card contains a computer
chip that keeps track of your phone
number, the ser vices that you have
ordered from your network operator
and your phonebook information.
Before you can use the phone, you
must inser t the SIM card.
Release the card holder by sliding
it open
Setting up
Mini SIM card
Page 10

8
3. Charge the battery
With the battery attached to the
phone.
• Connect the charger to the mains.
A green indicator lamp on the
charger lights up.
• Connect the charger to the phone.
The flash symbol on the plug
must face upwards.
The batter y now starts to charge.
To indicate this, a battery icon in
the display fills and empties
continuously and the indicator lamp
on the top of the phone shows a red
light. When the batter y is fully
charged, the green indicator light
will be steadily illuminated.
Your BT Onephone is supplied with a
Nickel Metal Hydride battery. The
battery will need to be charged before
you can use your mobile handset.
While you are charging the battery
you can turn the phone on and use it.
However, charging will take longer.
2. Attach the battery
Place the batter y on top of the
phone and press down until you
hear a click.
To remove the battery
Make sure the phone is turned off.
• Press the locking catch on the
bottom of the batter y.
• Lift the batter y up and away fr om
the phone.
Setting up
Page 11

Low Battery Alarm
As a reminder that the battery soon
needs recharging or replacing, an
alarm signal (a long beep) sounds and
the message ‘BATTERY LOW’ appears
for ten seconds in the display.
In addition, the indicator light on the
top of the phone star ts blinking red.
If the phone is left on, the low battery
alarm will be repeated several times
and, finally, the phone will turn itself
off when the battery is no longer able
to power it satisfactorily. It is not
possible to turn the phone on again.
Instead the battery must be recharged
or replaced with a charged one.
9
Setting up
4. Turning your BT Onephone on
and off
To turn the phone on
• Press and hold down the NO
button until you hear a click.
The display will prompt you to
enter your PIN (the security code
of your SIM Card).
• Enter your PIN (default 4321).
The digits appear as
✱
in the
display. If you enter a wrong digit,
you can erase it by pressing the
CLR button.
• Press
#
or YES.
NO
YES
#
• If you entered your PIN corr ectly,
you will be welcomed by your
phone. Then the phone searches
for a network. When a network is
found, the phone beeps three
times and the indicator light on
top of the phone blinks green
once ever y second.
• If the message‘EMERGENCY CALLS
ONLY’ is displayed, you are within
range of a network but you are
not allowed to use that network.
However, in an emergency, you can
call the international emergency
number
112. Please refer to
‘To make an emergency call’
page 14.
• If the message ‘NO NETWORK’ is
displayed, there is no network
within range, or the received
signal is too weak. You have to
move to obtain a suf ficiently
strong signal.
Page 12

10
Setting up
To turn the phone OFF
• Press and hold down the NO
button until the display is turned
of f.
5. Setting the clock
When set, the time is shown on the
bottom line of the display (default is
for no clock set).
• Press or button repeatedly
until CLOCK appears in the display.
• Press
YES to select the CLOCK
menu.
• Press or button repeatedly
until SET CLOCK appears in the
display.
• Press
YES to select the SET CLOCK
function.
• Enter the time in hours and
minutes in the 24-hour format, for
example 13.01.
• Press
YES to confir m the setting.
• Press
CLR to leave the CLOCK
menu.
YES
CLR
NO
You can have the time presented in
the 12-hour (am/pm) format. You
can also have today’s date presented
in the display. See your Ericsson
handset guide ‘Setting time, date and
alarm’, page 22.
IMPORTANT
If not registering to a Diverse 2010,
the instructions for registering your
BT Onephone may differ from those
listed below. If you are having
difficulties registering your
BT Onephone please refer to the
registering procedure in the user guide
for your par ticular base station.
Registering your
BT Onephone
with your base
station
The following procedure explains
how to register your BT Onephone
to work with your base station.This
will allow you, once registered, to
use your BT Onephone as a home
handset when within range of your
base station.
Your BT Onephone will work as a
home handset when registered to
any DECT GAP compatible base
station.
Page 13

11
Ensure that you have your BT
Onephone switched on and your
home handset and base station has
been installed, then;
Set your BT Onephone to Home
(DECT) mode
• Press the button repeatedly
until NETWORKS appears on the
display.
• Press
YES.
• Press the button repeatedly
until SYSTEM appears on the display.
• Press
YES.
• Press the button repeatedly
until SYSTEM (DECT) appears on
the display.
• Press
YES. The display will show
SEARCHING.
Your BT Onephone is now in Home
(DECT) mode then
• Press the button repeatedly
until NETWORKS appears on the
display.
• Press
YES.
• Press the button repeatedly
until EDIT LIST appears on the
display.
• Press
YES. Display shows 1 .
• Press
YES. Display shows ADD NET?
• Press
YES.
• Using the keypad of your
BT Onephone handset enter the
name with which you wish to
associate your phone whilst
operating in DECT (max. 10
characters). If you enter a wrong
character, you can erase it by
pressing the
CLR button.
To enter names, use the alphabet
on the keypad.
• Press
YES. Display will show
ENTER PARK.
I
I
I
I
Setting up
YES
For example:
To display the letter C, press the
button three times.
2
ABC
Page 14

Set your BT Onephone to
AUTO mode
This will ensure your BT Onephone
automatically switches from home
to mobile mode and vice versa
when the handset is in and out of
range of the base station.
• Press the button repeatedly
until NETWORKS appears on the
display.
• Press
YES.
• Press the button repeatedly
until SYSTEM appears on the
display.
• Press
YES.
• Press the button repeatedly
until SYSTEM (AUTO) appears on
the display.
• Press
YES.
Your BT Onephone is now ready for
use in both home and mobile modes.
12
YES
Setting up
On the base station.
• Press the grey PAGER button and
hold down for 10 seconds until
the base station star ts to beep.
You now have up to 1 minute to
register your BT Onephone handset.
On your BT Onephone handset.
• Press the YES button to confir m
your pre-set PARK code. Display
will show ENTER AC.
• Enter the 4 digit system code for
the base station (default 0000).
• Press
YES. The display will ask
you to wait, then will give you the
message ADD NET DONE.
YES
Pager
Page 15

13
BT Onephone
Using your BT
Onephone Handset
Your BT Onephone
Handset can be used as a
mobile phone when away
from home and as part of
your home system when
within range of your base
station.
Your BT Onephone Handset has a
liquid crystal display. The following
char t shows the symbols that appear
on that display and their meaning.
Making and receiving
external calls
The following guidelines assume
that you have turned the phone on
and are within the coverage of a
network.
When you are abroad you may use
other networks, provided your UK
network has an agreement that
allows you to use those networks.
See ‘Other networks’ in your
Ericsson user guide (page 25).
To make a call
• Enter the area code and phone
number. The numbers will be
shown in the display.
• Press
YES to make the call. The
display shows CALLING, followed
by CONNECTING.
Display
Meaning
shows
Signal strength meter.
The more bars that are shown,
the higher
the signal strength.
Batter y meter; the fuller the
icon, the better the batter y
charge.
The keypad is locked. Press
followed
by YES to unlock.
The alarm function is activated.
All incoming calls are diver ted
to another number.
The ringing signal is turned
off.
You have received a text
message (SMS).
If you key the wrong number
•Press CLR to erase a single number.
Or
• Press and hold down CLR to erase
all numbers.
YES
NO
CLR
ERICSSON
GHI
7
PQRS
4
123
5
6
89
0
+
#
✱
ABC
DEF
KL
MNO
TUV WXYZ
TH688
YES
CLR
Page 16

14
When the call is answered, a Call
Time meter in the top line of the
display shows the elapsed time in
minutes and seconds.
If nobody answers or the line is
engaged, press
NO. The number is
stored in a memory, so you can easily
repeat the call. See ‘Last number
re-dial’ below.
To end a call
When the conversation is finished.
• Press
NO.
Last number re-dial
To recall the last called number
from memory.
• Press
YES. The display shows
CALL?, together with the number.
• Press
YES again to make the call.
To make an international call
• Press and hold the
0 button until
+ is displayed (the + will be
replaced by the international
prefix for the country from which
you are calling).
• Enter the countr y code, the ar ea
code (without any leading zero)
and the phone number you wish
to call.
• Press
YES to make the call.
To make an emergency call
• Enter
112 (the EU emergency
number) and press
YES.
The display shows EMERGENCY.
112 can be used in any country that
is a member of the European
community with or without a SIM
Card inser ted, pr ovided a GSM
network is within range.
NO
YES
YES
0
+
Please note:
It is only possible to make an
international call if your network
service includes that country - please
check with your network service
provider.
YES
1
1
2
ABC
BT Onephone
Page 17

15
When a call is in
progress.
During a call you can change the
volume of the earpiece and mute
the microphone.
To change the volume
You can use the volume keys to
increase (
+) or decr ease (
–
) the
earpiece volume.
To mute the microphone
• Press and hold down the
CLR
button. Display shows MUTE.
To receive a call
When you receive a call, the phone
rings, the indicator light on the top
of the phone rapidly blinks green
and the display shows ANSWER?.
To answer the call:
• Press
YES to answer the call.
When the call is finished, press
NO.
To reject the call:
• Press
NO, or press a volume
button twice, when the phone
rings. If the callers network
suppor ts it, the caller will hear
a busy tone.
Unanswered calls:
• If you have been unable to answer,
the number of unanswered calls
will be shown in the display, until
you press
CLR.
YES
NO
CLR
+
–
CLR
BT Onephone
Page 18

16
Making and receiving
internal calls
To make an internal call to a
home handset
• Ensure you are in home (DECT)
mode.
• Enter the number of the handset
you want to call.
• Press the button to select
SPECIAL FUNCTIONS.
• Press
YES.
• Press the button to select
INTERNAL CALL.
• Press
YES.
• Dial the internal number of the
handset you wish to call.
• Press
YES.
• To end the call, press the
NO
button.
YES
NO
BT Onephone
Transferring calls
It is not possible to transfer an
external call from the BT Onephone
handset to a home handset.
To receive an internal call
from a home handset
• When an internal call is received,
your BT Onephone will ring and
the display will show DECT CALL.
• Press
YES to accept the call, then
speak to your caller.
• To end the call, press
NO.
YES
NO
Page 19

If the handset is beyond operating
distance of the base station, the
symbol f lashes. You cannot make or
receive calls until the handset is
brought back within range. The
symbol also flashes for a while after
power-up until the handset
automatically registers to the base.
17
Using your
Home Handset
(Diverse 2010 handset)
Using your
Home Handset
The home handset comes
complete with your base
station. This is your
cordless digital phone
which can be used within
the house up to a range of
50 metres indoors and 300
metres outdoors (in ideal
conditions) – so you can use it
outside too!
Switching your home
handset on and off.
To switch on
Press and hold down the
PWR
button until the display is activated.
When the home handset is ON, the
symbol will be shown on the
display. You can now make and
receive calls.
To switch off
Press and hold down the
PWR
button until the display goes blank.
PWR
PWR
When your home handset is
switched of f phone calls cannot be
made and the handset does not
respond to incoming calls. Nothing
is shown on the display.
Making and receiving
calls
To make an external call
Ensure the handset is switched ON.
• Press the
PHONE button. You will
hear the dial tone. The ‘In Use’
light on the base station comes on.
• Enter the phone number you
wish to call. The number is dialled
immediately and is shown on the
display.
STO
LNR
MEM
INT
ABC
DEF
1
2
3
JKL6MNO
GHI
4
5
PQRS
7
✱
RCL
TUV9WXYZ
8
0
#
PWR
Page 20

To redial the last external
number
• Press the
PHONE button.
• Press the
LNR button. The last
external number you called will
be redialled automatically.
• Press the
END CALL button at
the end of your call, or replace
the handset on the base station.
To redial any of the last 5
external numbers
• Press and release the
LNR button
until the number you want is
displayed.
• Press the
PHONE button to dial.
• To end the call, press the
END
CALL button or replace the
handset on the base station.
Call timer
Your home handset automatically
times the duration of all external
calls. The handset display shows the
call duration both during your call
and for a few seconds after it is
completed.
18
Alternatively, you can enter the
phone number you want to dial first,
check that it is correct, and then
press the
PHONE button to dial.
To end a call
• Press the
END CALL button.
Or
• Place the handset back on the
base station.
To receive an external call
When the phone rings the display
flashes EXT.
• Press the
PHONE button on the
handset and speak.
Or
• If the handset is on the base station
or charging station, simply lift it
up and speak. You do not need to
press the
PHONE button.
• At the end of the call, either press
the
END CALL button or replace
the handset on the base station.
If another handset is already being
used to make an external call, your
handset will display ‘—-’ f lashing and
you will hear the internal ‘busy’ signal.
LNR
Using your
Home Handset
LNR
Page 21

19
Making and transferring
calls between handsets
If you have multiple handsets
registered with the base station, the
home handset enables two handsets
to talk to each other on an internal
‘intercom’ call, while a third handset
can be on an external call.
Calls can be transferred fr om home
handset to home handset and from
home handset to your BT Onephone
handset. You cannot transfer an
external call fr om your
BBTT OOnneepphhoonnee
handset to a home
handset.
To page a handset from the
base station
To locate handsets that are away
from the base station.
• Press the
GREY button on the
base station. All handsets
registered with the base station
will ring for 30 seconds.
• To stop paging press the
GREY
button again.
Or
• Press the
PHONE button on the
handset.
Using your
Home Handset
To make an internal call to
another handset
If you have additional handsets, you
can make internal intercom calls
between the handsets.
• Press the
INT button. Display
shows your handset number.
• Enter the number of the handset
you want to call. The handset will
ring.
• To end the call, press the END
CALL button, or replace the
handset on the base.
To receive an internal call
• When the handset rings, the
display flashes INT plus the
number of the handset calling you.
• Either press the
PHONE button,
or simply lift the handset off the
base station to receive the call.
INT
Page 22

20
To make an internal call to all
handsets
You can call all handsets r egistered
to a base station simultaneously.
• Press the INT button. Display
shows your handset number.
• Press the
✱
button. All handsets
will ring. The first handset to
answer will take the call.
• To end the call, press the
END
CALL button or replace handset
on the base station.
To put an outside caller on
hold and speak to another
internal handset
• Press the
INT button. You hear the
internal dial tone and your outside
caller is put on hold. Your caller
will hear ‘music on-hold’.
• Press the handset number you
want,
1-6. When the handset
answers, you can talk without your
outside caller hearing.
• Press the
RCL button to end the
internal call and speak to your
outside caller.
INT
✱
If all available handsets are engaged
on an internal call and an external
call arrives, a ‘call waiting’ signal is
given. To take the call, either replace
the handset on the base, or press END
CALL.You can accept the new call
when you hear the phone ring.
INT
RCL
1
6
MNO
Using your
Home Handset
To transfer an external call
between handsets
If you want to transfer an external
call to another handset.
• Press the
INT button. Display
shows EXT INT plus your handset
number. The caller hears ‘music
on-hold’.
• Enter the number of the handset
to which you wish to transfer the
call. When the call is answered,
you can talk to the other handset
without the outside caller hearing.
• To reconnect to your outside
caller press the
RCL button.
Or
• To transfer the call to the other
handset press the
END CALL
button, or replace your handset
on its base station.
Immediate call transfer
After dialling the other handset, you
can immediately press the
END CALL
button, or replace the handset on
the base station and the call will be
transferred straight thr ough. If the
other handset is already engaged,
or does not answer the call within
30 seconds, the call will be returned
to your handset.
INT
RCL
Page 23

21
Please note: If you go out of range
of a base station for a long time while
your handset is switched ON, it may
take more than 20 minutes to ‘find’ the
base station again when you come
back within range. However, by simply
switching the handset OFF for a
moment, then ON again, it will find
the base station within a few seconds.
Using your
Home Handset
Page 24

BT Flexinumber is designed to
put you in control of your phone.
BT Flexinumber ensur es you will
maintain the same number whether
you move home or place of work and
allows you to be contacted wherever
you are.
The diagram below shows just how
easy and flexible it is. Your
BT Flexinumber can be diverted to
your BT Onephone, so whether you
are in your office, home or on the
move you can be reached easily.
There is a simple management
system which you dial into and direct
your incoming calls (eg.your mobile
number or home line number).
All the calls to your BT Flexinumber
(07071/07041) can be received on
your BT Onephone.
XXXXXX
22
What is a BT
Flexinumber?
How BT Flexinumber
works
If you do not want to be contacted
for whatever reason, don’t worry
because BT Flexinumber puts you
in control. With BT Flexinumber’s
unique “Fallback” and “VIP” facility
you can determine when you are
contactable, so you only have to talk
to the people you want to.
If you would like to obtain a
BT Flexinumber please ring
0800
070000 for further information.
07071/
07041
Your office
Your home
On the move
Flexinumber
BT Onephone
Fallback
Other
Location Options
- temporary
- numbered locations
Caller
Page 25

23
Help
Help
BT Onephone User Guide
(Ericsson TH688)
• Changing the greeting text
• Changing the ring type
• Choosing a language other than
English
• Dialled numbers memor y
• Displaying your phone number
• Editing the phone number
• Erasing a phone number
• Editing a melody
• Help
• Recalling a phone number
• Setting the minute minder
• Speed dialling facility
• Storing a phone number
• The phone’s menus
GSM Roaming User Guide
• Global Roam®Service
• Help
• How to use your mobile handset
when travelling overseas
• International call charges
• International dial codes
• Making and receiving
international calls
• Useful numbers
Your BT Onephone has been designed to be easy to use. If you should
experience a problem when setting up your BT Onephone, please check the
relevant sections in this user guide.
Fur ther infor mation can be found in the relevant user guides pr ovided with
your BT Onephone.
Home Handset User Guide
(Diverse 2010)
• Adjusting the volume and
confirmation ‘beeps’
• Approvals
• Call allocation
• Call barring
• Emergency calls
• Help
• Maintenance
• Other optional settings
• Registering additional handsets
• Removing handset registration
• Resetting the system
• Secrecy and ‘listening in’
• Security codes and PIN numbers
• Technical information
• Tone and Pulse dialling
• Using the memory to store and
dial numbers
• Using with switchboards/PBX’s
• Using with additional base units
• Warnings and contra-indications
• Warranty details
If you are experiencing problems either setting up or using your BT Onephone,
please phone our Helpline on
0345 860 860.
Page 26

Offices in Europe, North America,
Japan and Asia Pacific.
The Telecommunications services described in this
publication are subject to availability and may be
modified from time to time. Services and equipment ar e
provided subject to British Telecommunications plc’s
respective standard conditions of contract. Nothing in
this publication forms any part of any contract.
Touchtone
TM
is a registered trade mark of
British Telecommunications plc in the UK.
© British Telecommunications plc 1996.
Registered Office: 81 Newgate Street, London EC1A 7AJ.
Registered in England No. 1800000.
Printed in UK. Issue No.1 (10/98) 14.2.
Designed by The Art & Design Partnership Limited.
APPROVED for connection to
telecommunication systems specified
in the instructions for use subject to
the conditions set out in them
504116
CE compliant to 89/336/EEC
(EMC Directive) & 73/23/EEC (Low
Voltage Directive)
 Loading...