

Page 1
SOME FEATURES
OF THIS PHONE REQUIRE
SUBSCRIPTION TO A CALLER
NETWORK PROVIDER.
DISPLAY SERVICE FROM YOUR
A QUARTERLY FEE IS PAYABLE.
User Guide
BT IN TOUCH 2000
Page 2
A
B
C
D
E
F
G
H
I
J
K
L
M
N
O
P
Q
R
S
T
U
V
W
X
Y
Z
Handsfree
V
o
l
u
m
e
Redial
Store
Secrecy
R
Dial
Calls
Directory
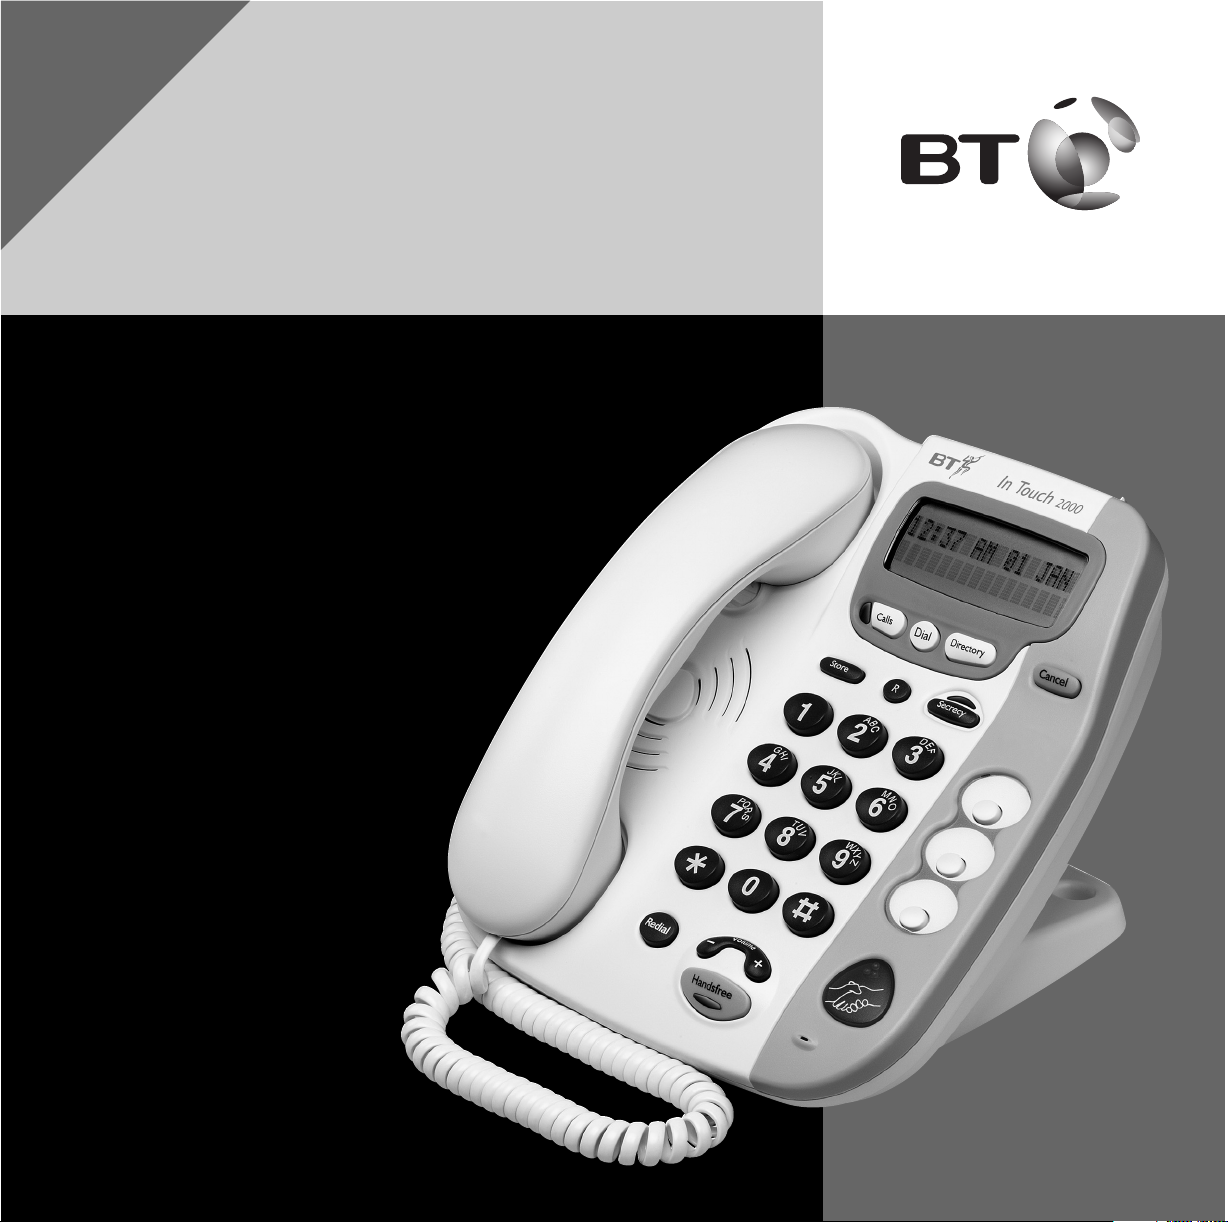
BT In Touch 2000
At a glance
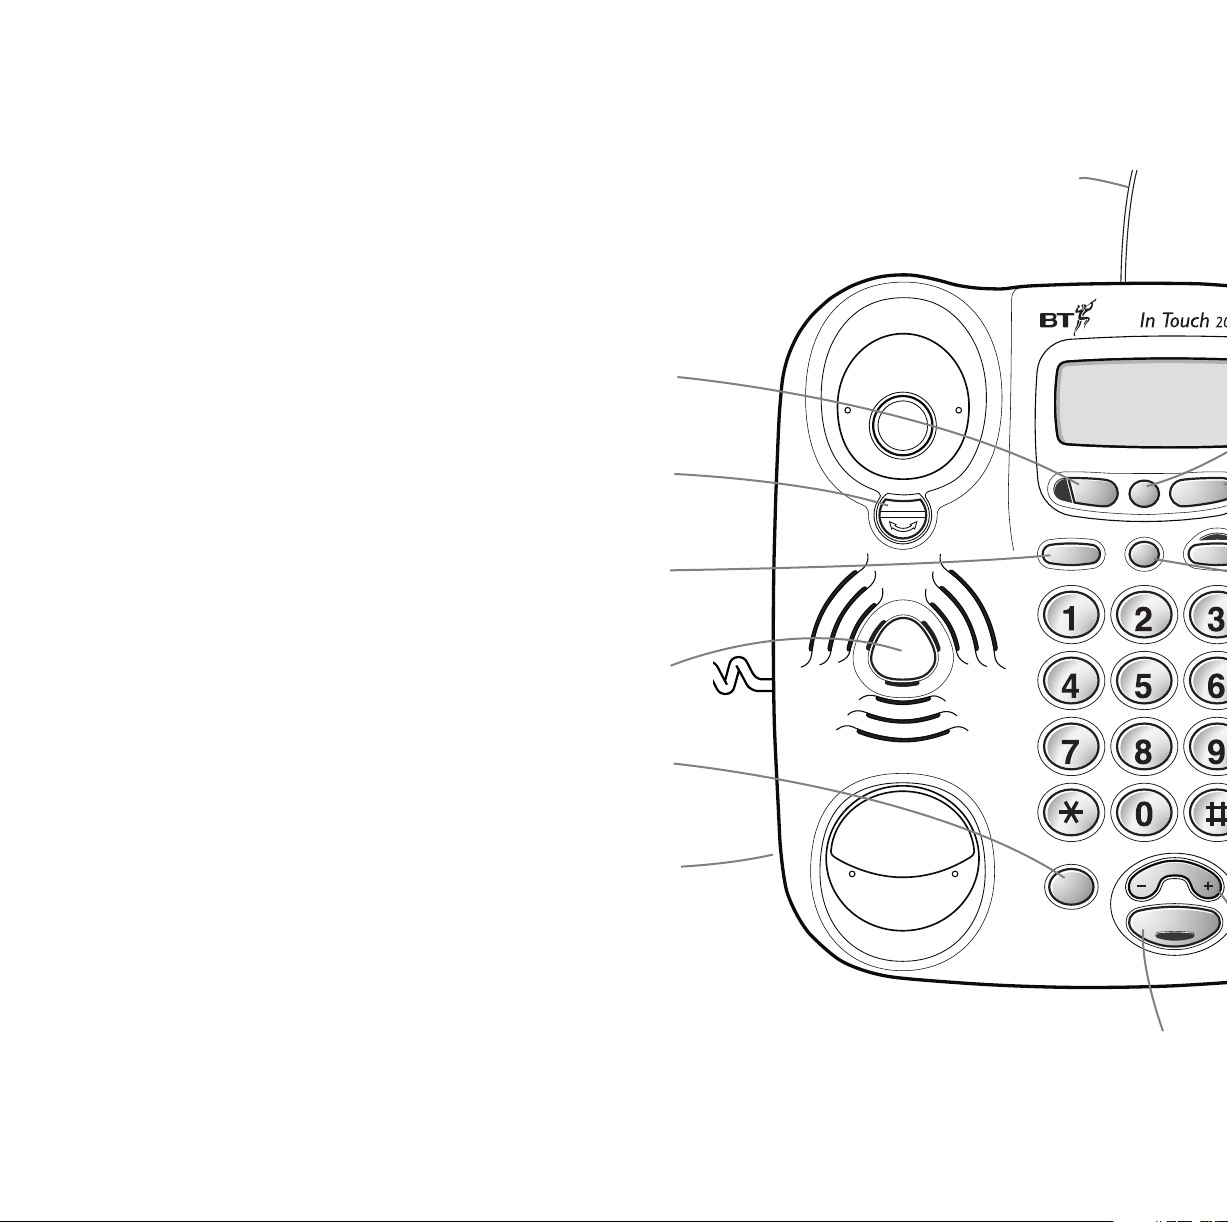
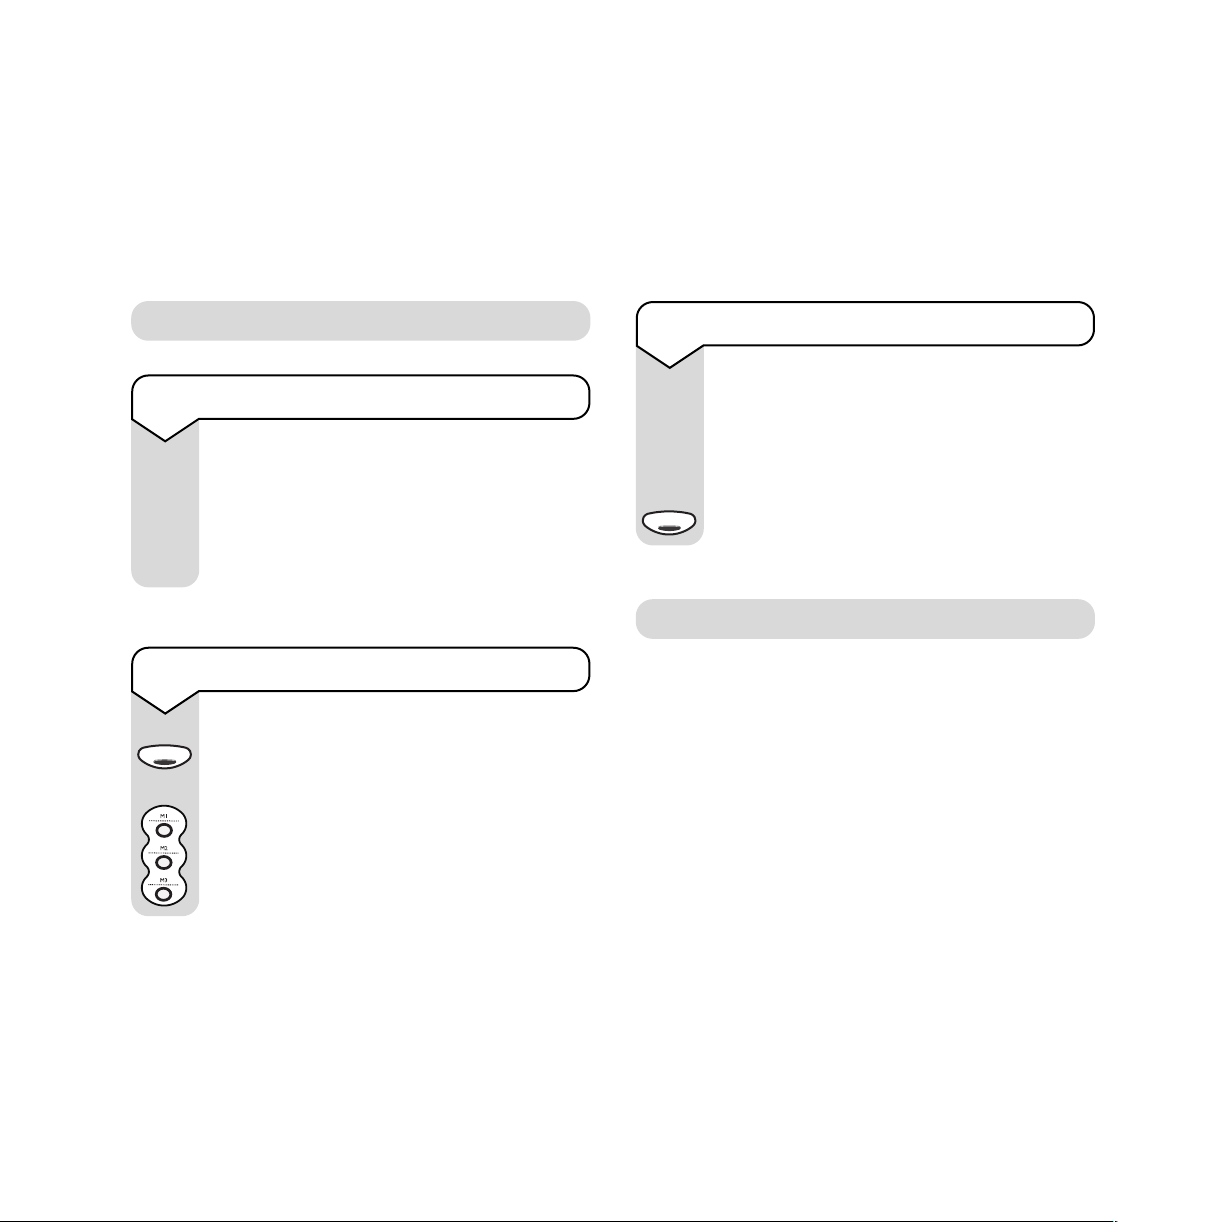
Calls button*
Use to access the Calls List (the list of
numbers that have called you).
Handset hook
When the phone has been wall-
mounted, it keeps the handset in place.
Pendant receiver aerial
Aerial receives the Pendant signal to remotely
activate the emergency sequence or automatically
answer an incoming call in handsfree.
Use to store phone numbers in the
Store button
Quickdial memories and directory.
When in handsfree, your caller’s voice
will be heard through the speaker.
Redial button
Press to redial the last number dialled.
Ringer volume and ringer tone
switches (underside)
Use to adjust the volume and tone
of the ringer.
* Subscription to a Caller Display network service is required to use this feature.
Speaker
Handsfree button
Allows you to use the phone without lifting
the handset.
Page 3

D
E
F
M
N
O
W
X
Y
Z
Cancel
Secrecy
Setup
Announce
Handset park (for wall-mount use only)
When you leave the phone during a conversation, you can place the handset on here.
Display
Displays time and date, call information and User prompts.
Dial button
Press to dial a number shown in the display.
Directory button
Use to access numbers stored in the directory.
Cancel button
Used to delete entries in the Directory and Calls List and used to cancel the emergency
sequence if activated.
Secrecy button
Held down, this button allows you to speak to someone in the same room without the
M1
M2
M3
person on the other end of the line hearing your conversation.
Recall button
Use with some BT Calling Features and for transferring calls on cer tain switchboards.
Announce button (under Quickdial memory label)
Use to listen to messages and to record your own personal message (via the handset).
3 Quickdial memories
Three Quickdial buttons that can be assigned to be used as emergency numbers.
Setup button (under Quickdial memory label)
To check and change optional features on your phone.
Emergency button
Press in an emergency to start the emergency sequence.
Quickdial memory label
For keeping a record
of your Quickdial
numbers.
Microphone
Use in ‘handsfree’ conversation.
Volume button
Use to adjust the handsfree (loudspeaker)
volume. Also use it to move the cursor left
and right when editing names and numbers.
1
Page 4

In this guide
At a glance 1
Introduction 3
Unpacking 3
For your records 3
Safety 4
Setting up your phone 5
Using the telephone 9
Making and receiving calls 9
Using handsfree 9
Redial 10
Calls button and Calls List 10
Using the R (recall) button 12
Secrecy 12
Quickdial and Directory 13
Directory 14
To use your Cancel button 15
Desk and wall-mounted
phone positions 16
Raised 16
Wall-mounted 17
The called number can now speak
to the caller 19
What to do next 19
Entering your emergency contacts 20
Changing Quickdial memory numbers 22
Emergency announcements 22
Status announcements 23
Warning alerts 23
Using the BT In Touch 2000
in an emergency 24
Starting an emergency call 24
What the caller will hear during
an emergency call 24
Cancelling an emergency call
at the BT In Touch 2000 25
Someone else is using the telephone line
in the caller’s home in the event of an
emergency 25
Optional settings of the BT In Touch 2000 25
Returning your BT In Touch 2000 to
its factory settings 27
Registering your BT In Touch Pendant 28
Maintenance 31
Additional features available
on your BT In Touch 2000 19
Using the Emergecy button 19
If the called number is engaged 19
2
Help and advice 32
Technical specification 33
Index 34
Page 5
Introduction
You can expect your BT In Touch 2000 to provide
many years of quality service. Please read the
instructions carefully before use and keep this user
guide for future reference.
For your records
Date of purchase:
Place of purchase:
Serial number:
Purchase price:
For warranty purposes, proof of purchase is
required, so please keep your receipt.
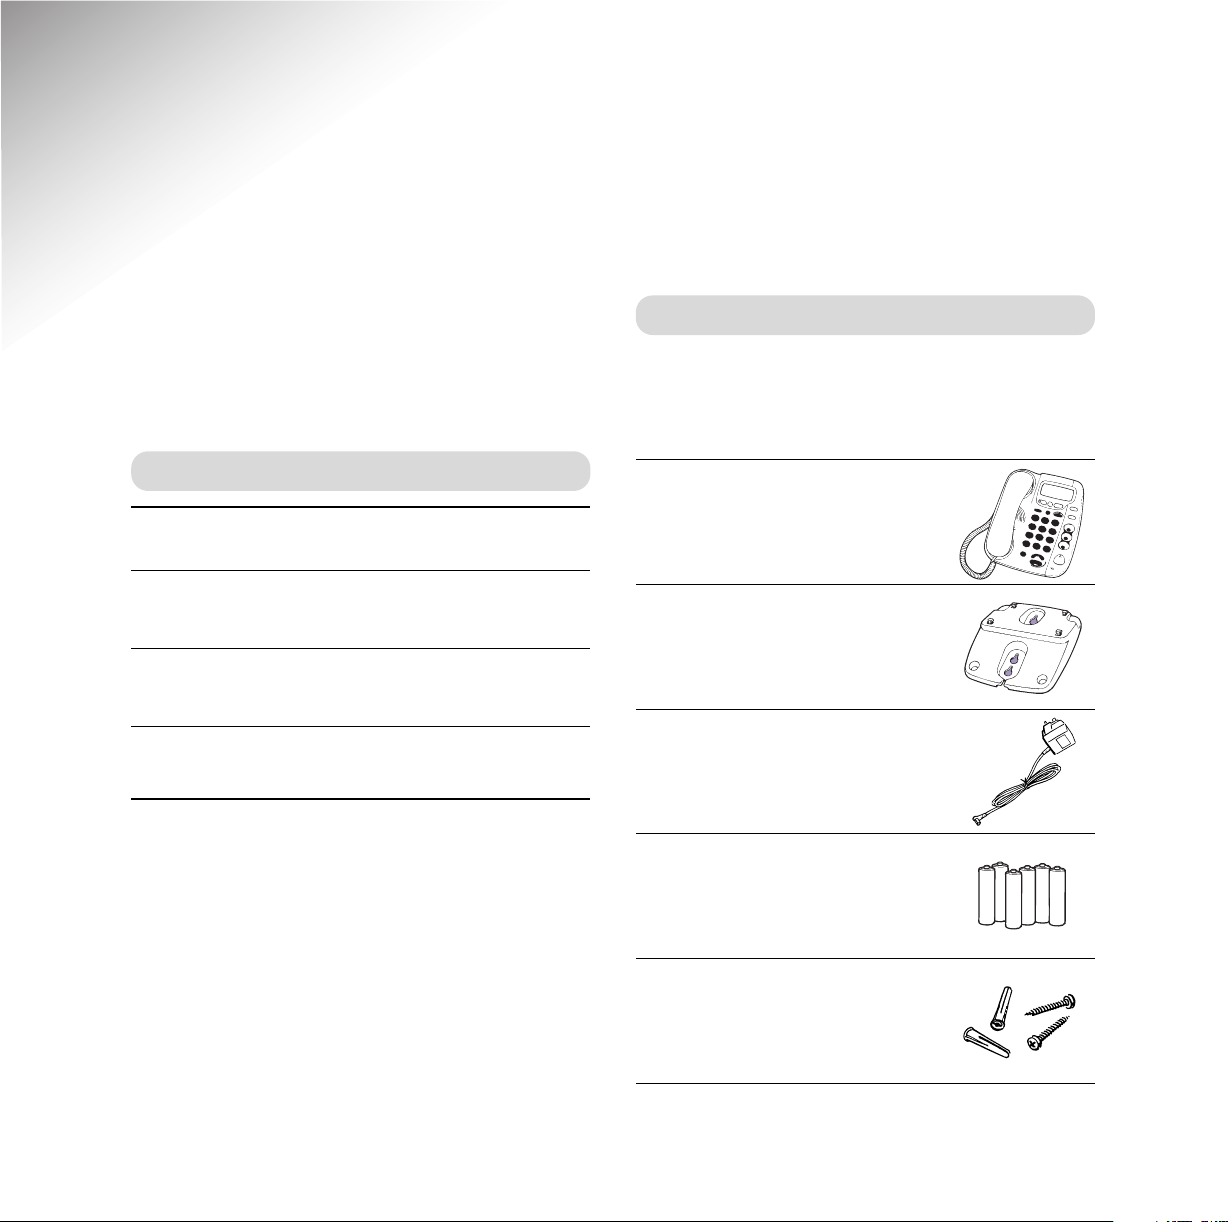
Unpacking your BT In Touch 2000
Check that your BT In Touch 2000 is complete.
If anything is missing, please contact your place of
purchase immediately.
BT In Touch 2000
1 base stand for wall
mounting or raised mounting
1 mains adaptor
6 x AA batteries
Wall plugs and screws
3
Page 6
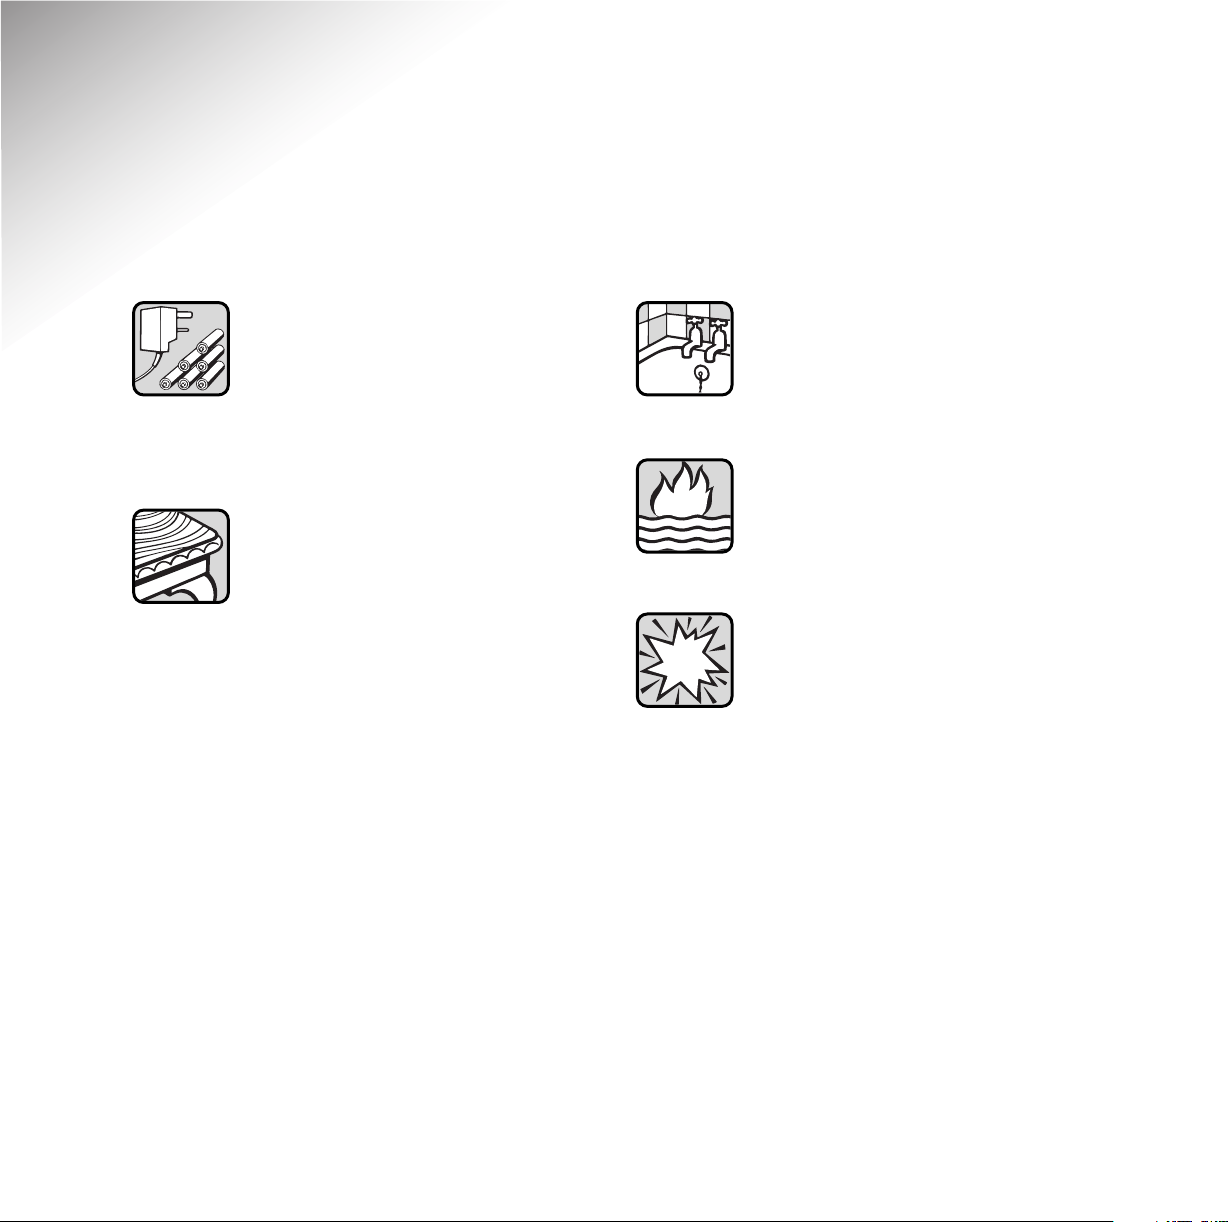
Safety information
Use the power adaptor and the
batteries supplied. Spare batteries and
power adaptors are available from the
Helpline on 0845 6011 406. The power
adaptor item code is: 870629.
We advise against placing these
products on antique, veneered or
wooden surfaces as damage may occur.
Do not use the BT In Touch 2000
in damp, humid conditions such
as bathrooms.
Do not expose the BT In Touch 2000
or related equipment to fire or water.
Do not use the BT In Touch 2000
in places where there are explosive
hazards.
4
Page 7
Setting up your phone
Please follow all the steps in the order shown
1 Plan where you will put your
BT In Touch 2000 Phone
The phone should be within 2 metres of a phone
socket.
Warning
Your BT In Touch 2000 is only designed to operate
in a normal domestic environment.
2
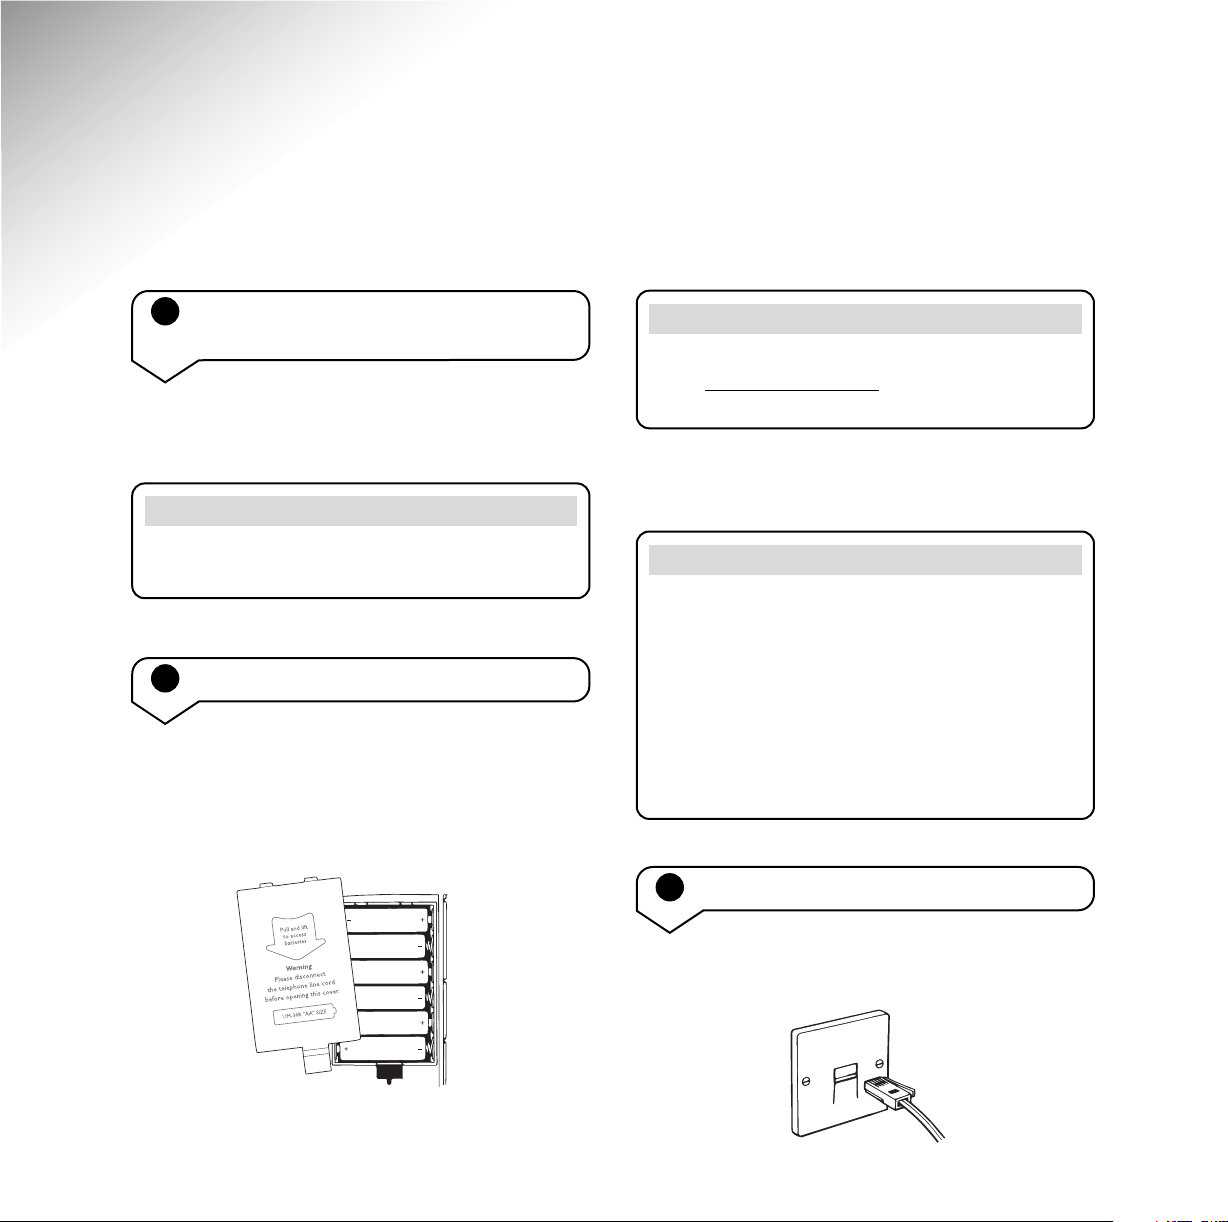
Install the batteries
You must fit the batteries supplied before you
attach the base stand for either raised or wallmounting positions.
Warning
Before installing (or replacing) the batteries, the
phone must be disconnected
and the mains power.
Open the battery cover on the underside of your BT
In Touch 2000. Insert the 6 x AA Alkaline batteries.
Please note
The BT In Touch phone has 3 voice prompts to
indicate that mains power or the telephone line has
been disconnected or that the battery power is low.
These are: “Telephone line disconnected”, “No mains
power” or “Please change batteries”.
You may hear these voice prompts when first setting
up your phone. This is perfectly normal and shows
the phone’s warning alerts are working.
3
Connect the telephone line cord
from the phone line
Connect the line cord to your phone socket.
5
Page 8
4 Select ringer volume
RINGER
VOLUME
HI
LOW
OFF
The ringer volume switch is on the underside of
your phone.
Set the volume of the ringer to High, Low
or Off.
This should be done before you attach the base
stand for either raised or wall-mounted positions.
5 Select ringer tone
RINGER
R1
R2
R3
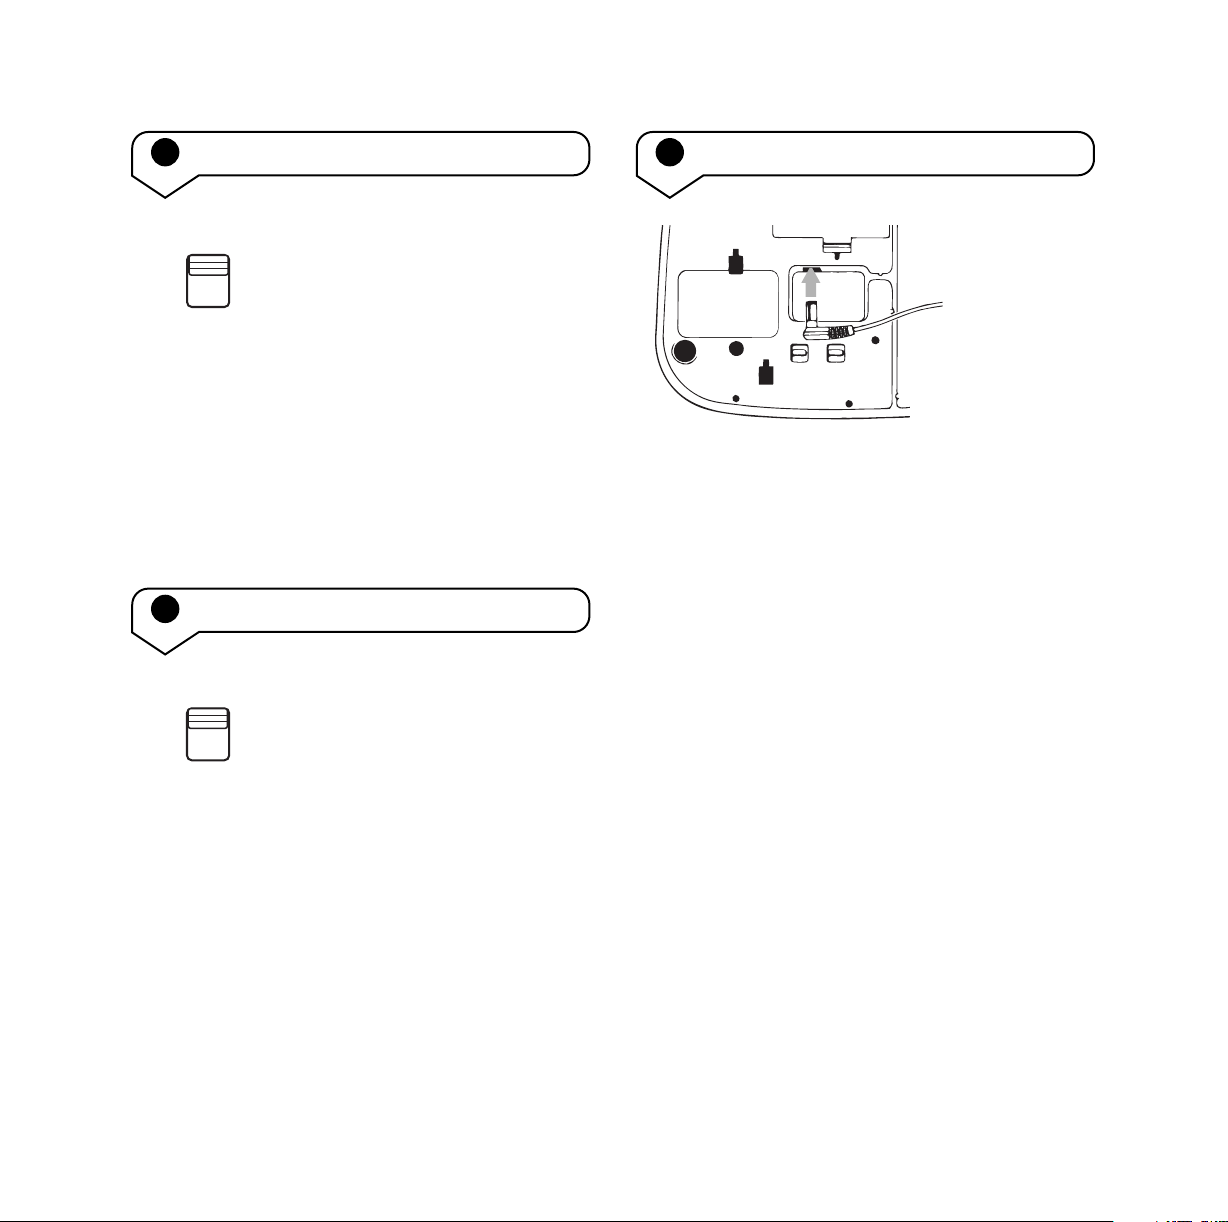
6 Connect the power cable
Plug the power cable into the socket on the
underside of your BT In Touch 2000 as shown.
The cable needs to be pressed in to its channel
to keep it out of the way. The way you do this
will depend on how you have positioned your phone
(with or without the base stand, wall-mounted or
not). See ‘Desk and wall-mounted phone positions’
on page 16.
The ringer tone switch is on the underside of your
phone.
This switch allows you to select the pitch required
for the ringer.
R1: for a low-pitched tone
R2: for a medium-pitched tone
R3: for a high-pitched tone
This should be done before you attach the base stand
for raised or wall-mounted positions.
6
Page 9
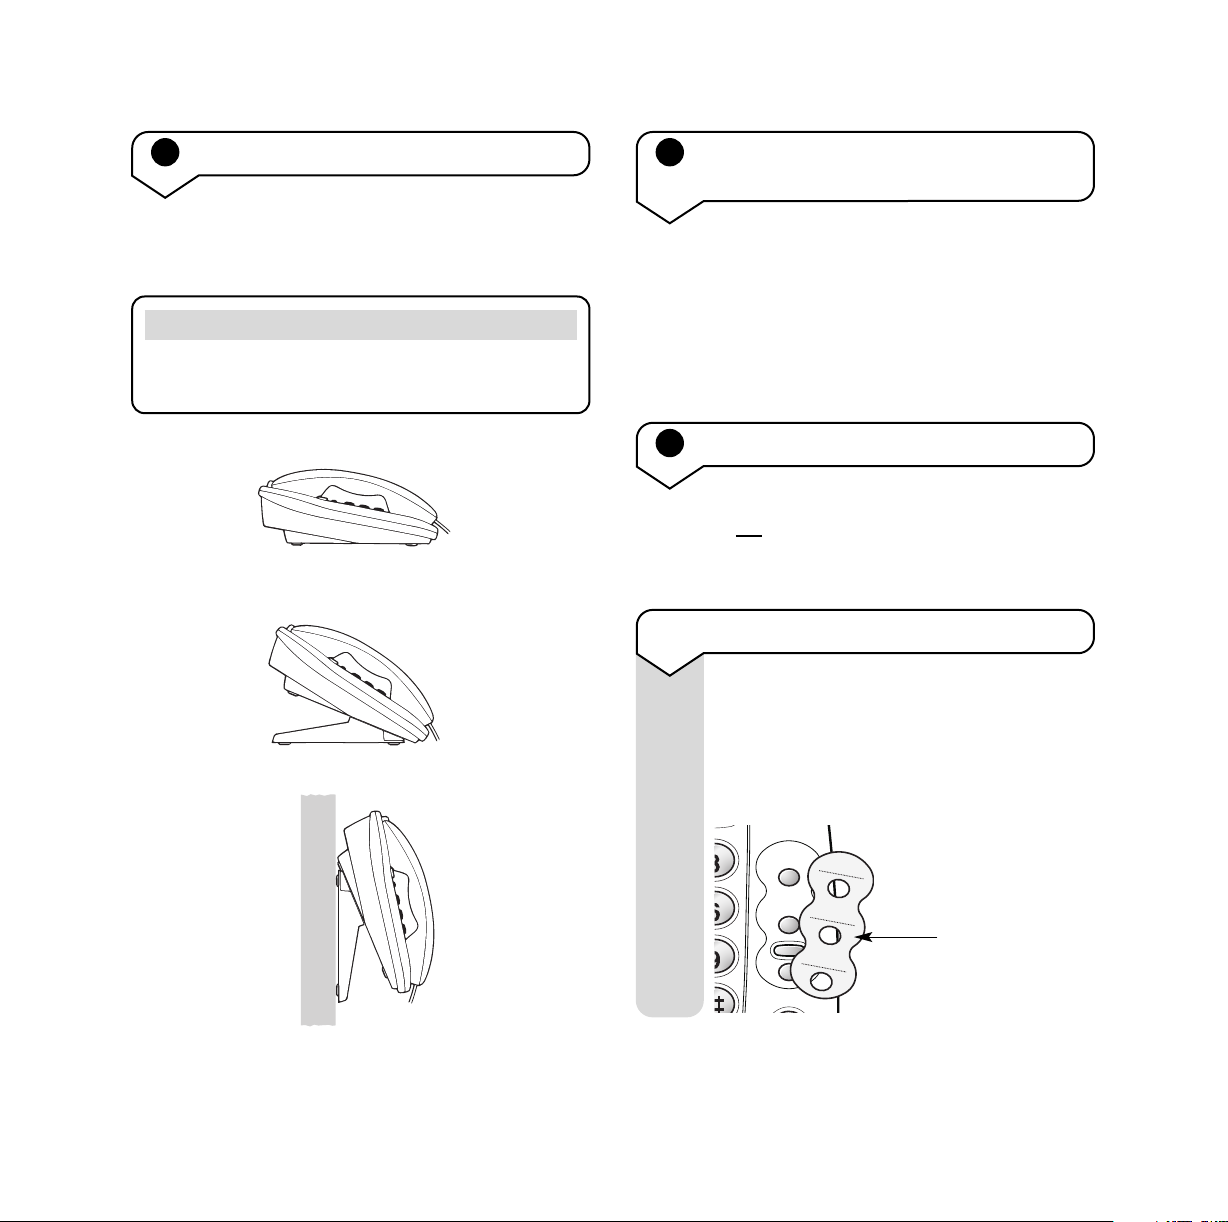
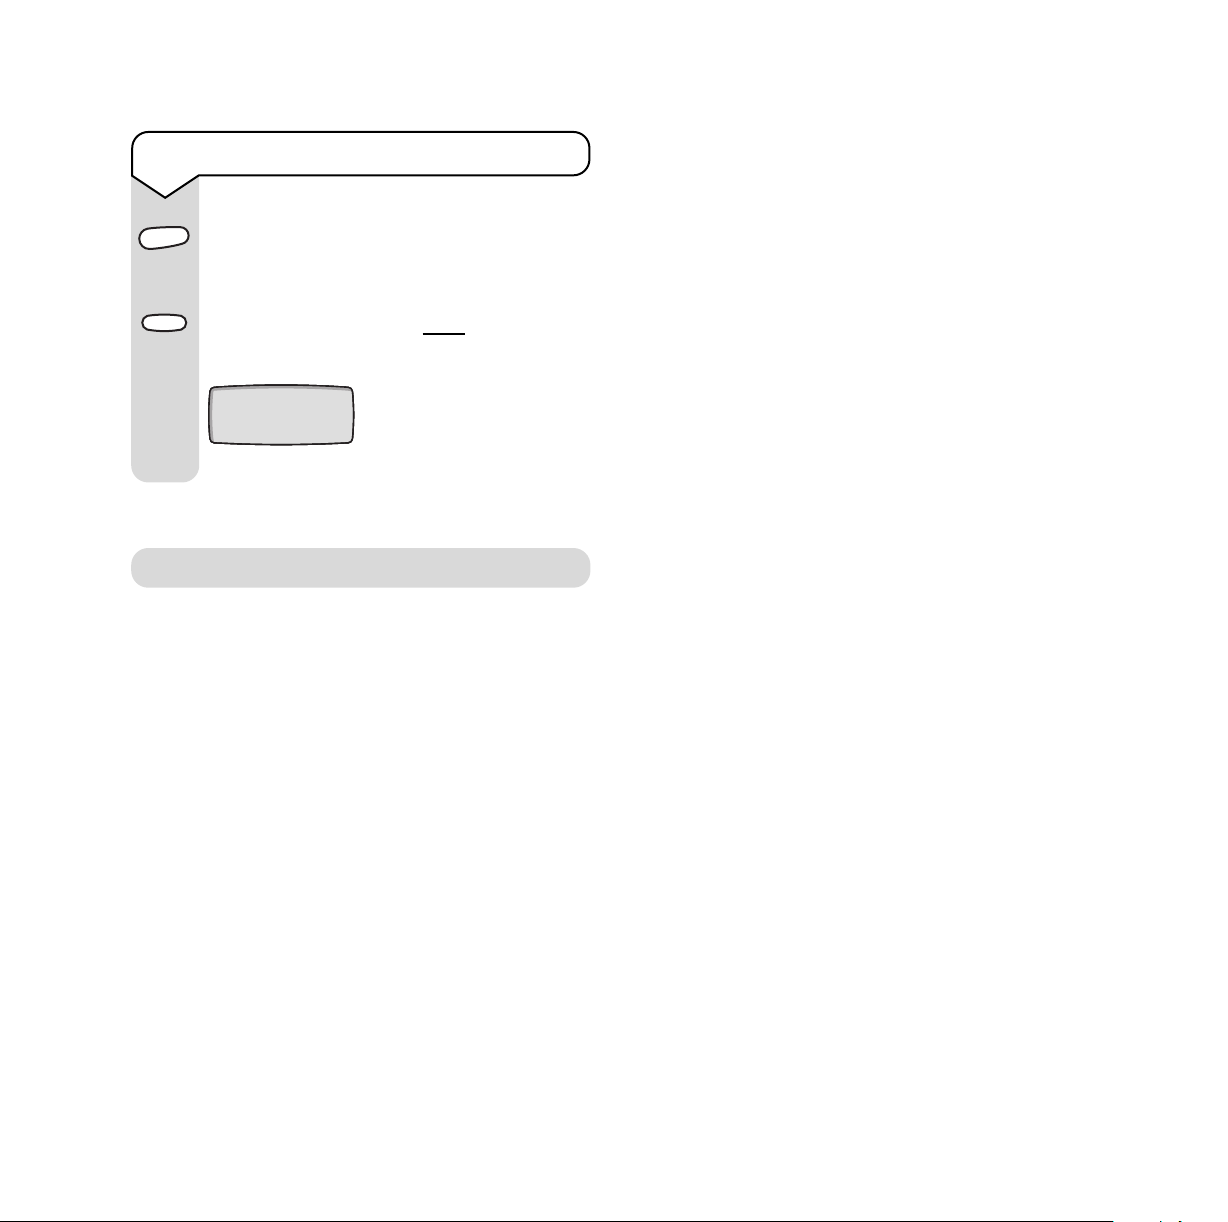
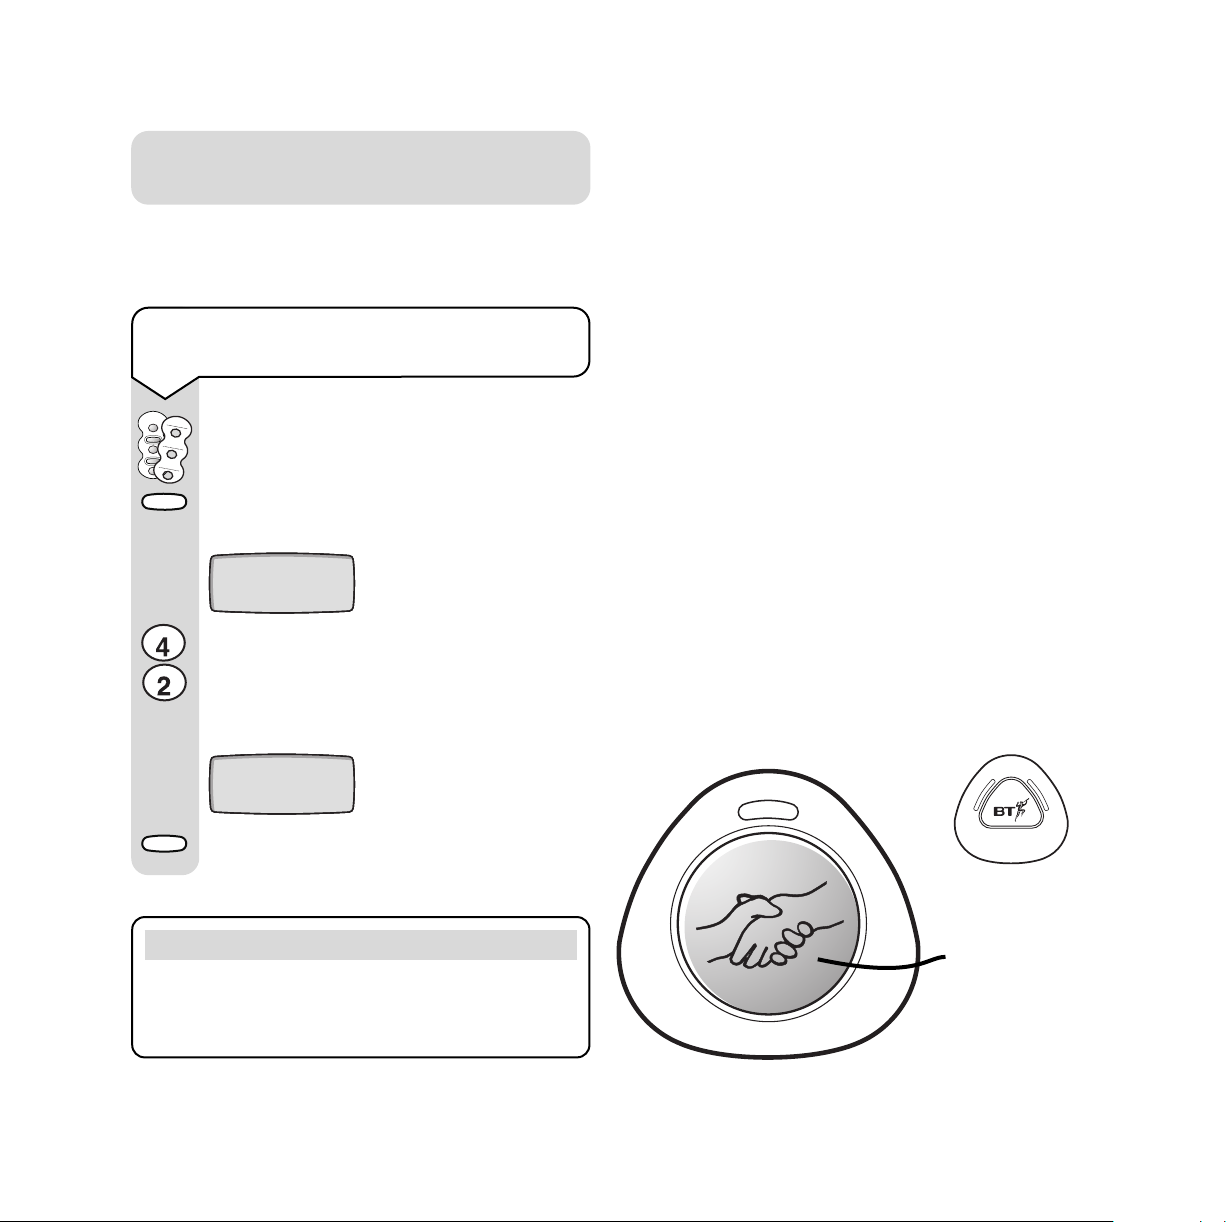
7 Positioning your BT In Touch 2000
Your BT In Touch 2000 Phone can be positioned in
3 different ways:
Please note
Make sure you test your phone before you finally
fix it in position.
8 Setting time and date
(with Caller Display)
If you have already subscribed to a Caller Display
network service, the time and date on the display will
be set automatically when the first incoming phone
call is received. For more information about BT
Calling Features, call BT on Freefone 0800 800 150.
• Flat on a table or desk.
• Raised position on a table or desk using
the base stand.
• Wall-mounted using the base stand.
9 Setting time and date (manually)
If you have not subscribed to a Caller Display
service, you can set the time and date manually.
To set the time and date manually
Your BT In Touch 2000 uses the
12-hour clock.
Lift the label surrounding the Quickdial
memory buttons to reveal the Setup button.
D
E
F
M
N
O
W
X
Setup
Y
Z
Lift label
See ‘Desk and wall-mounted phone positions’ on
page 16.
7
Page 10
Setup
Press the Setup button.
J
K
L
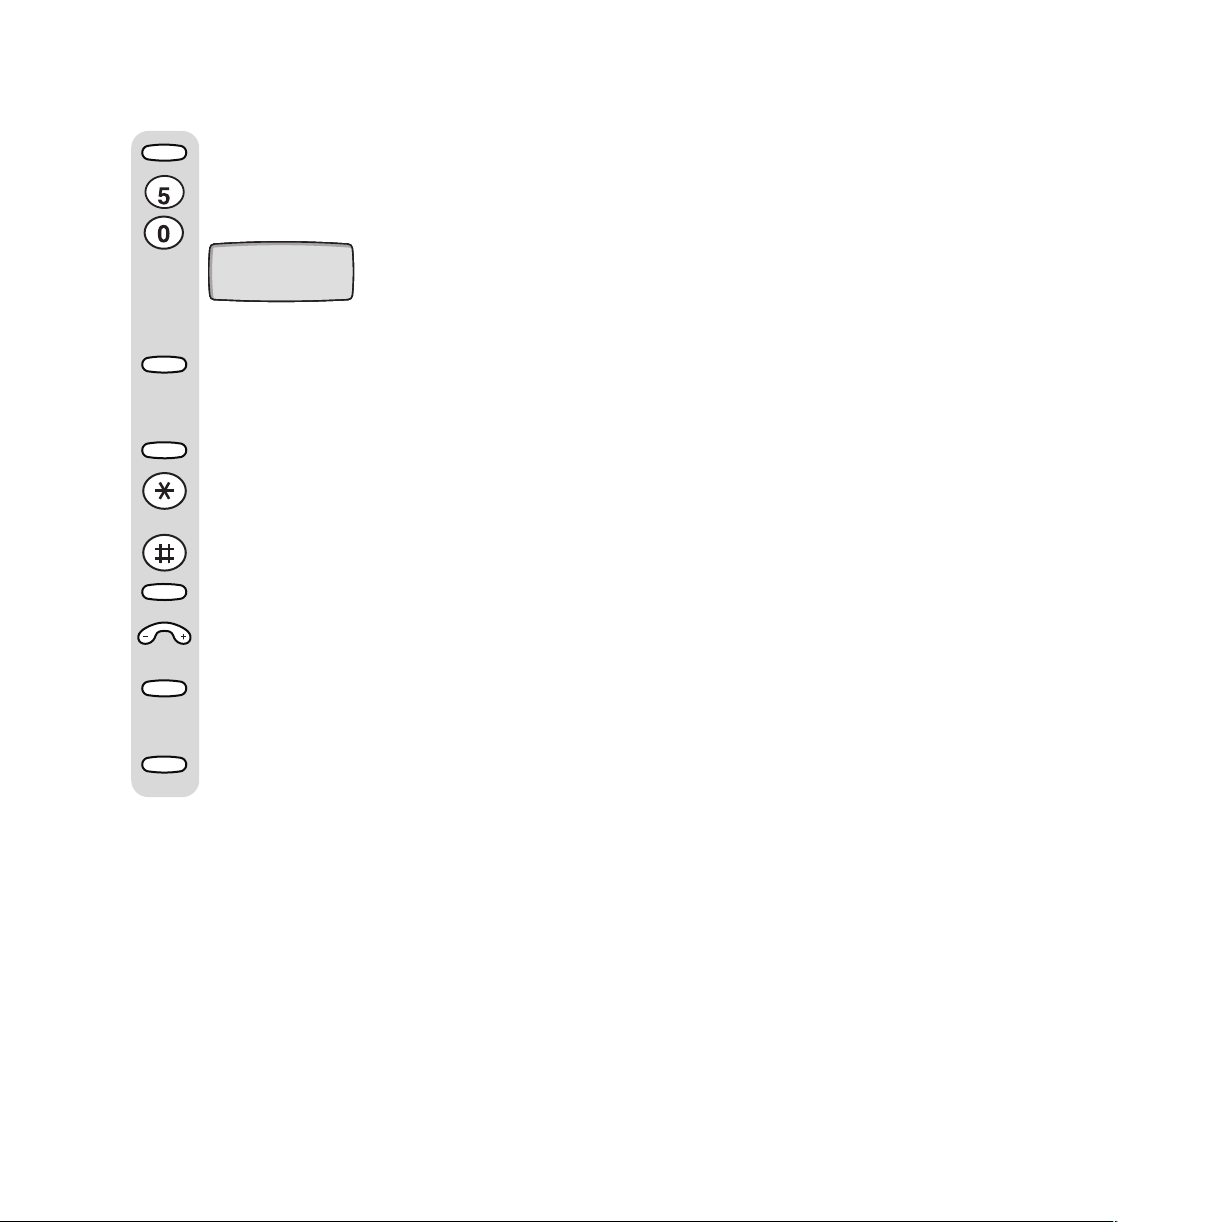
Enter 5 then 0 using the keypad.
The display shows: (the hour flashes)
12:00 AM 01 JAN
Enter the hour using the keypad.
Setup
Press the Setup button (minutes flash).
Enter the minutes using the keypad.
Setup
Press the Setup button (
AM/PM
flashes).
Press the
button to set AM.
✱
or
Press the
Setup
Press the Setup button (month flashes).
m
u
l
o
e
V
Press the -/+ on the Volume button to
button to set PM.
#
select the month.
Setup
Press the Setup button (day flashes).
Enter the day using the keypad.
Setup
Press the Setup button to confirm the
setting.
8
Page 11
Using the telephone
Handsfree
Handsfree
Making and receiving calls
To make a call
Lift the handset and listen for a dialling
tone.
Dial the number you require.
To end the call, replace the handset.
To dial a Quickdial memory number
Lift the handset, or press the Handsfree
button.
Press the required Quickdial memor y
button, for example M1, M2 or M3.
The number stored on that Quickdial
memory button is dialled.
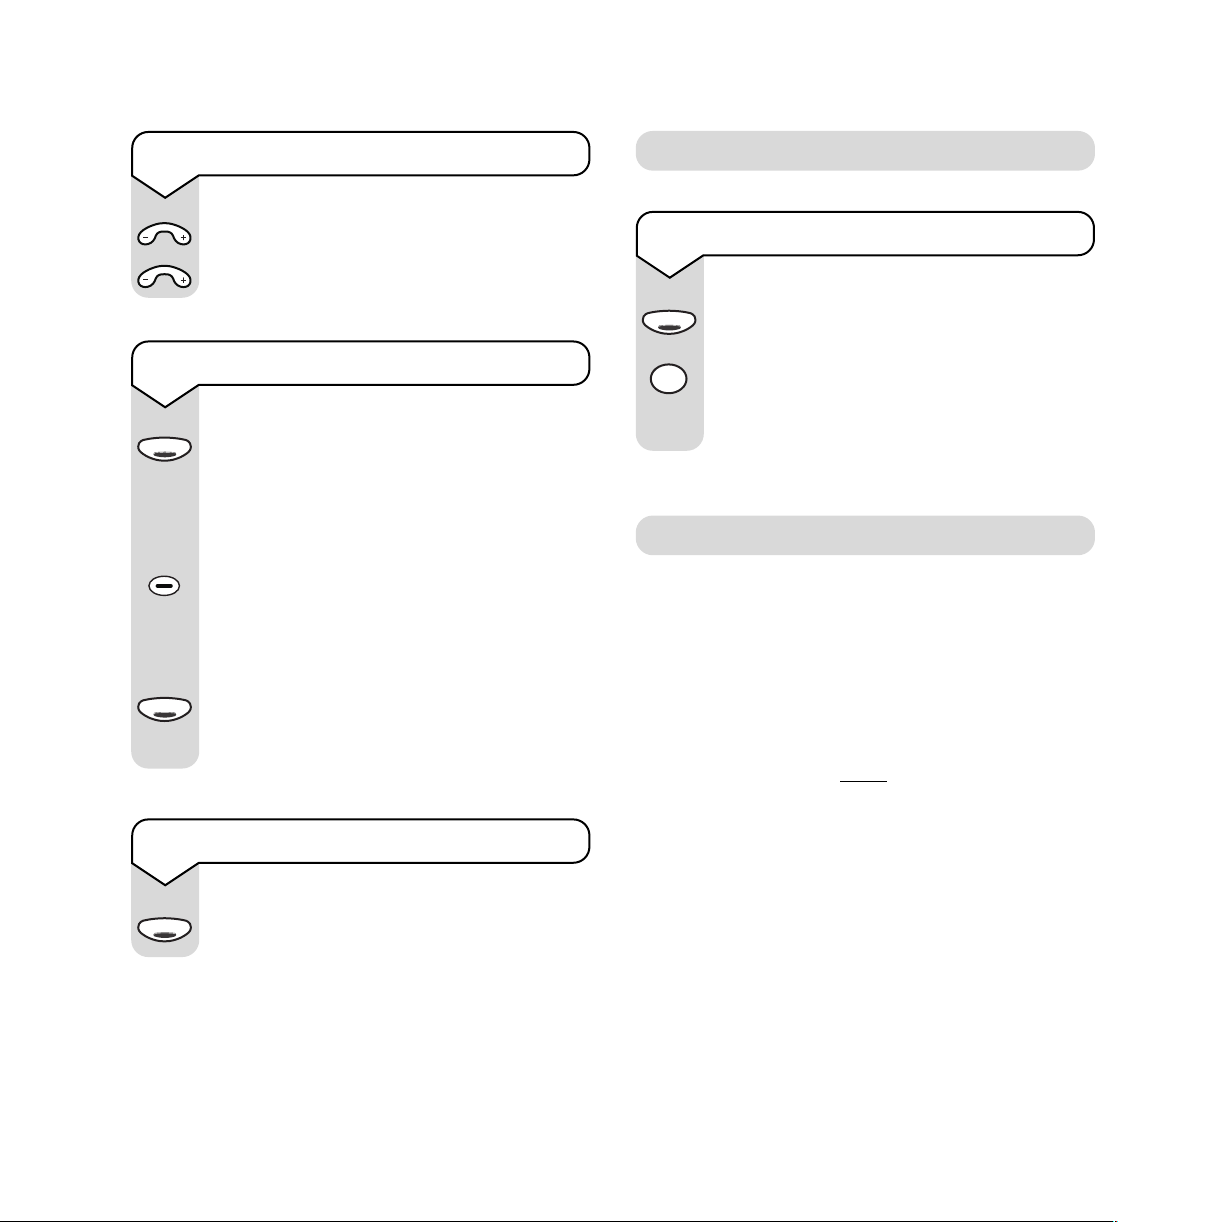
To receive a call
When the phone rings, either:
Pick up the handset and speak.
Or
Press the Handsfree button.
Using handsfree
The handsfree feature allows you to use the phone
without picking up the handset, giving you more
freedom while you are speaking on the phone.
You can hear the caller’s voice through the
built-in speaker.
You can adjust the speaker volume with the
handsfree speaker volume control on the front
of the phone.
9
Page 12
To adjust the speaker volume
Handsfree
Redial
m
u
l
o
e
V
Press – to reduce the volume.
m
u
l
o
e
V
Press + to increase the volume.
To make a handsfree call
Handsfree
Press the Handsfree button.
The handsfree light comes on and you can
hear the dialling tone.
Dial the number you require.
Redial
To redial the last number dialled
Lift the handset or press the Handsfree
button.
Press the Redial button.
The phone will automatically dial the last
number dialled.
Calls button and Calls List
10
Now speak to your caller through the
microphone.
You can lift the handset at any time during
the conversation.
Handsfree
To end your call, either replace the handset
(if lifted) or simply press the Handsfree
button.
To answer a call in handsfree
Handsfree
When the phone rings, press the Handsfree
button and speak.
For your BT In Touch 2000 to function fully you
should subscribe to your network’s Caller Display
service. A quarterly fee is usually payable.
Your BT In Touch 2000 can store up to 30
incoming numbers with the time and date of each
call. If you have stored the name of the person in
the Directory, then the name will be displayed,
rather than the number. Your calls will be listed
in date/time order. When a new call has been
received, the red incoming call indicator light will
flash to let you know.
Page 13

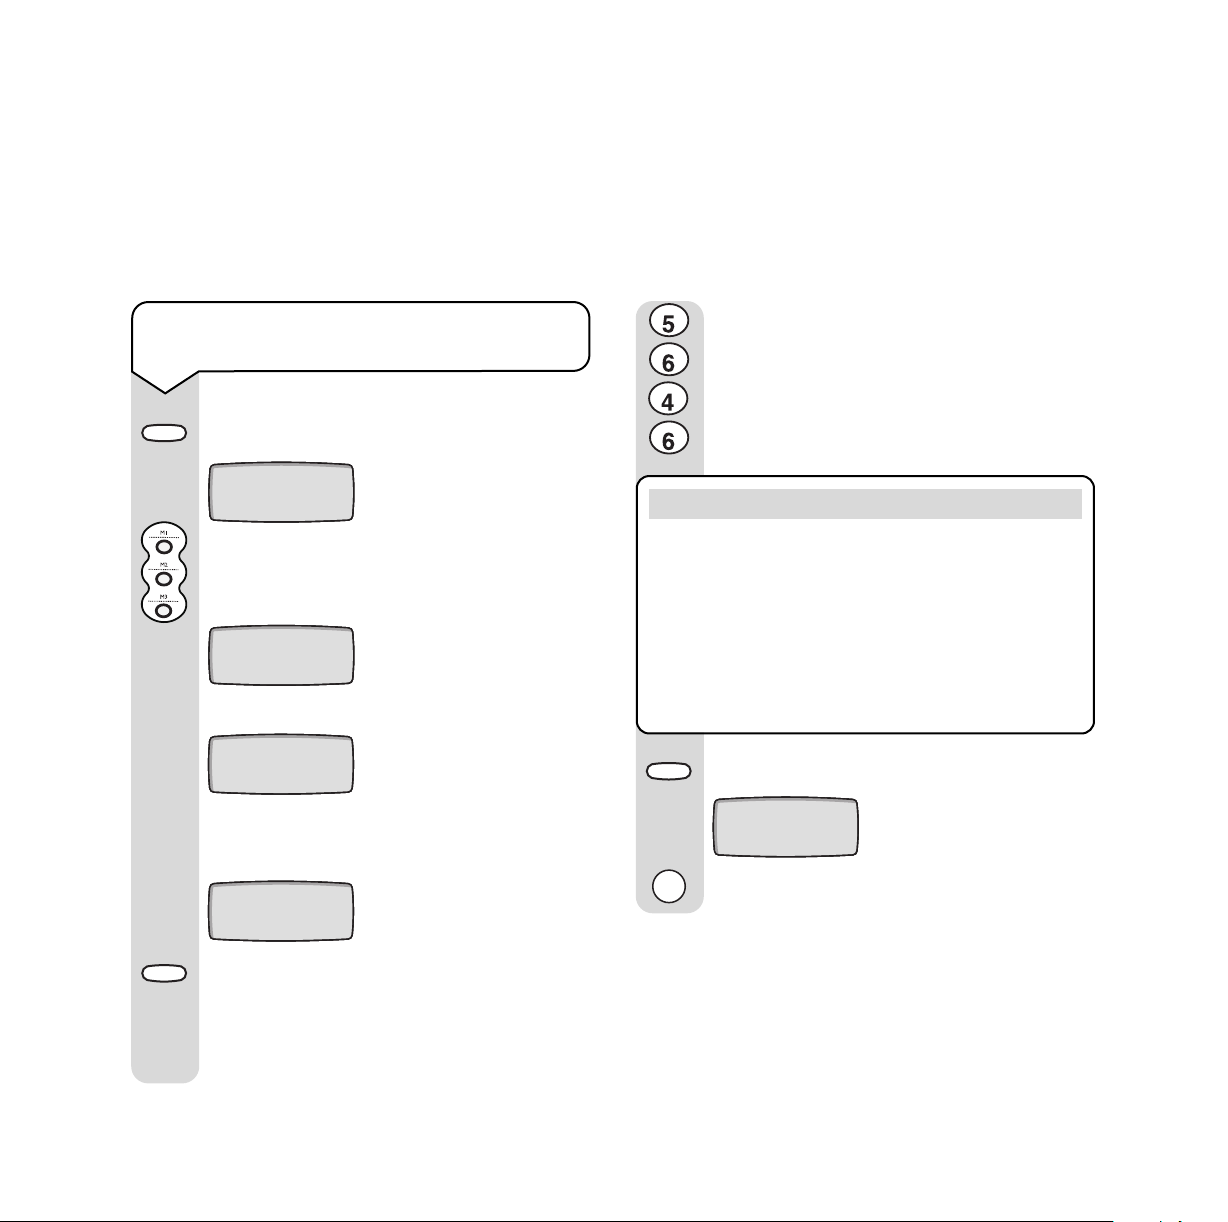
Cancel
To view the Calls List
Dial
Calls
Press the Calls button. The display shows
details of the most recently received call.
2:39 pm 15 APR
0208 100 5678
Each press of the Calls button displays the
previous call.
To delete an individual call from the
Calls List
Press and hold down the Calls button to
Calls
scroll through the Calls List until you come
to the entry you wish to delete.
Cancel
Press the Cancel button twice
succession. You will hear 2 beeps and the
display will show:
in quick
If you press and hold down
the Calls button,
the display will auto-scroll through the
entire list.
To dial a number shown in the Calls List
Calls
Press and hold down the Calls button to
scroll through the Calls List until you come
to the entry you wish to dial.
2:39 pm 15 APR
0208 100 5678
Press the Dial button.
The number is shown on the display and is
dialled automatically.
PRESS CANCEL TO
DELETE
then
DELETED
(after first press)
To delete all calls from the Calls List
Display any call from the Calls List.
Press and hold down
the Cancel button for
about 6 seconds until the display shows:
LIST EMPTIED
11
Page 14

Calls
Directory
Store
Store
Store
To copy numbers stored in the Calls List
to the Directory
Using the R (Recall) button
R
Numbers stored in the Calls List can be
copied to the Directory.
Press the Store button.
The display shows:
2:39 pm 15 APR
SELECT LOCATION
Press the Directory button.
The display shows:
ENTER NUMBER
then
ENTRIES XX
Press and hold down
THEN PRESS STORE
the Calls button to
scroll through the Calls List, until you come
to the entry you wish to store, for example:
ENTER NUMBER
0181 100 5678
Press the Store button.
The display shows:
This button is used with some network services or if
your phone line is connected to a switchboard.
To find out more about BT Calling Features, please
call BT free on 0800 800 150.
Secrecy
To use the Secrecy button
This allows you to talk to someone in the
same room, without the person on the other
end of the line hearing your conversation.
Secrecy
Press and hold down
the Secrecy button.
The Secrecy light will come on.
Release the Secrecy button to continue
your call.
ENTER NAME
THEN PRESS STORE
Enter the name using the keypad.
(See page 13.)
Press the Store button.
The display shows:
STORED
12
Page 15
Quickdial and Directory
✓
J
K
L
M
N
O
G
H
I
M
N
O
Store
Store
Store
Storing a name and number in the
Quickdial memory
Press Store. The display shows:
12:00 AM 03 JAN
SELECT LOCATION
Select ‘location’ by pressing one of the
memory buttons, either M1 or M2 or M3.
The display shows (if M2 was pressed):
MEMORY 2
The display then shows:
ENTER NUMBER
THEN PRESS STORE
Enter the phone number.
Press Store. The display then shows:
ENTER NAME
THEN PRESS STORE
Press the 5 button until the display shows
Press the 6 button until O is shown.
Press the 4 button until
Press the 6 button until
H
is shown.
N
is shown.
Please note
When storing and editing names and numbers, you
can use the -/+ on the Volume button to move the
cursor left and right or add a space and the 1 button
to enter + or - in the name, for example. Mum + Dad.
If you wish to enter a pause in the telephone
number, (for example, when using a switchboard)
press the Redial button in the appropriate place.
Press Store, the display shows:
STORED
The phone number is now stored.
J
.
Enter a name for this phone number. Use
the keypad to type in letters by pressing the
number button which contains the letter
you want. Press the button until the letter is
JOHN
shown. For example, to show ‘
’.
13
Page 16
Directory
You can store up to 10 names and numbers
in the Directory.
Please note
When storing and editing names and numbers, you
can use the -/+ on the Volume button to move the
cursor left and right and add a space and the 1
button to enter + or - in the name, for example
Mum + Dad.
If you wish to enter a pause in the telephone
number (for example when using a switchboard),
press the Redial button in the appropriate place.
Storing names and numbers in the directory
Store
Press the Store button.
The display shows:
Store
Press the Store button.
The display shows:
ENTER THE NAME
THEN PRESS STORE
Enter the name of the person you wish to
store (see page 13 for how to enter names).
Store
Press the Store button.
The phone beeps twice and the display
shows:
STORED
Dialling from the Directory
Directory
Press the Directory button repeatedly
until the display shows the number you
wish to dial.
Dial
Press the Dial button.
14
Directory
SELECT LOCATION
Press the Directory button.
The display shows the number of entries
(up to 10).
ENTER NUMBER
ENTRIES XX
Enter the phone number.
then
THEN PRESS STORE
The entry shown on the display is dialled
automatically.
Page 17
Deleting entries from the Directory
Directory
Press the Directory button repeatedly
until the display shows the entry you wish
to delete.
Cancel
Press the Cancel button twice
.
The display shows: (after first press)
PRESS CANCEL TO
DELETE
Your entr y has now been deleted.
To use your Cancel button
The Cancel button can be used to delete entries in
the Calls List and Directory.
15
Page 18
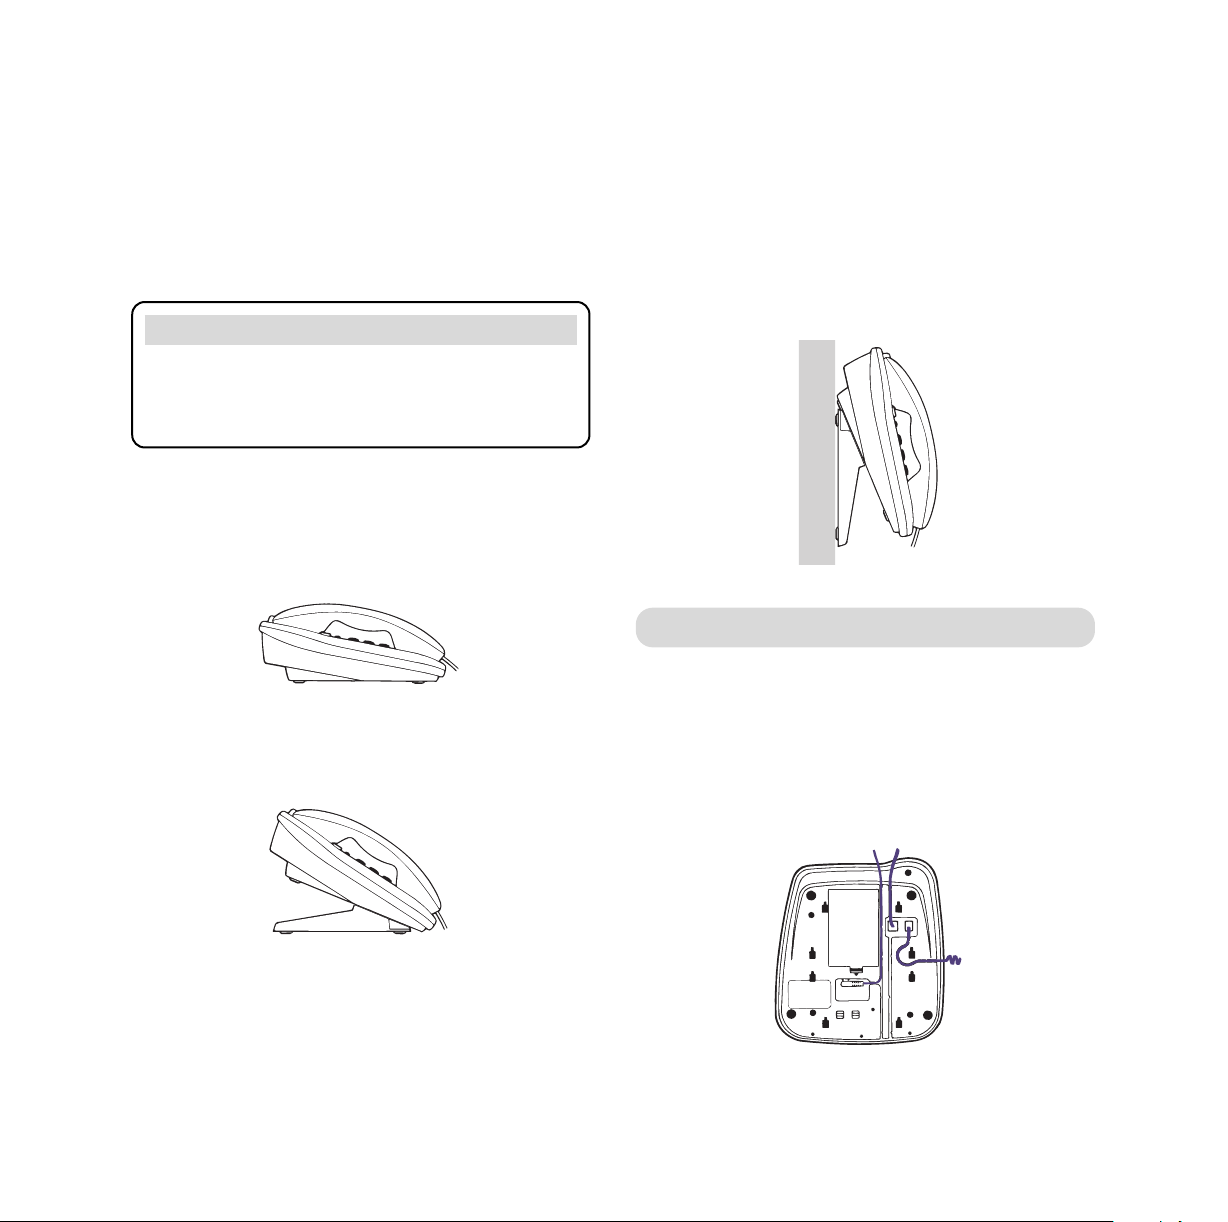
Desk and wall-mounted
phone positions
• Wall-mounted using the base stand.
Please note
Check that you have installed the batteries and set
your base switches to the settings you want before
you attach the base stand. See pages 5 & 6.
Your BT In Touch 2000 can be positioned in 3 ways:
• Flat on a table or desk.
Raised
Your BT In Touch 2000 can be placed on a table or
desk and raised using the base stand.
• Raised on a table or desk using the
base stand.
16
Press all the cables coming from the BT In Touch
2000 into their guides on the underside of the unit,
as shown below.
Page 19

Insert the base stand into the holes in the base of
your phone marked ‘RAISED’. You may need to push
quite hard to fix it securely.
2
1
Wall-mounted
Your BT In Touch 2000 can be wall-mounted using
the screws and wall plugs provided.
Please note
Use the base stand provided as a template to pencil on
the wall where the drill holes should go.
Drill the holes (diameter 5.5mm) for the screws.
Insert the wall plugs provided (if required).
Drive the screws into the wall, leaving about 5mm
free on which to hang the phone.
WALL PLUG
WALL
SCREW
Press all the cables coming from the BT In Touch
2000 into their guides on the underside of the unit,
as shown below.
Before you wall-mount your BT In Touch 2000
check that:
The wall can support the weight of the phone.
The position you choose leaves sufficient space so
that the phone is clear of any obstruction on the
wall, such as a shelf or a cupboard.
The power cable and telephone line cord will reach
their correct wall points.
17
Page 20
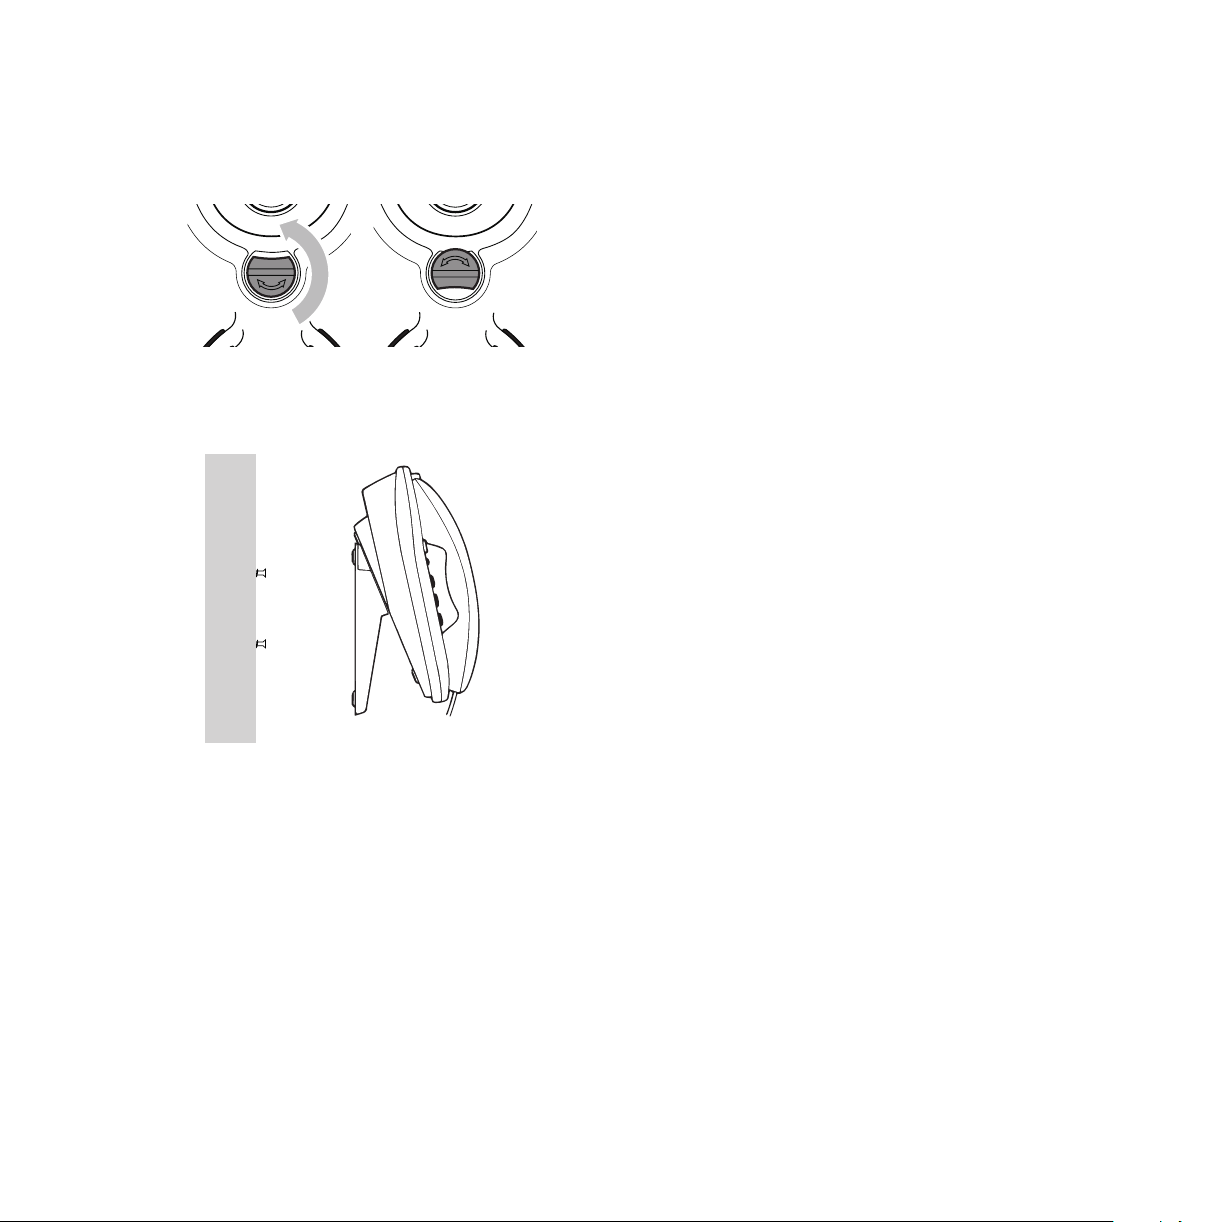
Rotate the handset hook 180˚ so that you can hang
up the handset when the phone is wall-mounted.
Hang the holes on the back of the phone over the
screwheads and gently pull the phone downward to
make sure it is securely in place.
Feed the phone line through the bottom of the wallmounted base stand to allow the cable to rest flat
against the wall.
18
Page 21

Additional features available on
your BT In Touch 2000
Your BT In Touch 2000 can be set up to contact
relatives or friends in an emergency. If you decide
to use these functions, please follow the instructions
in this section. To further enhance this feature, a
Pendant is available that will alert your BT In Touch
2000 and the emergency sequence will be activated.
Pendants are available from the BT In Touch Helpline
on 0845 6011 406.
Using the Emergency button
In the event of an emergency simply press the
Emergency button on the BT In Touch 2000 or BT
In Touch Pendant. This starts the emergency
sequence, confirmed by a flashing orange light on
the BT In Touch 2000 and a series of beeps. The BT
In Touch 2000 then dials the first of the allocated
emergency contact numbers.
It will continue to call all 3 numbers in turn until the
‘call for help’ is answered and the 3-digit code
entered.
If the called number is engaged
If the called number is engaged, or the call is taken
by an answering machine, fax or someone who does
not know the 3-digit code, the BT In Touch 2000 will
continue to call the next emergency number.
Once the emergency call has been answered, the
called number will hear ‘Emergency call, emergency
call, please enter the 3-digit code’. The emergency
sequence will only stop when the person who has
answered the call enters the 3-digit security code
(555) or the caller presses and holds down
Cancel button on their BT In Touch 2000.
The BT In Touch 2000 will then stop trying to call
any of the other emergency numbers.
the
The called number can now speak to
the caller
Because your BT In Touch 2000 is ‘hands free’ there
is no need to pick up the handset as long as you are
within hearing distance of your BT In Touch 2000.
What to do next
Having assessed the situation, the called number
can decide on the best thing to do.
The called number can also remotely clear the BT In
Touch 2000 and return it to an ‘idle’ state allowing
the caller to make further calls, by pressing 6 ✱✱.
19
Page 22

Setting up the emergency facility on
Store
your BT In Touch 2000.
IMPORTANT
It is important that you set up your emergency
contact numbers correctly. To do this, first enter the
phone numbers and names into the Quickdial
memories. Then separately give emergency status to
each Quickdial memory.
If a Quickdial memory has not been allocated
emergency status, it will not be automatically
dialled when you press the Emergency button (on
the BT In Touch 2000 or Pendant).
If none of the Quickdial memories have been
allocated emergency status then the emergency
feature will not work. A voice prompt is played to
alert the User “Warning. No emergency numbers”.
To enter your emergency phone numbers
Enter the phone numbers you want to use for
emergencies as Quickdial numbers by
following the instructions shown in ‘Storing
Quickdial numbers’, page 13.
IMPORTANT
It is highly recommended that more than one
number is stored as an emergency contact number.
Also, do not store the same emergency contact
number on more than one Quickdial memory button.
To give numbers emergency status
You must enter your emergency phone
numbers before you can give them
emergency status.
Entering your emergency contacts
Although the BT In Touch 2000 will accept “999” as
a phone number which can be allocated emergency
status, it is not recommended. BT strongly
recommends that the person called first assesses
the nature of the emergency call and then rings the
emergency services with the relevant information.
This ensures that only appropriate calls are passed
on to the emergency services.
20
Press the Store button.
The display shows:
12:00 AM 01 JAN
SELECT LOCATION
Press the # button. The display shows:
EMERGENCY STATUS
ENTER MEMORIES THEN PRESS STORE
then
Page 23

Press the Quickdial memory buttons you
✓
Store
Store
wish to give emergency status. The display
shows the memories you have selected for
emergency status, for example:
ENTER MEMORIES
M1 M2
Press Store. The emergency status is
announced, e.g. “Emergency status on” or
“Emergency status off”. The display shows
the memories you have set with emergency
status, such as:
EMERGENCY STATUS
M1 M2
These Quickdial memories now have
emergency status.
Please note
To confirm and change which numbers
have emergency status
Press the Store button.
Press the # button.
The display shows, for example:
EMERGENCY STATUS
M1 M2 M3
EMERGENCY STATUS
M1 M2
Press the appropriate M1/M2/M3 memory
buttons to toggle between emergency
status on/off.
Press the Store button to confirm.
If all 3 numbers have
emergency status
If only M1 and M2 have
emergency status
You cannot allocate emergency status to a Quickdial
memory without first storing a telephone number.
If you try, you will hear “Error. Store number first”.
IMPORTANT
If you use any Quickdial numbers for a normal call
that have been allocated as emergency numbers, your
BT In Touch 2000 will treat them as an emergency.
To avoid this you will need to insert the prefix 141.
It is recommended that you also store the Quickdial
emergency numbers in the directory and use the 141
prefix before the telephone number, see “Storing names
and numbers in the Directory”, on page 14. The
Quickdial number can then be used in an emergency
and the Directory number in a non-emergency.
important
If you have not given emergency status to any
Quickdial memories, your BT In Touch 2000 will
announce “Warning no emergency numbers” at the
end of the programming sequence.
IMPORTANT
Please ensure that you advise your family and
friends that you have programmed their number to
receive emergency calls from your BT In Touch 2000.
They should enter the code 555 on their telephone to
accept the emergency call. Failure to enter this code
within 1 minute will cause the BT In Touch 2000 to
try the alternative emergency numbers.
21
Page 24

Setup
Announce
Announce
Announce
Setup
Announce
Changing Quickdial memory numbers
You can only change a Quickdial memor y number
when the emergency status has been removed from
that number. See ‘To confirm and change which
numbers have emergency status’ on page 21.
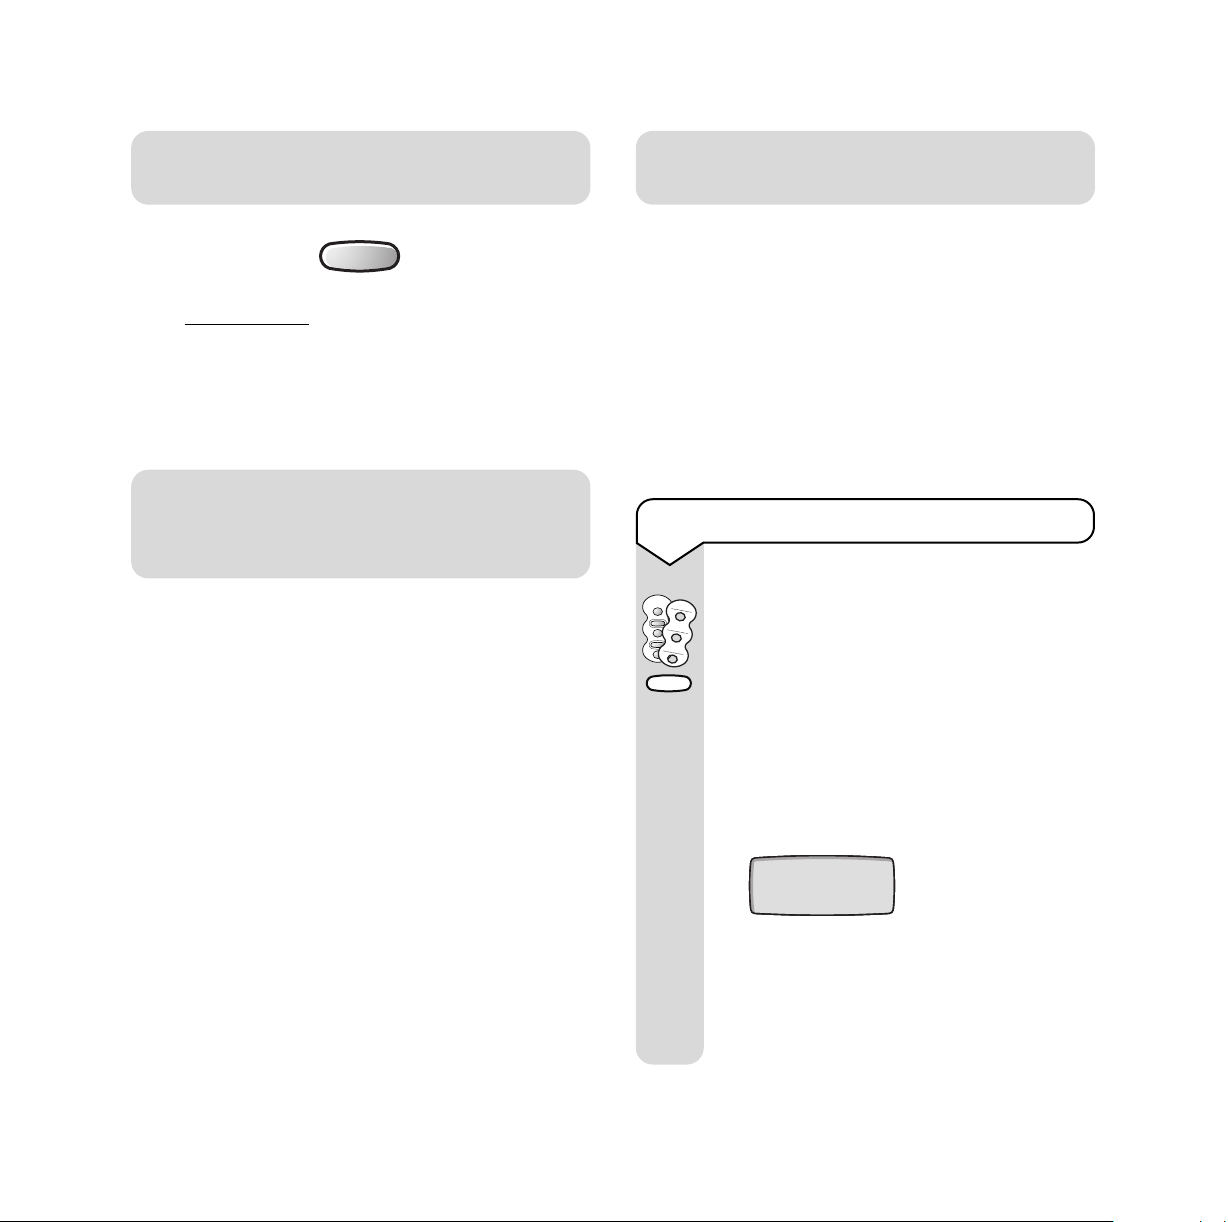
To record a personal emergency
announcement
Lift the label surrounding the Quickdial
memory buttons to reveal the Announce
and Setup buttons.
To change a number stored in the memory, repeat
the process for storing numbers, but enter the new
number (see page 13). The new number will
automatically replace the old number. Then give the
number emergency status if you wish it to be
included in the emergency sequence (see page 20).
Emergency announcements
The emergency announcement is the message
which will be heard by the called number when they
answer an emergency call. The announcement tells
the called person that there is an emergency but can
also convey important information about the caller,
for example “I am an asthmatic and my call-out
doctor’s phone number is...”.
When the caller presses the Emergency button and
the emergency sequence is started, an emergency
announcement will be played to the allocated
emergency numbers.
The BT In Touch 2000 has a pre-programmed
announcement, which is –
Lift the handset.
Press and hold down
the Announce button.
You will hear, “To record a new announcement,
please speak now” followed by a long beep.
You have 10 seconds to record a new
announcement message.
The display shows:
RECORD
10 SECONDS
Release the Announce button on
completion of your message.
Your BT In Touch 2000 will playback “Your
emergency announcement is...” and then the
new personal message.
If you wish to hear the new announcement
again, press and release the Announce
button.
To check the emergency announcement
22
“Emergency call, Emergency call.
Please enter the 3-digit code”.
Lift the label surrounding the Quickdial
memory buttons to reveal the Announce
and Setup buttons.
Press and release the Announce button.
Page 25

To delete your personal emergency
Setup
Announce
Store
Announce
Store
announcement
Lift the label surrounding the Quickdial
memory buttons to reveal the Announce
and Setup buttons.
You can revert to the original BT
pre-recorded announcement as follows:
Press the Store button.
Press the Announce button.
The display shows:
PRESS STORE TO
RESTORE TO DEFAULT
Press the Store button.
Your BT In Touch 2000 will play back
“Your emergency announcement is...” and
then the original pre-recorded emergency
announcement.
“No mains power”.
“Emergency call. Please enter the
3-digit code”.
Warning alerts
If you hear one of the emergency warning aler ts,
such as “No mains power” ,“Please change batteries”
or “Telephone line disconnected” then you must take
the necessary action to rectify the problem.
If you hear “No mains power”
The back-up batteries will automatically take over for
the duration of their battery life (up to 7 hours for
new batteries). The mains power should be
reconnected as soon as possible and the batteries
replaced, if necessary.
If you hear “Please change batteries”
Replace the batteries in the BT In Touch 2000 as soon
as possible. 6 x AA Alkaline batteries are required,
see ‘Install the batteries’ on page 5.
Status announcements
If your BT In Touch 2000 detects either no mains
power or low batteries on the phone or the Pendant,
then it will convey this information to the called
number as part of the emergency announcement,
for example:
“Emergency call”.
(Plus any personal emergency
announcement you have recorded).
If you hear “Telephone line disconnected”
Check that the BT In Touch telephone line cord is
still connected to the socket. If disconnected, then
reconnect it immediately (see page 5). If the
telephone line cord is still connected, then a line
fault has occurred and you will need to contact your
network service provider (for example, BT) as soon
as possible.
23
Page 26

Using the BT In Touch 2000 in
an emergency
Starting an emergency call
There are two ways to start the emergency sequence
on the BT In Touch 2000 – from your BT In Touch
Pendant and from your BT In Touch 2000 itself.
From your BT In Touch Pendant
Press the Pendant button on the BT In
Touch Pendant, the light will flash to
confirm that the button has been pressed.
The BT In Touch 2000 will beep and the
orange Emergency button will flash, the
phone will automatically switch to
‘handsfree’ and start the emergency
sequence by dialling the first of the
emergency contact numbers that you have
programmed.
From your BT In Touch 2000
Press the orange Emergency button on the
BT In Touch 2000. The phone will beep and
the orange emergency light will flash, the
phone will automatically switch to
‘handsfree’ and start the sequence by
dialling the first of the emergency contact
numbers you have programmed.
What the caller will hear during an
emergency call
The BT In Touch 2000 will beep to confirm that the
Emergency button on either the BT In Touch 2000
or the BT In Touch Pendant has been pressed. It will
then switch to ‘handsfree’. In ‘handsfree’, the BT In
Touch 2000 will play the emergency sequence to the
caller reassuring them that help is being sought.
Firstly, the Caller will hear the message “Don’t worry
we are trying to contact help”. They will then hear the
BT In Touch 2000 dialling the emergency contact
numbers and the emergency announcements being
played (see ‘Emergency announcements’, on page 22).
When the emergency call is answered and the
3-digit code (555) has been entered by the called
number, both the beeps and the emergency
announcements will stop and the caller will be able to
speak to the called person in handsfree. The handset
does not work. This is to prevent the handset being
accidentally knocked off and then both parties
being unable to communicate with each other.
If the emergency call is not answered by the first
emergency contact, then the caller will hear the
BT In Touch 2000 hang up and start to contact the
second emergency contact number.
24
Page 27
Setup
Announce
Setup
Cancelling an emergency call at the
BT In Touch 2000
Optional settings of the
BT In Touch 2000
Cancel
Press and hold down the Cancel button until the
emergency light stops flashing and beeping.
The caller will hear a double beep to confirm the
emergency sequence has been cancelled.
Someone else is using the telephone
line in the caller’s home in the event
of an emergency
If the caller presses the Emergency button (phone/
pendant) but another person is already using the
telephone line, the BT In Touch 2000 will announce
over the loudspeaker and down the telephone line
“Emergency call. Please hang up now”.
The BT In Touch 2000 will then wait a few seconds
and try to start the emergency sequence. If the
person on the telephone line has failed to hang up,
the BT In Touch 2000 will replay the message
“Emergency call. Please hang up now”.
The BT In Touch 2000 will continue to do this until
the telephone line is clear and the emergency
sequence has begun.
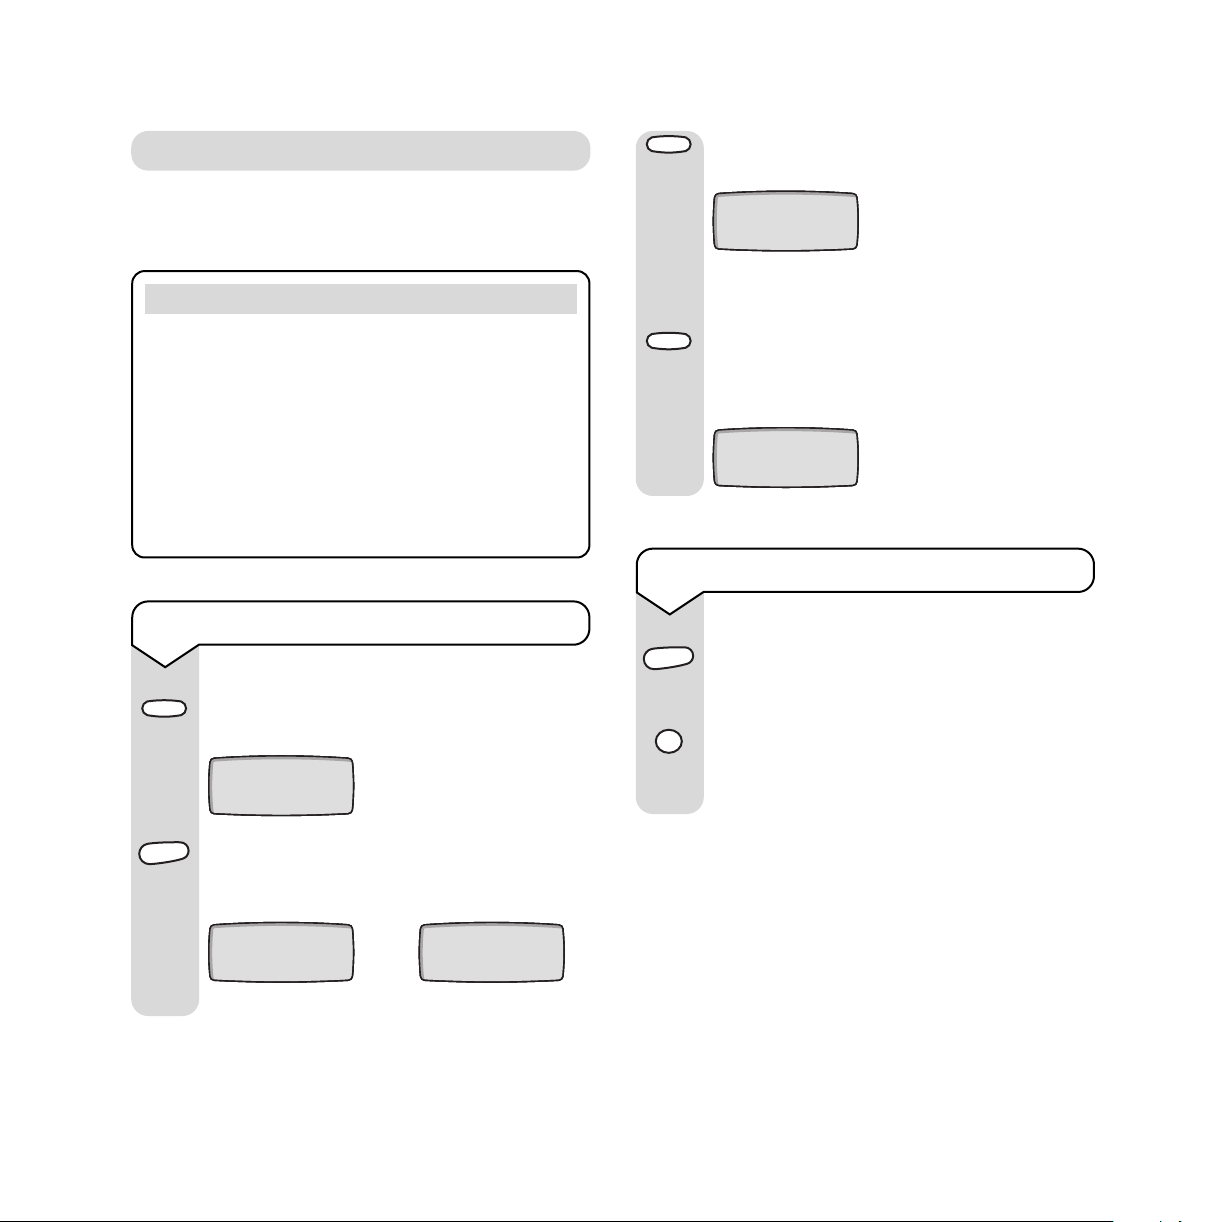
You can use the Setup button, located under the
memory label, to set and change the optional feature
settings.
Voice prompts
When you set voice prompts to ON, your
BT In Touch 2000 will confirm each numeric key
press with an announcement.
For example, if you press 7 you will hear “Seven”.
To set the voice prompts to ON or OFF
Lift the Quickdial memory label to reveal
the Setup button.
Press the Setup button.
Then press the 2-digit code to change the
relevant setting:
00 Optional voice prompts ON.
Display will show:
VOICE ON
SET UP
With voice prompts set to ON, the following
are examples of what you can expect to
hear:
If you press the 1 button, “One” will be
announced.
25
Page 28

Setup
Setup
Setup
Announce
Setup
If you press the M1 button, “Dialling
Setup
Announce
Setup
memory one” will be announced.
(Only if emergency status has been given
|to that Quickdial memory).
01 Optional voice prompts OFF.
(Default setting). Display will show:
VOICE OFF
SET UP
Then press the Setup button to confirm
the setting.
11 The emergency cancel timer is set
to a 9-second delay. The display
will show:
1 SECOND DELAY
SETUP
Then press the Setup button to confirm the
setting.
9 SECOND DELAY
SETUP
Emergency cancel timer
The emergency cancel timer is the time the phone
takes to start the emergency sequence after you
press the Emergency button (on the phone or
Pendant). The time can be changed from one to nine
seconds in order to help you test your BT In Touch
Pendant.
To set the emergency cancel timer
Lift the Quickdial memory label to reveal
the Setup button.
Press the Setup button.
Then press the 2-digit code to change the
relevant setting:
10 The emergency cancel timer is set
to a 1-second delay (the default
setting.) The display will show:
1 SECOND DELAY
SETUP
Display contrast control
Adjust the contrast of the display to your preferred
level.
To set the contrast of the display
Lift the Quickdial memory label to reveal
the Setup button.
Press the Setup button.
Then press the 2-digit code to change the
relevant setting:
30 Contrast level 1.
31 Contrast level 2.
32 Contrast level 3 (default setting).
33 Contrast level 4.
34 Contrast level 5.
Then press the Setup button to confirm the
setting.
26
Page 29
Returning your BT In Touch 2000 to
Setup
Announce
Setup
A
B
C
G
H
I
Setup
its factory settings
Follow the procedure below to restore the original
settings.
To return your BT In Touch 2000 to its
factory settings
Lift the Quickdial memory label to reveal
the Setup button.
Press the Setup button.
The display shows:
BT In Touch Pendant
Small, lightweight and waterproof, the BT In Touch
Pendant acts as a portable emergency button for the
BT In Touch 2000. When pressed in an emergency,
the BT In Touch Pendant contacts the BT In Touch
2000 which starts dialling the stored emergency
numbers.
In a non-emergency, the BT In Touch Pendant button
can be pressed to answer and end an incoming call,
enabling the User to hold a ‘handsfree’ conversation
via the loudspeaker on the phone.
The BT In Touch Pendant has a battery life of about
5 years (based on 2 presses a day) and a range of
up to 50 metres from the BT In Touch 2000.
SETUP
Press 4 then 2. The display shows the
digits and you hear a beep after each digit
is entered.
The display changes to:
RESET?
SET UP
Press the Setup button. You now hear a
double beep as confirmation.
Warning
This will also delete all stored memories, even
Quickdial memories which have been given
emergency status.
It has 2 interchangeable, detachable mountings
allowing it to be worn around the neck or on a
wrist strap.
You can have up to 2 BT In Touch Pendants working
with one BT In Touch 2000.
Reverse side
BT In Touch Pendant
emergency button
When pressed, this
button starts the
emergency sequence.
27
Page 30

✓
Store
2 detachable mountings for necklace, wrist strap or
belt clip wearing
To register your BT In Touch Pendant(s)
Press and hold down the Store button for 5
seconds. The display shows:
Necklace Wrist strap
BT In Touch Pendants
If you require either a new, additional or
replacement BT In Touch Pendant, please contact
the Helpline on 0845 601 1406.
If you are having problems with the pendant, call
the product Helpline on 0845 601 1406.
Pendant item code: 871769
Registering your BT In Touch Pendant
Before using your BT In Touch Pendants for the
first time, you need to register them to your BT In
Touch 2000.
The pendant receiver aerial which hangs from the
back of your BT In Touch 2000 needs to be uncoiled.
LOG PENDANT
Continue holding down
Press and r
If you have a second BT In Touch Pendant,
continue holding down
Press and r
button.
Now r
You will hear a double beep, and the
announcement “Pendant logged on. Please
test all Pendants.”
The display shows:
elease the Pendant button.
elease the second Pendant
elease the Store button.
the Store button.
the Store button.
PENDANT LOGGED ON
BT In Touch Pendant registration is
now complete.
Testing the range of the BT In Touch Pendant
When attempting to register your BT In Touch
Pendant, if no emergency contact numbers have been
stored with emergency status, when the Pendant
button is pressed you will hear 3 beeps and the
message “Warning. No emergency number stored”.
28
You need to check the per formance of the BT In
Touch Pendant under the conditions of your own
home and garden.
Page 31
The maximum range in a clear line-of-sight of the BT
In Touch Pendant is 50m, but this operating range
may vary depending on certain conditions. For
example:
When you have finished your conversation,
press the Pendant button again to hang-up.
The light on the Handsfree button will go
out.
• You are too far from the phone – the maximum
range in a clear line of sight, that is, with no
obstructions, is 50m.
• You have another radio device or transmitter
situated near your home which is interfering with
your BT In Touch Pendant, such as a fire station
nearby.
• Something is blocking the signal between the
BT In Touch Pendant and the phone, such as,
unusually thick walls, a tree or a garden shed.
Important
Whenever you change the location of the
BT In Touch 2000, you should test the BT In Touch
Pendant again.
Using the BT In Touch Pendant
BT In Touch Pendant in normal use
If, during the call, you decide to use the
handset, simply pick it up and continue
your conversation.
Using the BT In Touch Pendant in an
emergency
To use the BT In Touch Pendant in an
emergency, you simply press the Pendant
button. The small red light will flash to
confirm that the Pendant button has been
pressed.
Your BT In Touch 2000 will dial the stored
emergency contact numbers you have
programmed (see page 20).
Important
If the Pendant button is pressed at the same time as
a call is coming in, then your BT In Touch 2000
will assume that you want to receive the incoming
call rather than start the emergency sequence.
You can use the BT In Touch Pendant to
answer incoming calls. When the phone
rings, simply press the Pendant button to
answer the call. This puts the phone into
‘handsfree’ mode. You don’t need to pick up
the handset, simply speak to the callerusing
the built-in microphone on the telephone.
29
Page 32

BT In Touch Pendant battery low
warning
When the battery in your BT In Touch Pendant has
about a year’s life left, the BT In Touch Pendant will
warn you by flashing 3 times ever y time the
Pendant button is pressed, and the voice prompt will
say “Replace Pendant soon”.
This gives enough time for you to order a
replacement BT In Touch Pendant by ringing the
product Helpline on 0845 6011 406 and quoting
Item Code 871769.
30
Page 33

Maintenance
General
Clean your BT In Touch 2000 with a damp cloth (not
wet) or an antistatic wipe. Never use a dry cloth as
this may cause a static shock.
Service
Within guarantee
If you experience a problem with your BT In Touch
2000 you should contact the BT In Touch Product
Helpline on 0845 6011 406. Calls are charged at local
call rates. If the problem is not remedied, you will be
advised to contact your original point of purchase.
Some retailers offer extended warranty schemes for
cover outside the initial 12-month period. Please ask
them for details.
Please note
Outside warranty
If your BT In Touch 2000 needs repair after the
warranty period has ended, call the BT In Touch
Product Helpline on 0845 6011 406 for information
on our recommended repair agents.
If you have to return any part of your
BT In Touch 2000
Keep all parts that are working correctly.
Pack the faulty part(s) securely, preferably using the
original packaging.
Please note
BT cannot take responsibility for goods damaged
in transit.
The batteries are not covered under the guarantee.
31
Page 34

Help and advice
If you cannot find the information you require in this section, then phone
the BT In Touch Product Helpline on 0845 6011 406
No dial tone
Is the telephone line cord plugged into the
telephone socket?
Check that the power cable is connected to the
mains power.
Replacing phone batteries
After a time, you may find that the batteries are
running out. When the batteries need replacing -
You will hear the batter y low warning beep and
BATTERIES LOW
will appear on the display.
Battery disposal
Do not immerse the batteries in water. Do not throw
the batteries into fire, or dispose of them with
ordinary domestic refuse.
Your batteries contain cadmium. Check your local
regulations for special disposal instructions.
Damage liability
BT accepts no responsibility for damage caused to
your BT In Touch 2000 by using any other batteries
than the type recommended.
No display appears
The batteries may be discharged or the power
supply may be disconnected. Check the power is
connected and switched on. If it is, you will need to
replace the batteries.
The display may be faulty.
After mains power loss
When the mains power comes back on all
your Quickdial memory numbers will be kept.
To find out more about BT Calling Features including
Caller Display, ring BT on Freefone 0800 800 150.
32
Page 35

Technical specification
BT In Touch 2000
Radio frequency and bandwidth ..............173MHz, 25kHz
Power supply .......................................9V, 300mA
Batteries.............................................6 x AA Alkaline
Standby power.....................................7 hours
Signalling............................................Tone
Recall key function ...............................Timed Break Recall
Handsfree ...........................................Enhanced Quality Voice Channel (can be switched into simplex mode)
Hearing aid compatibility.......................Yes
Caller Display ......................................Caller Display and Caller Display/Call Waiting
Operating modes .................................Carer
Carer + Careline
Careline
Permitted ambient conditions.................0°C to 55°C
Permitted storage temperature...............-10°C to +60°C
Dimensions .........................................197mm x 225mm x 82mm (152mm with base mount) (Width x Depth x Height)
Weight ...............................................1150g (with base mount)
REN ...................................................1.0
BT In Touch Pendant
Radio frequency ...................................173MHz
Transmitted power ...............................Less than 10mW
Range ................................................50 metres free-field
Important note: The range can be greatly reduced where conditions are not ideal, (i.e. in
certain buildings or near bodies of water, etc).
Battery life ..........................................Up to 5 years (based on 2 presses a day)
Waterproofing standard.........................IP67
Dimensions .........................................38mm x 15mm (Width x Depth)
Weight ...............................................5g
Approvals............................................SRDGB
33
Page 36

Index
Additional features 19
At a glance 1
Batteries
disposal 32
installation 5
low warning 5, 30, 32
recommended type 5
replacing 32
warning alerts 5, 23
Caller Display 7
Calls button 10
Calls list 10
copying to directory 12
delete 11
delete all calls 11
dial 11
view 11
Cancel button 15, 25
Contrast on display 26
Date and time 7
Desk-mounting 7, 16
Directory 14
deleting 15
dialling 14
storing name and number 14
Emergency
call 24
cancelling 25
button 19
engaged 19
contacts 20
announcements 22
alerts 23
For your records 3
Guarantee 31
Handsfree 9
Help 32
Maintenance 31
Making a call 9
handsfree 9
quickdial 9
receive 9
redial 10
secrecy 12
Pendant 29
Positioning your phone 7
Power cable 6
Quickdial 13
34
Page 37

Recall 12
Receive a call 9
Redial 10
Registering 28
Returning your product 31
Ringer tone 6
Ringer volume 6, 10
Safety information 4
Secrecy 12
Service 31
Setting up 5
Technical specifications 33
Telephone line cord 5
Time and date 7
Volume
ringer 6
speaker 10
Wall-mounting 17
Warning alerts 5, 23
35
Page 38

Visit us at www.bt.com
Offices worldwide
The telecommunications services described in this publication
are subject to availability and may be modified from time to time.
Services and equipment are provided subject to British
Telecommunications plc’s respective standard conditions of
contract. Nothing in this publication forms any part of any contract.
© British Telecommunications plc 2005.
Registered Office: 81 Newgate Street, London EC1A 7AJ.
Registered in England No. 1800000.
BT In Touch 2000 (03/05) 3
Designed by The Art & Design Partnership Limited.
X
CE compliant to R&TTE Directive (1999/5/EC)
 Loading...